In this Itechguide, Victor teaches you how to sort Gmail by sender. The guide covers steps for 2 methods to sort Gmail by sender.
Option 1: Sort Gmail by Sender with Gmail Search
This section covers steps to sort your messages if you are accessing Gmail.com or the Gmail app.
Method 1: Sort Gmail from a PC or Mac (Gmail.com)
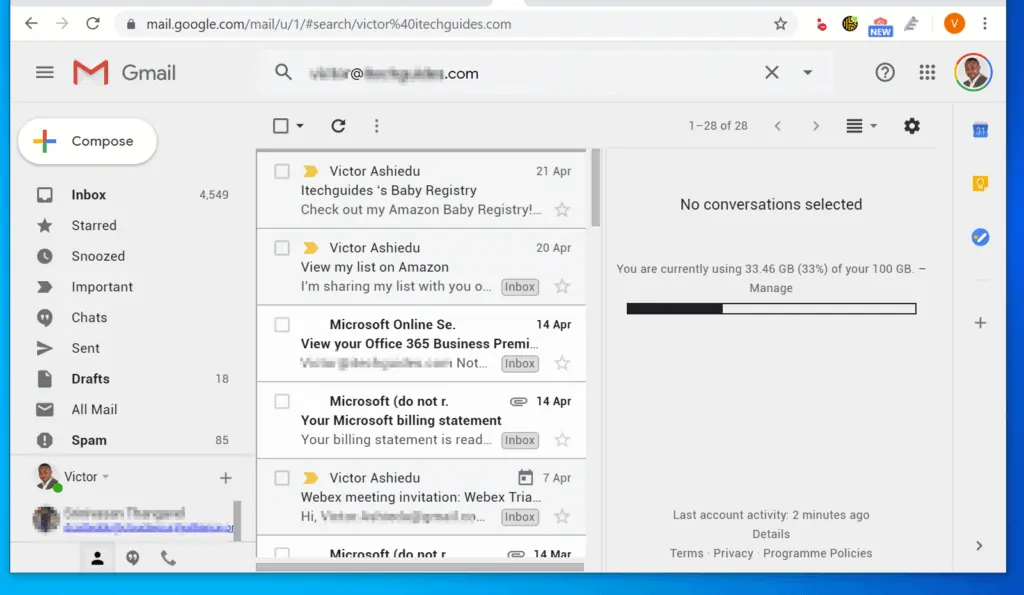
- Open Gmail.com from a browser on your PC or Mac. If you have not yet signed in, sign in with your Gmail user name and password.
- Then, on the search box, type the email address of the person you want to display emails for.
- Your Gmail messages will be sorted by messages from the sender.
- To sort messages from any sender with specific words, click the drop-down beside the search box.
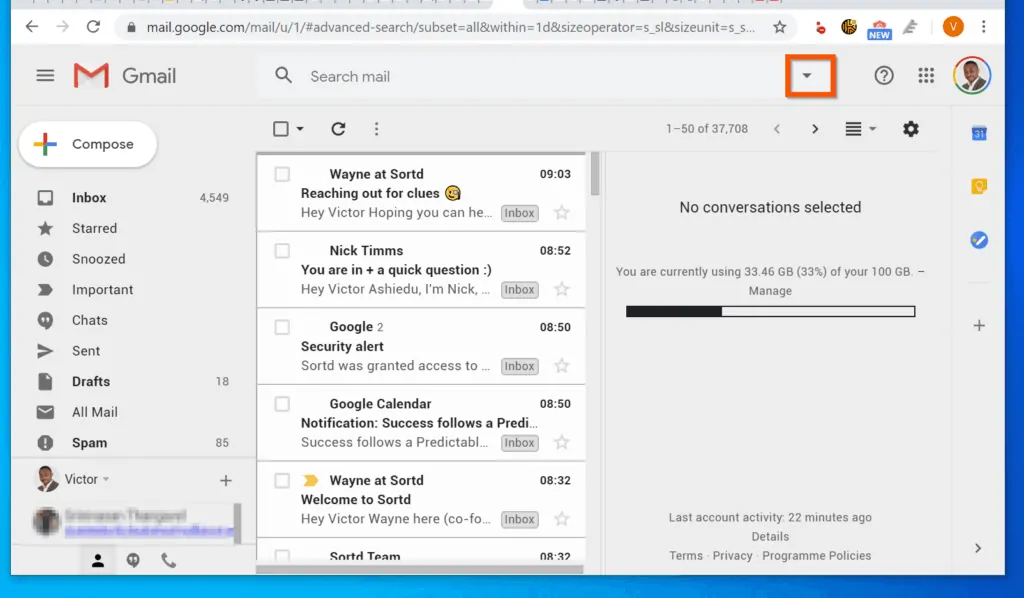
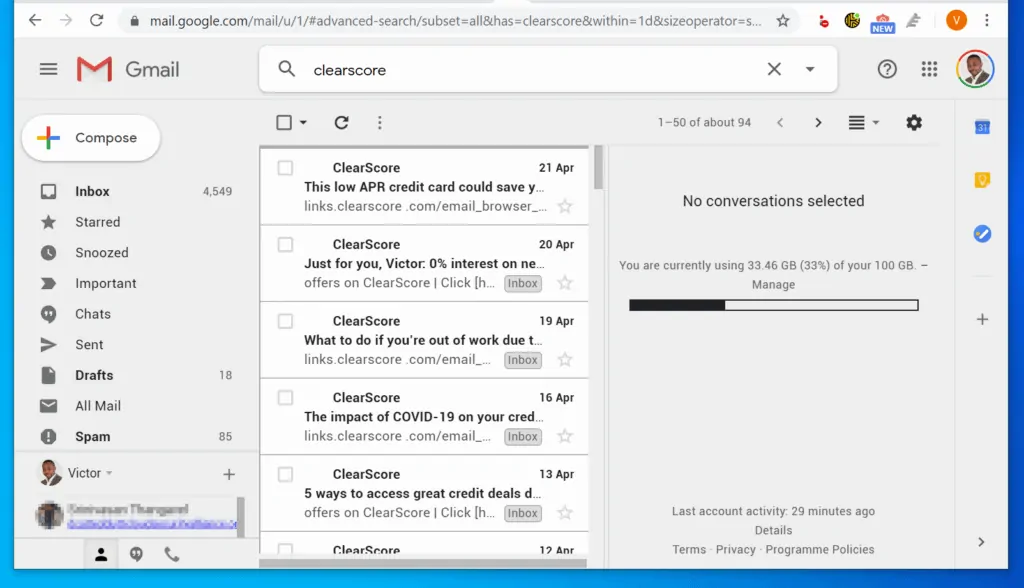
- Then, on the displayed search options, enter the relevant information and click Search. In this example, I want to sort my Gmail messages by emails containing the word “clearscore”. I entered the word in the Includes the words field.
- The messages in my Gmail will now be sored by messages containing the word “clearscore” – see the second image below.

Method 2: Sort Gmail from the Gmail App
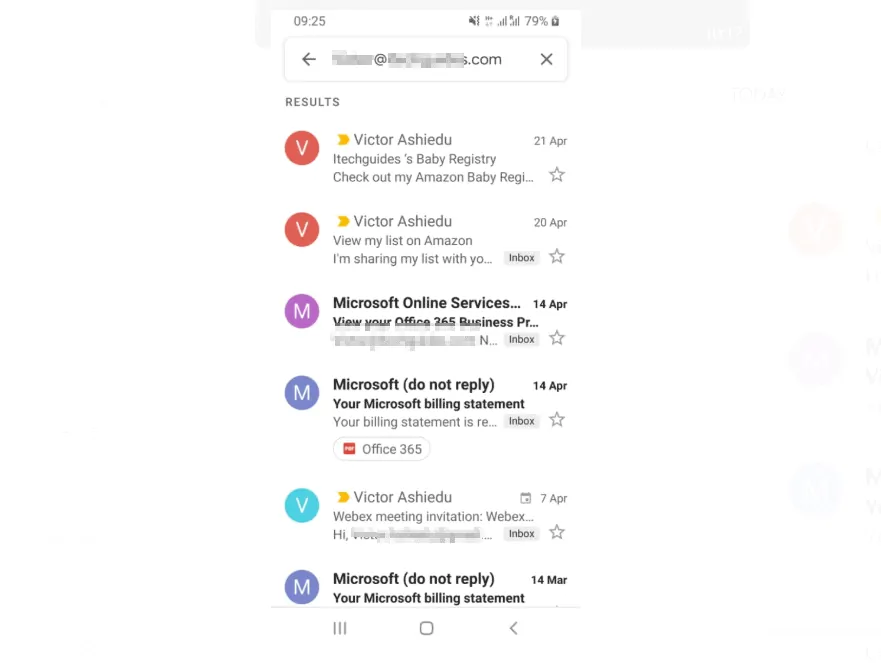
- Open the Gmail app on your phone.

- Then, on the search box, type the email of the sender you want to sort Gmail messages by. The app will display emails containing the email address you specified in the search.
Option 2: Sort Gmail by Sender with “Clean Email”
As I said in the introduction of this Itechguide, “Clean Email” is a third-party tool (not owned by Gmail) that you can use to actually sort your messages by sender. Here are the steps to use this tool:
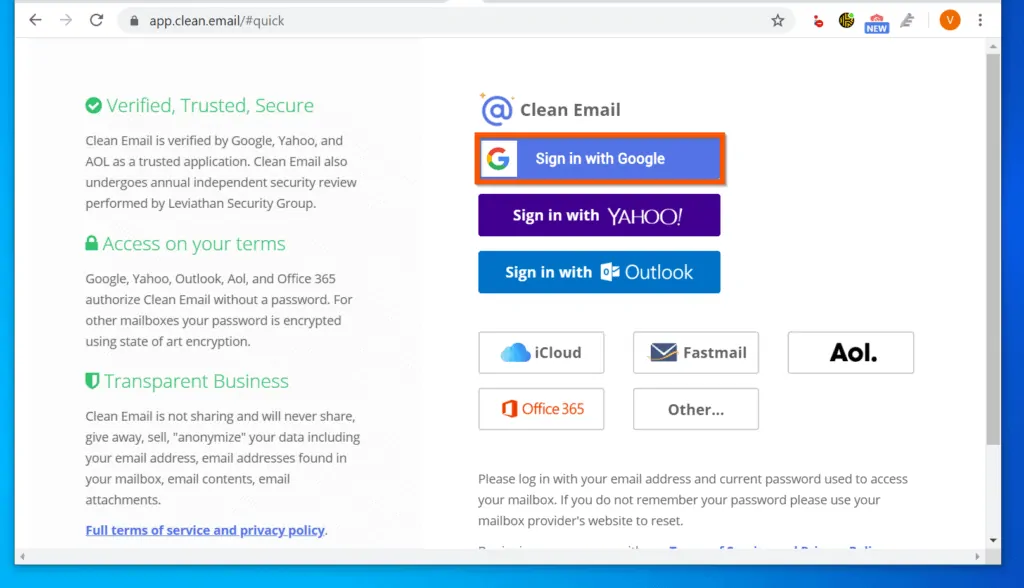
- Open App.Clean.Email link from a browser on your PC.
- Then, on the right pane of the page, click Sign in with Google. You will be required to grant “Clean Email” access to your Gmail account.
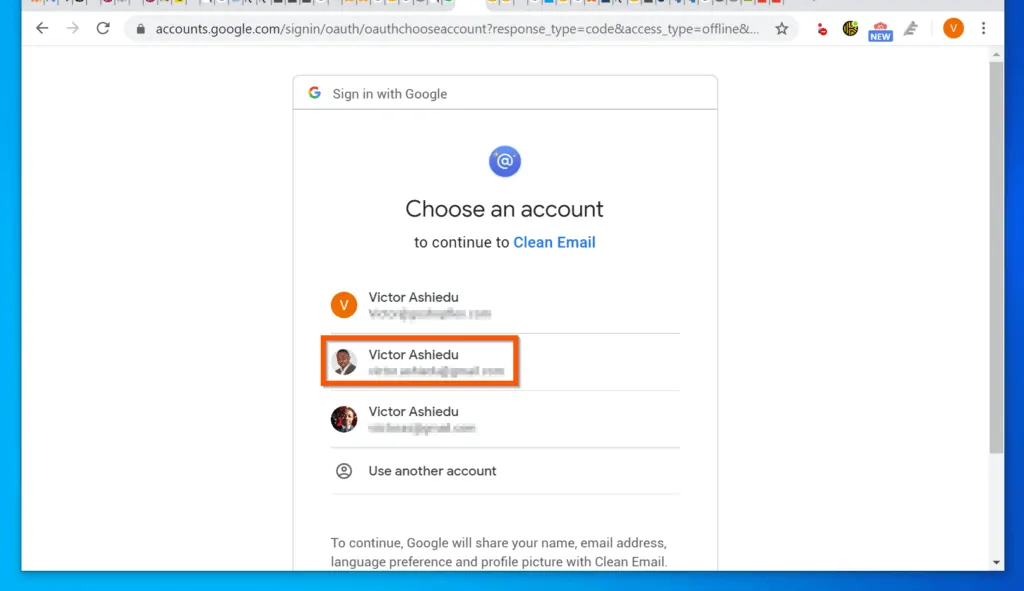
- If you have signed in to the browser with more than one Google account, you will be required to select the account you want to grant “Clean Email” access to.
- However, if you have not signed in to Gmail from the browser you will have the option to sign in with the Gmail email address and grant the app access to your account. After signing in to your Google account, Google will display a page with the details of the access you are about to grant the app.
- On the bottom right of the permission page, click Allow.

- Once you sign in, the app will start analyzing the messages on your Gmail email account. Depending on the number of emails on your account, it may take a while to complete the task.

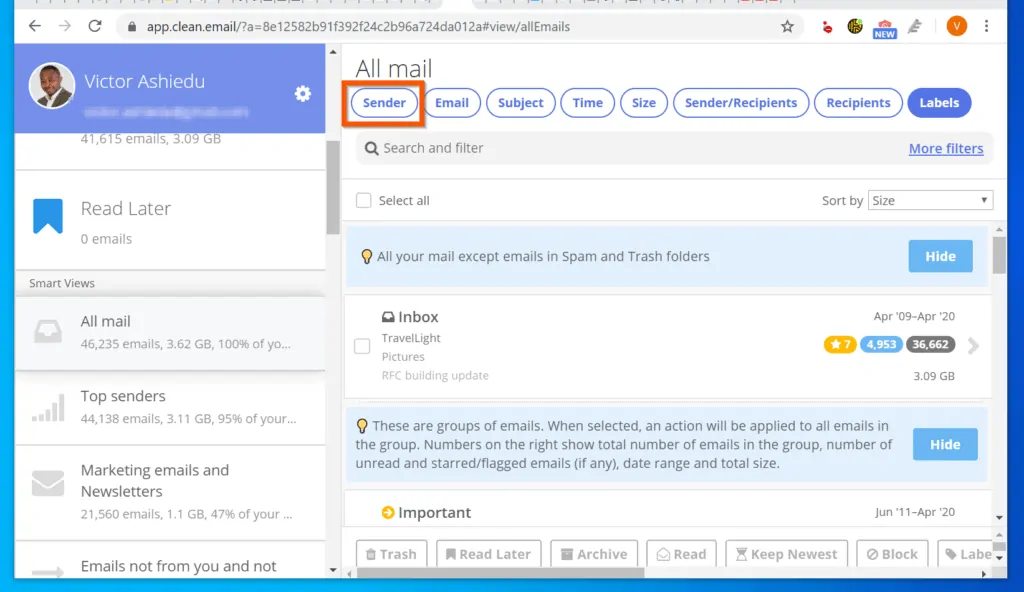
- When the app finishes analyzing your Gmail email, it will display your emails. Scroll down the left pane and click All mail.

- Now, here is the fun part – to sort Gmail by sender, click the Sender button. The app will sort your emails by sender’s name. The app also displays the size of the emails from each sender.
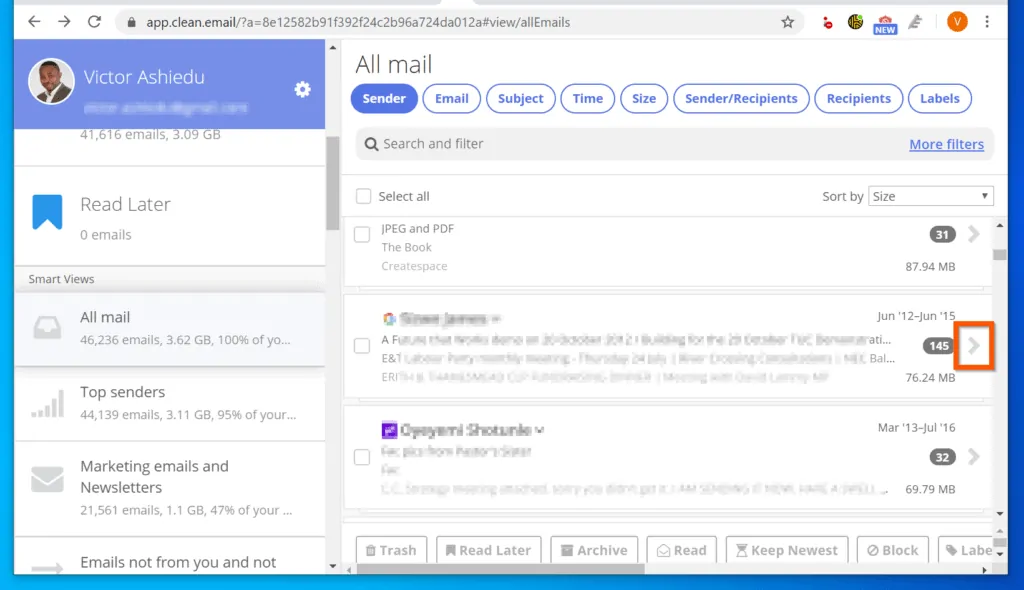
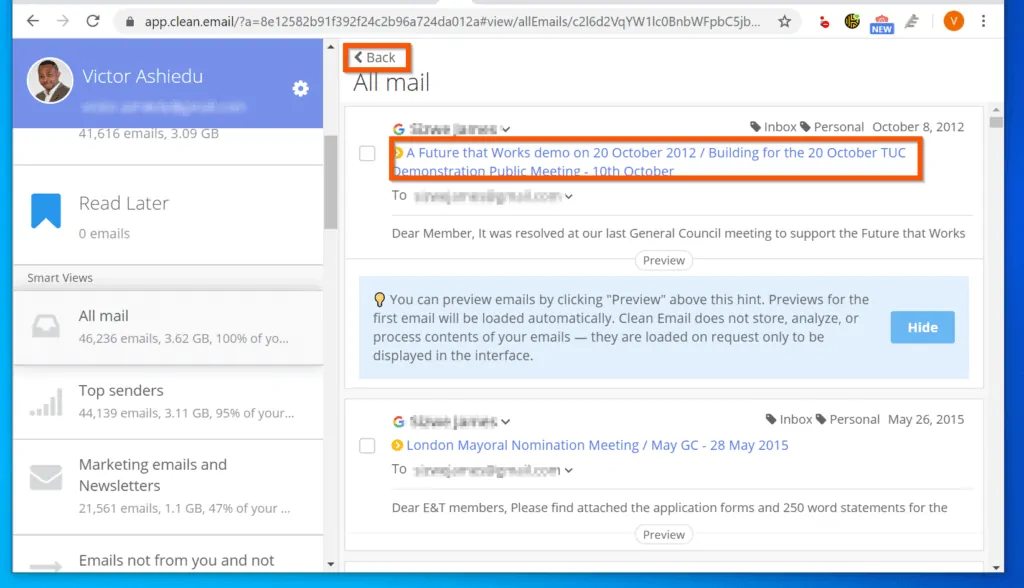
- To display all emails from a specific sender, click the arrow on the right side of the person’s name.
- “Clean Email” will now display only emails from the sender you selected. To read an email, click on it. When you click on an email, it will open on Gmail (on a new tab). To return to the All mail view, on the top left of the right pane, click the Back button.
- Back on the All mail view, the email client used by each sender is displayed on the left of the person’s name. In the image below, the first sender uses Gmail, the second sender uses Yahoo.
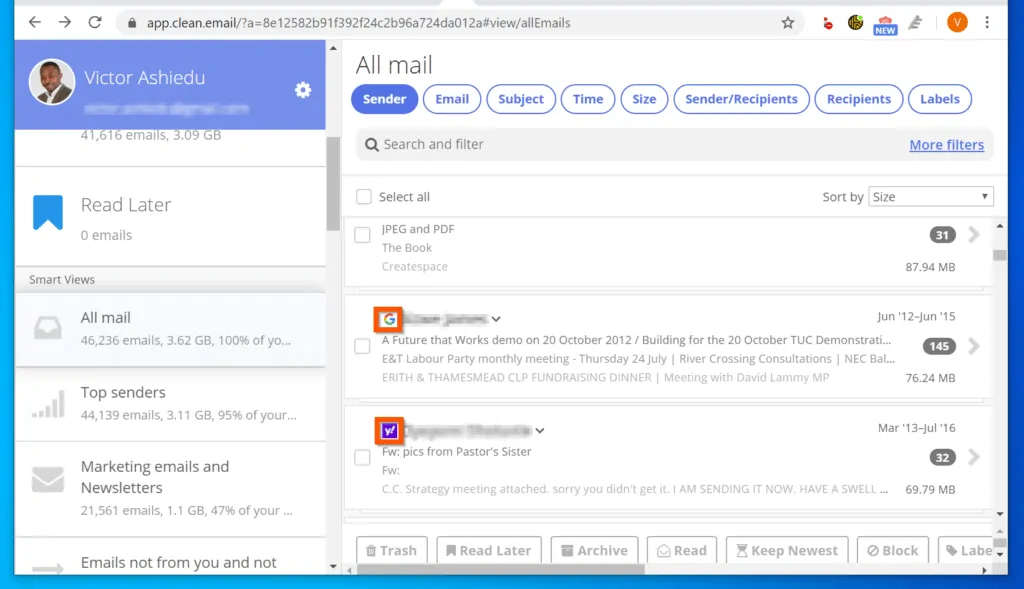
- You can also Trash, Archive, mark as Read, Block, or Label the sender. To perform additional tasks on a sender, check the box beside the sender.
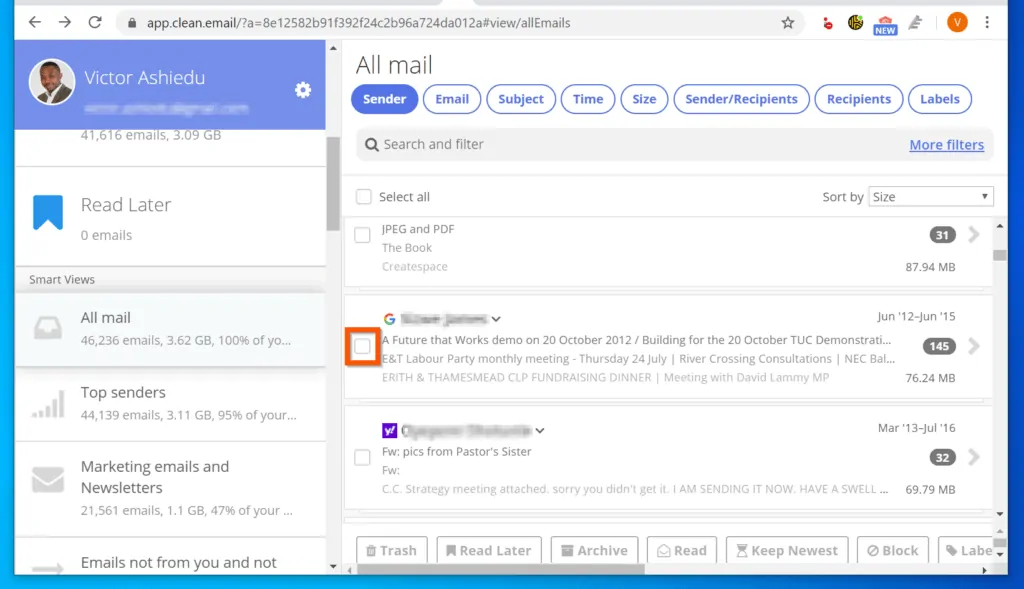
- When you check the box, 2 things happen – 1, the number of emails from the sender is displayed on top. 2, the options on the bottom of the app are activated.
- On the bottom of the page, you can Trash all emails from the sender, Archive the emails, mark all the emails as Read, Block the sender, or Label the sender. To see more available options, scroll to the right of the displayed options.

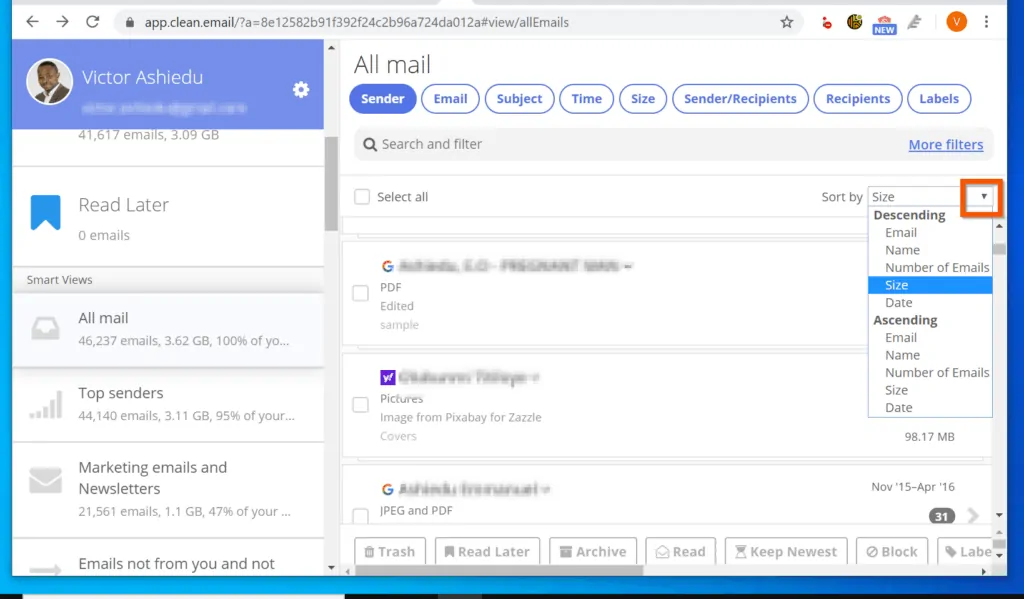
- The tool has another sorting option. Use this to determine how the Senders are displayed. To select a sorting option, click the Sort by drop-down.
- You can sort by Descending or Ascending. Then, sort by Email, Name, Number of Emails, or Size.
You can use the 2 methods covered in this Itechguide to sort Gmail by sender! I hope you found this Windows 10 guide helpful. If you found it helpful, click on “Yes” beside the “Was this page helpful” question below.
You may also express your thoughts and opinions by using the “Leave a Comment” form at the bottom of this page.
Finally, for more emails and productivity Itechguides, visit our Emails & Productivity page. You may also find our Work from Home page very helpful.


The entire internet is flooded with posts and pages which claim to show how to sort…then immediately proceed to filtering. I don’t even know how to ask anymore…everything triggers someone to start their reply with “so you enter the name of the sender you want to see emails from”… ugh. Perhaps sorting alphabetically by sender will preclude these incorrect responses. –Funny enough, the product he’s showing at the end actually does sort. Way more effective if he correctly portrayed Gmail’s filter feature as filtering and useless for sorting; then showed the other product. Oh well, I will find a reasonably priced app that does this. Preferably a web-based one.
Stop calling it sort. You start by correctly saying it has no built in function to sort, then you describe ways to FILTER your email but call it sort. It doesn’t sort, you can’t sort, please don’t call it sort. You’re not sorting your email you are filtering it.