Need help configuring the two most popular browsers to display the favorite bar? This quick article guides you through the steps to enable the bookmarks bar to show on Chrome and Microsoft Edge.
Option 1: Show the Favorites Bar in Chrome
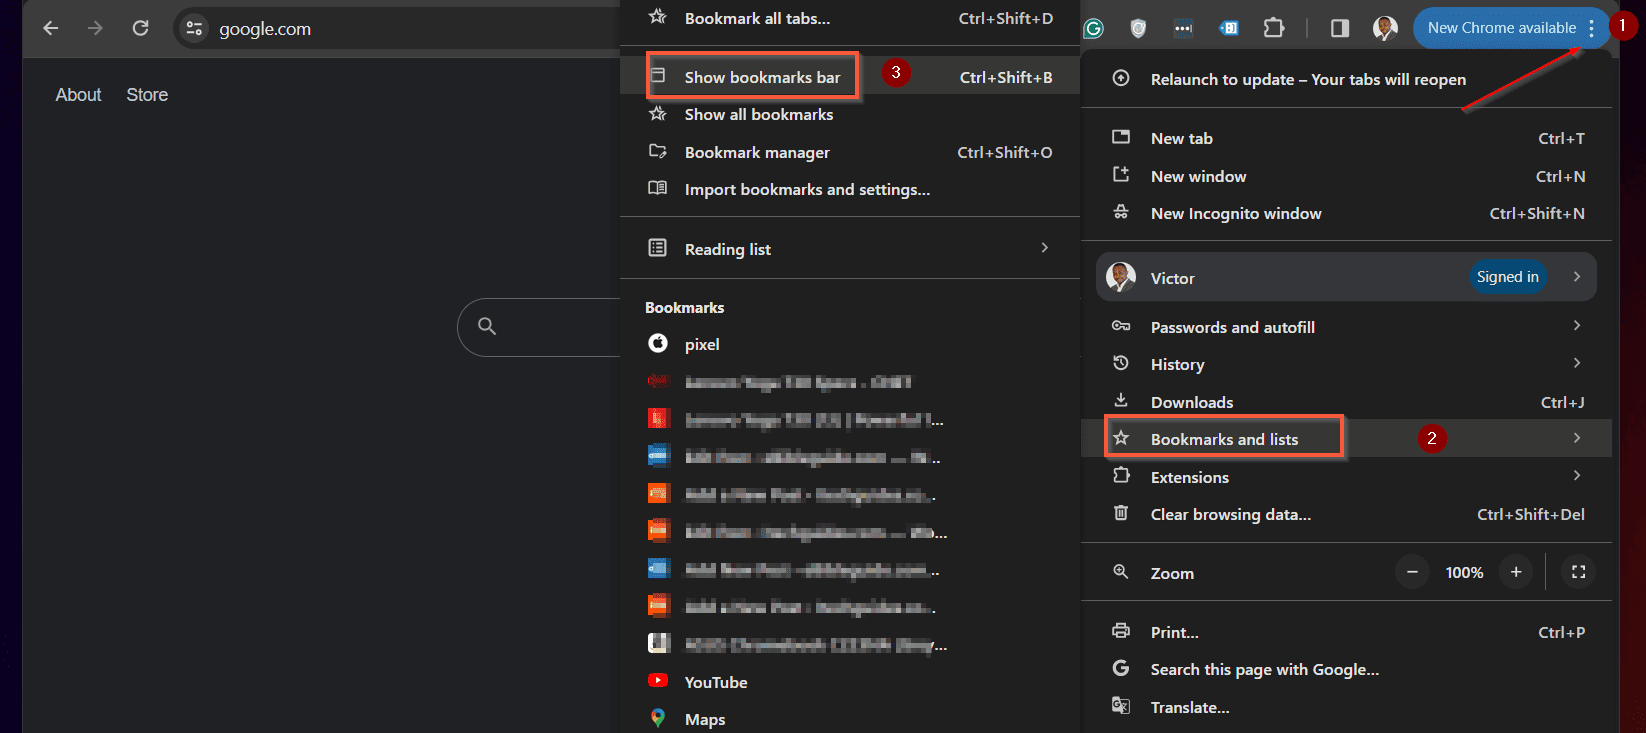
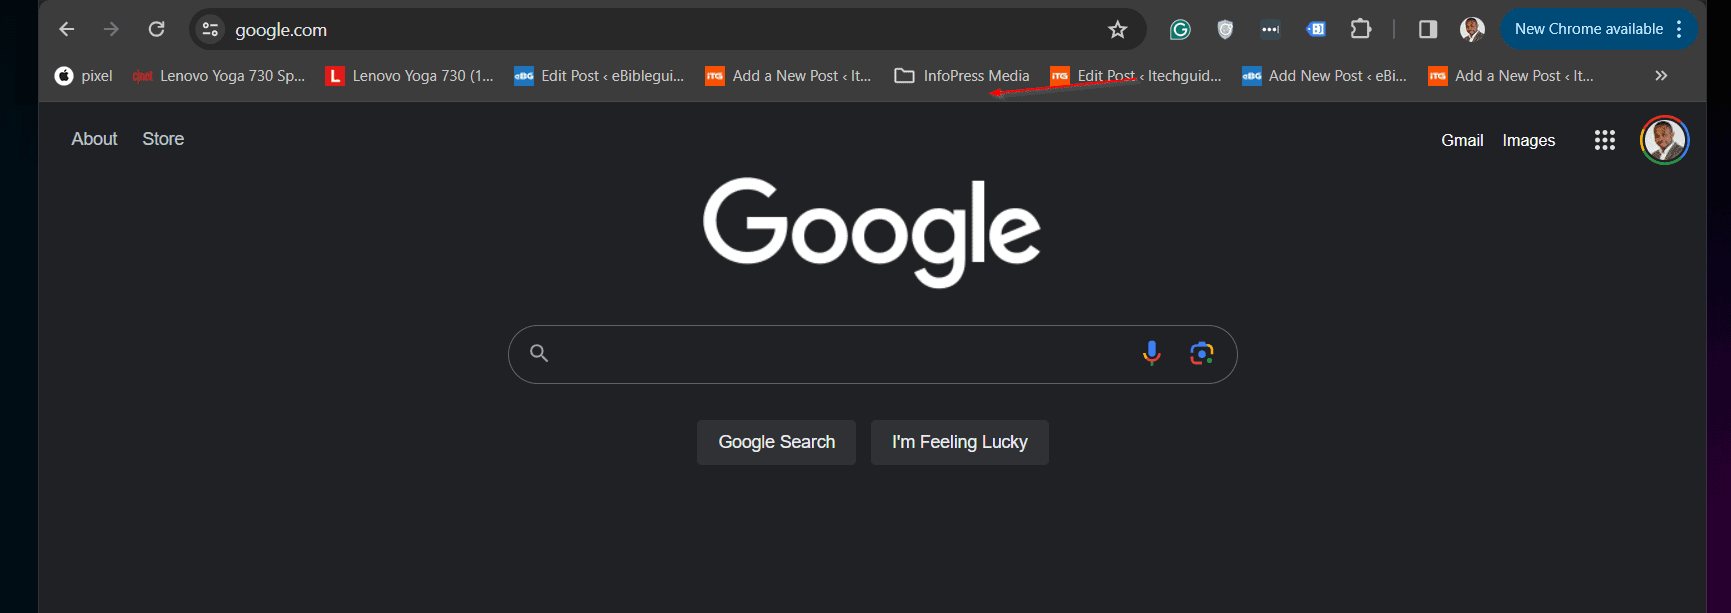
- On the top right of the Google Chrome browser, click the menu. Then, point to Bookmarks and lists and select the Show bookmarks bar.
Now the favorites bar will be available on top of your browser.
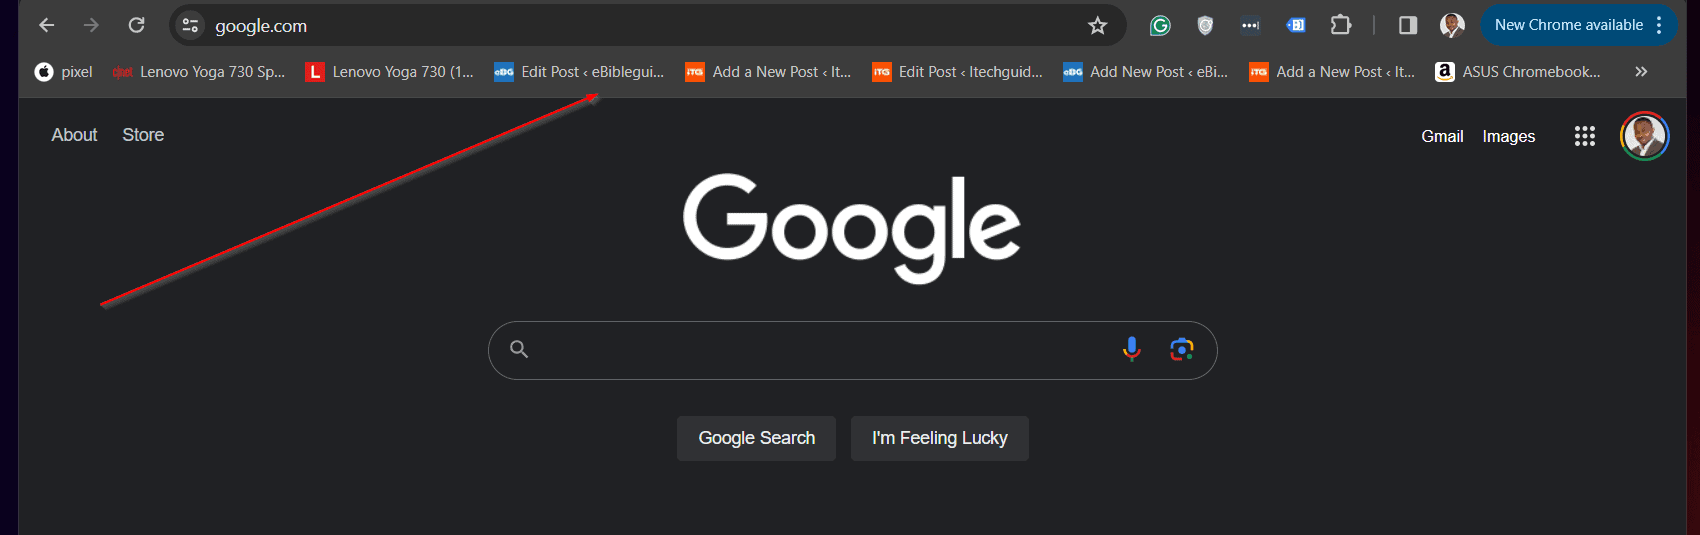
Unfortunately, as you can see, my Chrome bookmarks bar is cluttered. I can make this better by creating folders and organizing my favorite site by folders.
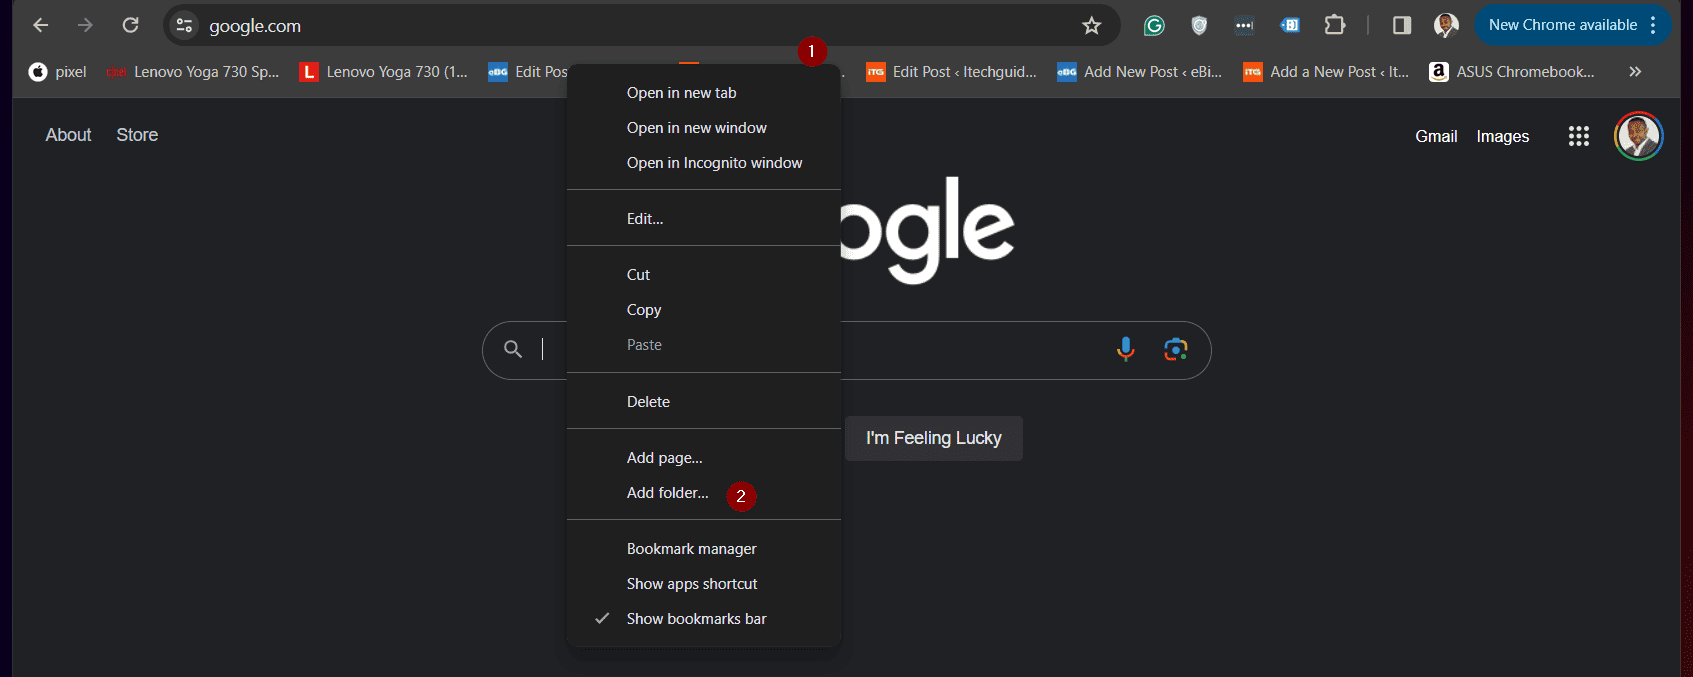
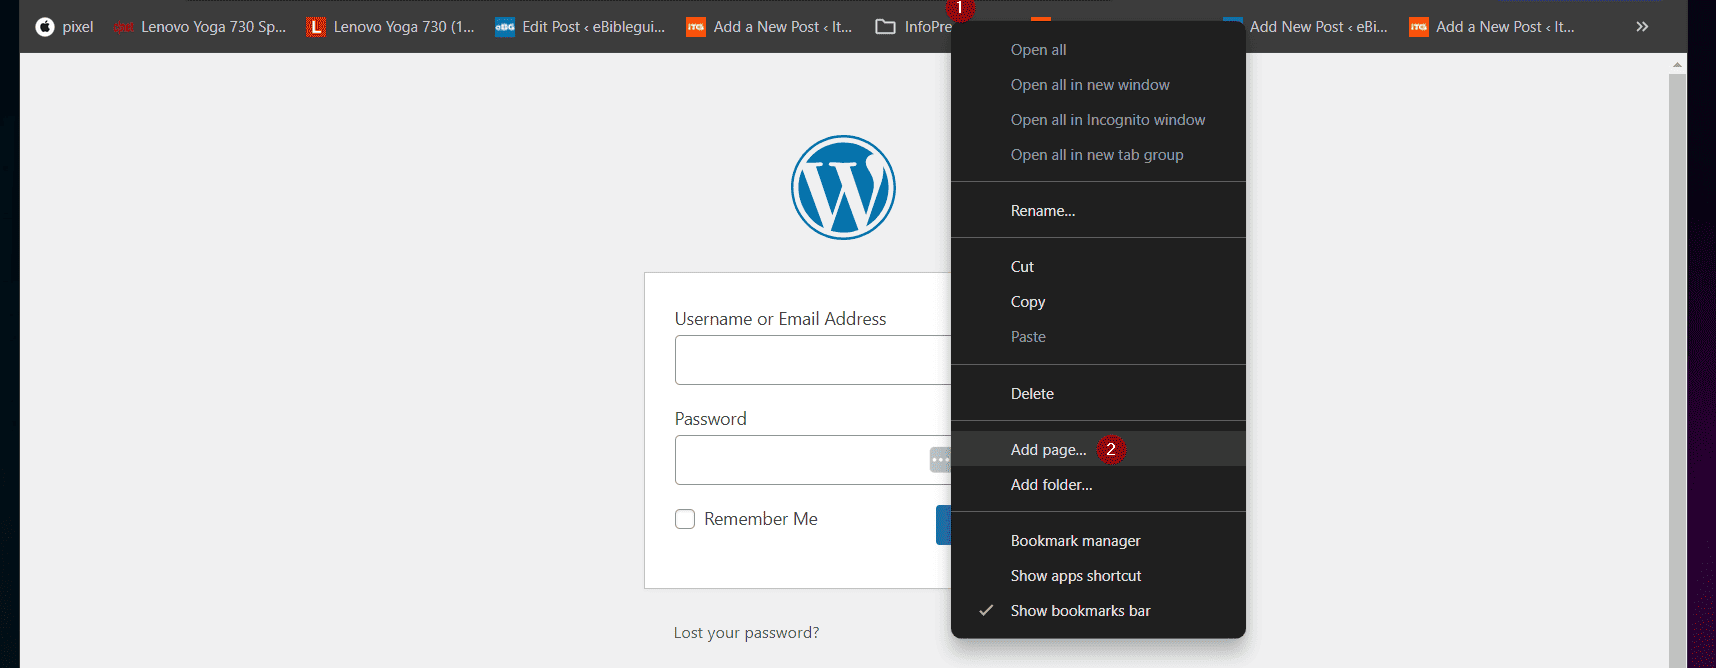
- To create a folder in the Chrome browser bookmarks bar, right-click anywhere on the bar. Then, select the Add folder option.
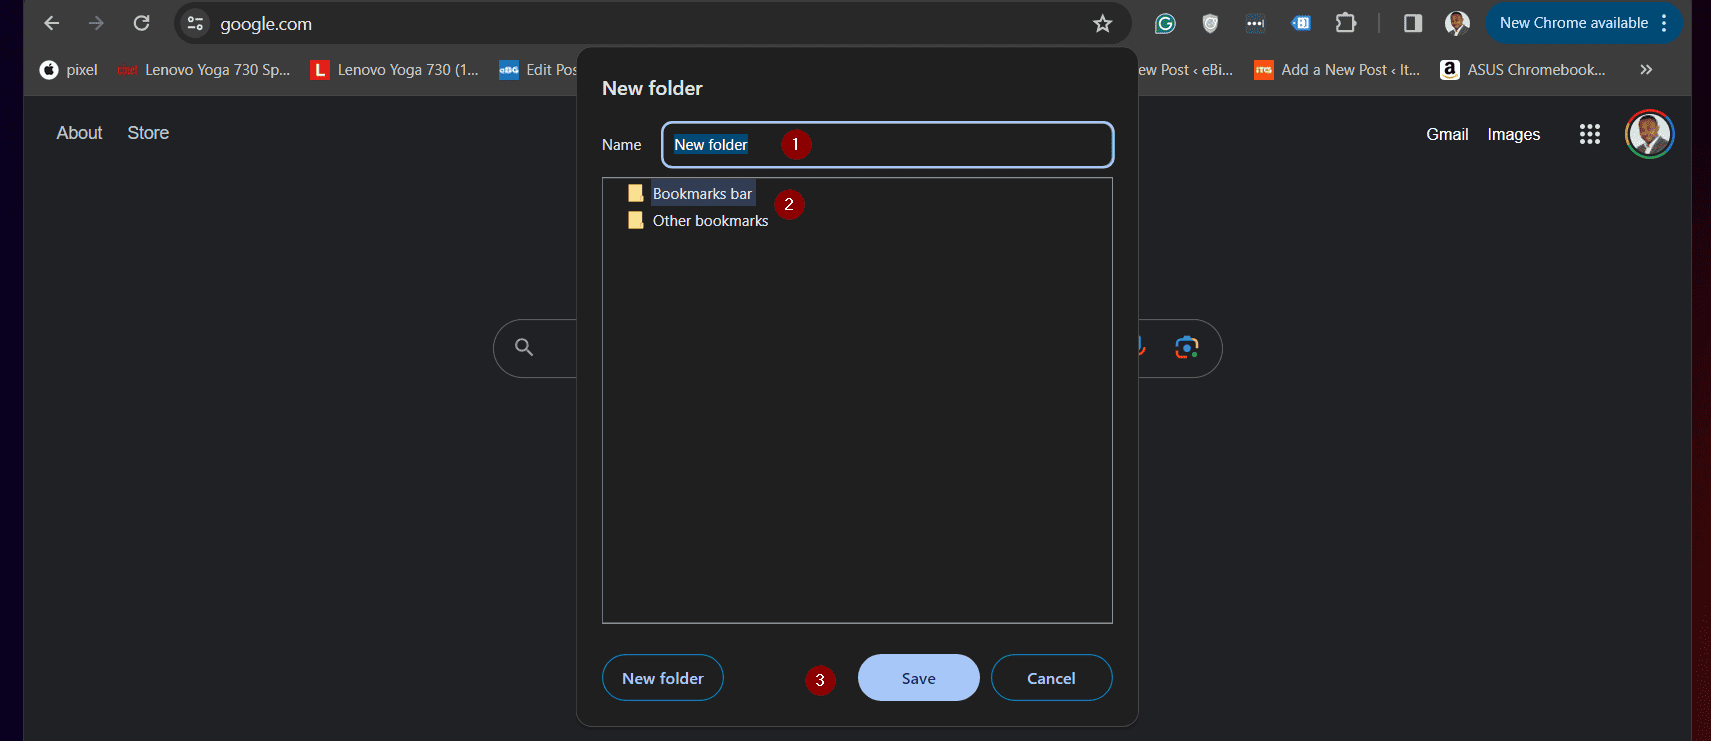
- Finally, rename the “New folder” to whatever you like to call it. After that, select whether to add the folder to the “Bookmarks bar” or “Other bookmarks” and click Save.
- After creating the new folder, you can drag existing favorite websites to the folder. Alternatively, you can add new websites as favorites to the new folder.
To add a page to the folder, open the page. Then, right-click the folder on the bar and select Add page.
You can use the same steps to remove a saved bookmark from the bar or from a folder.
Option 2: Show the Bookmarks Bar in the New Edge
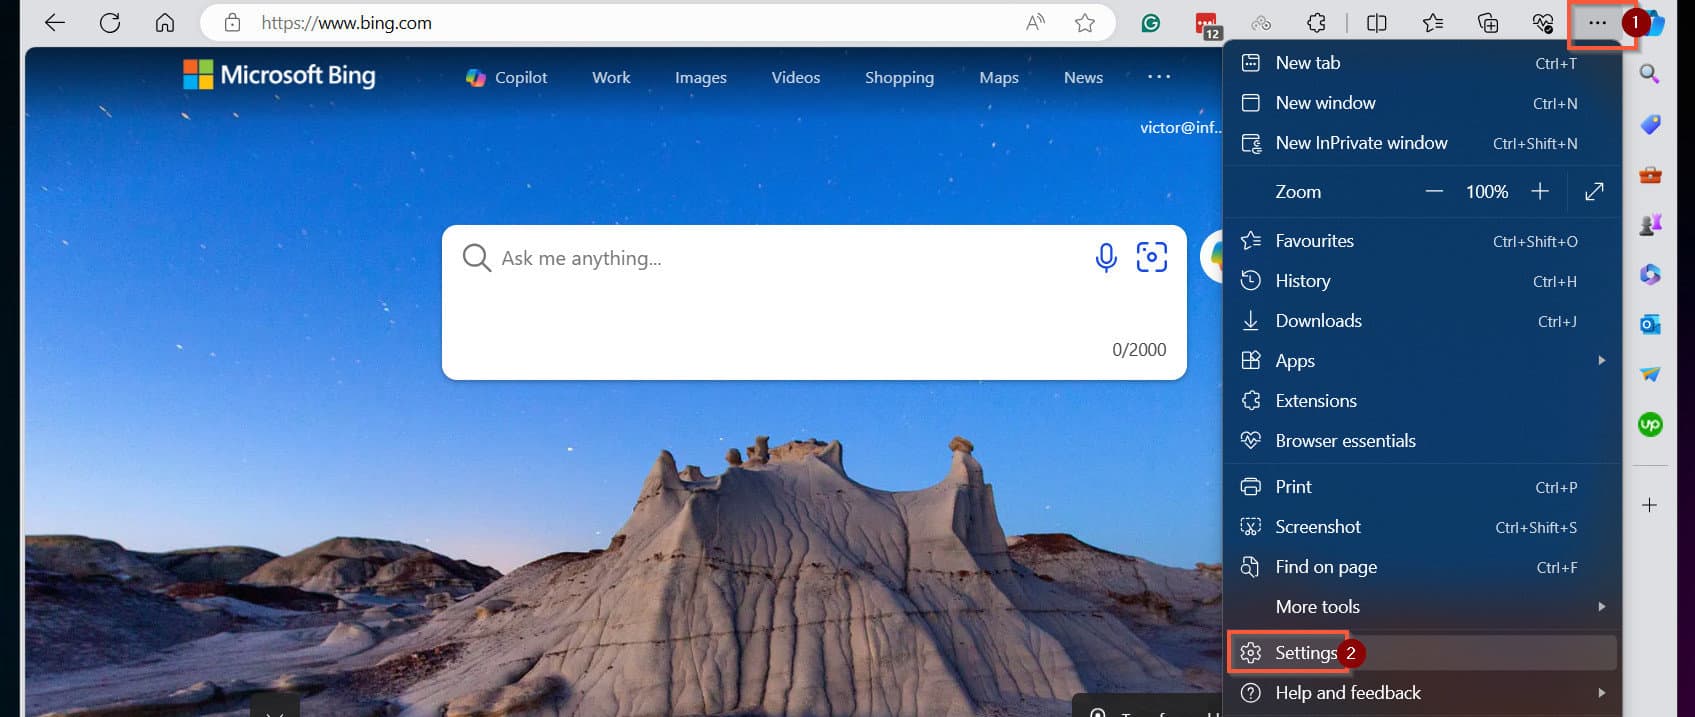
- Click the menu icon (3 dots) on the top right of Microsoft Edge and select Settings.
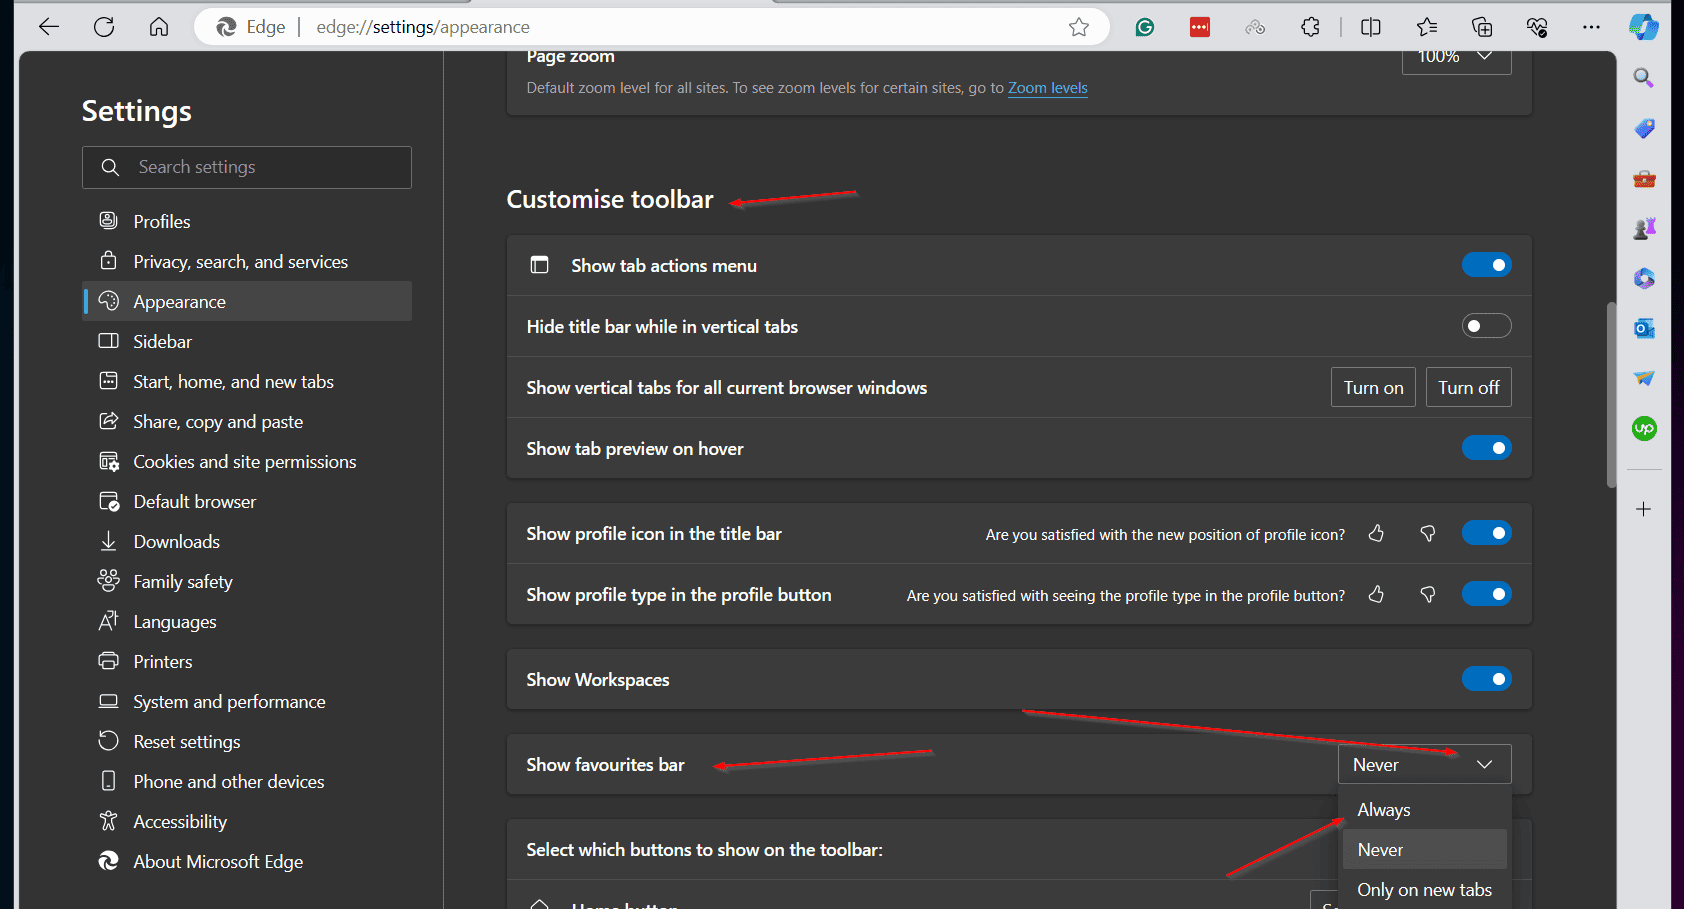
- On the Settings page, click Appearance.
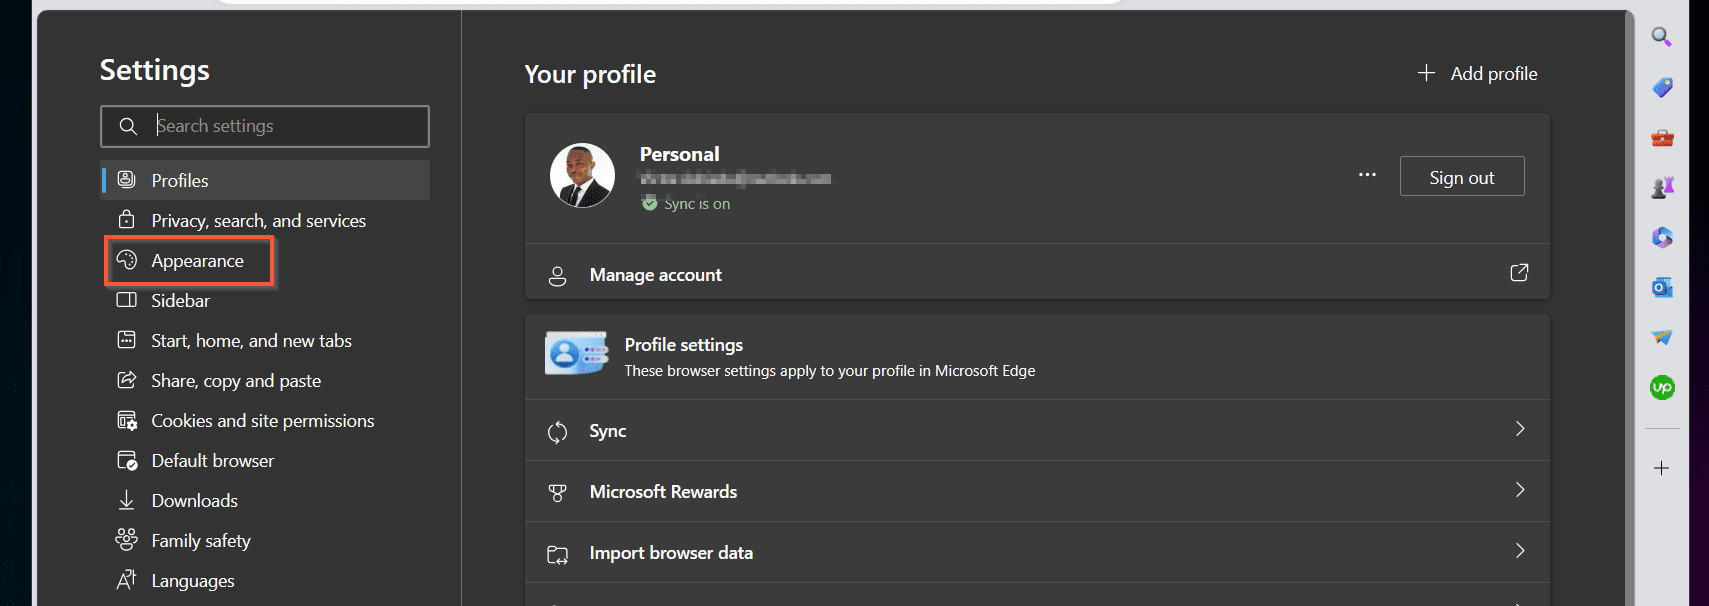
- Finally, scroll down to the “Customise toolbar,” section click the Show favourites bar drop-down, and select “Always.”
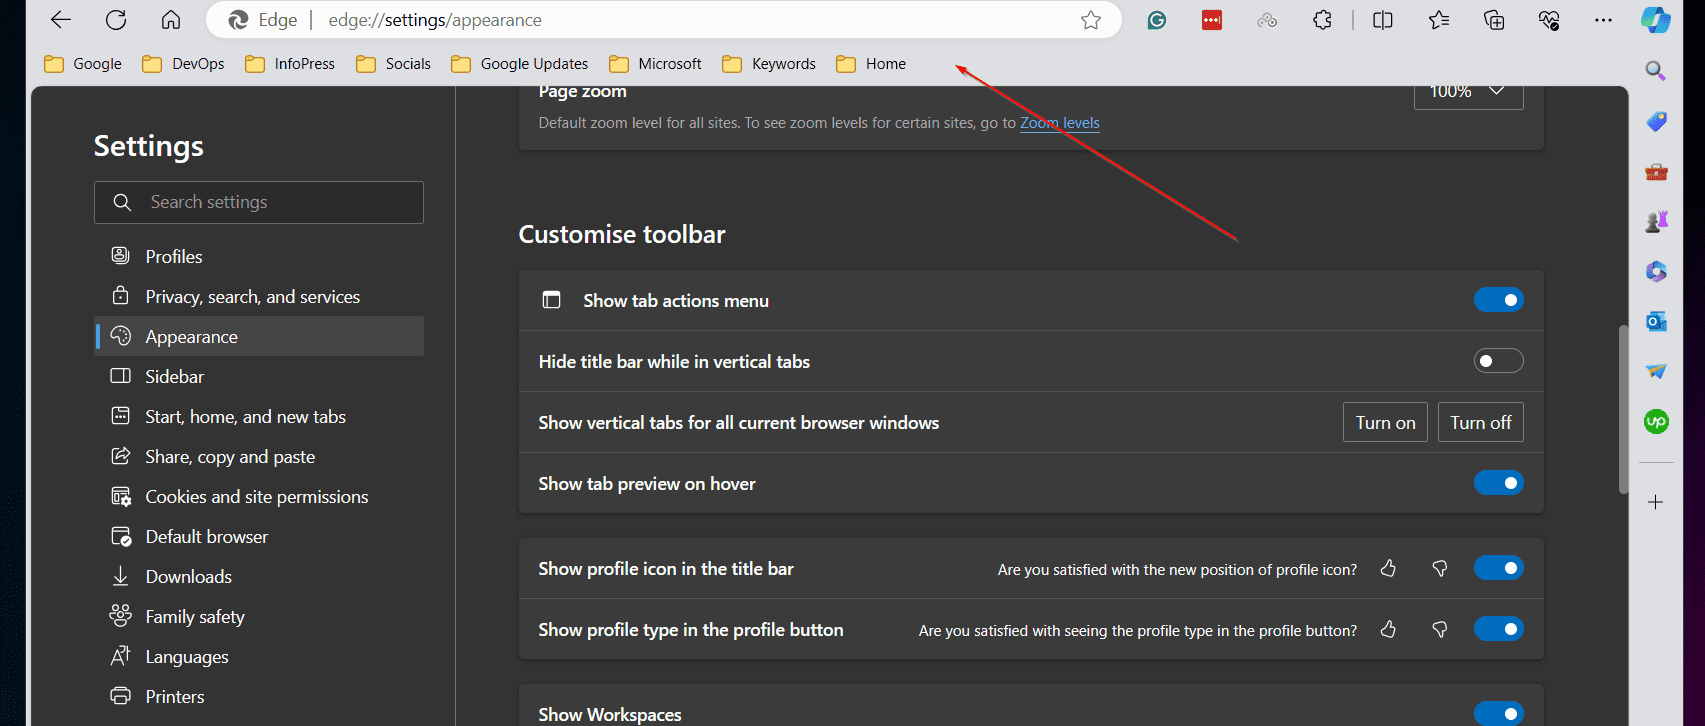
After completing the steps above, Edge will display the Favorite bar on top of the browser.
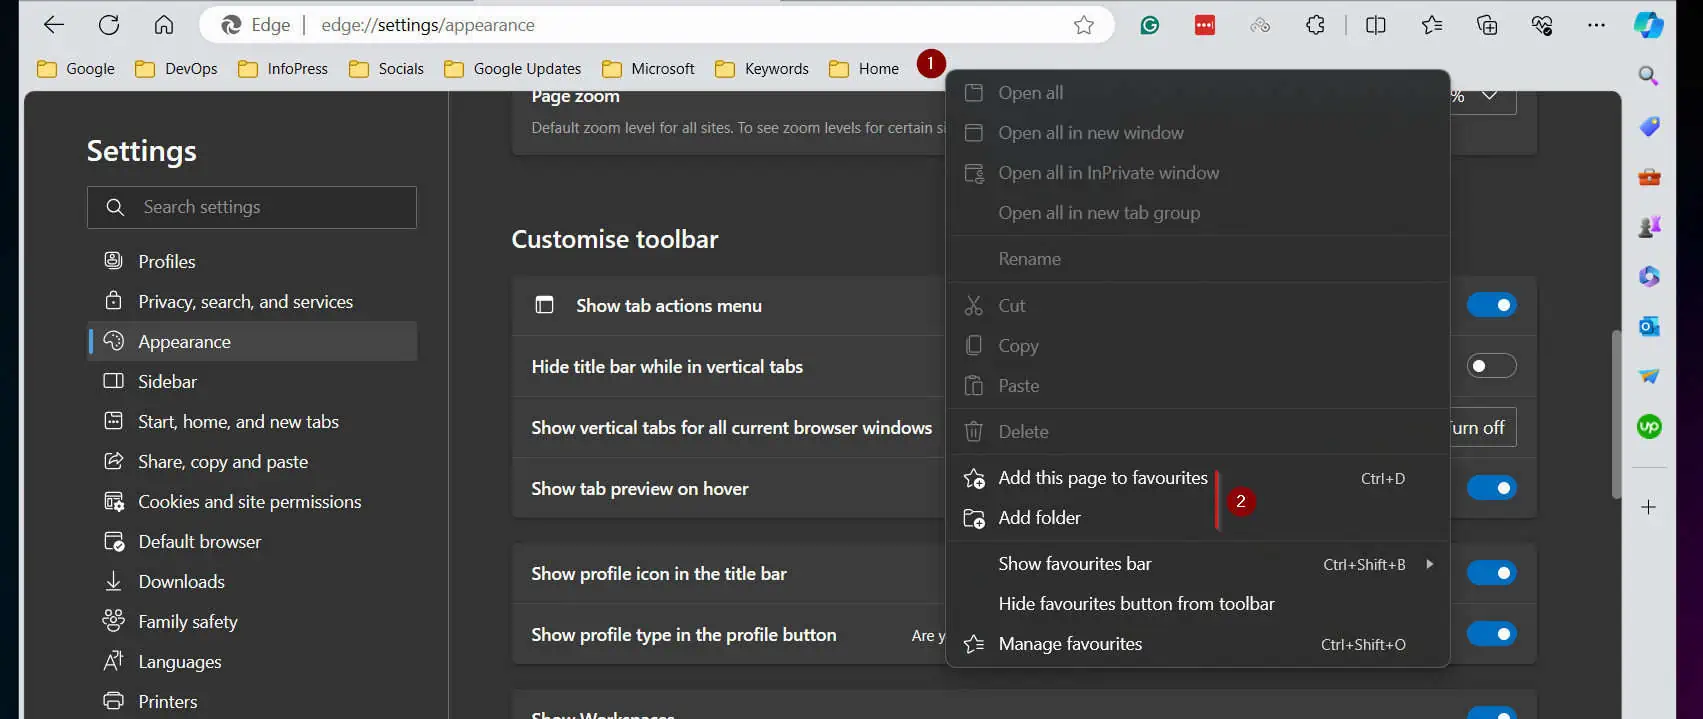
Like in Chrome, you can organize your bookmarked websites in folders. To create a new folder, or add a page to a folder, right-click the bookmark bar and select the option you require.
Frequently Asked Questions
The way you set up your favorite bar in Windows 10 depends on the browser you’re using. This guide shows the steps for Chrome and Edge browsers.
If you’re not displaying the Chrome bookmarks bar on top of the browser, you can show them temporarily by clicking the Chrome browser menu on the top right (3 dots).
Next step, point to Bookmarks and lists and select Show all bookmarks.
The favorite bar on your Edge browser will not stay on top unless you select the “Always” option in the Show favourites bar drop-down.
To view the Show favourites bar drop-down, open edge://settings/appearance (ensure you’re reading this article in Edge before clicking this link) and scroll down to the “Customise toolbar”. Finally, click the Show favourites bar drop-down and select “Always.”
In a way, bookmarks and favorites are the same. However, while bookmarks is the place you save websites you visit regularly, favorites refer to the websites you save in your bookmarks.
To back up your bookmarks in Chrome, click the Chrome menu (3 dots on the top right). Then, point to “Bookmarks and lists” and select Bookmark manager.
Finally, click the Organise menu (3 vertical dots on the right of the Bookmark manager page) and select Export bookmarks.
Similarly, to back up your Mdge browser bookmarks, right-click the bookmarks bar and select Manage favorites. Finally, click on the More options menu (3 vertical dots on the right of the Manage favorites page) and select Export favorites.
Conclusion
Creating and managing bookmarks is pretty straightforward. But, what is the need if you cannot easily access your saved favorite websites?
Fortunately, the New Microsoft Edge and Google Chrome provide the settings to set up your browser to Always show the bookmark bar.
As always, we like to hear what you think about our articles as this helps us improve. The fastest way to share your feedback is by responding to the “Was this page helpful” question below – thank you.
Alternatively, you can share your thoughts with our community using the “Leave a Reply” form at the bottom of this page.
Alternatively, you can respond to the “Was this page helpful?” question below.
Finally, you can read more articles like this one by visiting our Emails & Productivity How-to Guides page.