This Itechguide teaches you how to use Windows 10 Disk Management to Shrink or Extend a volume.
Option 1: Use Disk Management to Shrink Volume
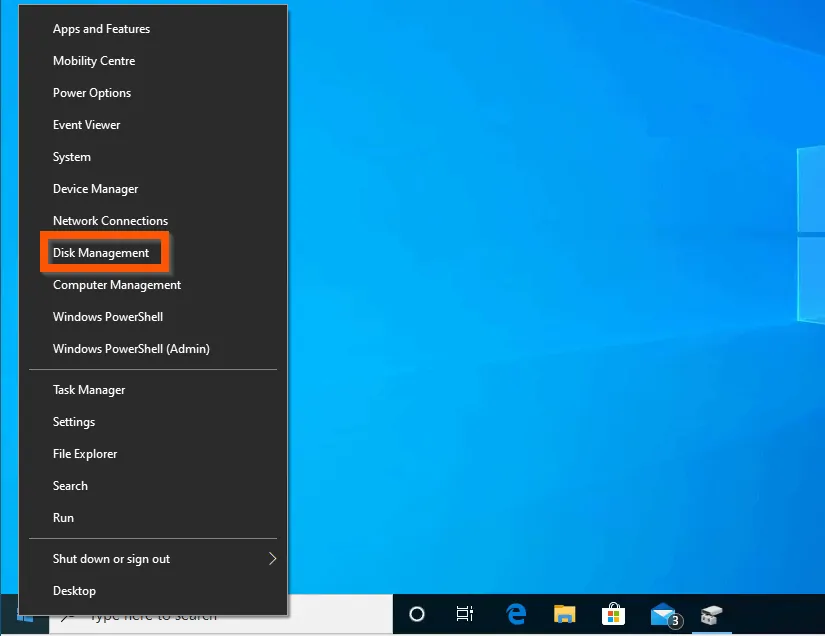
- Right-click Windows 10 Start menu and select Disk Management.
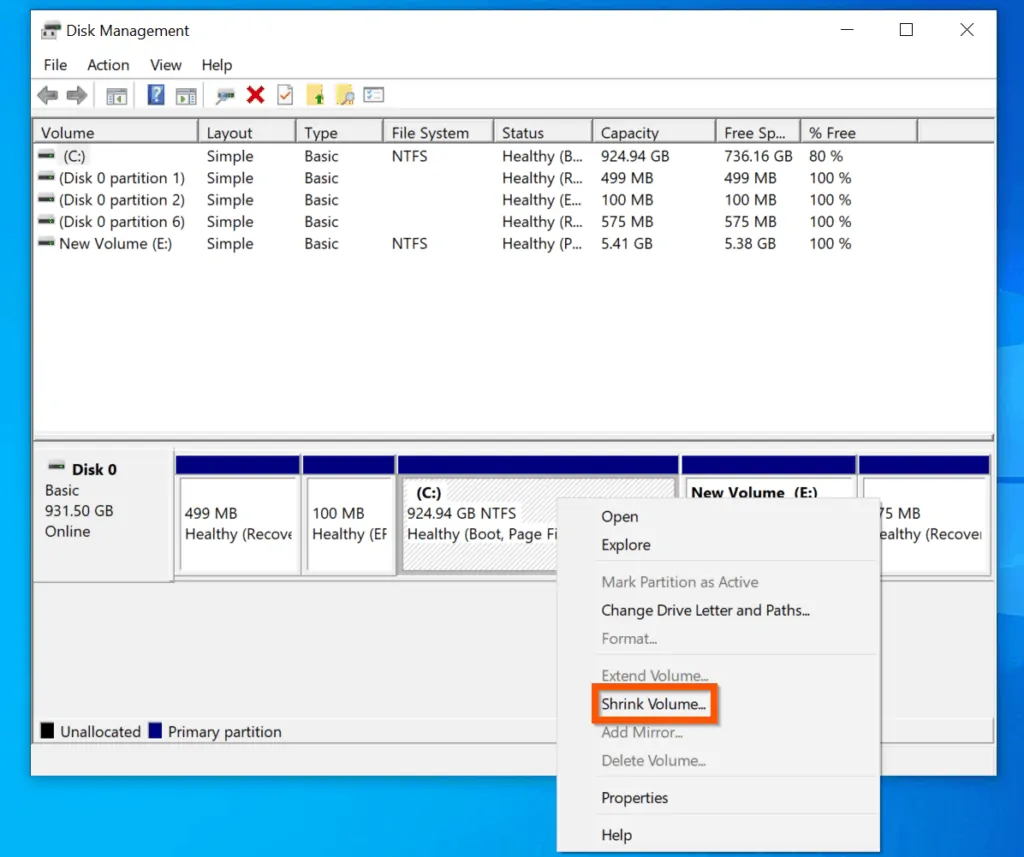
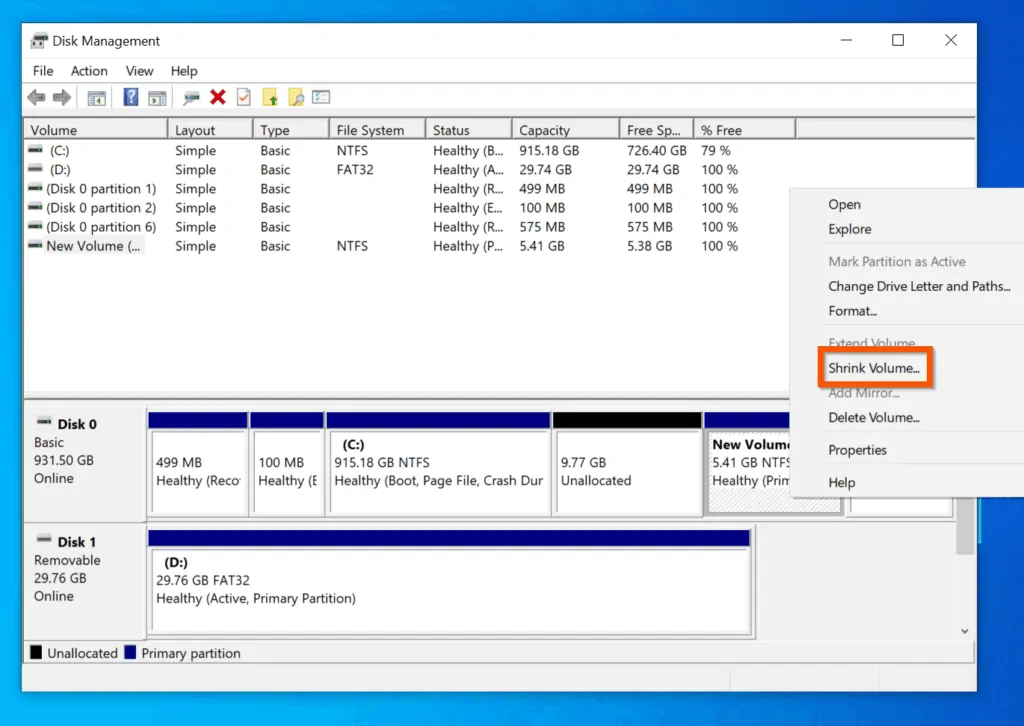
- When Disk Management opens, right-click the partition you want to extract free partition from and select Shrink Volume.
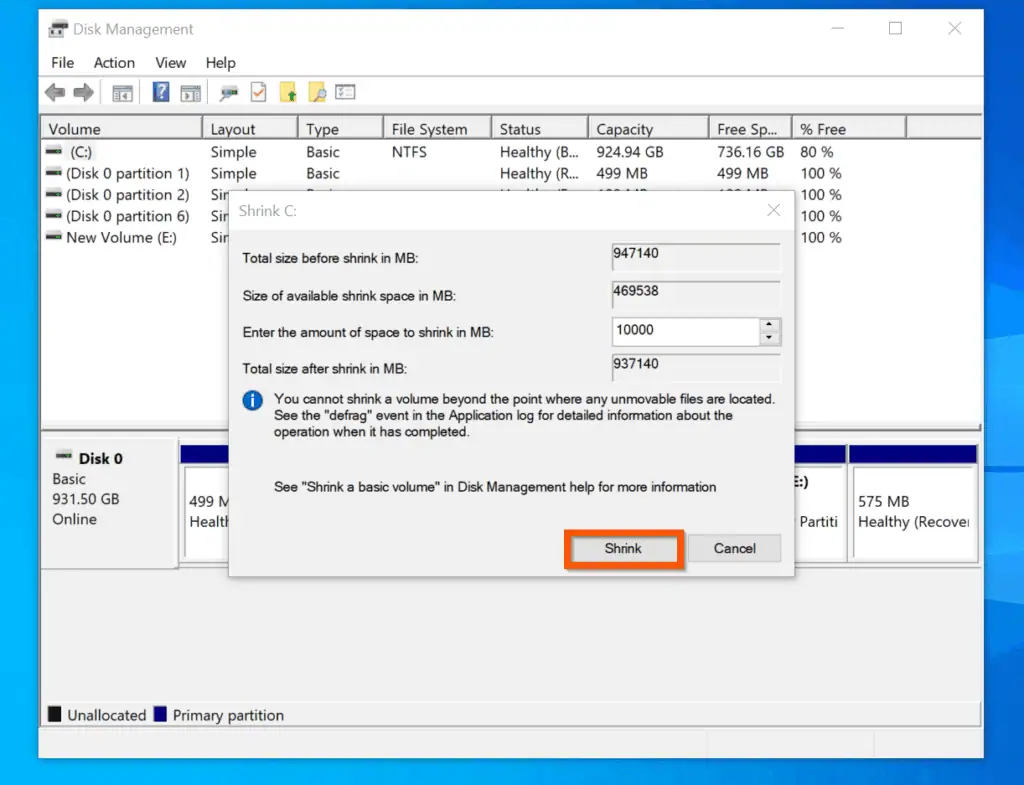
- On the Shrink window, enter the value of the size of free space you want to Shrink from the volume (partition).
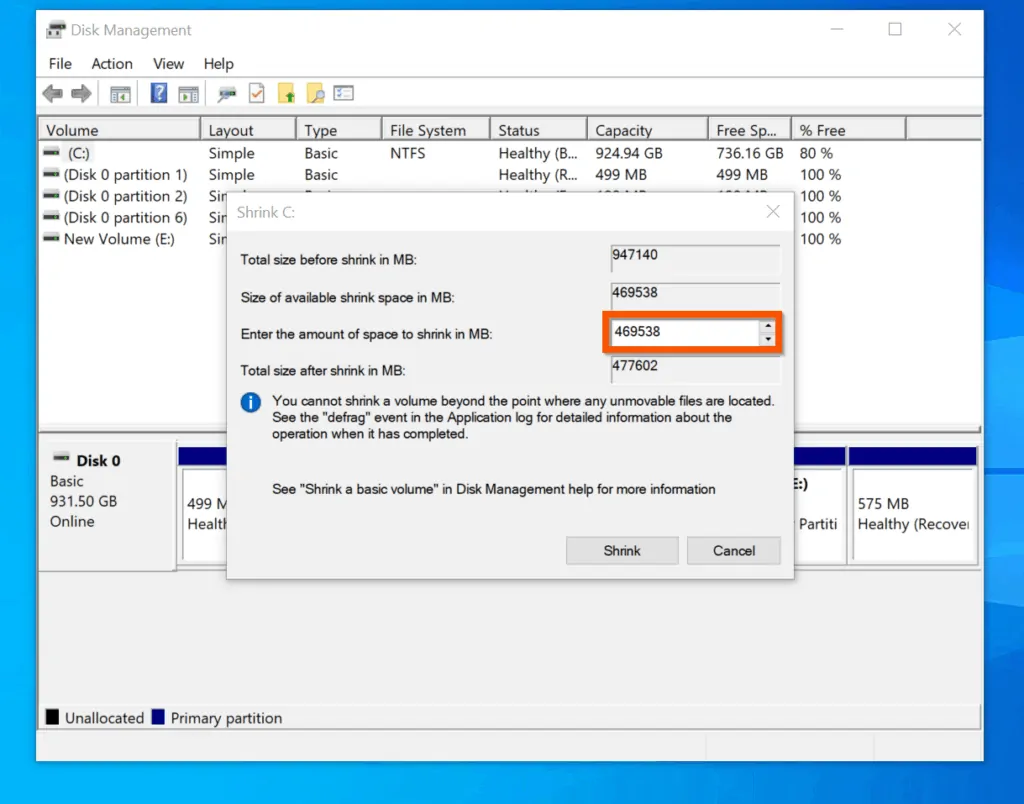
- Once you have entered the value you want to free from the disk volume, on the bottom right of the pop-up window, click Shrink.
Option 2: Use Disk Management to Extend Volume
Before you can extend a volume in Windows 10, you must have a free, unallocated space on the same physical disk. If you manage a VM environment, you may have need to extend disk volumes from time to time.
The first step is to add more storage space to the disk you want to extend. Then, use the steps below to extend the volume…
- Right-click Windows 10 Start menu and select Disk Management.
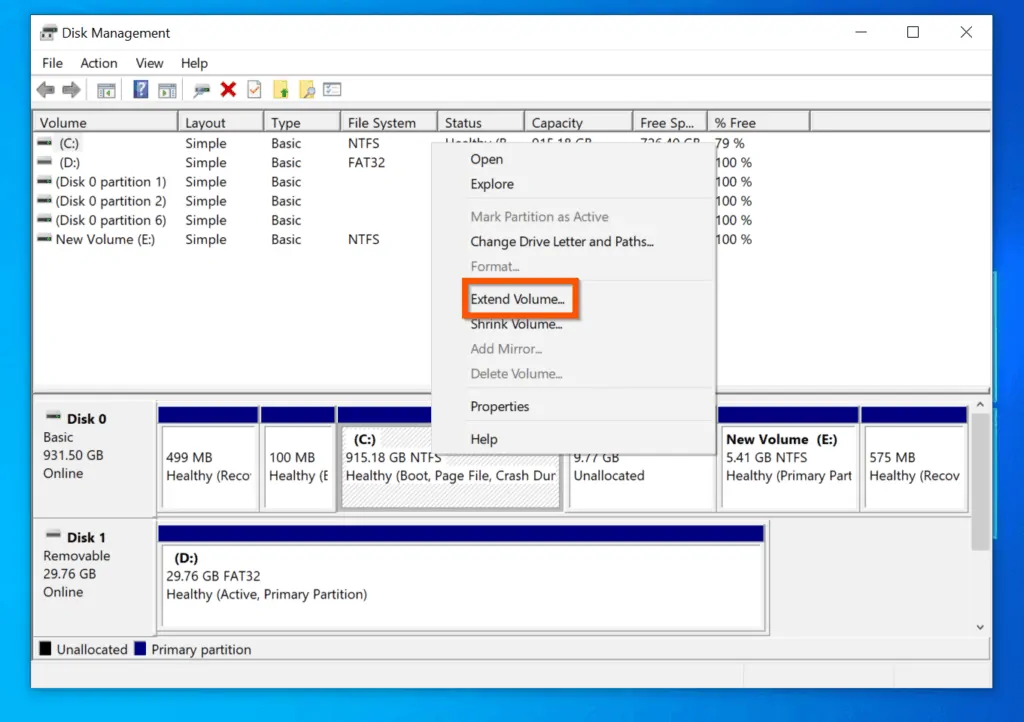
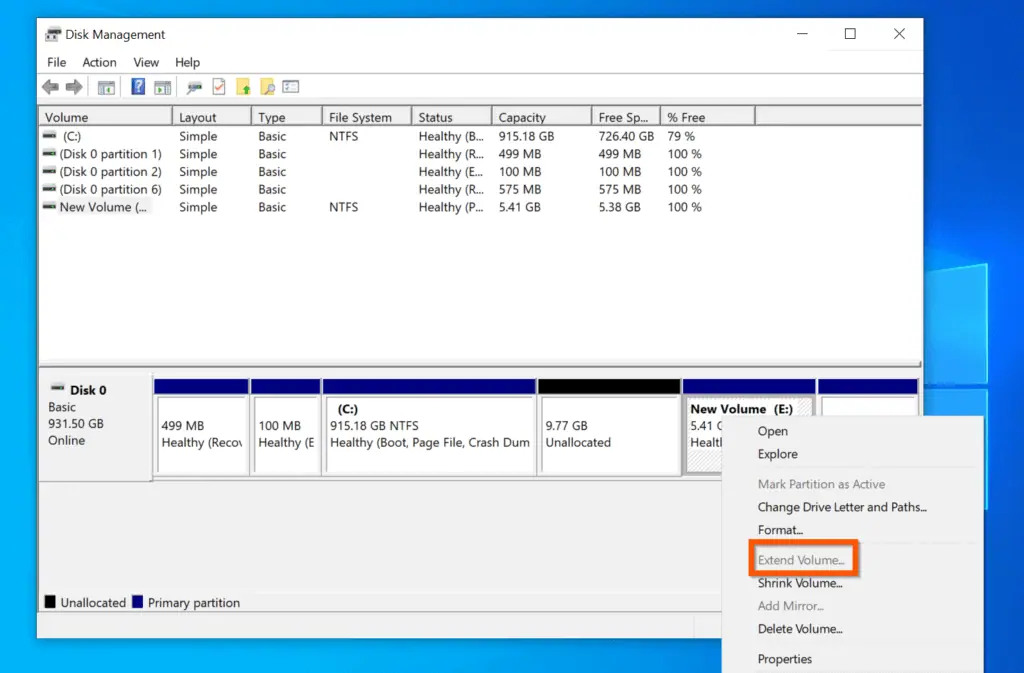
- Then, right-click the partition you want to extend and select Extend Volume. The Extend Volume Wizard will launch.
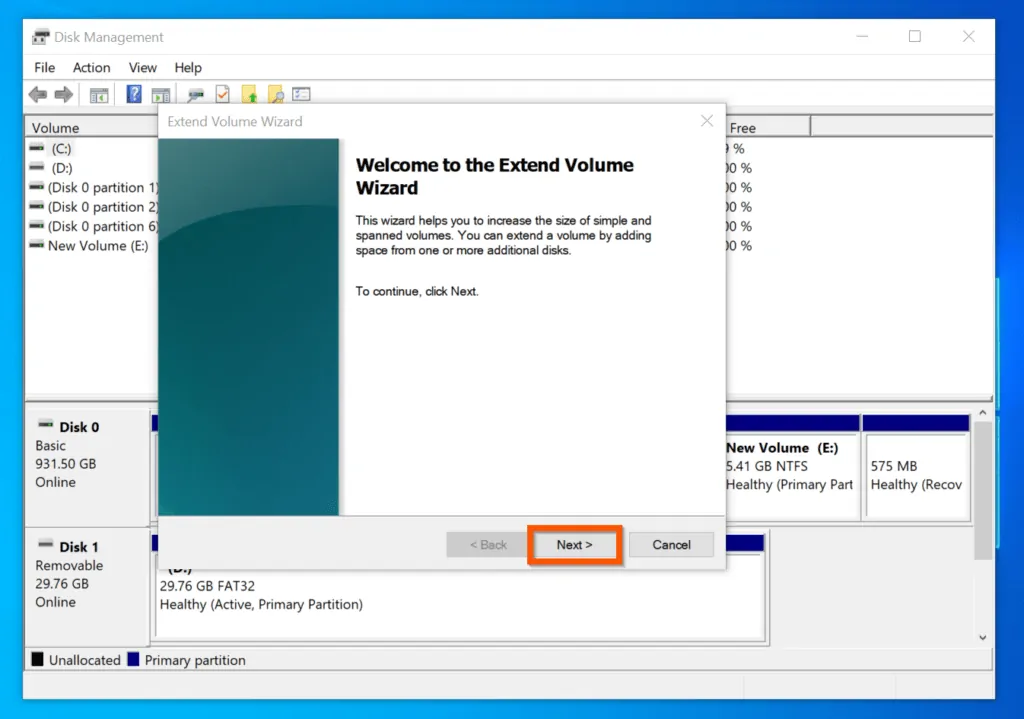
- On the first screen on the Extend Volume Wizard, click Next.
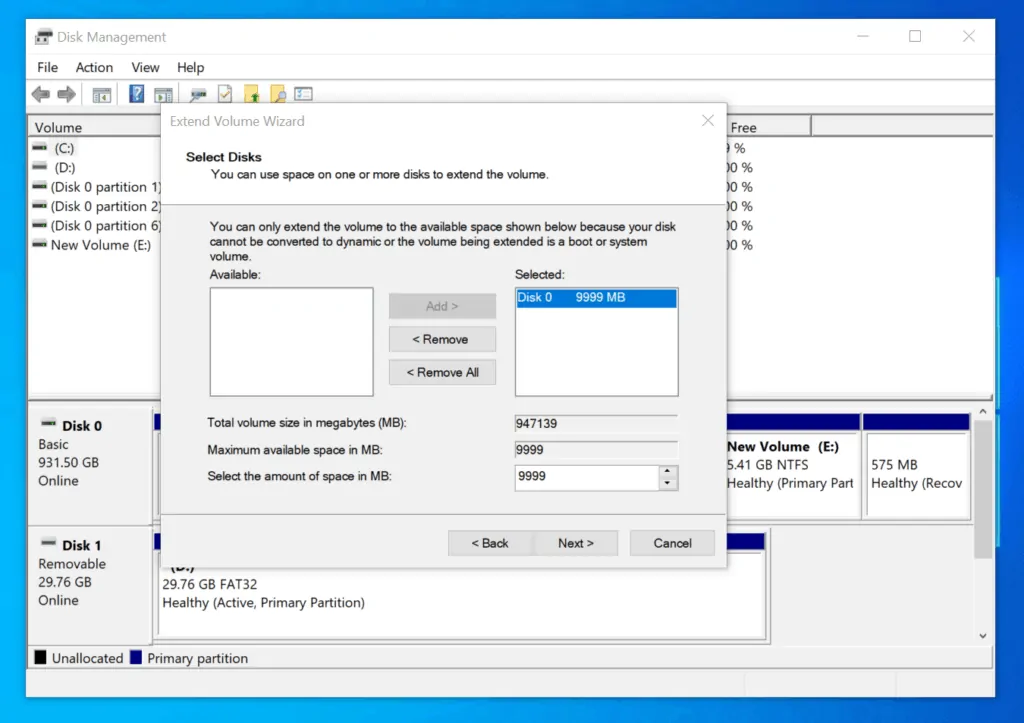
- Then, on the Select Disks screen, confirm that all the free disk spaces you want to add to the existing partition have been selected and click Next.
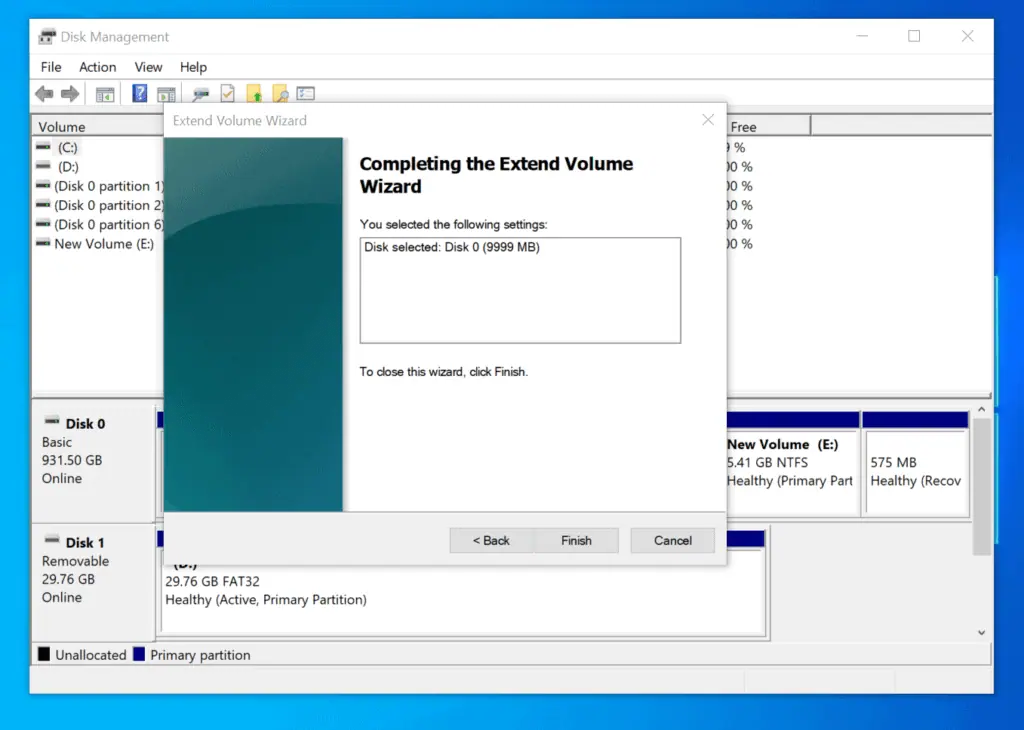
- Finally, to use Windows 10 Disk Management to Extend Volume, on the Completing the Extend Volume Wizard screen, click Finish.
Why is Disk Management “Extended Volume” Grayed Out?
If Extend Volume grayed out, it could be cause by any of the following:
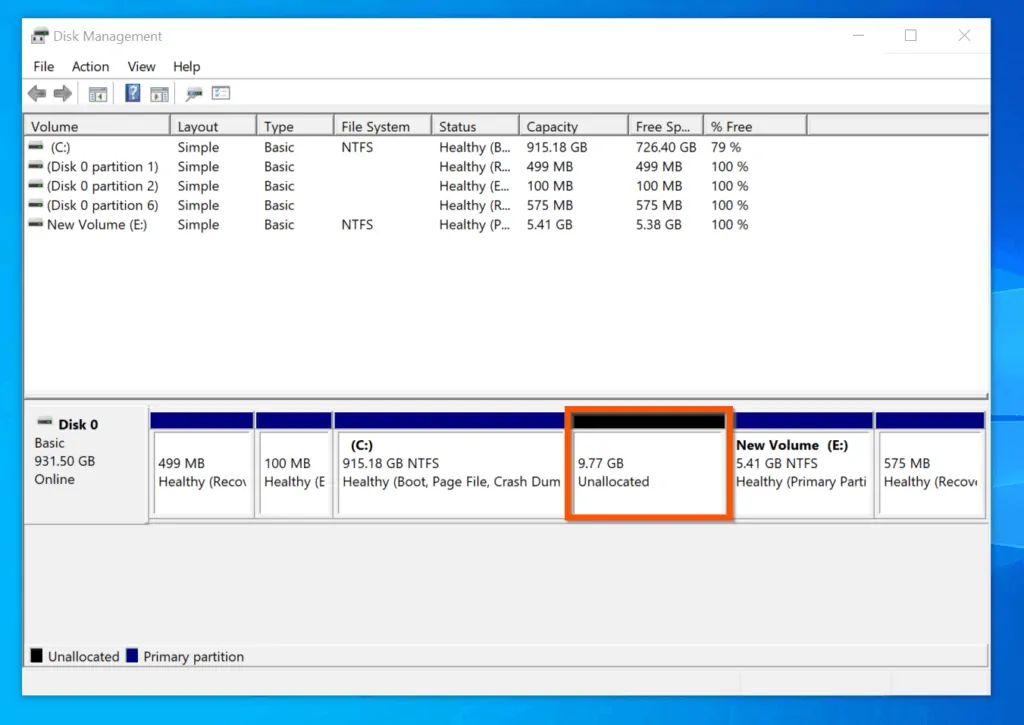
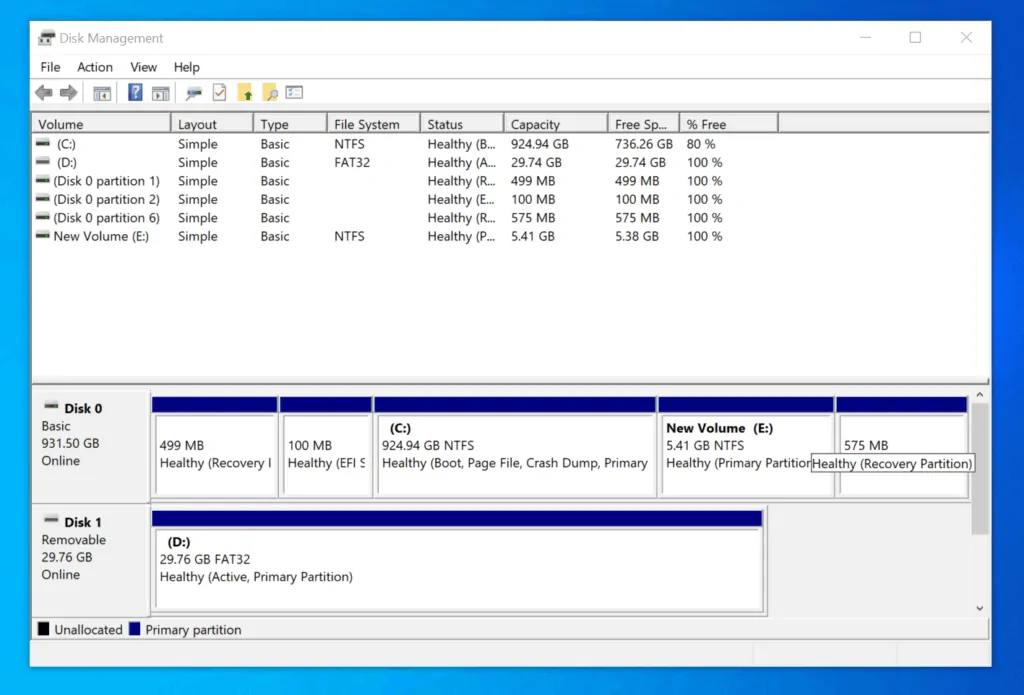
- You do not have a free, unallocated and contiguous disk space to the right of the partition you wan to to extend. In the example below, I have 10 GB free space to the right of drive C. I can extend drive C. However, If I right-click Drive E, Extended Volume will be grayed out because the free volume is NOT on the right of E.
- Another reason Extend Volume may be grayed out is if you try to extend a non-NTFS partition.
- Finally, if you try to extend a removable drive, Extend Volume will be grayed out. Windows cannot extend removal drives.
Why is Disk Management “Shrink Volume” Grayed Out?
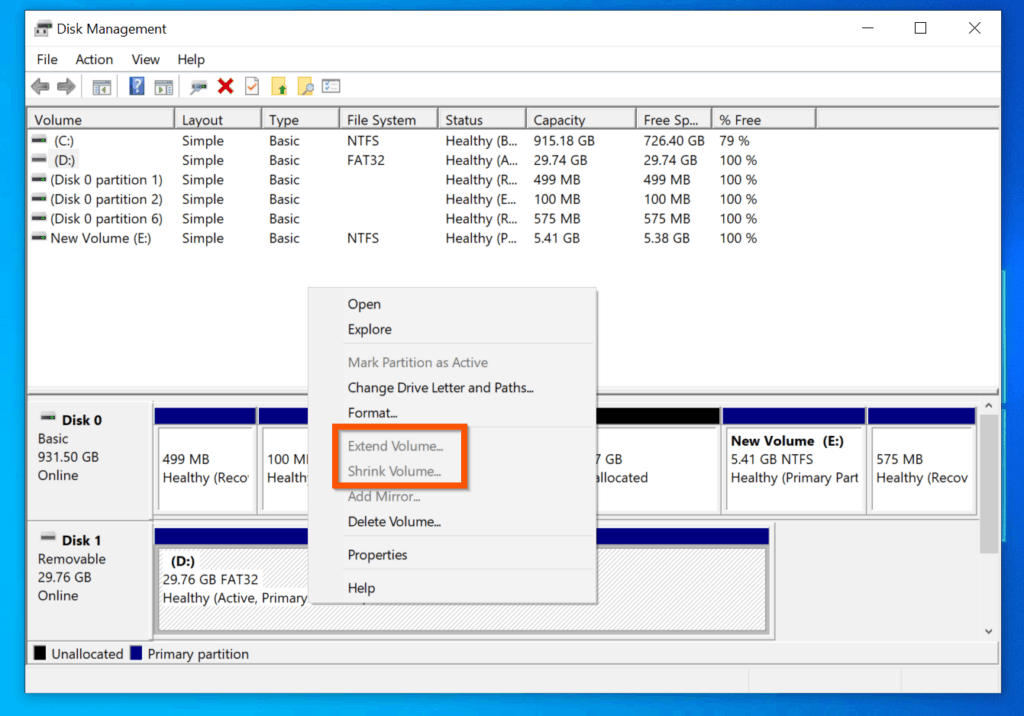
The main reason Shrink Volume may be grayed out is if you try to Shrink a removable drive. Windows cannot extend or Shrink an external, removal drive.
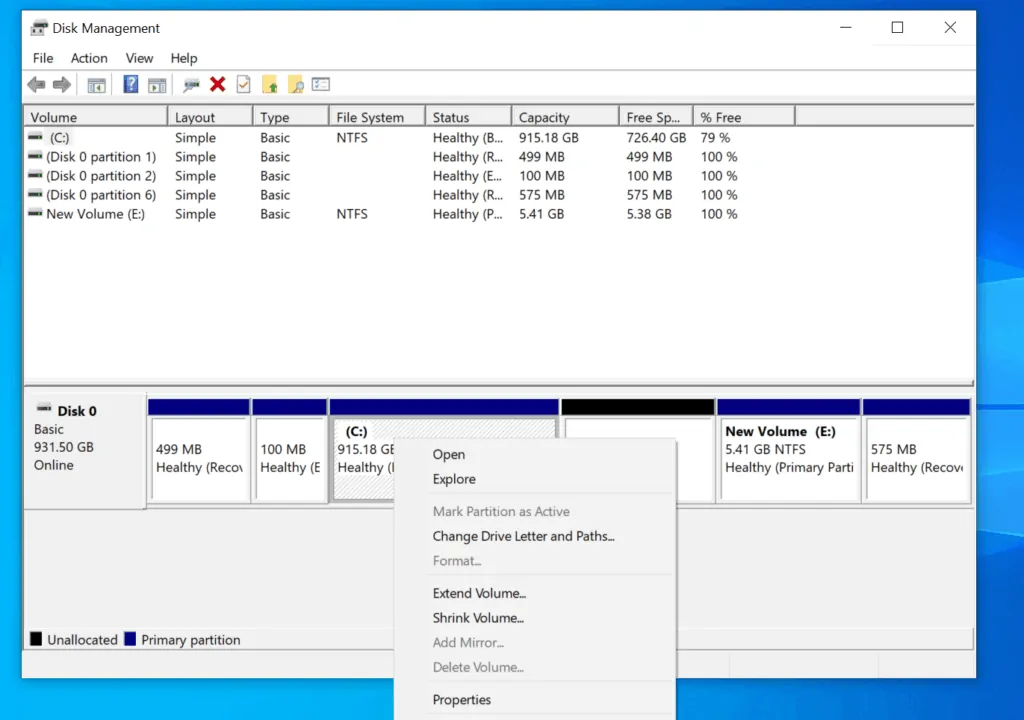
In the screenshot below, the volume I right-clicked is an external (removable) drive volume. This is why Shrink Volume is grayed out. Compare this with the second screenshot – Shrink Volume is available because drive E is on an internal drive.
Conclusion
I hope you found this Itechguide helpful. If you found it helpful, click on “Yes” beside the “Was this page helpful” question below.
You may also express your thoughts and opinions by using the “Leave a Comment” form at the bottom of this page.
Finally, for more Windows 10 Itechguides, visit our WINDOWS 10 HOW-TO page. You may also find our Work from Home page very helpful.


![How To Run Sysprep (Generalize) In Windows 10 [2 Methods]](https://www.itechguides.com/wp-content/uploads/2022/05/8-2.webp)