RSAT (Remote Server Administration Tool) is a set of tools used to administer Windows Server from a PC. Learn how to install the tools with the options in this guide.
Option 1: Install RSAT with Manage Optional Features
To enable RSAT with Manage Optional Features:
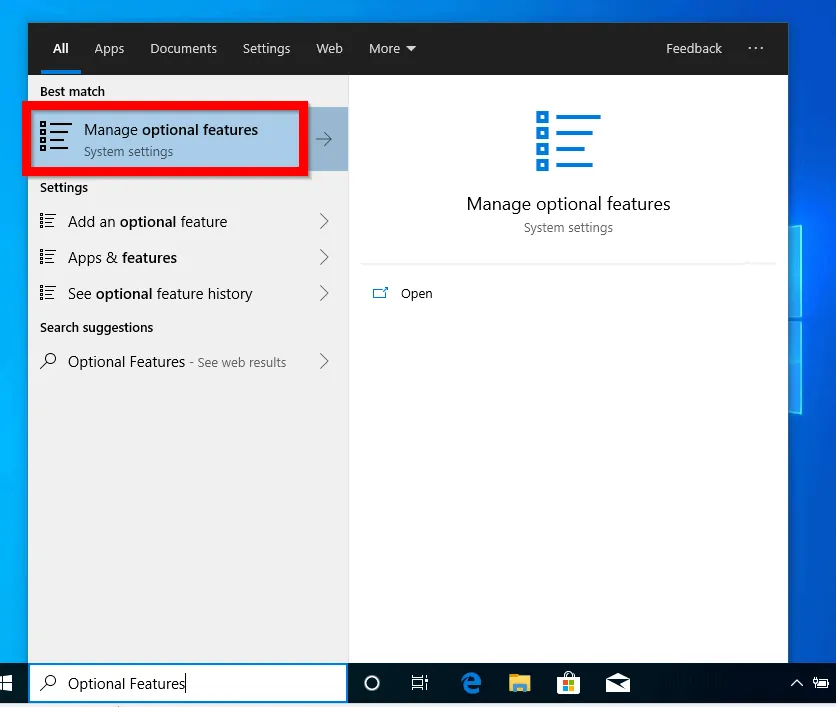
- Type Optional Features in the search bar. Then select Manage Optional Features.
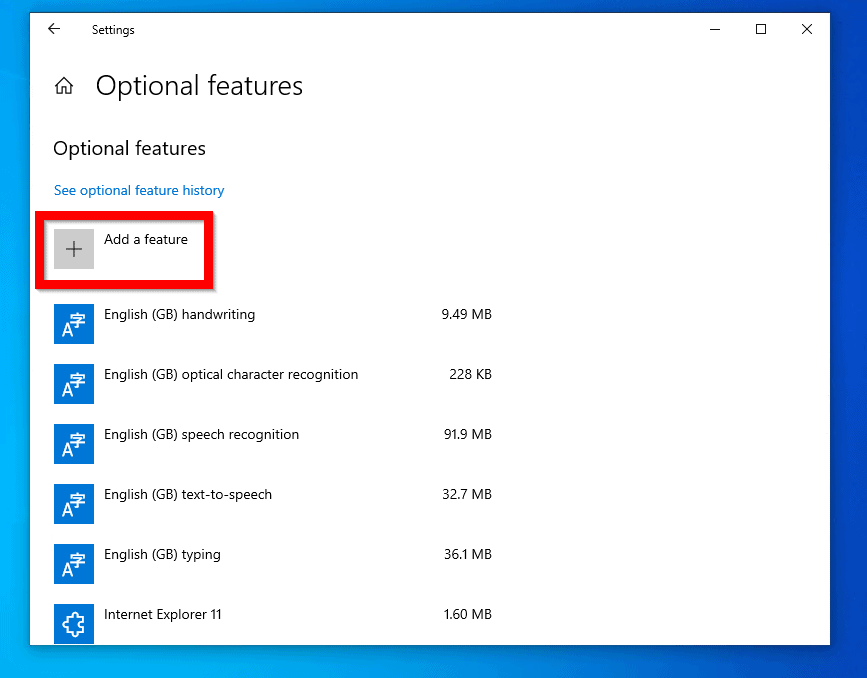
- When Optional features settings opens, click Add features.
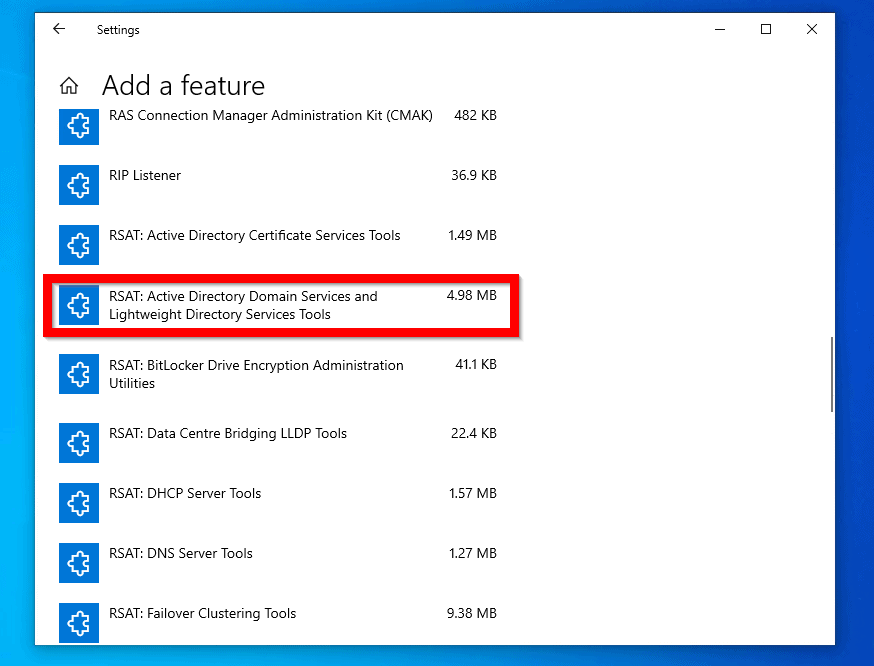
- Then scroll through available features and click on the feature you wish to add.
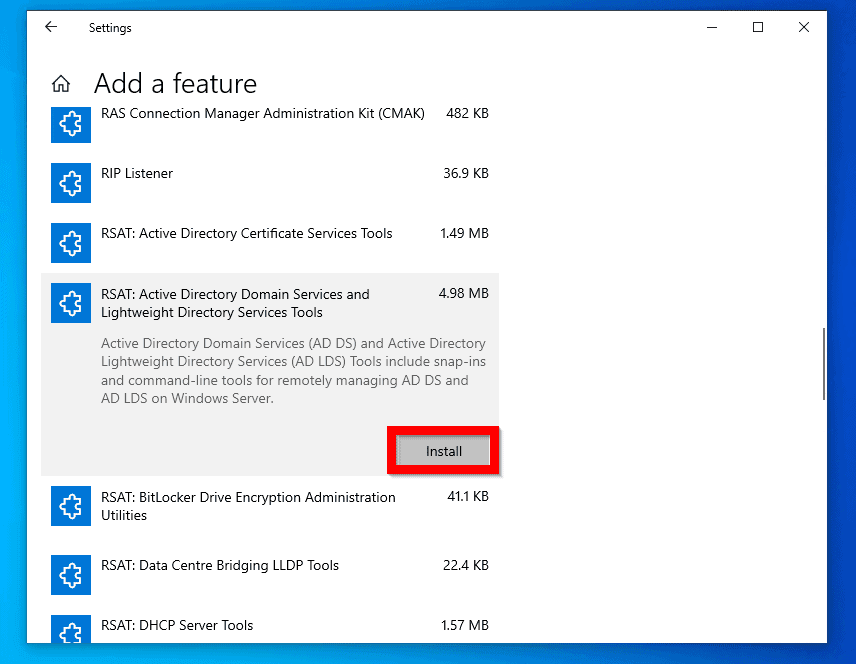
- Finally, click Install.
- Once you click Install, the feature will disappear from the list. To confirm it has been enabled, click the back button beside Settings.

- Then click see optional feature history. The feature you just installed should be in the list. The installation progress bar will be displayed.

- When the installation is completed, scroll down the Optional features list. RSAT will be listed.

- To confirm that this feature is installed, search for it.
Option 2: Install RSAT with the DISM Command
Another method to install RSAT is to use DISM Command.
Here is how:
- Type cmd in search bar. Then right-click Command Prompt and select Run as administrator.
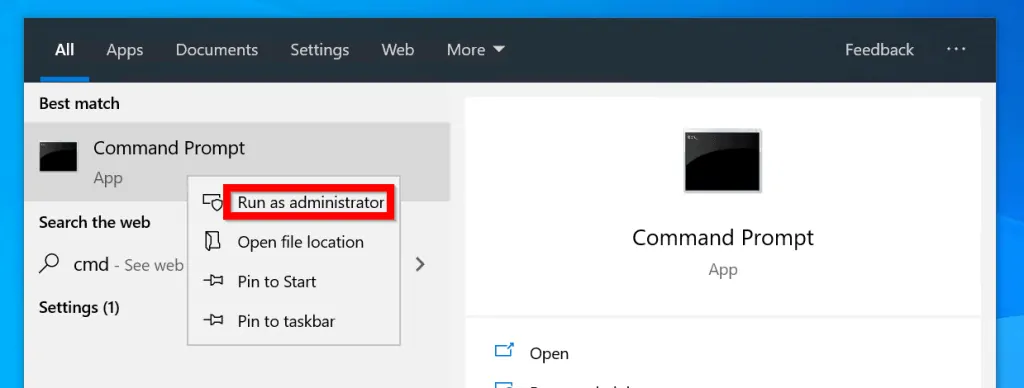
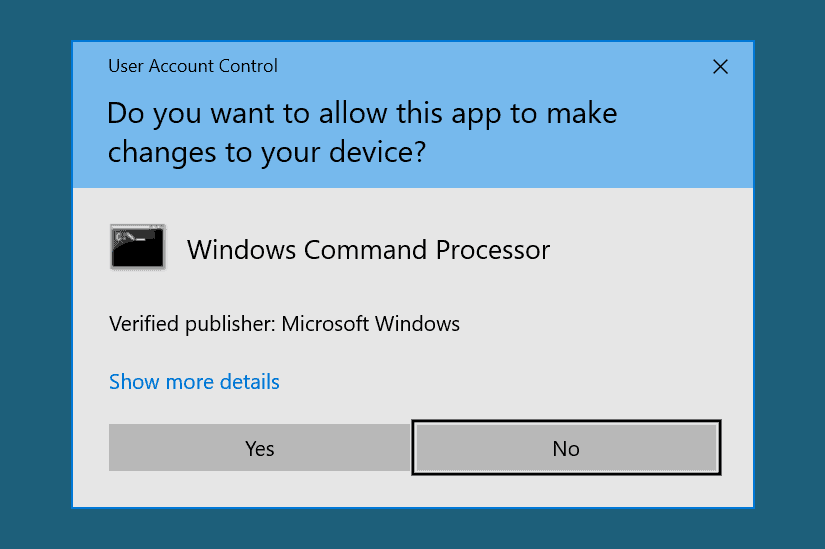
- If you receive User Account Control prompt, click Yes.
- At command prompt, type this command. Then press enter.
DISM.exe /Online /Get-Capabilities | find "Rsat"
The command lists all available RSAT optional features you can install.

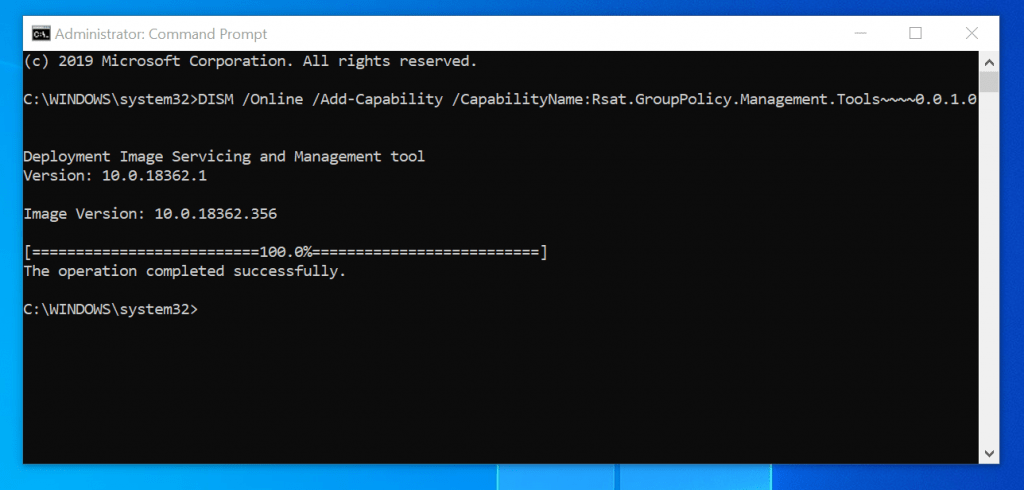
- To install a feature, type this command. Then press enter.
DISM /Online /Add-Capability /CapabilityName:Rsat.GroupPolicy.Management.Tools~~~~0.0.1.0
Replace “Rsat.GroupPolicy.Management.Tools~~~~0.0.1.0” with the name of the RSAT feature you wish to install.
To avoid errors, it is recommended to copy the feature name from the results of the DISM.exe /Online /Get-Capabilities command.
The last command will install Group Policy Management console.
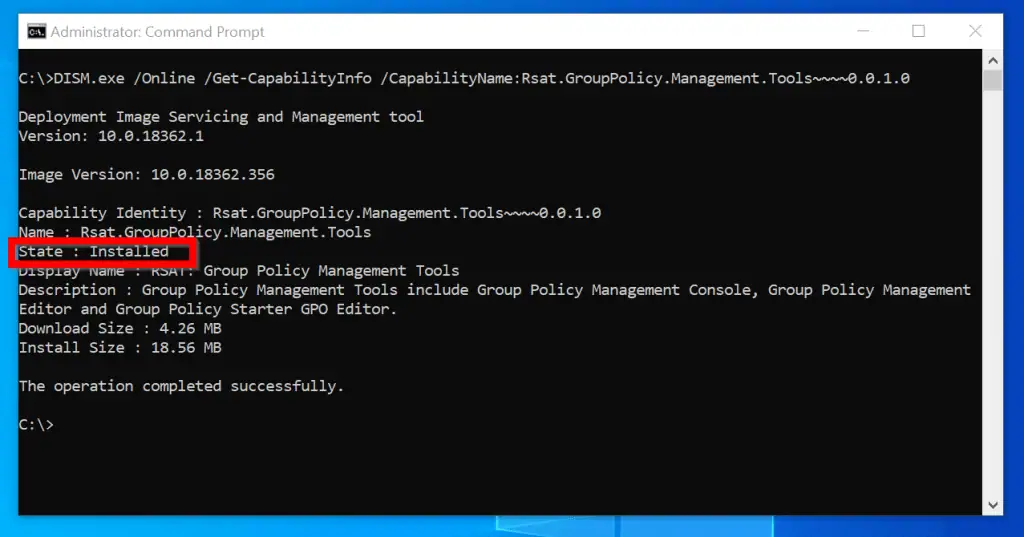
- To confirm that the feature was installed successfully, run this command
DISM.exe /Online /Get-CapabilityInfo /CapabilityName:Rsat.GroupPolicy.Management.Tools~~~~0.0.1.0
Replace “Rsat.GroupPolicy.Management.Tools~~~~0.0.1.0” with the RSAT feature you installed…
Here is the result…The State is Installed.
Option 3: Install RSAT with the PowerShell
The last method to install RSAT is with PowerShell.
Here are the detailed steps:
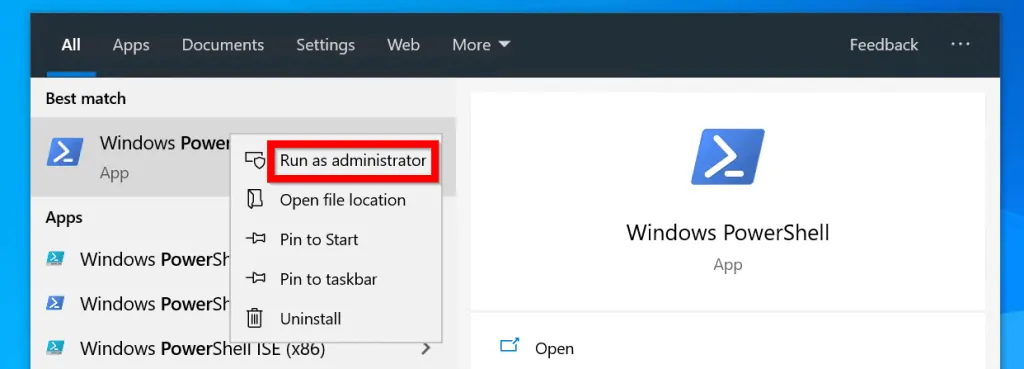
- Search PowerShell. Then right-click Windows PowerShell and select Run as Administrator.
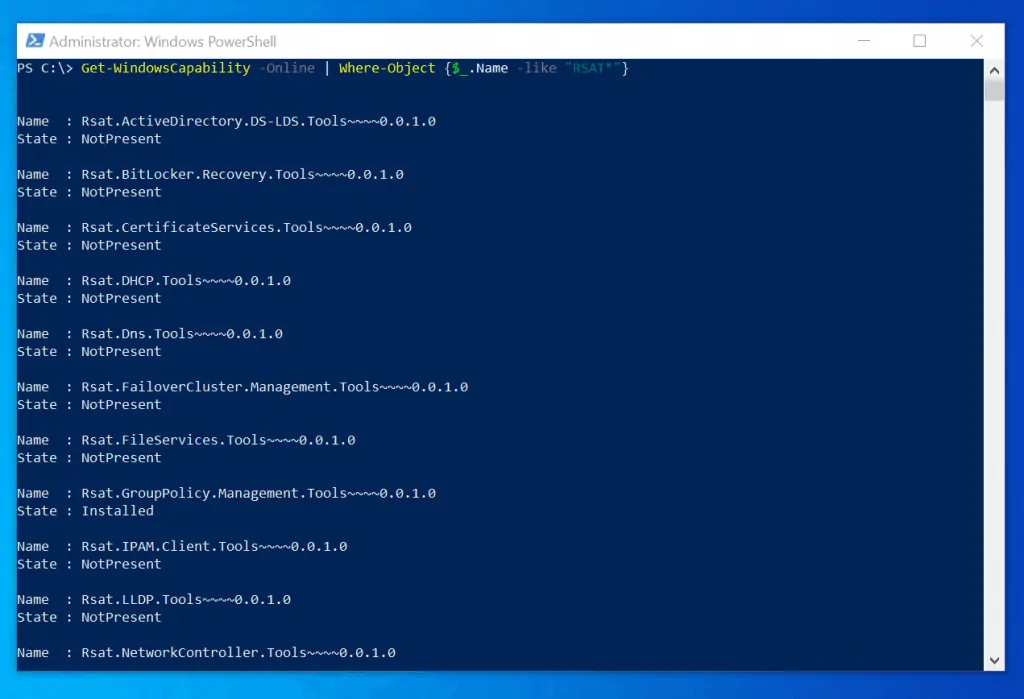
- At powershell command prompt, to list available RSAT features, type the command below. Then press enter.
Get-WindowsCapability -Online | Where-Object {$_.Name -like "RSAT*"}Here is the result of the command:
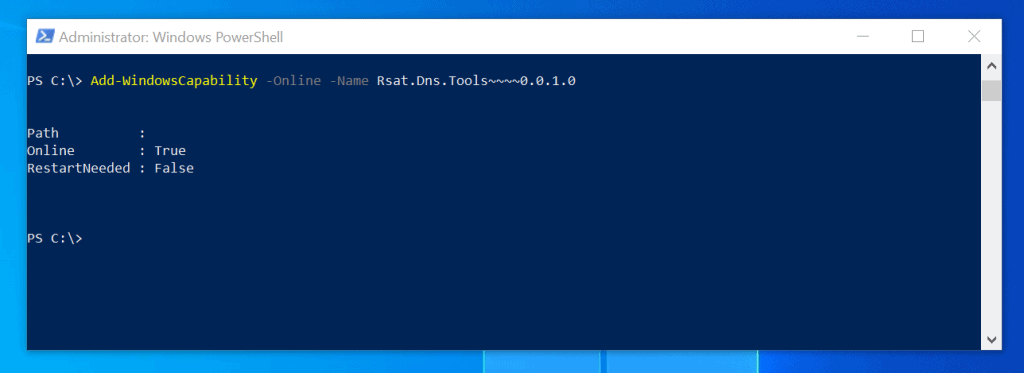
- To install one of the RSAT features, use the command below:
Add-WindowsCapability -Online -Name Rsat.Dns.Tools~~~~0.0.1.0
- PowerShell will start installing the feature…

- When the installation is completed, the result will display as shown below. If you need to restart, RestartNeeded will display True.
- To confirm that the feature installed successfully, use a command similar to the one below:
Get-WindowsCapability -Online | Where-Object {$_.Name -like "Rsat.Dns.Tools*"} Te result should show that the feature is installed

Conclusion
With one of the methods discussed in this guide, you should be able to install RSAT in your Windows PC. Let me know which option you used.
You can share your feedback by responding to the “Was this page helpful?” question below.
Do you have a question or comment concerning the article? You can also post them by responding to the “Was this page helpful?” question below.
Finally, for more Windows guides, visit our Windows How-To page.


![How To Run Sysprep (Generalize) In Windows 10 [2 Methods]](https://www.itechguides.com/wp-content/uploads/2022/05/8-2.webp)
Hi I cant install RSAT any of above three method, mine windows 10 home 1803 version
could you please help me to install RSAT
Hi Gobi,
RSAT is not available in Windows 10 Home. You can only install RSAT in Pro or Enterprise editions of Windows 10
Thanks for this. This is the best guide for cmd and powershell I have found so far.
Thank you! Glad you found the Itechguide helpful!