In this Itechguide, Victor teaches you how to resize partition on Windows 10.
Option 1: Resize Partition with Disk Management
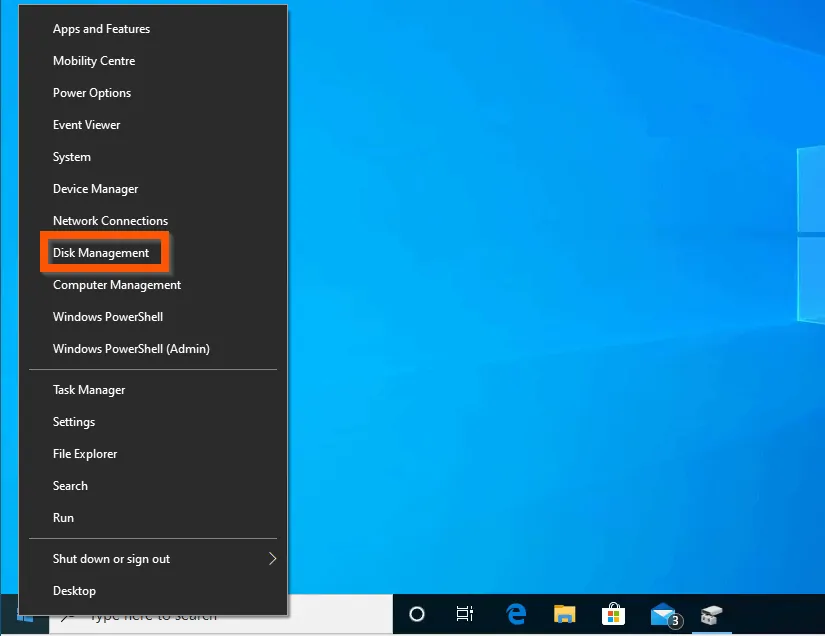
- Right-click Windows 10 Start menu and select Disk Management.
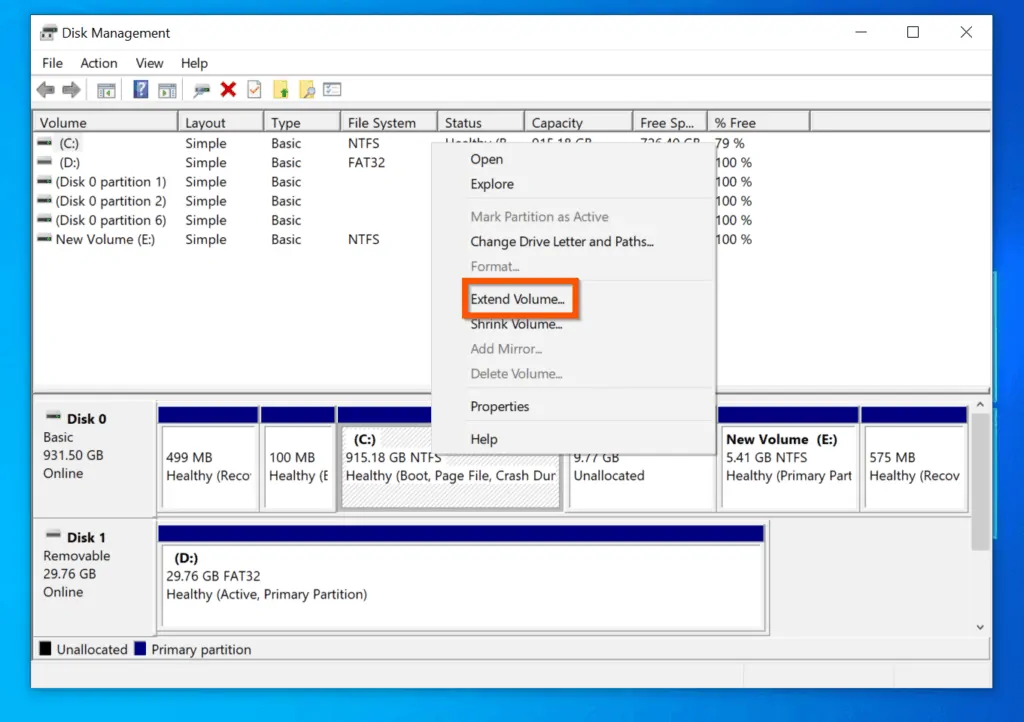
- Then, right-click the partition you want to resize and select Extend Volume. The Extend Volume Wizard will launch.
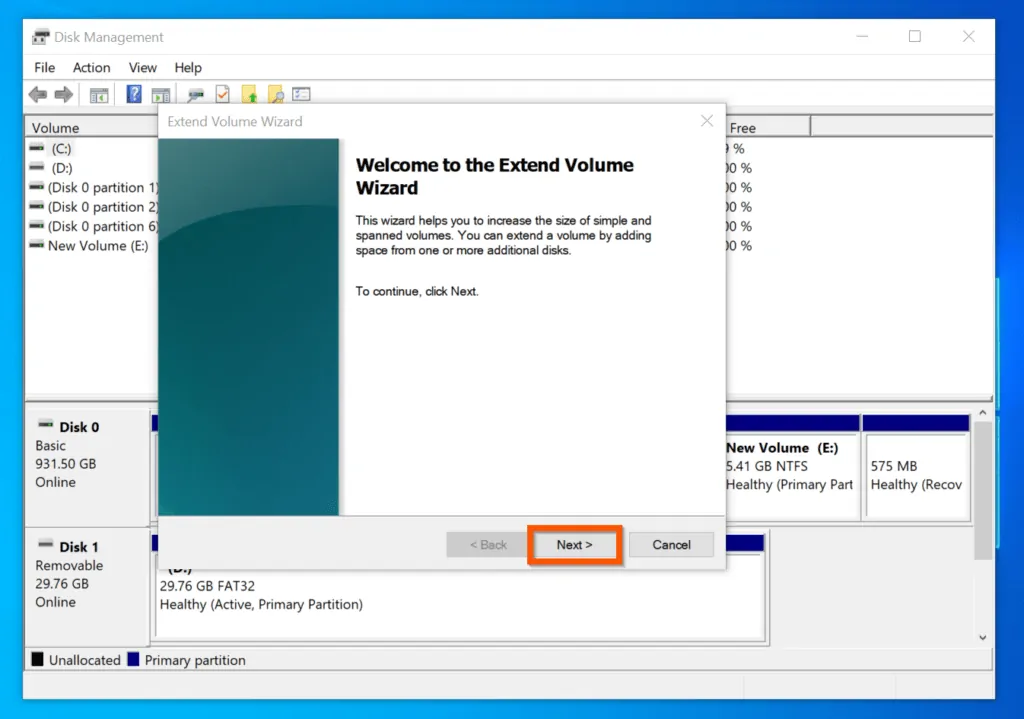
- On the first screen on the Extend Volume Wizard, click Next.
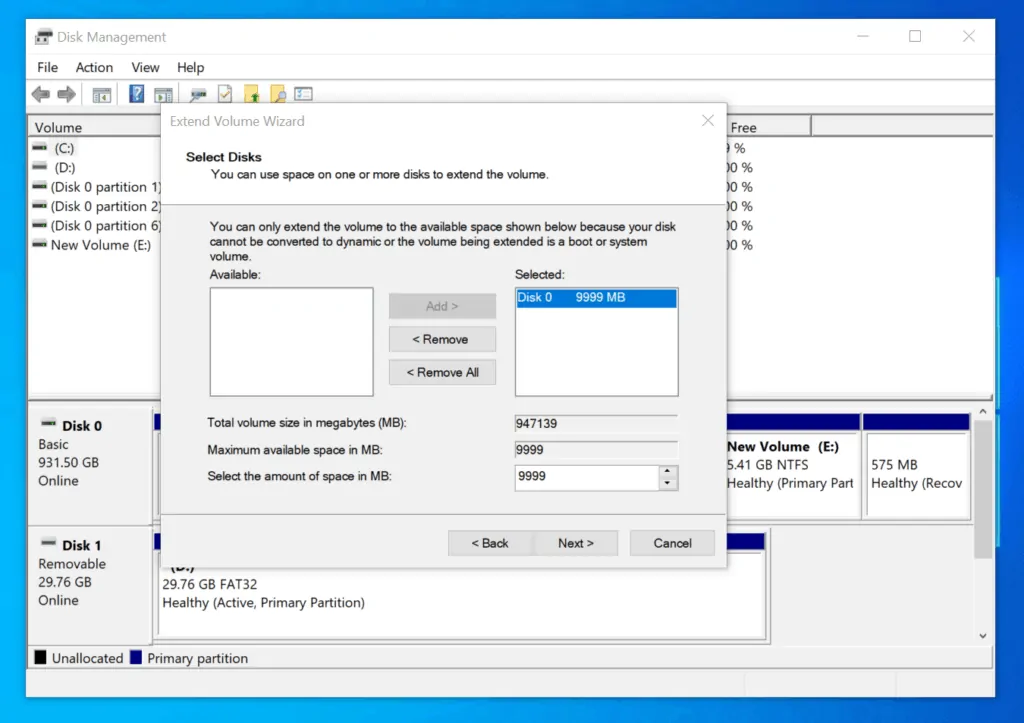
- Then, on the Select Disk screen, add all the free, unallocated spaces you want to use to resize the existing partition and click Next.
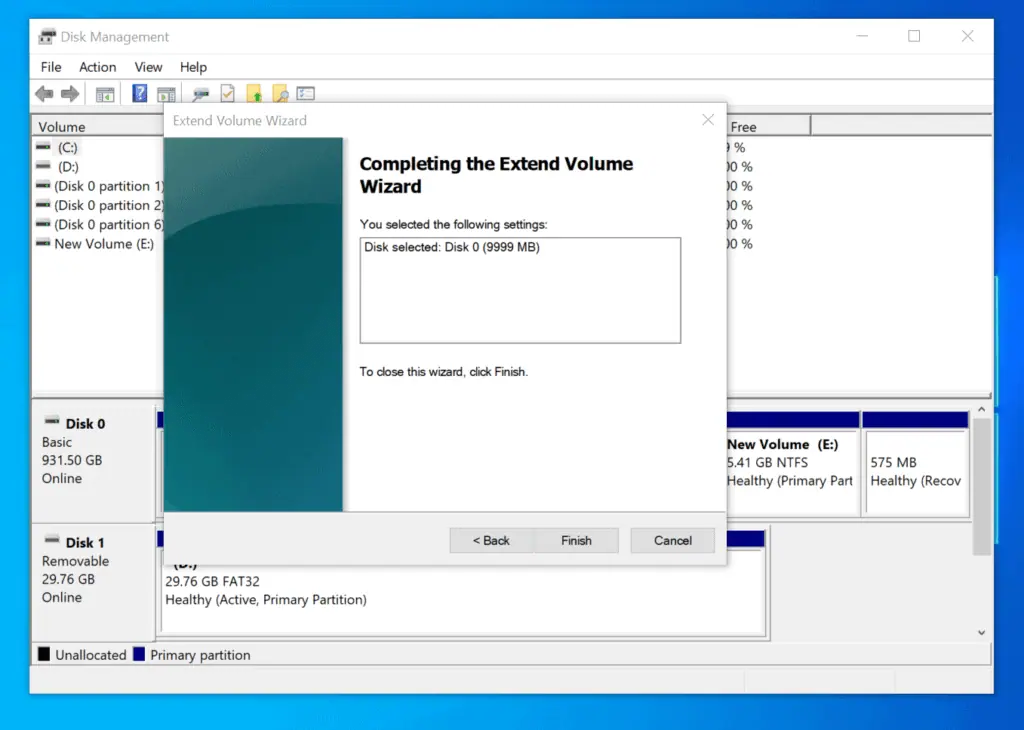
- Finally, on the Completing the Extend Volume Wizard screen, click Finish.
Option 2: Resize Partition with DISKPART
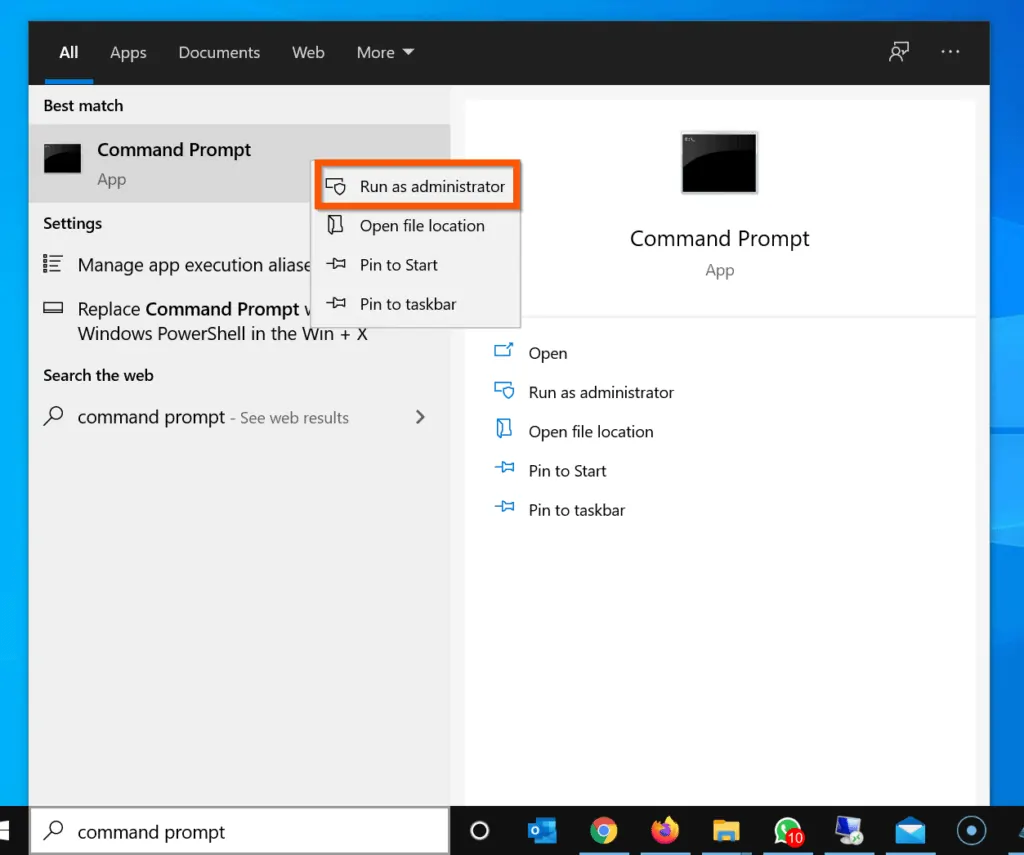
- Enter cmd in the Windows 10 search box. Then, right-click Command Prompt and select Run as Administrator.
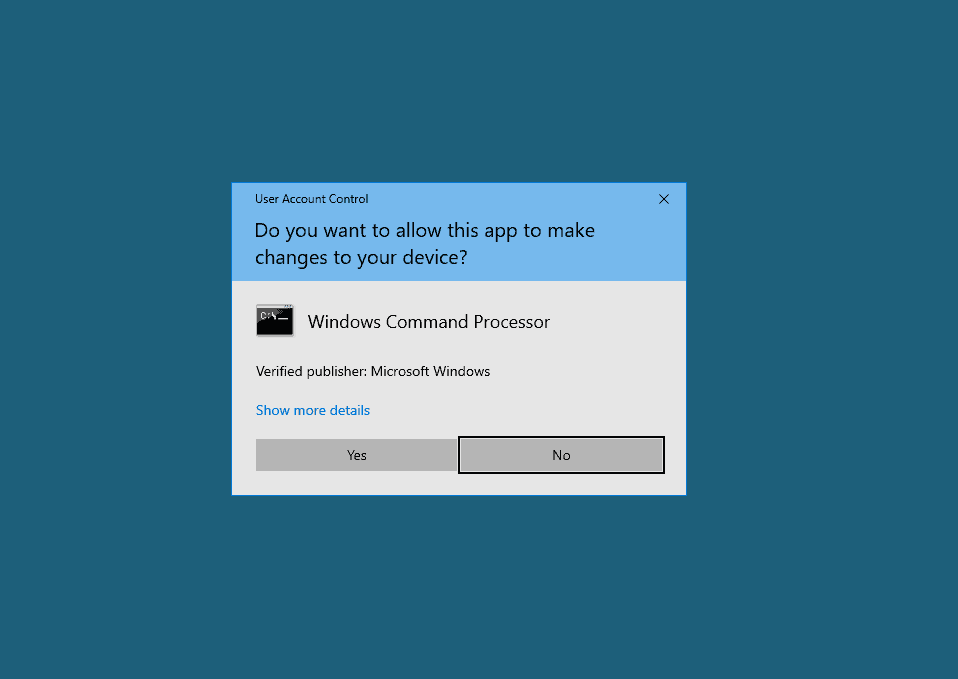
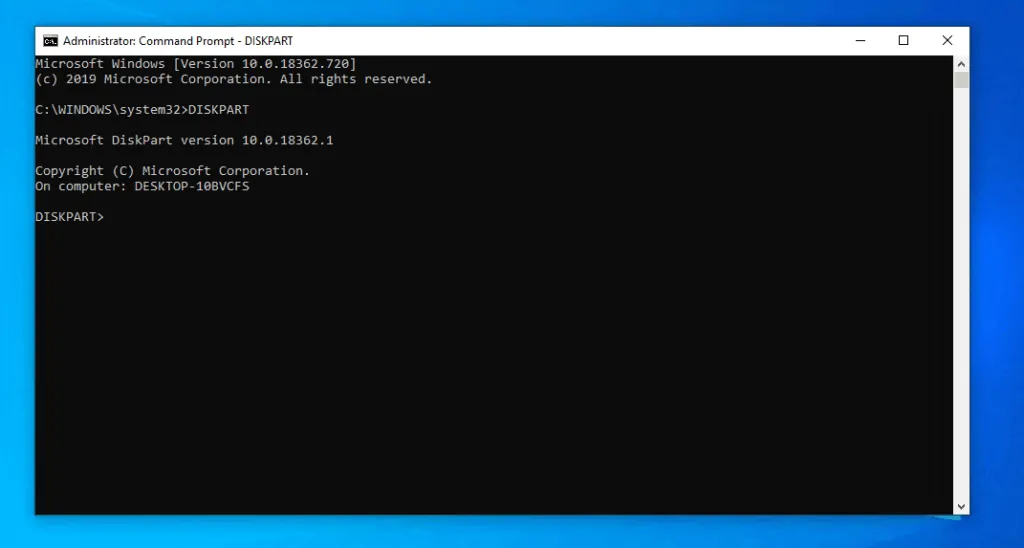
- On command prompt, type DISKPART and press enter.
DISKPART
The DISKPART prompt will open.
- Then, on the DISKPART prompt, enter this command and press enter.
LISK DISK
The List Disk command displays all disks on the PC. The next step is to select a disk.
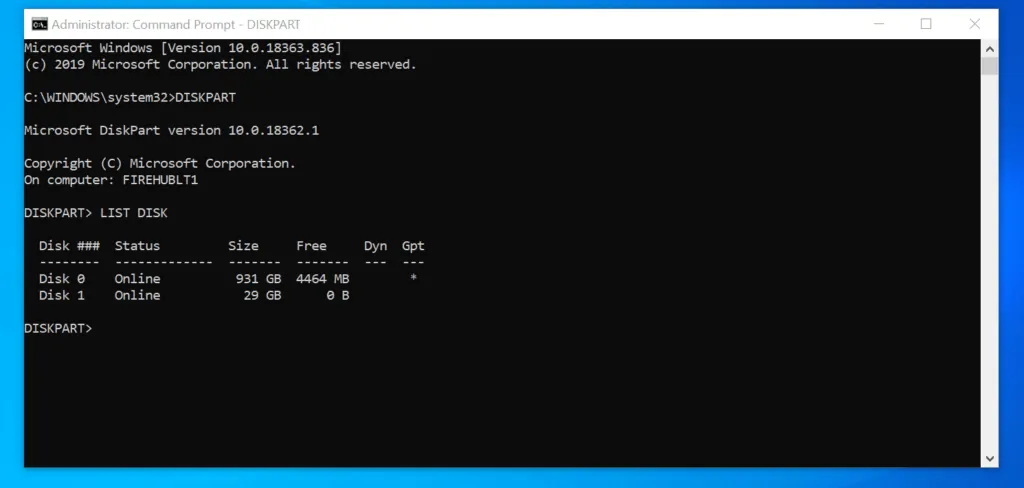
- To select a disk, enter the SELECT DISK command below (replace 1 with your disk #). Then, press enter.
SELECT DISK 1
The next step is to list all volumes (partitions) on the PC.
- To list the volumes on the PC, enter the LIST VOLUME command and press enter.
LIST VOLUME
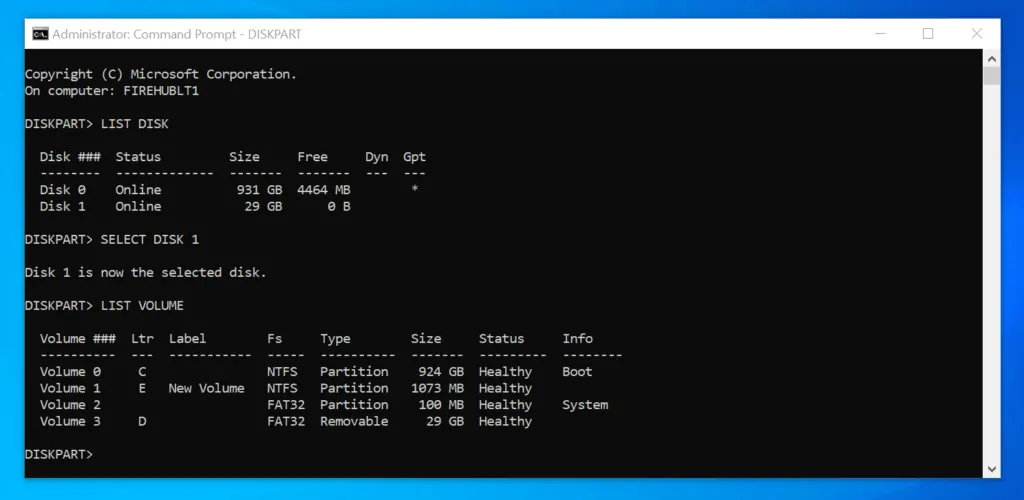
- To select a partition, enter the SELECT VOLUME command below (change 1 to the volume # for the volume you want to extend). Then, press enter.
SELECT VOLUME 1
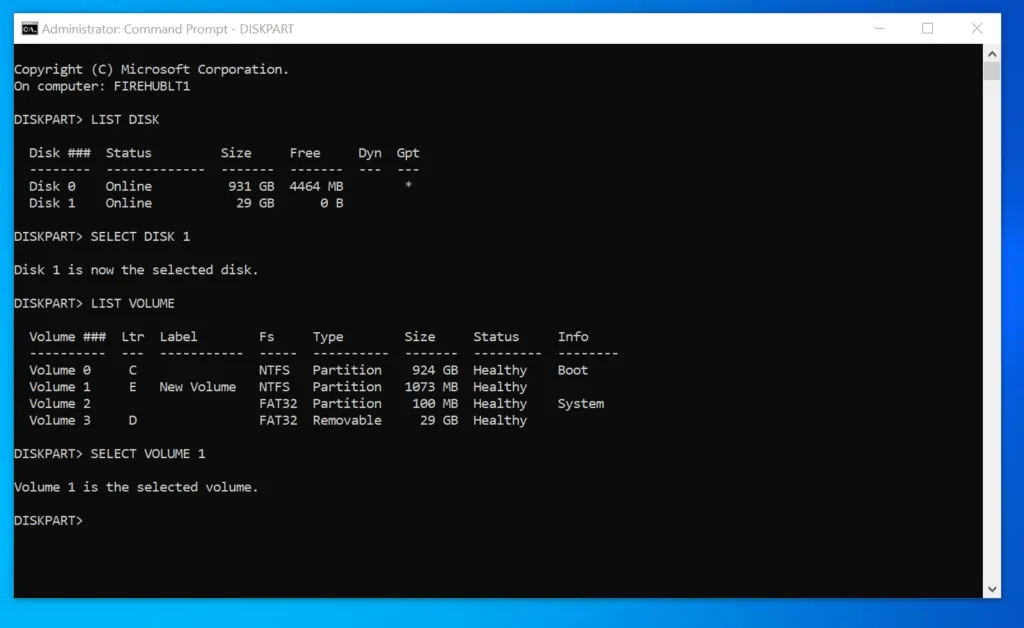
- Finally, to resize partition on Windows 10, enter EXTEND command and press enter.
If you use EXTEND command without specifying a size, DISKPART will resize the partition with all available free, unallocated, contiguous space. However, to specify the amount of disk to resize the partition with, modify your command like the command below:
EXTEND size=x
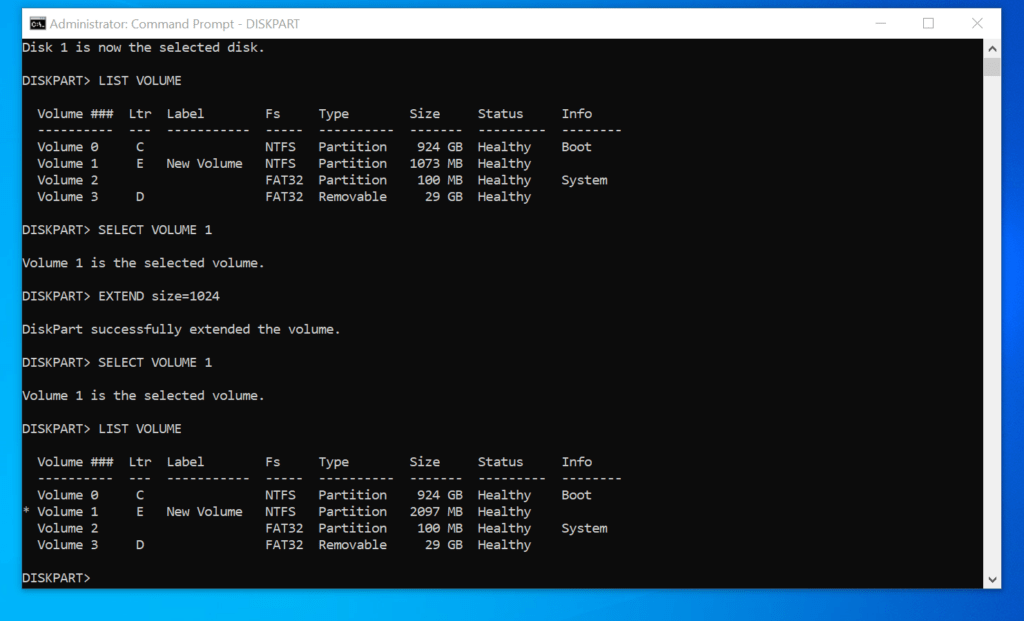
x is the disk size (in MB) you want to extend (resize) the volume (partition) by. To extend a partition by 1 GB, enter this command below and press enter.
EXTEND size=1024
The selected volume will be resized by the specified disk size. To confirm that the partition was resized, run the LIST VOLUME command again. In my example, drive E has increased from 1073 MB to 2097 MB.
Option 3: Resize Partition with PowerShell
- Type PowerShell in the search bar. Then click Run as administrator.
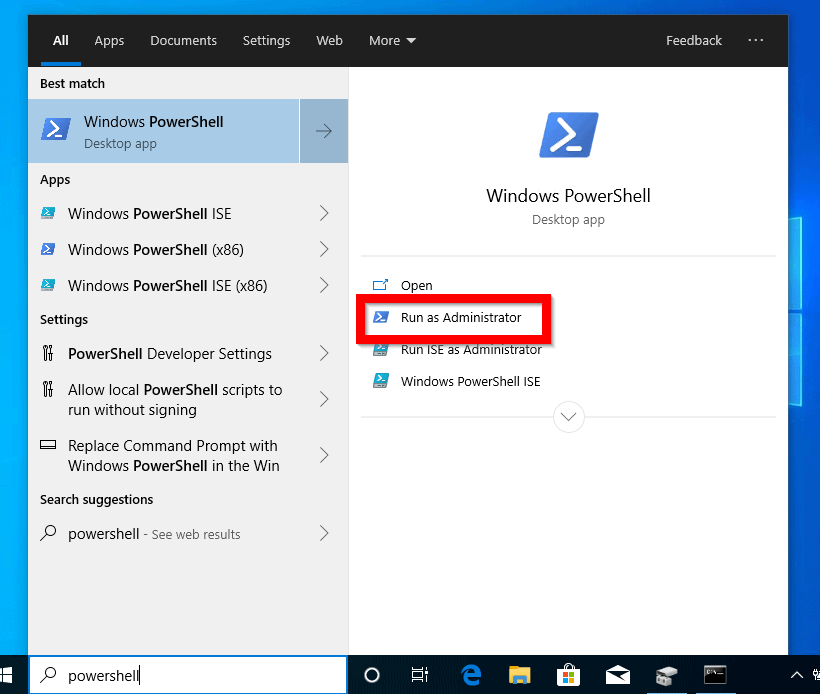
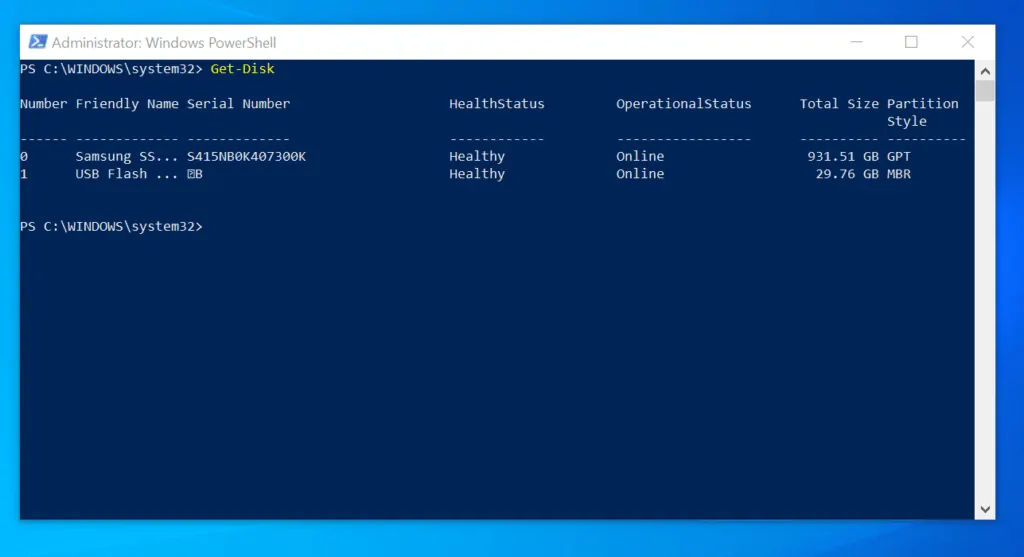
- On the PowerShell prompt, to identify the disk with the partition you want to resize, enter the Get-Disk cmdlet and press enter.
Get-Disk
Note the disk number for the disk you want to resize a partition on. In my example, I want to resize a partition on disk 0.
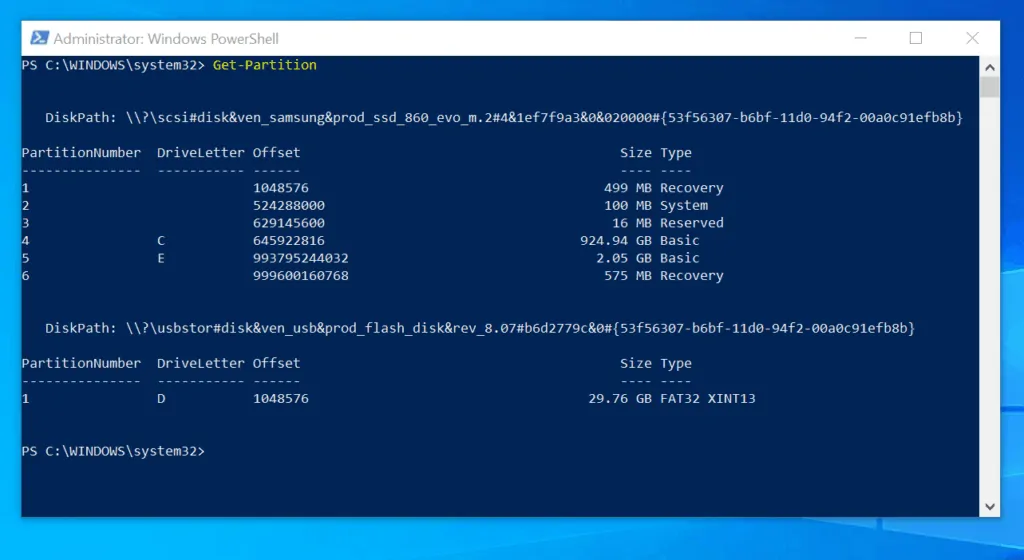
- Then, to identify the partition number for the partition you want to resize, enter the Get-Partition Cmdlet and press enter.
Get-Partition
Note the partition number for the partition you want to resize. In my example, I want to resize partition with PartitionNumber 5 (drive E).
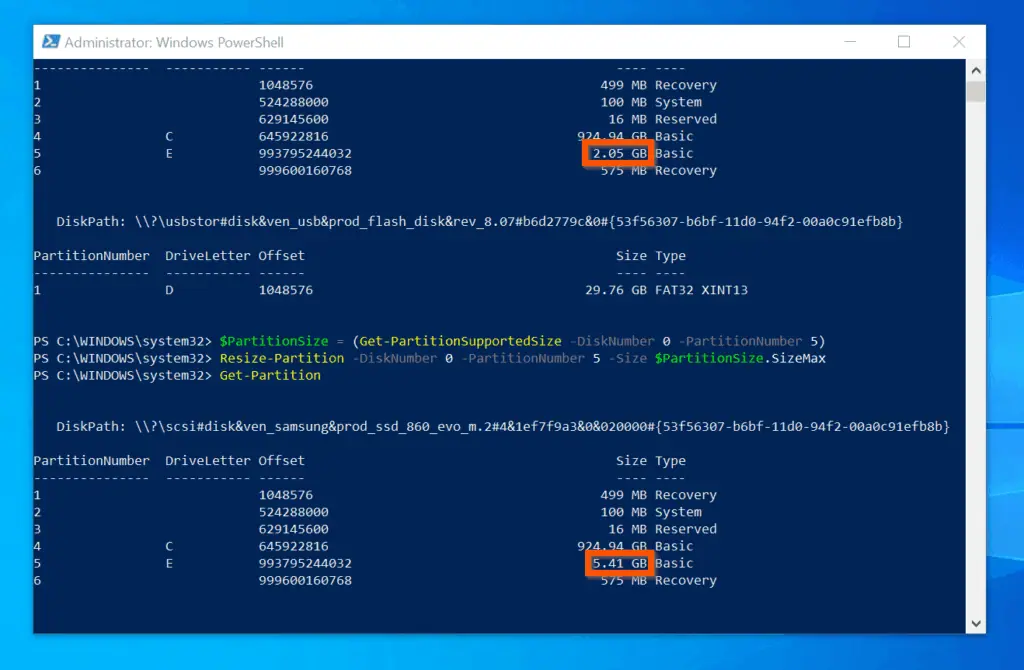
- To find the mazimize size of a partition, use the Get-PartitionSupportedSize Cmdlet and pipe the result to a variable.
$PartitionSize = (Get-PartitionSupportedSize –DiskNumber 0 –PartitionNumber 5)
- Finally, to resize partition on Windows 10 with PowerShell, use the Resize-Partition Cmdet.
Resize-Partition -DiskNumber 0 –PartitionNumber 5 -Size $PartitionSize.SizeMax
The partition using all available free space. To confirm that the partition resized, run the Get-Partition command again. In my example, the partition has increased from 2.05 GB to 5.41 GB.
Conclusion
You can use the methods covered in this Itechguide to resize partition on Windows 10! I hope you found this Itechguide helpful. If you found it helpful, click on “Yes” beside the “Was this page helpful” question below.
You may also express your thoughts and opinions by using the “Leave a Comment” form at the bottom of this page.
Finally, for more Windows 10 Itechguides, visit our WINDOWS 10 HOW-TO page. You may also find our Work from Home page very helpful.


![How To Run Sysprep (Generalize) In Windows 10 [2 Methods]](https://www.itechguides.com/wp-content/uploads/2022/05/8-2.webp)