In this Itechguide, Victor teaches you how to download and install QuickTime for Windows 10. The guide covers 2 steps to install QuickTime for Windows 10.
Step 1: Download QuickTime
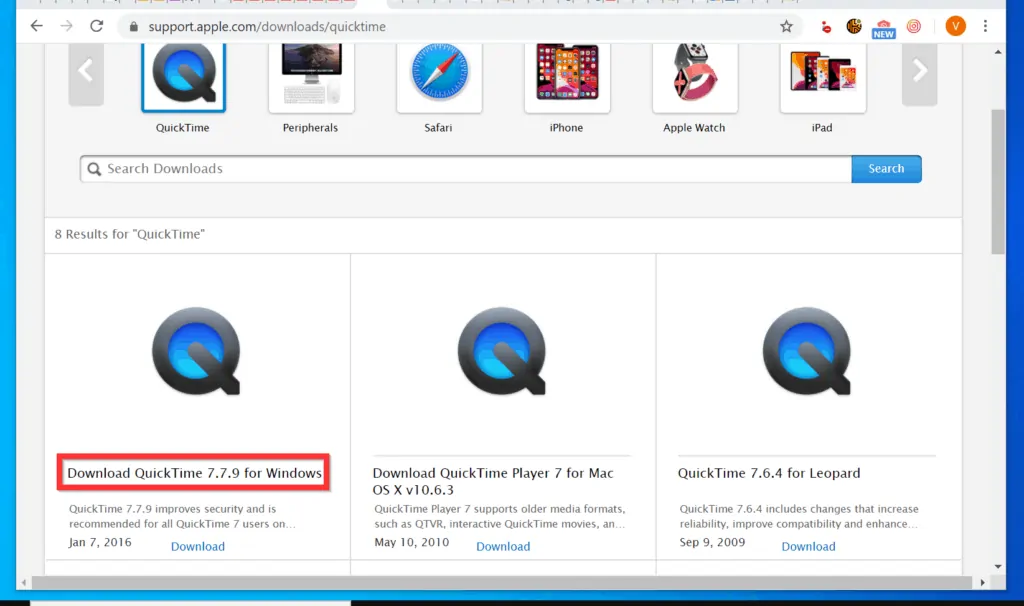
- Open the QuickTime download link from a browser on your PC.
If you are installing QuickTime on a different Windows 10 PC, other than the one you are reading this guide from, here is the download URL – https://support.apple.com/downloads/quicktime.
- When the download page opens, scroll down to Download QuickTime *7.7.9 for Windows link. The download page will open.
*The QuickTime version may be different for you depending on when you are performing the installation.
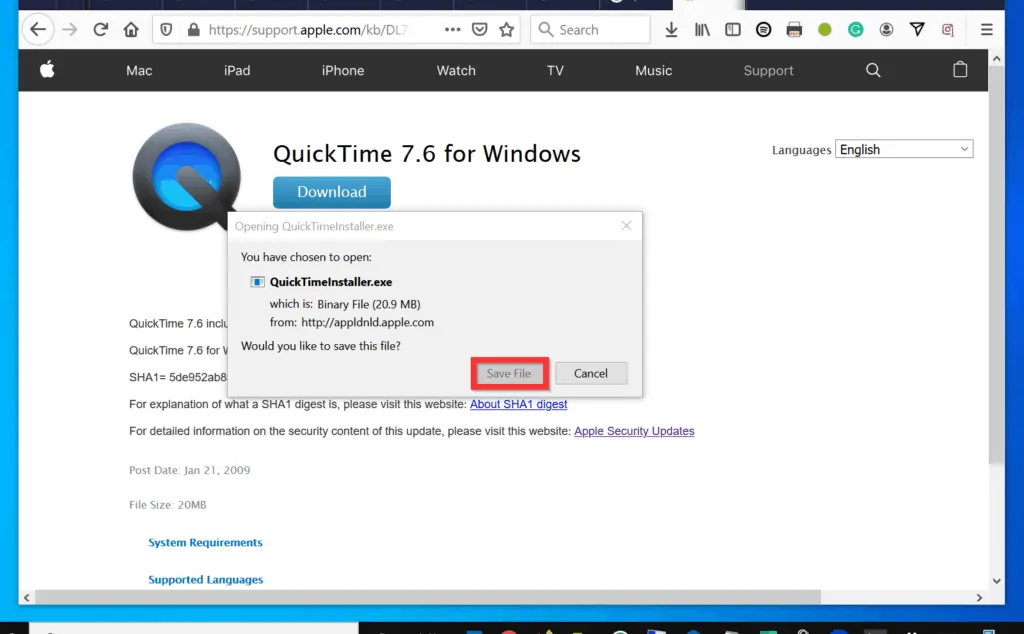
When I tried to install this latest version of QuickTime for Windows 10 – 7.7.9, I received the error shown in the second image below.
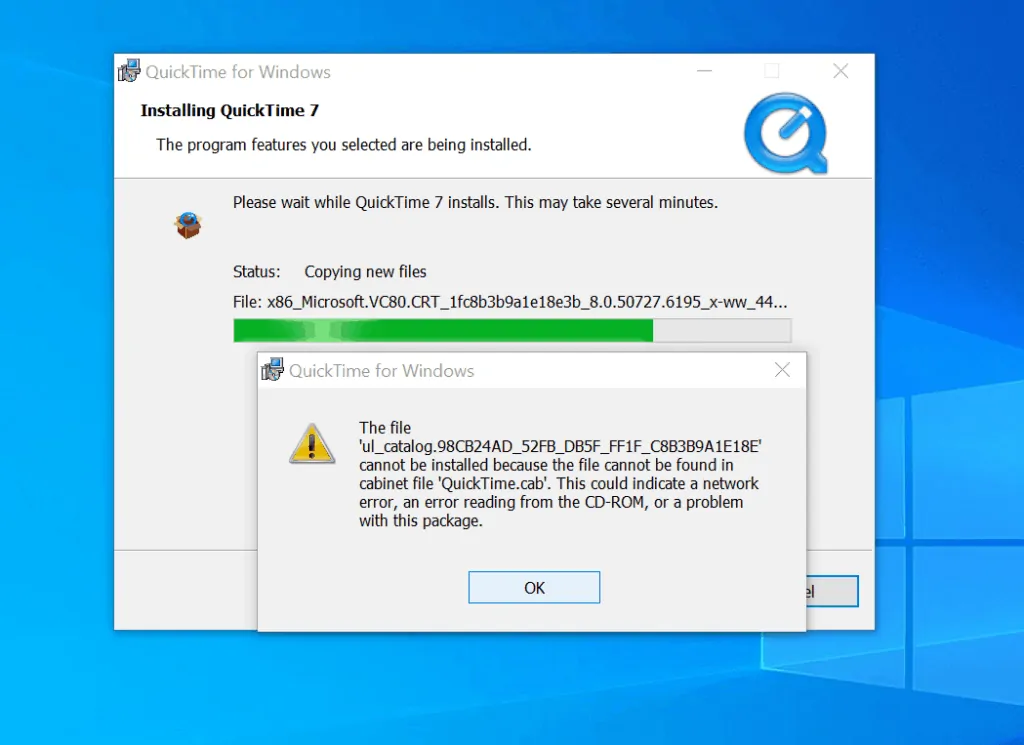
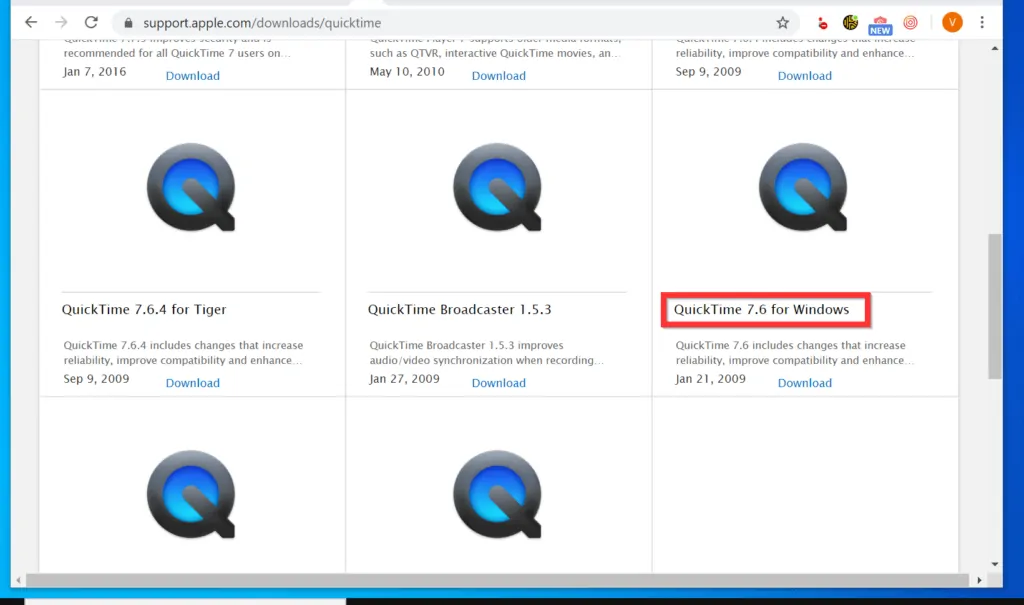
- My walk around to the above error is to download a previous version – I was able to install version 7.6 without any errors. I recommend you download this version instead.
- On the download page, click the Download link.
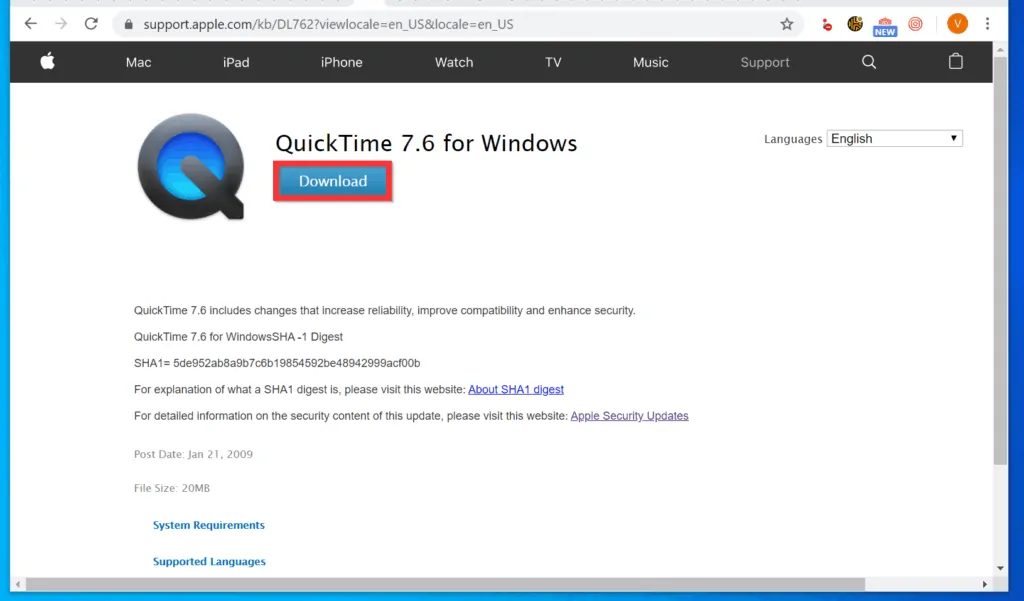
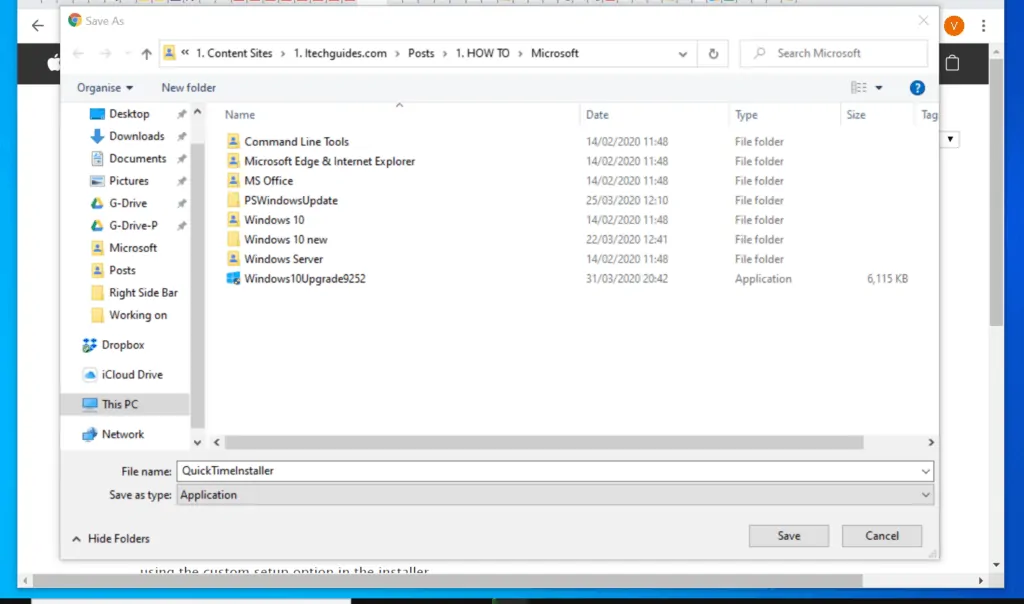
- If you are downloading with Google Chrome, Chrome will open a Save As page. Save the file to a folder on your PC.
- However, if you are downloading with Mozilla Firefox, Firefox will display a Save File pop-up. Click the Save File button to start downloading the file. Firefox saves downloaded files in the Download folder.
The QuickTime for Windows 10 installation file version 7.6 is about 20MB – depending on the speed of your internet connection, it may take a while to download. Wait for the QuickTime installation file to download. Then, proceed to the next step.
Step 2: Install QuickTime
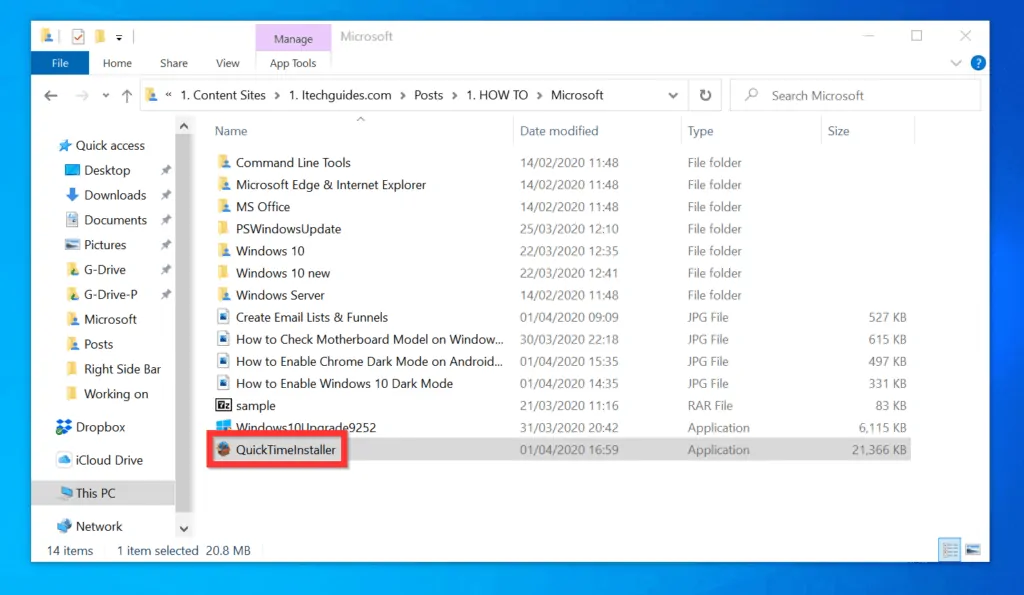
- Open the folder you saved the downloaded QuickTime installation file and double-click the file.
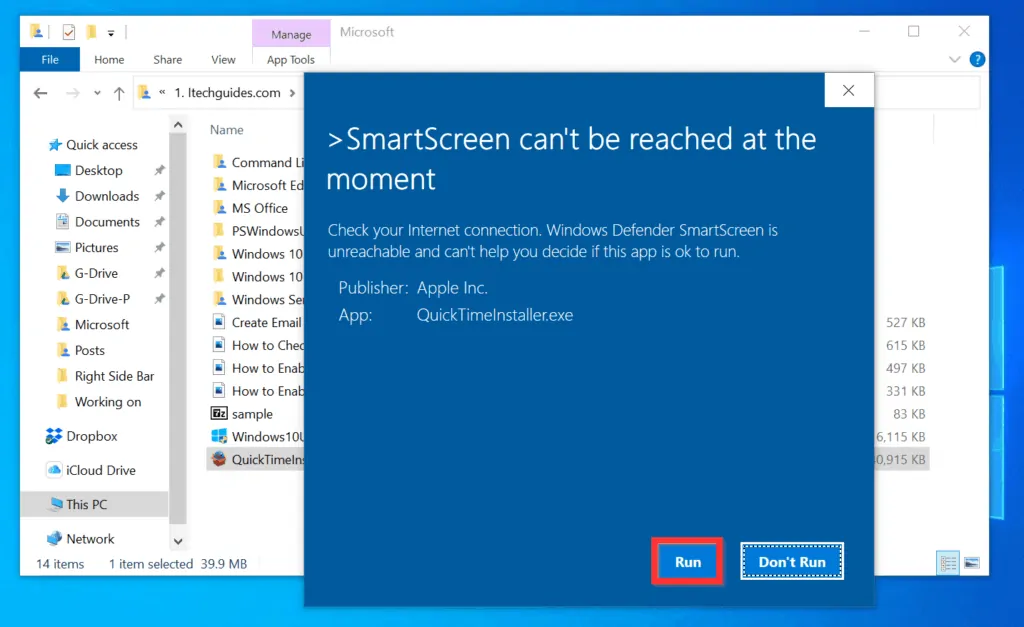
- If you receive the SmartScreen can’t be reached at this moment warning, click Run.
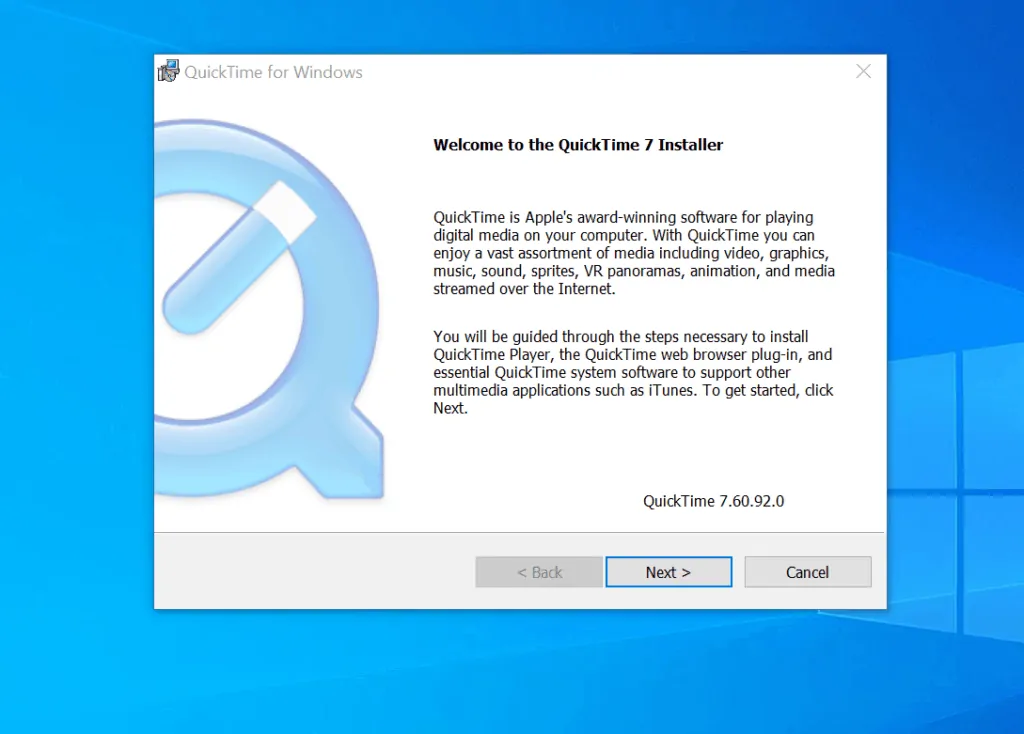
- Then, on the first screen of the installation wizard, click Next.
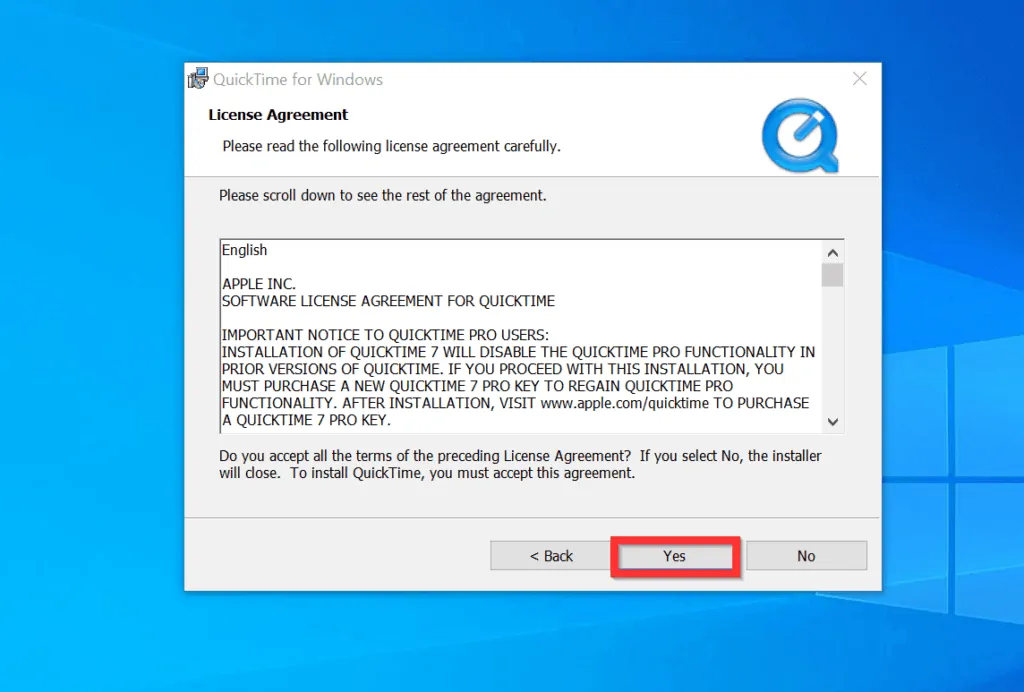
- When the License Agreement screen opens, click Yes.
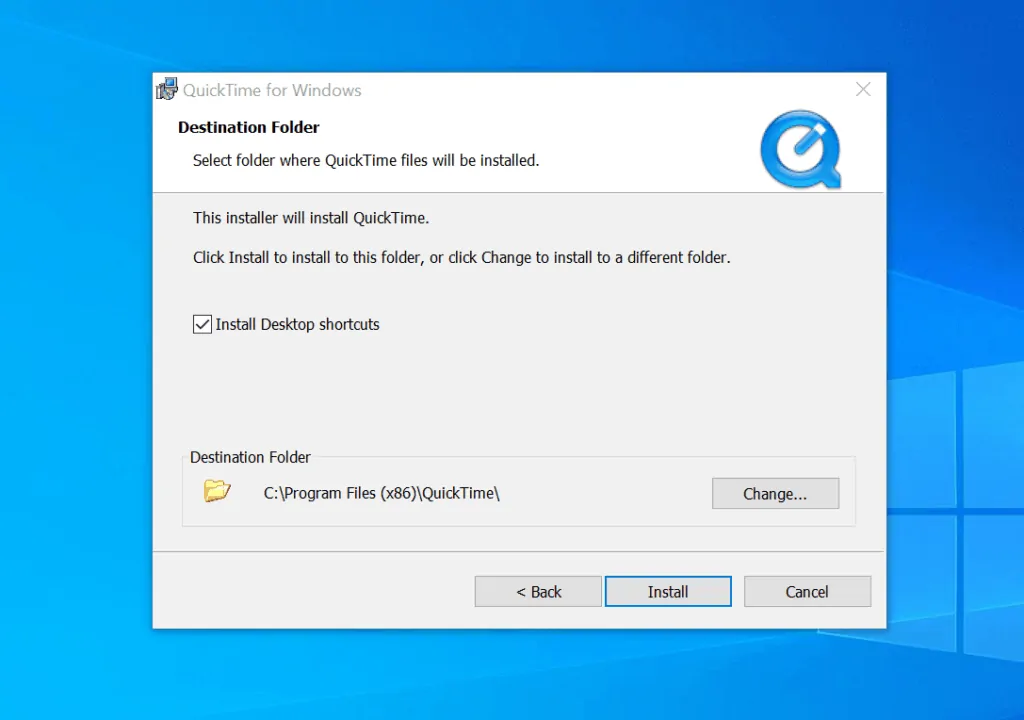
- Finally, on the Destination Folder screen, click Install.
- You will receive a User Account Control (UAC) screen requesting permission to allow the app to make changes to your PC. On the UAC screen, click Yes.
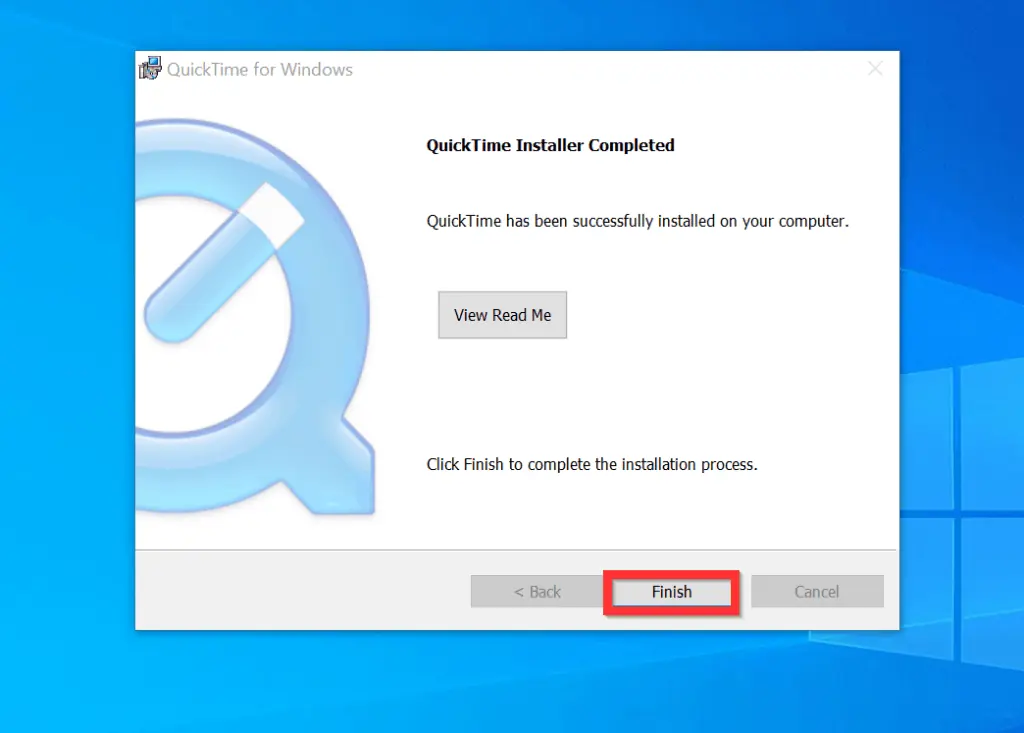
- When the installation is finished, click Finish.
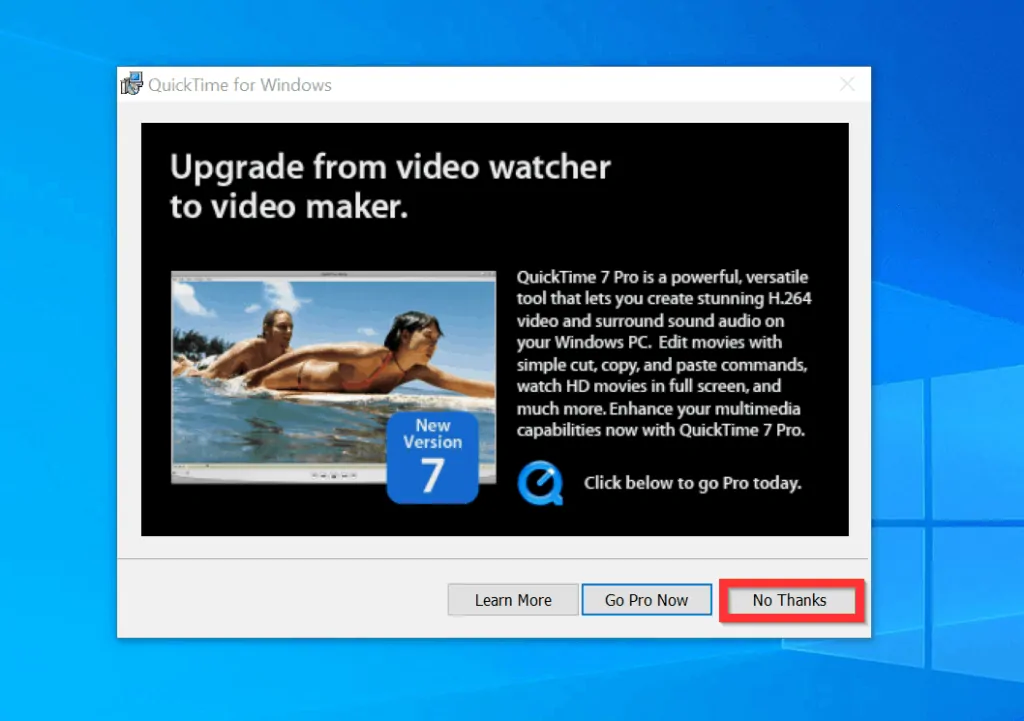
- If Apple tries to sell you QuickTime pro, on the bottom right of the screen, click No Thanks.
- To open QuickTime for Windows 10, double-click the QuickTime Player shortcut on your desktop. Alternatively, you can type quicktime in the search box and click QuickTime Player.


As you can see, it is very easy to download and install QuickTime for Windows 10! I hope you found this guide helpful. If it was helpful, let us know by sparing 2 minutes to share your experience with our community at [discourse_topic_url].
Alternatively, you could ask a question, leave a comment or provide feedback with the “Leave a Reply” form found towards the end of this page.
Finally, for more Windows 10 Itechguides, visit our Windows 10 How-To page.


![How To Run Sysprep (Generalize) In Windows 10 [2 Methods]](https://www.itechguides.com/wp-content/uploads/2022/05/8-2.webp)