This PowerShell tutorial is based on my book with the same title. You can get the book on Amazon.
There are 4 articles with a total of 7 tutorials. This is PowerShell Tutorial 3 & 4 of 7. If you have not read PowerShell tutorials 1 & 2, I recommend you read them before reading this tutorial.
PowerShell Tutorial 3: Variables and Pipelines
A PowerShell variable stores information from commands or information to be used as inputs to commands.
In PowerShell tutorial 3, you will learn the different types of variables. You will also learn how to create, access, and manipulate variables.
This tutorial will also teach you PowerShell pipelines. A pipeline allows you to use the output of one command as the input of the next command.
What are PowerShell Variables?
As defined in the about_variables help page, “A variable is a unit of memory in which values are stored”. This sounds good but it doesn’t do you much good, does it?
It simply means that a variable stores results of commands in it. Moreover, a variable also stores elements that are used in commands and expressions.
Let’s just cut the talk and take some examples!
A variable is represented by text strings (letters) that begin with a dollar sign ($). An example of a variable is $VarTest.
In this example, the text string is ‘VarTest’ and it begins with a dollar sign ($). It is that straightforward!
Open your PowerShell console and execute the command below:
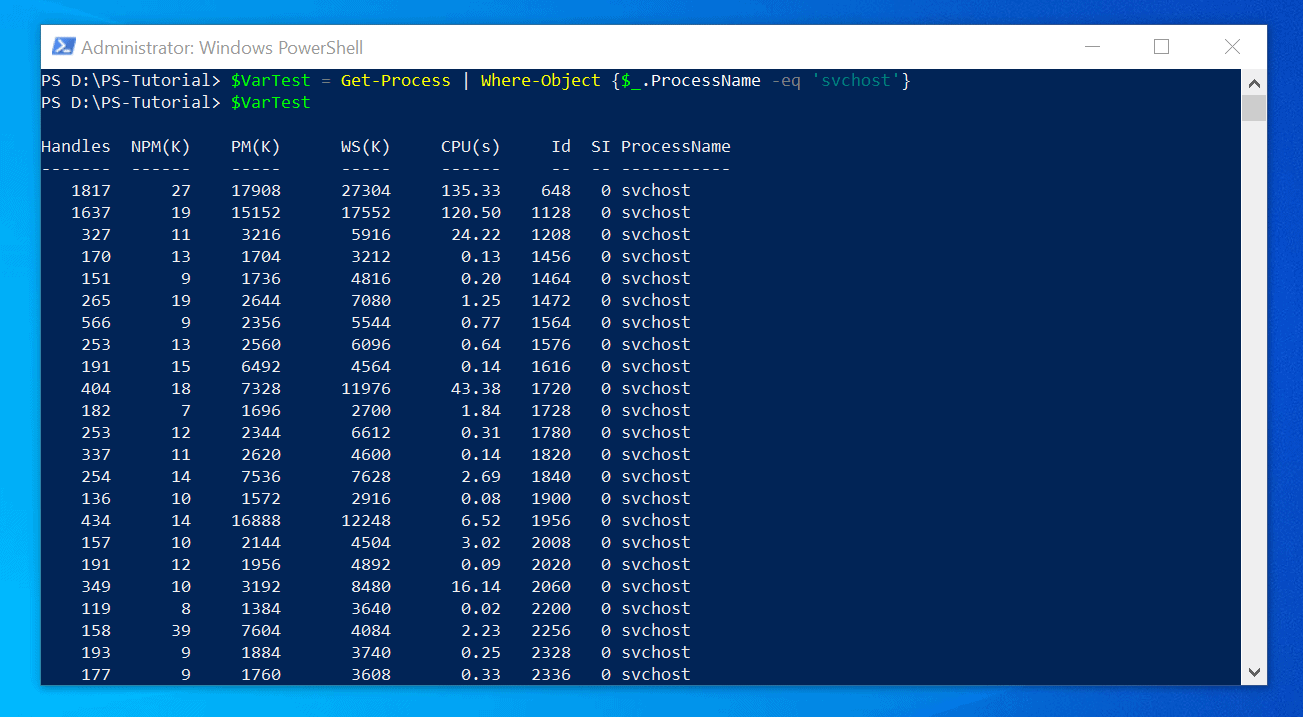
$VarTest = Get-Process | Where-Object {$_.ProcessName -eq 'svchost'}Notice that the command did not return any output to the console?
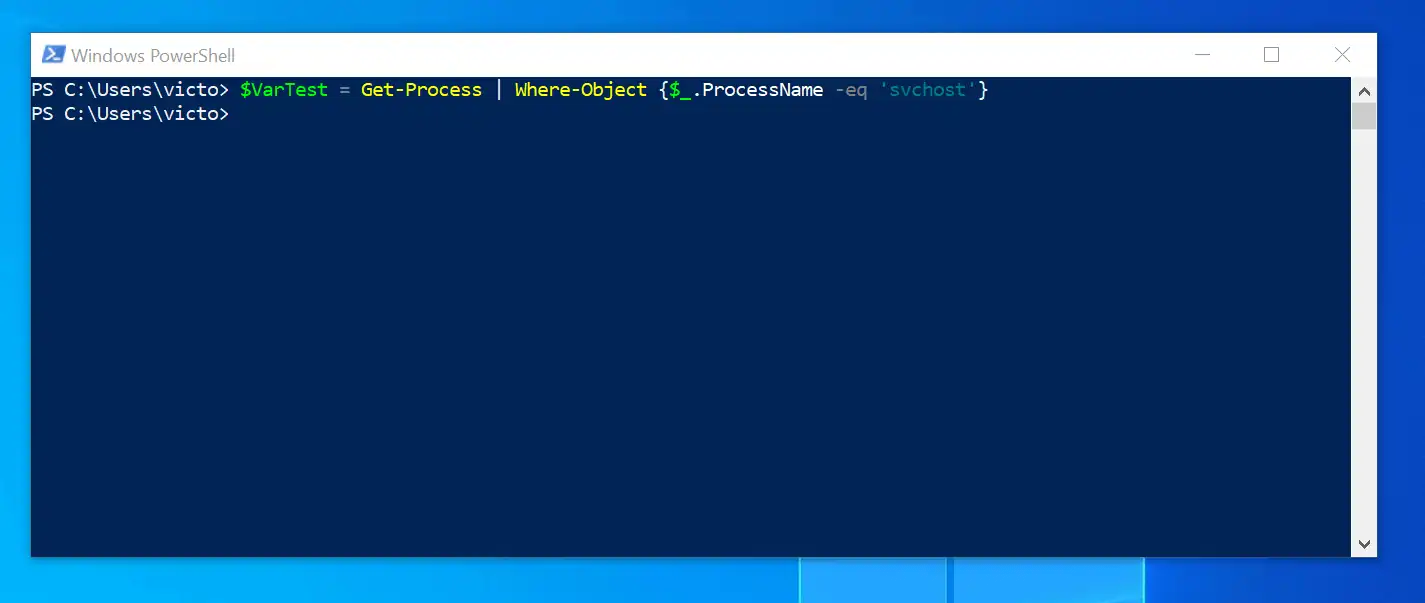
Now, execute the command on the right hand side of the equal (=) sign as shown below:
Get-Process | Where-Object {$_.ProcessName -eq 'svchost'}Now the command returns some results on the PowerShell console!

I guess the next valid question would be “What happened to the information in the first command?”
The answer is very simple. It was stored in the $VarTest variable.
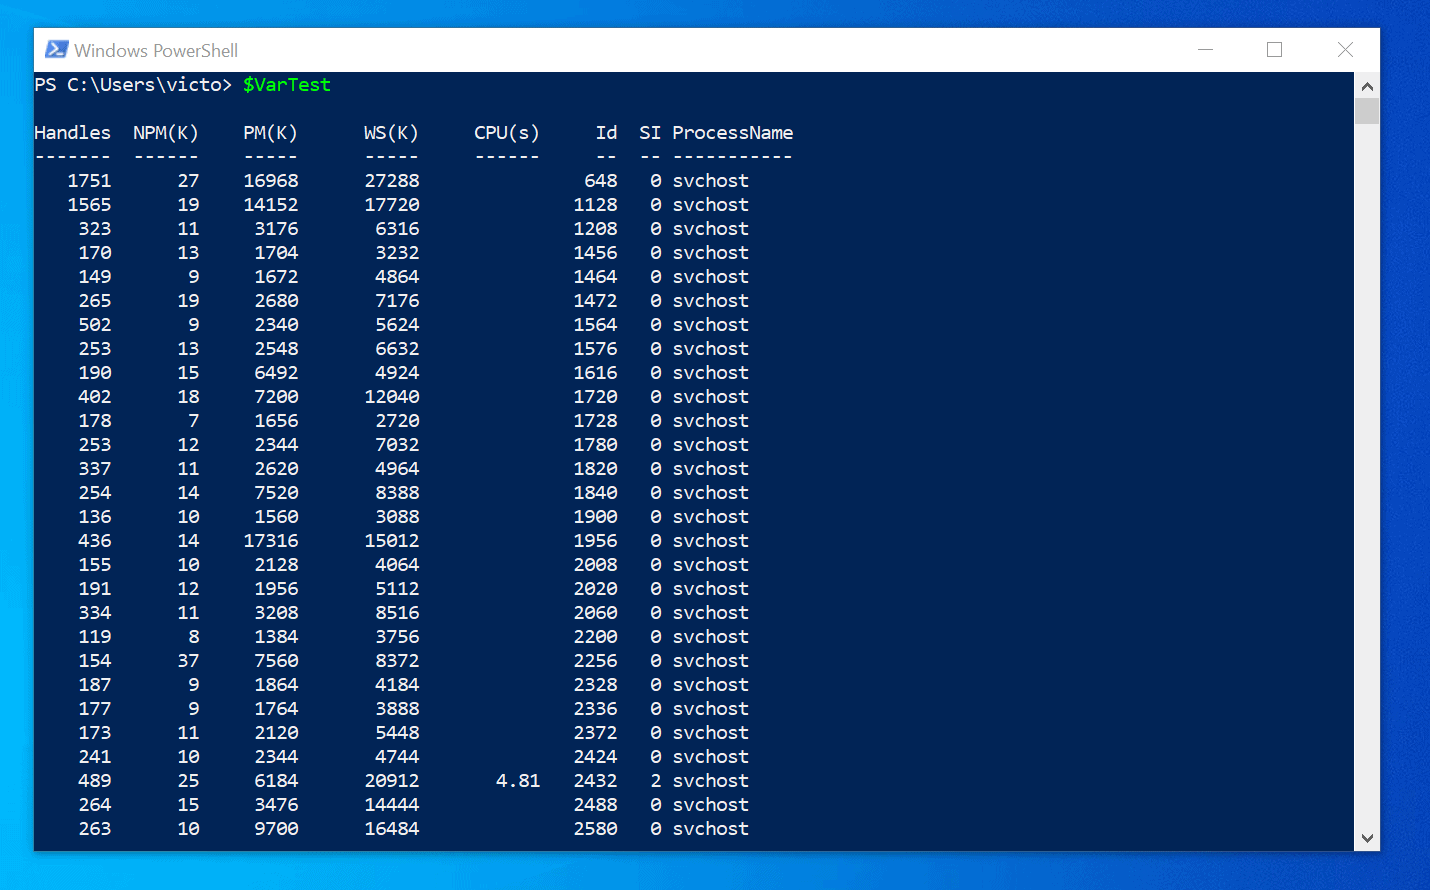
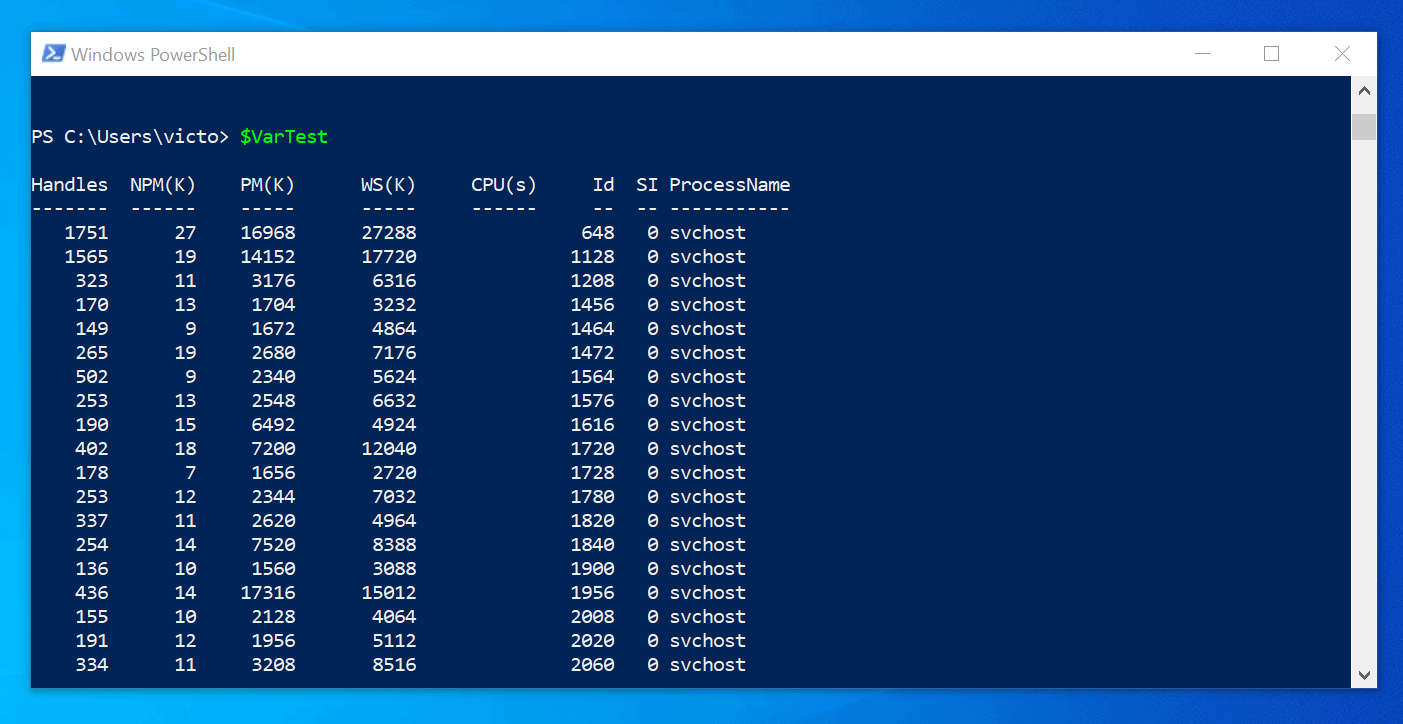
To confirm this, execute the Clear-Host command to clear your PowerShell console, then execute the command below:
$VarTest
The above command displays the content of the command previously saved in the ‘VarTest’ variable.
When you create complex PowerShell scripts, variables are very useful. One benefit of using variables in your scripts is to reduce the number of items on your script.
Another benefit of using variables is that once defined, you can use them in subsequent parts of your scripts.
Other Ways to Create and Manipulate Variables
As shown in the last example, one way to create variables is to name the variable and assign it a value. However, there are some Cmdlets that have the PowerShell ‘Noun’, ‘Variable’.
These Cmdlets can also be used to create, edit and remove variables.
To get a list of Cmdlets with the PowerShell ‘Noun’, ‘Variable’, execute the command below:
Get-Command -Noun Variable
Here you have them – five Cmdlets you can use to create, retrieve, remove and manipulate variables. Based on what you have learned in this PowerShell tutorial so far, can you guess what each of the commands does?
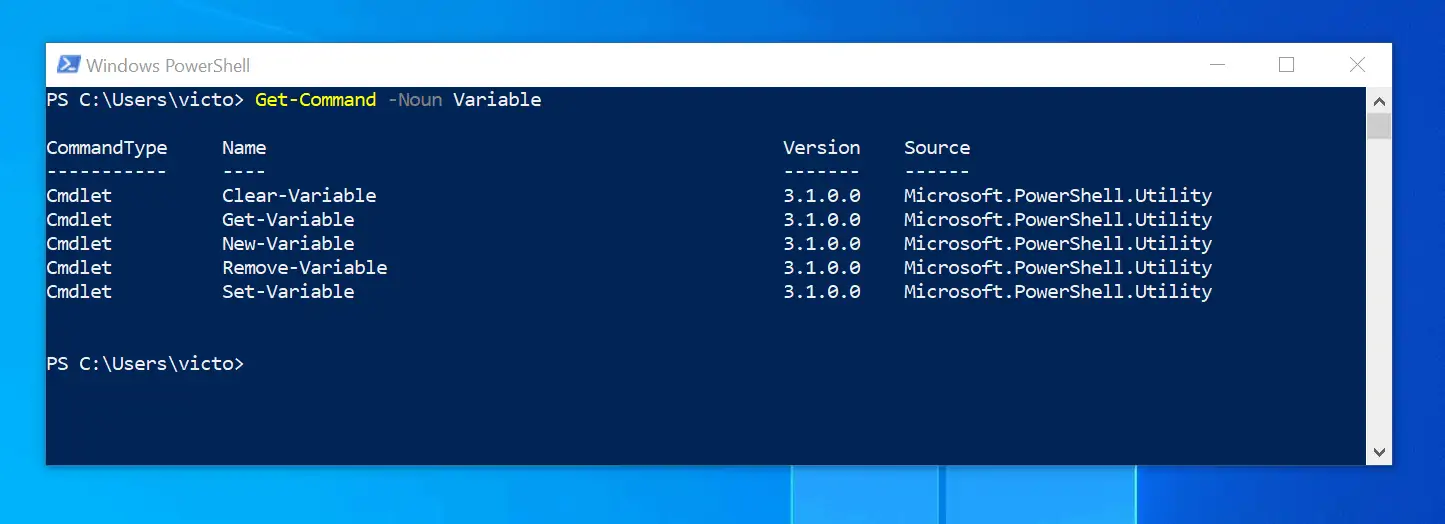
Clear-Variable deletes the information stored in a variable – however, it does not delete the variable itself. On the other hand, Remove-Variable deletes a variable and the data stored in the variable.
Furthermore, the New-Variable Cmdlet creates a new variable.
Finally, Get-Variable lists all variables in the current console session while Set-Variable sets the value of a variable.
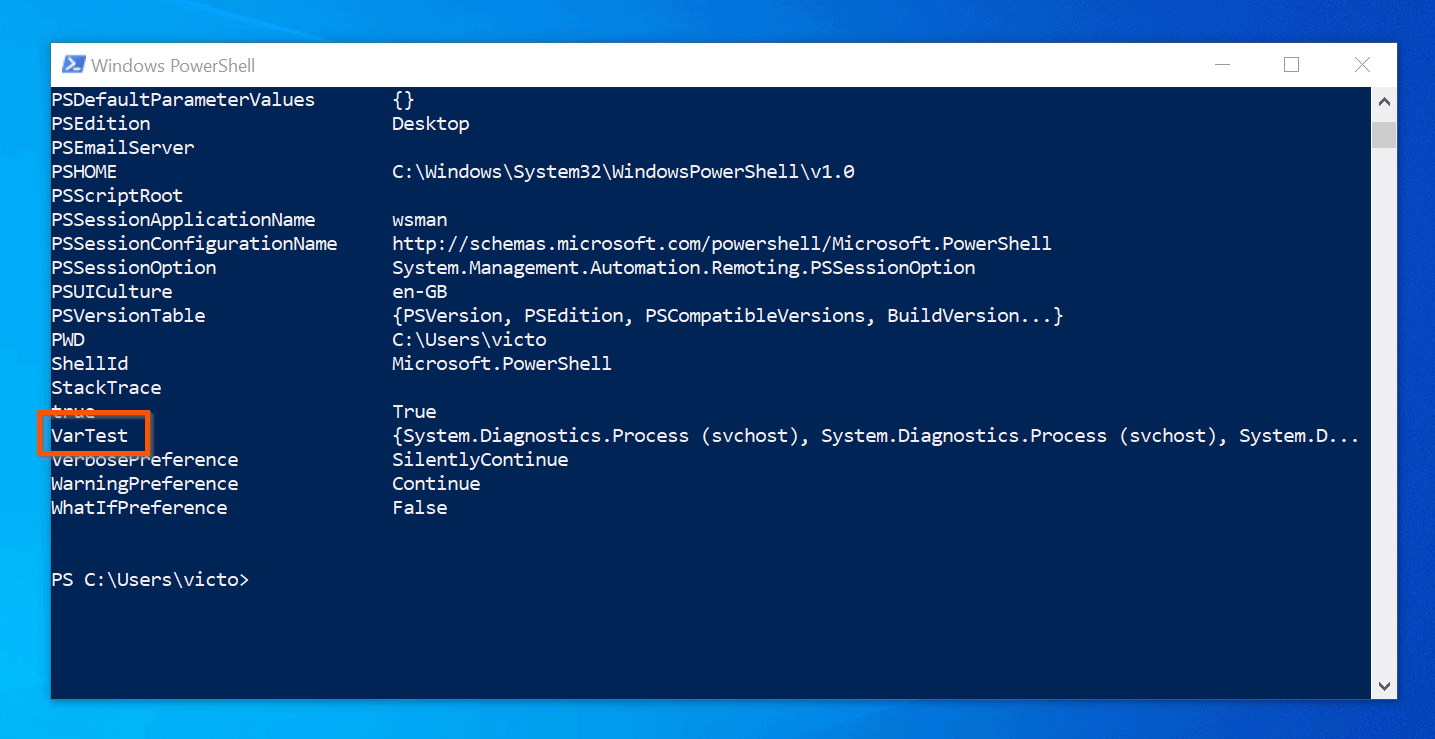
Before we proceed, lets see some of these Cmdlets in action – starting with the Get-Variable Cmdlet. Execute the command below:
Get-Variable
The command lists all variables in the current console. This includes variables you created and variables created and maintained by Windows PowerShell.
If you scroll down, you will see the variable we created earlier, ‘VarTest’ in the list.
When we created ‘VarTest’ variable, it had values assigned to it. These values were assigned by the command after the equal (=) sign.
Let’s confirm that these values are still stored in this variable. Execute the command below:
$VarTest
The command confirms that the values assigned to the ‘VarTest’ variable are still there.
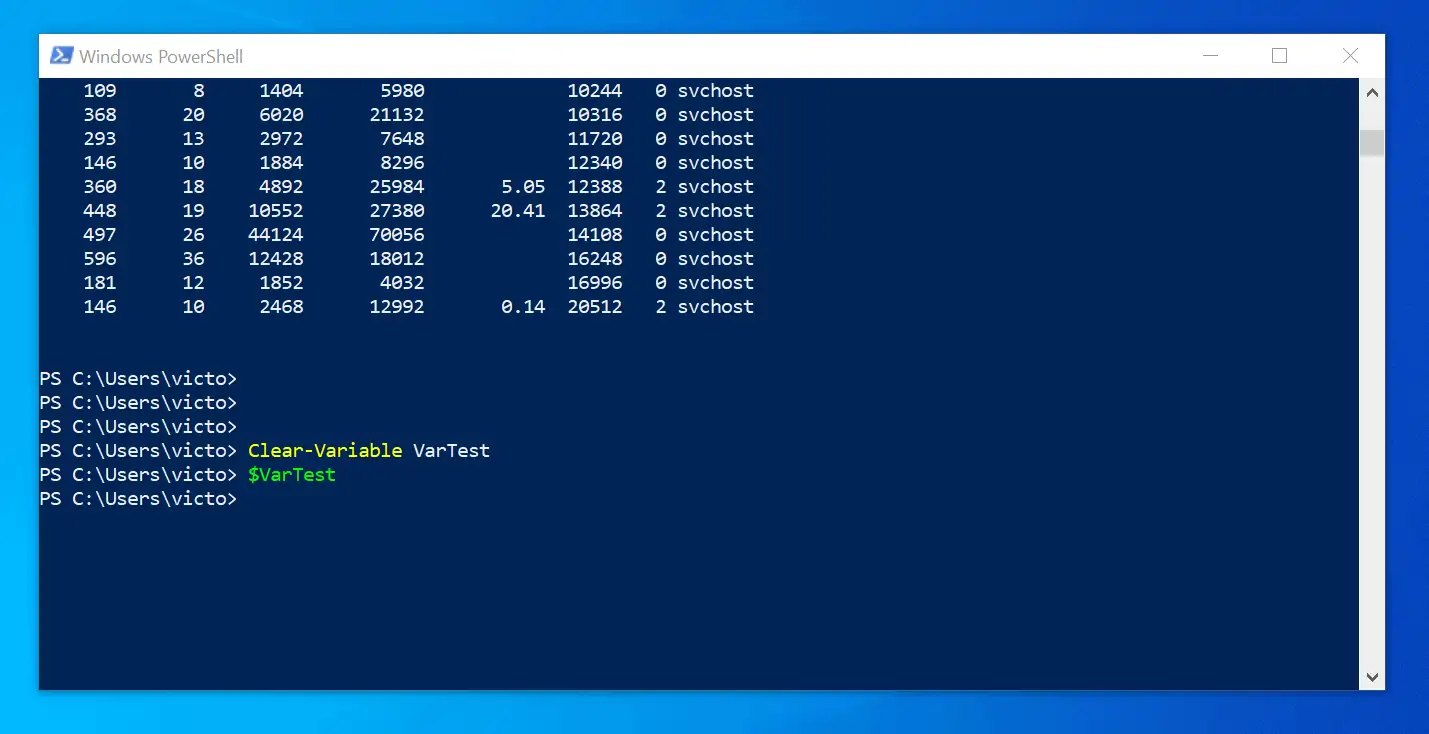
Now clear the values in the variables using the Clear-Variable command:
Clear-Variable VarTest
Now that you have cleared the values stored in ‘VarTest’ variable, if you execute $VarTest, it will not return any value.
To confirm this, execute the command below:
$VarTest
When you executed the last command, it did not return any results. The reason is that the ‘Clear-Variable VarTest’ we ran earlier cleared the values.
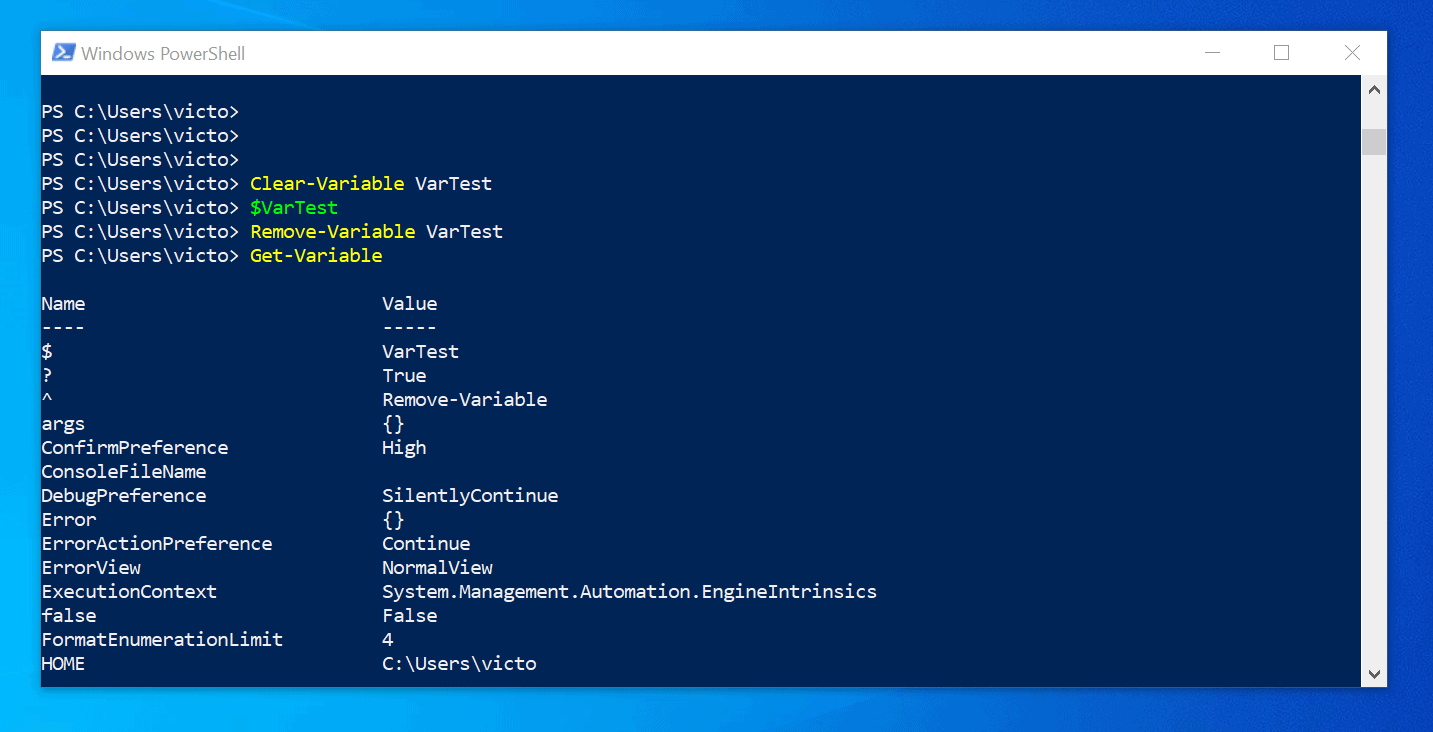
Finally, to delete the ‘VarTest’ variable completely, use the command below:
Remove-Variable VarTest
Now if you run the Get-Variable command, the ‘VarTest’ variable will not be listed.
Types of PowerShell Variables
So far, PowerShell Tutorial 3 has explained variables and how to create them. In this sub-section, you will learn the types of PowerShell variables.
User-created PowerShell Variables
A User-created variable is a variable created by a user. By default, when you create a variable, it only exists on the current PowerShell console it was created.
An example of a User-created variable is ‘VarTest’ created in the previous tutorial.
PowerShell Automatic Variables
Automatic variables are created by Windows PowerShell to store its states. Furthermore, all changes to an automatic variable is done by Windows PowerShell.
Therefore, you cannot change an automatic variable but you can work with them. An example of an automatic variable is ‘$_’ or ‘$PSItem’.
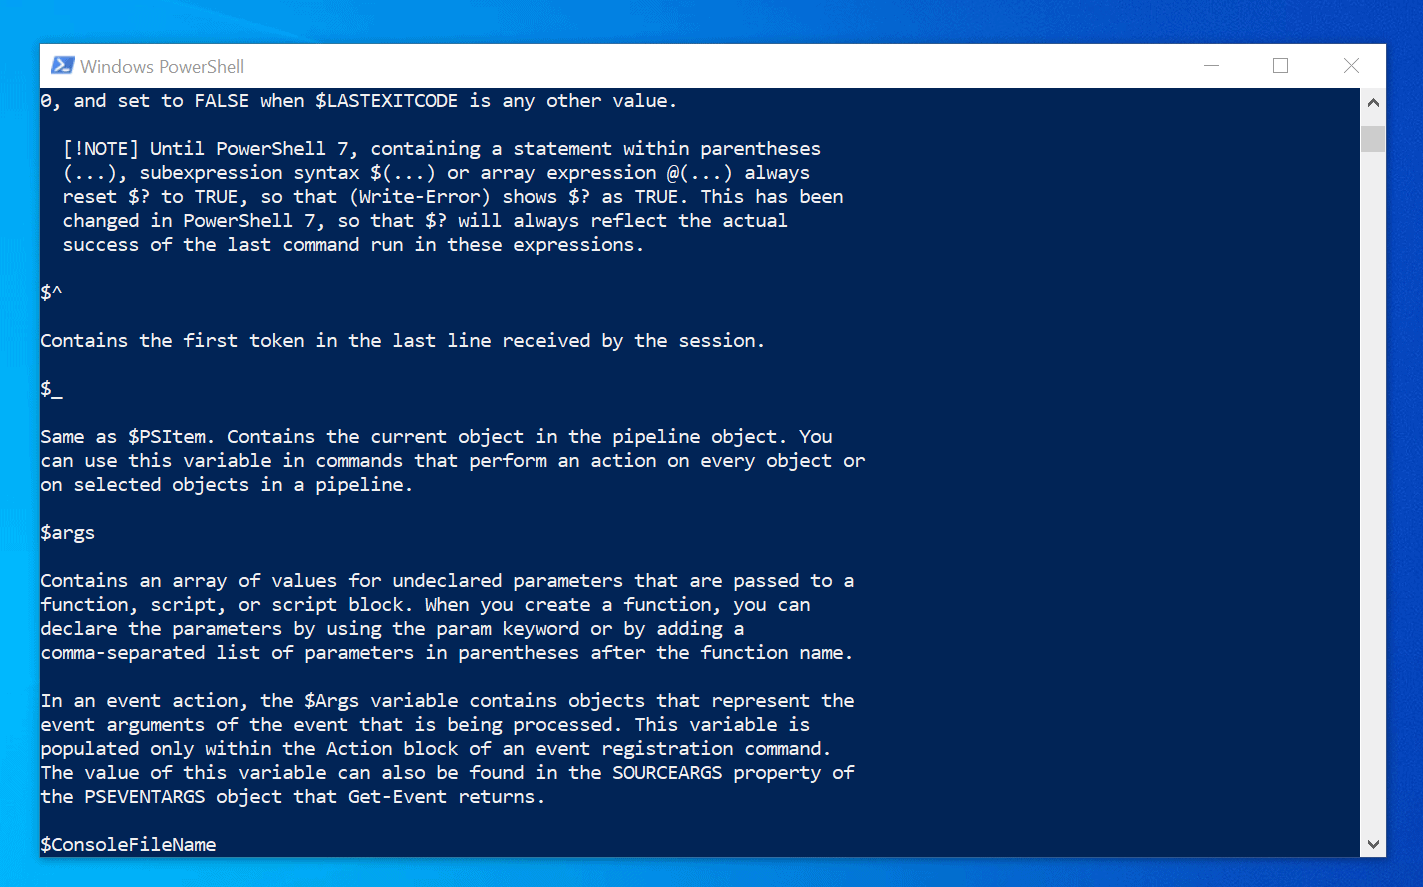
To learn about automatic variables including examples, execute the command below:
Get-Help about_automatic_variables
The command lists and explains all the PowerShell automatic variables.
PowerShell Environment Variables
While automatic variables store information about the PowerShell environment, environment variables store information about the operating system environment.
Information such as the operating system path, WINDIR and the number of processors, are stored in environment variables. Unlike automatic variables, environment variables can be changed by a user.
In the next few sub-sections, I will explain these PowerShell variables with some real-life examples.
PowerShell Automatic Variables Explained
As mentioned earlier, an example of automatic variable – that you will meet very often as you script in PowerShell – is ‘$_’. Dollar sign, followed by an underscore.
There are different types of automatic variables but I will only cover the ones you will likely use often – $Error, $True, $False, $Null, and $MyInvocation.
I will provide detailed examples of the usage and applications of these automatic variables. Before that, see the table below for the commonly used PowerShell automatic variables and their functions.
| S/N | Automatic Variables | What It Does |
| 1 | $_ | Contains the current object in the pipeline object |
| 2 | $Error | Contains an array of error objects that represent the most recent errors |
| 3 | $True | Contains the value ‘TRUE’. |
| 4 | $False | Contains the value ‘FALSE’ |
| 5 | $Null | Contains a NULL or empty value |
| 6 | $MyInvocation | Contains an information about the current command |
Now lets take a deep dive into these PowerShell automatic variables.
The ‘$_’ Automatic Variable
When you execute the Get-Process command, the column headers – Handles, NPM(K), PM(K), WS(K), CPU(s), Id, SI, and ProcessName – will be stored in an automatic variable, $_.
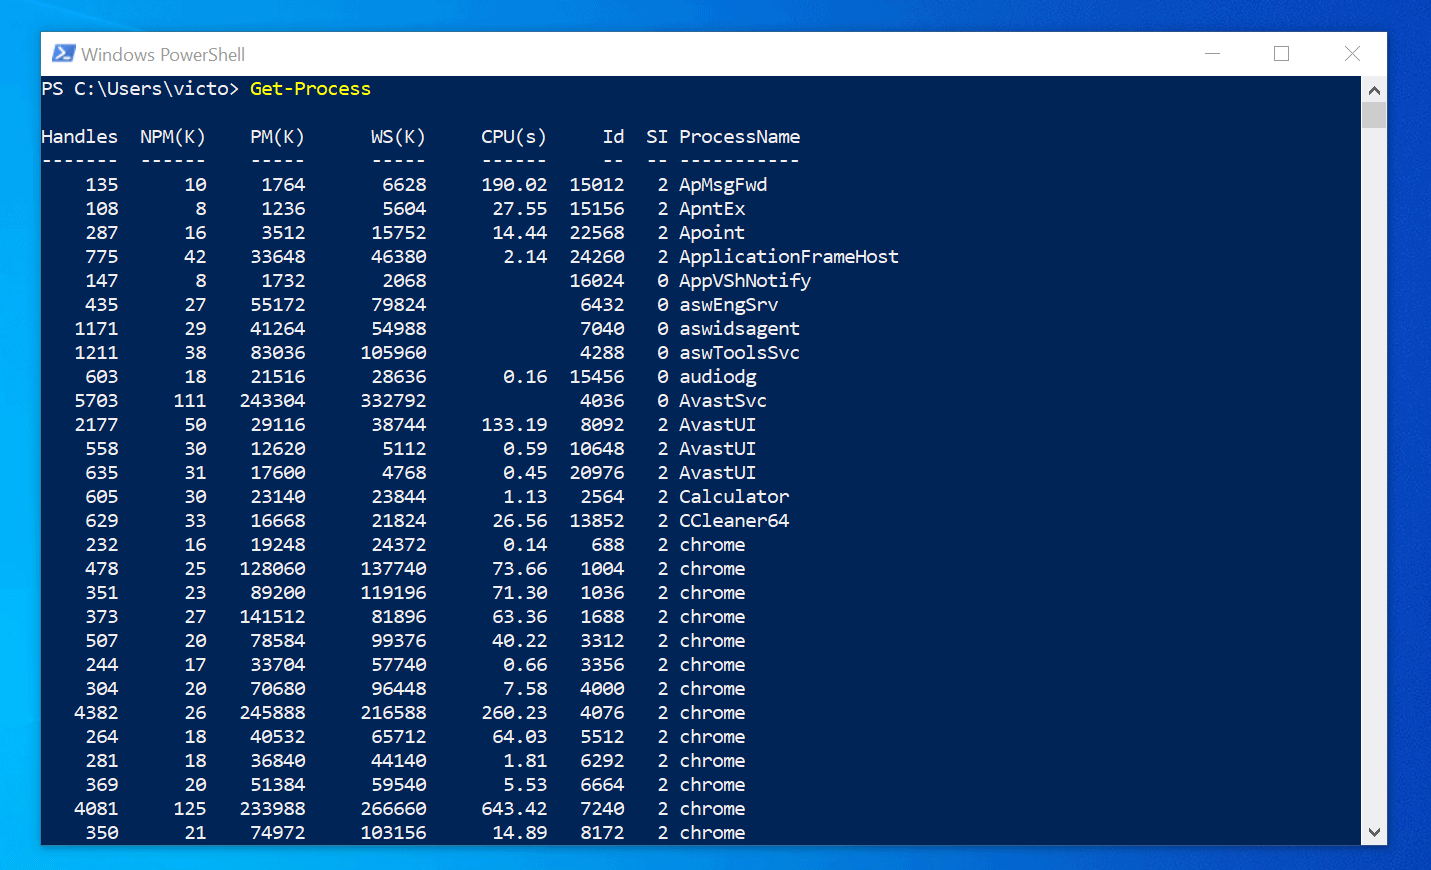
Each column is represented by the automatic variable $_, followed by a dot (.) then the column name. For example $_.Handles, $_.NPM and $_.ProcessName.
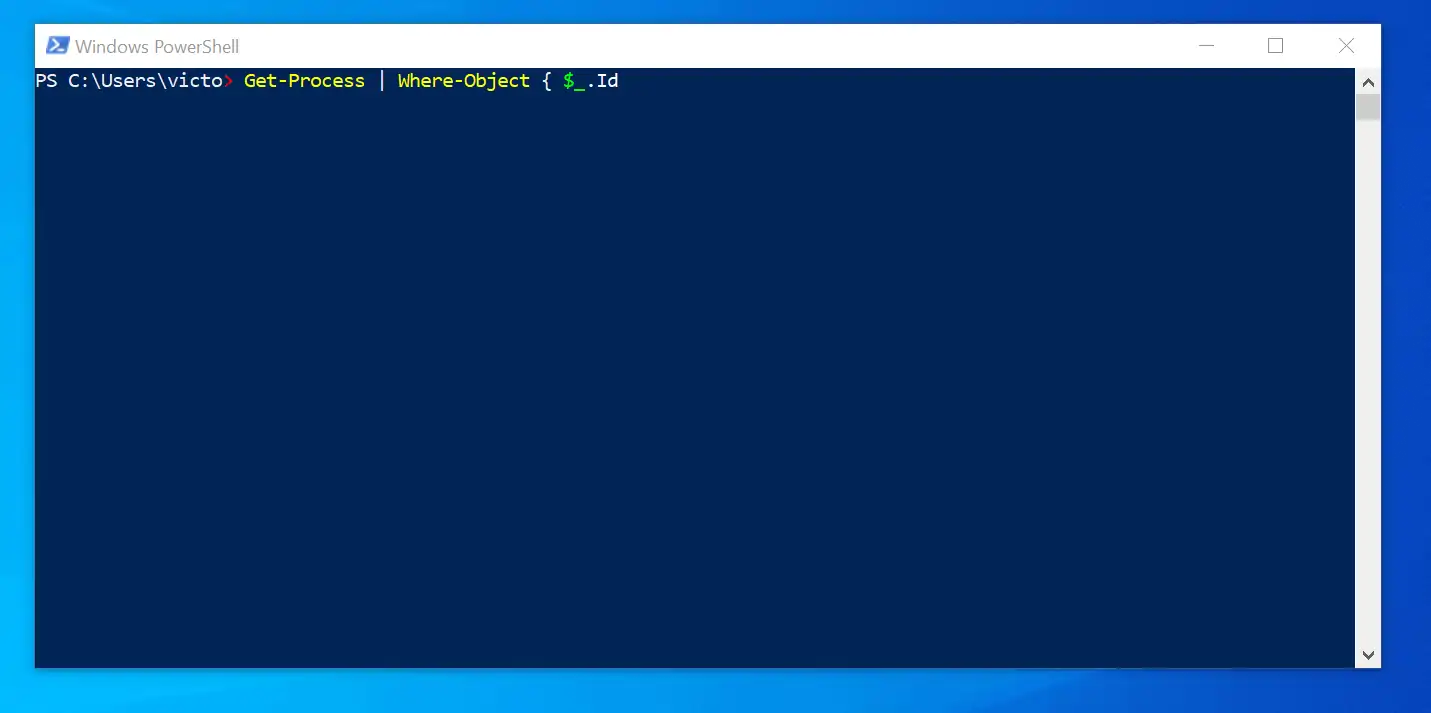
To confirm this, open a PowerShell console and enter the command below – do not execute the command:
Get-Process | Where-Object {$_.Then, press the tab key on your keyboard and see the magic. As you press the tab key, you will notice some properties are not shown in previous screenshot.
The reason for this is that by default, not all properties are display by the Get-Process command.
The ‘$Error’ Automatic Variable
Another automatic variable is $Error. To examine the power of $Error automatic variable, execute the command below in your PowerShell console:
$Error
The command above will likely display a long list of errors that have been logged on your PowerShell console. However, if the $Error variable does not return any errors, it means that no error(s) have been stored in the variable.
To get an error stored in the ‘$Error’ automatic variable, run this command:
Get-Command get
Now, enter $Error in the PowerShell command prompt and press enter. Notice that the error generated by the last command is now displayed?
This is because the error was stored in the automatic variable, $Error.
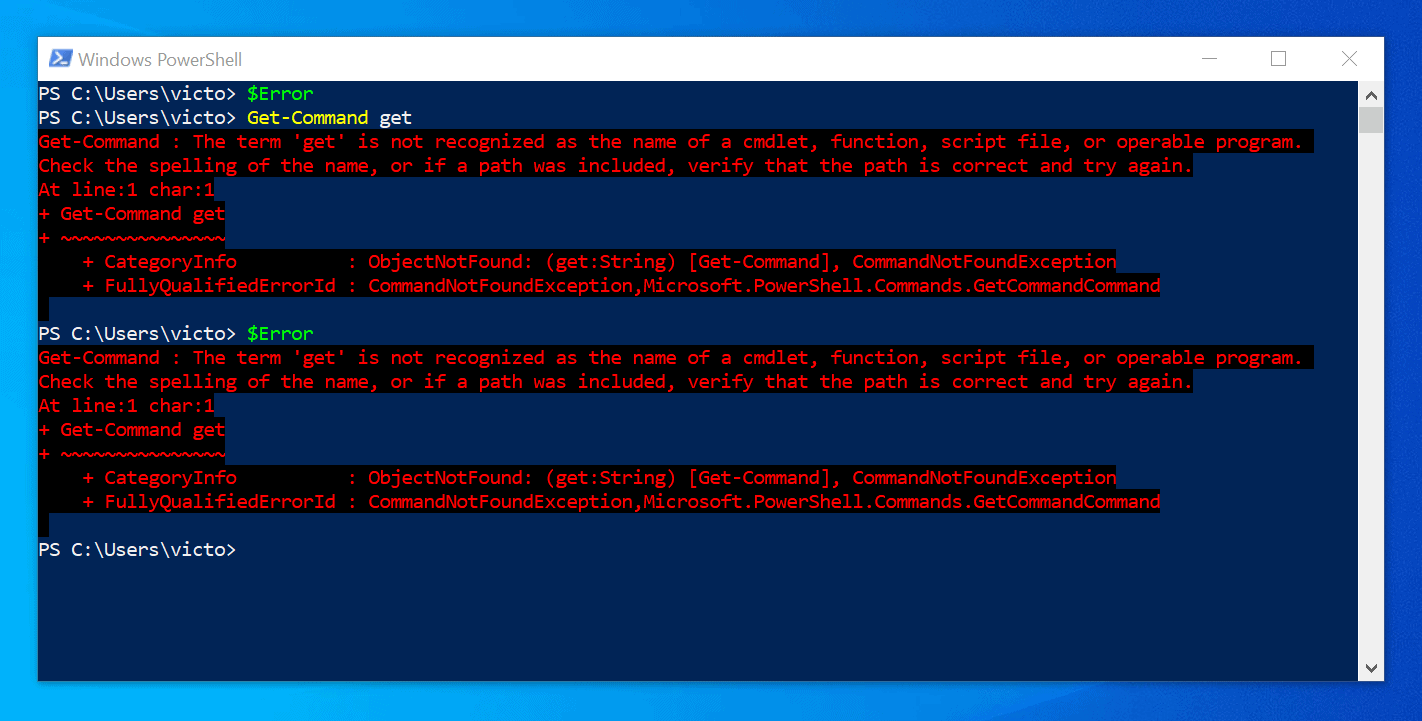
The $Error automatic variable contains an array of error objects that represent the most recent errors.
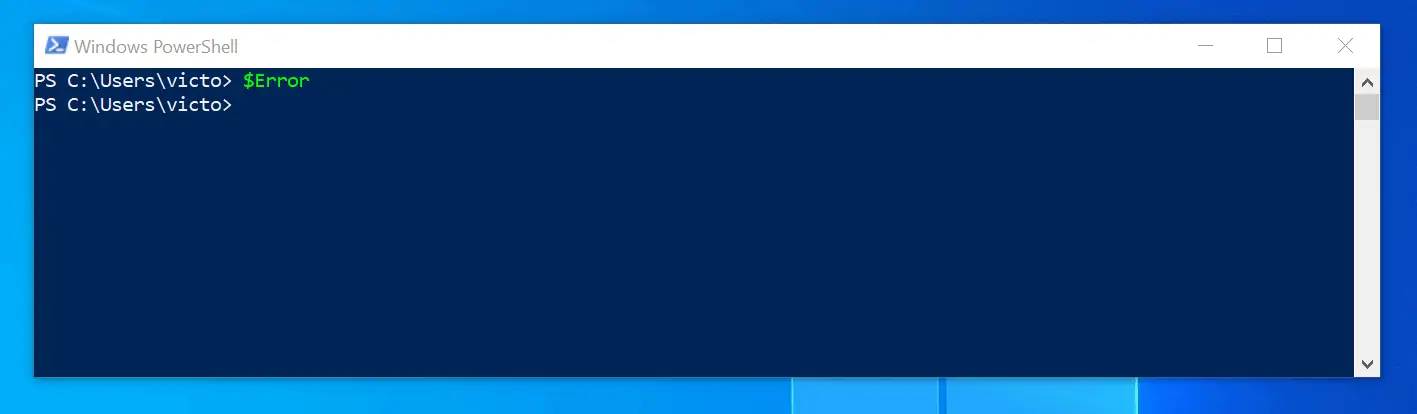
To clear all the errors stored in the $Error variable and clear your PowerShell console, execute the commands below, one at a time:
$Error.clear()
Clear-Host
The $Error.clear() command clears all errors stored in the $Error automatic variable, while the Clear-Host command clears your console.
Now, if you execute $Error command, no error will be displayed.
‘$True’, ‘$False’ And ‘$Null’ Automatic Variables
These variables can help you check if an expression or command is true, false or null (empty value). To continue with the $Error variable example, let’s execute a command that displays a message if the $Error automatic variable is $Null.
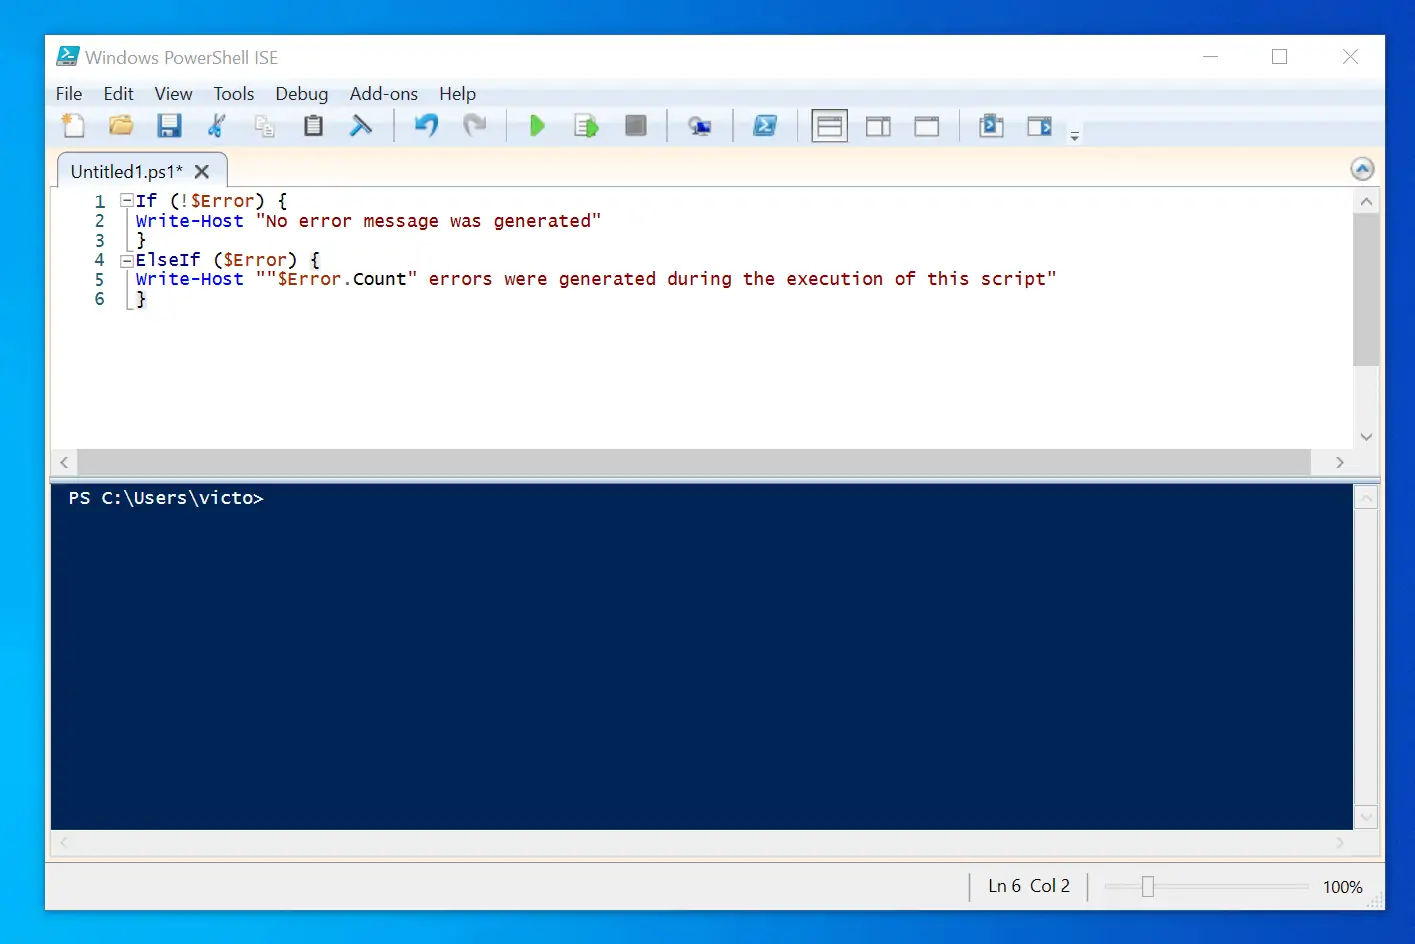
Open a new PowerShell ISE editor and enter the following:
If (!$Error) {
Write-Host "No error message was generated"
}
ElseIf ($Error) {
Write-Host ""$Error.Count" errors were generated during the execution of this script"
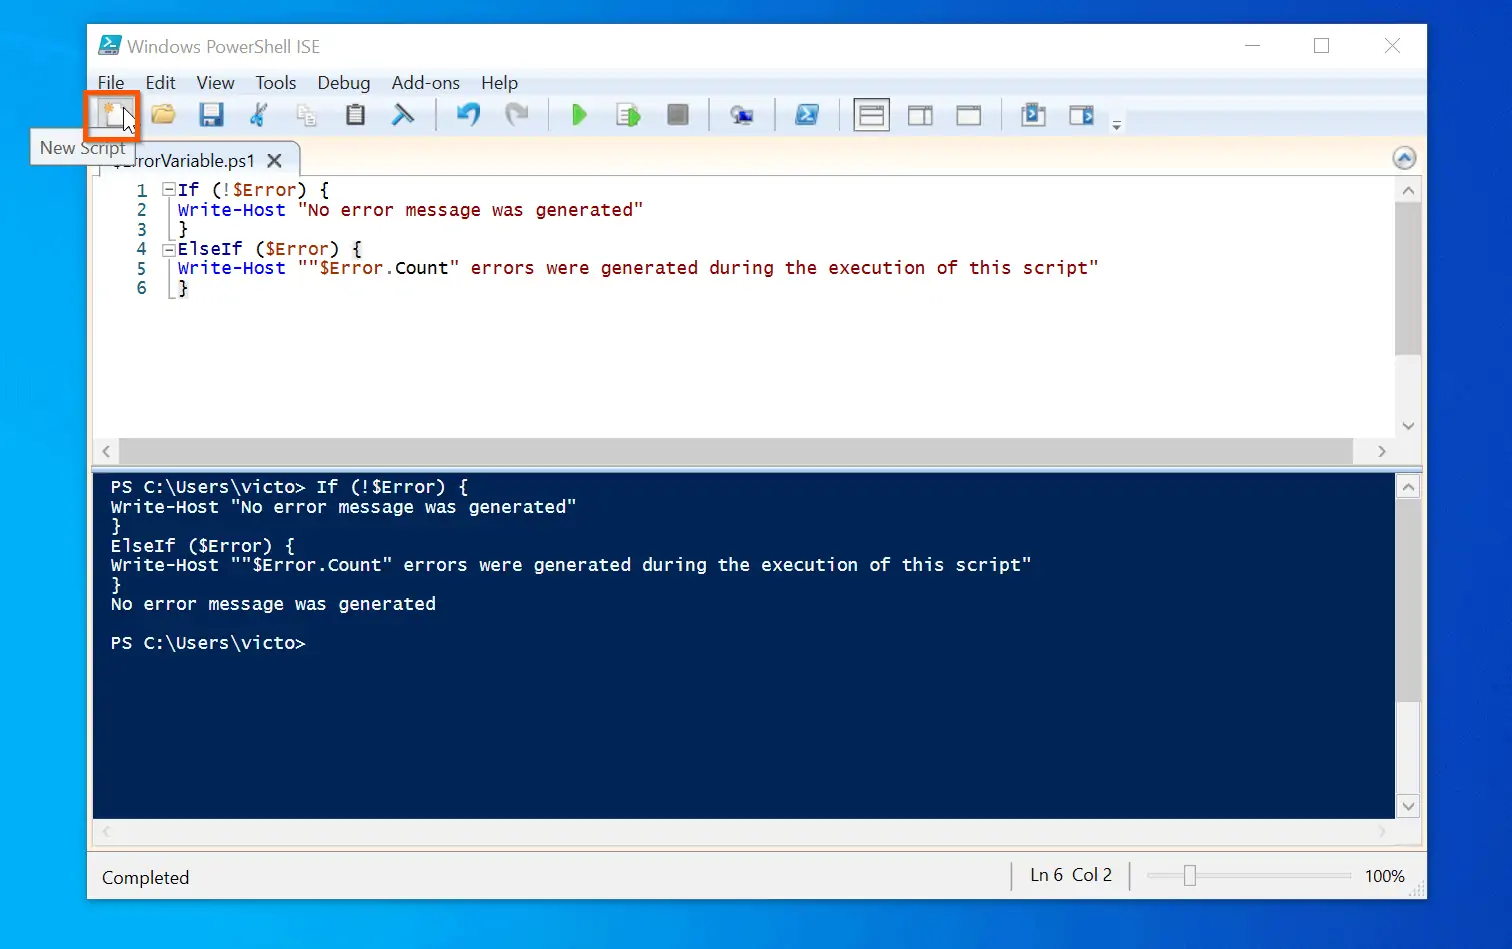
}The script checks the $Error automatic variable. If there is no information found in the variable, it displays the message “No error message was generated”.
Else, if the variable contains information, it displays the error count information: “2 errors were generated during the execution of this script”.
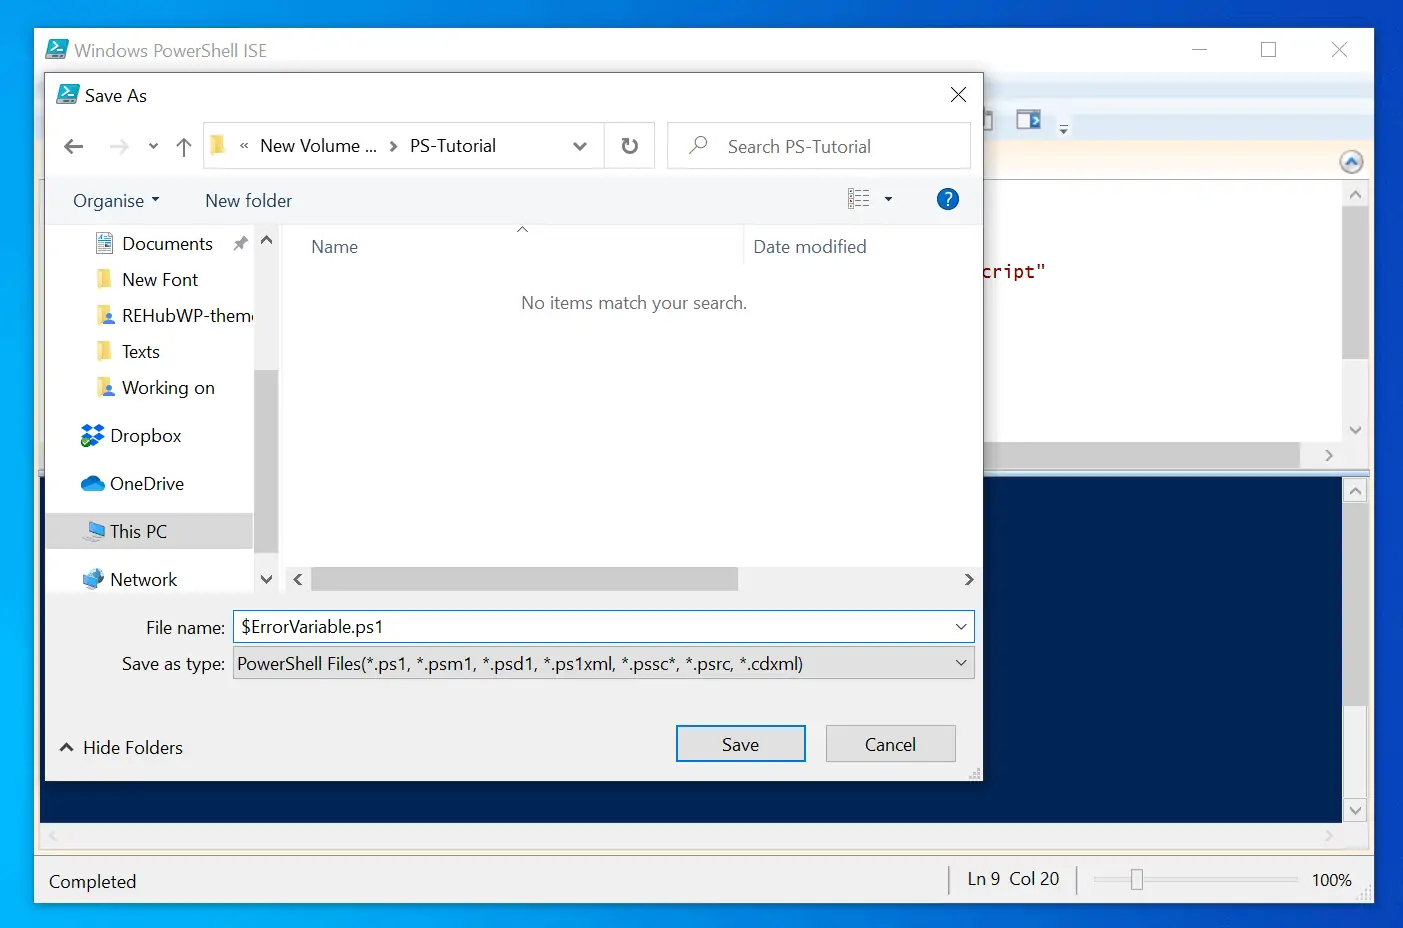
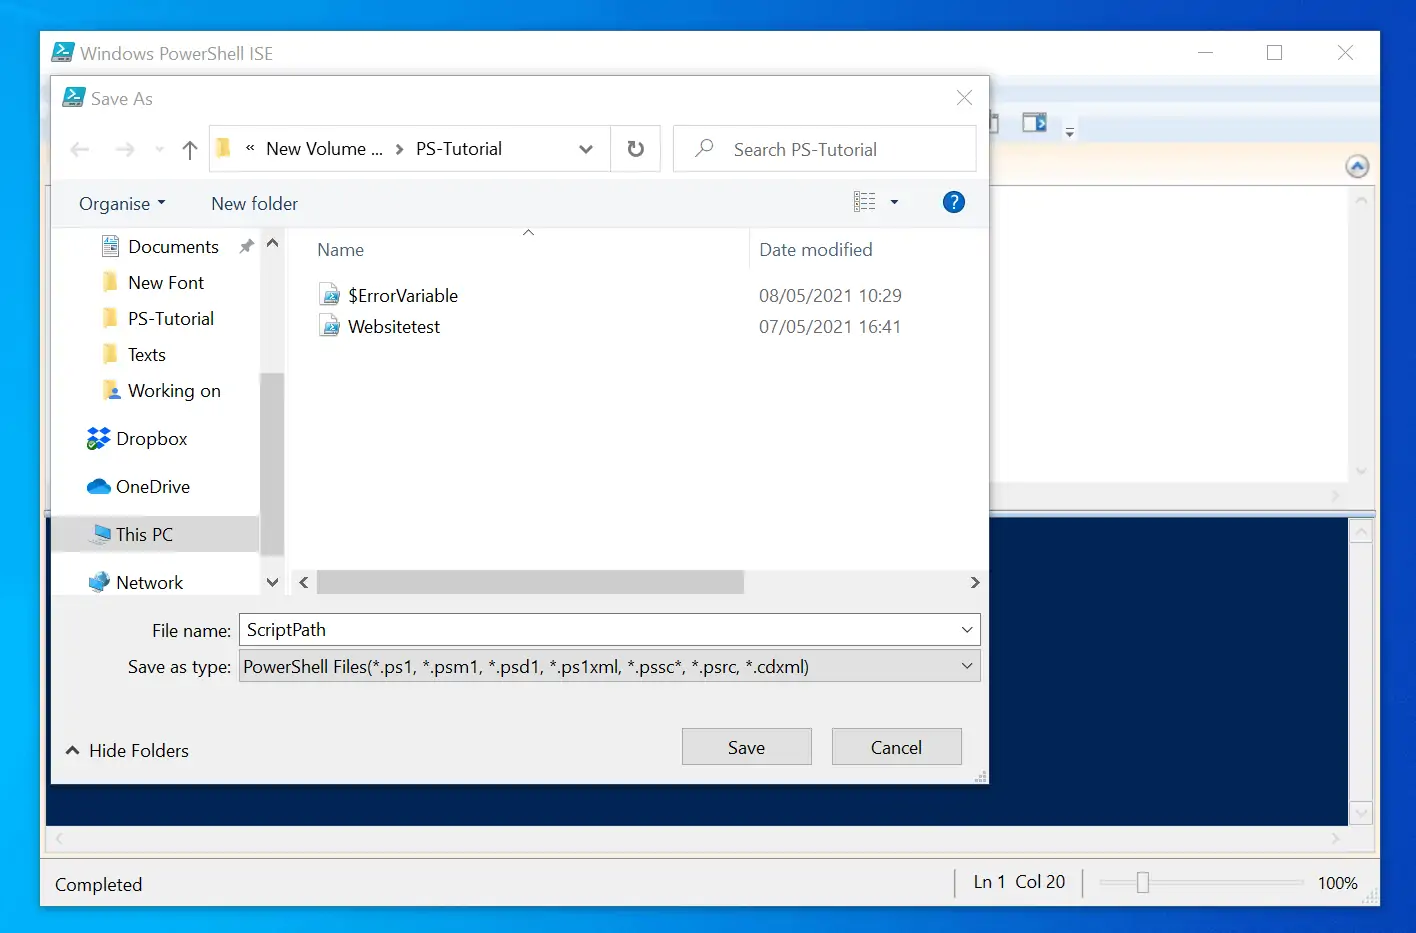
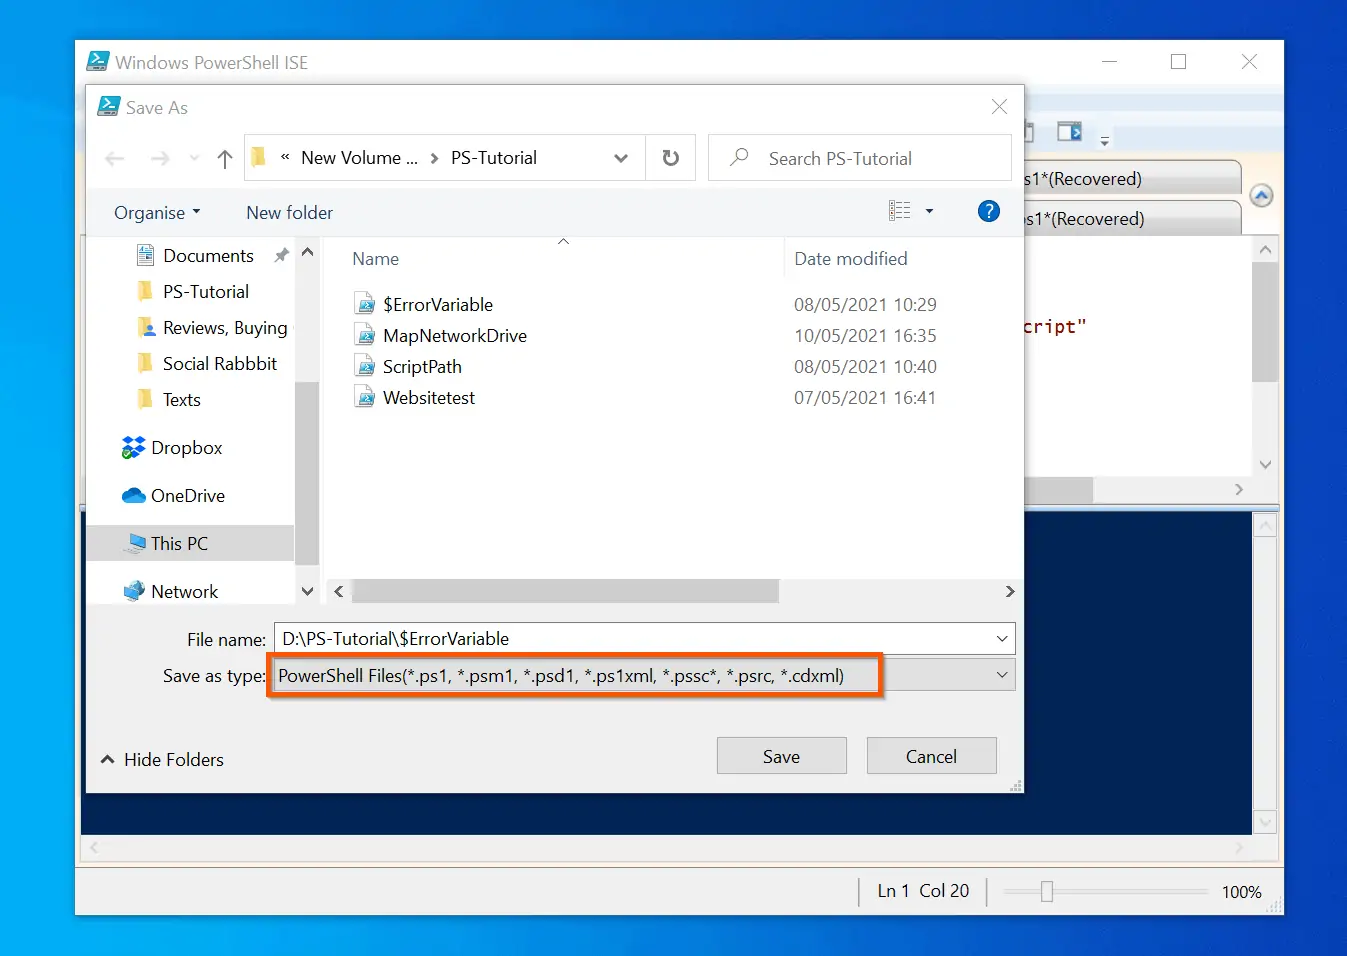
Save the script as $ErrorVariable.ps1. (File -> Save As).
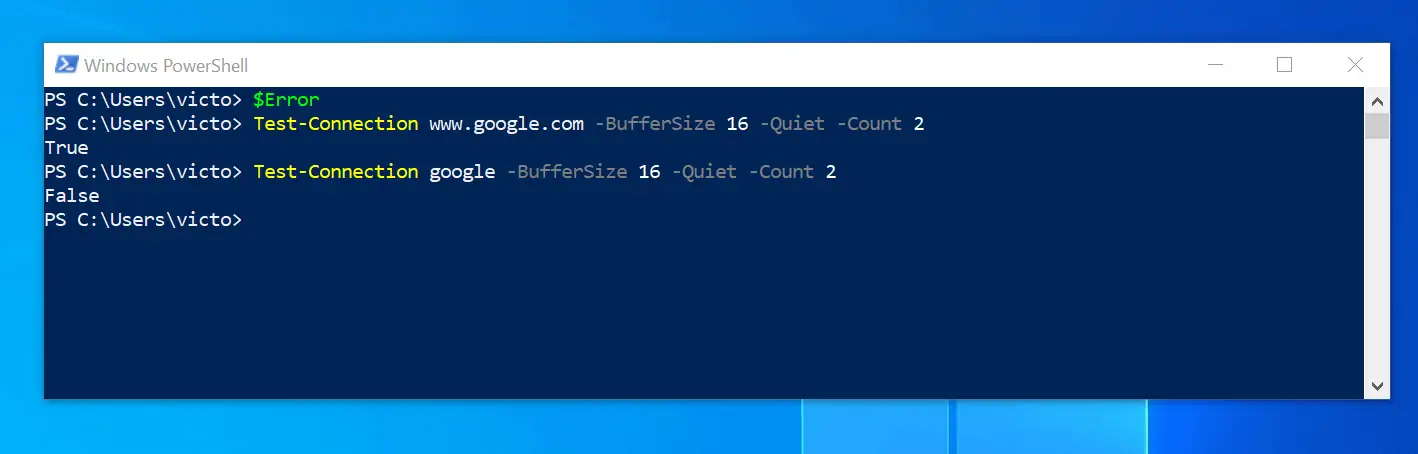
Moving on, to illustrate the use of $True and $False variables, open PowerShell and execute the following commands (One line at a time):
Test-Connection www.google.com -BufferSize 16 -Quiet -Count 2
 Test-Connection google -BufferSize 16 -Quiet -Count 2
The commands will return ‘True’ and ‘False’ respectively. The Test-Connection cmdlet with the -Quiet parameter, pings a host and returns a value of ‘True’ if the host replies successfully.
It returns ‘False’ if the ping fails.
To take this example to the next level, on PowerShell ISE, open a new script document.
Then, enter the following:
$WebsiteNames = @('Google.com','www.itechguides.com','Microsoft.com')
   ForEach ($WebsiteName in $WebsiteNames) {
         Test-Connection $WebsiteName -BufferSize 16 -Quiet -Count 2 | ForEach-Object {
        }
 }
The first line of the script adds the website names to the ‘WebsiteNames’ variable. In the second line, the ForEach command loops through the websites and uses the Test-Connection command to check if the websites respond to ping.
Finally, on the third line, when the website names are sent to the pipeline, each of them is represented by the automatic variable, $_.
Up to this point, hopefully, you are with me! Now I will introduce the part of the script that takes the result of the Test-Connection command and display additional information.
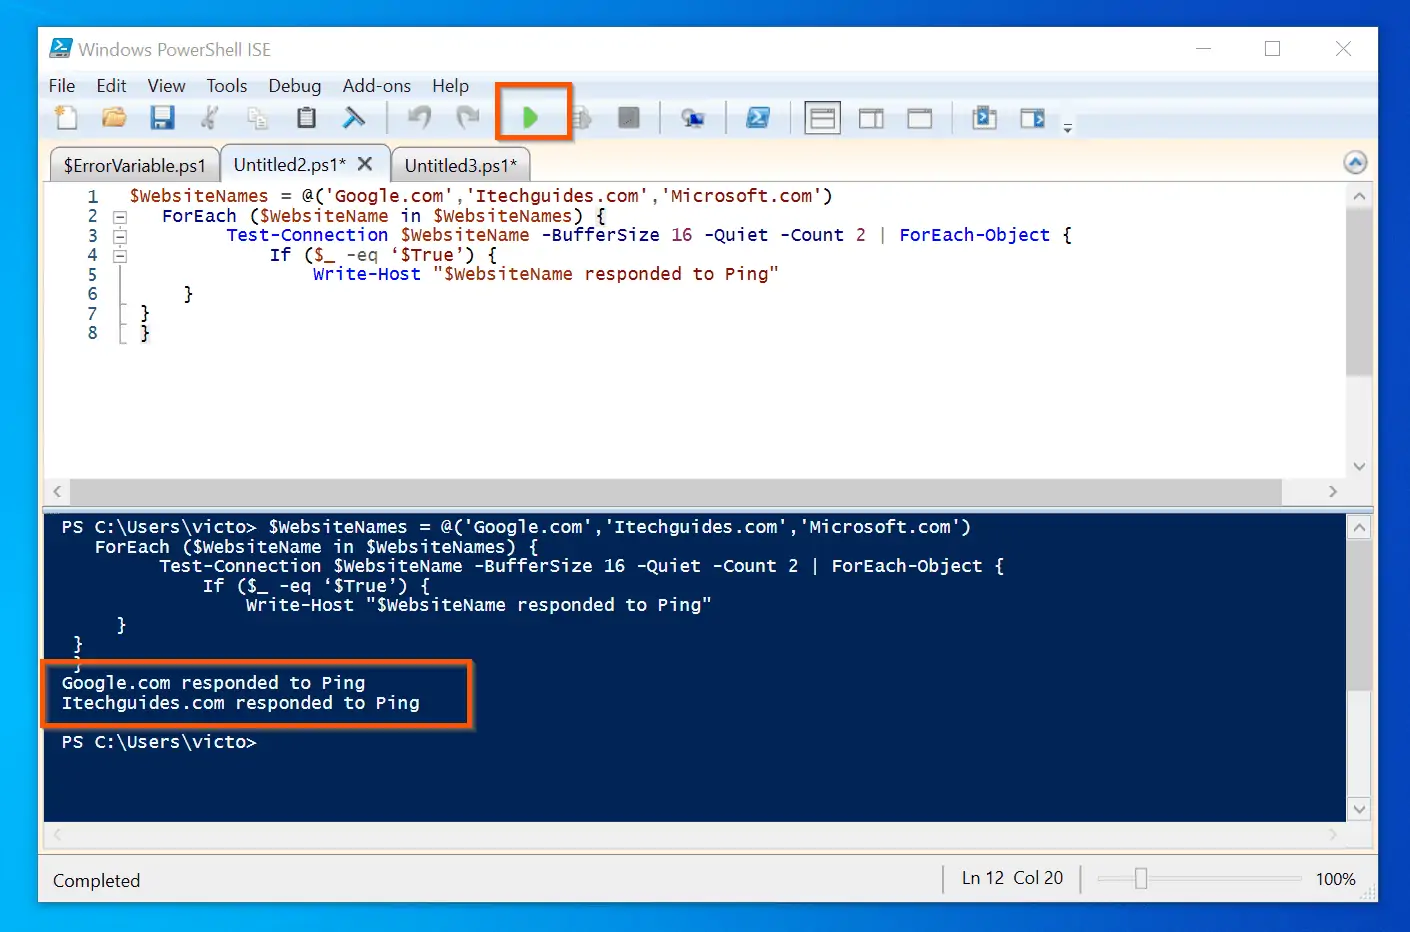
See the modified script below (I highlighted the new addition to the script):
$WebsiteNames = @('Google.com','www.itechguides.com','Microsoft.com')
   ForEach ($WebsiteName in $WebsiteNames) {
         Test-Connection $WebsiteName -BufferSize 16 -Quiet -Count 2 | ForEach-Object {
             If ($_ -eq ‘$True’) {
                 Write-Host "$WebsiteName responded to Ping"
     }
 }
 }
In the last part of the script, the result of the Test-Connection command is sent to the pipeline as $_ automatic variable. Finally, we used the IF conditional statement to check if $_ is TRUE – then, if it is TRUE, display the message.
To run the script, click run (or press F5). I have highlighted the result of the script.
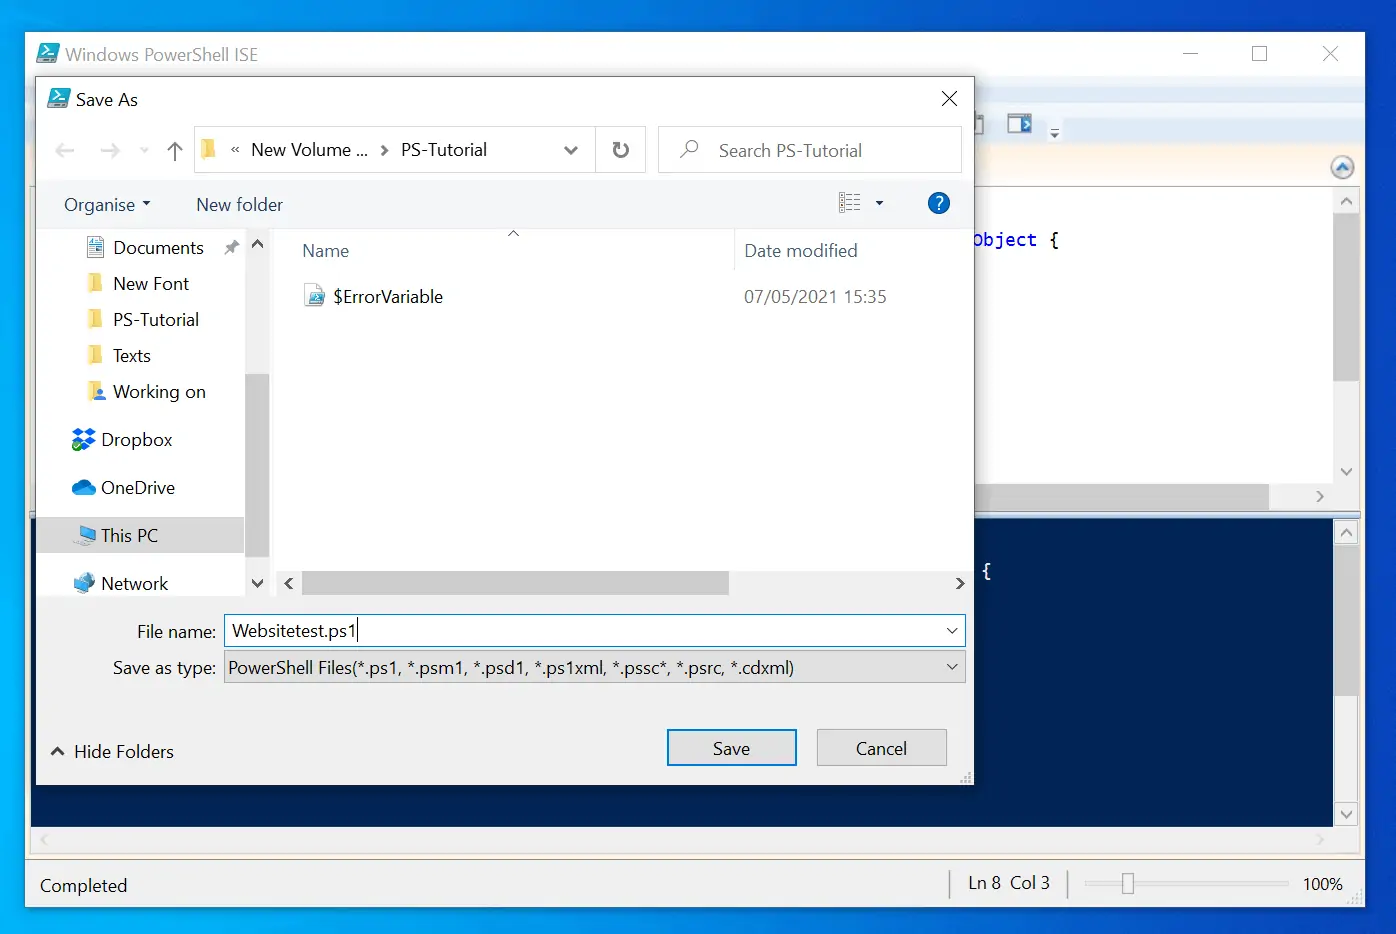
The result confirms that out of the three websites we pinged, two responded to ping. Save the script as Websitetest.ps1
PowerShell Environment Variables Explained
In the last session (PowerShell tutorial 3.1), we discussed Automatic Variables. This section will dive deep into Environment Variables.
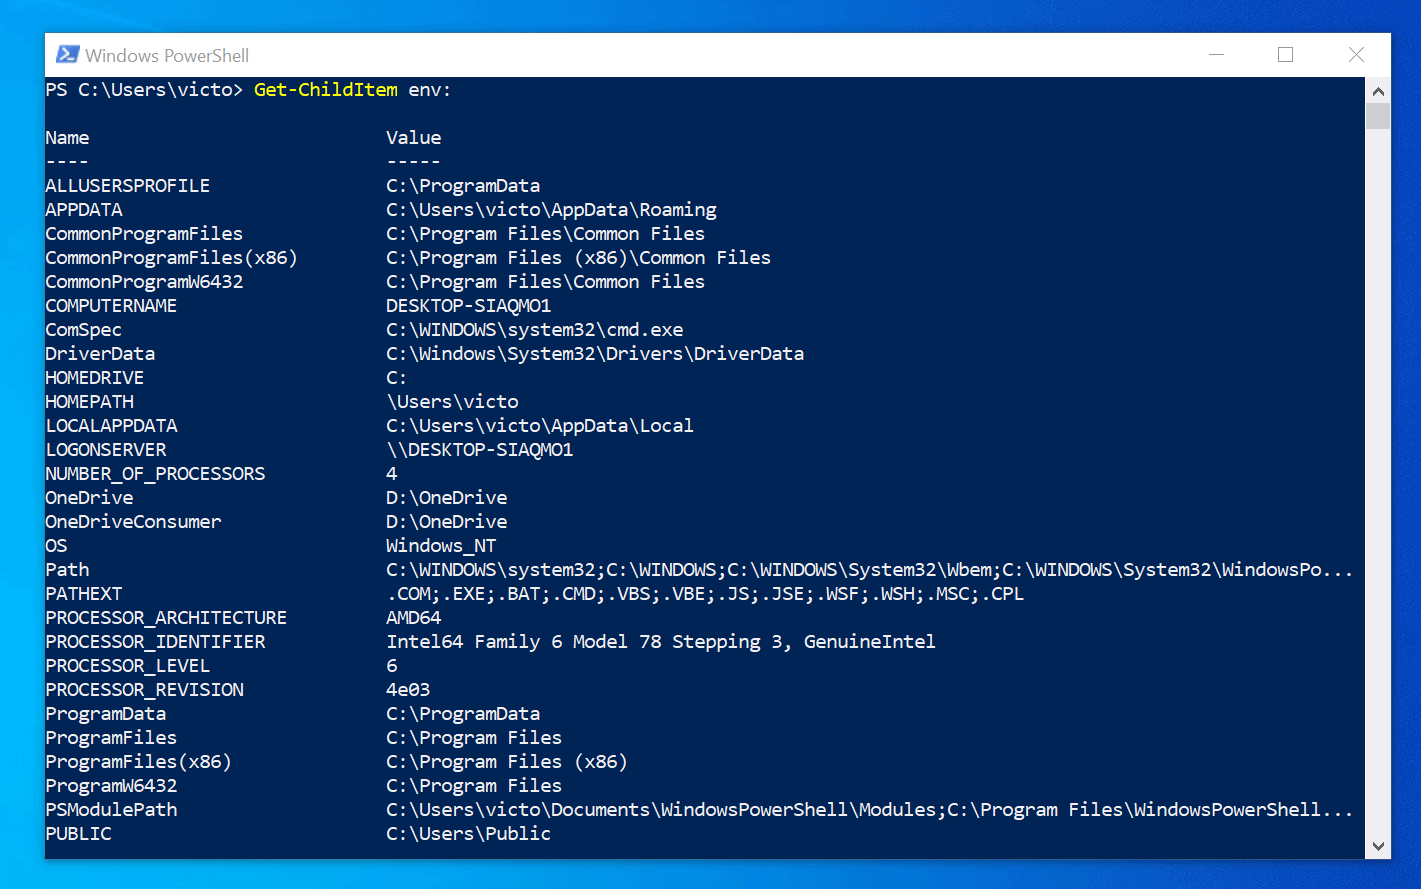
To kick this section off, open a PowerShell command prompt, and execute the command below:
Get-ChildItem env:
The command lists environment variables on your computer.
Like automatic variables, environment variables are created by PowerShell – you do not assign them. Let’s discover these variables by utilizing the command completion functionality of PowerShell.
Open a new PowerShell console and type the lines below:
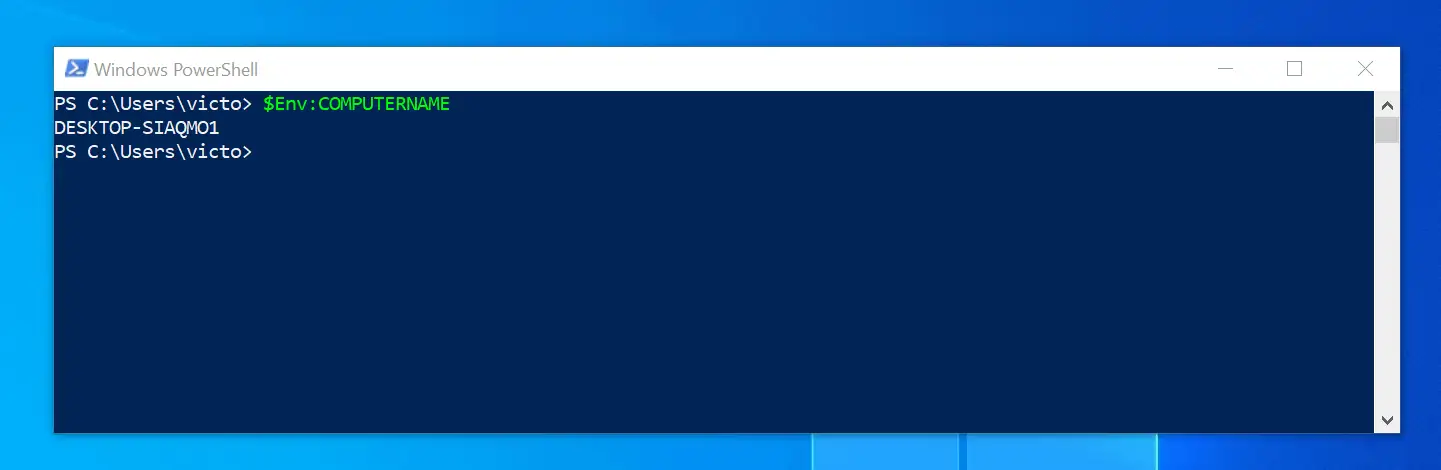
$Env:
Now, press the Tab key on your keyboard to display the first variable. Keep pressing the Tab key until the console displays COMPUTERNAME as shown below:
$Env: COMPUTERNAME
Now press the Enter key to execute the command: Can you guess the result?
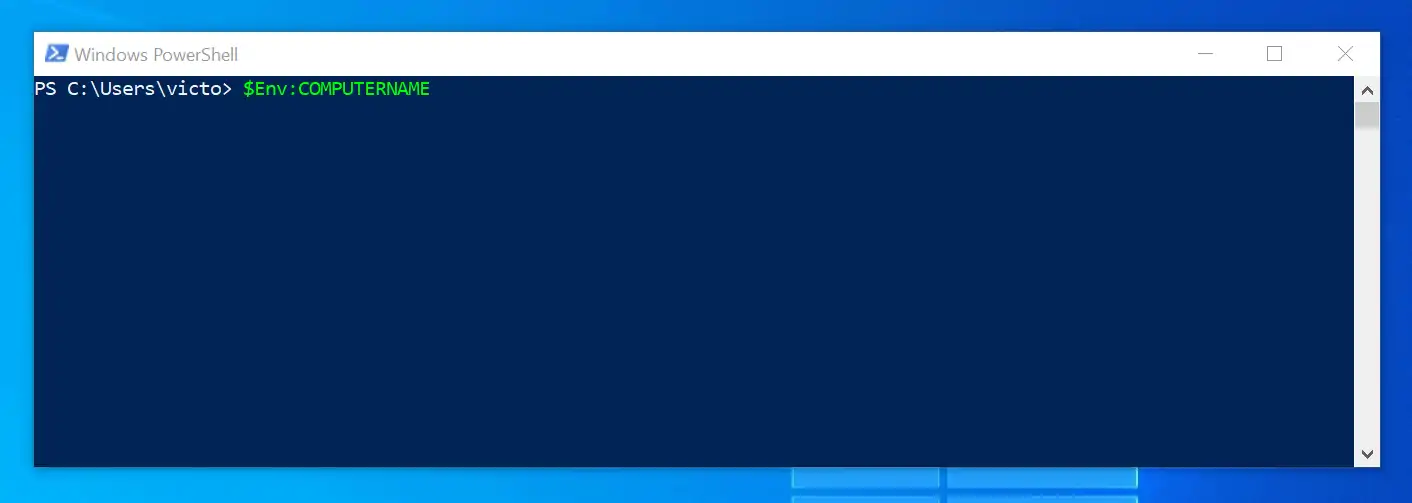
The name of your computer!
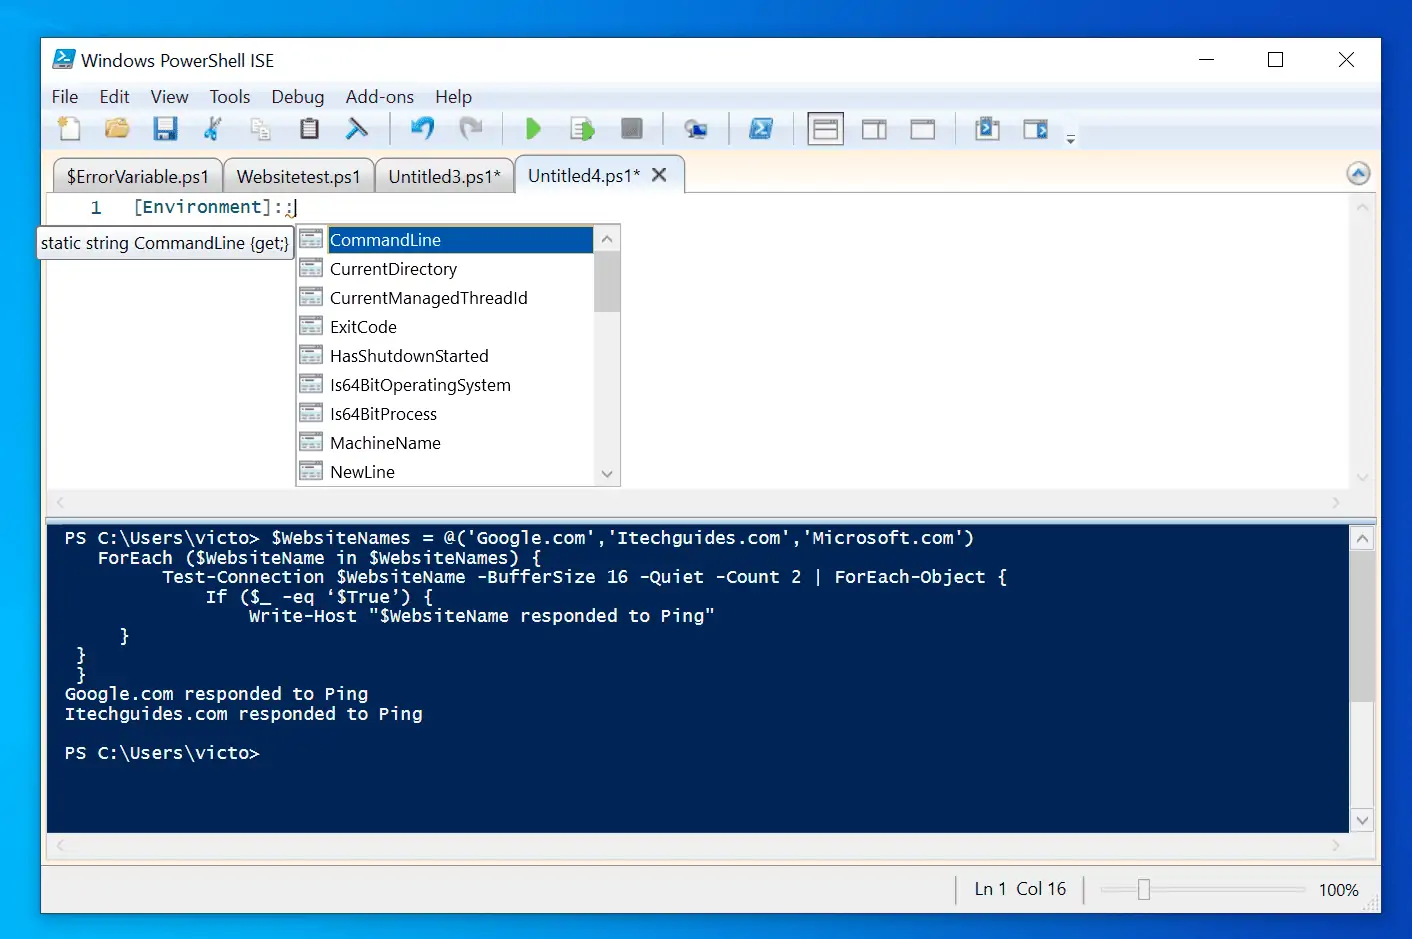
Let me introduce another way to find environment variables – ‘[Environment]:’ To discover the power of this variable, enter, open PowerShell ISE editor – then type [Environment], followed by two colons (::).
Your command should look like:
[Environment]::
Once you enter the colons beside [Environment], PowerShell ISE will display a list of available options – see the screenshot below.
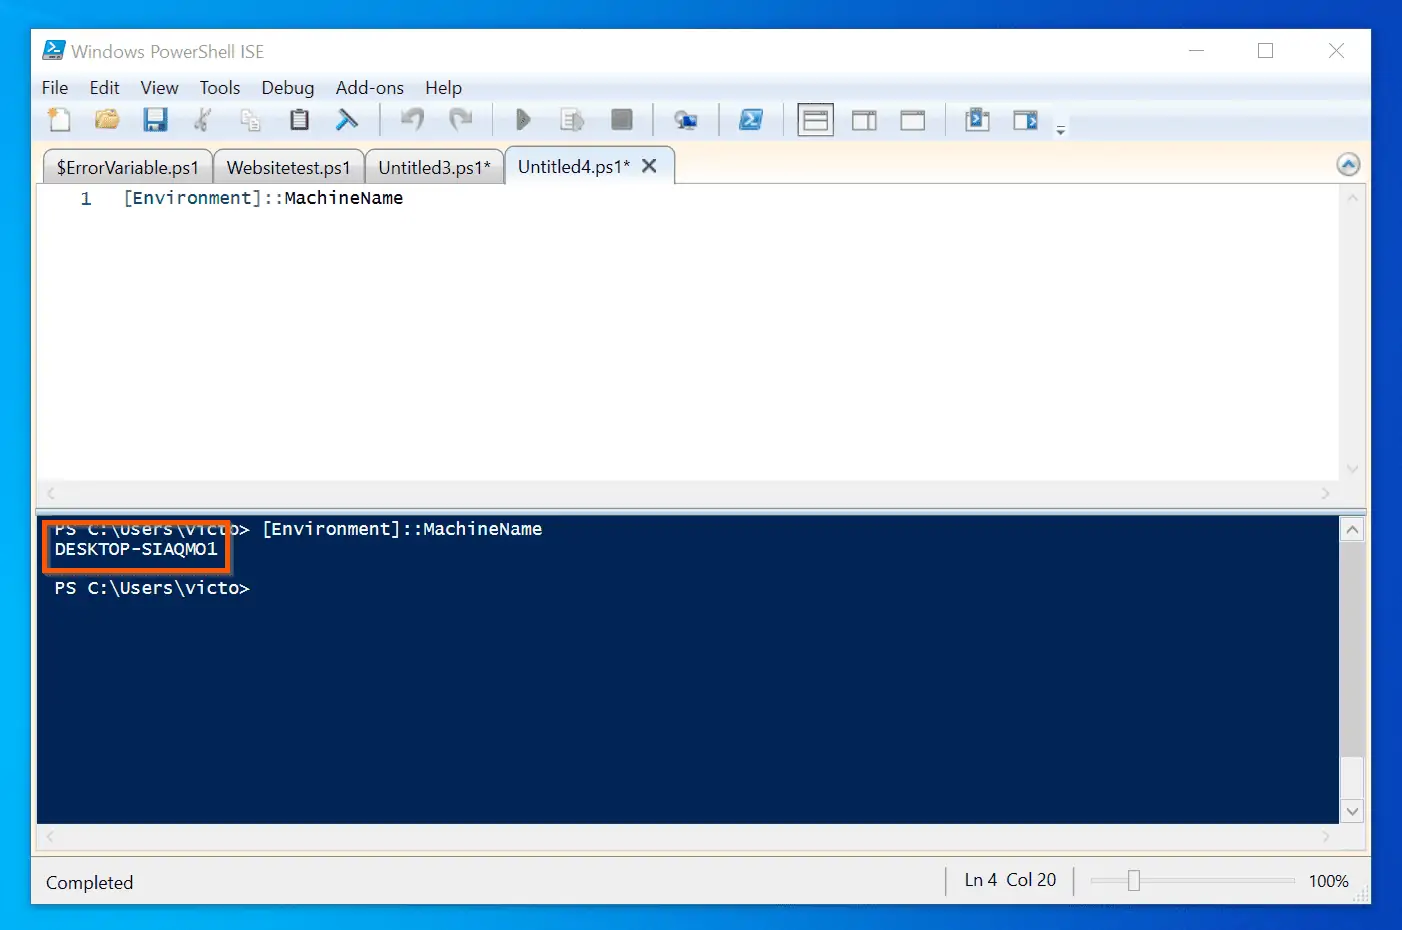
Scroll through the list and select MachineName. Then, run the command.
It is your computer name – the command produces the same result as $Env: COMPUTERNAME command.
$Script:MyInvocation.MyCommand.Path
Sometimes, you might need to access the location where your current script is executing from. For example, you might want to save reports in that location or create an error log text file.
When you are executing a PowerShell script, the ‘$Script:MyInvocation.MyCommand.Path’ automatic variable gives you access to the location of your script.
However, this automatic variable is activated when a PowerShell is running. If you try running the command from a PowerShell command prompt, it will not be useful to you.
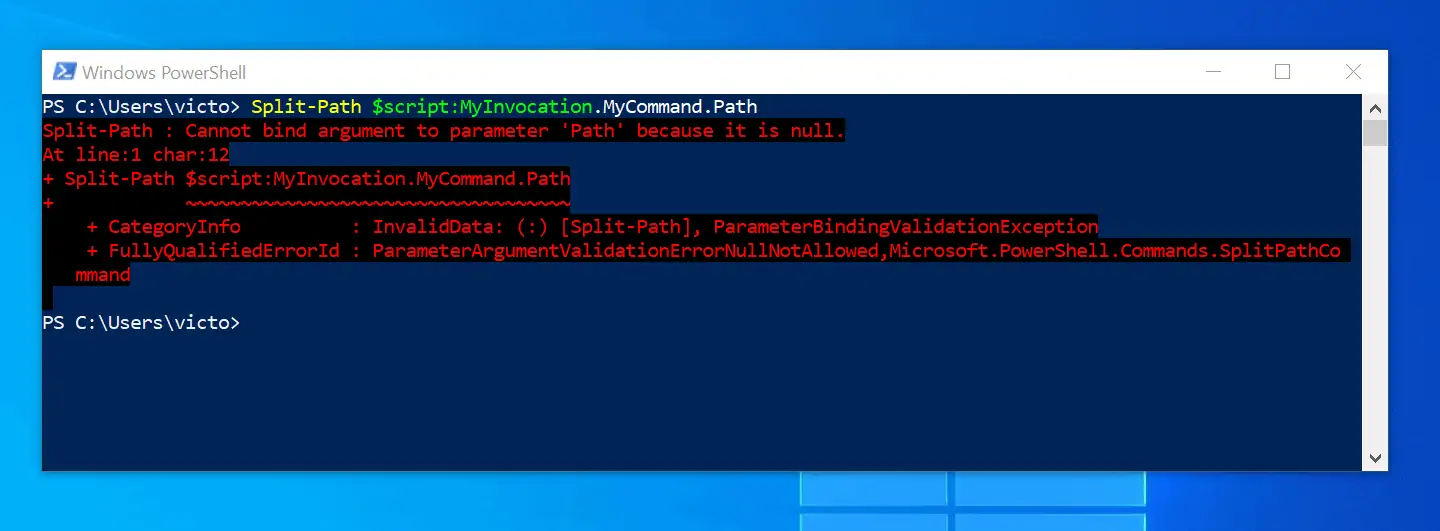
To demonstrate this, try running the command below in a PowerShell command prompt:
Split-Path $script:MyInvocation.MyCommand.Path
The ‘Split-Path $script:MyInvocation.MyCommand.Path’ command returns an error, instead of returning a path. Why? This is because as I mentioned earlier, the command only returns the path where an executing script is saved.
To display the path to a script, enter Split-Path $script:MyInvocation.MyCommand.Path in a new PowerShell ISE document. Then, save it as a script.
Once you have saved the command as a script, open a PowerShell command. Then, use Set-Location command to change to the directory you saved the script – I saved mine in D:\PS-Tutorial, so my command will be…
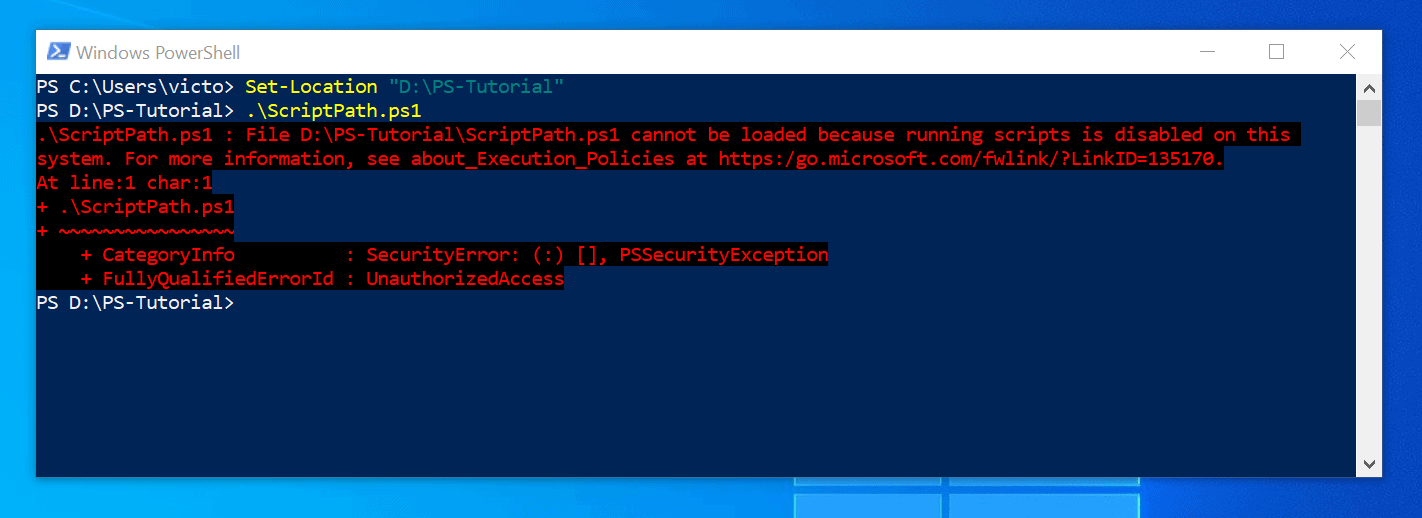
Set-Location "D:\PS-Tutorial"
Next, enter a dot (.) followed by a backslash (\). Then, press the tab key until your last script file is displayed.
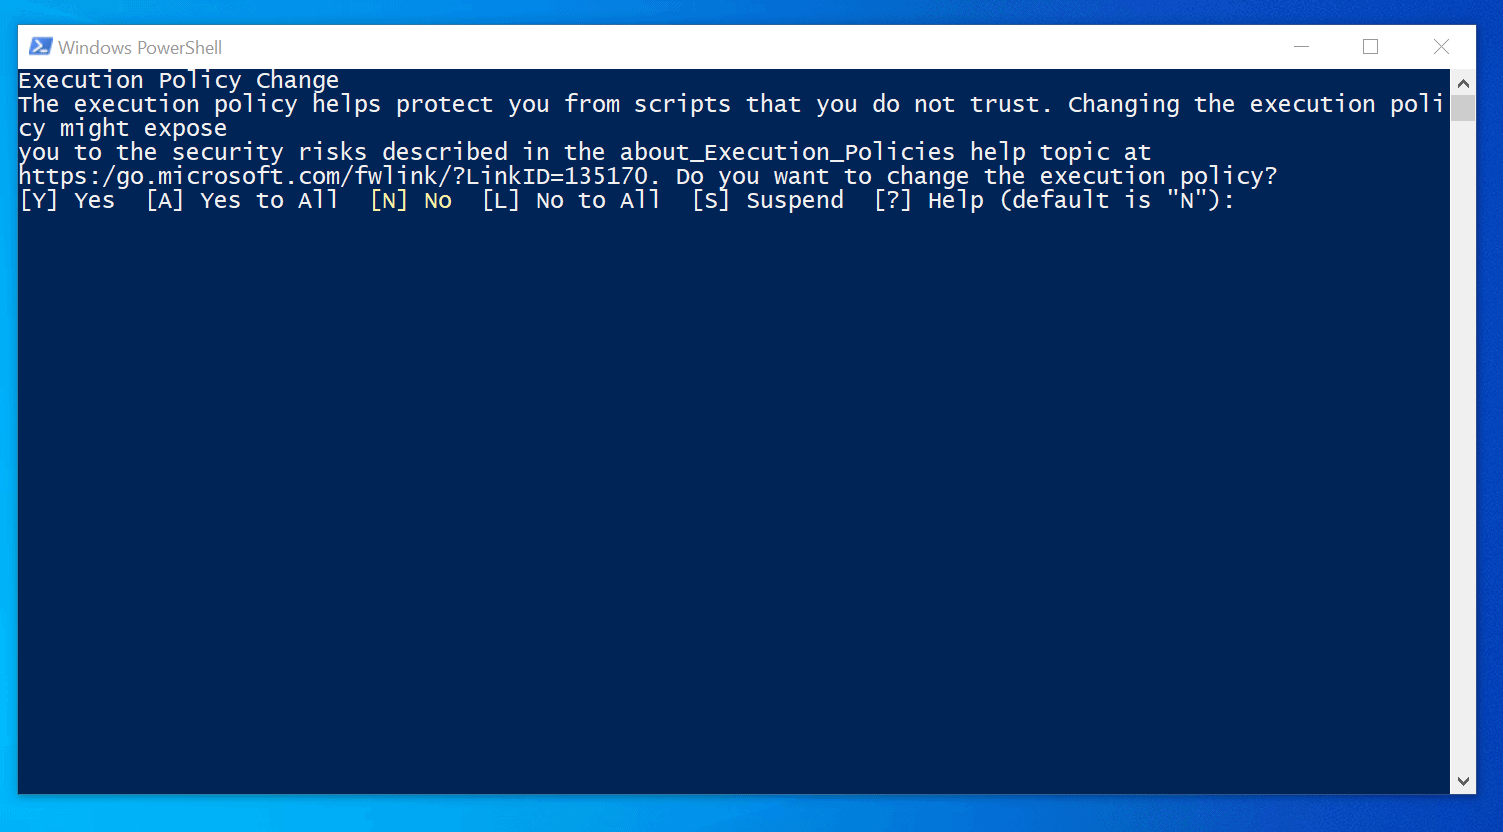
Finally, to execute the script, press the enter key. If you receive the error message that running scripts is disabled, see the fix beneath this screenshot.
To enable scripts to run on your computer, open PowerShell as administrator. Then, execute this command.
Set-ExecutionPolicy Unrestricted -Force
Now use the Set-Location command to change to the directory you saved the script. Then, open the script as described earlier.
When you press the enter key, the script will execute successfully – and display the path you saved your script.

So if you ever need to save a log file or reports while your PowerShell script is running, use the command below…
Split-Path $script:MyInvocation.MyCommand.Path
I hope you are finding this PowerShell Tutorial useful. If you are, remember to give us your feedback using the “Was this post helpful?” feedback tool found at the end of this page.
PowerShell Variables and Quoting Rules
In Windows PowerShell, quotation marks are used to specify a literal string. You can enclose a string in single quotation marks (‘) or double quotation marks (“).
A regular string literal consists of zero or more characters enclosed in double quotes. If the introduction has confused you, rather than clarify things, I will break it down in the next sub-sections.
How To Use Single And Double In Variables
When you create PowerShell variables, quote marks affect how PowerShell interprets the string in the variable. Earlier in this PowerShell tutorial, we created a variable called ‘VarTest’.
Here is the command we used to create that variable. Notice that the command on the right side of the equal to sign (=) is not enclosed in a quote?
$VarTest = Get-Process | Where-Object {$_.ProcessName -eq 'svchost'}By not adding double quotes around the command after the equal to sign, PowerShell interprets it as a command and passes the output of the command to the variable.
However, if you placed the command in a double quote (“”), PowerShell interprets the value on the right side of the equal to sign (=) as an expandable string. What this means in a lay man’s term is that PowerShell treats the command as a value.
To make it easy to understand, lets try some example. Execute the command below in PowerShell:
$VarTest = Get-Process | Where-Object {$_.ProcessName -eq 'svchost'}Now, run execute the variable alone. It displays the result of the command – Get-Process | Where-Object {$_.ProcessName -eq ‘svchost’} – previously stored in the variable.
Before you execute the command below, first execute Clear-Host, to clear the PowerShell console.
$VarTest = "Get-Process | Where-Object {$_.ProcessName -eq 'svchost'}"Now, run the variable alone. Instead of displaying the output of the command – Get-Process | Where-Object {$_.ProcessName -eq ‘svchost’} – it displayed the command itself!

So far, we have discussed how double quotes affect PowerShell variables. What about single quotes?
To illustrate how single quotes make PowerShell interpret commands as strings, I will share an experience I had when I created a PowerShell script to uninstalled patches.
To build the script, I used the Invoke-WmiMethod Cmdlet to call the spuninst.exe utility from the remote server. To do this, I needed to navigate to this path:
$spuninstpath = ‘\$RemoteServerName\c$\WINDOWS\$NtUninstallKB3002657$\spuninst\spuninst.exe'
Notice that ‘NtUninstallKB3002657’ (within the path) is enclosed in the Dollar ($) sign. This is the same sign that PowerShell uses to identify variables. As expected, this could cause some troubles.
To proceed with my script, I needed to check whether the spuninst.exe utility exists on the remote server before I attempted to uninstall the patch with the utility.
One way to achieve this was to use the Test-Path Cmdlet to test that files exists – ‘\$RemoteServerName\c$\WINDOWS\$NtUninstallKB3002657$\spuninst\spuninst.exe’.
Unfortunately, when I tested the script, I realized that Test-Path returned the error ‘file does not exist even when the file existed.
What was the problem?
It took some time before I realized what the problem was – the existence of \$NtUninstallKB3002657$\ in the path. PowerShell was interpreting $NtUninstallKB3002657$ as a variable rather than a string.
To resolve this problem, I needed to find a way to tell PowerShell that $NtUninstallKB3002657$ should be displayed exactly as it is (a string) – and not interpreted as a variable.
One way to achieve this is to store $NtUninstallKB3002657$ in a variable using the single (”) quote rule. So I stored $NtUninstallKB3002657$ in a variable called $Uniquepath as shown below:
$Uniquepath = '$NtUninstallKB3002657$'
Then I replaced $NtUninstallKB3002657$ with the variable, $Uniquepath as illustrated below:
$spuninstpath = "\\$RemoteServerName\c$\WINDOWS\$Uniquepath\spuninst\spuninst.exe"
Problem solved!
Hopefully, sharing this detailed experience helped explain how quote rules can affect PowerShell variables.
PowerShell Pipelines
In PowerShell, the pipe operator (|) allows you to use the output of one command as input for another command. For example, to limit the output of Get-Process to processes with ProcessName ‘svchost’, pipe the output of Get-Process to Where-Object cmdlet.
See the command below:
Get-Process | Where-Object {$_.ProcessName -eq 'svchost'}From the last command, I can decide to pipe the output of the Where-Object command as shown below:
Get-Process | Where-Object {$_.ProcessName -eq 'svchost'} | Select-Object ProcessName,Handles,IdThis time, the command returns only the properties specified in Select-Object.
Furthermore, I can pipe the output of the last command to Format-Table with ‘AutoSize’ parameter. This fits the result into the PowerShell console window.
Get-Process | Where-Object {$_.ProcessName -eq 'svchost'} | Select-Object ProcessName,Handles,Id | Format-Table -AutoSizeIn essence, the pipeline operator allows you to use the output of a command as the input to another command.
How PowerShell Pipelines Work
In the last subsection, I showed you different examples of how to pipe the output of a command to another command. It is important to note that, for a PowerShell Cmdlet to accept input from a pipeline, it must have a parameter that accepts pipeline input.
Most PowerShell Cmdlets have this parameter and will accept input from pipelines. However, to determine the parameters of a Cmdlet that accepts pipeline input, run the Get-Help command and specify the FULL or PARAMETER options.
For example, to determine the parameters of Where-Object that accepts pipeline input, run the command below:
Get-Help Where-Object -Parameter *
The command lists all the parameters of the Where-Object command. Any parameter that has “Accept pipeline input?” as true will accept input from the pipeline.
If you want to list only the parameters that accept pipeline input, run a command similar to the one below:
(Get-Help Where-Object).parameters.parameter | Where { $_.pipelineInput -like "true*" }From the command, we can see that only the InputObject parameter accepts input from pipeline.
Here is how PowerShell pipeline works: when you send the output of a command to another command, PowerShell does the following:
- Determines the parameters of the receiving Cmdlet that accepts pipeline input
- Tries to associate the output of the previous command to any of the parameters that accept pipeline input
In the example where I piped the output of Get-Process to Where-Object, PowerShell associated the output of Get-Process to the InputObject parameter of Where-Object.
Here is the command.
Get-Process | Where-Object {$_.ProcessName -eq 'svchost'}This tutorial is based on my book with the same title. You can get it from Amazon.
PowerShell Tutorial 4: Scripts, Functions and Modules
So far, you have gained significant PowerShell skills. In PowerShell tutorial 4, I will introduce you to PowerShell scripts, functions and modules.
You will learn about PowerShell scripts, and how to write them. You will also learn about PowerShell functions and their syntaxes.
PowerShell File Extensions
To help you understand PowerShell scripts, functions and modules, it may be helpful to know their file extensions. Additionally, knowing their their file extensions helps you identify them.
A PowerShell script file has the extension .ps1, a PowerShell module file has the extension .psm1 and a PowerShell data file has the extension .psd1.
If you open a new PowerShell ISE editor and click File -> Save As, the three file types mentioned earlier will be listed in the ‘Save as type’ drop-down.
What is a PowerShell Script?
A PowerShell script is a text file that contains Windows PowerShell commands. The file extension for a Windows PowerShell scripts is .ps1.
Once a text file has some commands and saved with the ‘.ps1’ file extension, Windows PowerShell will execute the file as a ‘script’ and run the commands in the script.
This tutorial will teach you about the different script extensions but first, lets discuss PowerShell Script Editors.
PowerShell Scripting Editors
As already discussed, a PowerShell script is a simple plain text with PowerShell commands. In theory, you could build PowerShell scripts with notepad. Fortunately, you don’t have to use notepads.
There are tools called PowerShell script editors that have better functionalities. Windows 10 has a pre-installed PowerShell scripting editor called PowerShell ISE.
To read more about this scripting editor, click Windows PowerShell ISE Explained. Moreover, Dell has a PowerShell scripting editor called PowerGUI.
PowerGUI was created by Quest Software. When Dell acquired Quest Software, Dell now owns PowerGUI.
The purpose of this section is to introduce you to PowerShell scripting editors. The reason for this is that if you are going to script in PowerShell, you need a PowerShell scripting editor.
How to Run a PowerShell Script
Before you run a PowerShell script, you may need to set PowerShell execution policy. However, to set PowerShell execution policy, you have to open PowerShell as administrator.
Before I show you how to set execution policy, let me first show you how to view the current execution policy. To display the current execution policy, run the command below:
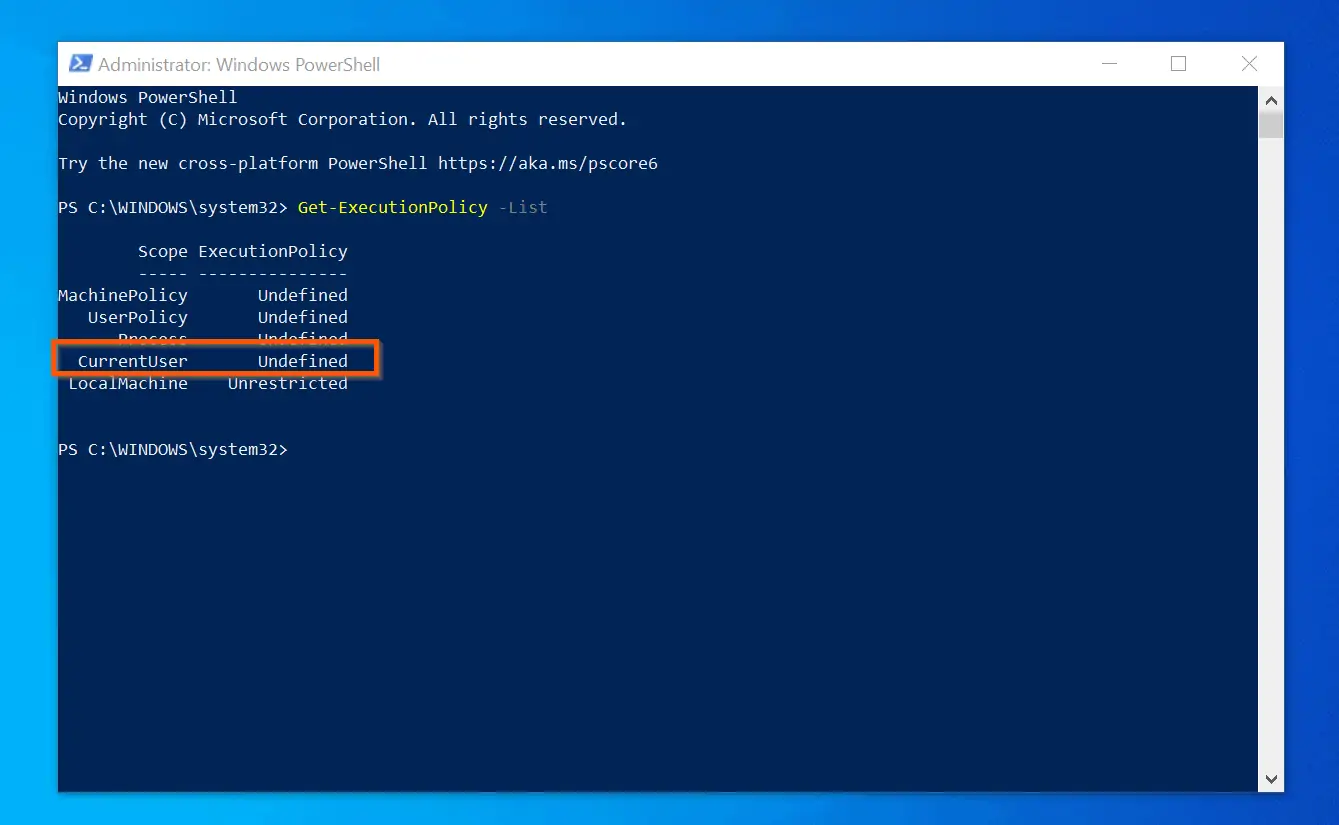
Get-ExecutionPolicy -List
Then, note the current execution policy for the CurrentUser.
To allow PowerShell run all scripts on your computer, run the command below:
Set-ExecutionPolicy -Scope CurrentUser -ExecutionPolicy Unrestricted -Force
Now, run the “Get-ExecutionPolicy -List” command again.

With the PowerShell executed policy sorted, you can now run PowerShell scripts without any hinderances.
There are two method you can run a PowerShell script:
Method 1: By calling the PowerShell script from within PowerShell. During the course of this PowerShell tutorial, I created some sample scripts saved in “D:\PS-Tutorial”.
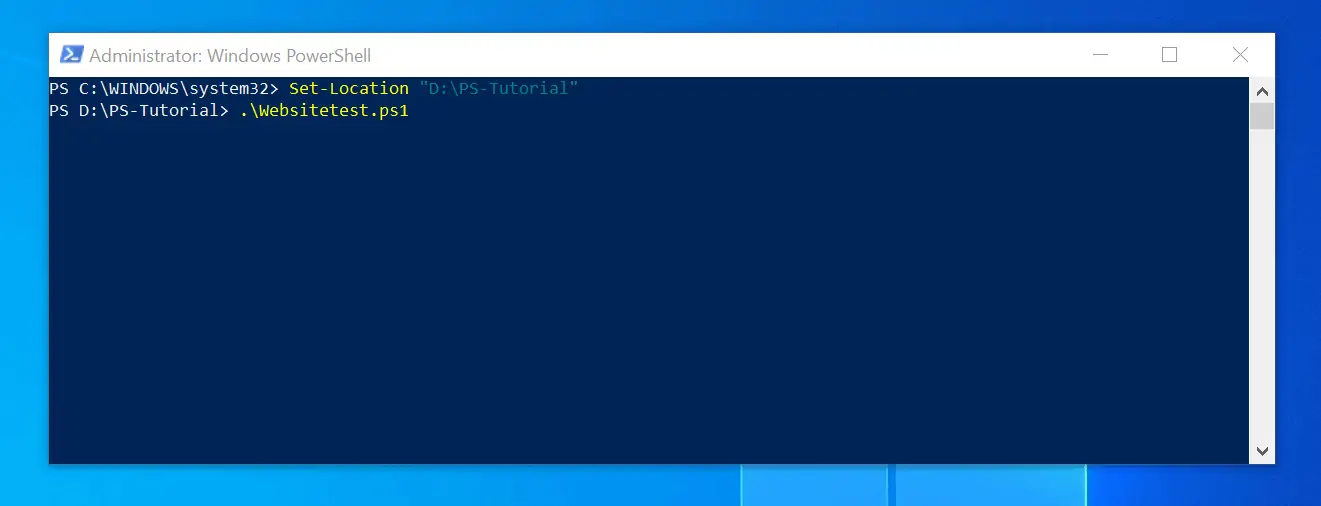
To run a script from that folder, I will use the command below to navigate to the folder:
Set-Location "D:\PS-Tutorial"
Once on the folder, enter a period, followed by a forward slash (/). Then, press the Tab key on your keyboard – as you press the Tab key, it will toggle through the PowerShell scripts in that folder.
When the script you want to run is displayed, press the Enter key on your keyboard. The PowerShell script will run and display results – see the second screenshot below.

Method 2: You can also run a PowerShell script by opening the folder you saved the PowerShell script. Finally, right-click the PowerShell scrip and click Run with PowerShell.
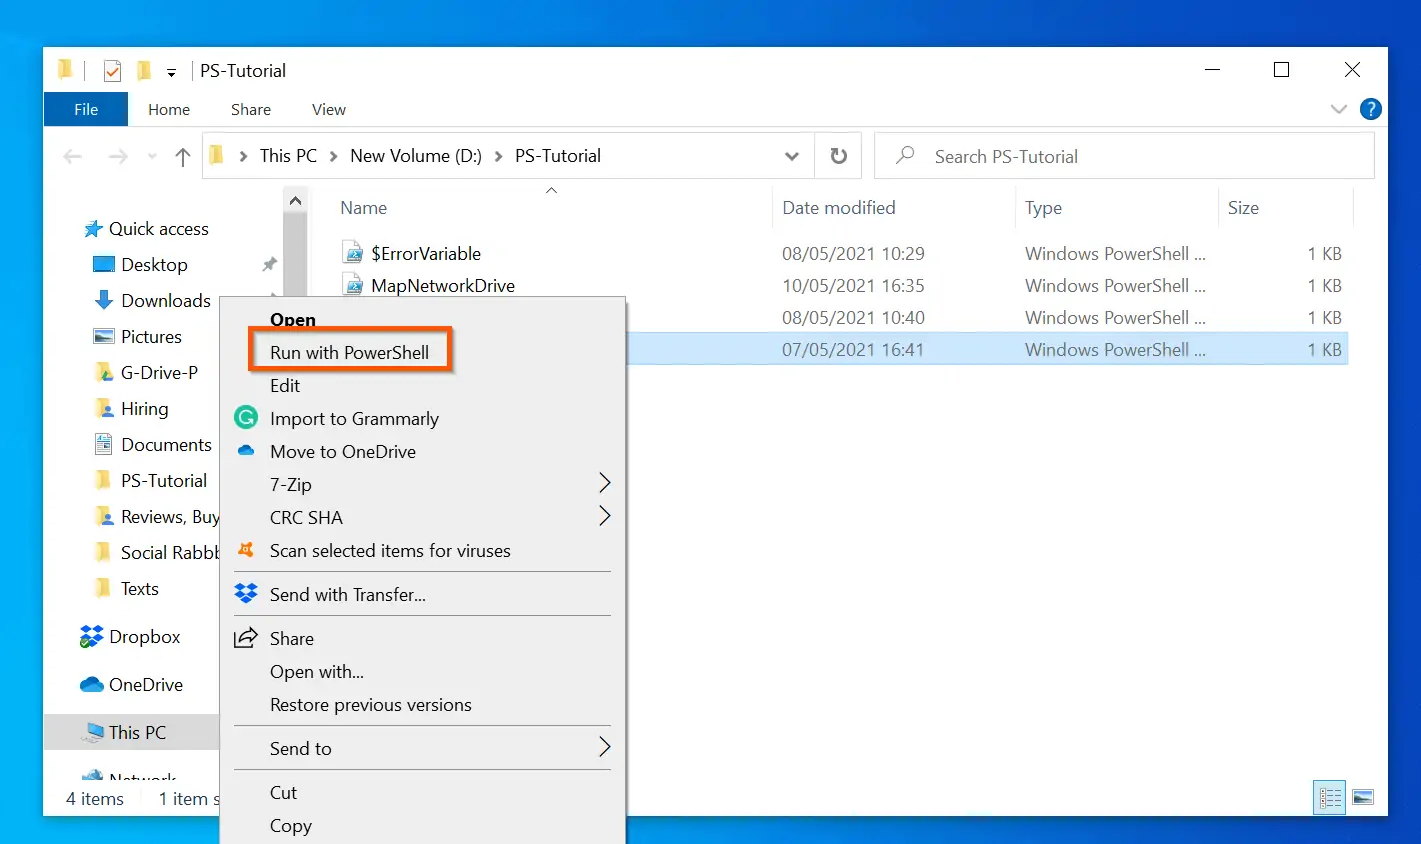
Due to the execution policy restrictions, you may be prompted to allow the script to run. Enter Y and press enter. One drawback of this method is that when the script finishes running, the PowerShell window will close.
PowerShell Functions
A PowerShell function is a list of Windows PowerShell statements with a name assigned to it. When you build a function, it executes like a normal Cmdlet.
Like Cmdlets, functions should be named in Verb-Noun pair and should adhere to the standard verbs that have been approved for all Windows PowerShell commands.
Standard approved PowerShell verbs was covered in tutorial 1.4.
Furthermore, when naming your function, it is also recommended that your ‘Nouns’ are descriptive of the task performed by the function.
Below is a very simple function called ‘Get-CurentWorkingDirectory’
Function Get-CurentWorkingDirectory { Convert-Path . }To see the function in action, open PowerShell and run the command. Then, run the function…
Get-CurentWorkingDirectory
The function will display your current working directory. Here is the result of the command for me.
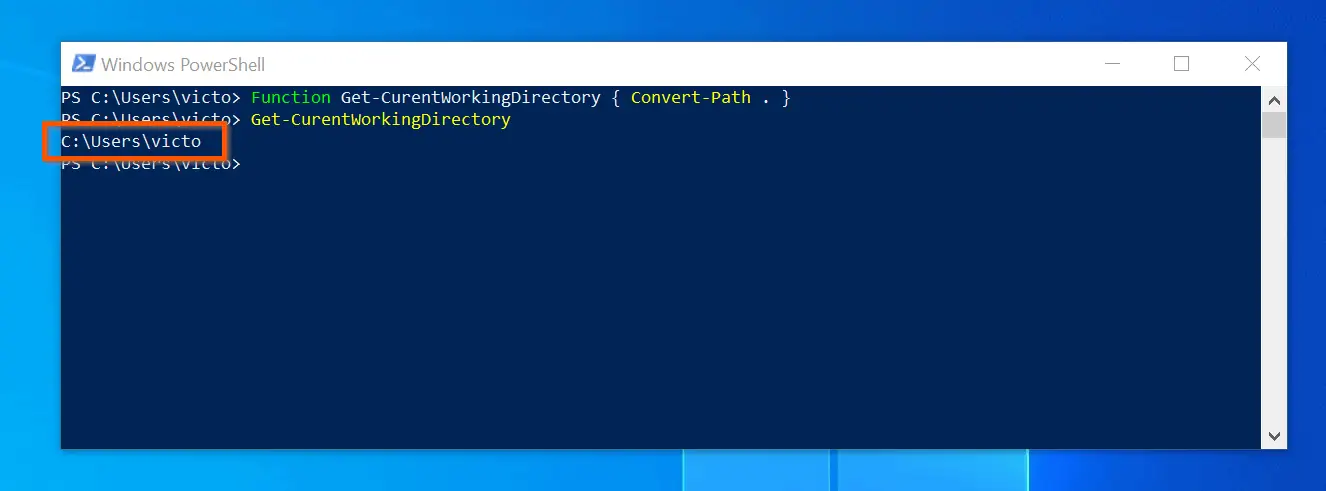
As you can see from this simple example, you can run a PowerShell function like a normal PowerShell Cmdlet.
Syntax of PowerShell Functions
The syntax of a function is shown below:
Function  {
   param
     (
     [type]$parameter1,
     [type]$parameter2,
     [type]$parameter3
 )
 Begin {<statement list>}
 Process {<statement list>}
 End {<statement list>}
 }
A function begins with the word ‘Function’ followed by the name of the function. After the name of the function, every other statement is enclosed in braces ({}).
In its simplest form, a function has the syntax below:
Function <name>
 {
 [type]$parameter1,
 [type]$parameter2,
 [type]$parameter3
 <statement list>
   }
PowerShell Function Parameters
As seen in the syntax above, you can define parameters for your functions. A function parameter does the same thing that a cmdlet parameter does.
Like Cmdlets, a parameter allows a function to accept inputs.
From the syntax, after the first open brace ({), you define parameters for the function. Then you have the three important statement blocks: ‘Begin’, ‘Process’, and ‘End’.
To read more about PowerShell parameters, read our guide Powershell Param: Syntax, Types, Attributes and Examples.
How to Run a PowerShell Function
Since a PowerShell function is similar to a PowerShell script, you can run a function the same way you run a script.
From a PowerShell command console, navigate to the folder (directory) the function is saved. Then, enter a period (.), followed by a forward slash (/).
Finally, use the Tab key to display the Power|Shell function you want to run and press the Enter key.
Also, as explained in the PowerShell script tutorial, you can open the folder the PowerShell function is saved. Then, right-click the function and select Run with PowerShell.
PowerShell Modules
A PowerShell Module is a package of PowerShell commands containing cmdlets, providers, functions, workflows, variables, and aliases.
To help you differentiate scripts, functions, and modules; a script is a collection of PowerShell commands. On the contrary, a function is a named list of PowerShell statements.
This means that you can easily convert any PowerShell script to a function. We can then say that a script is a subset of a function.
On the other hand, when you combine cmdlets, providers, functions, workflows, variables, and aliases into a package you create a module. So, we can say that scripts and functions are subsets of the module.
This is really a simplified explanation but I hope it helps you understand the concepts.
In its simplest form, a PowerShell module is a .psm1 file containing one or more PowerShell functions.
How to Install and Use PowerShell Modules and Functions
Beginning in Windows PowerShell 3.0 – the first time you run any command in an installed module or a function – Windows PowerShell imports modules automatically.
For this to happen though, you need to have the module files in the right location. Windows PowerShell will look at a certain location for modules.
Windows PowerShell stores pre-installed modules in the path:
C:\Windows\System32\WindowsPowerShell\v1.0\Modules. If you navigate to this path, you will see all PowerShell modules preinstalled on your system.
The above path is one of the Path environment variable. To see see a full list of all the items in the Path environment variable, run the command below:
$env:Path
See the highlighted portion of the screenshot below – the Modules folder is located in C:\Windows\System32\WindowsPowerShell\v1.0. As I mentioned earlier, all PowerShell modules are saved in the Modules folder in this path.
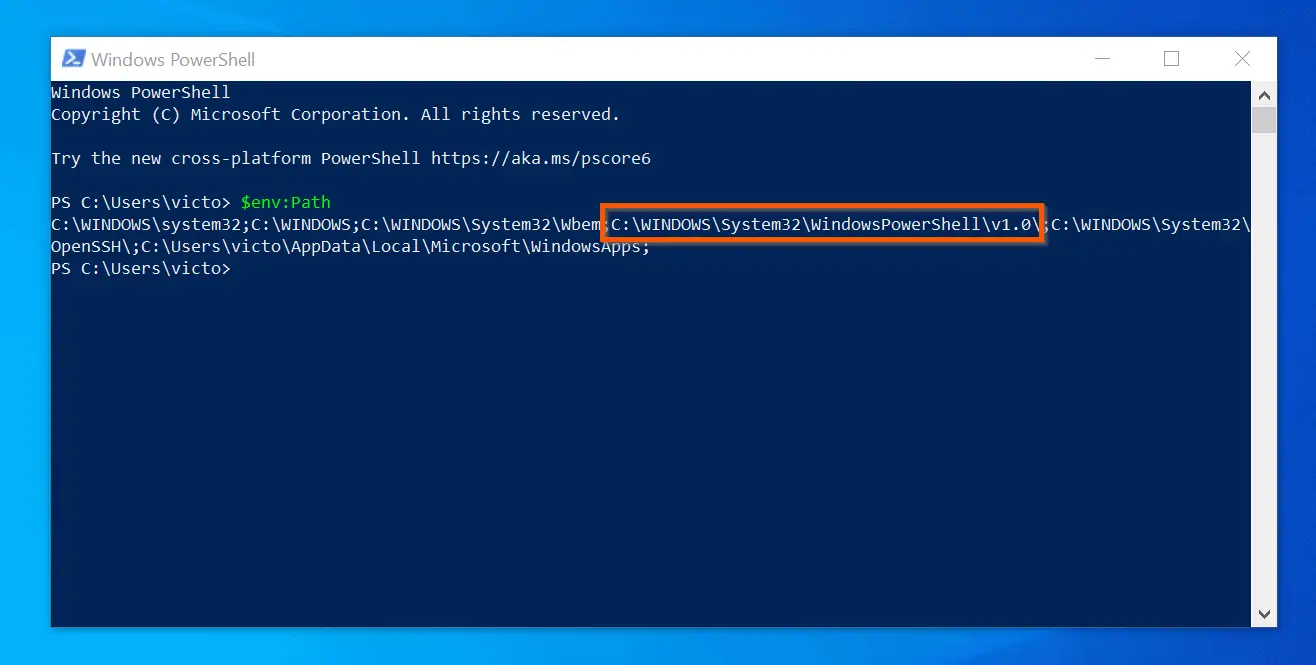
The C:\Windows\System32\WindowsPowerShell\v1.0\Modules folder is reserved for pre-build system PowerShell modules. You should not save download or custom-built modules in this path.
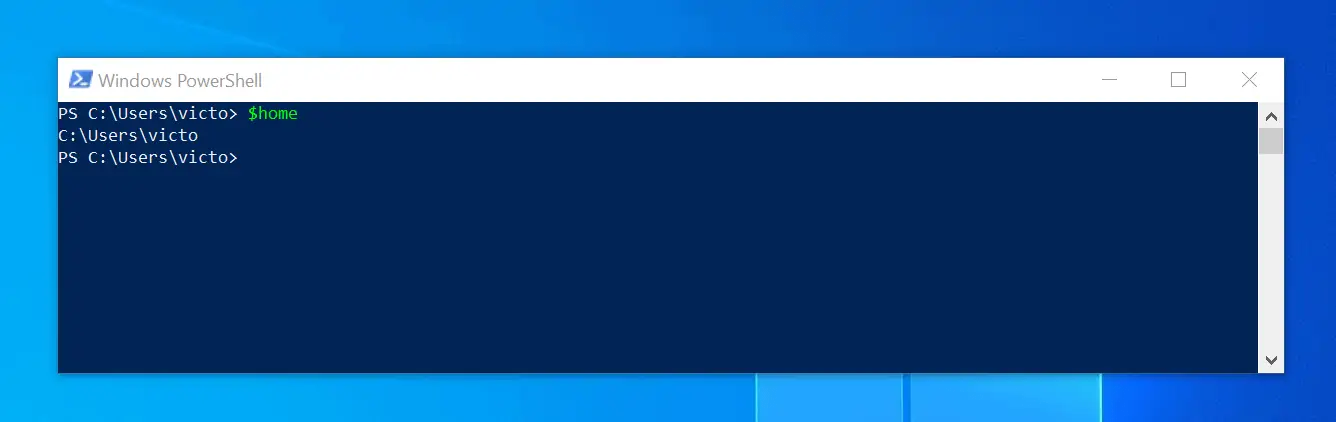
Each Windows 10 user has a module directory located in the path – $home\Documents\WindowsPowerShell\Modules. The automatic variable, $home is usually located in C:\Users\<UserName>.
To determine your $home directory or path, run the $home command in your PowerShell console:
$home
The screenshot below displays my PowerShell $home directory.
A user’s PowerShell module path is not created by default and needs to be created if required. If you create or download a PowerShell module, follow the steps below to install and use your PowerShell Module folder:
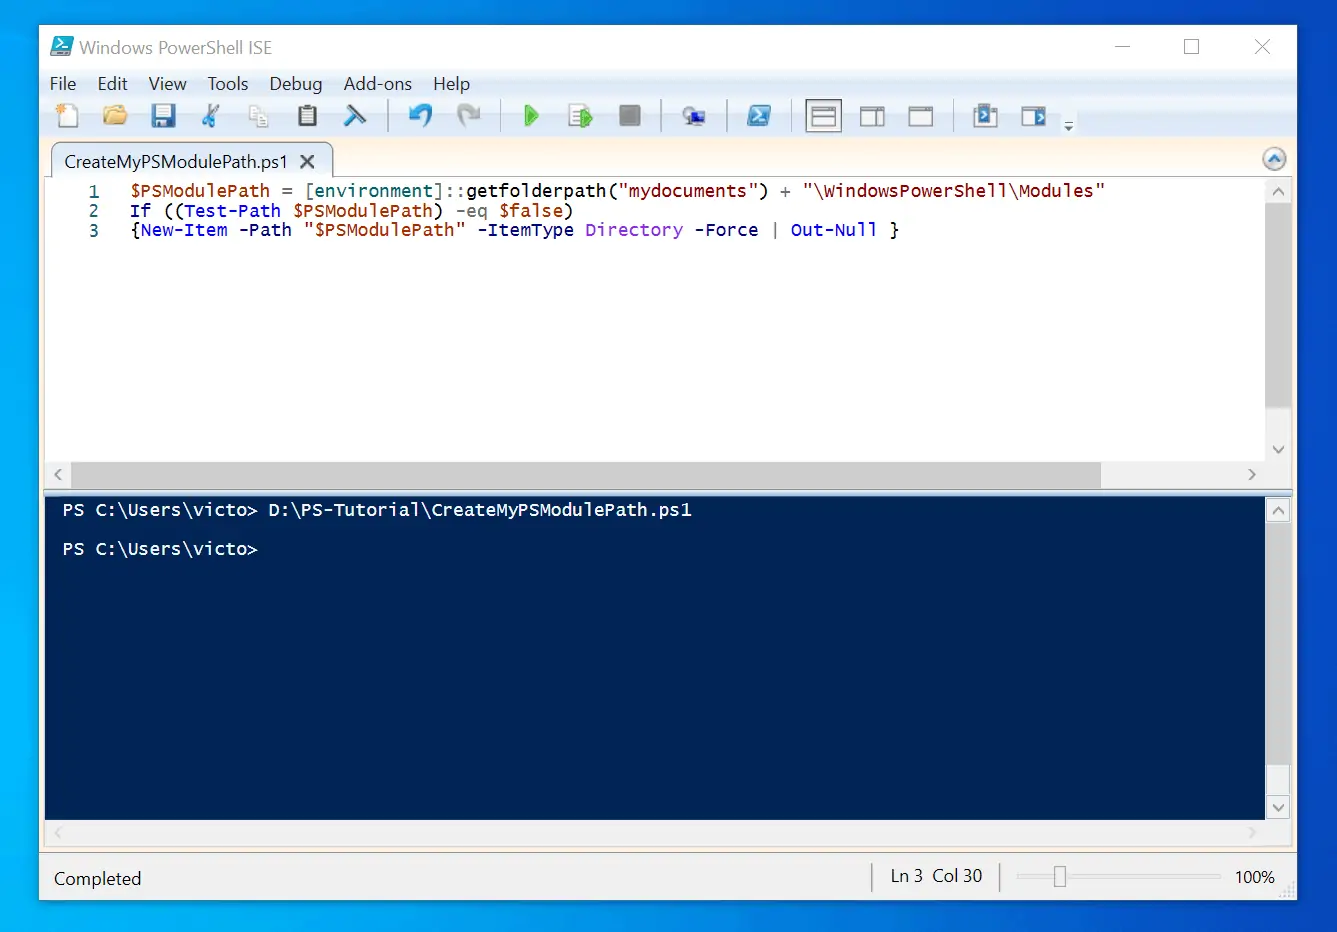
- Create a Module directory if it does not exist. To create a module directory, execute the commands below:
$PSModulePath = [environment]::getfolderpath("mydocuments") + "\WindowsPowerShell\Modules"
If ((Test-Path $PSModulePath) -eq $false)
{New-Item -Path "$PSModulePath" -ItemType Directory -Force | Out-Null }
The first line creates a variable, PSModulePath, and assigns the PowerShell Module path to the variable. Additionally, the second line tests whether this path exists.
Finally, in the third line, if the path does not exist, the folders in the path (including the Modules folder), are created using the New-Item command.
To create your PowerShell modules folder, copy the above script into a new PowerShell ISE document and run the script. Then, save the script as CreateMyPSModulePath.
- Now that you have created your PowerShell Modules folder, you can copy downloaded or custom-created modules and functions into this folder.
- Finally, before the module or function becomes available for use, it has to be imported using the Import-Module command.