Have you heard about the Local Security Policy in Windows 10 and Windows 11, but you do not know what it does? Learn all there is to know about this Windows feature.
Overview
The Windows Operating System offers some features you can use to enhance the security of your PC. If you use your computer in an office and the computer belongs to a Windows network (called “domain”), your IT administrator can apply some of these security features from the server.
In a domain network, the IT administrator will apply these policies using what we call “Group Policy”.
However, if your computer does not belong to a domain, you can apply some of these security features using the Local Security Policy. The Local Security Policy is a set of information you can use to enhance the security of a local Windows computer.
Windows offers the Local Security Policy in two main categories – Account Policies and Local Policies. The Account Policies allow you to set Password policies like enforce password history.
In addition to that, under account policies, you can also set Account Lockout Policies. For example, you can set a policy that determines how many minutes an account stays locked (if locked out) before automatically becoming unlocked.
On the contrary, under the Local Policy section of the Local Security Policy, you can set Audit Policy, User Rights Assignments, and Security Options policies.
In the subsequent sections of this guide, I will break down how these security policies work, their features and advantages, and their limitations.
How Local Security Policy Works
When a Windows 10 or Windows 11 local administrator sets Local Security Policies, the policies apply to all users that log in to the computer.
For example, a local administrator may modify the Local Security Policy, “Allow Log on locally” to allow only administrators to log on to the computer.
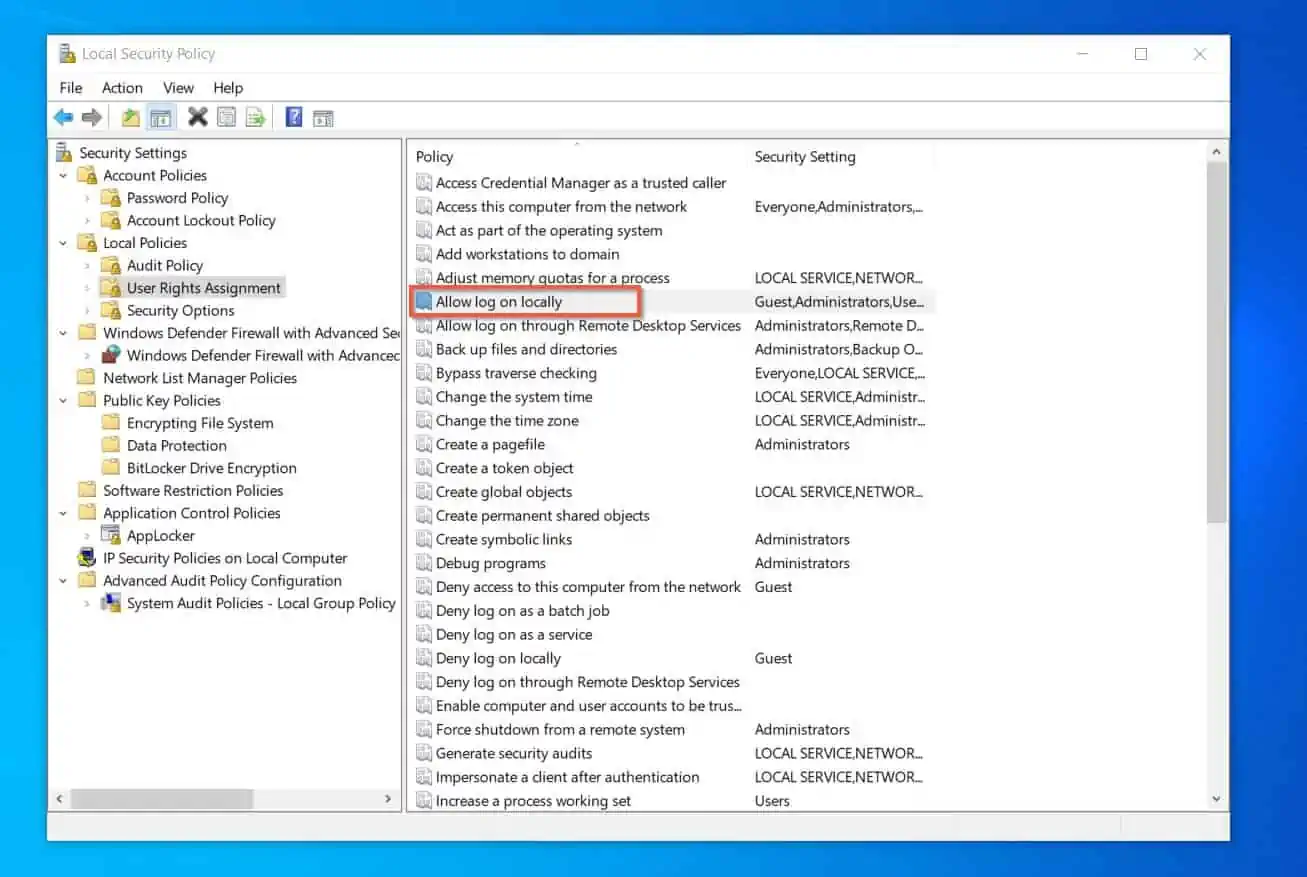
This policy will be enforced on the local computer. So, when a non-administrator tries to log in to the computer, the computer will deny the user access.
This policy will remain enforced as long as the computer does not belong to a Windows domain network. If, however, the computer belongs to a Windows domain network, policies (called “Group Policy”) applied by the network administrator will override any Local Security Policy applied by the local administrator.
If this happens, a non-administrator user can log on to the Windows 10 or Windows 11 computer. That is if the Group Policy applied by the network administrator allows non-administrators to log in to computers on the Windows domain network.
Essentially, Local Security Policies applied on the computer from the computer’s Local Security Policy snap-in only apply to the local computer.
Features of Local Security Policy
So far, I have discussed an overview of the Local Security Policy. In addition to that, I have also discussed how this Windows security feature works.
In this section, you’ll learn the main features of the Local Security Policy in Windows 10 and Windows 11.
Policies Created from the Local Computer Applies Only to the Computer
Unlike policies applied by a Windows domain network administrator, if a Windows local administrator applies a policy, it is only enforced on the local computer.
On the contrary, if a network domain administrator applies a security policy via Group Policy, the policy applies to all computers and/or users that meet the criteria.
Group Policies Applied by the Network Domain Administrator Takes Precedence Over Local Policies
As I hinted in the “how it works” section, if an administrator creates a policy that conflicts with a local policy, the domain policy takes precedence. The implication of this is that the network administrator has more control over Windows computers than local administrators.
So, for domain-joined computers, Local Group Policies apply before Group Policies. So, when the computer applies the Group Policies, they override the local policies.
Windows 10 and Windows 11 Home Editions do not Have the Local Security Policy Snap-in
This is a very important feature to mention as many Windows 10 Home users complain that they cannot find the Local Security Policy snap-in. If you own a Windows 10 Home edition, your license does not include this option.
To determine your Windows 10 edition, search winver and open the app. Then, check your Windows edition – see the screenshot below.
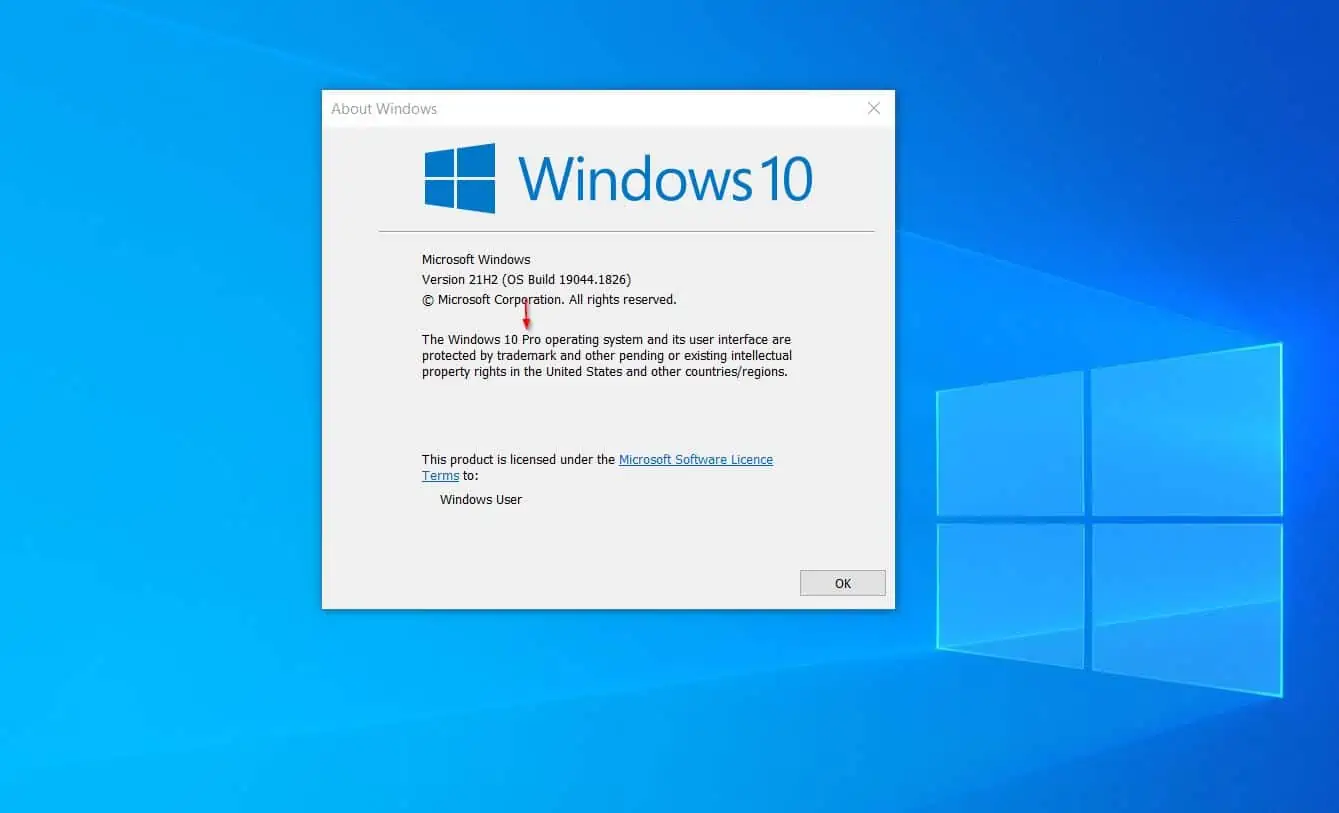
If your Windows 10 or Windows 11 shows “Home” where mine displays “Pro” in the screenshot above, you’ll NOT be able to open the Local Security Policy.
So, you need to upgrade your Windows “Home” to “Pro” in this situation.
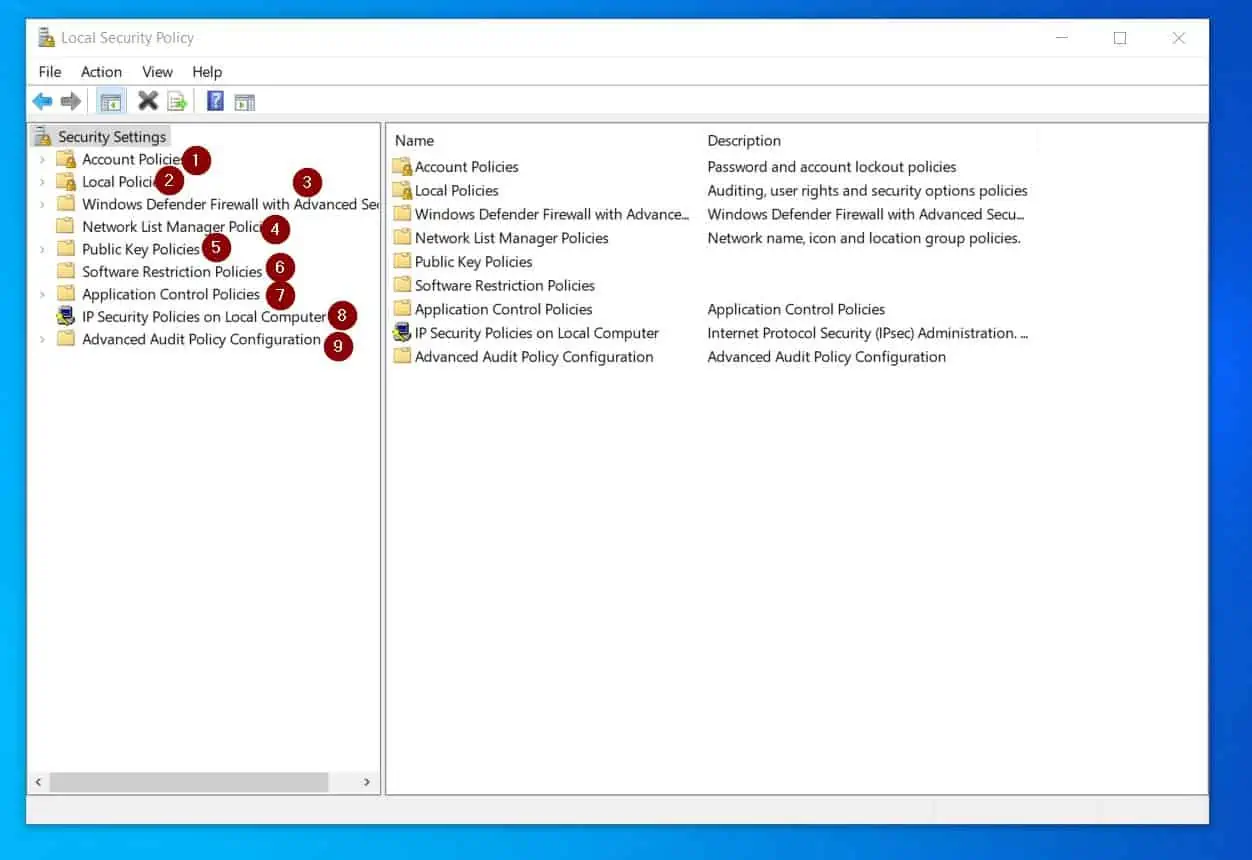
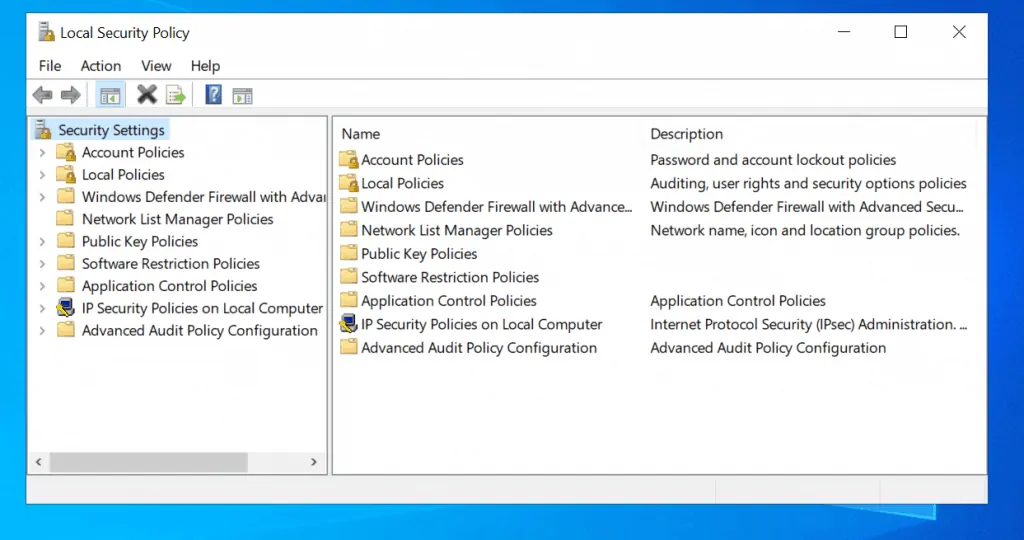
The Local Security Policy Snap-in has Nine Nodes
The LSP snap-in has 9 nodes that offer you different policies you can apply to the local computer. However, most of the policies you may need to apply to a local computer are located in the Account Policies and Local Policies nodes.
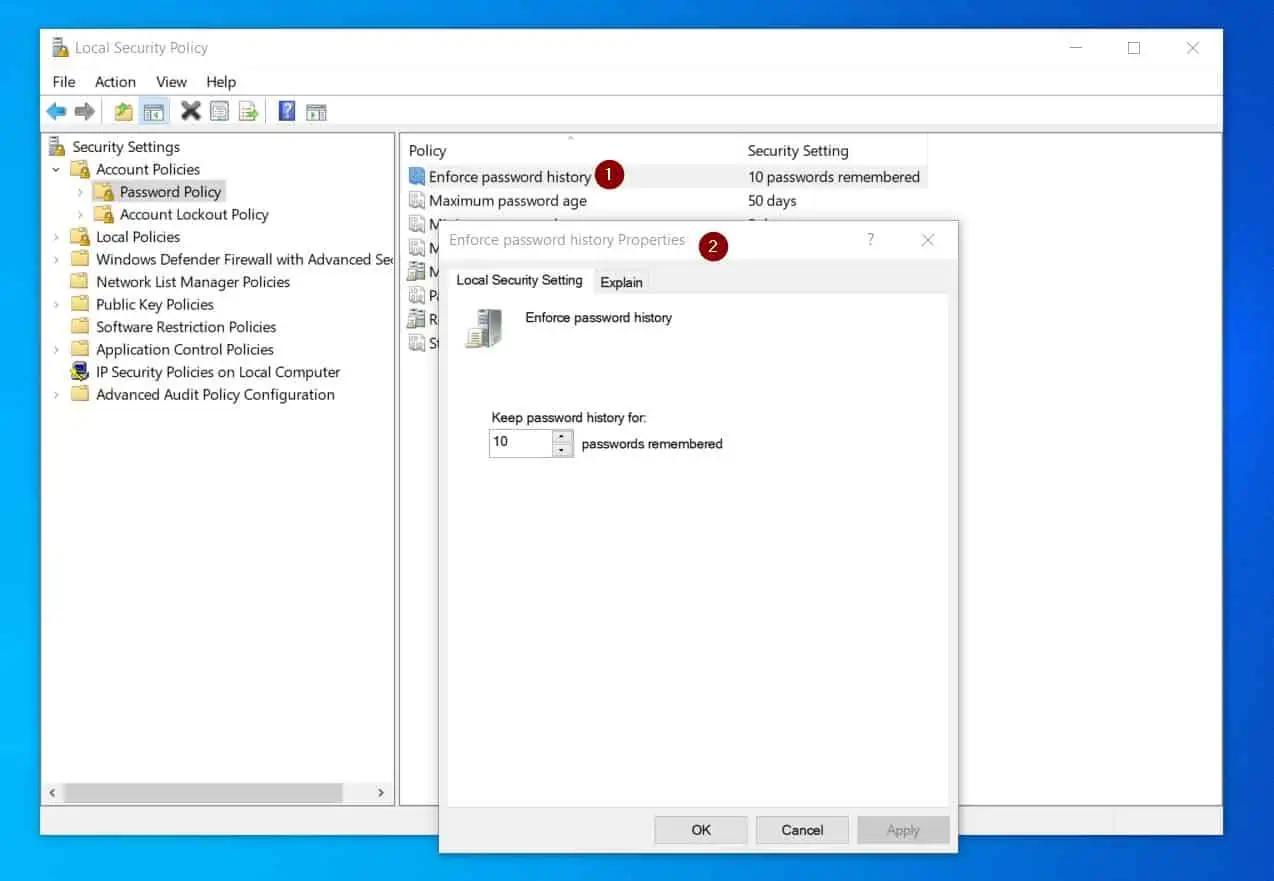
Moreover, within each node, there are sub-nodes that contain the policies you can enable and apply. As an example, the Account Policies node has two sub-nodes – Password Policy and Account Lockout Policy.

To display the policies available in a sub-node, click on it. For example, click the sub-node to display the policies in the Password Policy sub-node.
Finally, to configure a policy, double-click it. For example, if I want to configure the “Enforce password history”, double-click the policy. Then, configure the policy and click OK.
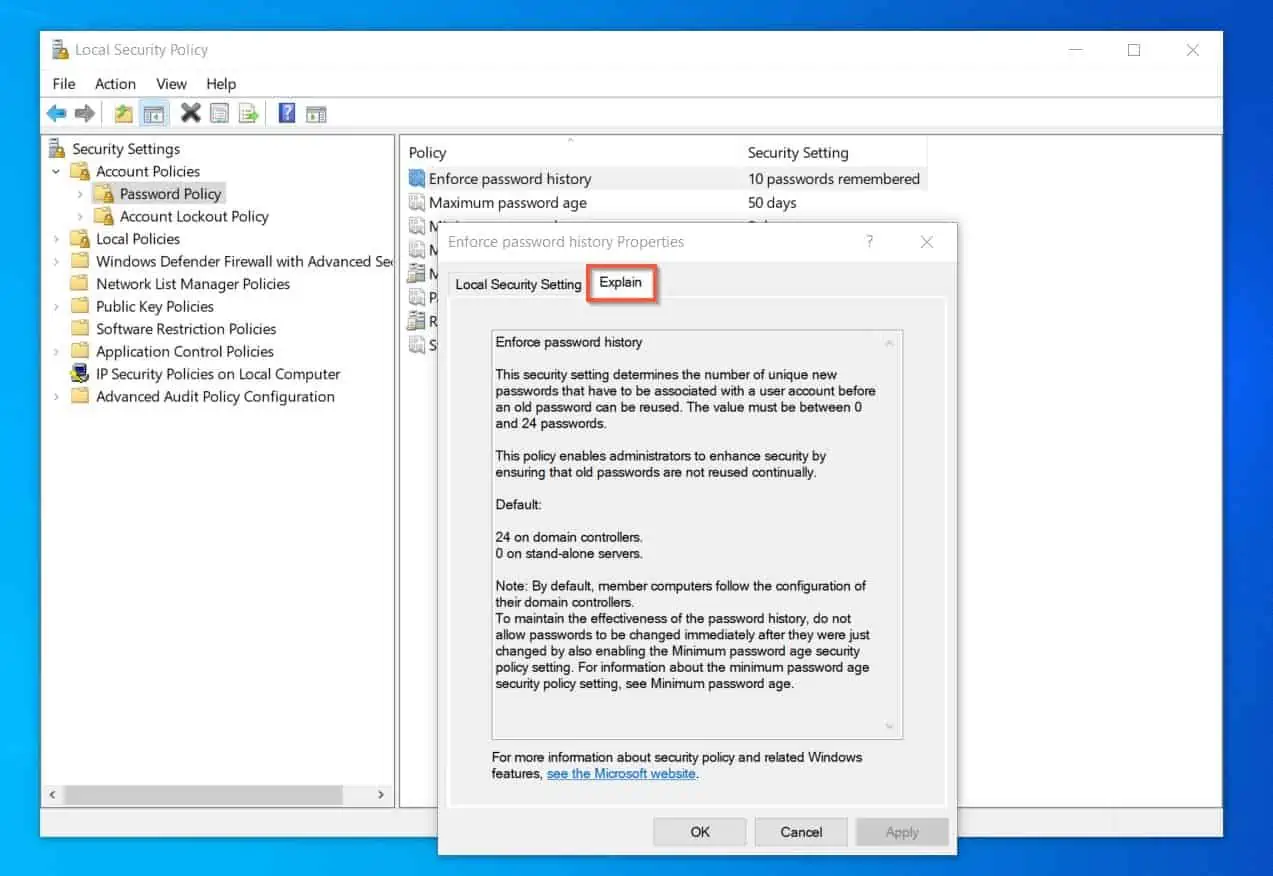
However, if you need additional help with the policy, click the “Explain” tab.
Pros of the Local Security Policy
Local Security Policies have Helpful Information that Explains what the Policy Does and how to Configure it
If you want to enable a policy in the LSP snap-in but you do not know what it does, you can click the “Explain” tab to get more information.
To learn how to do this, see the last sub-section in the features section of this guide.
Local Security Policies Help Local Administrators Tighten Security on Computers Used by Multiple People
If you manage a small office with computers available to multiple users, you can use the Local Security Policies to enhance the security of the computers.
It Offers Ease of Configuration
Setting up local policies with the LSP snap-in is relatively easy.
In addition to ease of configuration, the policies apply immediately without requiring you to restart the computer.
Offers Audit and Advanced Audit Policies that Allows Tracking of Events
If you want to track potential security breaches by users that log in to a local computer, you can use the audit policies provided by the Local Security snap-in.
After enabling these policies, you can track the events in the Windows events log. Then, take the necessary actions to tighten the local computer’s security further.
Limitations of the Local Security Policy
Domain Group Policies Override the Local Security Policies
If a Windows 10 or Windows 11 computer is joined to a domain, all policies applied by the network administrator override all policies applied via the Local Security Policy.
This is a major limitation for the local administrator because this means that the local administrator loses control over the security of the PC. However, for the network administrator, this is a benefit as this gives the administrator the ability to manage the security of multiple computers.
Local Security Policies Apply to Local Computers
As I mentioned in the features section of this guide, when you set a policy in the Local Security Policy snap-in, the policy applies to the local computer.
So, if your computers are not in a Windows domain network, you have to set the policies individually on each computer. This is time-consuming and an inefficient way to secure your multiple computers.
Therefore, if you run a small office with up to 20 computers, I strongly recommend that you consider joining your computers to the Microsoft Azure Domain
How to Open Local Security Policy
You can open the Local Security Policy in 5 different ways. This section covers the 5 methods.
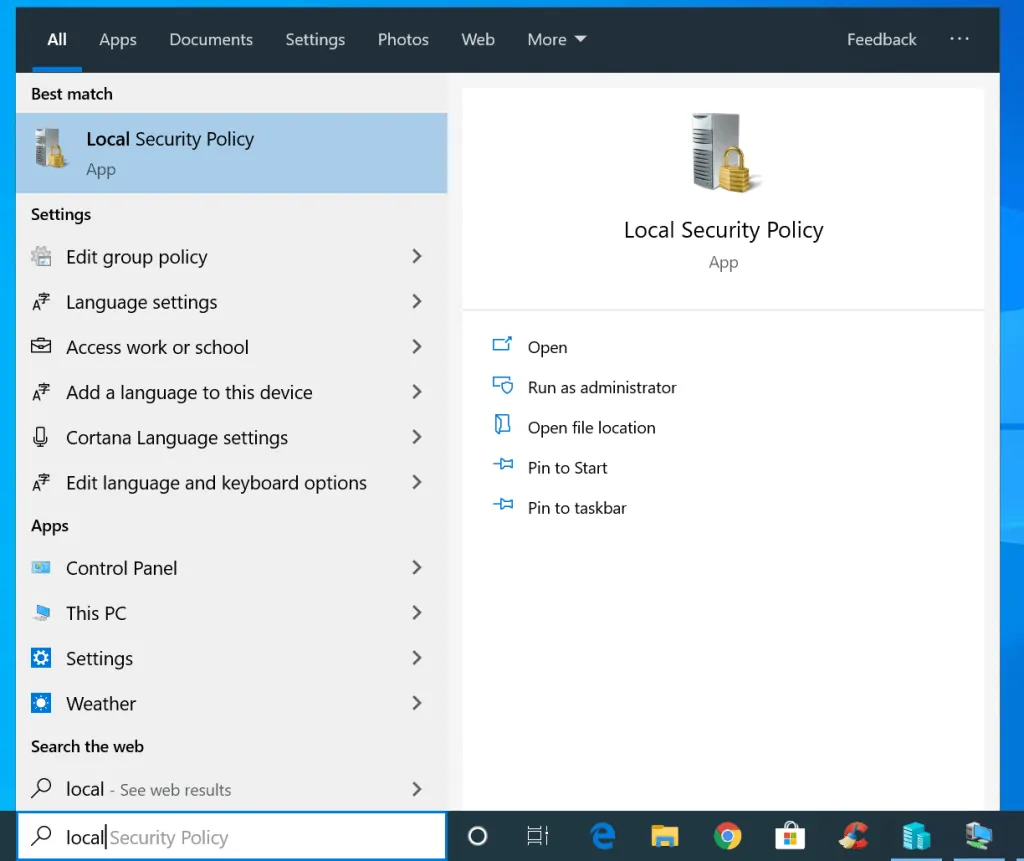
Option 1: Open Local Security Policy from Search
The quickest method to open the local security policy in Windows 10 or Windows 1 is to use search.
Here are the detailed steps.
- Type local in the Windows search bar. Then click Local Security Policy.
- It will open…
Option 2: Access Local Security Policy from Local Group Policy
You can also access the local security policy from the local group policy editor.
The detailed steps…
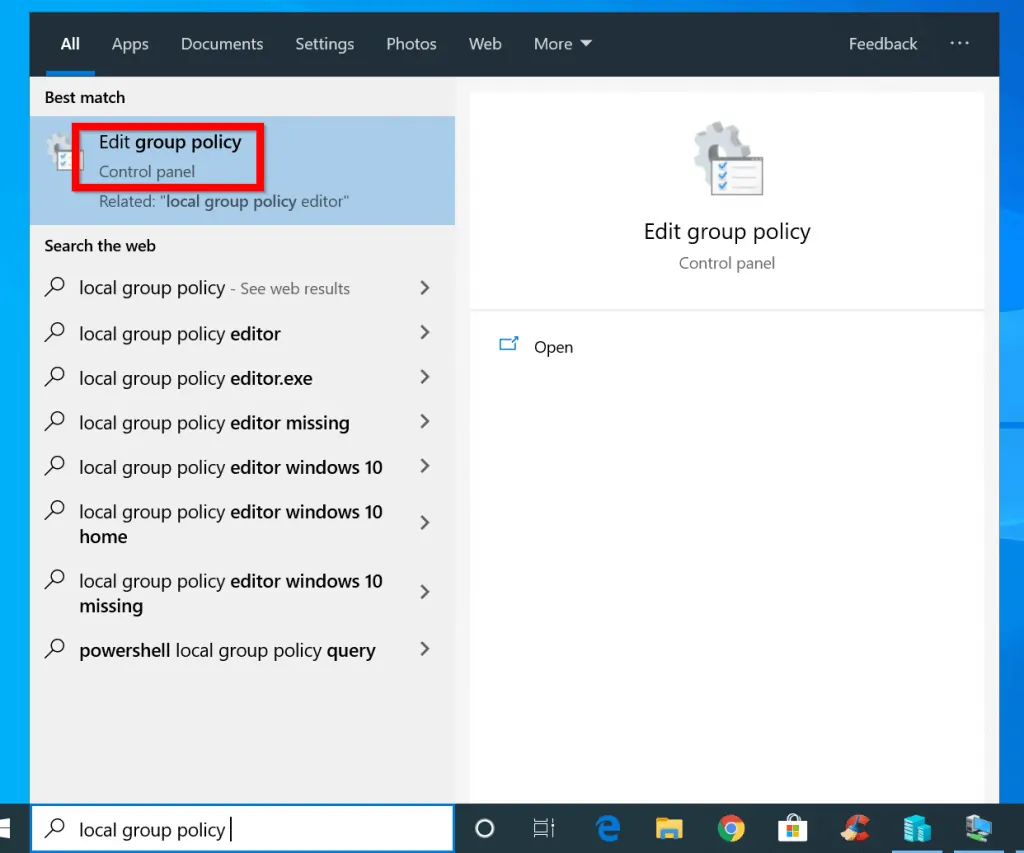
- Type local group policy in the search bar. Then select Edit group policy.
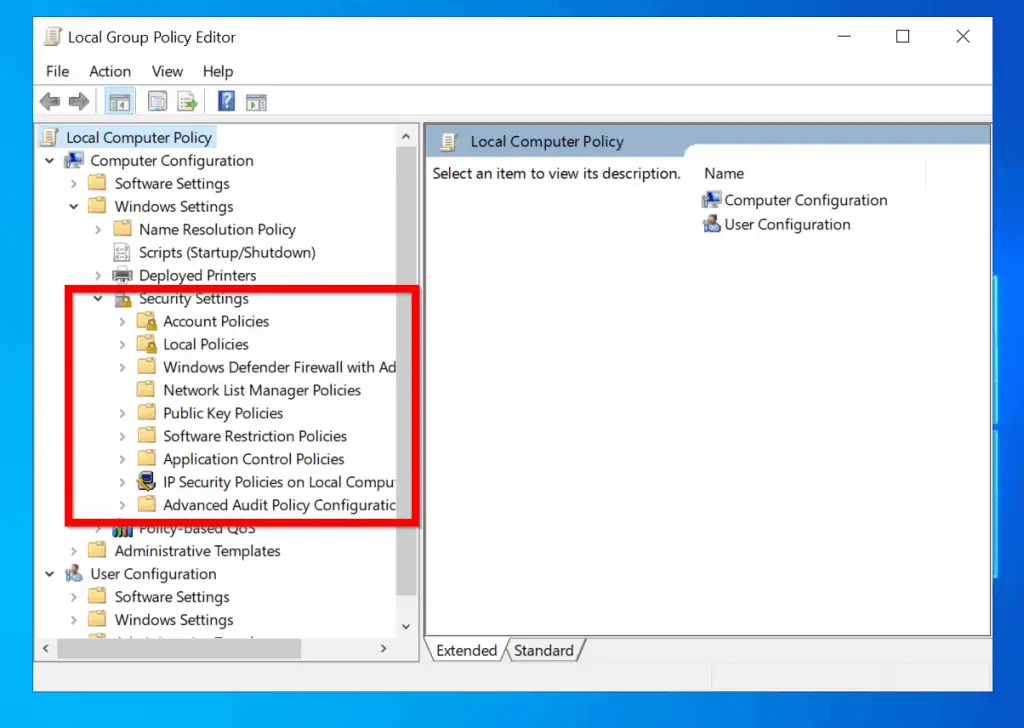
- At Local Group Policy Editor, expand Windows Settings on the Computer Configuration section. Then expand Security Settings. You can configure your Local Security Policies from the highlighted section of the image below..
Option 3: Access Local Security Policy from the Run Command
Another easy way to access local security policy is via Run Command. Here are the detailed steps:
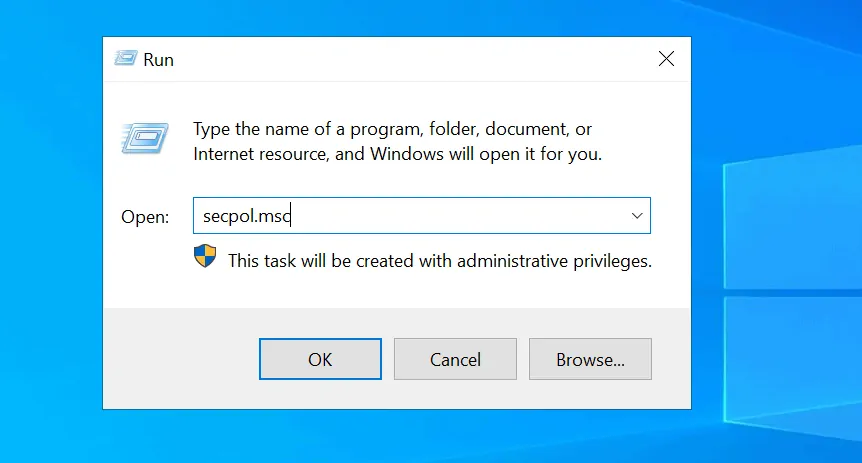
- Click the Windows logo and R keys to open the Run command box.
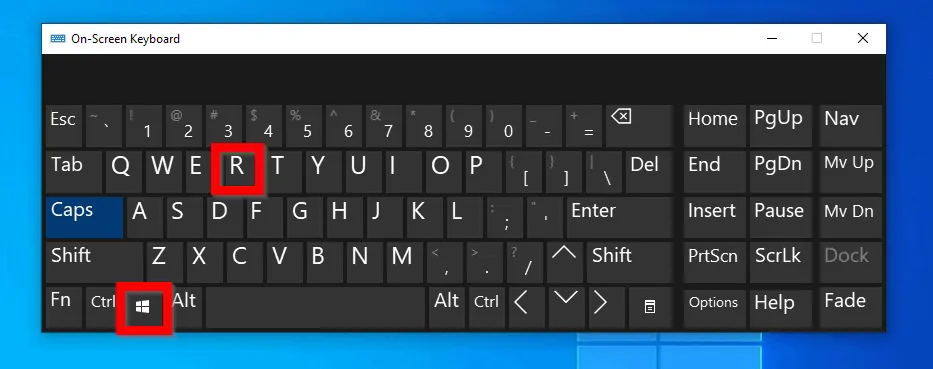
- Then, at the Run command, type secpol.msc and click OK.
Option 4: Access Local Security Policy from the Command Prompt
This method is very similar to the Run command method. Here are the steps:
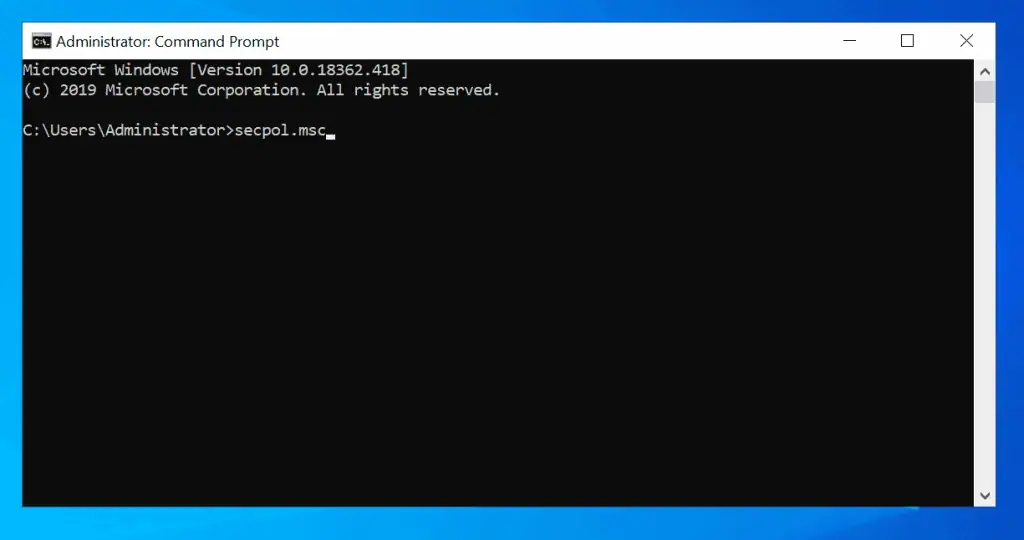
- Type command prompt in the search bar. Then click Command Prompt in the search results.

- At the command prompt, type the command below. Then press enter the command below and press the enter key on your keyboard.
secpol.msc
Option 5: Open Local Security Policy from the Control Panel
You can also access security policy from Administrative Tools via Control Panel. The steps are detailed below:
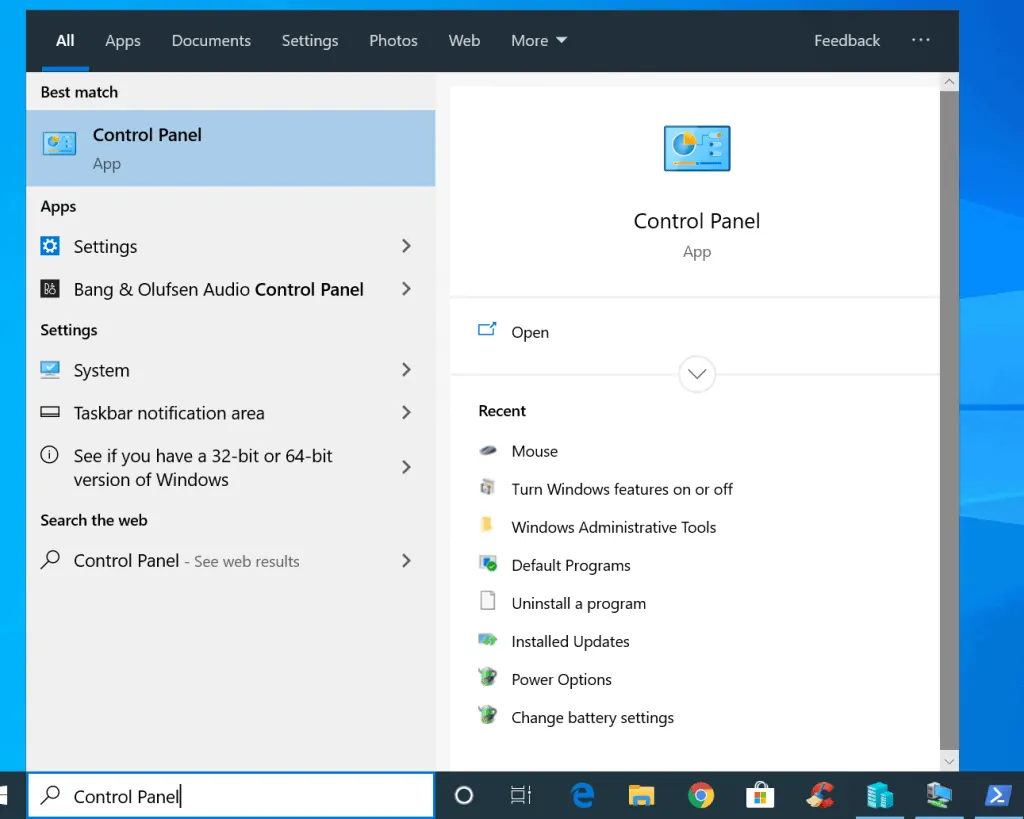
- Type Control Panel into Windows 10 search. Then click Control Panel from the search results.
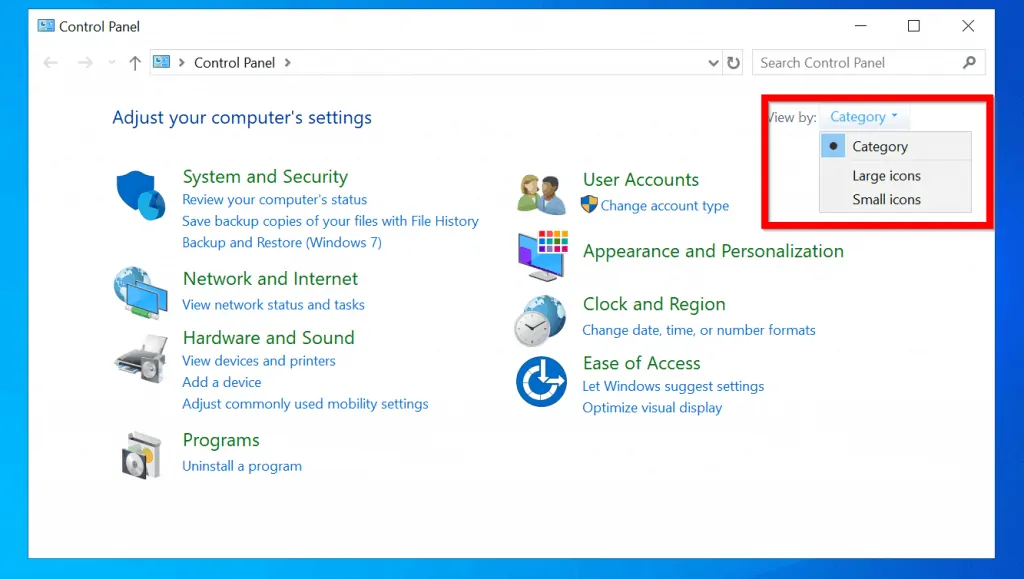
- When Control Panel opens, click the View by drop-down. Then select Large icons.
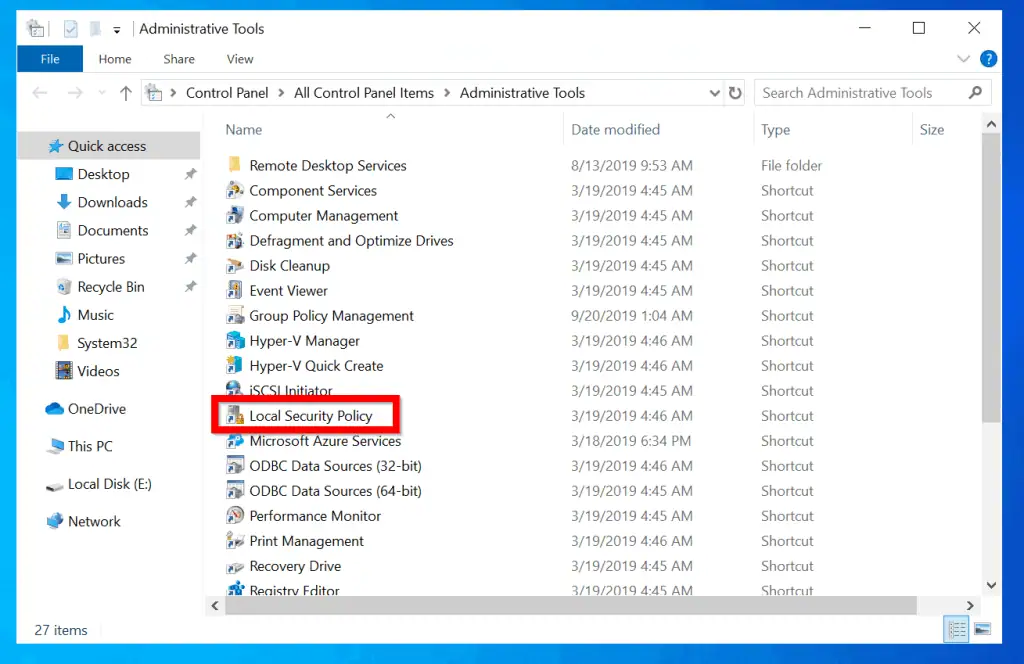
- At the modified Control Panel view, click Administrative Tools. It will open in a new Window.
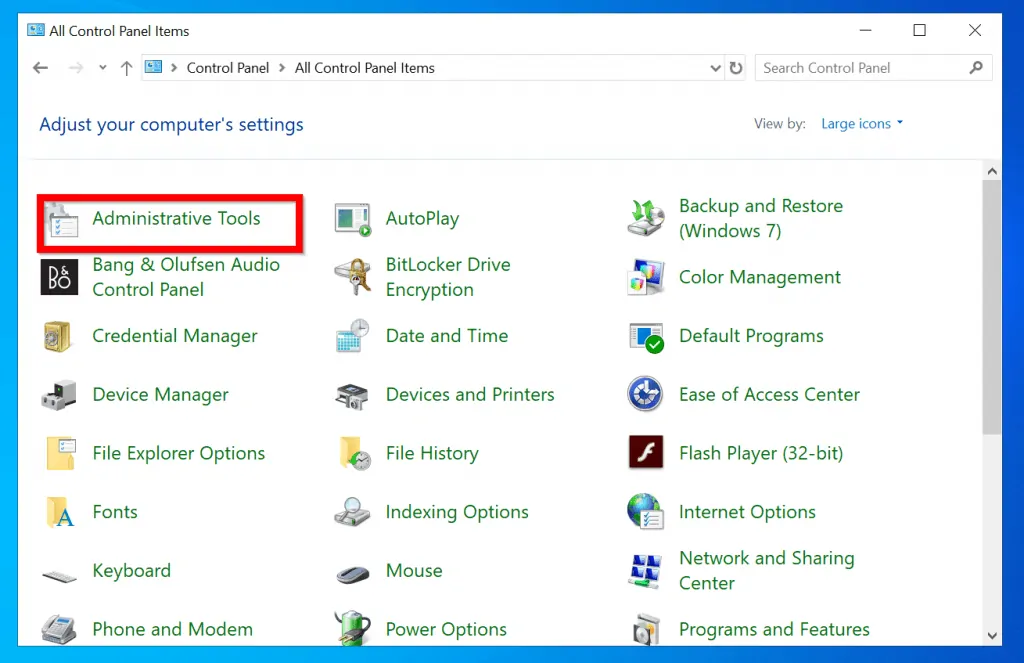
- Finally, to open the local security policy in Windows 10, click Local Security Policy.
Frequently Asked Questions
Yes. Windows 10 and Windows 11 have the Local Security Policy. However, the Home edition of Windows Operating Systems does not have this security snap-in
The reason your Windows 10 or Windows 11 computer does not have the Local Security Policy is likely that you’re running the Home edition of these operating systems.
The Local Security Policy snap-in contains policies that allow you to tighten the security and access of your Windows computer.
The easiest way to open the Local Security Policy is to search for it. You can search Local Security Policy in Windows 10 or Windows 11.
The primary difference between Local Security Policy (LSP) and Group Policy is that LSP is created on a local computer, and the policies apply to the local computer. On the contrary, Group Policy is created on a Domain Controller, and the policies apply to all domain-joined computers that meet the GPO criteria.
Another difference is that Group Policies take precedence over Local Security Policies. So, if you create a local policy and a network administrator creates Group Policies, the network policies will be applied, and the local policies will be ignored.
Conclusion
The Local Security Policy is a set of policies local Windows PC administrators can use to strengthen the security of the local computer.
Local administrators can create these policies using the Local Security Policy snap-in. These policies are applied to the local computer and to all users who sign in to the local computer.
However, if the computer belongs to a Windows domain, policies (Group Policies) that network administrators apply override local policies.
I hope I have been able to explain this Windows feature and made it easy for you to understand. If I did a good job, click on “Yes” beside the “Was this page helpful” question below.
You may also express your thoughts and opinions by using the “Leave a Comment” form at the bottom of this page.
Finally, you may read more Windows articles via one of these links – Windows 11 How-To Guides, Windows 10 How-To Guides – Over 500 Guides


I did exactly what you said on my coputer it doesnt show local security policy
Nice one! I like what you are doing bro. Leye-CWG