

iTechGuides is reader-supported. When you buy through links on our site, we may earn an affiliate commission. As an Amazon Associate I earn from qualifying purchases. Learn more
Do you want to host a Webex meeting or join one but are not exactly sure how to proceed? In this Itechguide, Victor teaches you how to use Webex.
Option 1: Use Webex to Schedule and Start a Meeting
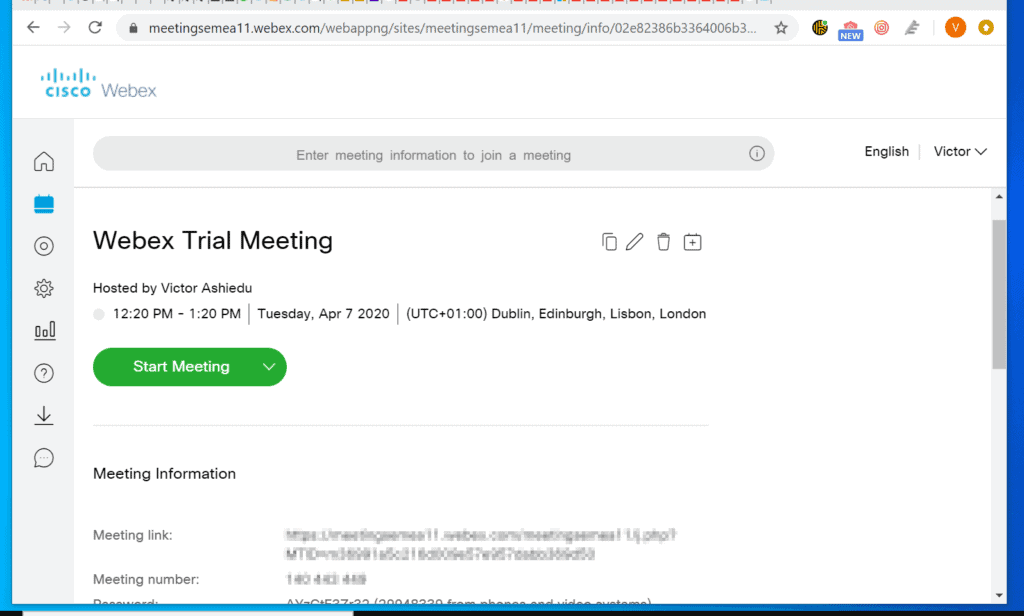
This section has 2 sub-sections – how to schedule a meeting and how to start the meeting.
1. Schedule a Webex Meeting
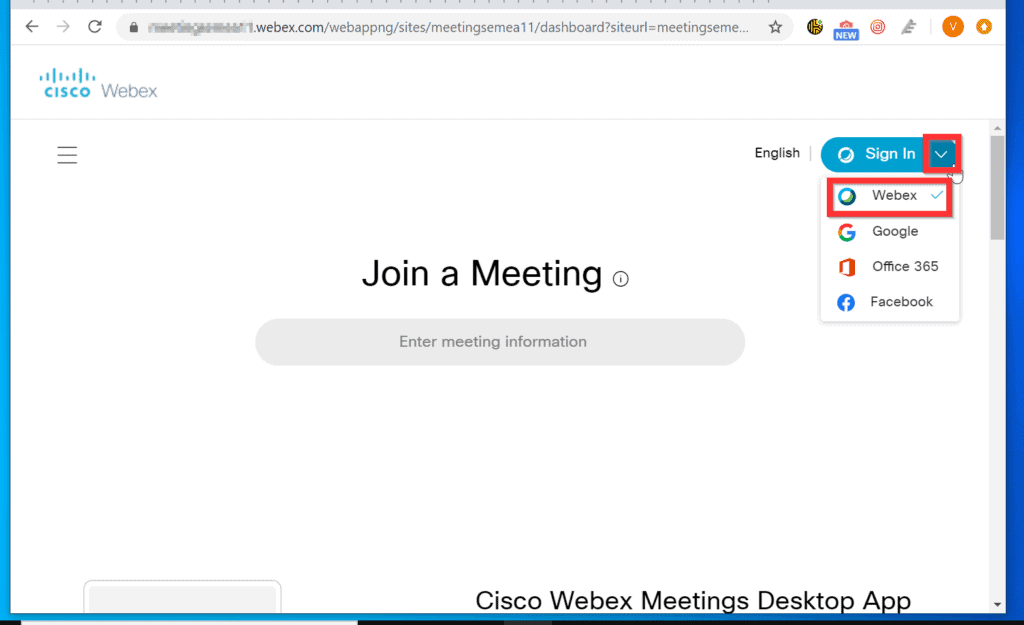
- Open your Webex page – usually in the format meetingsxxxxxx.webex.com. Then, log in with your email address and password – on the top right of the screen, hover over Sign in and select Webex.
- Once you are signed in to your account, click Schedule.
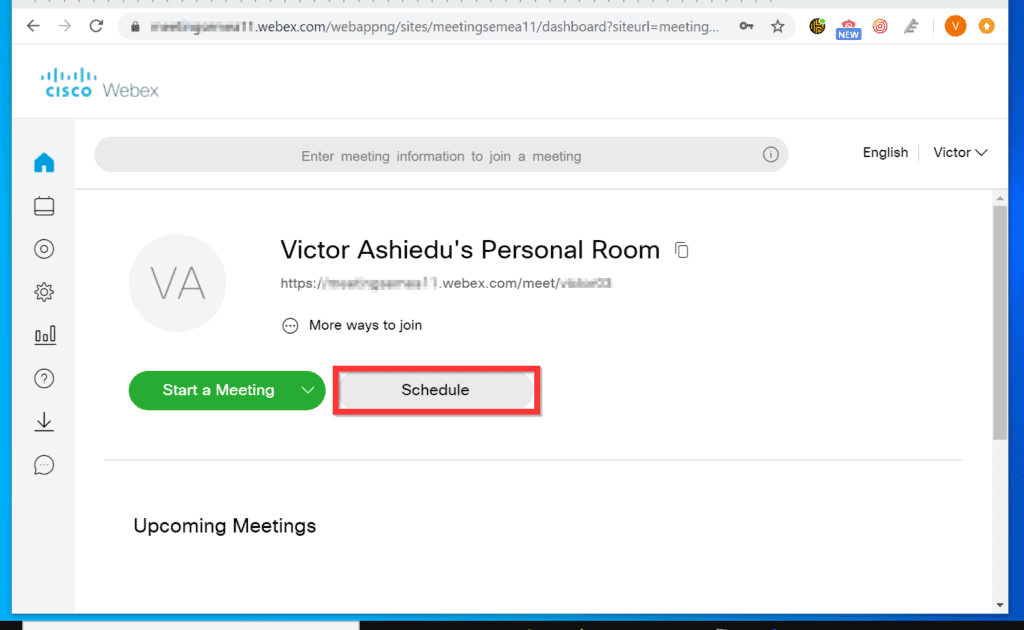
- On the Schedule a Meeting screen, enter a name for your meeting. A meeting password will be auto-generated – you can change it if you want to.

- Then, to set a date for your Webex meeting, click the Date and time drop-down.
- When the date and time picker opens, select a meeting date and time. Also select am or pm and meeting duration. When you finish, click Done.
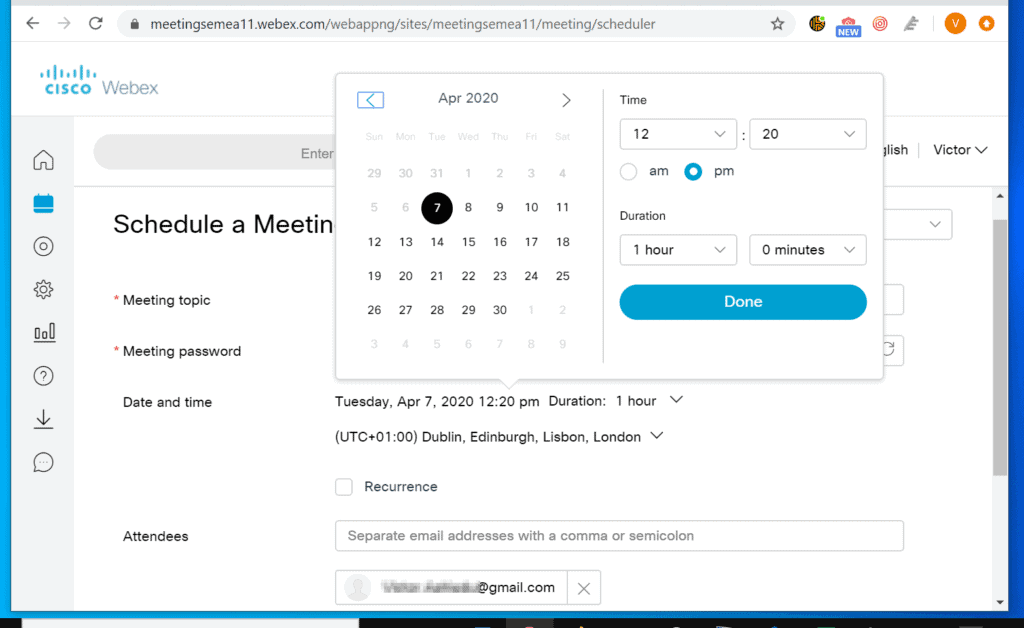
- Finally, on the Attendees field, enter the email address of each person you want to invite, separated by commas. The emails of the attendees will be displayed beneath the Attendees field.
- When you finish, to use Webex to schedule a meeting, on the bottom left of the page, click Schedule.
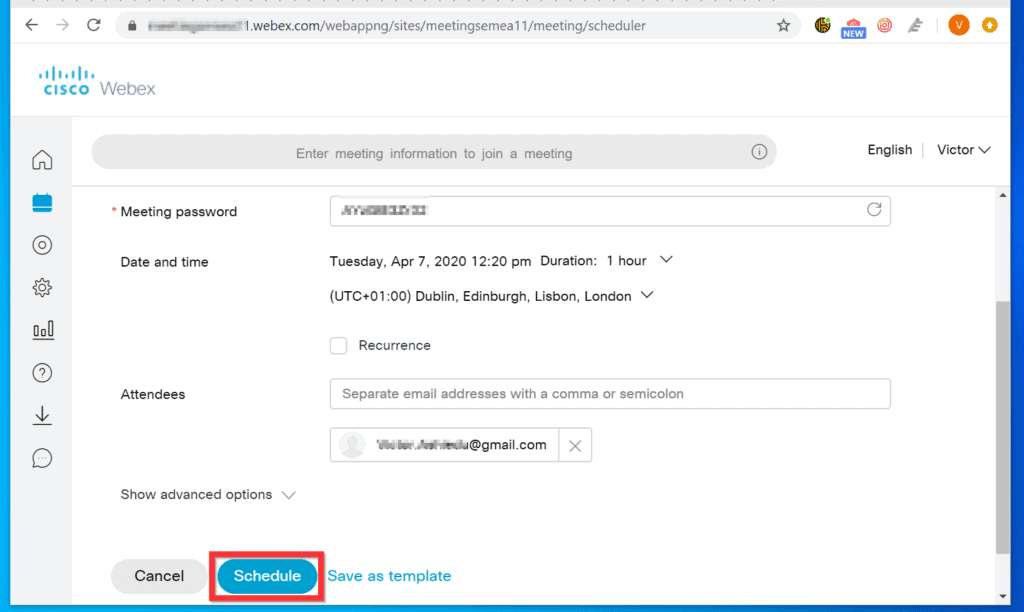
- The meeting details will now be displayed on your dashboard.
2. Start a Webex Meeting
- When it is time to start the meeting, login to your account. Then, beneath the meeting you want to start, click Start Meeting. A pop-up will be displayed.
- On the pop-up window, click Open Cisco Webex Meeting.

- The meeting window will open and activate the Webcam on your PC (if you have one). To turn the webcam video off, click the video icon.
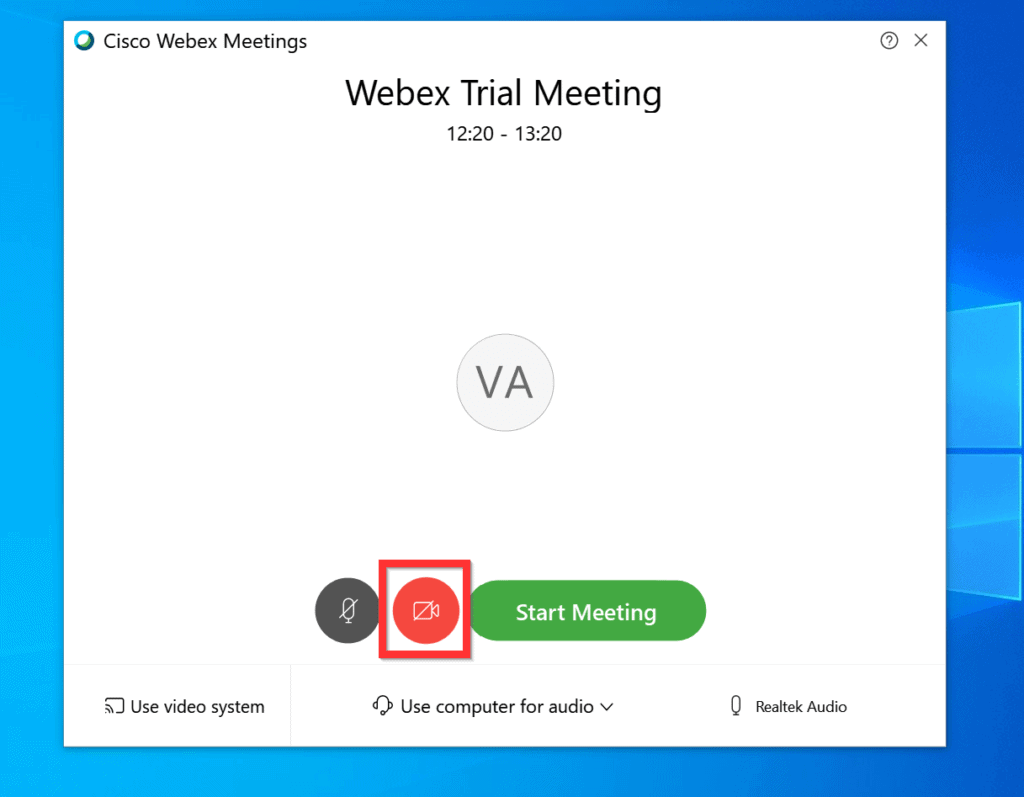
- Finally, to start the Webex meeting, click the Start Meeting button.

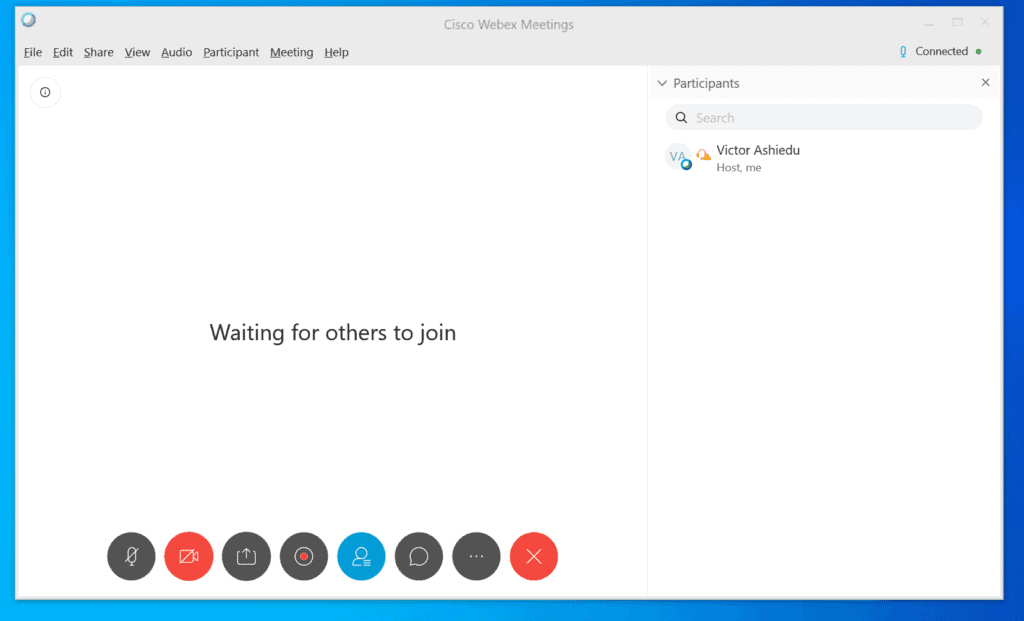
- The meeting will start and wait for others to join.
Option 2: Use Webex to Join a Meeting
There are other ways to join a Webex meeting but the 2 most common are to initiate the meeting from the email you received or the mobile Apps for Android or iPhone.
The Tool Desk
Outbyte PC Repair FREERepair Windows errors before they cause bigger problemsFix Now →Outbyte Driver Updater FREEScan for outdated or missing drivers - takes under a minuteDriver Scan →This section covers steps to join a meeting with these 2 methods.
Popular on Amazon
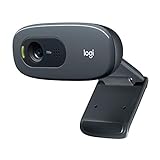
- Compatible with Nintendo Switch 2’s new GameChat mode
- Crisp HD 720p/30 fps video calls with diagonal 55° field of view and auto light correction. Compatible with popular platforms including Skype and Zoom.
- The built-in noise-reducing mic makes sure your voice comes across clearly up to 1.5 meters away, even if you’re in busy surroundings.
- C270’s RightLight 2 feature adjusts to lighting conditions, producing brighter, contrasted images to help you look good in all your conference calls.
- The adjustable universal clip lets you attach the camera securely to your screen or laptop, or fold the clip and set the webcam on a shelf. You’re always ready for your next video call.
Method 1: Join a Meeting from Email Invite on a PC
- Open the email the meeting invite was sent to. Then, scroll down and click Join meeting.

- The meeting details will open on a new browser window. Then, it will download a small software. Save the software to a folder on your PC.
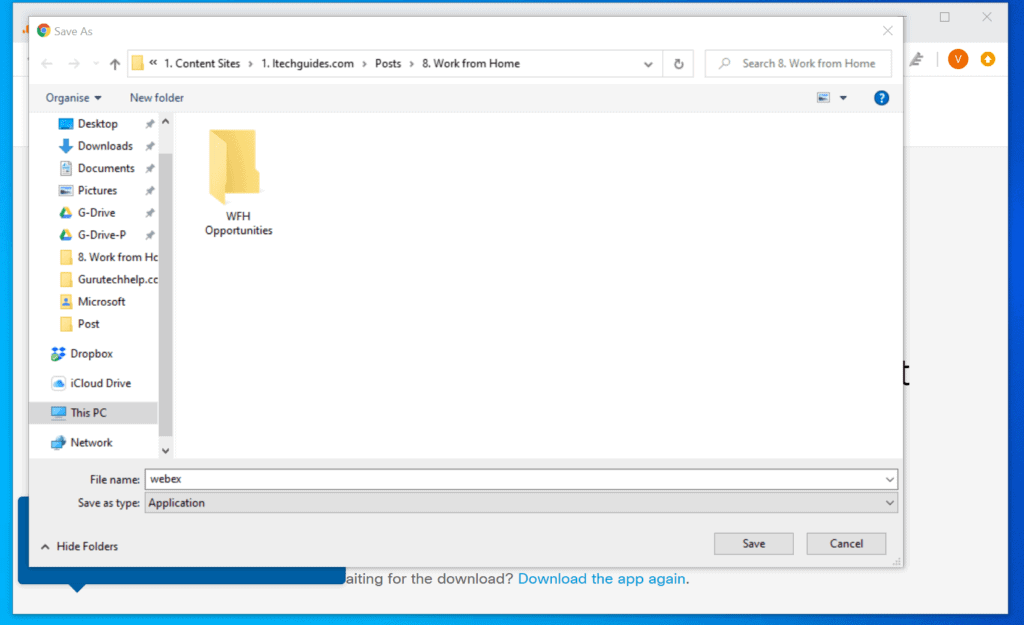
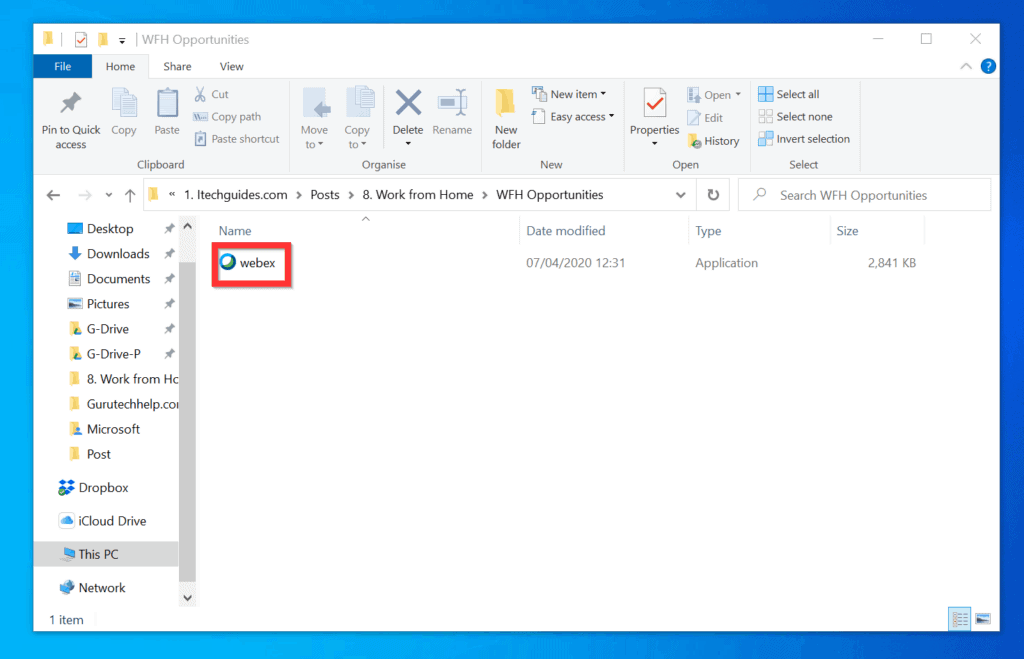
- Then, open the folder you saved the Webex application and double-click it.
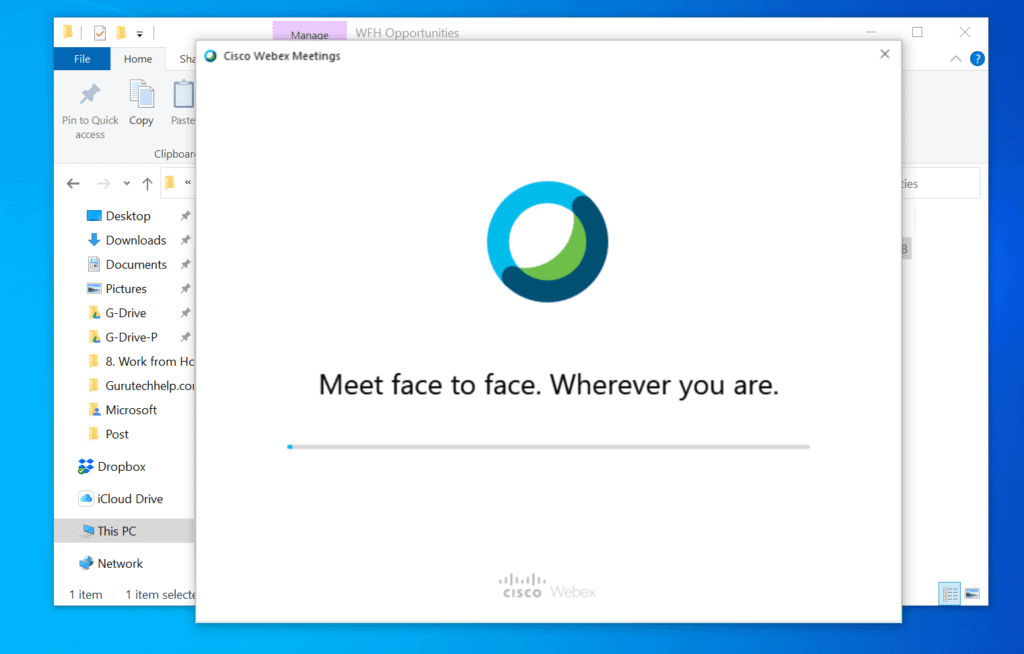
- Wait for the meeting to connect.
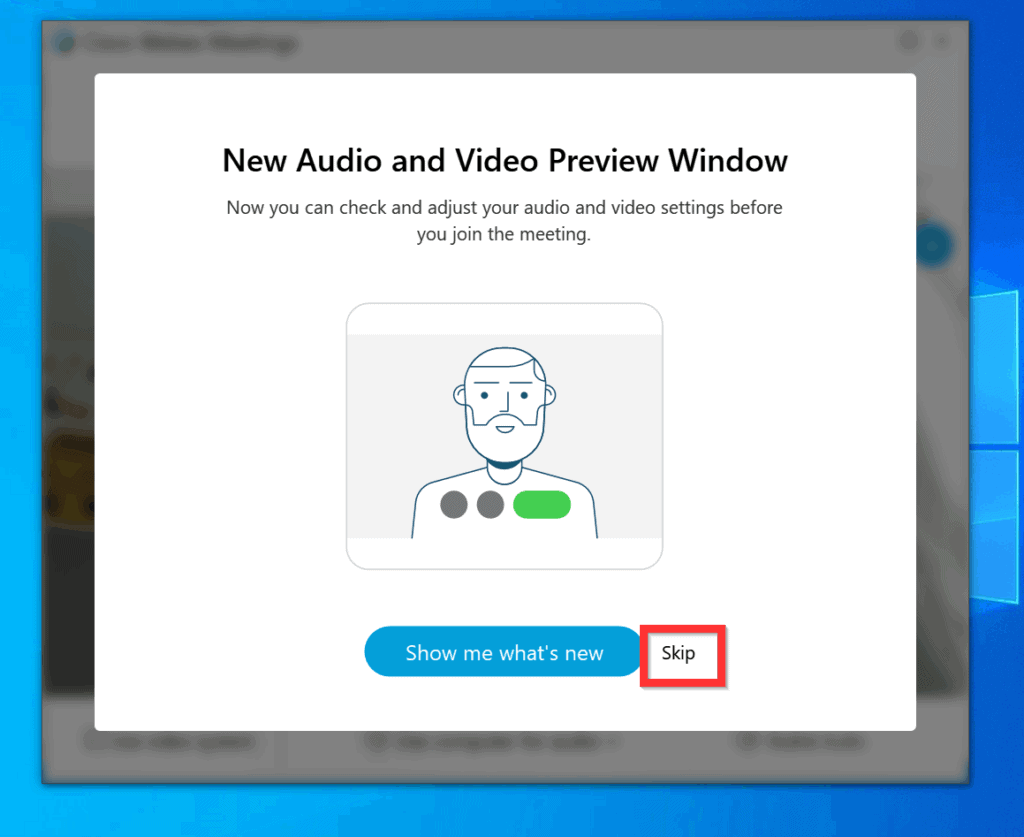
- When the meeting starts, if it is your first time joining a Webex meeting, you may receive a screen like the one below. Click Skip.
- When the Webex meeting window opens, it will activate the Webcam on your PC (if you have one).
- To disable the video, click the video icon. Finally, click Join Meeting.
Method 2: Join a Meeting from the Webex App
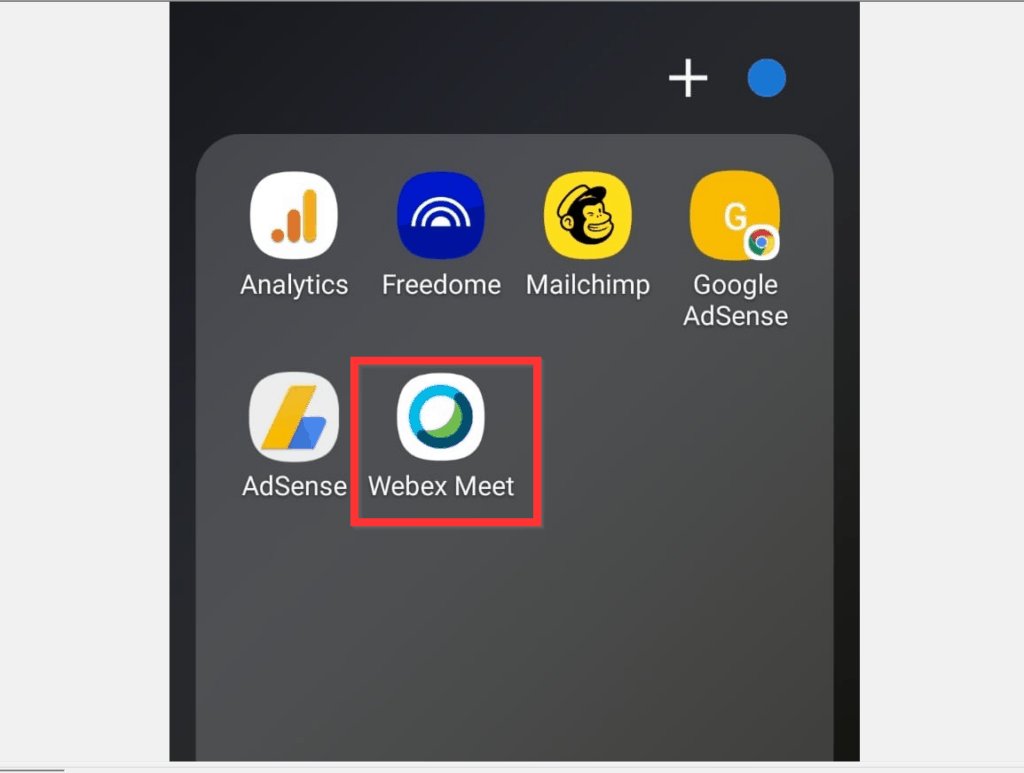
- Open the Webex Meet app on your phone.
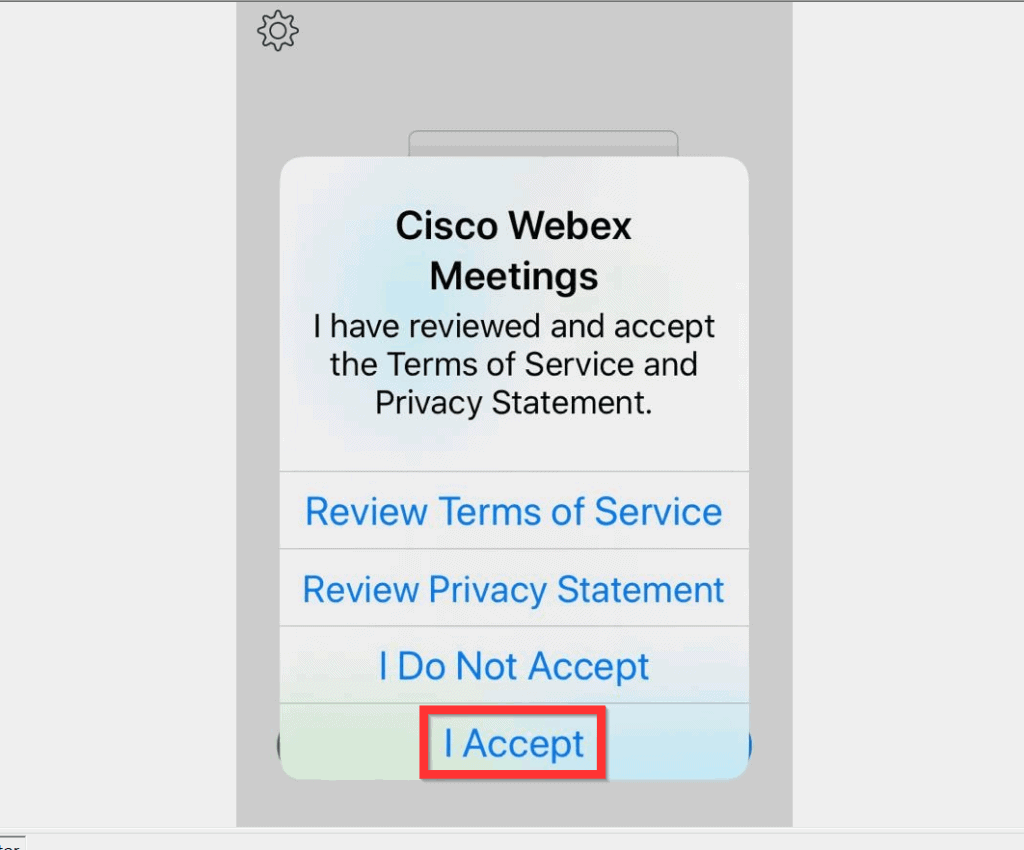
- If it is the first time you are opening the app, it will display the license agreement screen. To proceed, accept the license agreement.
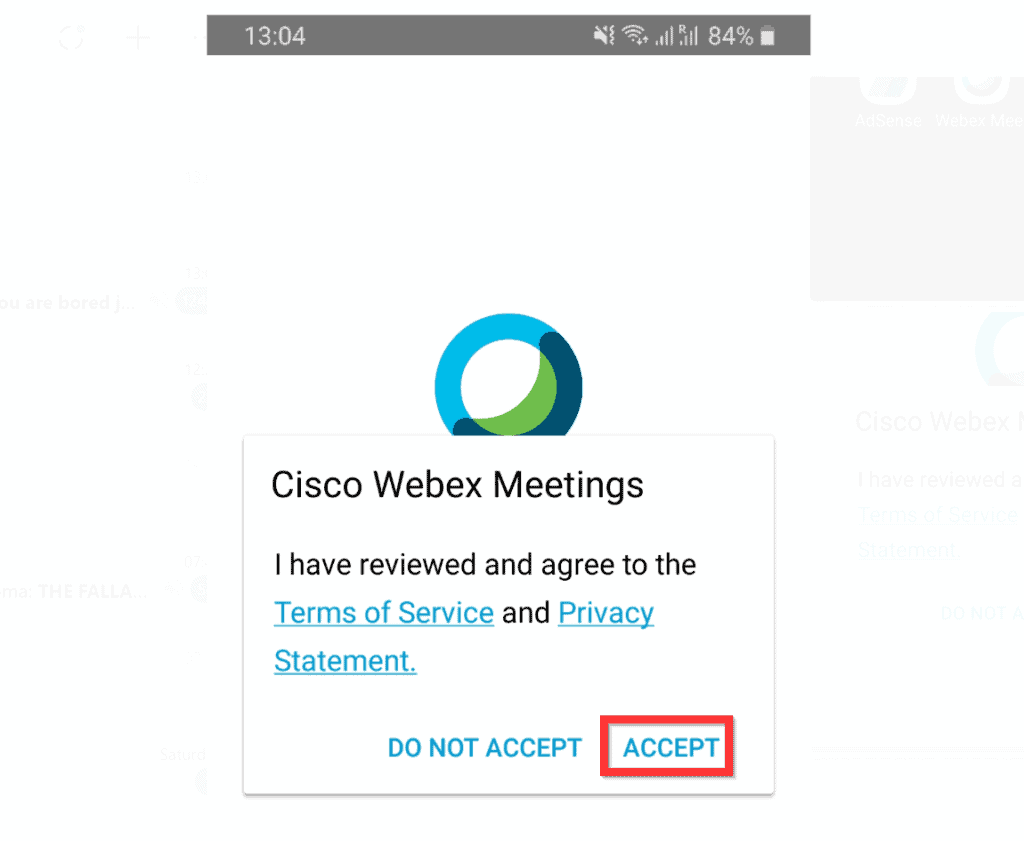
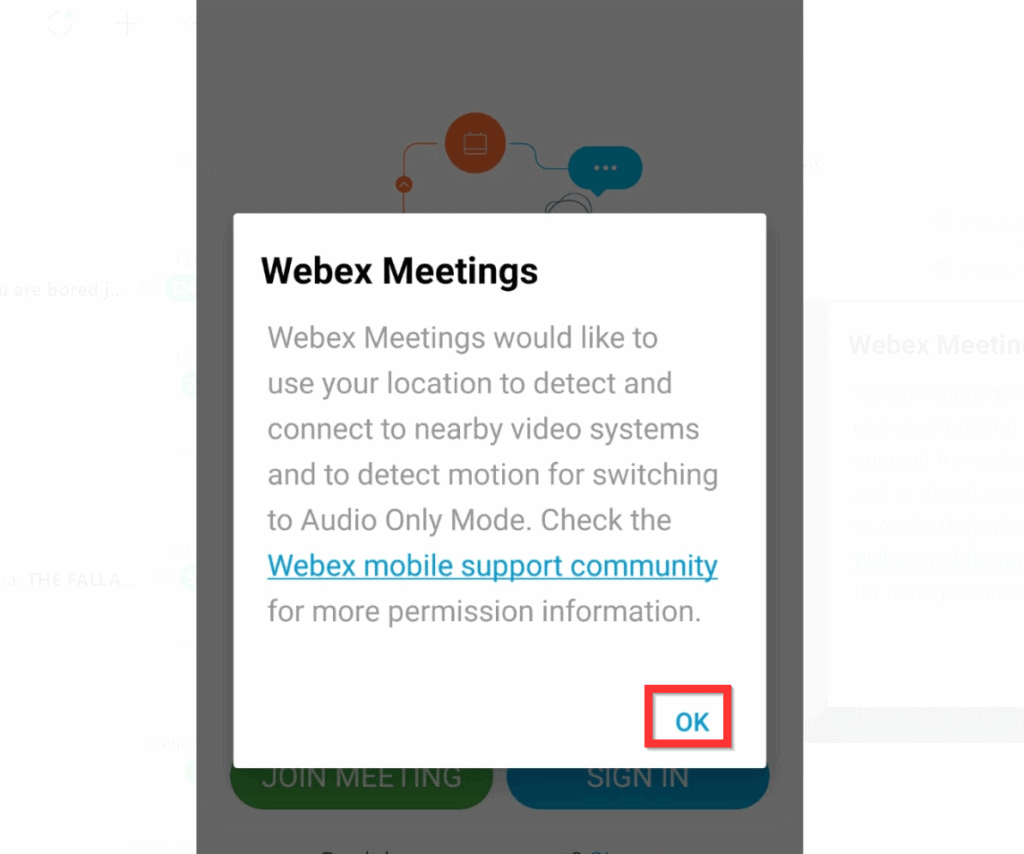
- If you use the Android app, it may display the screen like the one shown below – tap OK. The iPhone app may not display this.
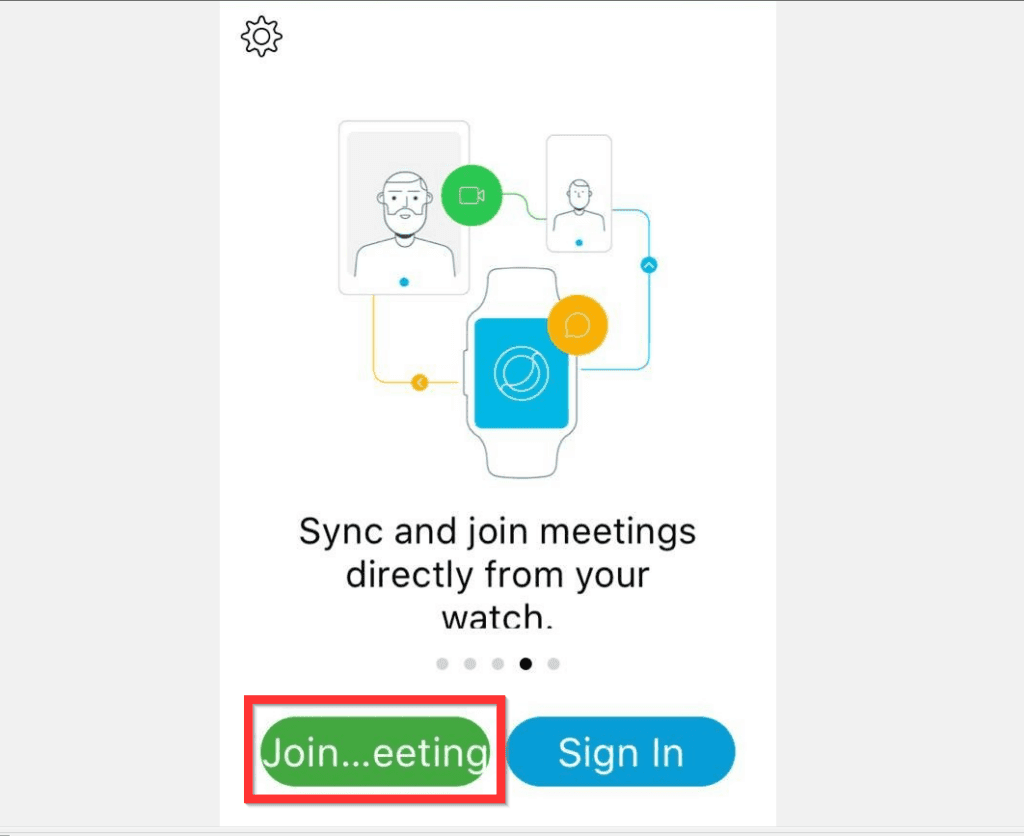
- On the bottom left of the app, tap Join Meeting.
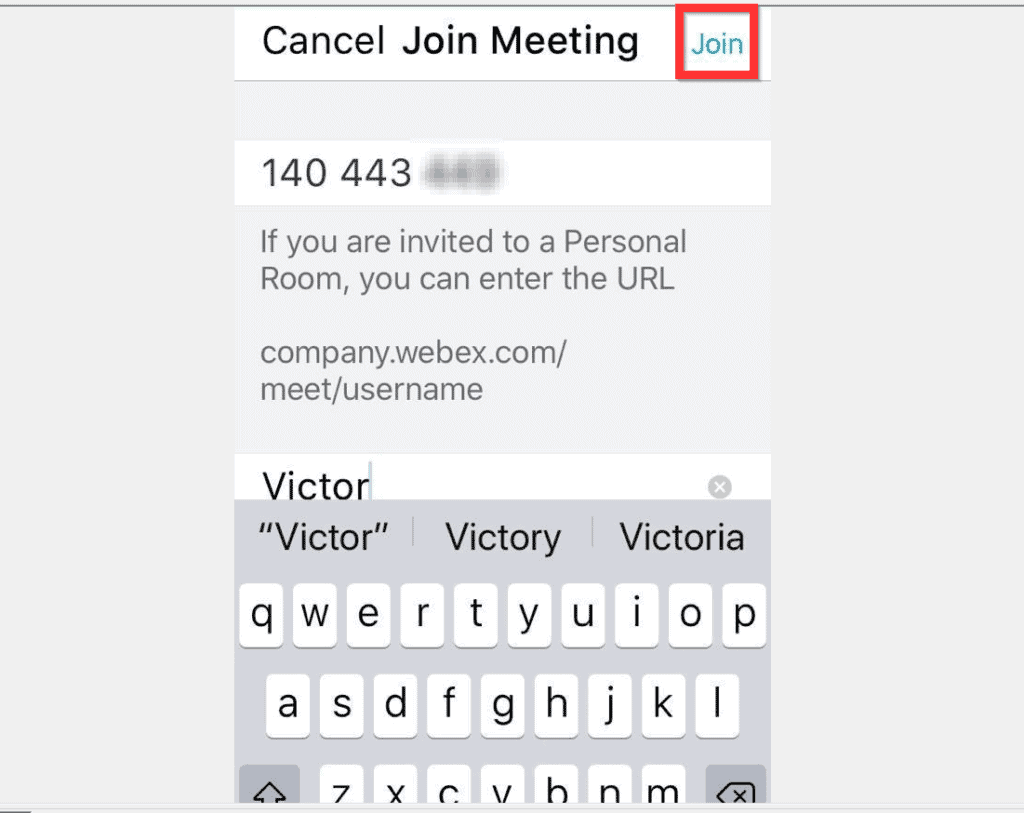
- Then, on the next screen enter the meeting number. Get the meeting number from the email you received from the Webex host.
- You are also required to enter your name and email – finally, on the top right of the app, tap Join.
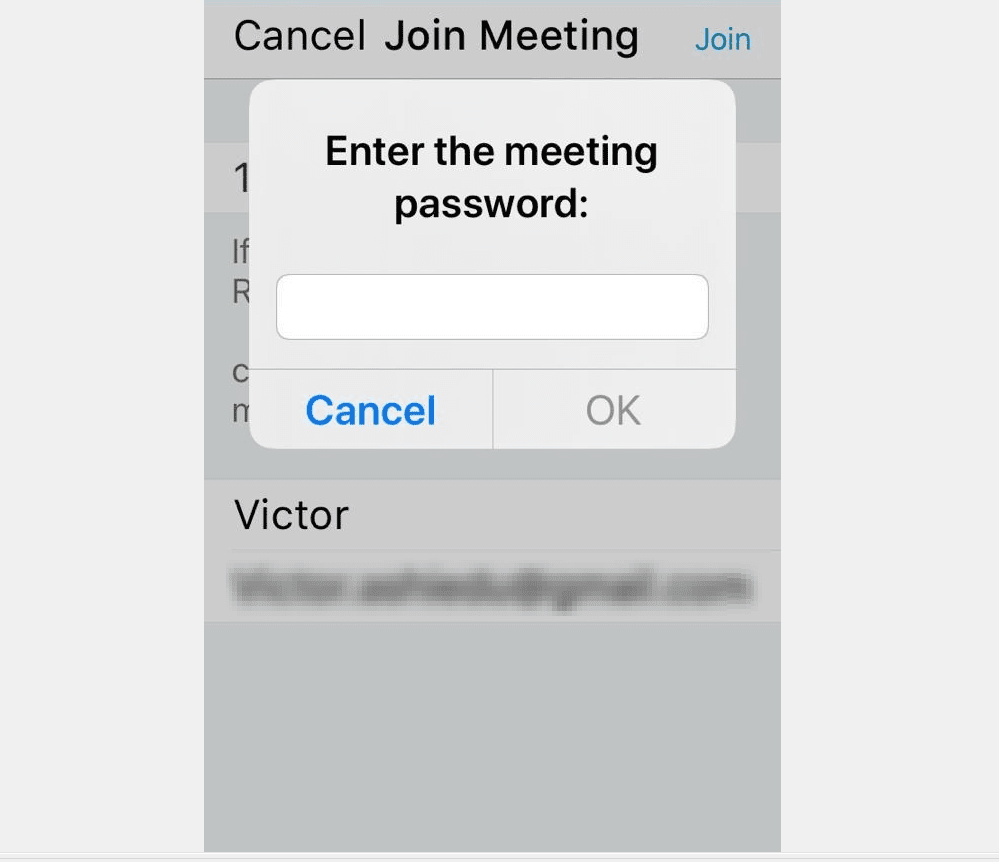
- On the Enter the meeting password screen, enter the meeting password (found on the meeting invite email). When you finish entering the password, click OK.
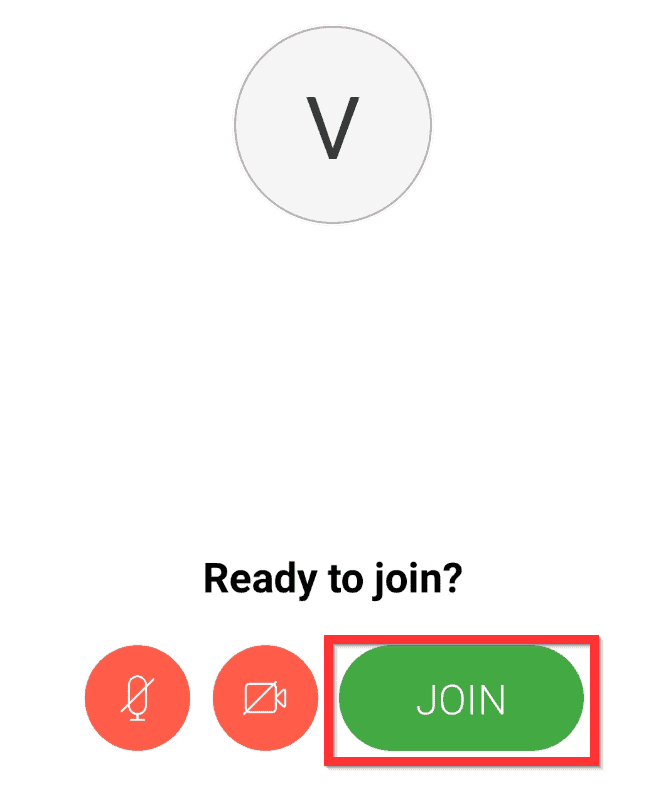
- Finally, click Join.
As you can see, it is very easy to use Webex to schedule, start or join a meeting!
I hope you found this article helpful. If you did, click on “Yes” beside the “Was this page helpful” question below.
Also popular on Amazon

- Compatible with Nintendo Switch 2’s new GameChat mode
- Auto-Light Balance: RightLight boosts brightness by up to 50%, reducing shadows so you look your best—compared to previous-generation Logitech webcams (1)
- Privacy with a Slide: The integrated webcam cover makes it easy to get total, reliable privacy when you're not on a video call
- Built-In Mic: The built-in microphone lets others hear you clearly during video calls
- Easy Plug-And-Play: The Brio 101 works with most video calling platforms, including Microsoft Teams, Zoom and Google Meet—no hassle; it just works
You may also express your thoughts and opinions by using the “Leave a Comment” form at the bottom of this page.
Do these 3 things before closing this tab:
1Fix the driver behind crashes, sound loss and screen glitches2Repair Windows errors before they cause bigger problems3Scan for outdated or missing drivers - takes under a minuteFinally, for more Work from Home Itechguides, visit our Work from Home page.
Quick Recap
Also popular on Amazon
- 1131
- 132
- 24343
- 3535
- 35435
Also popular on Amazon

- 1080P Webcam with Cover for Video Calls - EMEET computer webcam provides design and Optimization for professional video streaming. Realistic 1920 x 1080p video, 5-layer anti-glare lens, providing smooth video. C960 computer camera delivers 1920x1080 video with fixed focus (11.8–118.1 inches), so as to provide a clearer image. C960 USB webcam has a cover and can be removed automatically to meet your needs for privacy. For optimal image performance, use the webcam in a well-lit environment.
- Built-in 2 Omnidirectional Mics - EMEET webcam with microphone for desktop features 2 built-in omnidirectional microphones, picking up your voice to create clear audio for communication. When installing the webcam, select EMEET C960 as the default microphone input device in your computer and video applications and select C960 as the default device in Zoom/Teams and ensure microphone permissions are enabled for proper use. Please note that C960 does not include built-in speakers.
- Automatic Light Adjustment - Automatic exposure adjustment is applied in EMEET HD webcam 1080p so that the streaming webcam can deliver stable image performance. EMEET C960 camera for computer also features color adjustment and exposure optimization to help you look your best. For optimal video quality, it is recommended to use the webcam in normal or well-lit environments and select suitable video settings in your application. Proper lighting helps achieve a clearer and more balanced image.
- Plug-and-Play & Upgraded USB Connectivity - New C960 webcam features both USB Type-A & A-to-C adapter connections for wider compatibility. For stable performance, connect the webcam directly to the computer's main USB port and ensure the device is recognized correctly. If a hub or docking station is used, please ensure it provides sufficient power and stable data transmission, as limited ports may affect performance. 90° wide-angle lens captures more participants without frequent adjustments.
- High Compatibility & Multi Application - C960 webcam for laptop is compatible with Windows 10/11, macOS 10.14+, and Android TV 7.0+. Not supported: Windows Hello, TVs, tablets, or game consoles. It works with Zoom, Teams, Facetime, Google Meet, YouTube and more. Please select C960 webcam as the default camera and microphone device in your application and ensure camera/microphone permissions are enabled, especially on macOS. (Tips: Incompatible with Windows Hello)
Product prices and availability are accurate as of the date/time indicated and are subject to change. Any price and availability information displayed on Amazon at the time of purchase will apply.
Independent reader supportYour contribution helps us test, update, and keep practical guides available for everyone.




I’m impressed, I have to admit. Seldom do I come across a blog that’s both educative
and amusing, and let me tell you, you’ve hit the nail on the head.
The issue is something that too few folks are speaking intelligently about.
I’m very happy I found this during my hunt for something
regarding this.