Do you want to turn off the auto-save feature in WordPress but don’t know how? You should read this guide, as it features multiple ways to do that.
Option 1: Disable Autosave Using a Plugin
A major way to disable the auto-save feature in WordPress is by using a plugin. Although there are various plugins that can do that, we will focus on the Disable Gutenberg Autosave plugin for this article.
This free plugin automatically turns off the auto-save feature in WordPress as soon as it is activated. Thus, follow the procedures below to learn how to install and enable the plugin in WordPress.
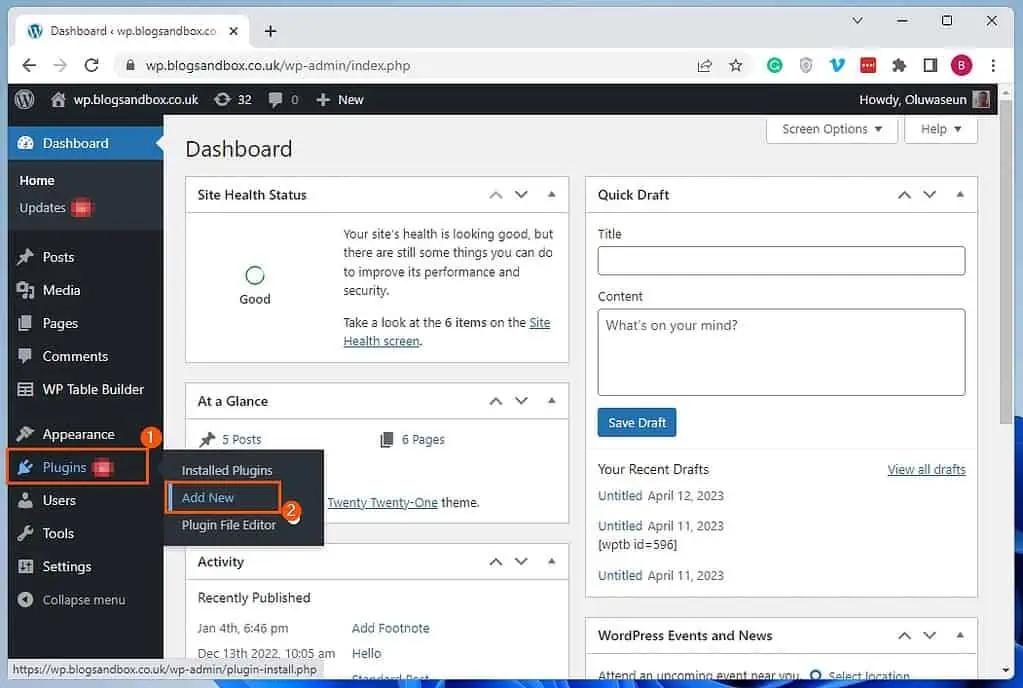
- Access the backend of your WordPress site as an administrator. Now, place your mouse cursor on Plugins on the left pane, then left-click Add New from the options that appear.
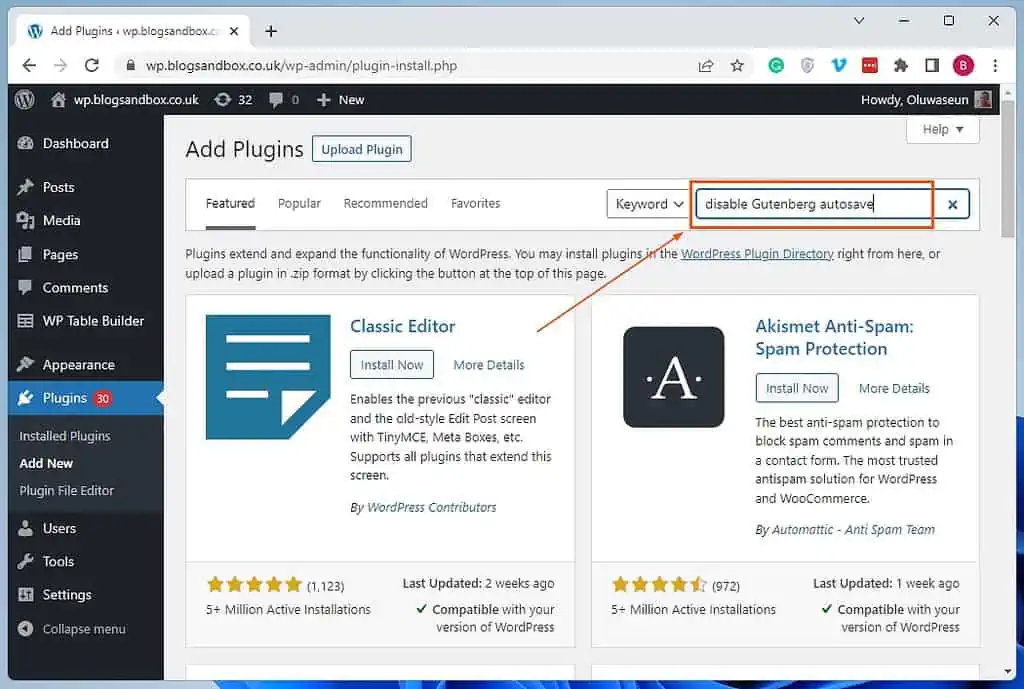
- On the Add Plugins page, type “disable Gutenberg autosave” in the search field.
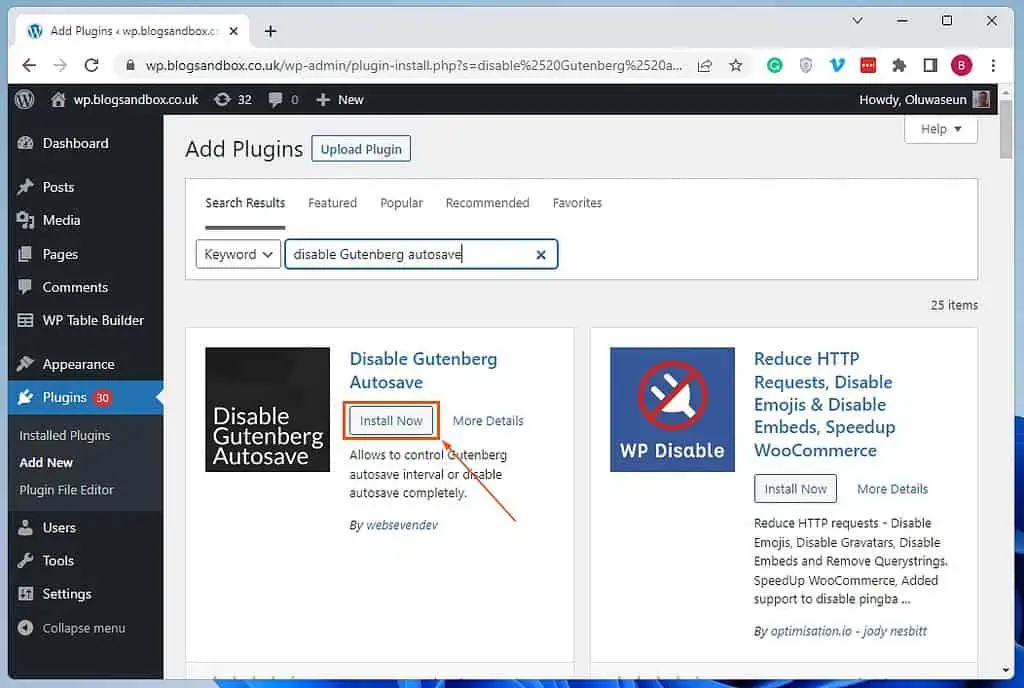
- Then, left-click the Install Now button on the Disable Gutenberg Autosave plugin from the search results.
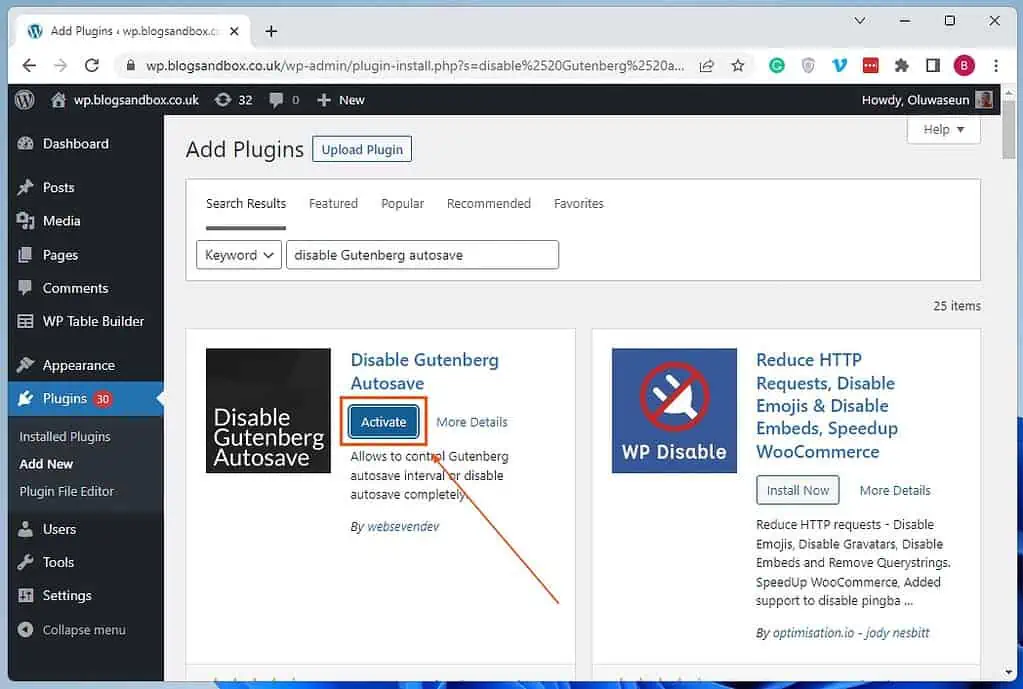
- After installing the plugin, click the Activate button. Consequently, the auto-save feature in WordPress should be automatically disabled.
Interestingly, this plugin not only disables the auto-save feature but also allows you to change the autosave interval. Basically, the plugin enables you to set a different time interval at which WordPress automatically saves a page/post.
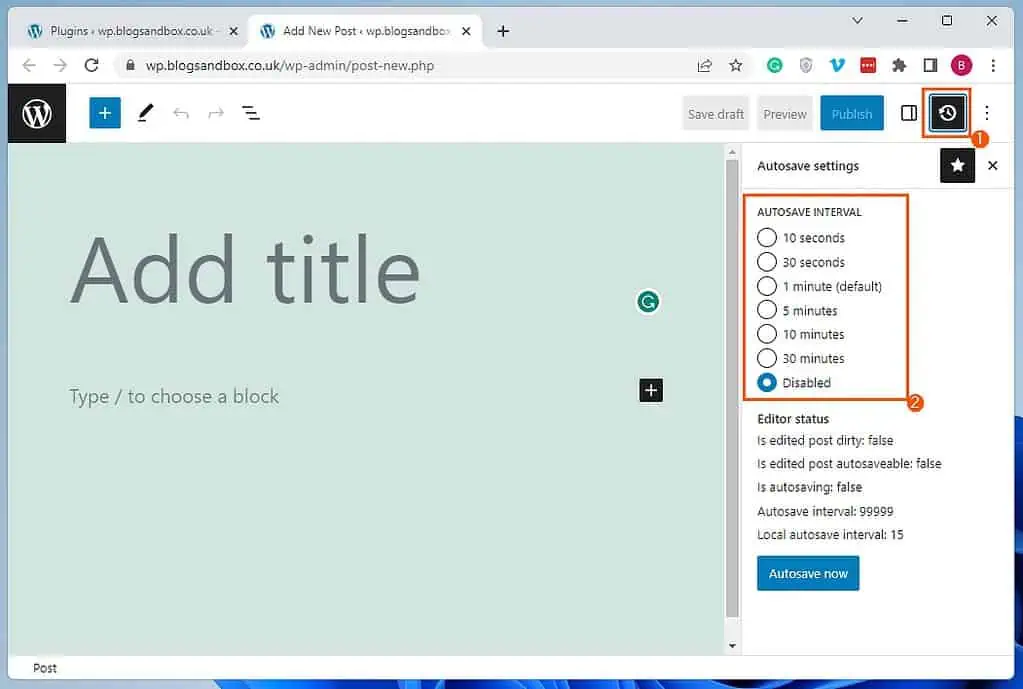
This feature can come in handy if you don’t wish to completely disable the auto-save feature in WordPress. Well, to change the autosave interval using the plugin, open the WordPress Gutenberg block editor – it can be a page or post.
Then, click the Autosave Settings icon at the top right corner of the page/post. Finally, select a preferred autosave interval from the options that appear.
Option 2: Deactivate Autosave Using Code
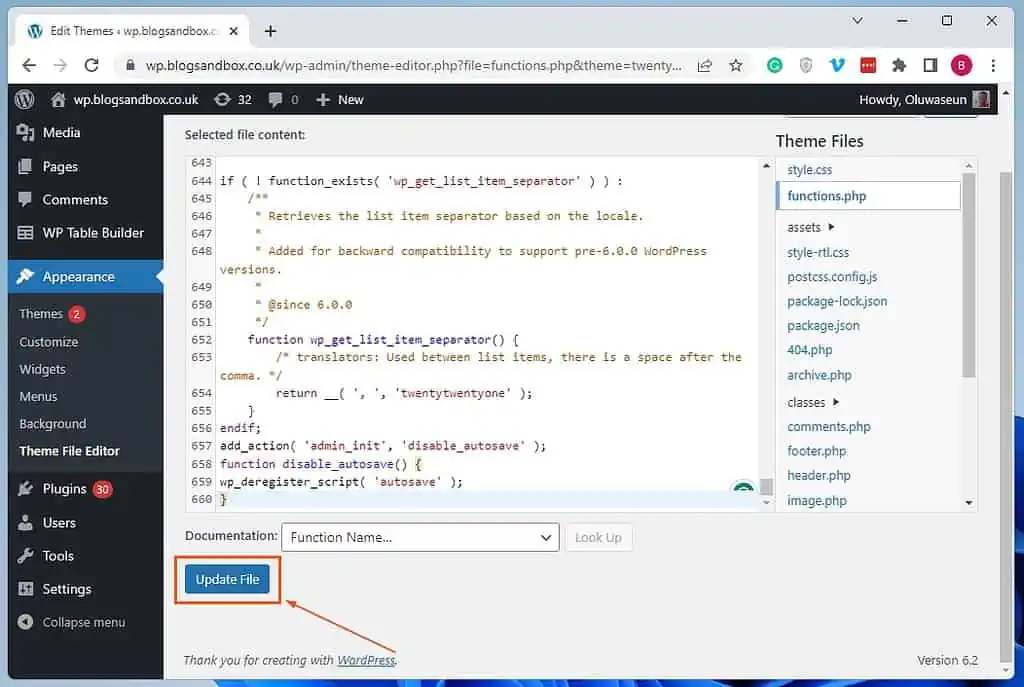
Another way to disable the autosave feature in WordPress is by adding a certain code to your theme’s functions.php file. To do that, observe the subsequent procedures and screenshot images below.
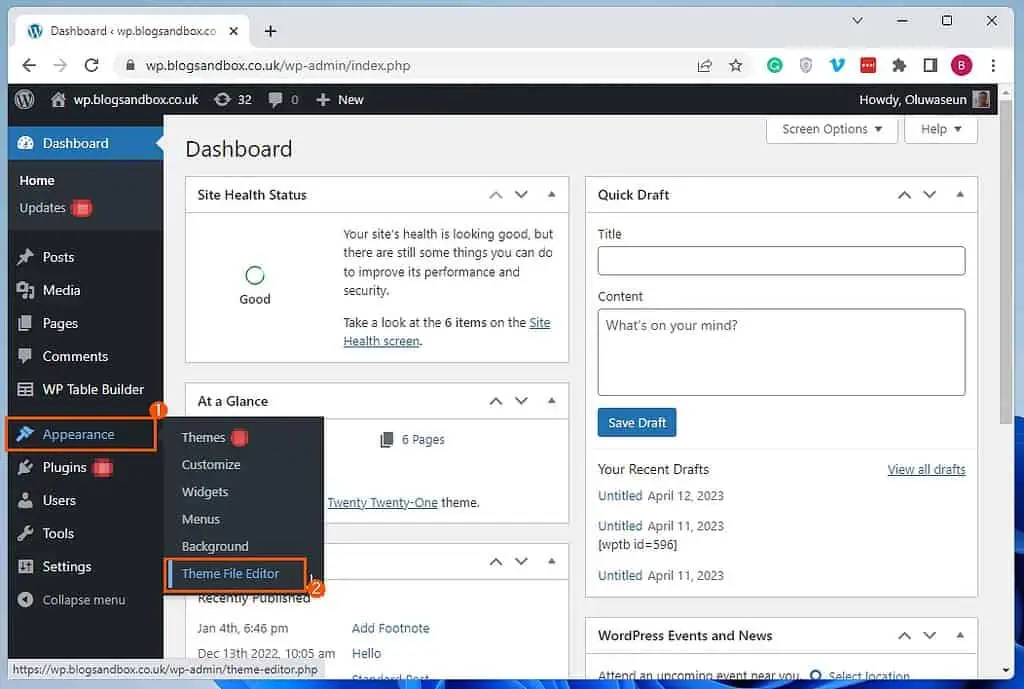
- Sign in to the WordPress backend using an administrator account. Next, place your mouse cursor on Appearance among the options on the left pane, then click Theme File Editor.
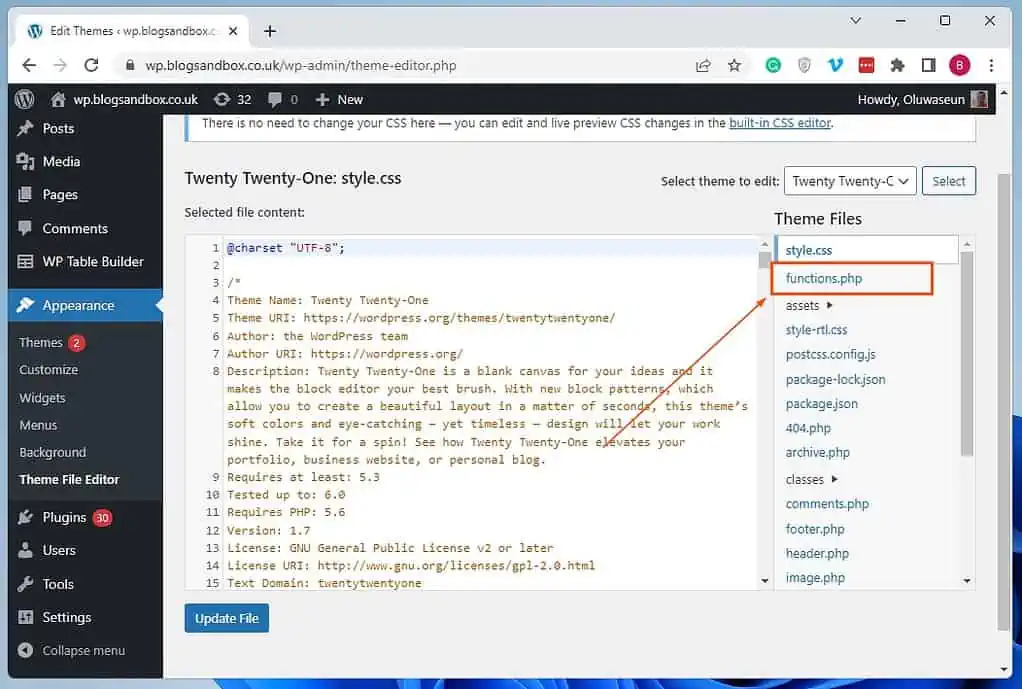
- After that, select the functions.php file among the Theme Files.
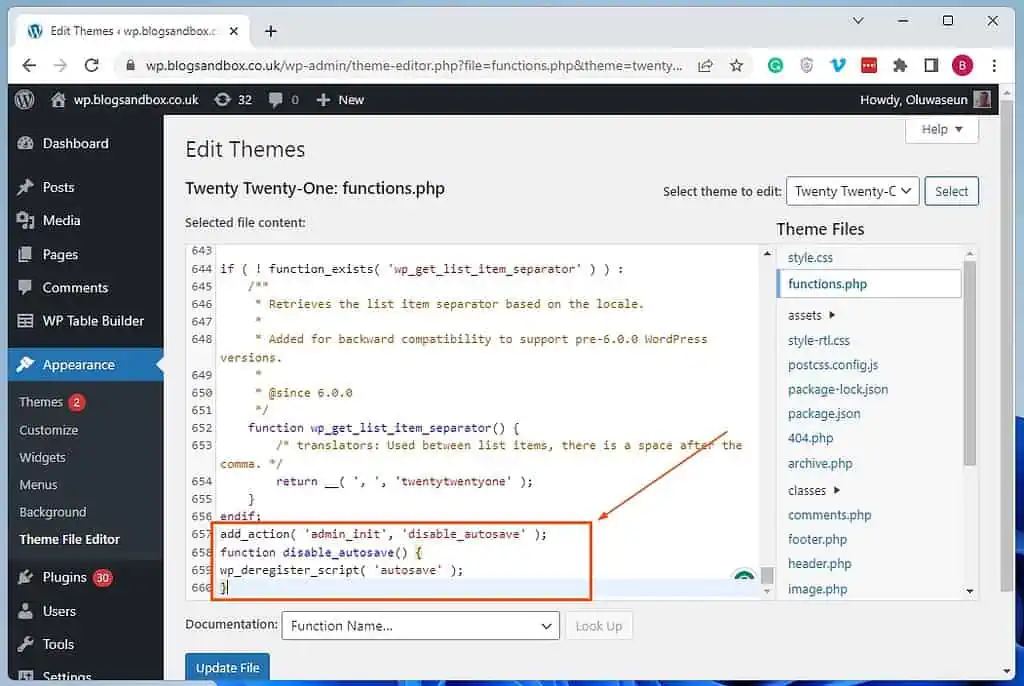
- Now, add the subsequent command to the functions.php file content.
add_action( 'admin_init', 'disable_autosave' );
function disable_autosave() {
wp_deregister_script( 'autosave' );
}
- Finally, click the blue Update File to save the input. Thus, the autosave feature in WordPress should be automatically disabled.
Frequently Asked Questions
The default autosave time interval in WordPress is 1 minute.
You can disable the Autosave feature in WordPress by activating the Disable Gutenberg Autosave plugin. Follow the steps below to do that.
a) Access the backend of your WordPress site as an administrator.
b) Now, hover your mouse on Plugins among the menus on the left pane, then select Add New options that appear.
c) On the Add Plugins page, type “disable Gutenberg autosave” in the search field.
d) Aftrward, click the Install Now button on the Disable Gutenberg Autosave plugin from the search results.
e) After installing the plugin, click the Activate button. Consequently, the auto-save feature in WordPress should be automatically disabled.
Yes, the autosave feature in WordPress is enabled by default.
Yes, there are. Disabling autosave in WordPress can reduce server load and improve site speed.
Yes, the WordPress classic editor has an autosave feature.
Conclusion
The autosave feature in WordPress is a helpful feature that automatically saves your posts or pages as you work on them. Thereby ensuring that you don’t lose any content in case of accidental page closing or a system crash.
However, some WordPress users may prefer to turn off the autosave feature for various reasons. Turning off the feature can help to reduce the number of revisions saved, reduce server load, and improve site speed.
Gladly, this guide demonstrated two ways to disable the autosave feature in WordPress. Specifically, we discussed how to execute this task with the aid of a free plugin.
Then, we learned how to deactivate the feature by adding a code to the theme’s function.php file.
I hope this guide was helpful to you. If it were, click on “Yes” beside the “Was this page helpful” question below.
You may also express your thoughts and opinions by using the “Leave a Reply” form at the bottom of this page.
Finally, go through our WordPress & Websites How-to Guides page to find other insightful guides like this.
![WordPress Lost Password Redirects to Page Not Found [Fixed]](https://www.itechguides.com/wp-content/uploads/2024/03/WordPress-Lost-Password-Redirects-to-Page-Not-Found-Fixed.webp)


