Do you want to use CloudWays Elastic Email for sending emails to your WordPress site? This how-to guide shows the step-by-step process of configuring CloudWays Elastic Email for WordPress.
Overview
A WordPress site needs a mail server to send admin emails. For example, when you need to change your admin password, your WordPress site will email you to verify the new email.
If you use shared web hosting, the mail server is usually configured by default. Unfortunately, CloudWays does not pre-configure this feature, so you must set it up manually.
Step 1: Subscribe to Elastic Email
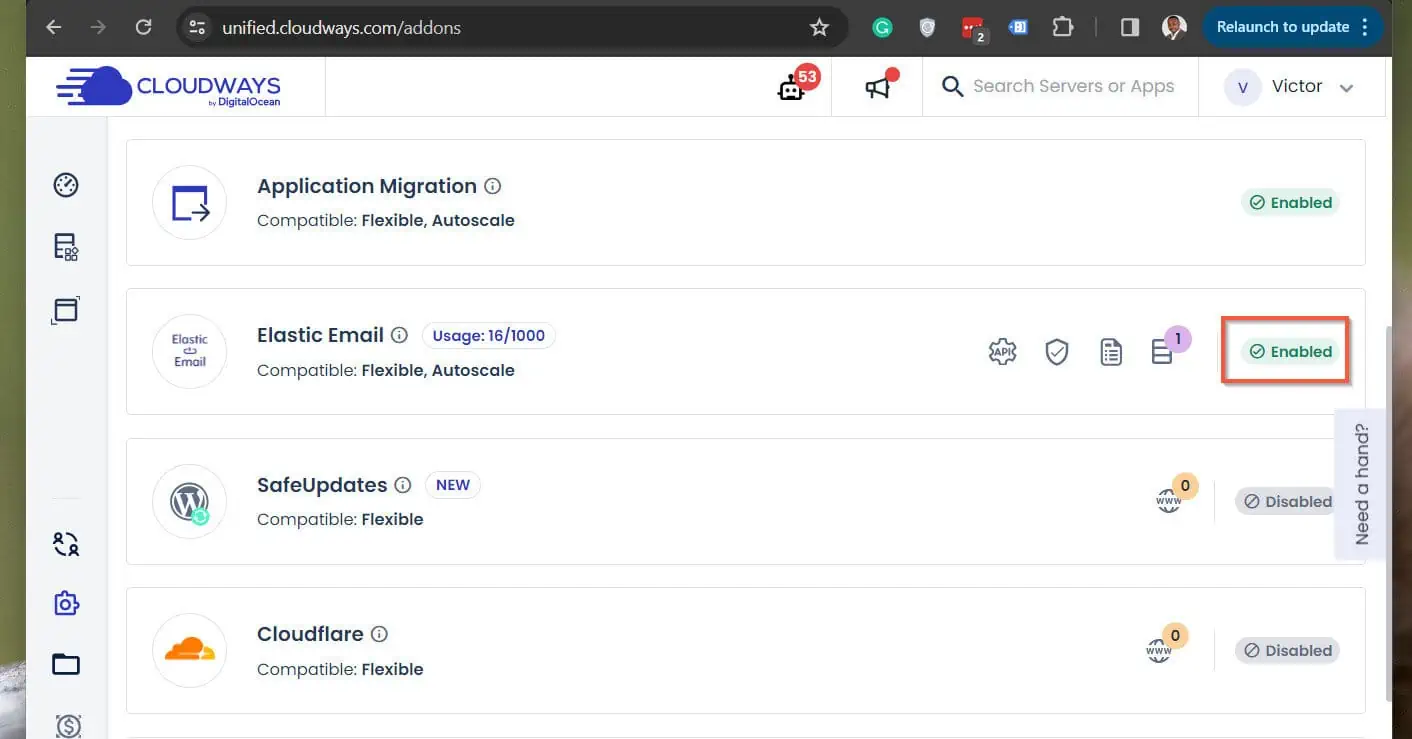
- Sign in to your CloudWays account and open the add-ons section. There, locate the Elastic Email add-on and click the “Disabled” link next to it.
In my screenshot below, I already enabled this add-on so mine is showing the “Enabled” link.
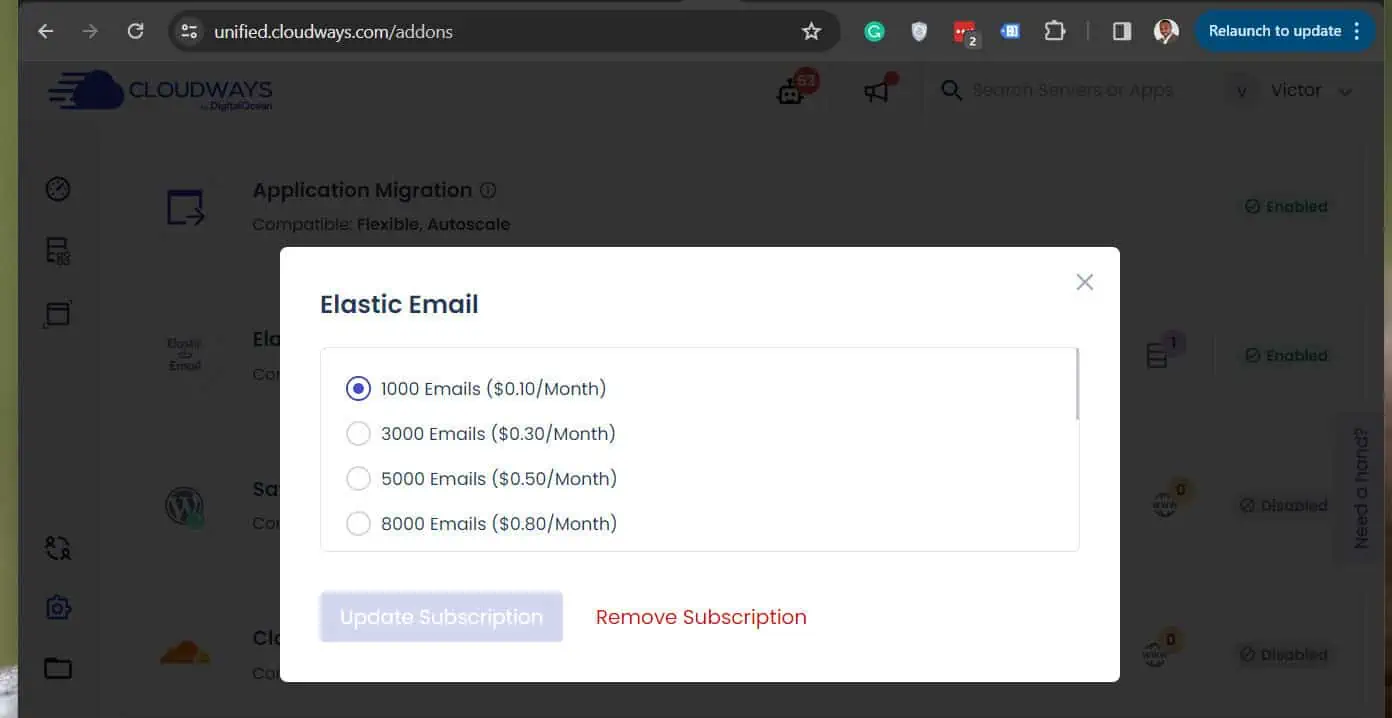
- When the subscription page opens, select the subscription level (1,000 emails monthly should be more than enough). After that, click the Subscribe button.
Step 2: Enable Elastic Email on Your CloudWays Server
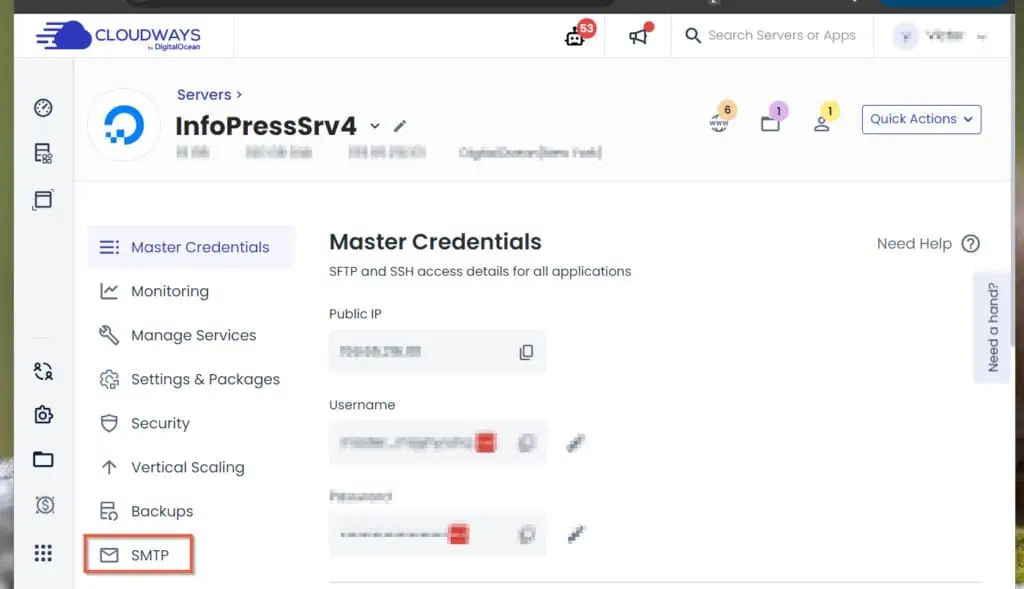
- Open the Servers node of your CloudWays profile and open the server. When the Server opens, click the SMTP menu.
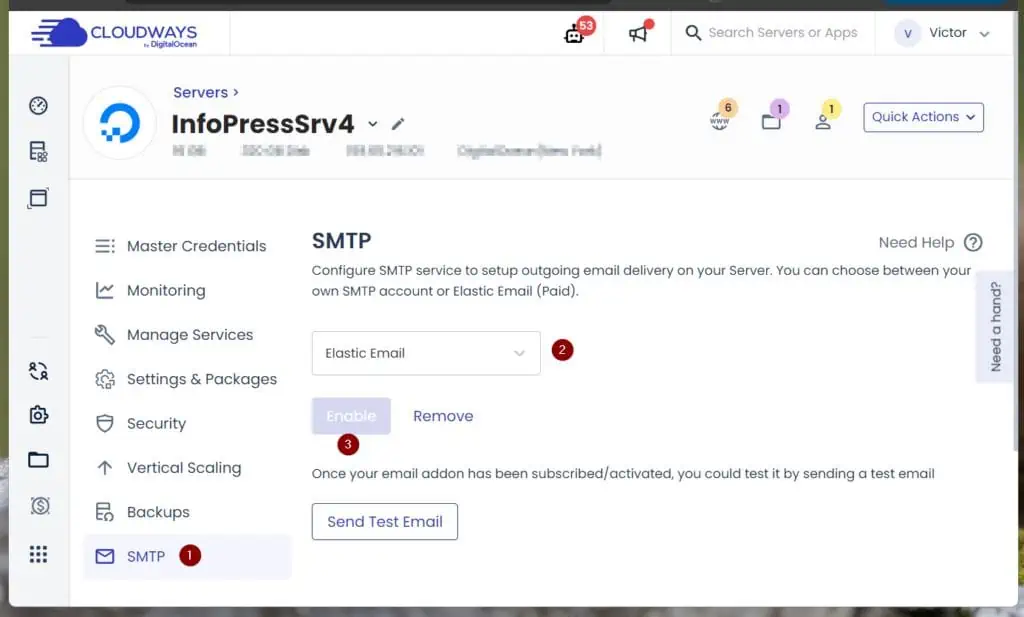
- Finally (for this step), from the SMTP drop-down, select “Elastic Email,” then click Enable.
Step 3: Configure the Required DNS Records
- Sign in to the provider that hosts your domain’s DNS record and add the SPF, DKIM, Tracking, and DMARC as specified in this CloudWays guide.
- After that, sign back into your CloudWays account and open the Applications node.
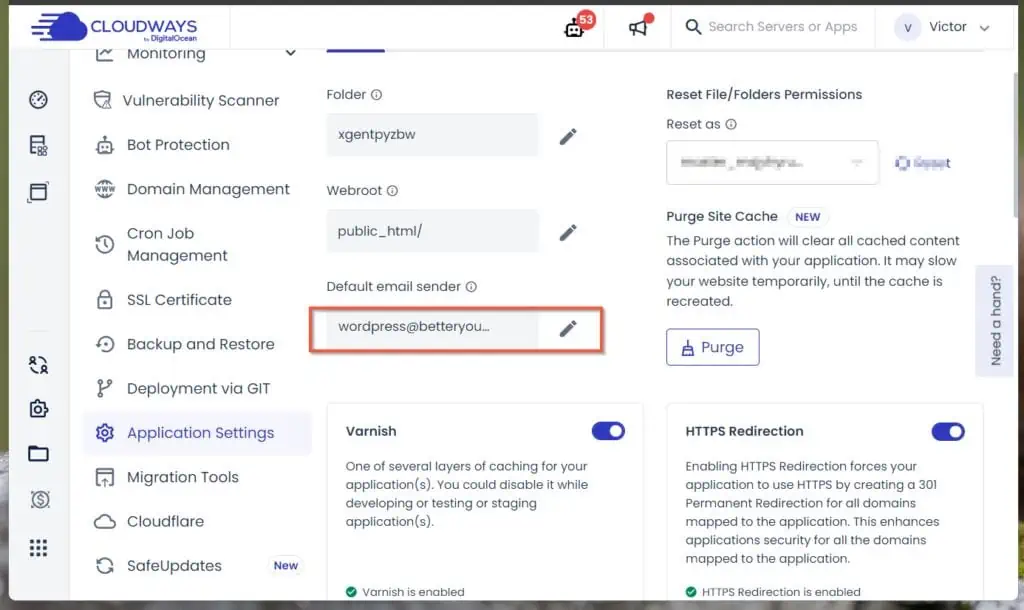
- Then, open the application you’re configuring and click the Applications Setting menu.
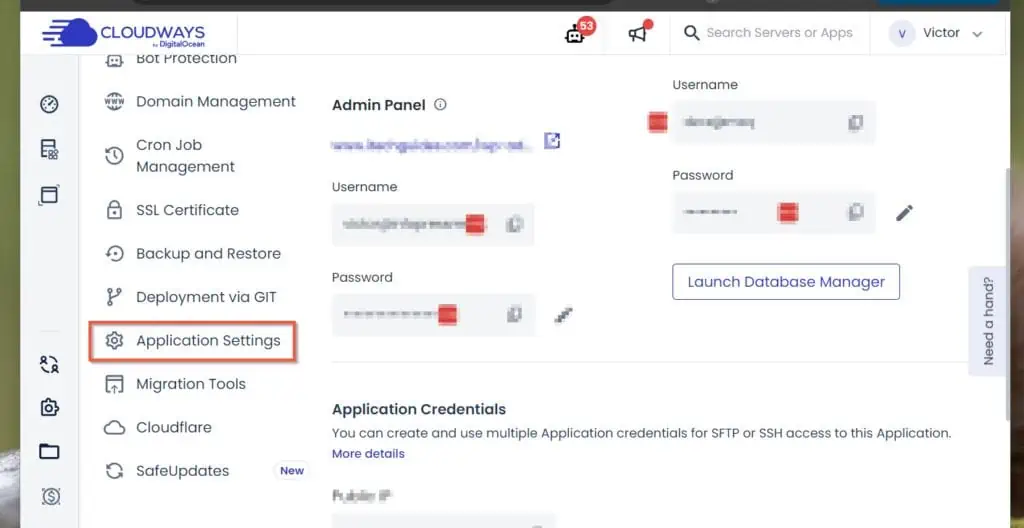
- Finally, click the edit button next to “Default email sender”, and enter the email address, [email protected].
Replace YourDomainName.com with your domain details.
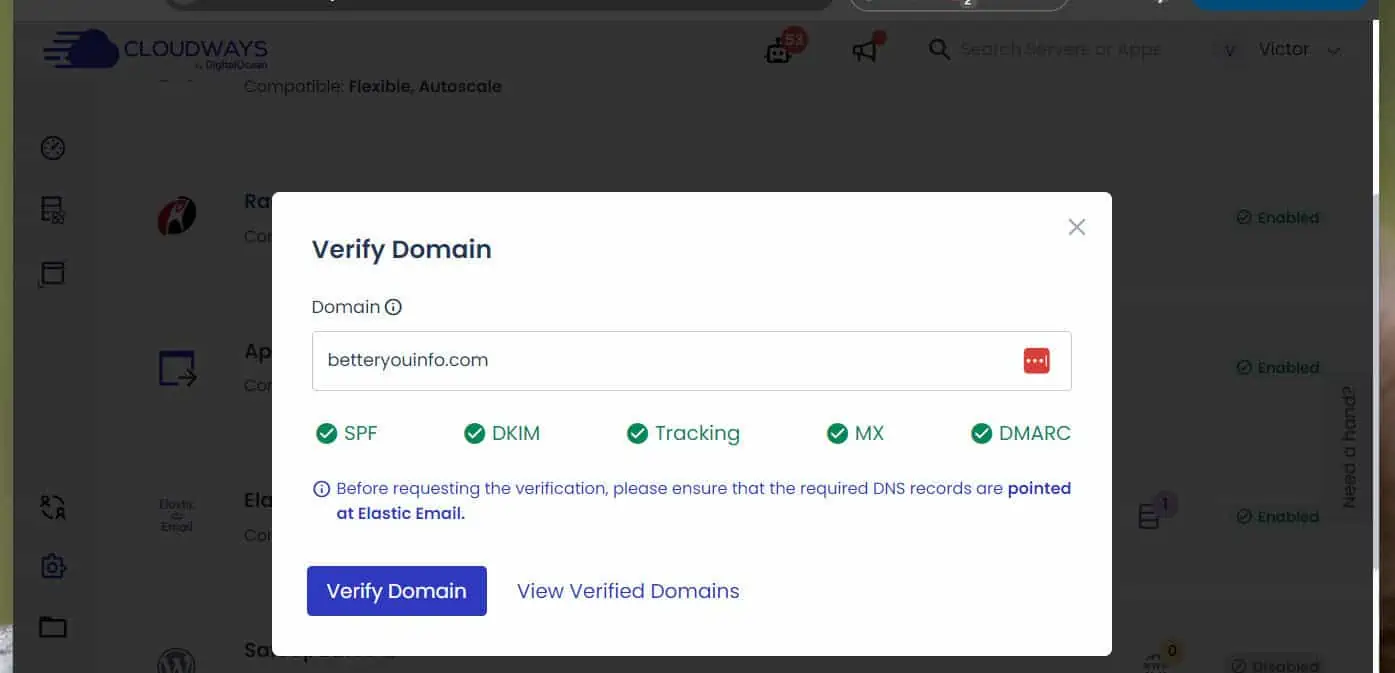
Step 4: Verify Your Domain
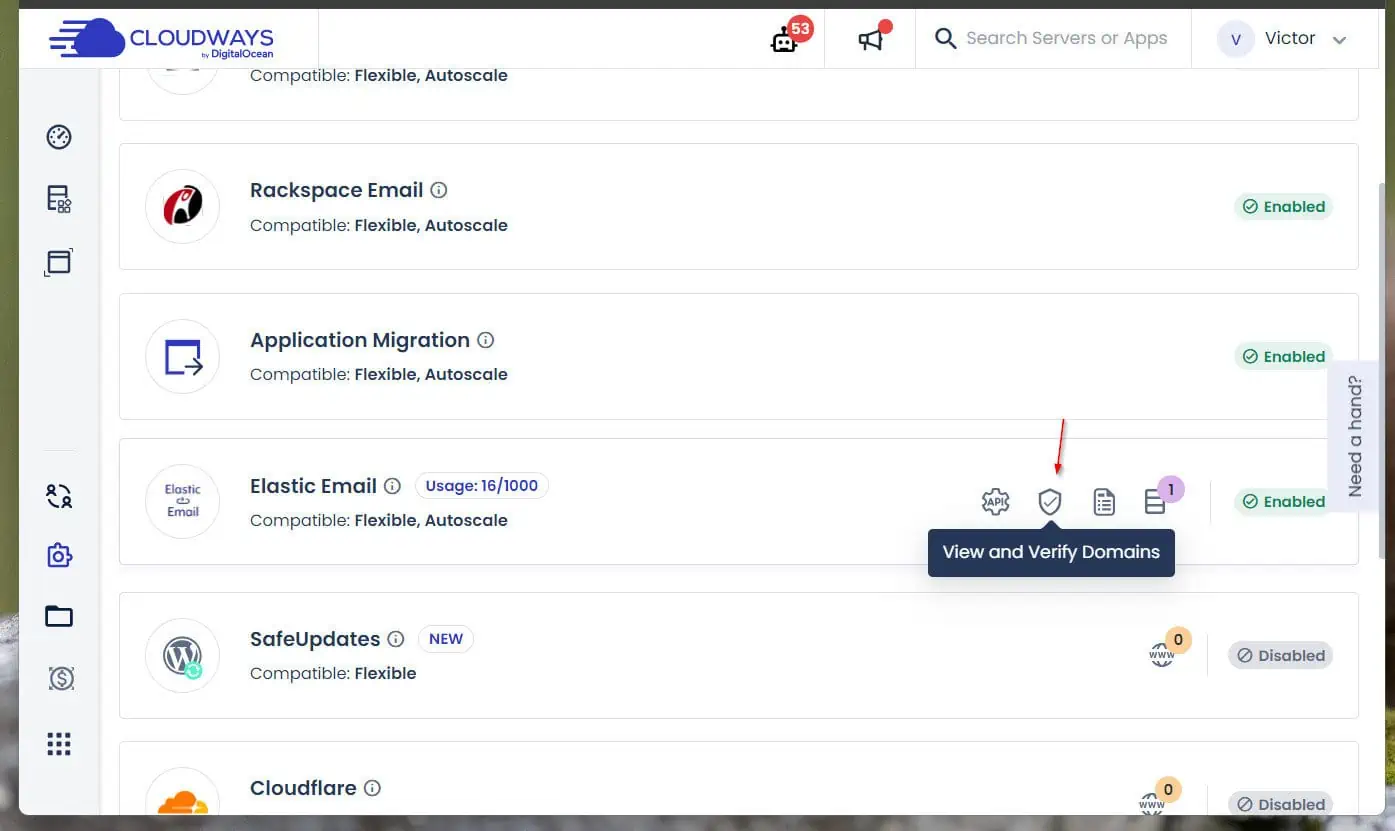
- While still logged in to your CloudWays account, open the add-ons page. Then, next to the Elastic Email add-on, click the “View and Verify Domains” icon.
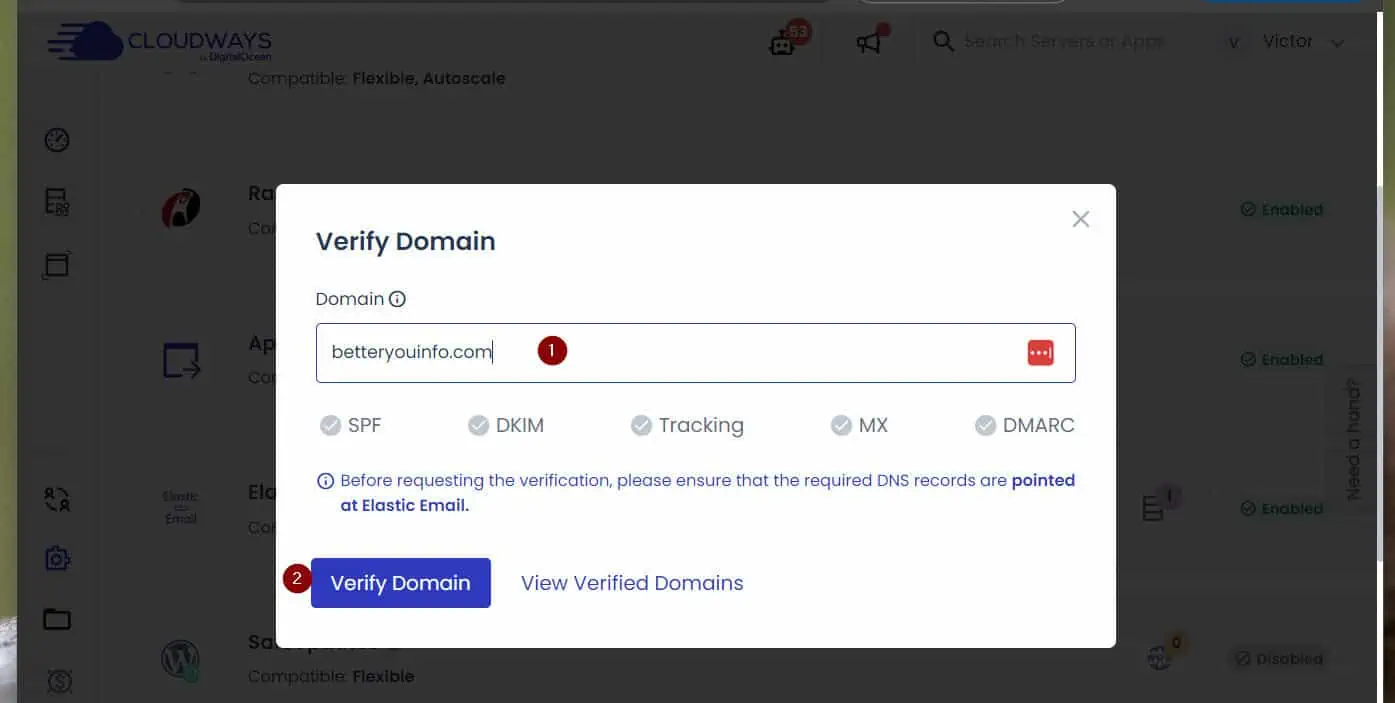
- Finally, to configure CloudWays Elastic Email for WordPress, enter the domain name and click “VErify Domain.” If everything goes as planned, all the records should show green after the verification – see the second screenshot below.
Thank you for stopping by and we hope we made your day with this article. If we did, let us know by clicking the “Yes” button in the “Was this page helpful?” question below.
![WordPress Lost Password Redirects to Page Not Found [Fixed]](https://www.itechguides.com/wp-content/uploads/2024/03/WordPress-Lost-Password-Redirects-to-Page-Not-Found-Fixed.webp)