This Itechguide teaches you how to reinstall notepad in Windows 10. Notepad is pre-installed as a Windows optional feature. However, for some reason, it sometimes disappears.
Method 1: Reinstall Notepad From Windows Optional Features
The fastest method to reinstall notepad in Windows 10 is via the Windows optional features. Follow the steps below to reinstall notepad with this method:
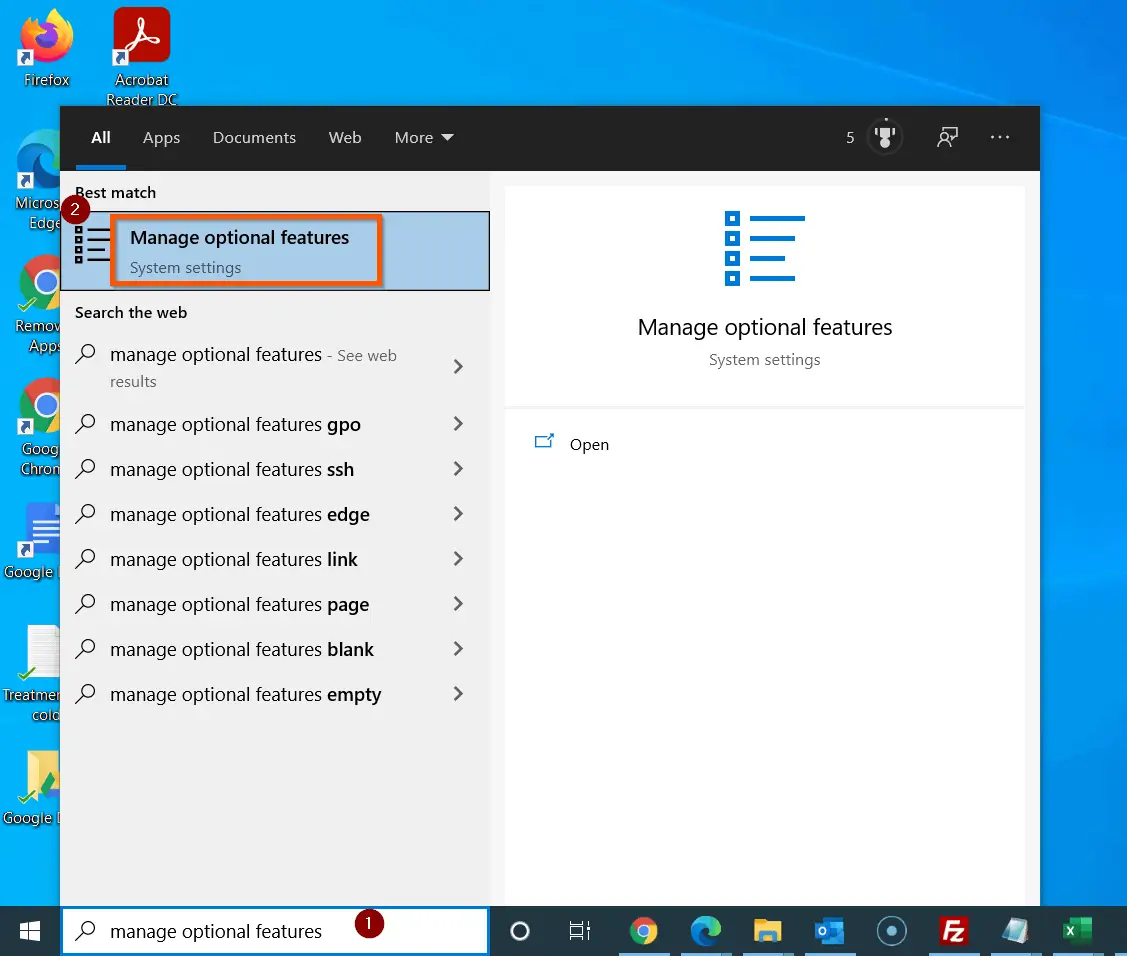
- Enter manage optional features in the Windows 10 search box. Then, from the search results, select Manage optional features.
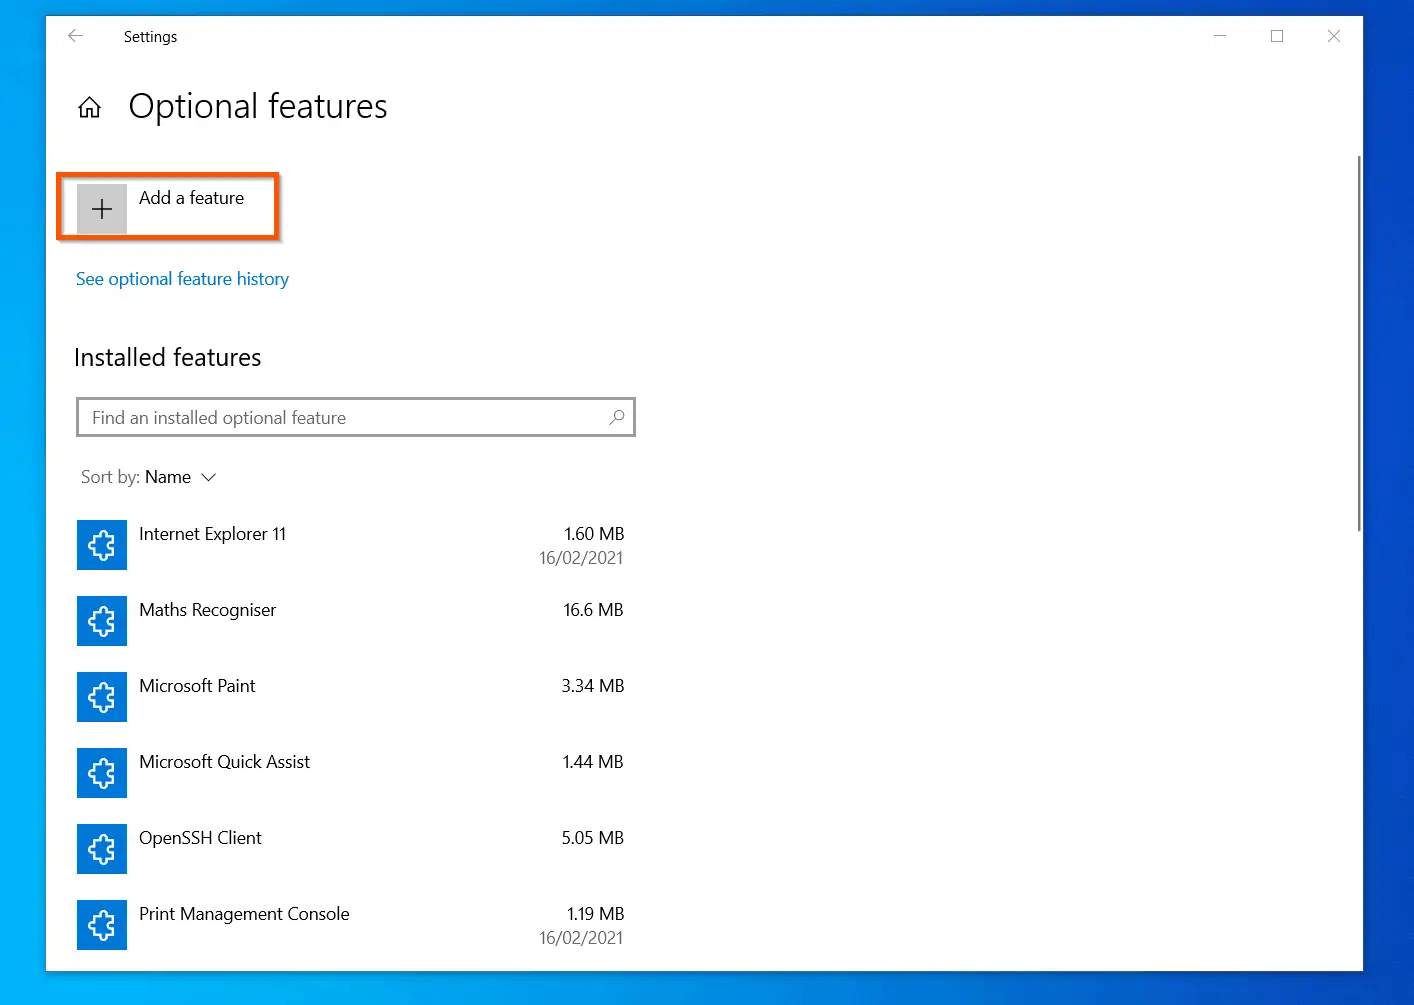
- When the Optional features settings screen opens, click Add a feature.
- Then, on the search box that is displayed, enter notepad. When Notepad is displayed, check the box beside it. Finally, to install the optional app, on the bottom left of the screen, click Install – see the second screenshot below.


- Finally, wait for the installation to complete. If prompted, restart the computer.
Method 2: Reinstall Notepad with Dism Command
You can also reinstall notepad with the Dism command. If you prefer command line, follow the steps below to reinstall notepad.
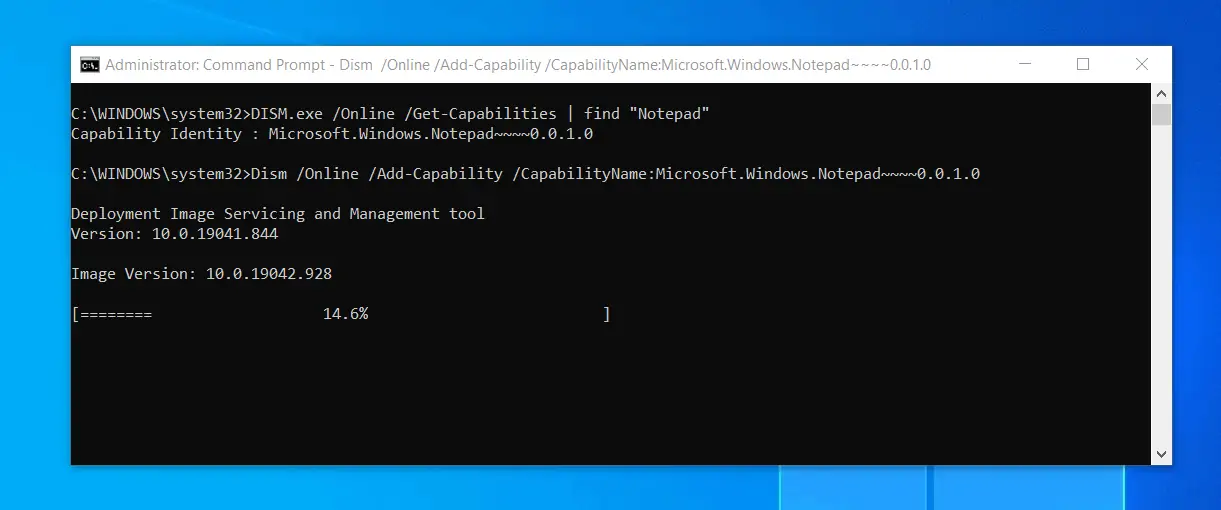
- Search command prompt. Command prompt should be selected in the search result – beneath the app, click Run as administrator.

- To get the capability identity for Notepad, enter the command below. Then, press the enter key on your keyboard.
DISM.exe /Online /Get-Capabilities | find "Notepad"
The command will display the Capability Identity of the app. You will need it to to install notepad.

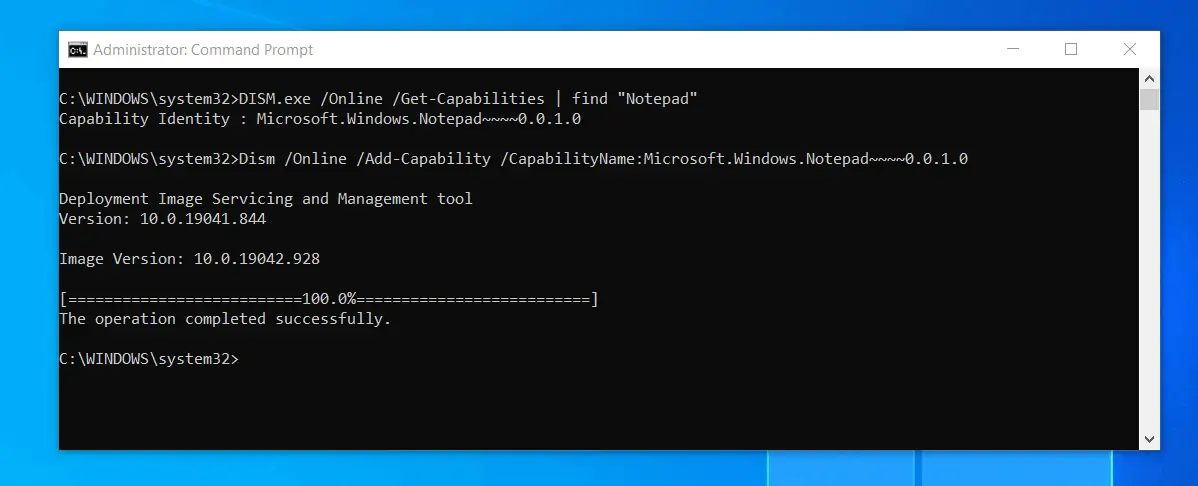
- Finally, to install notepad in Windows 10 with Dism, enter the command in the command prompt – then, press the enter key on your keyboard. Wait for the command to complete – reach 100%.
Dism /Online /Add-Capability /CapabilityName:Microsoft.Windows.Notepad~~~~0.0.1.0
When the command completes, notepad will be available on your Windows 10 PC.
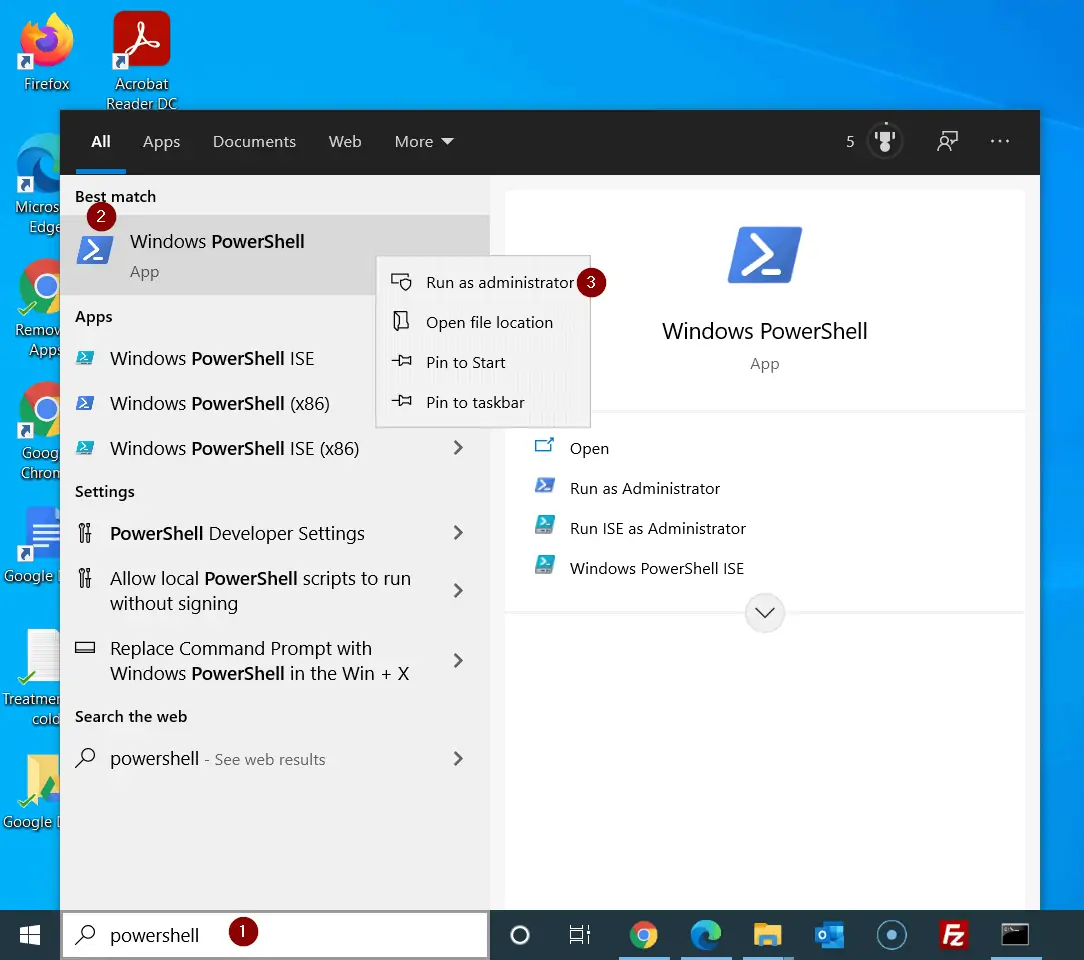
Method 3: Reinstall Notepad with PowerShell
If you are a Windows administrator, you will be excited to know that you can reinstall notepad in Windows 10 with PowerShell. Even though you are not a Windows admin, you can still use this method to reinstall notepad.
Here are the steps to reinstall notepad with PowerShell:
- Enter powershell in the Windows 10 search. Then, right-click Windows PowerShell and select Run as administrator.
Before you install notepad with PowerShell, you need to first get the name.
- To get the name of notepad with PowerShell, enter the command below in PowerShell. Then, press the enter key on your keyboard.
Get-WindowsCapability -Online | Where-Object {$_.Name -like "*notepad*"}The command will display the name as “Microsoft.Windows.Notepad~~~~0.0.1.0”. You will need this for the next command.
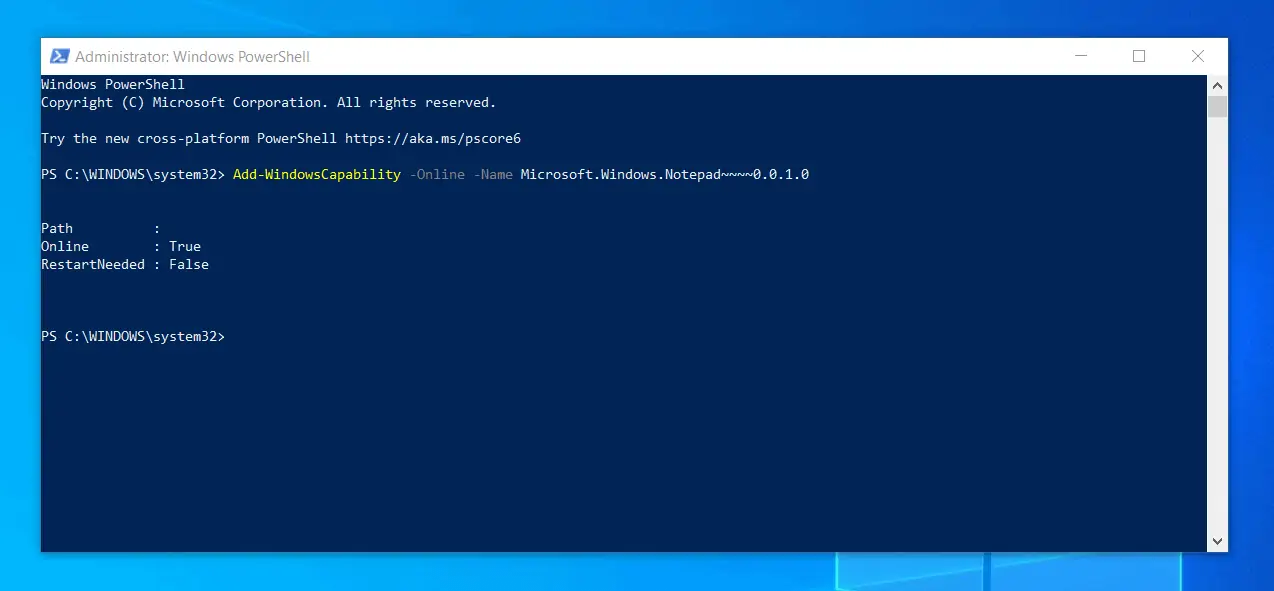
2. Finally, to reinstall notepad in Windows 10 with PowerShell, enter the command below and press enter.
Add-WindowsCapability -Online -Name Microsoft.Windows.Notepad~~~~0.0.1.0
Wait for the command to complete.

When the installation is completed, PowerShel will display some status information – which will include whether the reinstallation requires a restart.
As you can see from the screenshot below, RestartNeeded is False. This means that you do not need to restart your computer.
I hope you were able to reinstall Notepad In Windows 10 with one of the 3 methods discussed in this guide. I also hope you found the guide easy to understand and helpful.
If you found this guide helpful, kindly spare two minutes to share your experience with our community at [discourse_topic_url].
Nevertheless, if the steps in the guide did not fix your problem or you have any questions about the guide, please post your questions using the comments form below.
You could also share your thoughts with the “Leave a Comment” form found at the end of this page.
Furthermore, visit our Windows 10 Fix-it guides page for more Windows 10 fix-it guides.
Also, to learn more about the DISM command, see DISM Capabilities Package Servicing Command-Line Options. You may also read more about Get-WindowsCapability and Add-WindowsCapability PowerShell commands.


![How To Run Sysprep (Generalize) In Windows 10 [2 Methods]](https://www.itechguides.com/wp-content/uploads/2022/05/8-2.webp)
It worked! My Notepad is back on — i used the Command Prompt method
Thank you!!!