The guide covers 6 methods to map a network drive on Windows 10 – via File Explorer, Shortcut, CMD, PowerShell, logon scripts, and GPO.
Option 1: Map Network Drive From File Explorer
Here are the steps to map a network drive using this method:
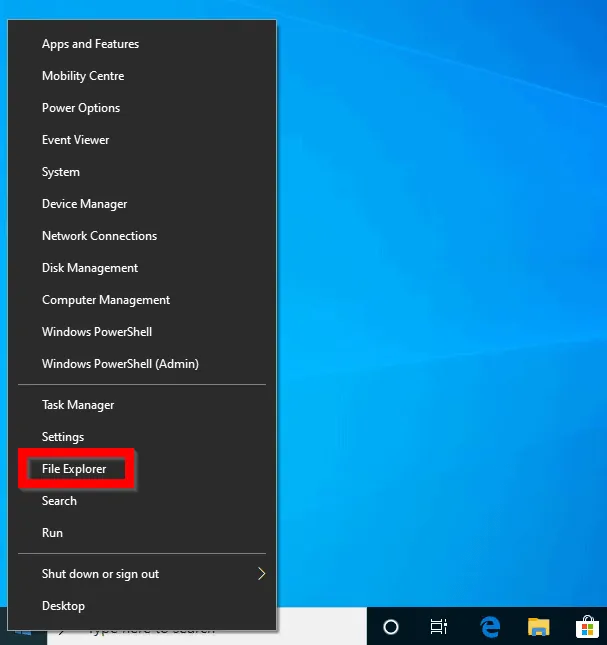
- Right-click start menu. Then select File Explorer.
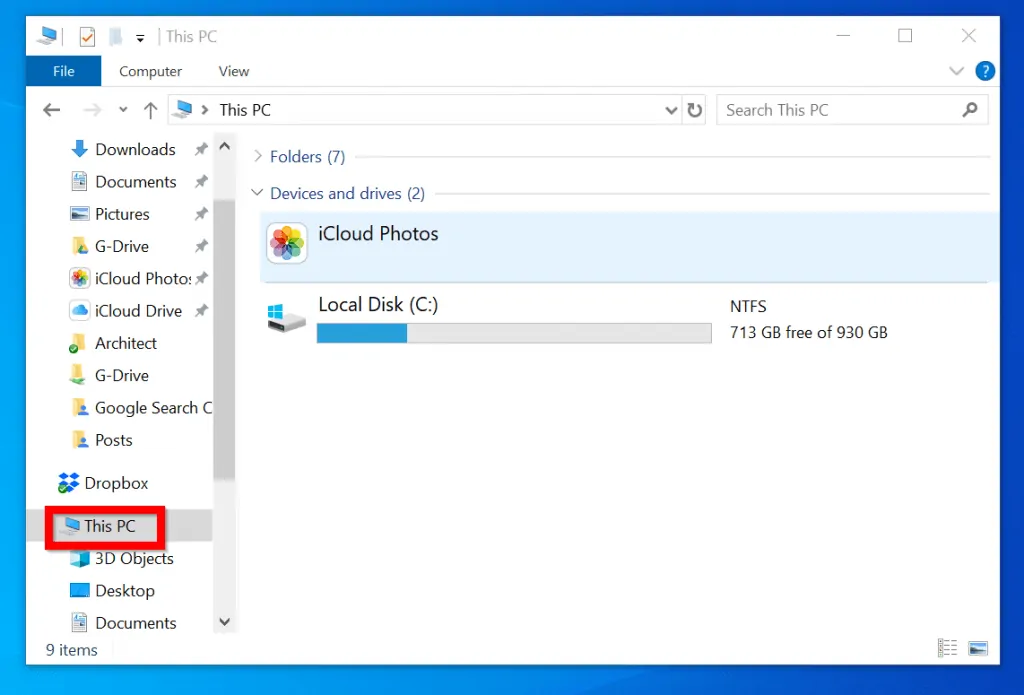
- When File Explorer opens, click This PC.
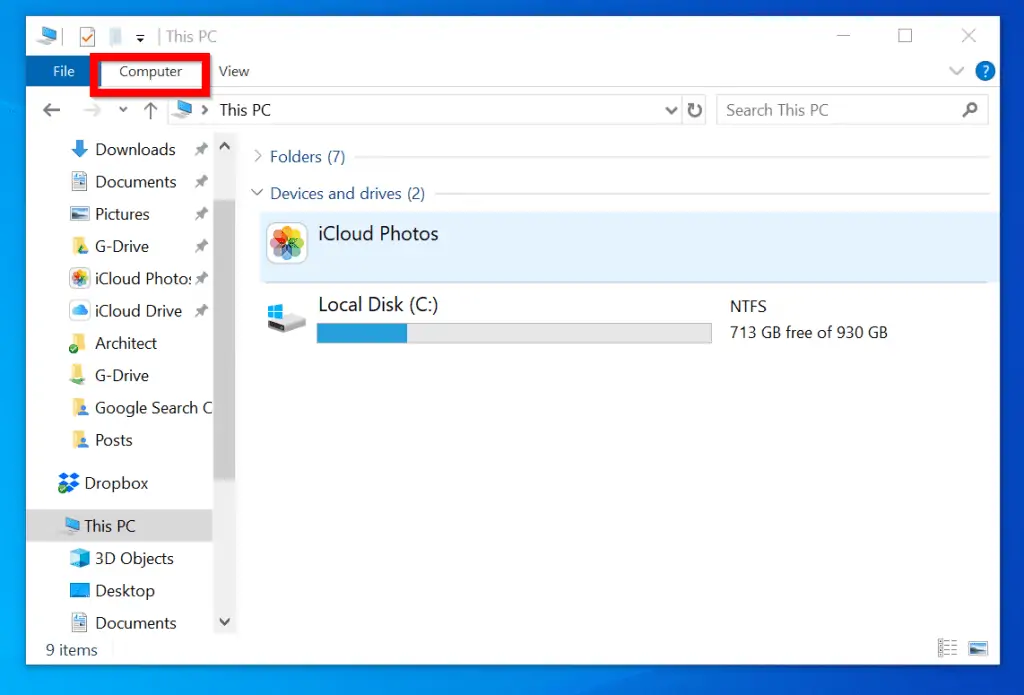
- Then click Computer tab.
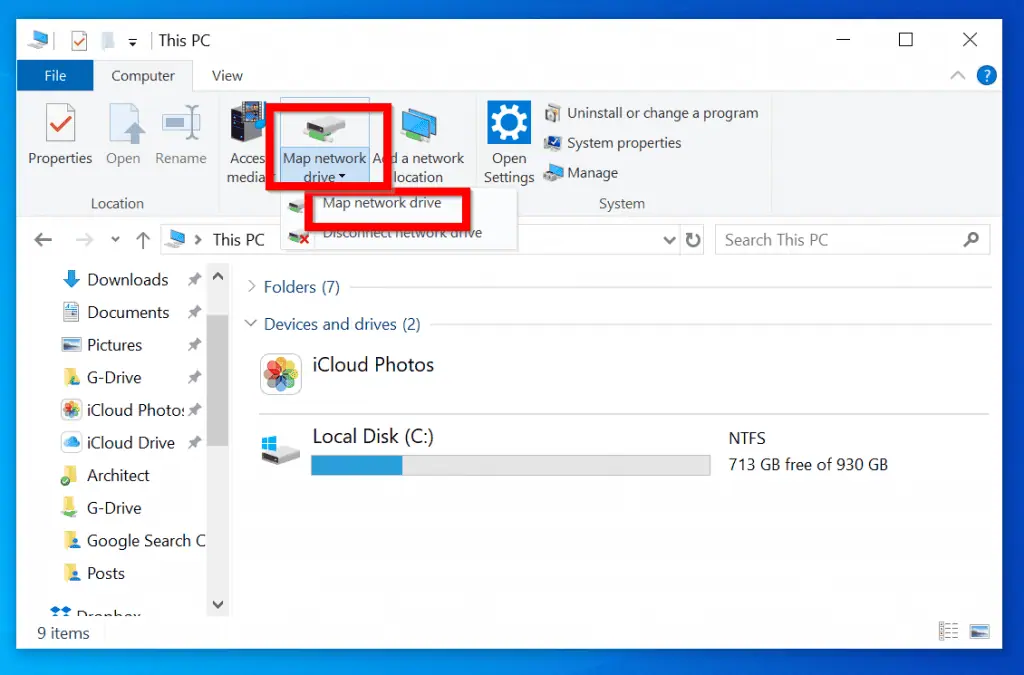
- Finally, click Map network drive drop-down and select Map network drive.
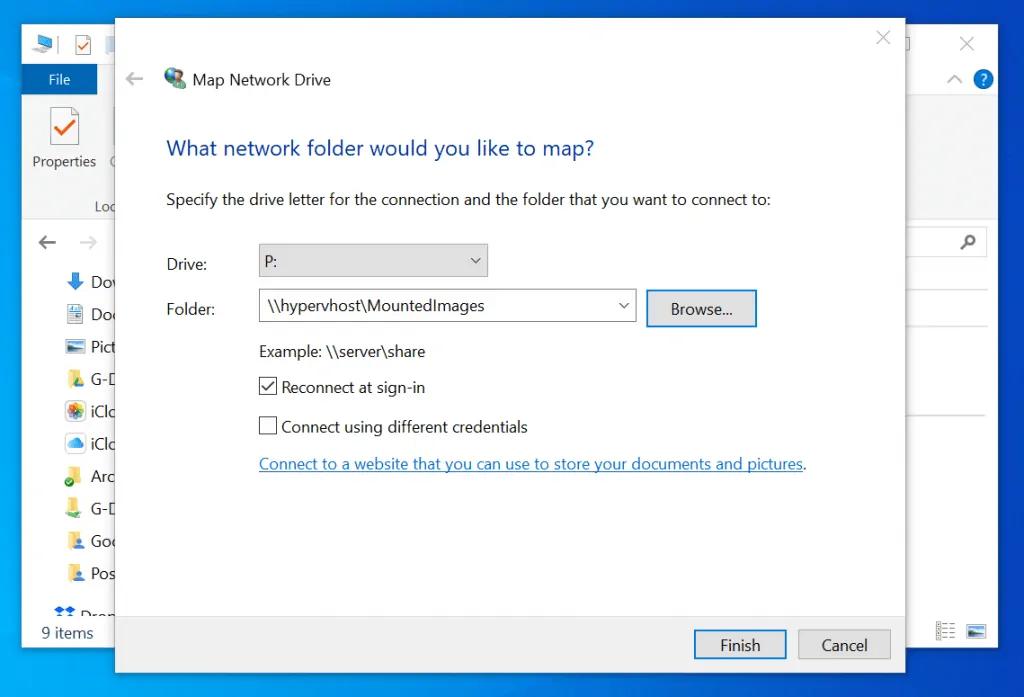
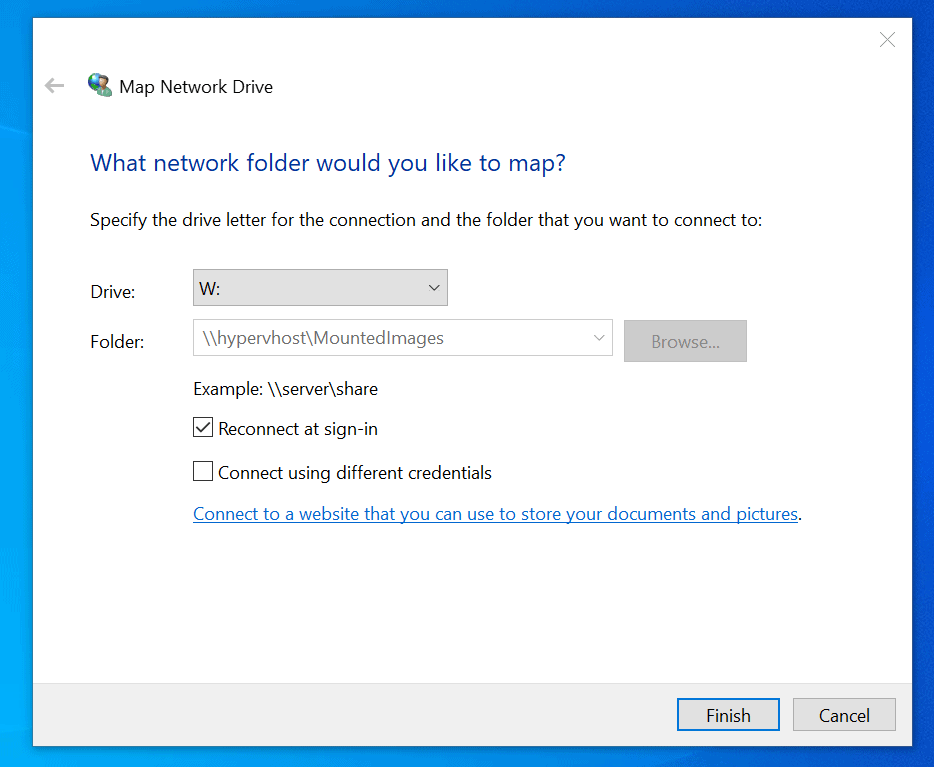
- When the tool opens, at the Drive drop-down, select a drive letter to assign the network drive. If you know the full path to a network share, enter it in the Folder field using the format \\ServerName\ShareName. Then click Finish.

- Alternatively, if you do not know the full path to the share you want to map, enter the server name in the format \\ServerName. Then click Browse. The network computer will then display all the shares. Click on the share you wish to map and click OK.
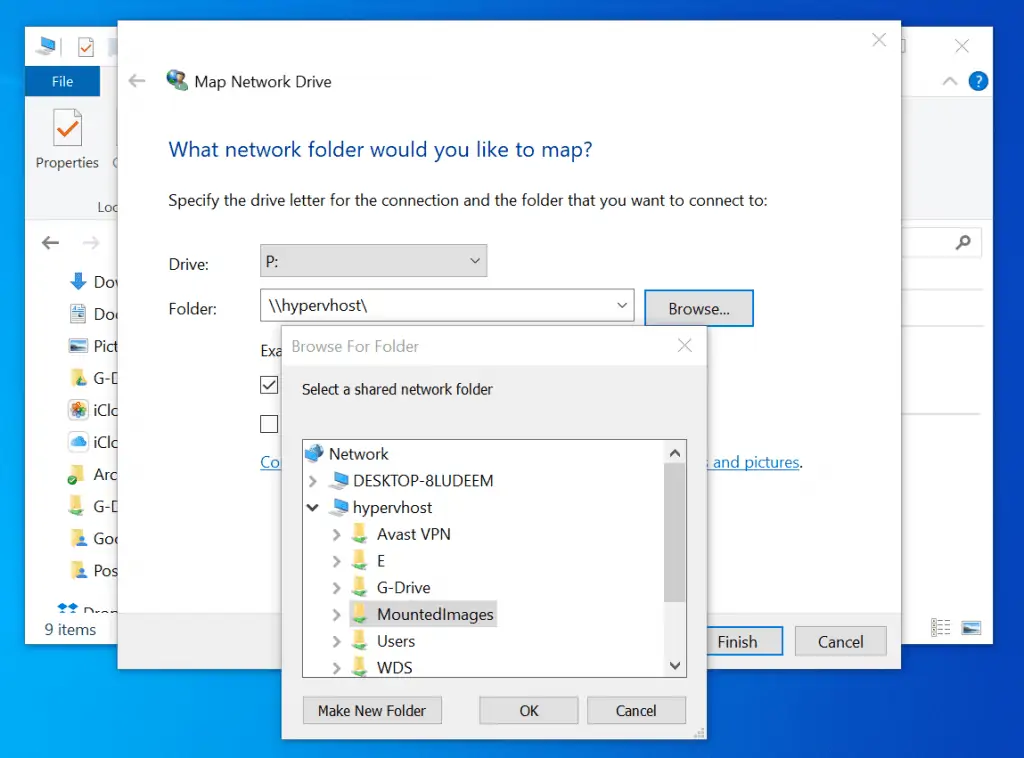
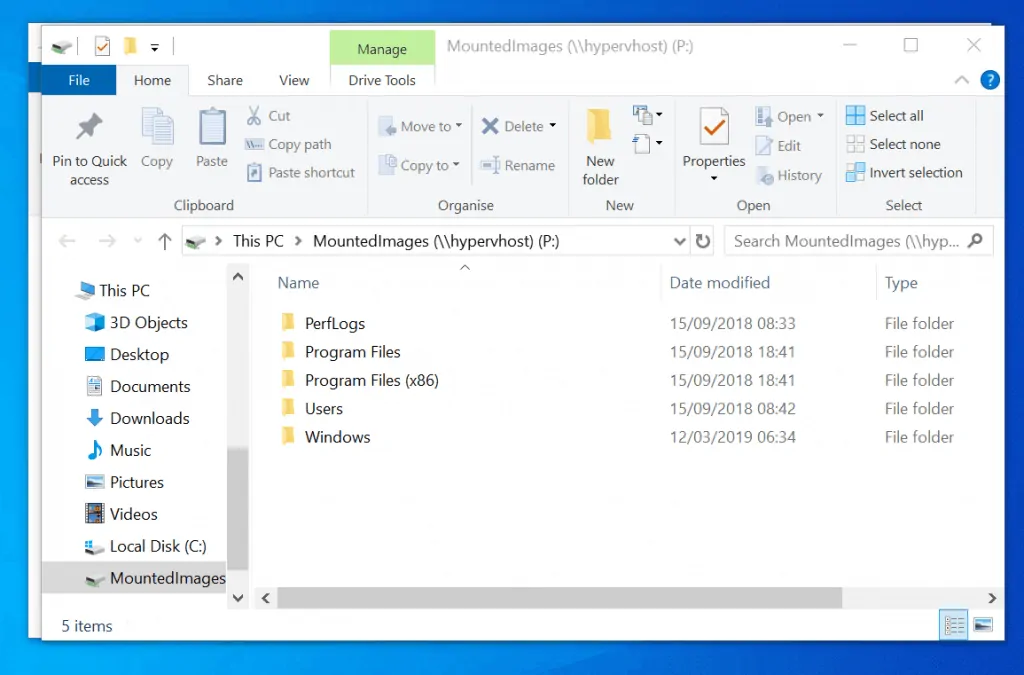
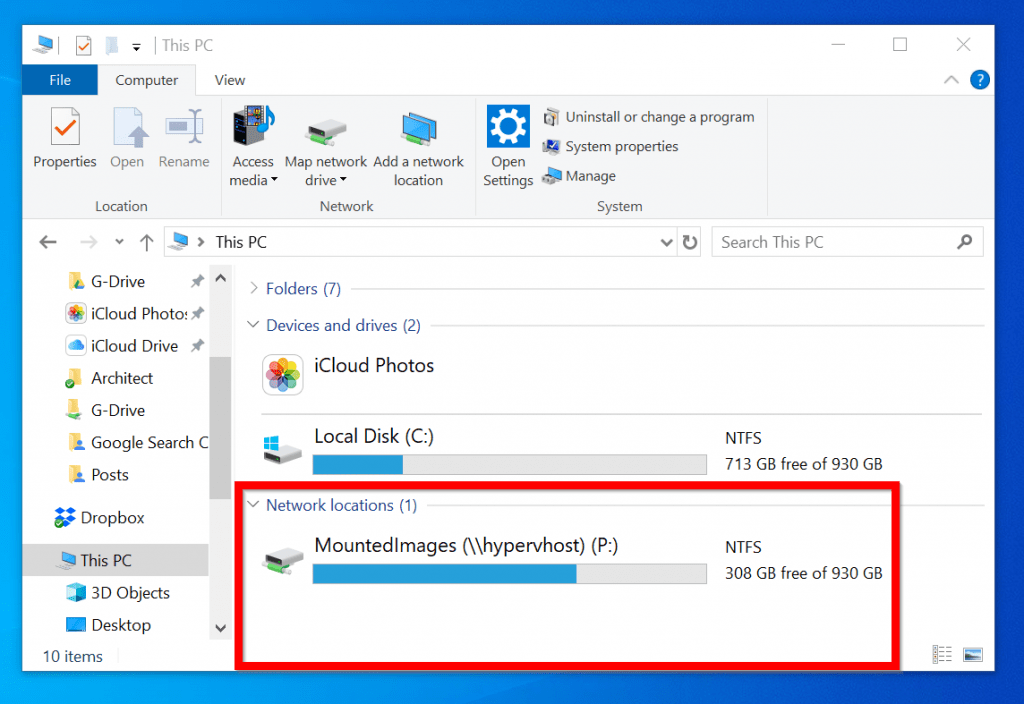
- Finally, click Finish. The mapped drive will open automatically (see the second image below).
Option 2: Map Network Drive From an Existing Shortcut
Another method is to map a network share from a Shortcut. If you have an existing network share shortcut, simply right-click it and map the share to a drive.
But if you do not already have a shortcut to the share, here are the steps to create the shortcut. Then map the share to a drive.
- Right-click anywhere on your desktop and point to New. Then select Shortcut.
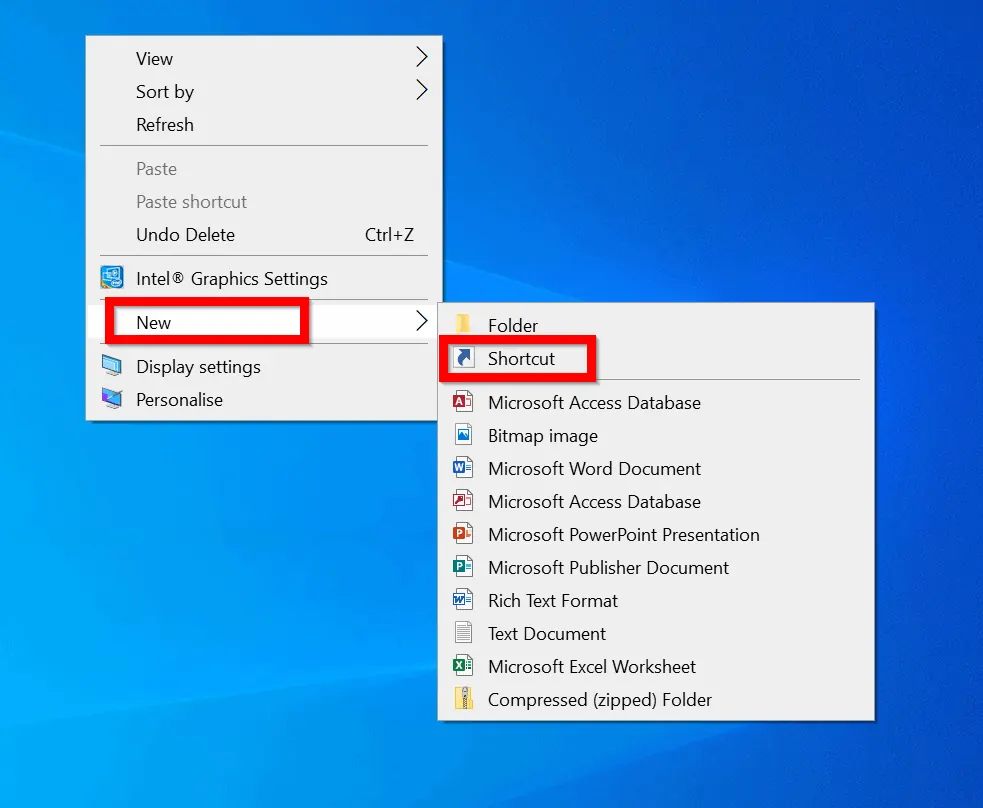
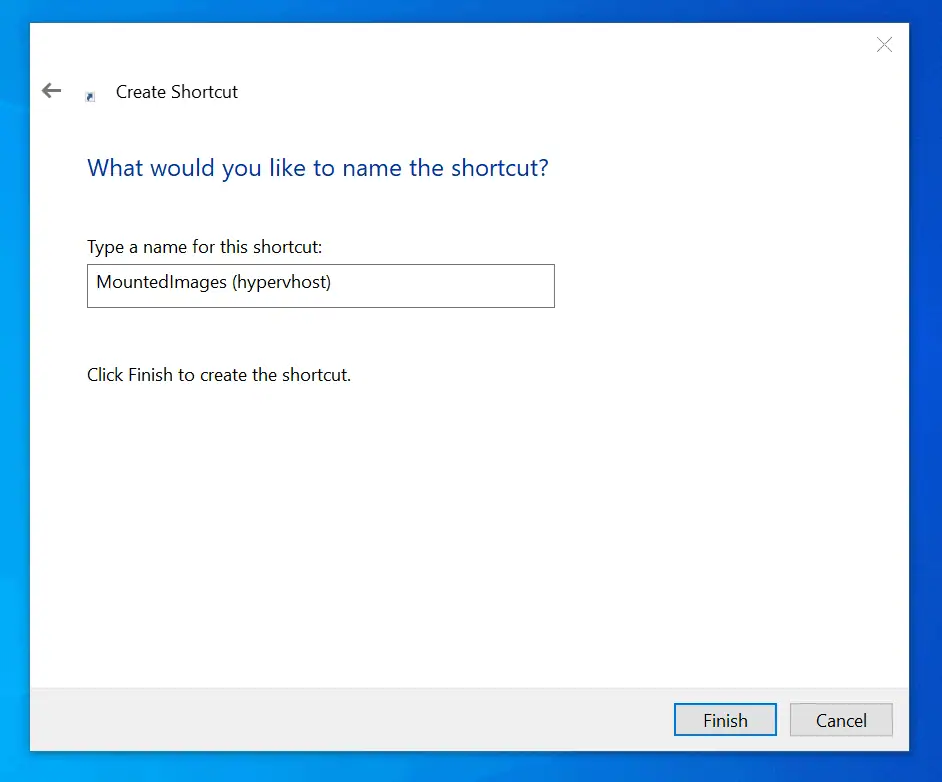
- At the first page of the Create Shortcut wizard, enter the path to the network share. Use the format \\ServerName\ShareName. Then click Next.
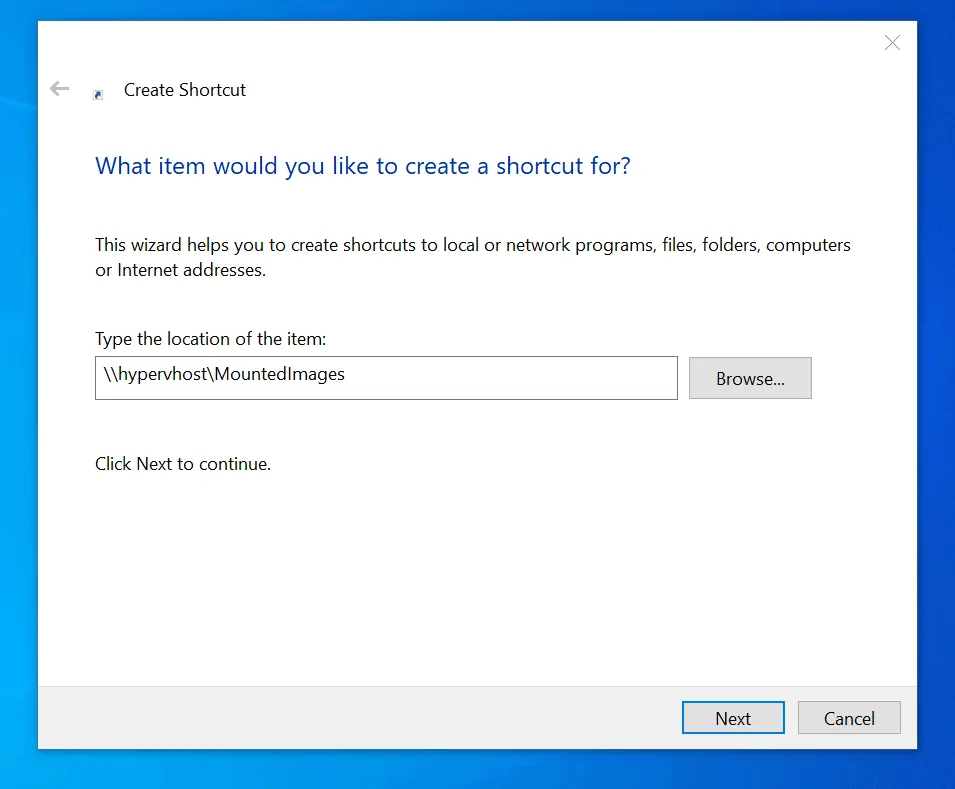
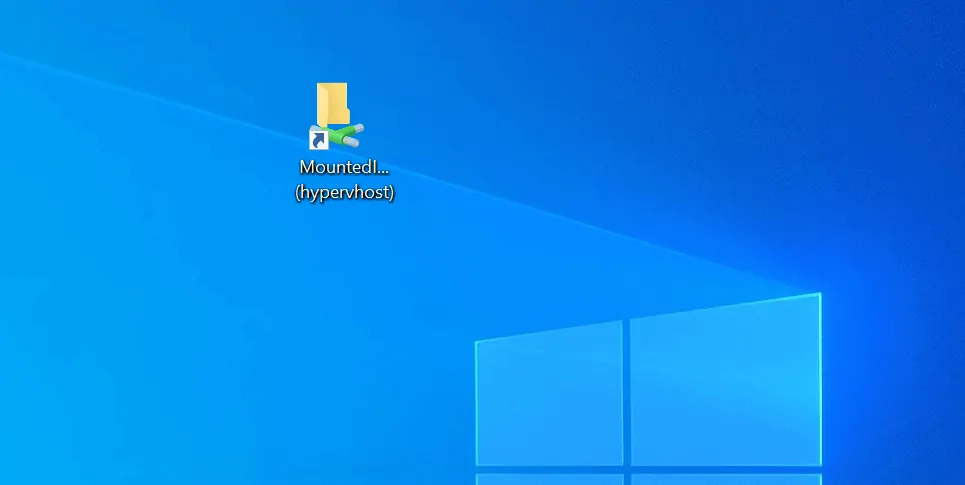
- Then on the Type a name for the shortcut field, enter a name for the share or accept the default name. When you finish, click Finish. The shortcut to the network share will be created on your desktop (see the second image below).
- To map the share to a drive on your computer, right-click the shortcut. Then select Map network drive.

- Then select a drive letter from the Drive drop-down and click Finish.
Option 3: Map Network Drive with Command Prompt
This is one quick way to map a network share to a drive.
Here are the steps to use this method:
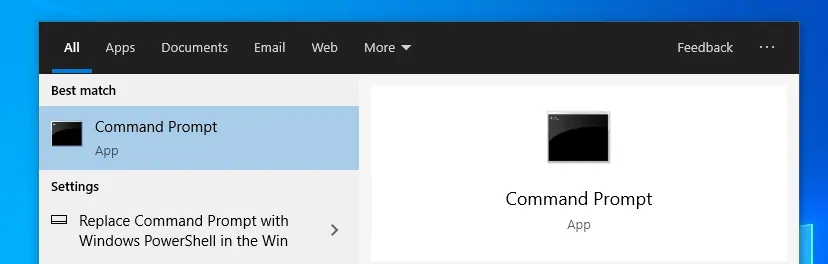
- Type cmd on the search bar. Then open Command Prompt.
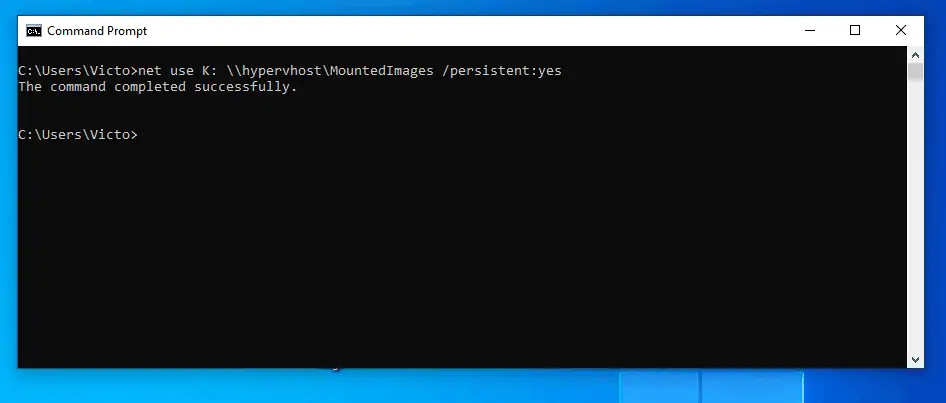
- At the command prompt type this command. Then press enter.
net use <drive letter> <\\ServerName\ShareName> /persistent:yes/no
Replace:
<drive letter> with the drive letter you want to map the drive to. For example K:
<\\ServerName\ShareName> with the path to the share you want to map.
Finally, for the /persistent switch specify Yes or No. Yes will reconnect the drive at each logon. No will not.
Here is an actual command for this demo:
net use K: \\hypervhost\MountedImages /persistent:yes
The result of the command:
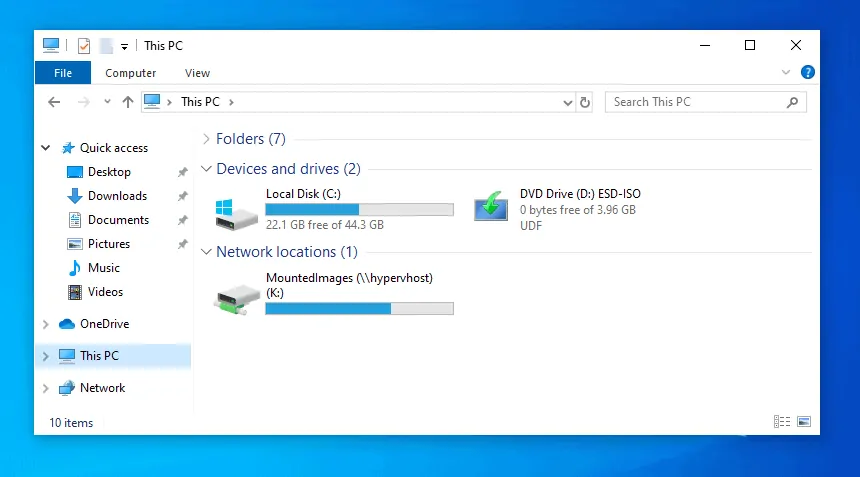
Here is the mapped drive on my This PC.
The remaining methods discussed in this guide are for Sys Admins.
Option 4: Map Network Drive with PowerShell
If you are a Windows SysAdmin, you will be keen to learn how to map network drive on Windows 10 with PowerShell.
To map a network drive with PowerShell, open Windows PowerShell. Then, enter a command in the format below –
New-PSDrive -Name "<name of the mapped drive>" -PSProvider "FileSystem" -Root "\\ServerName\FolderName"
To make the mapped drive persistent (stays mapped when you restart your PC), add the Persist parameter
New-PSDrive -Name "<name of the mapped drive>" -PSProvider "FileSystem" -Root "\\ServerName\FolderName" -Persist
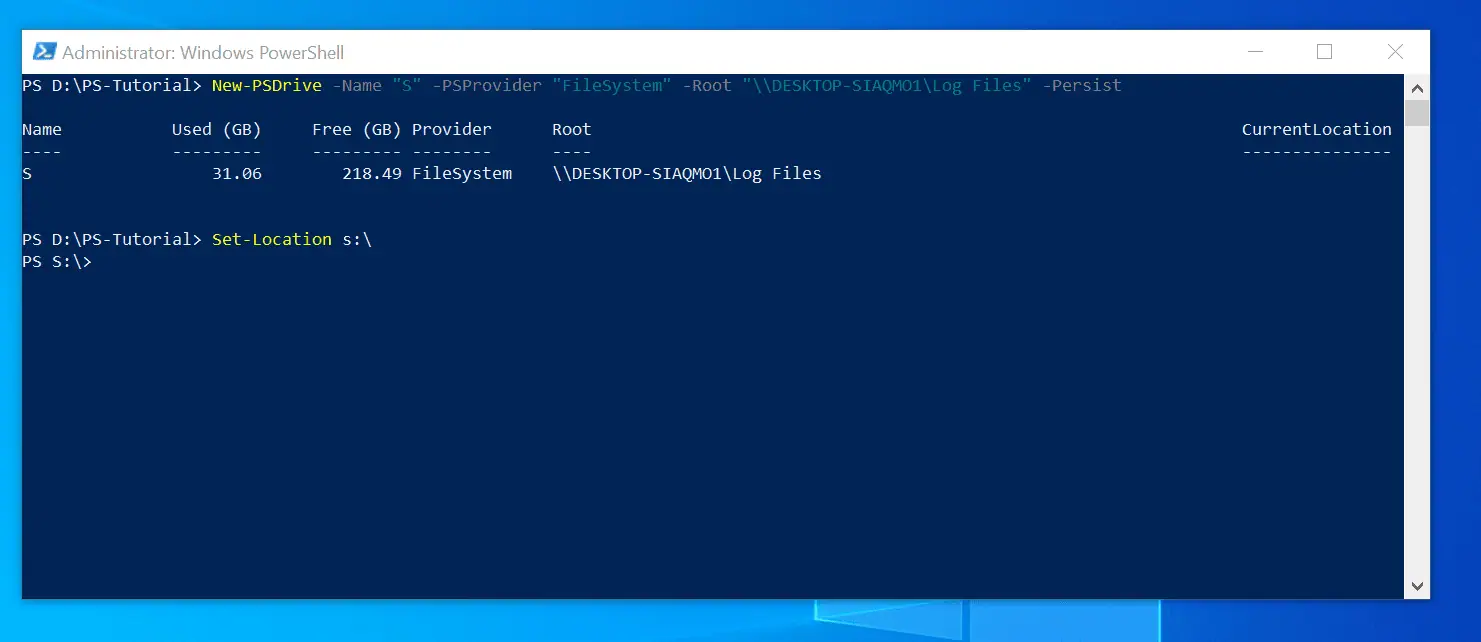
To give you an example, to map a persistent network share \\DESKTOP-SIAQMO1\Log Files, use the following code:
New-PSDrive -Name "S" -PSProvider "FileSystem" -Root "\\DESKTOP-SIAQMO1\Log Files" -Persist
After mapping the drive, you can change the PowerShell directory to the mapped drive using the command below:
Set-Location s:\
Here is a screenshot of both commands:
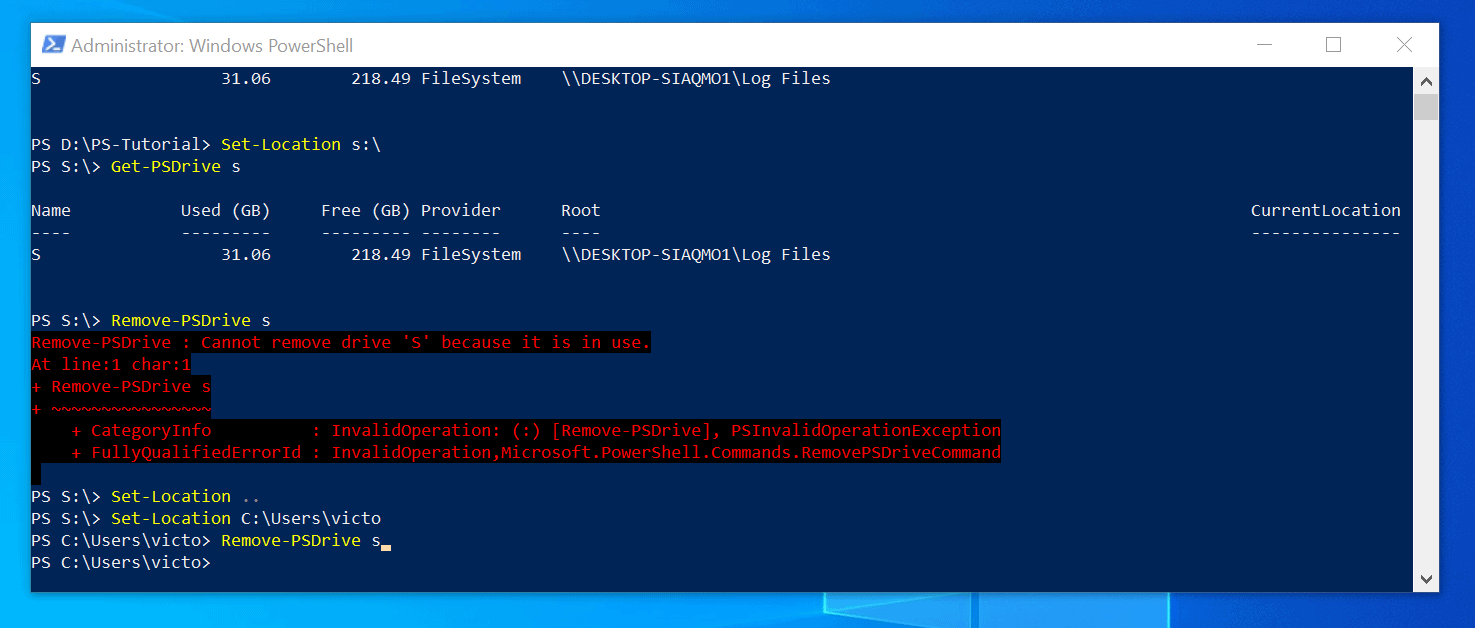
Finally, you can list the properties of the mapped drive and remove the mapped drive with the 2 commands below:
Get-PSDrive s
Remove-PSDrive s
Option 5: Map Network Drive with Logon Scripts
System Administrators can automatically map a network drive or drives using logon script.
There are 3 steps to complete this task:
- Create a Batch file with the commands to map the drive (s)
- Copy the batch file to \\DomainName.<extension>\NETLOGON
- Assign Users the logon script in Active Directory Users and Computers OR
- Assign the batch file to users using Group Policy
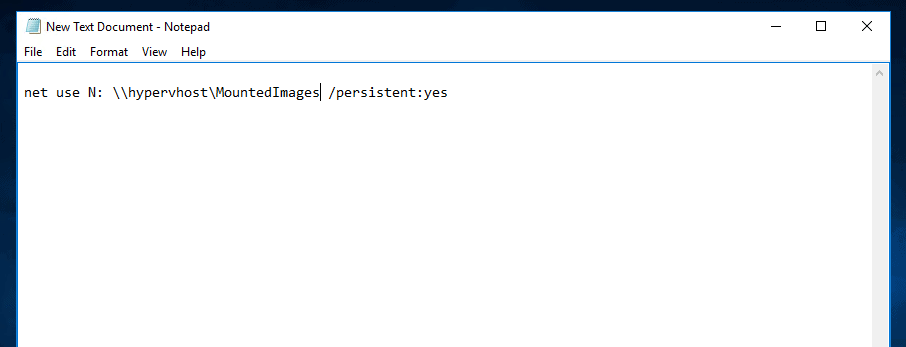
Step 1: Create a Batch file
- Open a notepad and enter the commands similar to the commands used in the last section.
- Here is an example
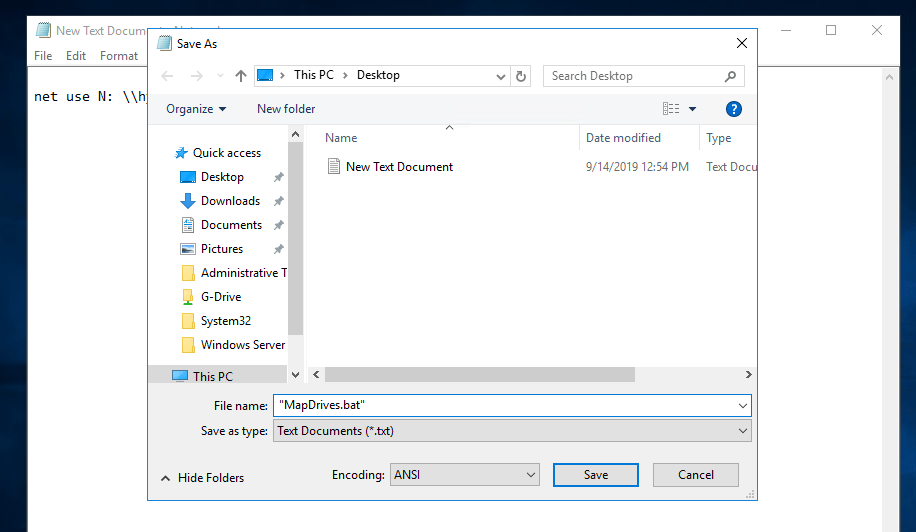
- Save the file with .bat extension: File -> Save As…Give the file a name then include .bat extension. Have the names in quotes. See the example below. Finally, click Save. The file will look like the file in the second image below.

Step 2: Copy the Batch file to the Domain NETLOGON
The final step in this method is to copy the batch file you just created to the NETLOGON share in your domain.
Here is how:
- Open Run command (Windows logo + R keys)
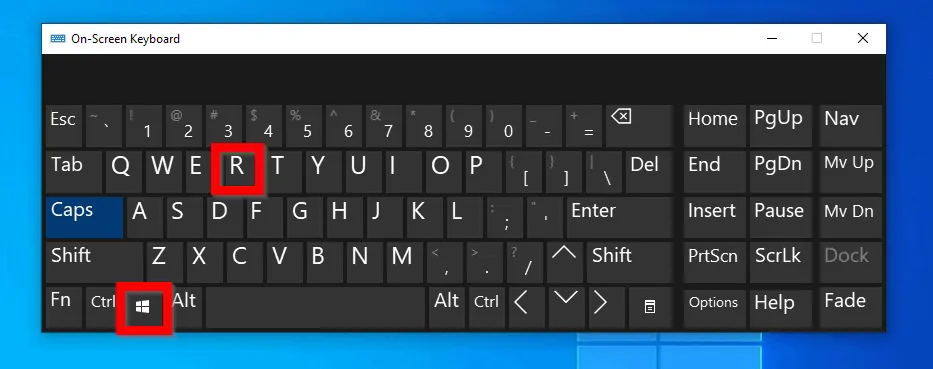
- At the Run command enter a path similar to this below. Then press enter or OK.
\\itechguides.local\NETLOGON
Change itechguides.local to the FQDM for your domain.
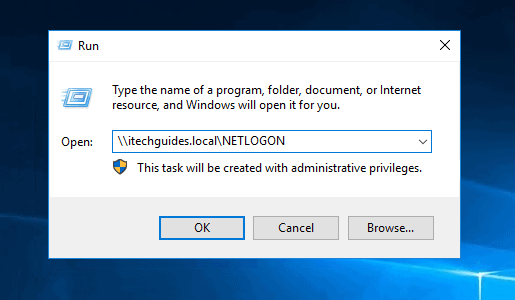
- Finally, copy the batch file you created earlier to the NETLOGON share.
Step 3 (Method 1): Assign Users the Logon Script in ADUC
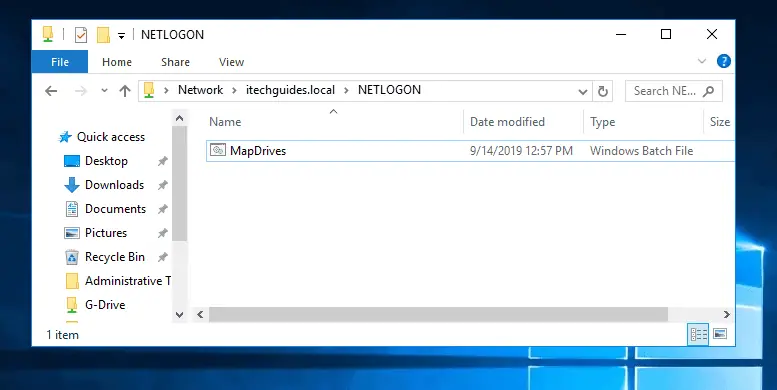
After creating the logon script and copying it to the NETLOGON share, the last step to map network drive in Windows 10 is to assign the script to a user.
Here are the steps:
- Logon to your a Domain Controller and open Active Directory Users and Computers.
- Navigate to the AD OU or container where your users are located. It is usually Users container except you moved the users to another OU.
- Double-click the user you wish to assign the logon script. On the Profile tab, enter the name of the batch file in the Logon Script field. When you finish, click OK.
- When next the user logs on to Active Directory, the script will run and the drive will be mapped automatically.

Step 3 (Method 2): Assign Users the Logon Script with Group Policy
This is an alternative way to automatically assign the batch file to users.
Here are the steps:
- Copy the batch file you created earlier.
- Open the GPO you wish to use. This GPO must be assigned to the AD container with the users you wish to assign the batch file automatically.
- Right-click the GPO and click Edit.
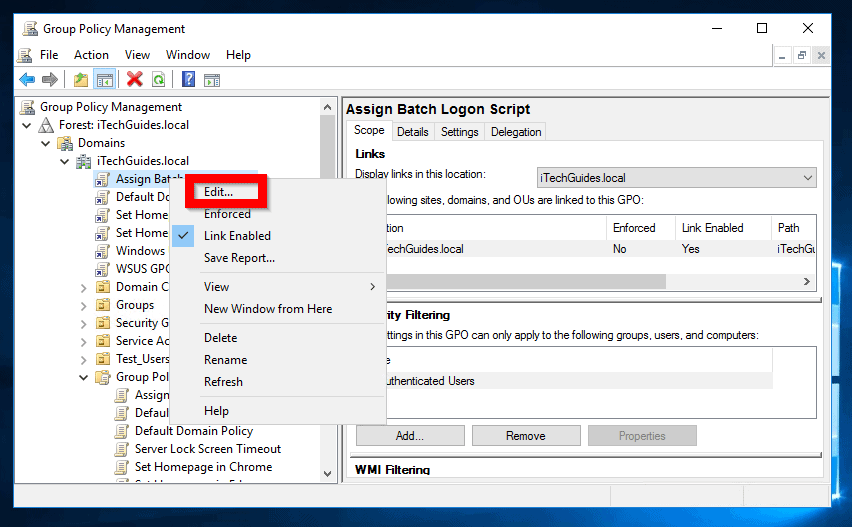
- When the navigate to User Configuration > Policies -> Windows Settings > Scripts.
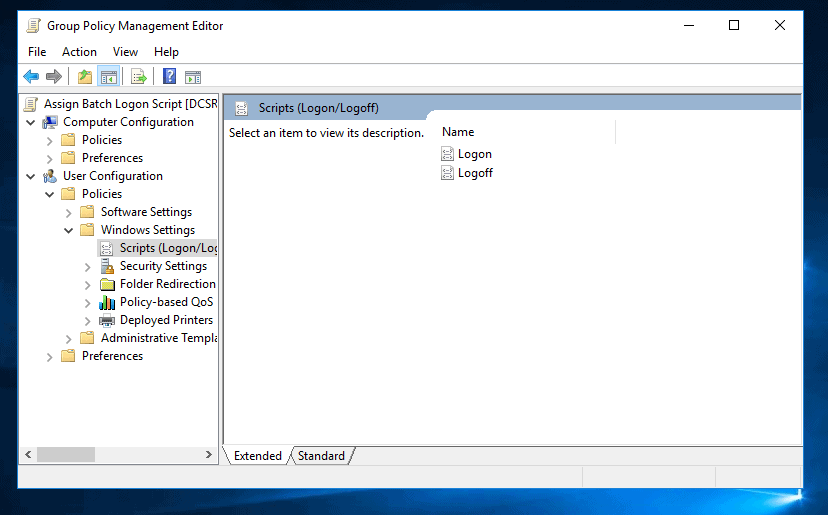
- Double-click Logon. Then click Show Files…
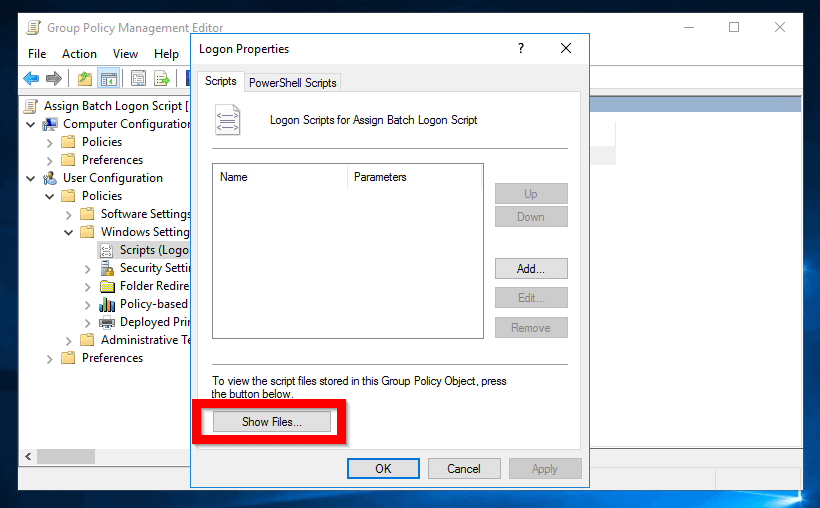
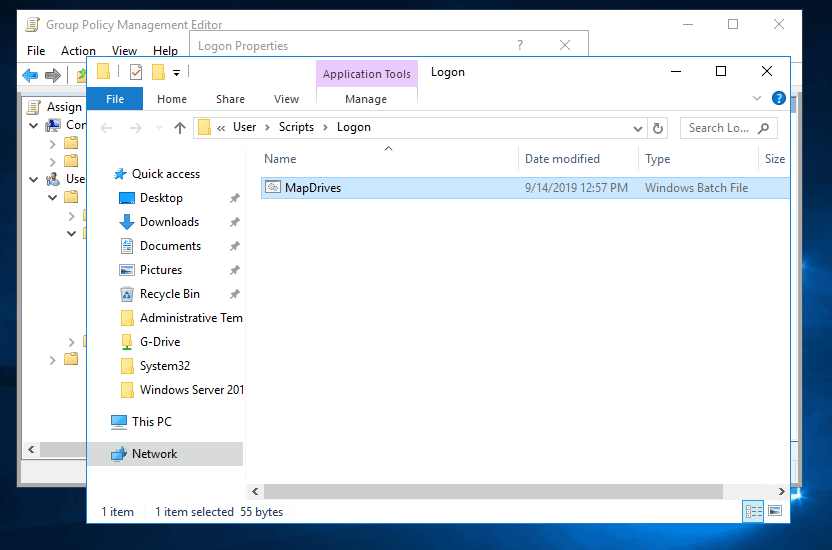
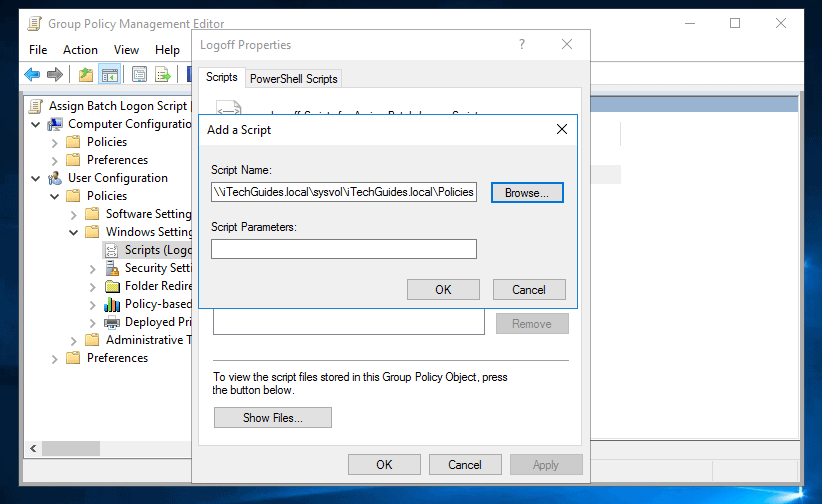
- When the path opens, paste the batch file. Then close the path.
\iTechGuides.local\sysvol\iTechGuides.local\Policies{653DBD32-0F2B-483F-8BCC-608A9754605D}\User\Scripts\Logon
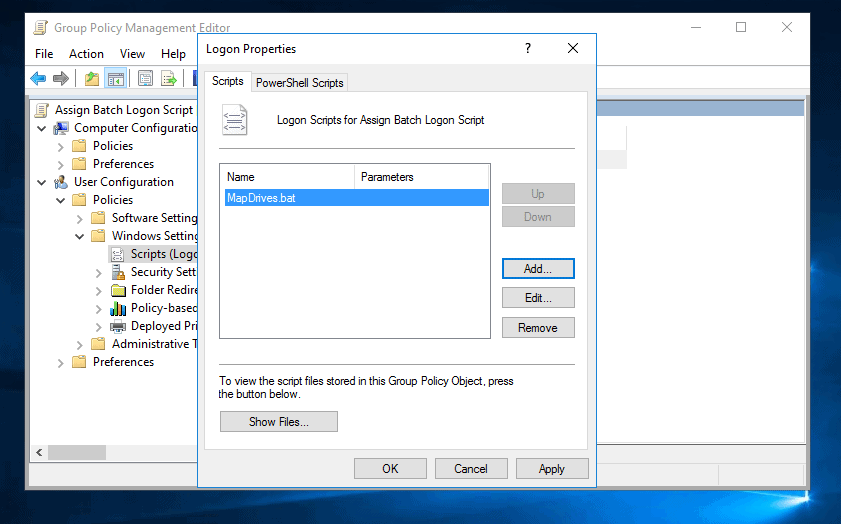
- When you return to Logon Properties, click Add.
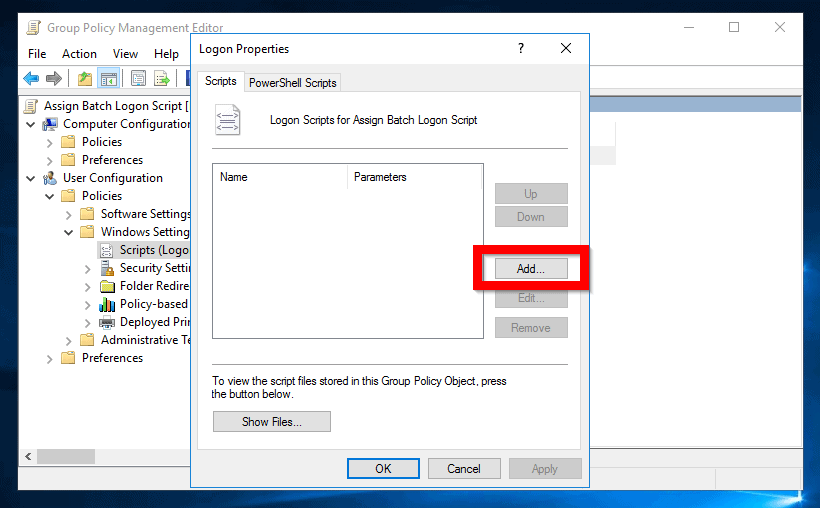
- When Add a Script window opens, click Browse.
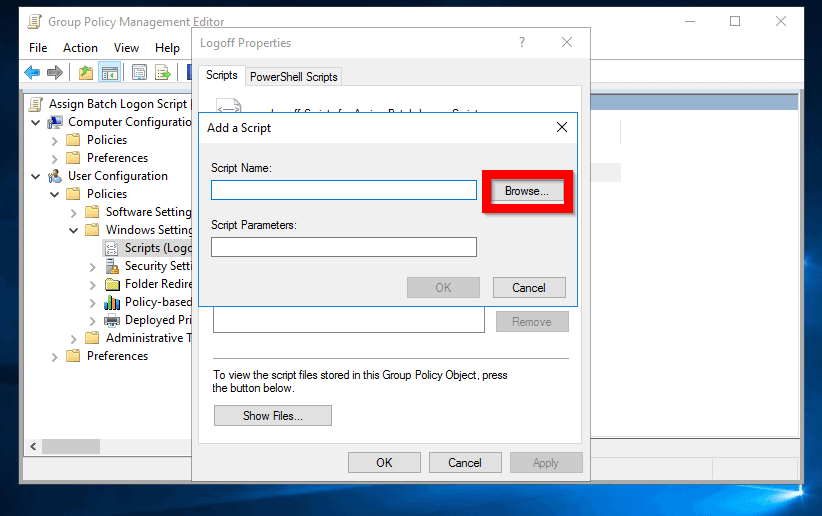
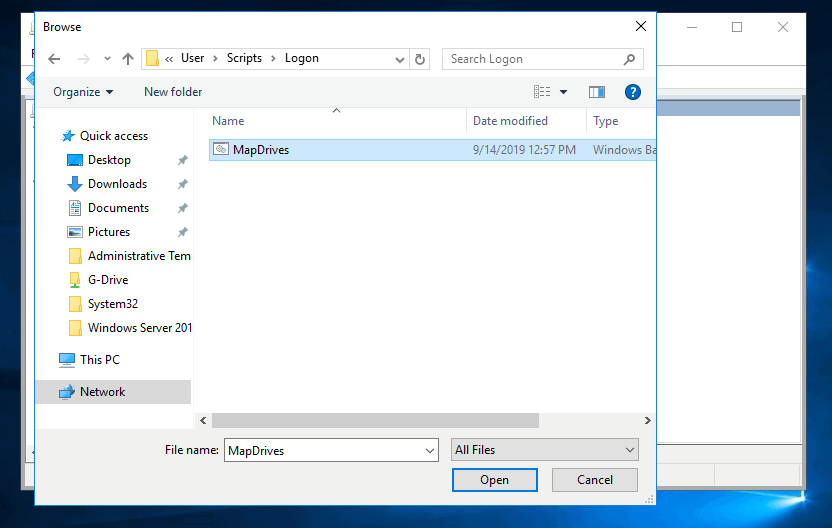
- Select the script you copied earlier. Then click Open.
- Back on the Add a Script window, click OK.
- Finally, on the Logon Properties click OK.
When next a user logs on to Active Directory, the script will run, and the drive will be mapped.
Option 6: Map Network Drive with Group Policy
For the steps to use this method, click Map Network Drive in Windows 10 with Group Policy.
Conclusion
As you can see, it is very easy to map a network drive on Windows 10! I hope you found this Itechguide helpful.
If you found this article helpful, kindly spare 2 minutes to share your experience with our community at [discourse_topic_url]. However, if you have any questions regarding this article or if the steps did not fix your problem, please post your question at [discourse_topic_url].
Our team and other community members will come back to you with a fix as soon as possible.
Finally, for more Windows 10 Itechguides, visit our Windows 10 How-To page.


Victor,
Trese steps are very straight forward: however, when I see the drive that I want to map and click on it I am requested to “load my Credentials and/or you may not have permission to access this drive.” This is where I’m lost.
Hi,
Thanks for your question. The problem is likely that you do not have Share or NTFS security permission to the mapped drive.