Do you wish to install an IIS manager on your Windows 11 computer? This article shows you ways to install IIS in Windows 11.
In this guide, you will learn three methods to install the IIS manager on your PC. To be more specific, you will learn how to install IIS from Control Panel and with DISM (Deployment Image Servicing and Management).
That’s not all; I will also show you how to perform this task using Windows PowerShell. Hence, at the end of this guide, you should be able to perform this task using any of the three methods I discussed in this guide.
Furthermore, this guide contains a Frequently Asked Questions section that provides answers to other questions you have on this topic or in Windows 11 in general.
How To Install IIS In Windows 11 From Control Panel

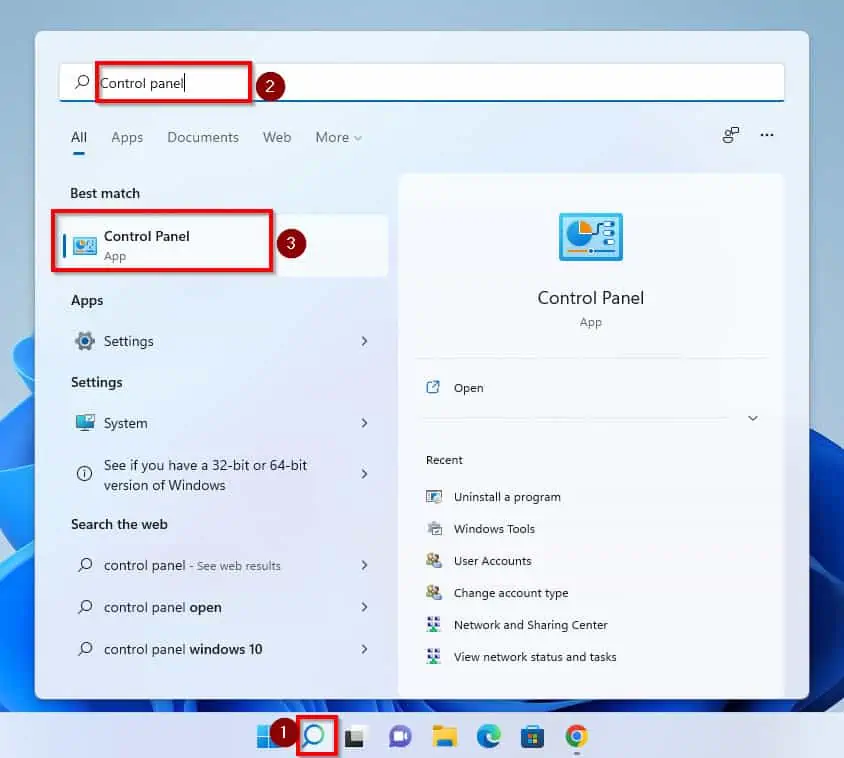
- To start with, click the Windows 11 search icon beside the Windows key in the Taskbar.
- Then, type the word control panel in the Windows 11 search box.
- From the result of your search, double click on Control Panel.
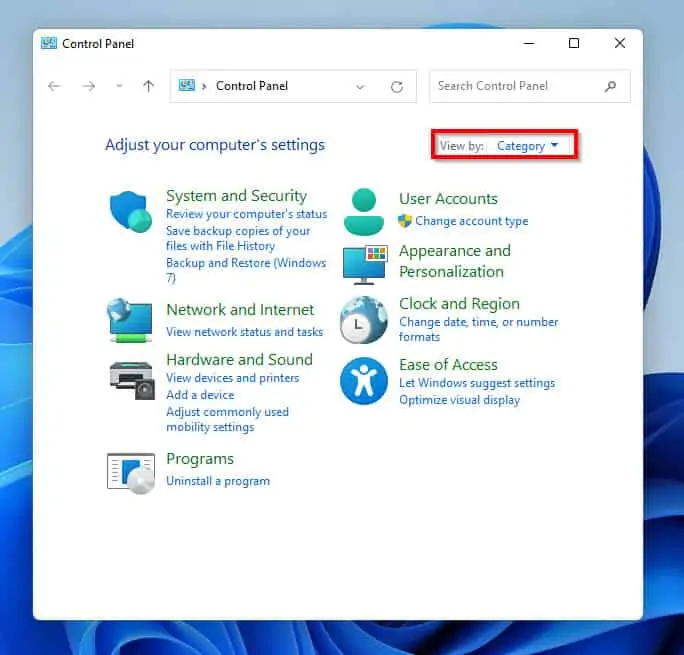
- In Control Panel, confirm that View by is set in the Category option. If it is not on this option, click the drop-down and select Category.
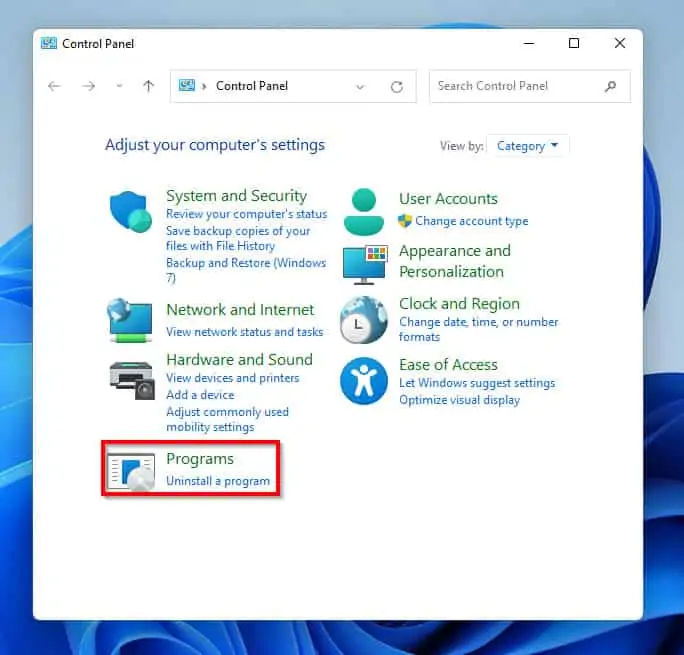
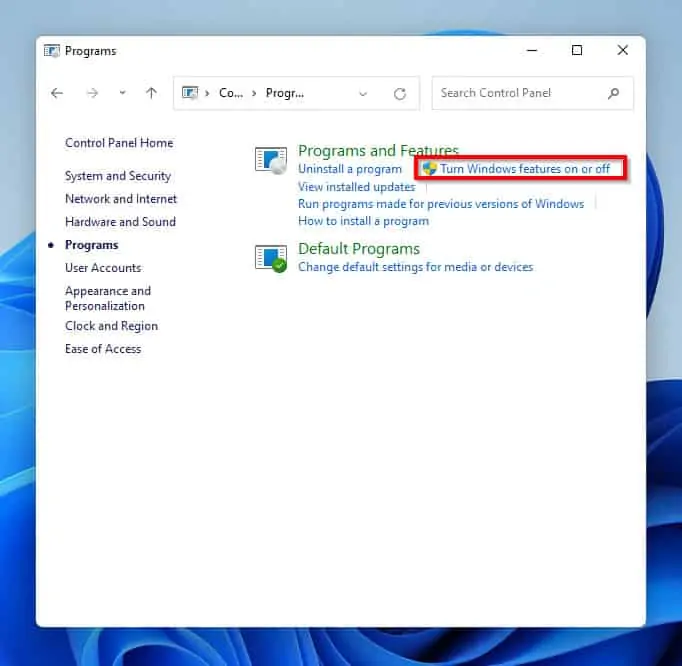
- Once that is done, click on Programs.
- When Programs opens, under the Programs and Features option click on Turn Windows features on or off. Clicking this will open a Windows Features pop-up menu.
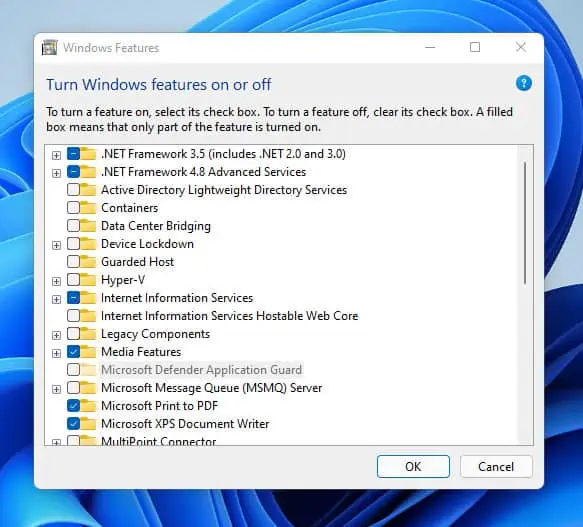
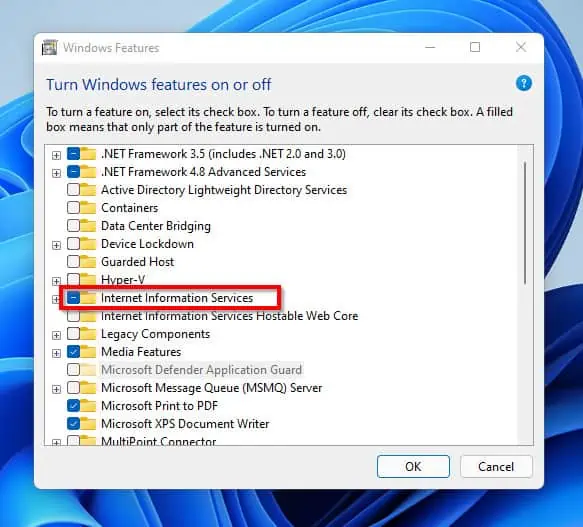
- On the Windows Features pop-up menu, locate the Internet Information Services option and click on the check box beside it. By clicking on the check box you have checked the default sub-features in this option.
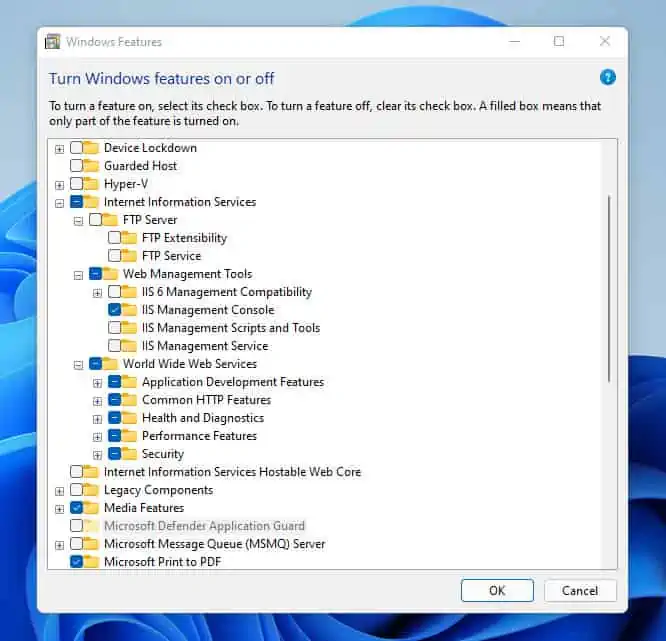
- Still on the Windows Features pop menu, if you wish to customize the features in the Internet Information Services option, click on the + sign beside the check box. Furthermore, you can expand the 3-sub-features folders and check additional feature(s) you wish to add to the installation.
- When you are done with your selection, click on the OK button to start the installation.
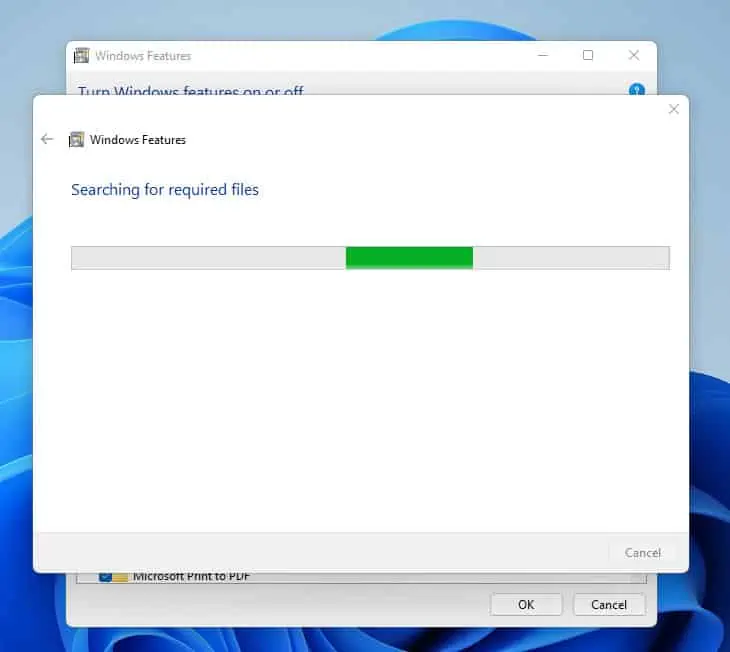
- Then, the installation process will commence by searching for the required files.
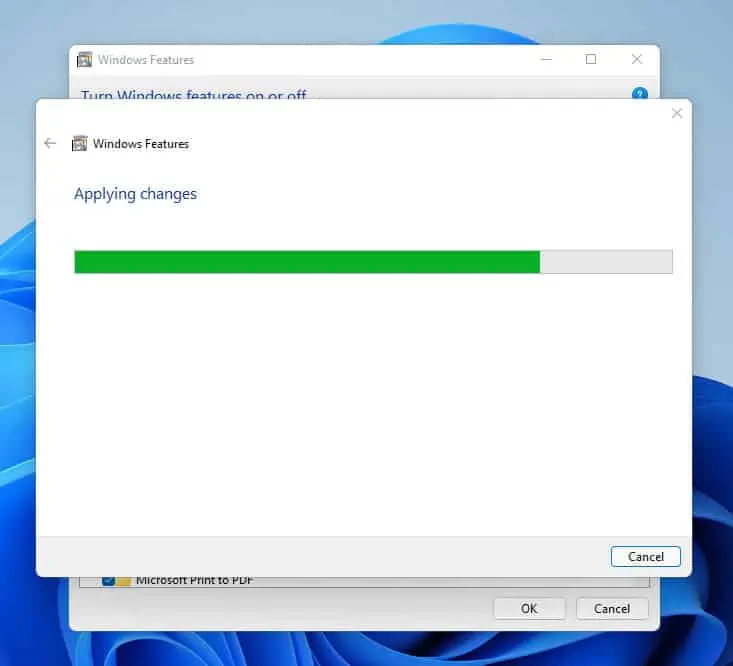
- Once the search is complete, the features will start applying. Here’s what it looks like.
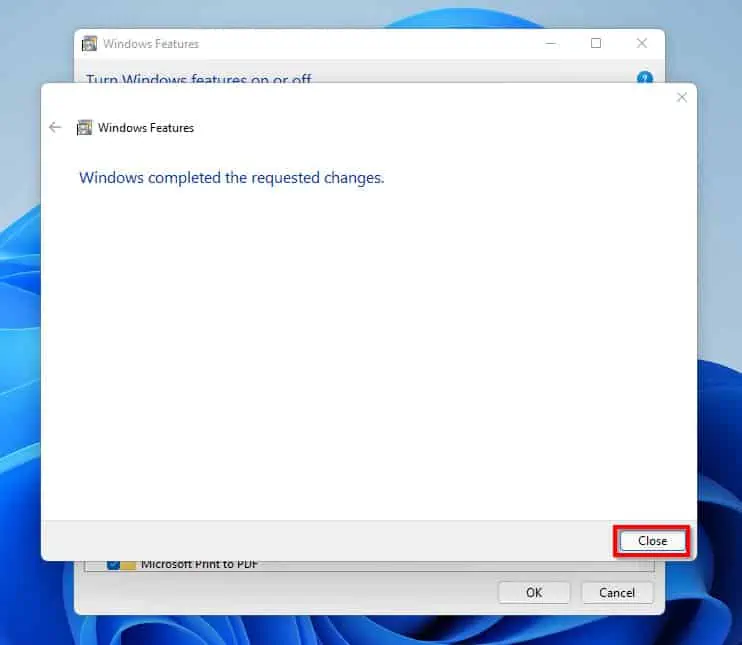
- When the installation is completed, click on the Close button at the bottom right corner of the pop-up screen.
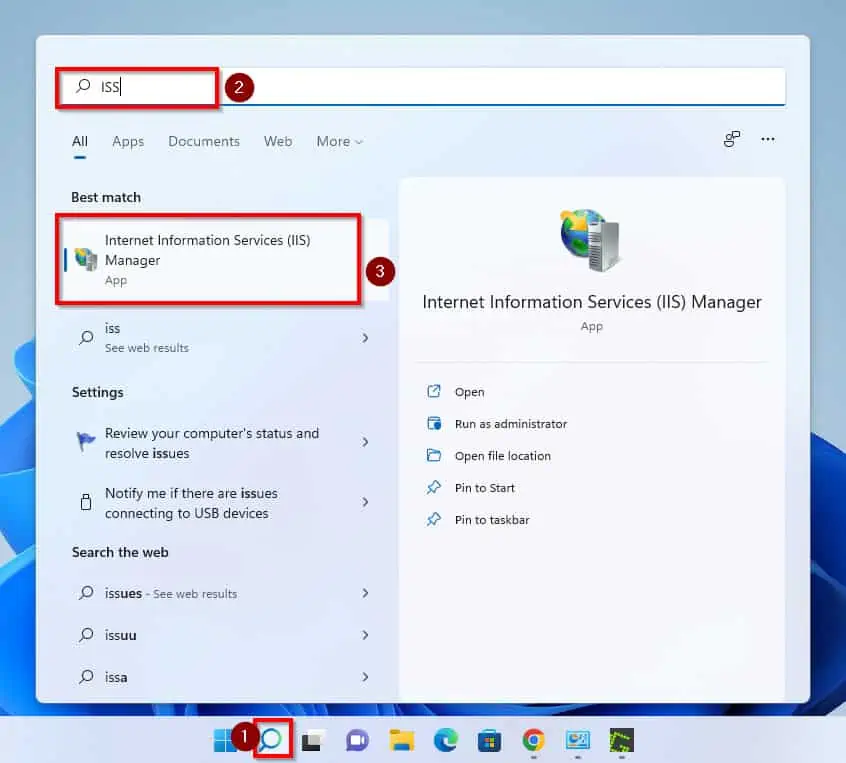
- Furthermore, to confirm that your installation was successful, click on the search icon beside the Windows start and type IIS in the search field.
How To Install IIS In Windows 11 With Command Line

As expected, you can also install IIS in Windows 11 using the command prompt. Follow the steps below to enable IIS with the DISM command:
- Firstly, click on the search icon next to the Windows start menu on the Taskbar and type cmd in the search field.
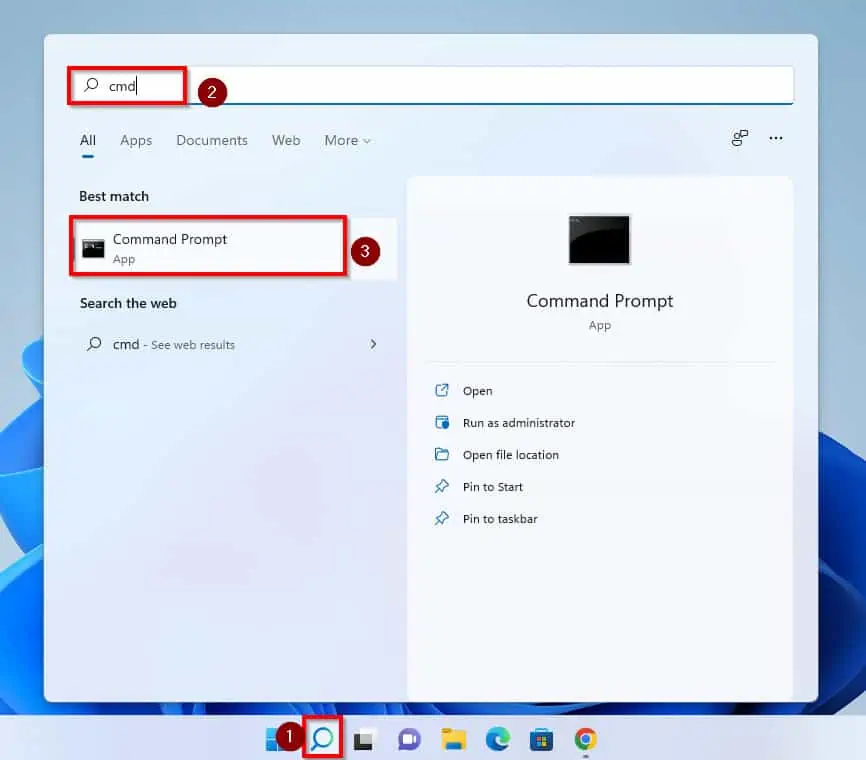
- On the right pane of your search results, beneath Command Prompt, click on Run as Administrator.
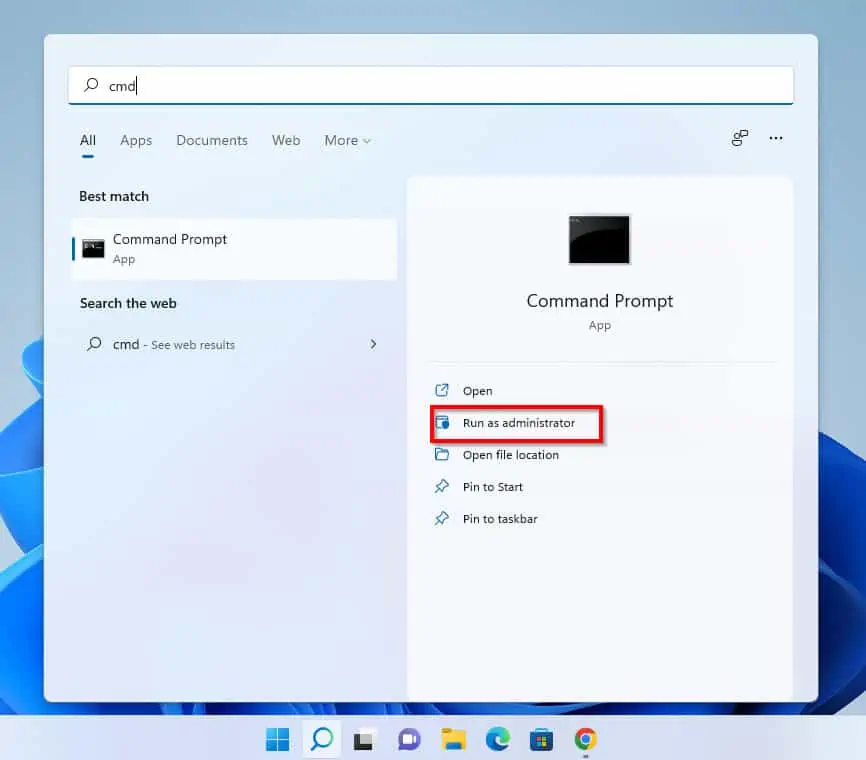
- Click Yes to the User Account Control prompt requesting to allow the app to make changes on the PC.
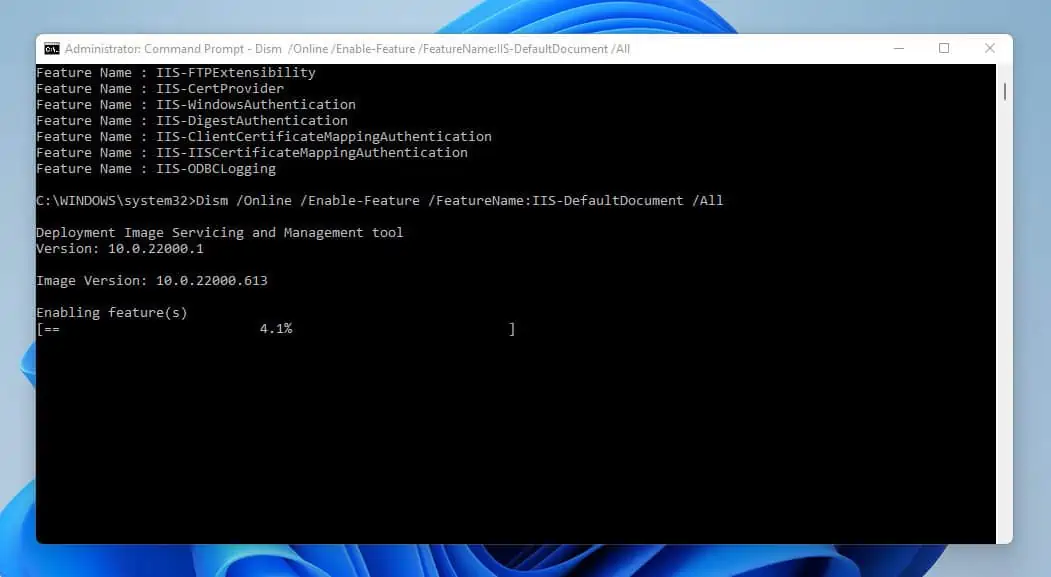
- When Command Prompt opens, type the command below and press enter.
DISM.exe /Online /Get-Features | find "IIS"
The result of this command will show all available IIS features…
- To install the IIS default features, type the command below and press enter on your keyboard. This command will initiate the installation process.
Dism /Online /Enable-Feature /FeatureName:IIS-DefaultDocument /All
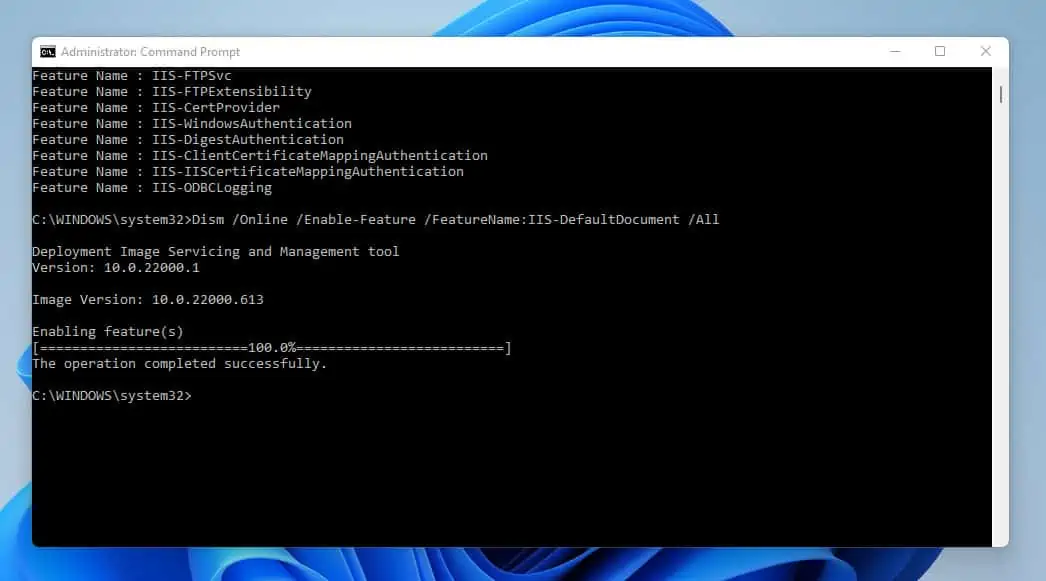
- Once Enabling feature (s) bar reaches 100% and displays “The operation completed successfully,” you have successfully installed IIS.
How To Install IIS In Windows 11 With PowerShell

Here are the detailed steps to install IIS in Windows 11 using Windows PowerShell:
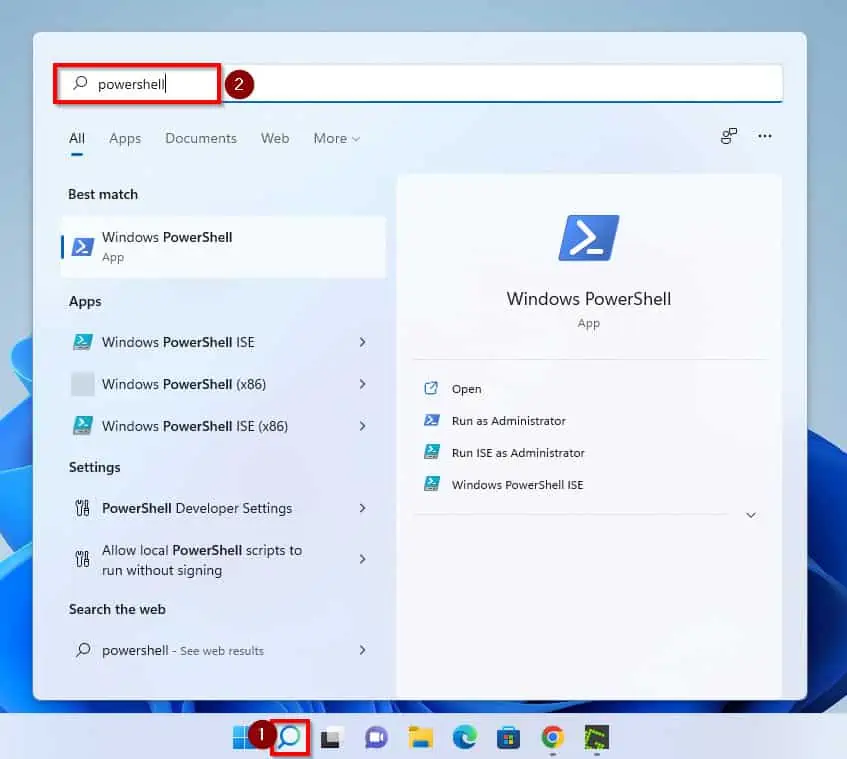
- To begin with, click on the search icon next to the Windows start menu on the Taskbar. In the search field, type the word powershell.
- Then, on the right pane of your search results, click on Run as Administrator beneath PowerShell.
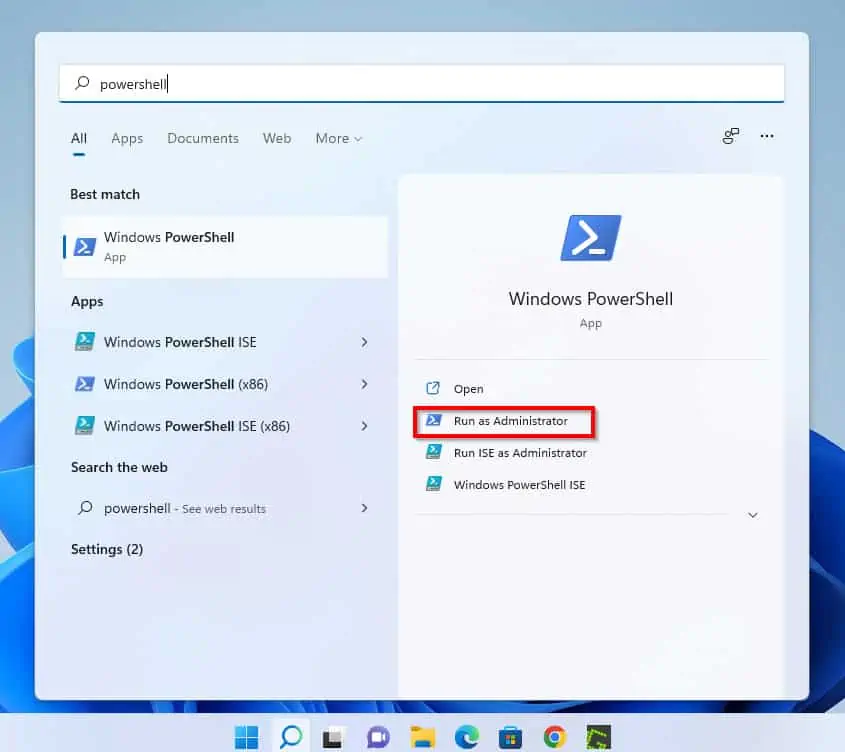
- You will receive a User Account Control prompt requesting that you grant permission to Powershell to make changes on your PC. Click on the Yes button to proceed.
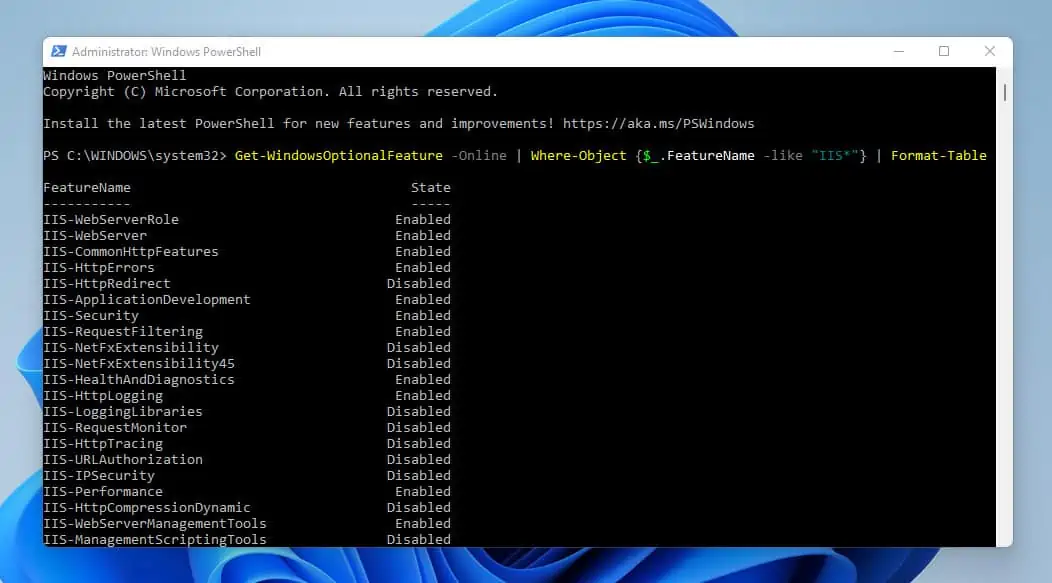
- In PowerShell, type the command below and press enter to get a list of all IIS optional features.
Get-WindowsOptionalFeature -Online | Where-Object {$_.FeatureName -like "IIS*"} | Format-TableHere is what the results of the command will look like in PowerShell. However, some of the results are hidden in my screenshot below.
- Moving on, to install the default IIS features, type the command below and press enter to proceed.
Enable-WindowsOptionalFeature -Online -FeatureName "IIS-DefaultDocument" -All
- Once you’ve entered the command, PowerShell will begin the IIS installation.
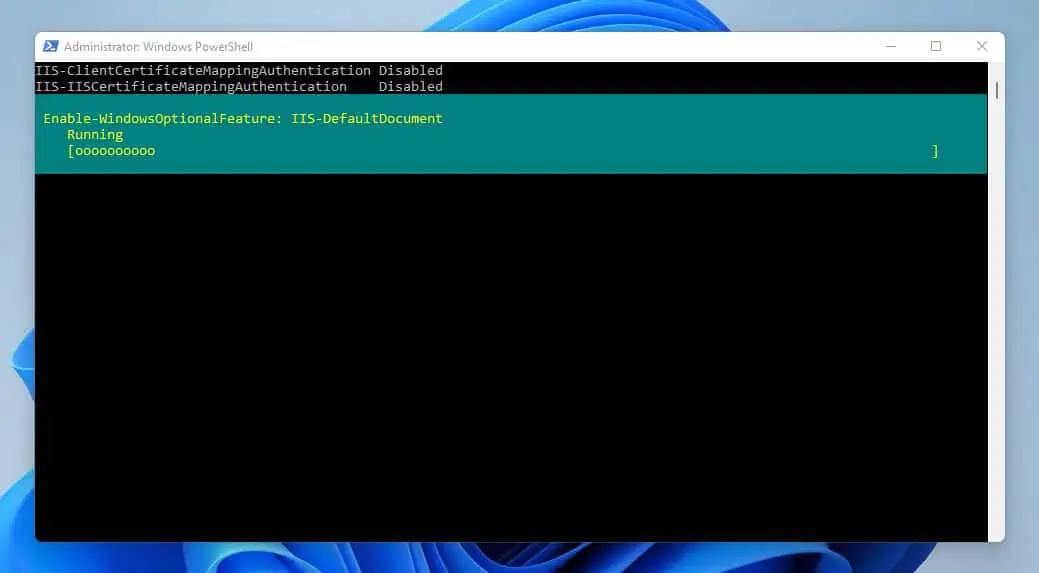
- When the installation is completed, it will display a result similar to the one in the image below.
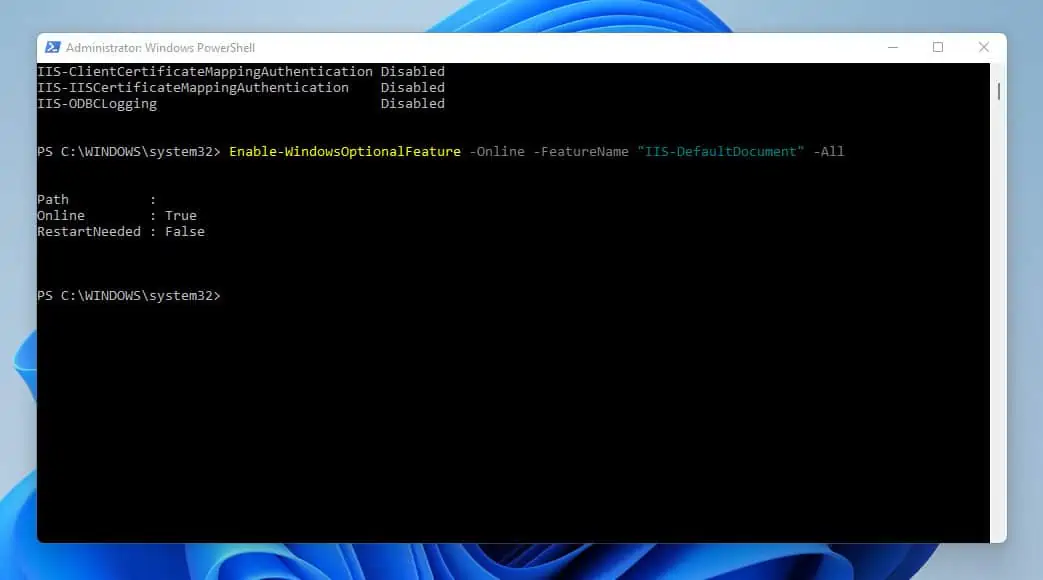
- Hence, you have successfully installed IIS with PowerShell.
How To Install IIS In Windows 11: Frequently Asked Questions

To get the IIS (Internet Information Services) manager on your Windows 11 computer, follow these simple steps below:
a) Click on the search icon right next to the Windows start menu on your Taskbar.
b) On the search field, type control panel, and from the result of your search, click on Control Panel.
c) In Control Panel, click System and Security.
d) Next, click on the Administrative Tools window and double-click Internet Information Service (IIS).
No, it isn’t. Tomcat is a server developed for running Java and JSP applications.
Also, it has an HTTP web server that is capable of running Java codes. On the contrary, IIS is a Microsoft web server for processing HTML documents, and it is exclusive to Windows Servers.
IIS is an acronym for Internet Information Services. It is a multi-purpose web server developed by Microsoft to process HTML files and pages.
Navigate to your computer’s Control Panel-> select Programs-> click on Programs and Features->open “Turn Windows Features on or off“-> click on the checkbox in front of Internet Information Service.-> Then click the OK button.
No, it doesn’t. Installing IIS does not require your system to reboot.
How To Install IIS In Windows 11: My Final Thoughts

IIS (Internet Information Services) is a web server that processes HTML files and pages. To give more details, the server is capable of securely hosting and sharing information on the internet.
Hence, this guide teaches you how to install IIS on Windows 11 using three different methods.
Was this post helpful to you? If you found this article helpful, kindly spare 2 minutes to share your experience with our community at [discourse_topic_url]. .
However, if you have any questions regarding this article or if the steps did not fix your problem, please post your question at [discourse_topic_url]. Our team and other community members will come back to you with a fix as soon as possible.
Finally, for more Windows 11 guides and fixes, visit our Windows How-To page.