Have you ever wanted to have full control of your Windows 11 PC by becoming an administrator? This guide shows you how to get administrator privileges on Windows 11.
Option 1: Get Administrator Privileges via Windows Settings
Here is the step-by-step method of granting you or someone else administrator privileges on a Windows 11 PC via Windows Settings.
- Ensure that you are logged in to your Windows 11 PC as an administrator.
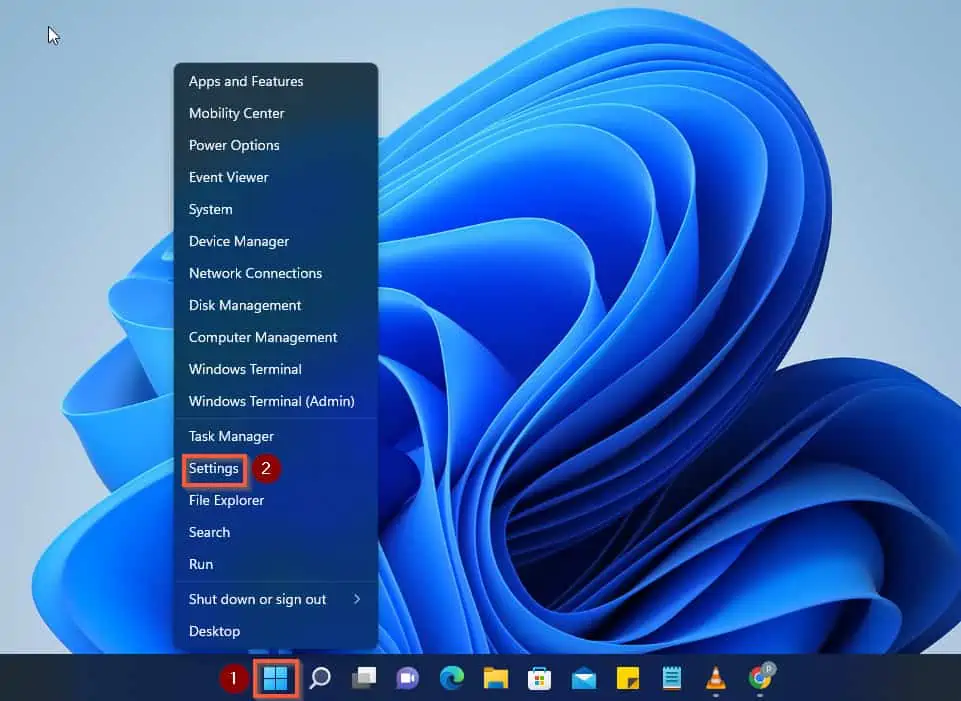
- Once you are logged in, right-click on the Windows 11 start menu and click Settings.
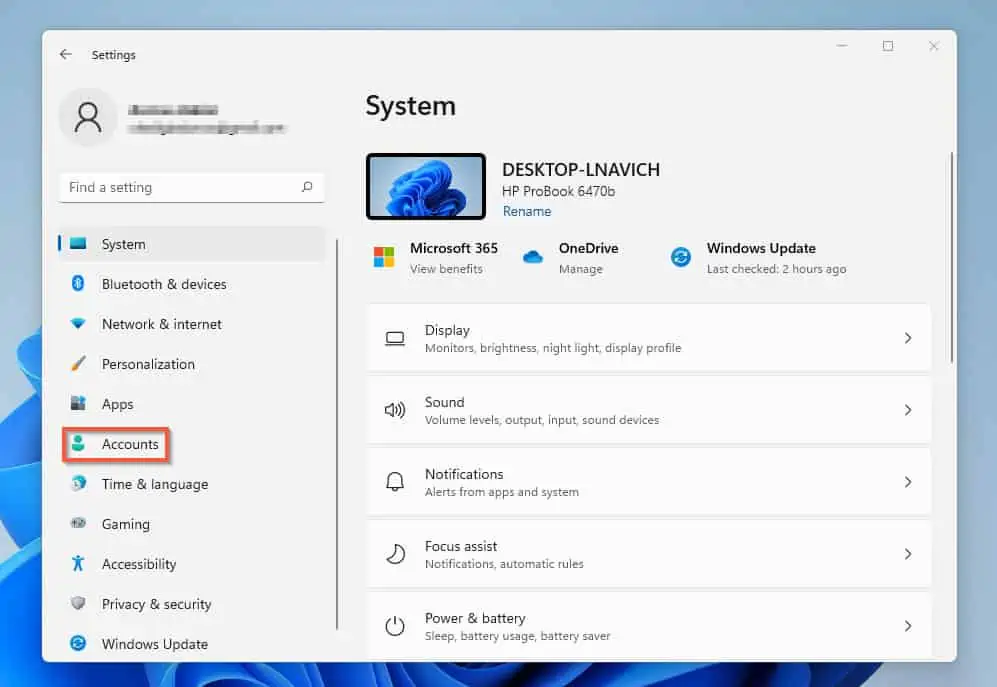
- On the left pane of the Windows 11 settings page, click Accounts.
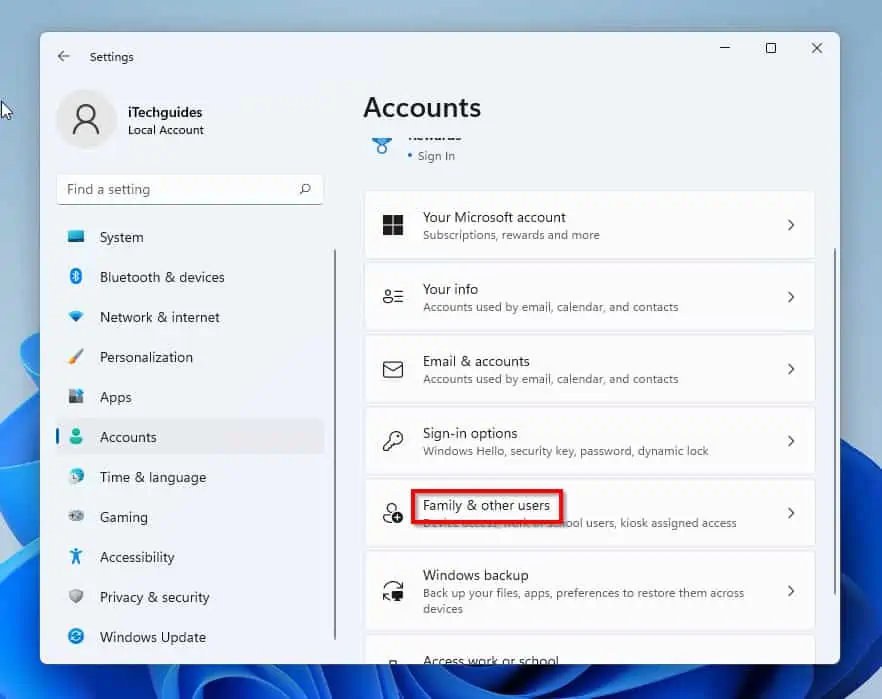
- Then, on the right pane of Your info screen, click on Family & other users.
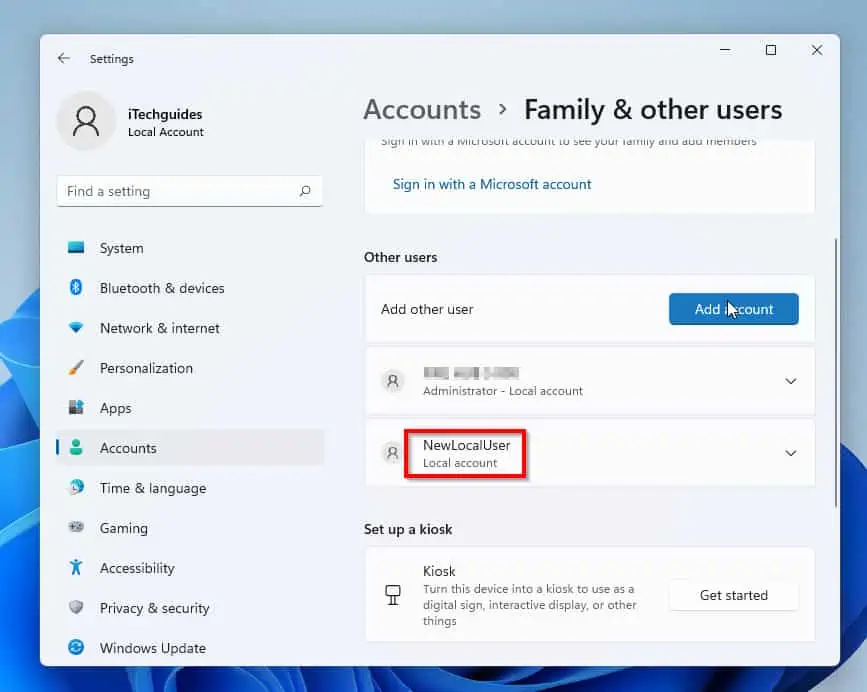
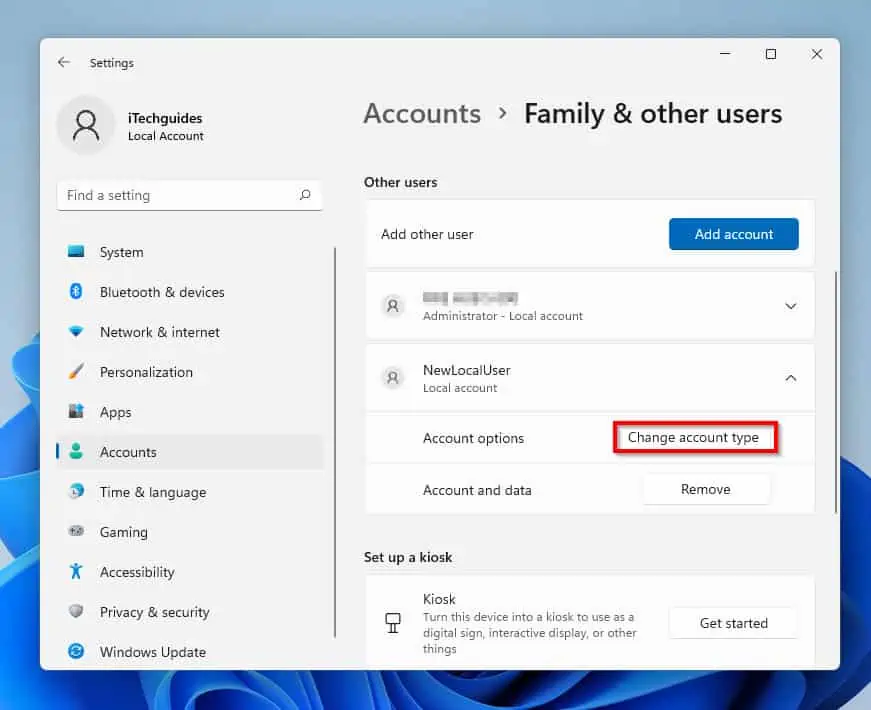
- As soon as the Family & other users screen loads, click on the account you want to grant administrator permission. The account in question will expand, giving your access to additional options.
- When that happens, click on the Change account type option.
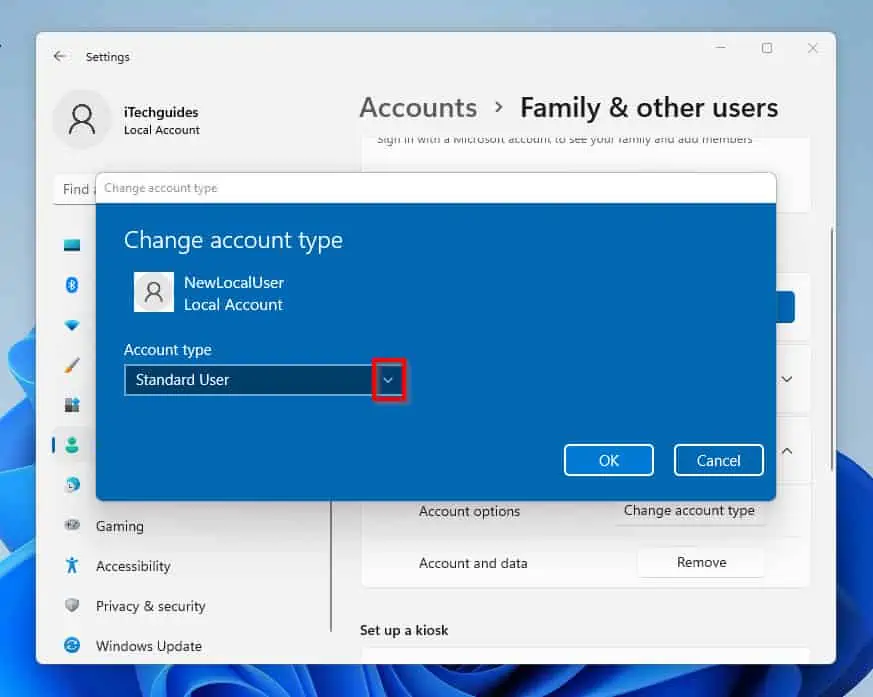
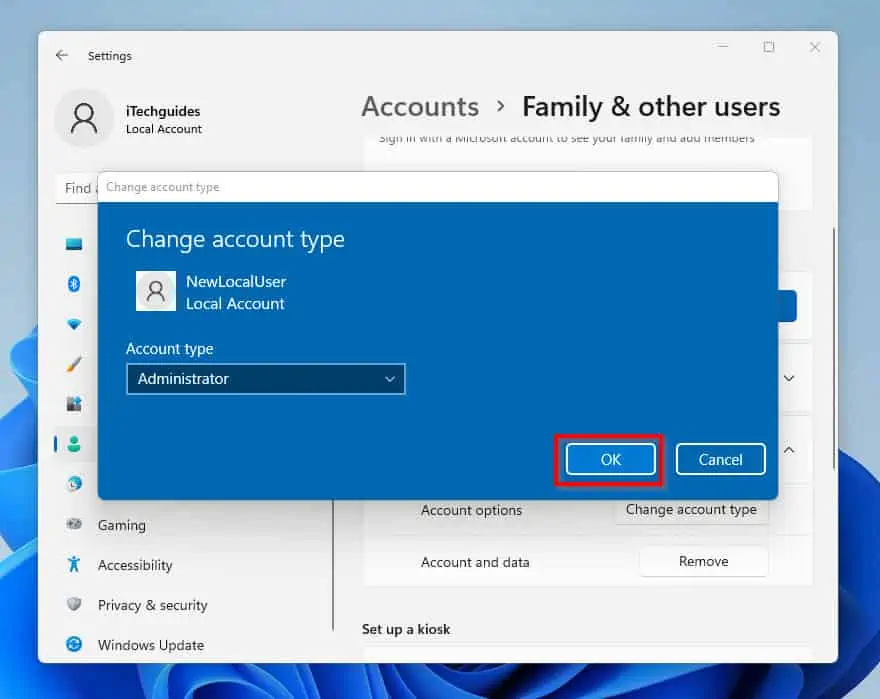
- Lastly, on the Change account type menu that pops up, click on the Account type drop-down and select Administrators.
- Finally, click the OK button at the bottom right corner of the Change account type pop-up menu.
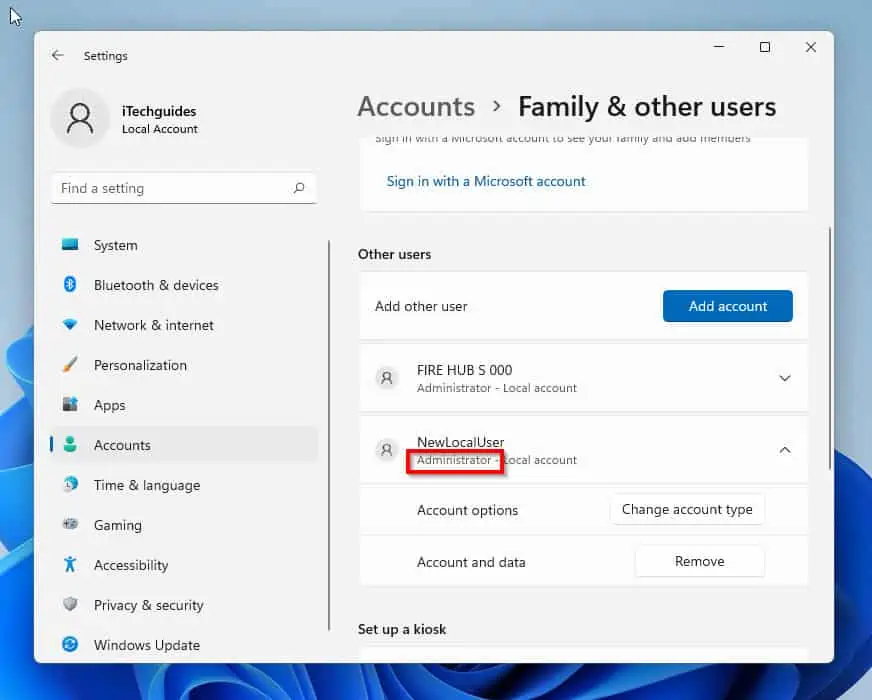
- Once this is done, you will be taken back to the Family & other users menu. In conclusion, the user is now a member of the Administrator group and can enjoy admin privileges.
Option 2: Get Administrator Privileges with Command Prompt
This section is mainly for Windows admins that prefer command prompt over GUI (graphical user interface).
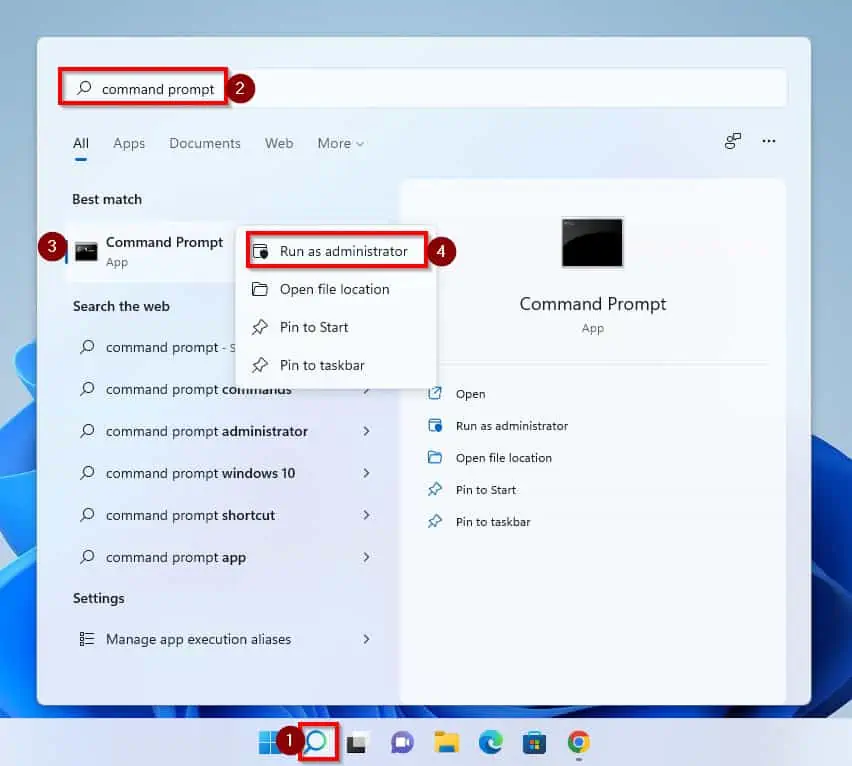
- To begin with, click the Windows 11 search icon on the Taskbar and type command prompt or cmd in your PC’s search box. From your search results, right-click on Command Prompt and then select Run as administrator.
- Click on the Yes button to the User Account Control permission menu that pops up afterward. Basically, this confirmation message requests for you to give access to this program to make changes on your PC.
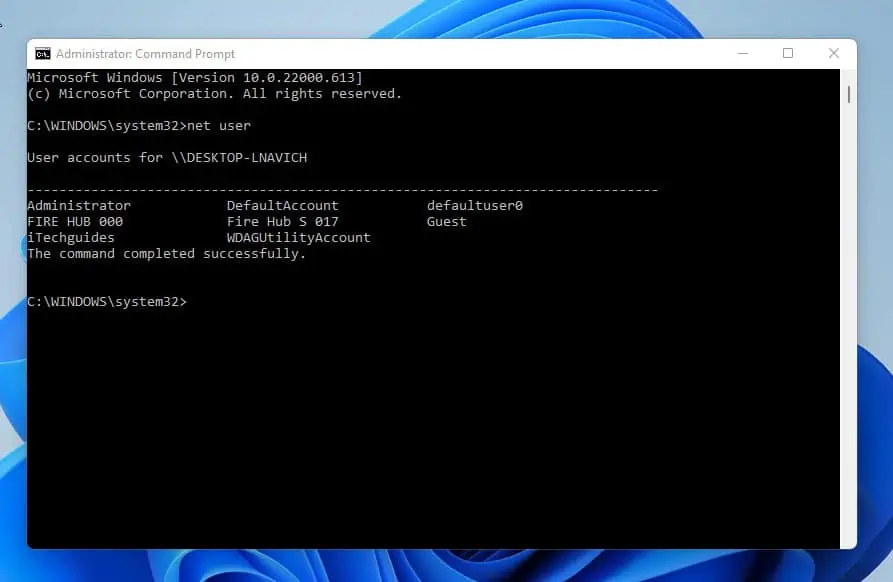
- Within Command Prompt, to get a list of all the users on your computer, type the command below and press enter.
net user
- Once the command executes, copy the username of the user you wish to grant administrator privilege.
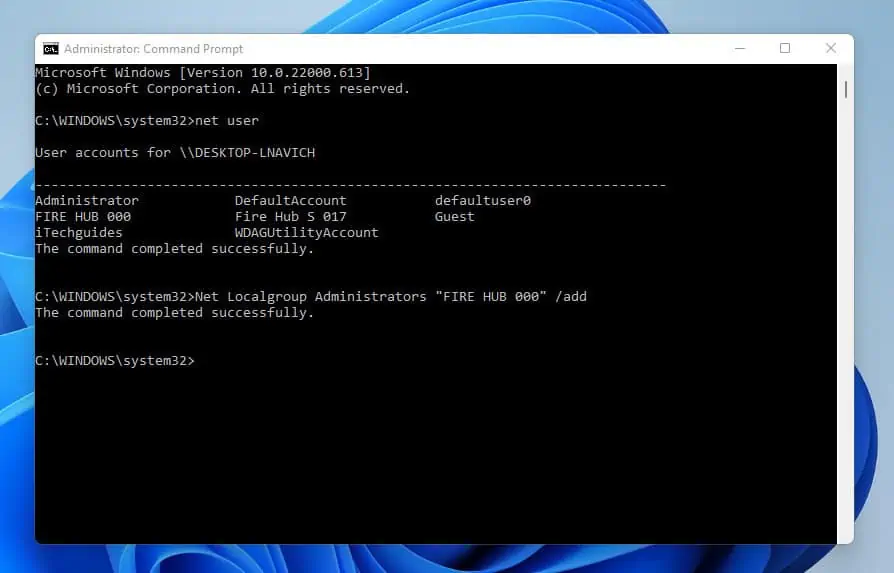
- Finally, to grant user administrator privileges on Windows 11, simply type the command below and press enter.
Net Localgroup Administrators UserName /add
Replace UserName with the username of the user you desire to include in the administrators’ group. For instance, I added the user Fire Hub 000 to the local administrators’ group.
Here’s what the modified command will look like.
Net Localgroup Administrators "FIRE HUB 000" /add
- To confirm that you have successfully granted the user administrator privileges, the command prompt will display “The command completed successfully”.
- Similarly, to remove administrator privileges from a user on your computer, type the command below and press enter.
Net Localgroup Administrators "FIRE HUB 000" /Delete
- If the command returns “The command completed successfully,” you have removed the user’s administrator privileges.
Option 3: Get Administrator Privileges with PowerShell
To begin with, in case you are not aware, PowerShell is Microsoft’s tool that aids Windows admins to automate Windows tasks. So, if you’re a PowerShell enthusiast, you will love this section.
Follow the steps below to grant a user administrator privileges with Powershell.
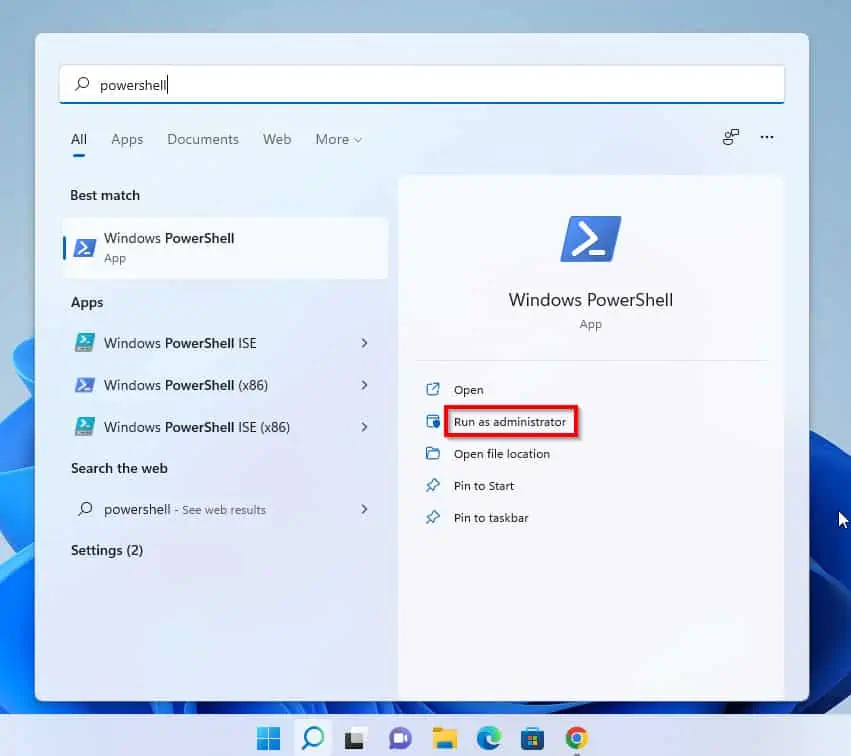
- Click on the search icon that is found beside the Windows icon on your Taskbar and type Powershell in the search field. From your search results, right-click on Windows PowerShell and select Run as Administrator.

- You will get a User Account Control prompt requesting permission to allow PowerShell to make changes on your PC. Click Yes to proceed.
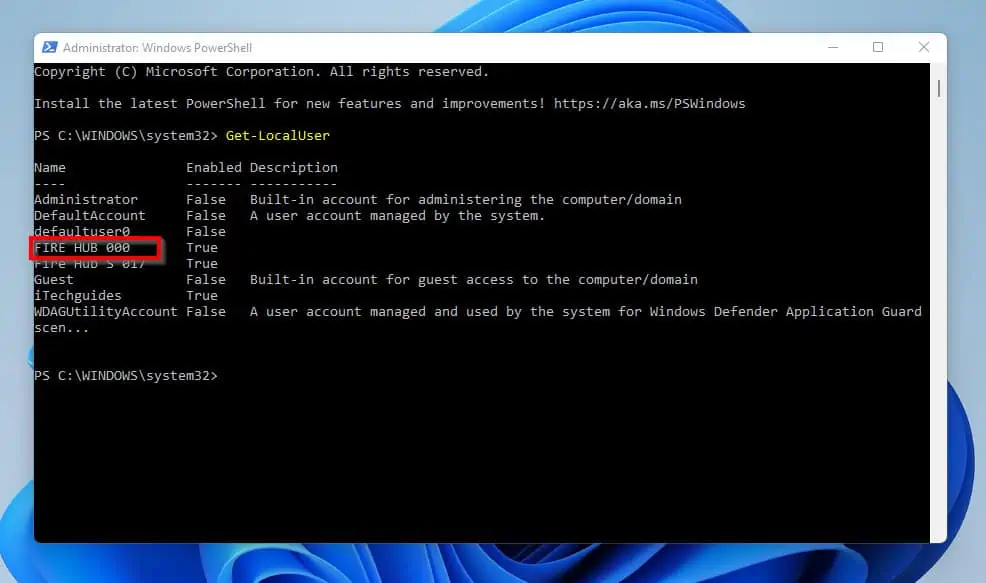
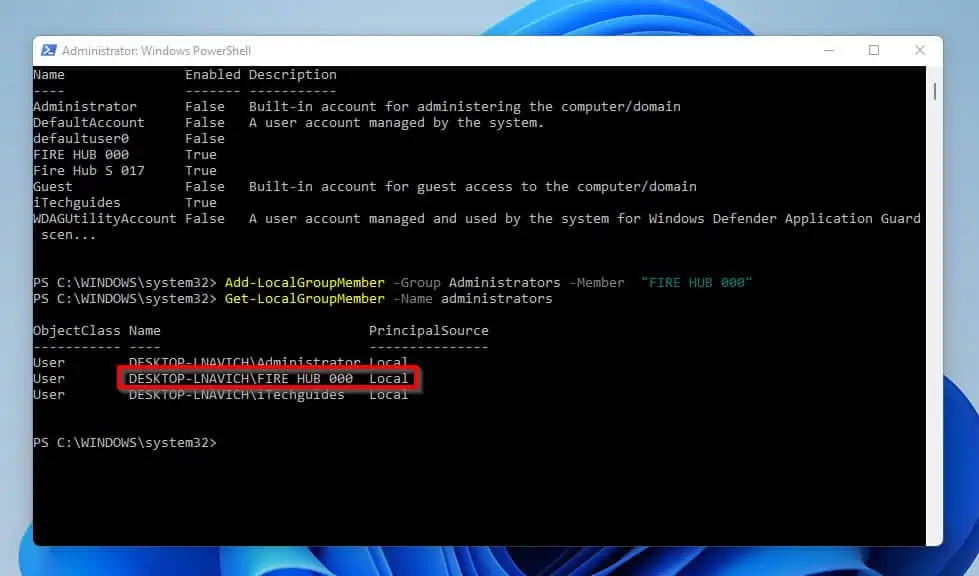
- Once PowerShell opens, type the command below and press enter to get the list of all the users on the PC.
Get-LocalUser
- As soon as you input this command, you will get a list of all local users on the computer. On the list, note and copy the username of the user you intend on adding to the administrators’ group.
For this example, I will be adding the user FIRE HUB 000 to the administrator’s group, as shown in the image below.
- Then, type the command below and press enter to grant the user administrator privileges on Windows 11 with PowerShell.
Add-LocalGroupMember -Group Administrators -Member "FIRE HUB 000"
- Type the command below and press enter to confirm that the user is now on the local administrators’ group.
Get-LocalGroupMember -Name administrators
- The user is now on the list of administrators.
- On the contrary, if you want to remove administrator privileges, type the command below and press enter.
Remove-LocalGroupMember -Group Administrators -Member "FIRE HUB 000"
- Then, use the command below to confirm that the administrator’s privileges have been revoked from the user.
Get-LocalGroupMember -Name administrators
- The result of this command confirms that the user, FIRE HUB 000 is no longer a member of the Administrators’ group.
Frequently Asked Questions
a) To start with, right-click on the start/windows icon on your taskbar and select Settings.
b) When the settings menu opens, click on Account that is found on the left pane of the page. Then, on the right pane of the page, select the family & other users option.
c) In the family and other users page, click on the user you want to make an admin and click change account type.
d) Once the page pops up, click on the scroll down button and select administrator.
e) Finally, to save the changes you have made, click on the OK button in the lower right corner of that menu.
You are not an Administrator because you don’t belong to the administrator group. To become an Administrator on your Windows 11 computer, you need to add your account to the administrators’ group.
Follow the steps in my answer to question 1 above to make yourself an administrator. Remember, before you can add yourself as an administrator, you need to log in to the computer with the Local Administrator account.
a) To navigate to Control Panel, click on the search icon right next to the Windows start menu on your Taskbar. Type control panel on the search box to start the search.
b) From your search results, double click on the already highlighted Control Panel to proceed to your PC’s control panel.
c) Alternatively, click on the Open button on the right pane from your search result to proceed to the computer’s control panel. 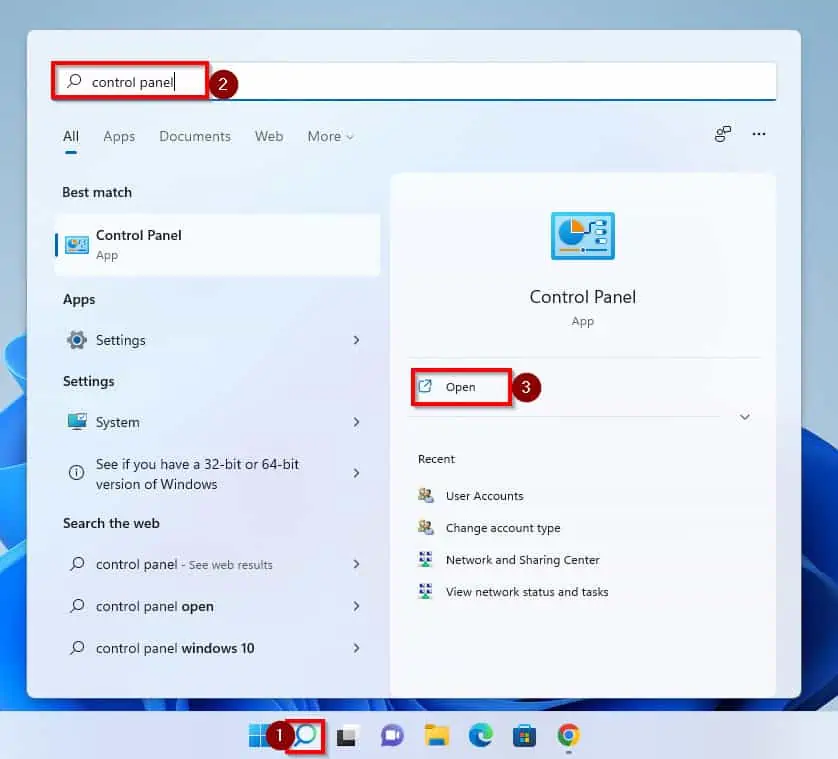
You can update your current Windows 10 computer to Windows 11 as long as your PC meets up with the minimum hardware specification for Windows 11 to run. Hence, to do the upgrade, go to Settings -> Update & Security -> Windows Update and click on Check for Updates.
If the Windows 11 update is available, click on Download and Install.
However, if the Windows 11 update is not available, you can follow our article on how to install Windows 11 manually for free.
No, it is not. Computer management is the framework that houses the Windows administrative tools. These administrative tools used for computer management tasks are grouped into three different categories –
System Tools, Storage, Service, and Applications.
Furthermore, each of these categories contains several tools or services used to perform computer management tasks.
Conclusion
If you desire to take full control of what happens on your Windows 11 computer, you need to have administrator privileges. However, before that can happen, you must have access to the password of the built-in Administrator account.
Alternatively, you can ask a user who is already an administrator to add you. Nevertheless, the three methods discussed in this article should be useful to you in getting administrative privileges.
The first method gives a detailed approach on perform the task using the Windows Setting. Furthermore, this guide also shows how to perform this task with Command Prompt and Windows PowerShell.
Thus, following the steps in this guide, getting administrative privileges on Windows 11 becomes relatively easy and sweatless.
If you were able to gain administrator privileges on your PC by following the steps in this guide, click on “Yes” beside the “Was this page helpful” question below. You may also express your thoughts and opinions by using the “Leave a Comment” form at the bottom of this page.
Finally, visit our Windows 11 How-To page to get more Windows 11 Itechguides. Also, you may find our Windows 10 How-to page.


