Do you wish to empty the trash in WordPress but have no idea how? You should read through this guide as it provides several ways to do that.
Option 1: Clear Trash Using Bulk Action
One way to clear the trash on your WordPress site is by using the bulk actions feature. This feature allows you to select multiple items in WordPress and perform various actions.
That being said, follow the steps below to learn how to get rid of the trash on your WordPress website using bulk actions.
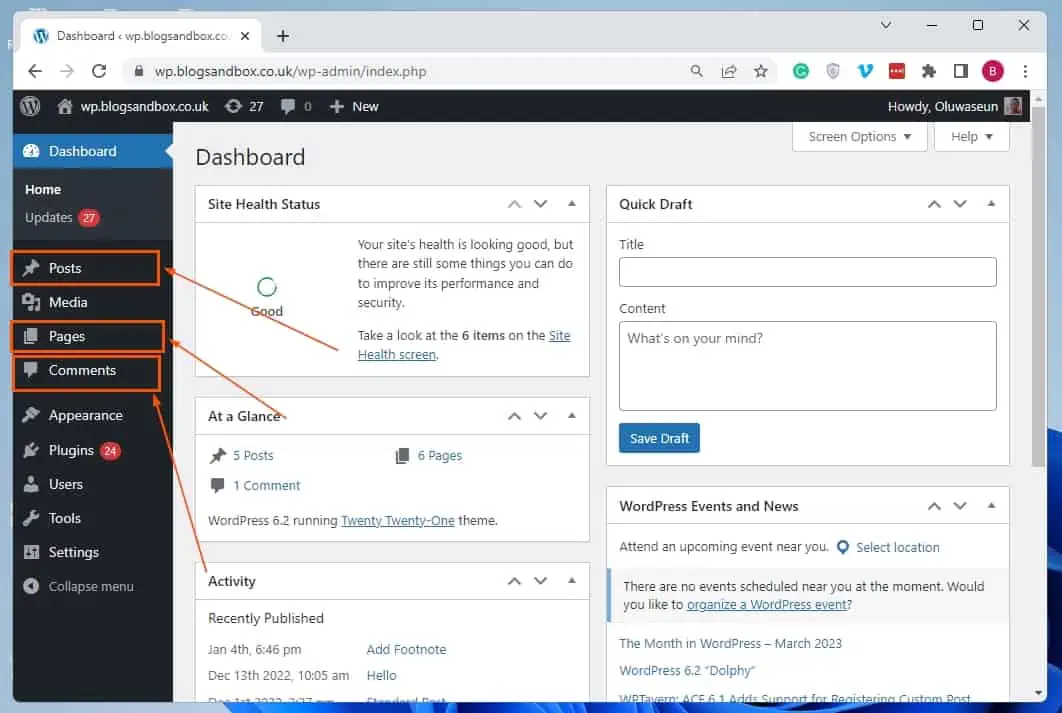
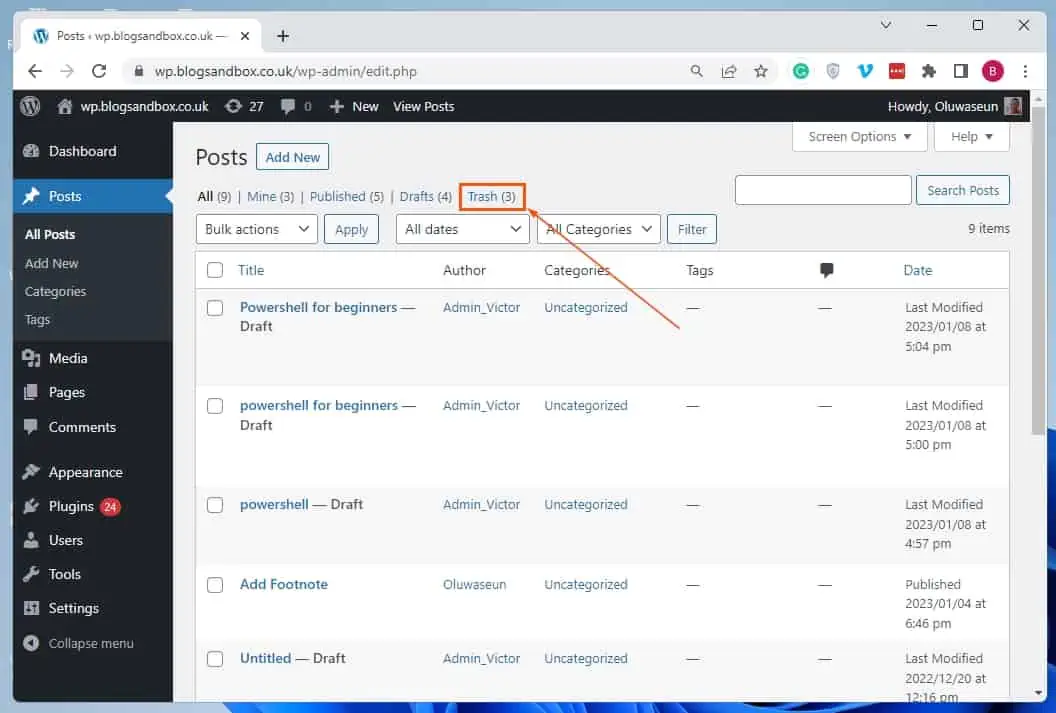
- Login to the WordPress backend as an admin. Then, click Posts, Pages, or Comments on the left pane, depending on which trash you wish to empty.
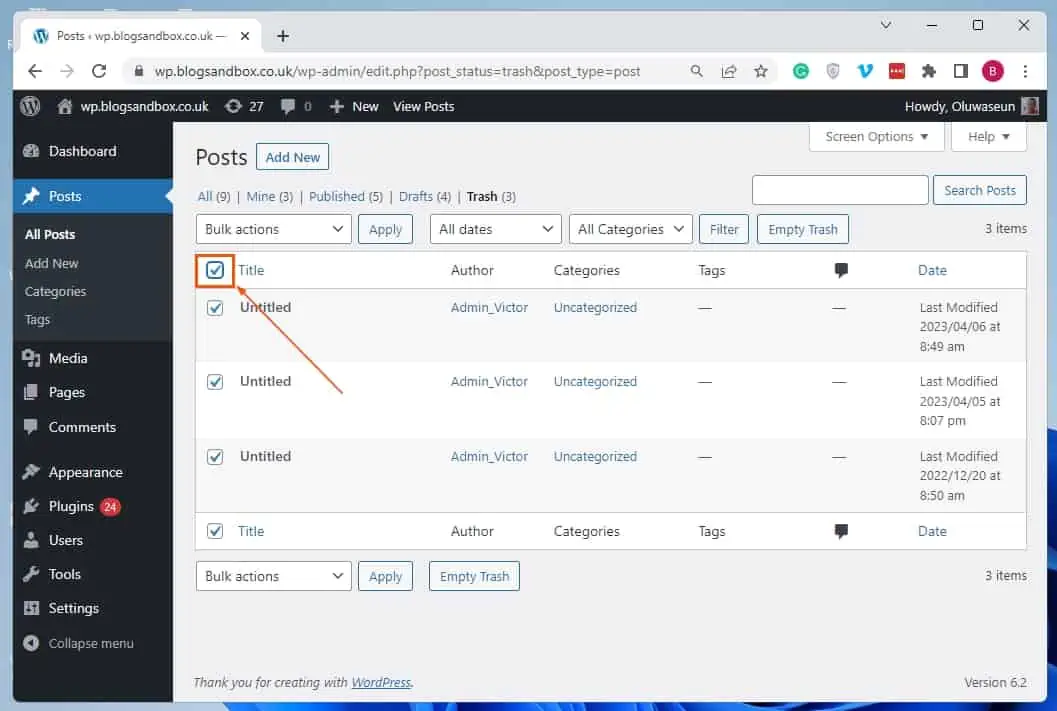
- Now, switch to the Trash tab on the next page.

- Afterward, click the checkmark box beside Title to select all the items in the trash.
- Then, click the Bulk actions drop-down and select Delete permanently.
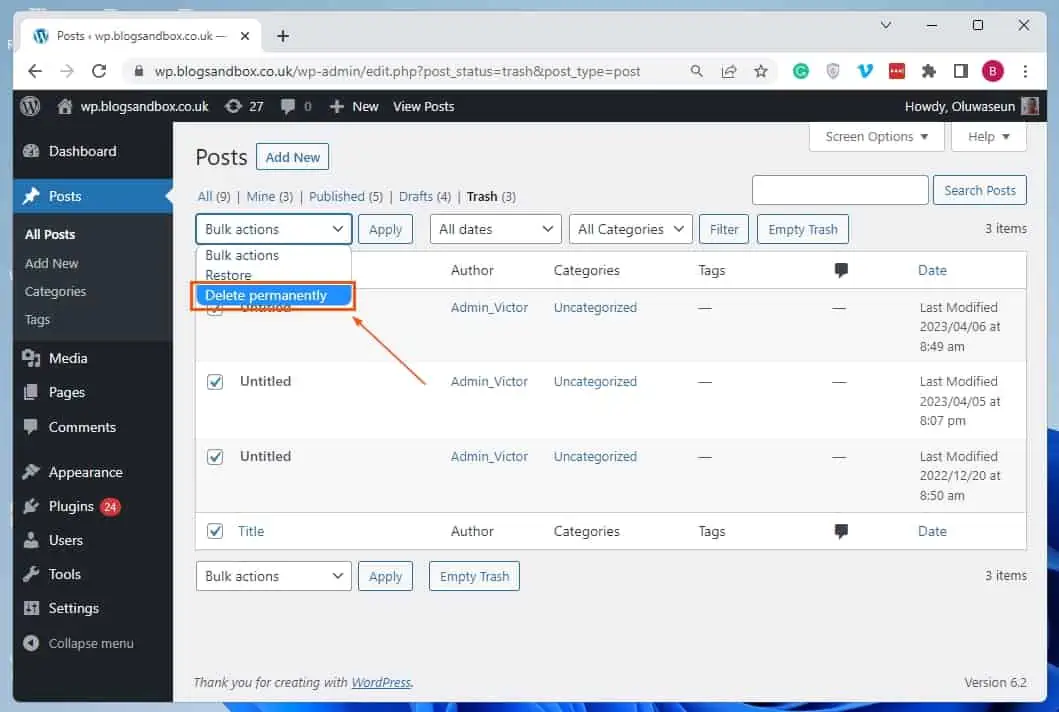
- Finally, click the Apply button beside the drop-down to empty the trash.

Option 2: Get Rid of Trash Using a Plugin
Another way to dispose of the trash in WordPress is by using a simple plugin called Quick Empty Trash. This free plugin adds an “empty trash” button to various categories in the WordPress backend, including the Posts and Pages category.
Hence, you can easily click the button to empty the trash in a particular category. That being said, in the sub-sections below, you will learn how to install and activate this plugin in WordPress.
Then, I will teach you how to use the plugin to eliminate the trash in WordPress.
Step 1: Install and Activate Quick Empty Trash Plugin
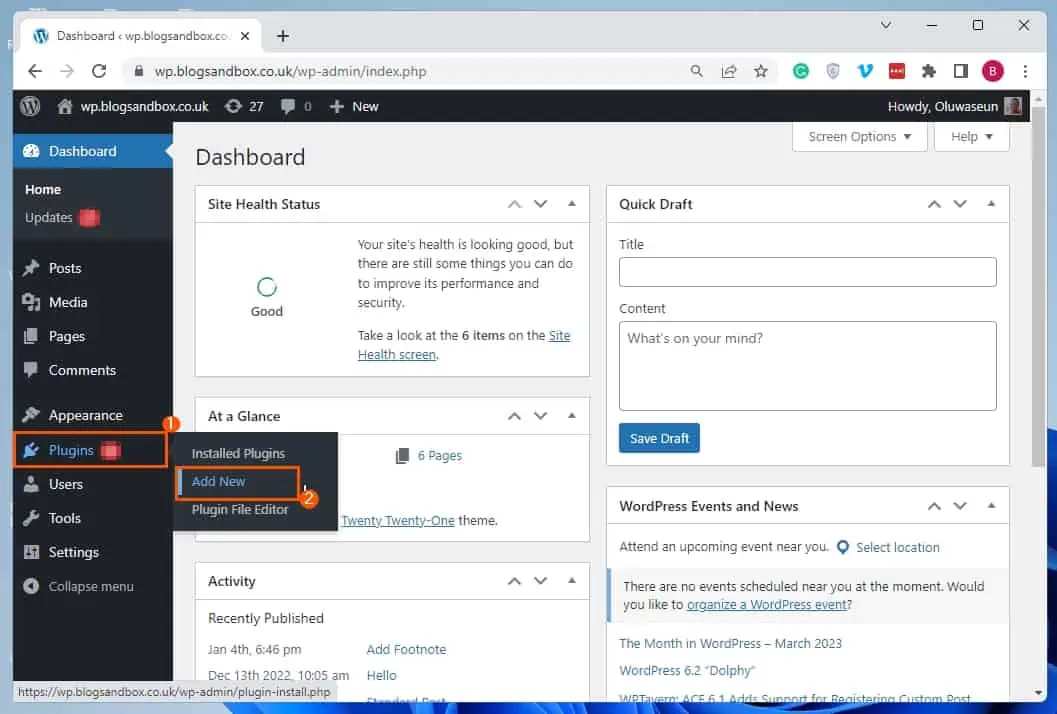
- Access the WordPress backend using an admin username and password. Then, hover your mouse on Plugins among the menus on the left pane and select Add New.
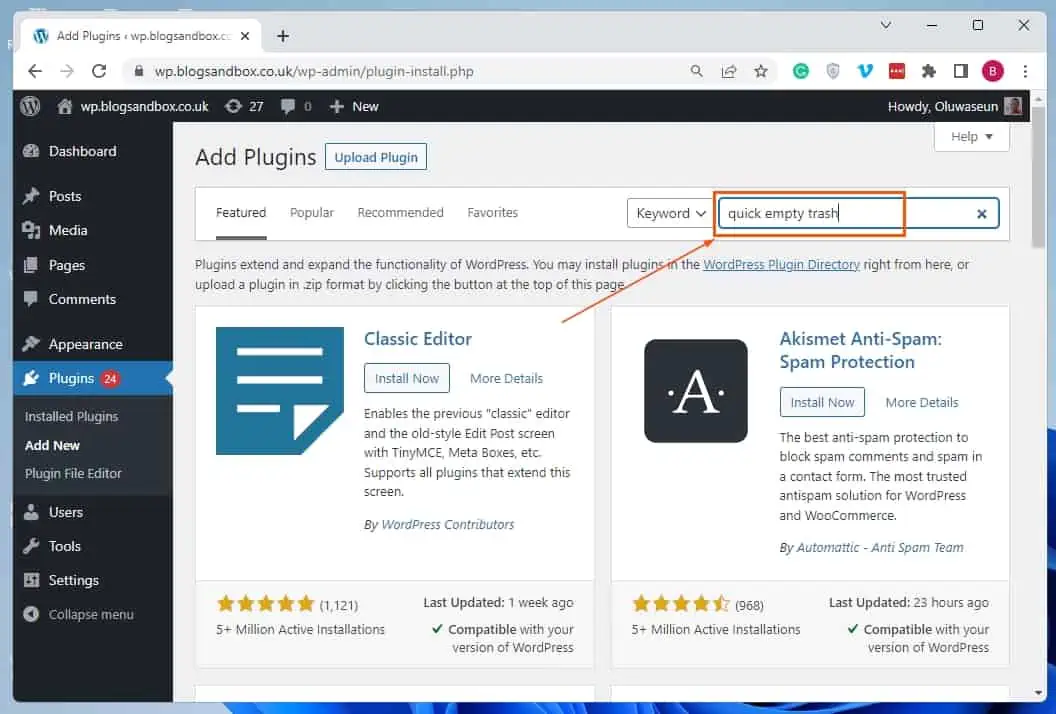
- On the Add Plugins page, input “quick empty trash” in the search field.
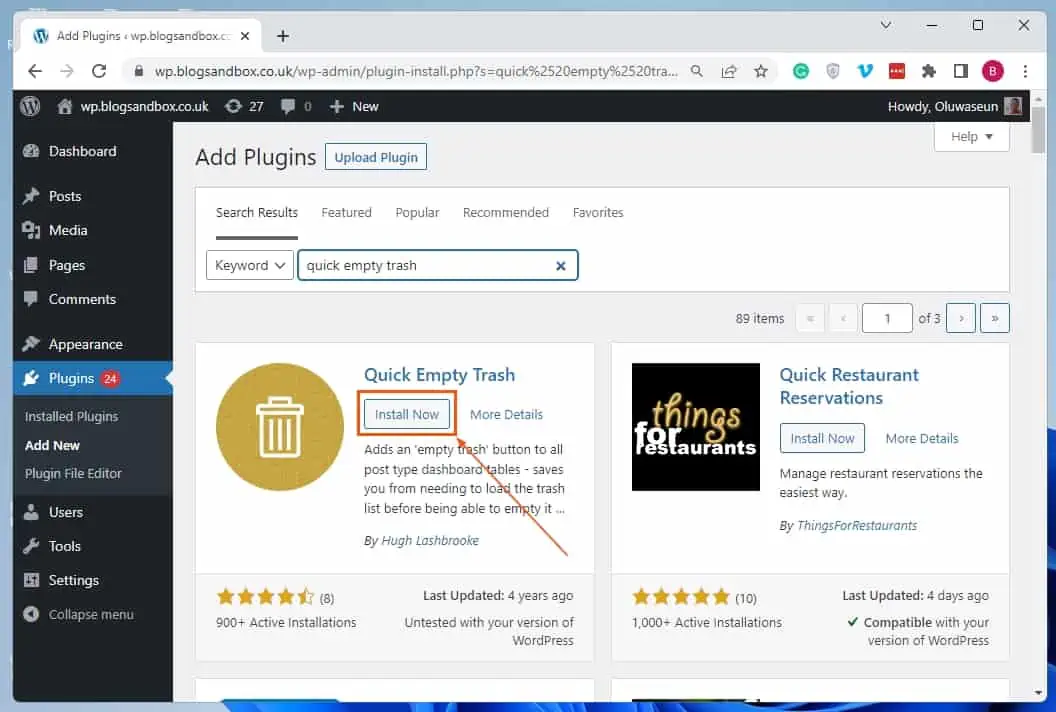
- Following that, click the Install Now button on the Quick Empty Trash plugin from the search result.
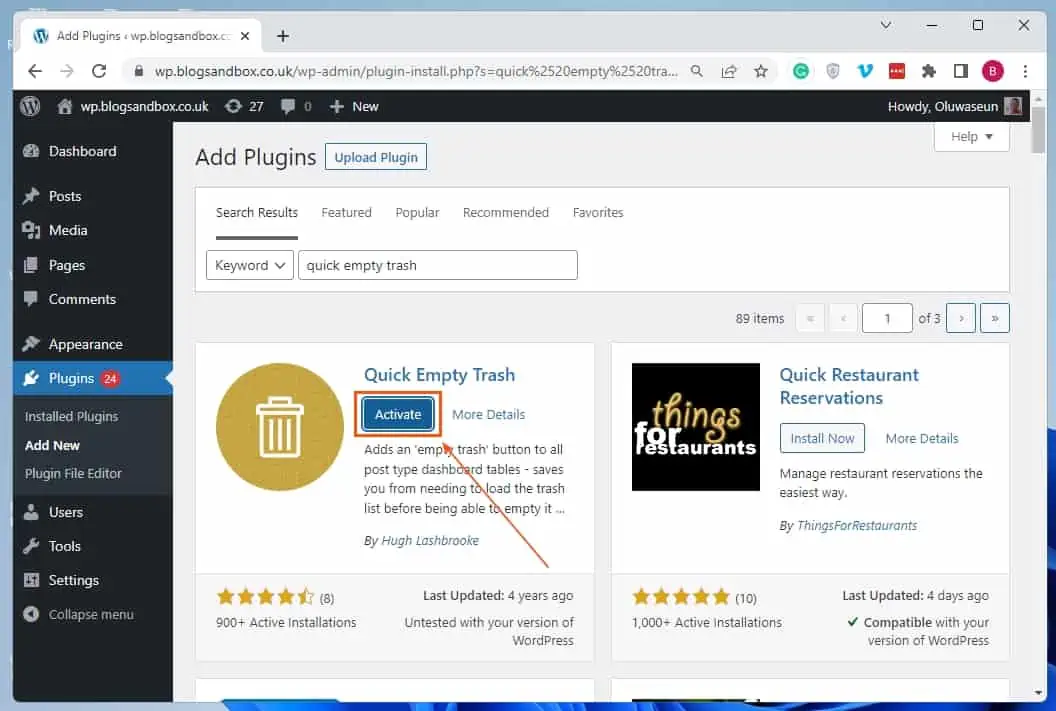
- When you’ve successfully installed the plugin, click the blue Activate button to enable it in WordPress.
Step 2: Empty Trash Using the Quick Empty Trash Plugin
- Login to the WordPress backend as an admin. Next, depending on which trash you want to get rid of, click Posts, Pages, or Comments on the left pane.
- After doing that, click Trash among the options at the top of the next page.
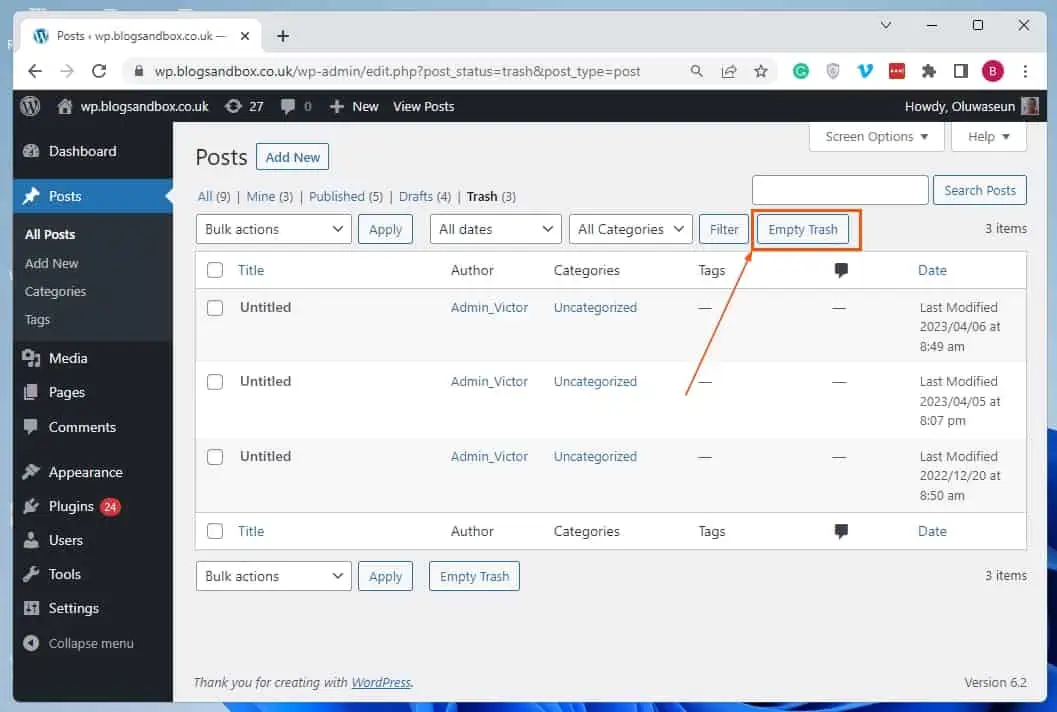
- Now, you should see an Empty Trash button beside the Filter button. Hence, clicking that button will empty the trash.
Option 3: Automatically Empty Trash
By default, WordPress automatically eliminates anything that has been in the trash for 30 days. However, you might want the trash to be automatically emptied more or less often.
Gladly, there is a plugin that allows you to change the time at which WordPress automatically deletes items in the trash. This plugin is called Change Empty Trash Time, and it is free.
So, the first sub-section below will illustrate how to install the plugin in WordPress. Afterward, the second sub-section will demonstrate how to use the plugin to change the time WordPress automatically deletes stuff in the trash.
Step 1: Install Change Empty Trash Time Plugin
- Sign in as an admin to the backend of your WordPress site. After a successful sign-in, hover your mouse on Plugins among the menus on the left pane, then select Add New.
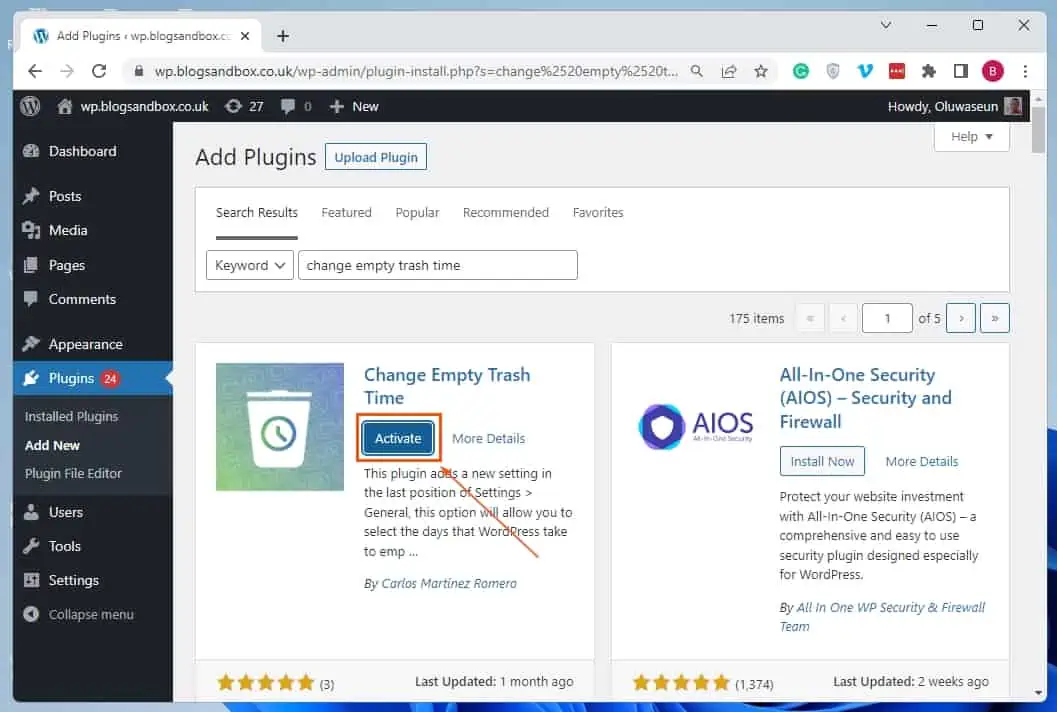
- Following that, type “change empty trash time” in the search field on the Add Plugins page.
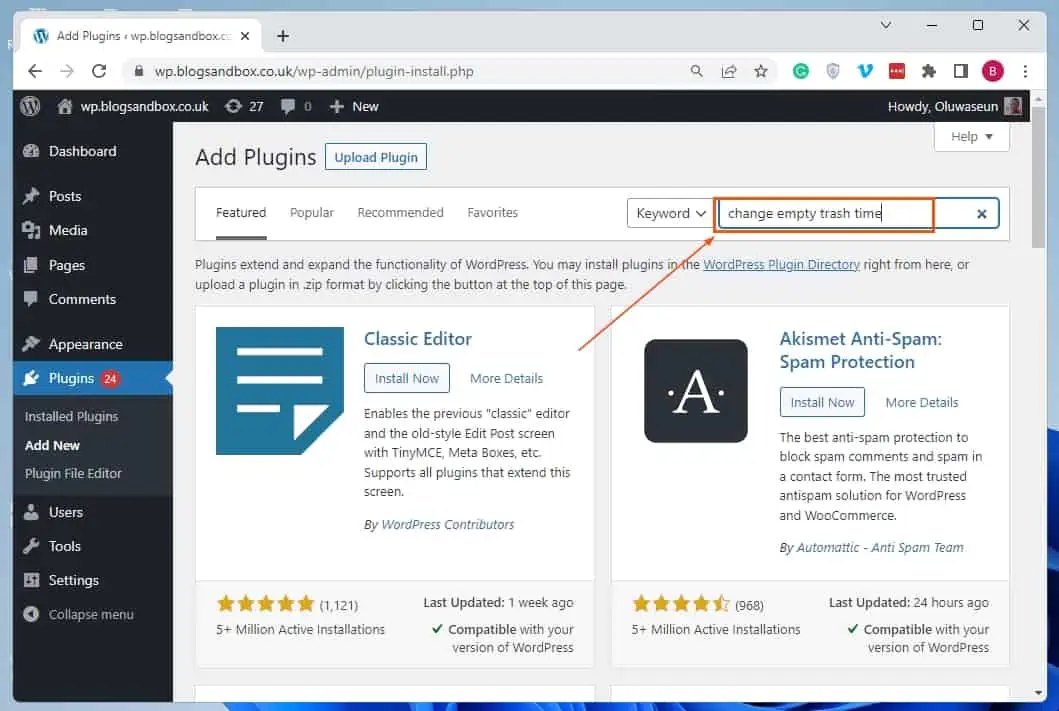
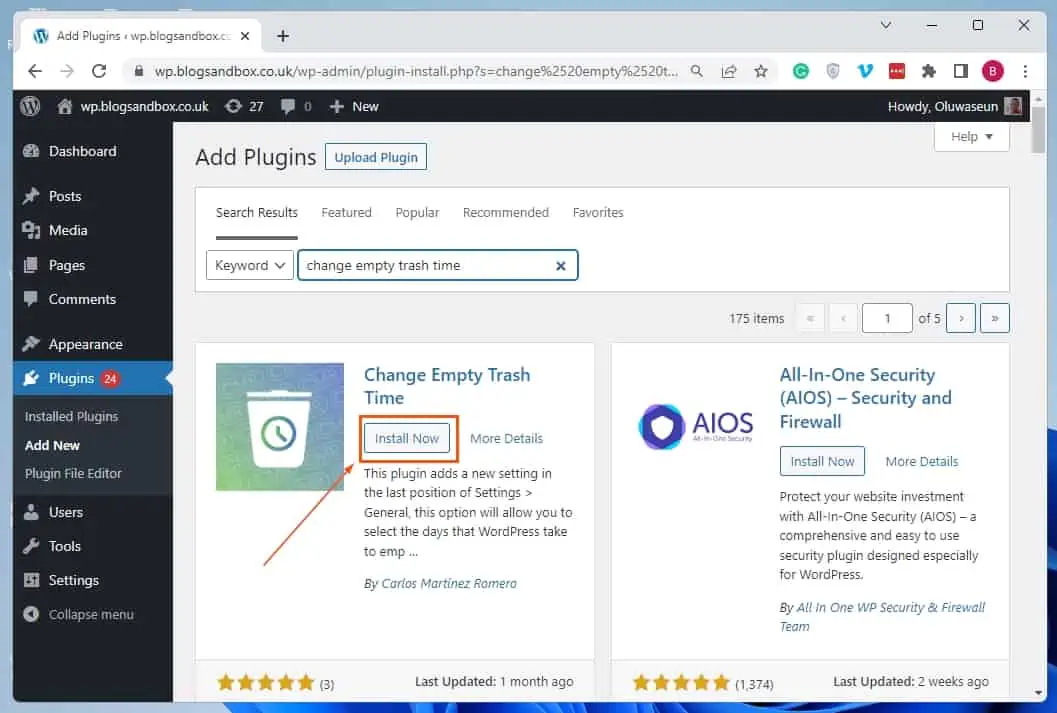
- Afterward, left-click the Install Now button on the Change Empty Trash Time plugin from the search result.
- After you’ve installed the plugin, click the Activate button to activate it on your WordPress site.
Step 2: Automatically Empty Trash Using the Change Empty Trash Time Plugin
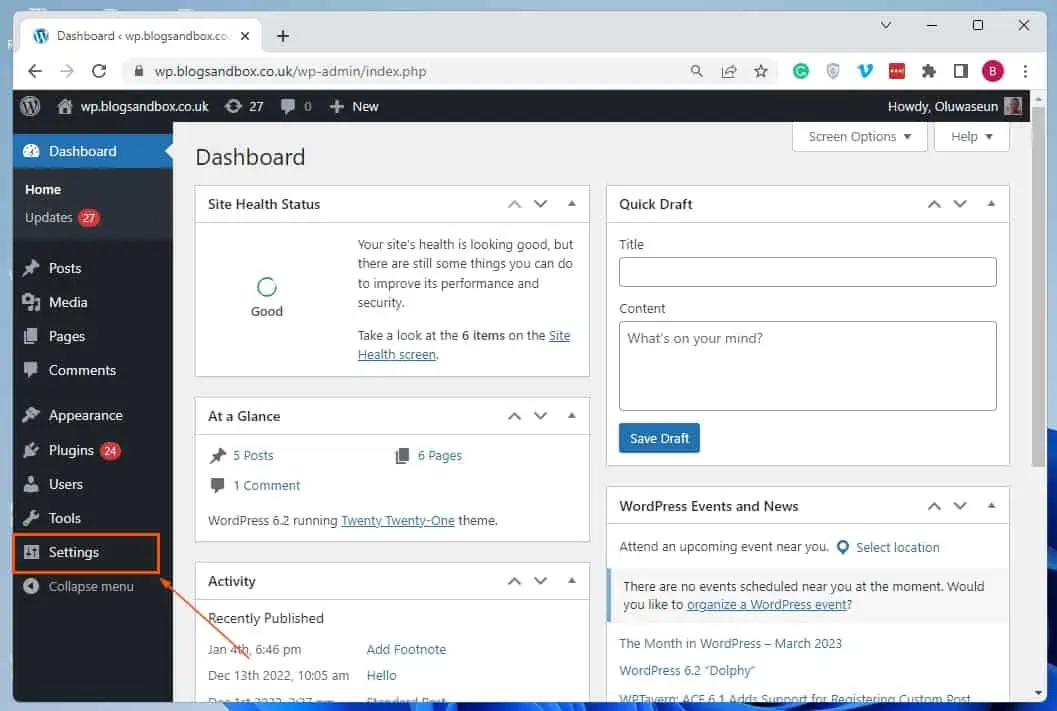
- After activating the plugin on your WordPress site, log in to the backend as an administrator. Then, click Settings among the menus on the left pane of the backend dashboard.
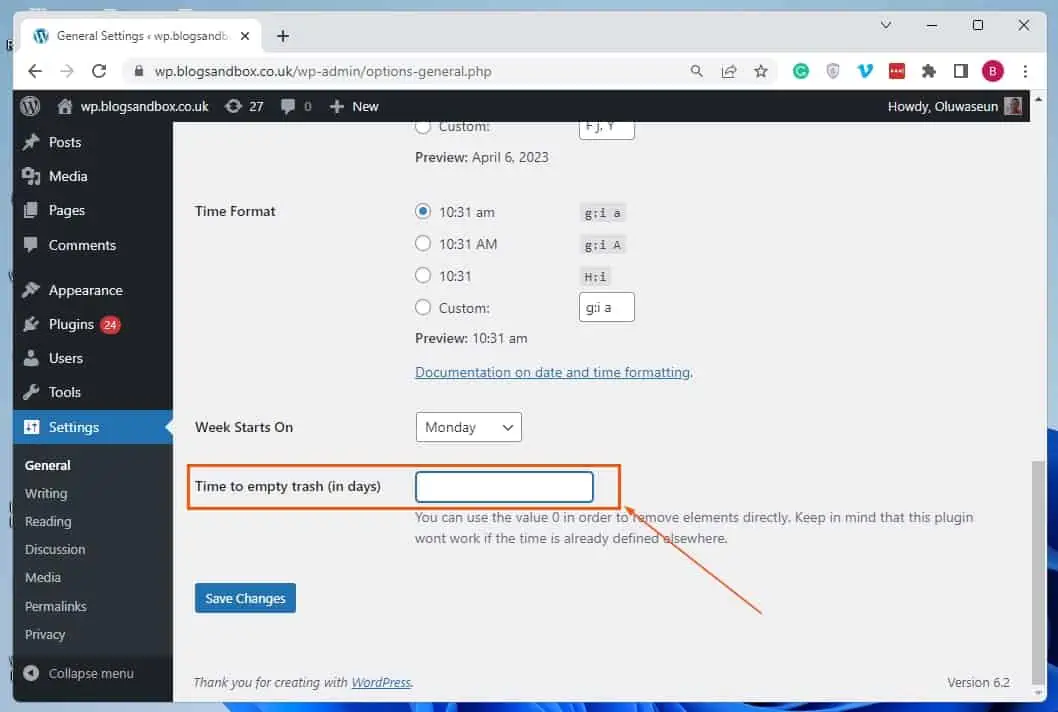
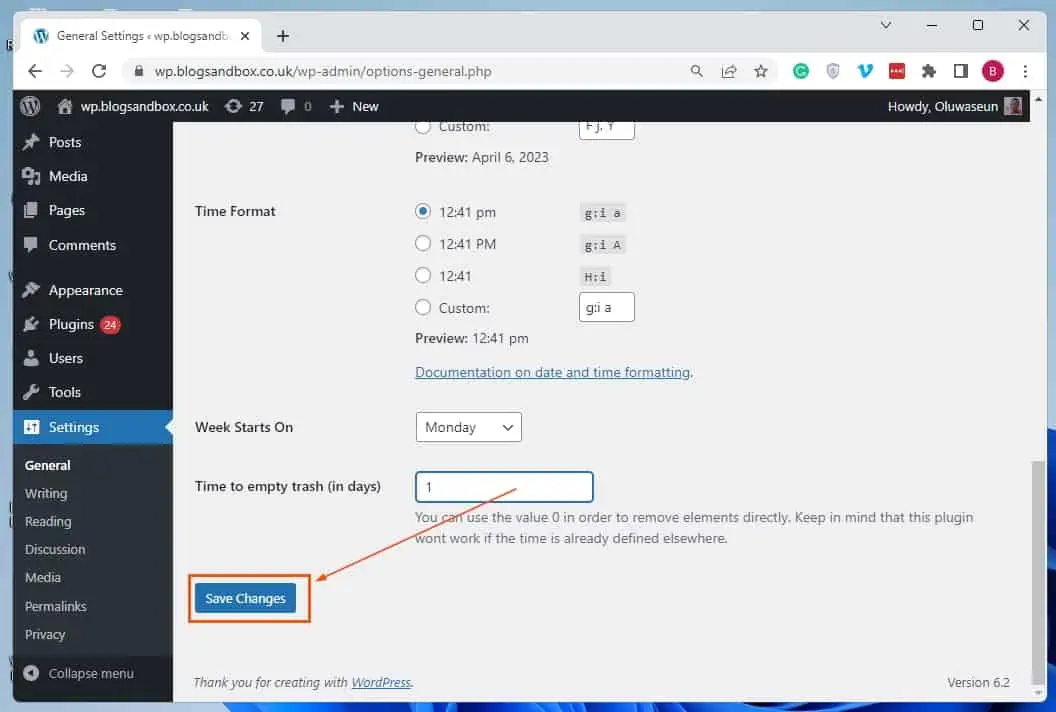
- In the Time to empty trash (in days) input box on the General Settings page, input a preferred time frame you want WordPress to delete items in the trash automatically. For example, if you input “1”, WordPress will automatically delete any item that has been in the trash for a day.
- After doing all that, click the Save Changes button at the bottom of the General Settings page to save the change.
Frequently Asked Questions
Yes, it does. By default, WordPress automatically deletes any item that has been in the trash for 30 days.
Follow the steps below to find trashed posts in WordPress.
a) Login to the WordPress backend as an admin.
b) Then, click Posts on the left pane of the backed dashboard.
c) After doing that, click Trash among the options at the top of the next page to find trashed posts.
Yes, you can delete pages in WordPress.
To clear the trash in WordPress, follow the steps below.
a) Login to the WordPress backend as an admin.
b) Then, click Posts, Pages, or Comments on the left pane, depending on which trash you wish to empty.
c) Now, switch to the Trash tab on the next page.
d) Afterward, click the checkmark box beside Title to select all the items in the trash.
e) Then, click the Bulk actions drop-down and select Delete permanently.
f) Finally, click the Apply button beside the drop-down to empty the trash.
a) Sign in to the WordPress backend using an admin username and password.
b) Then, hover your mouse on Plugins among the menus on the left pane and select Add New.
c) On the Add Plugins page, input “quick empty trash” in the search field.
d) Following that, click the Install Now button on the Quick Empty Trash plugin from the search result.
e) After installing the plugin, click the blue Activate button to enable it in WordPress.
Conclusion
In WordPress, when you delete a post, page, comment, or any other item, it is moved to the trash instead of being permanently deleted. This enables you to recover any accidentally deleted items and restore them if needed.
However, if you don’t need those items, you can empty the trash to delete them from your website’s database permanently. Gladly, this guide provided multiple ways to clear the trash in WordPress.
To be more specific, we discussed how to carry out the task using the bulk actions feature. This guide also taught us how to get rid of the trash in WordPress with the aid of a plugin.
As a matter of fact, how to automatically empty the trash in WordPress was also demonstrated in this guide.
Hopefully, you enjoyed this guide and found it helpful. If you did, click on “Yes” beside the “Was this page helpful” question below.
You may also express your thoughts and opinions by using the “Leave a Reply” form at the bottom of this page.
Lastly, visit our WordPress & Websites How-to Guides page for more insightful guides like this.
![WordPress Lost Password Redirects to Page Not Found [Fixed]](https://www.itechguides.com/wp-content/uploads/2024/03/WordPress-Lost-Password-Redirects-to-Page-Not-Found-Fixed.webp)