Have you ever thought of disabling IPv6 network protocol? This article teaches you how to disable IPv6 in Windows 11.
Option 1: Disable IPv6 From Network Settings
Follow the steps below to disable Internet Protocol Version 6 (TCP/IPv6) on your Windows 11 PC from network settings:
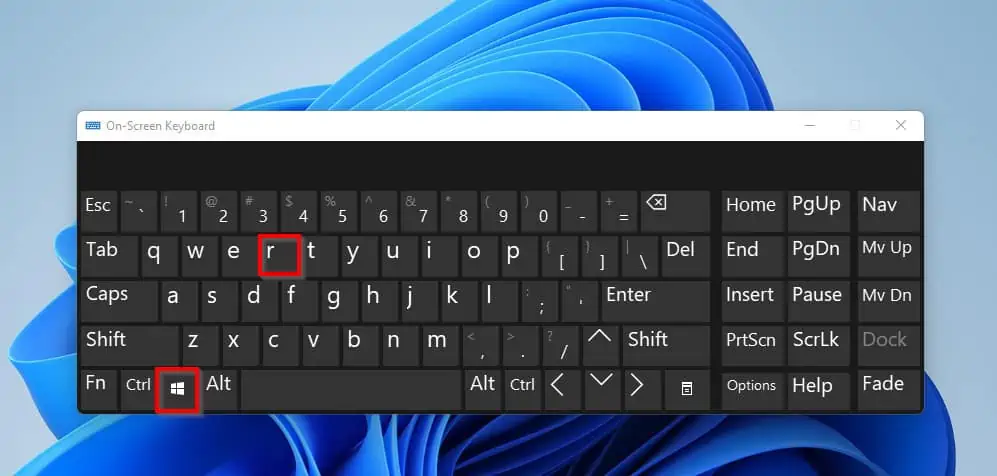
- Firstly, press the Windows + R keys together to open the Run command.
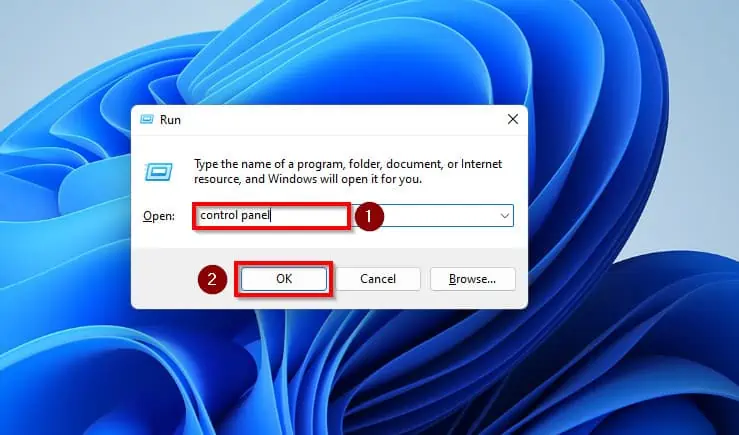
- Then, on the Run command, type control panel and click OK.
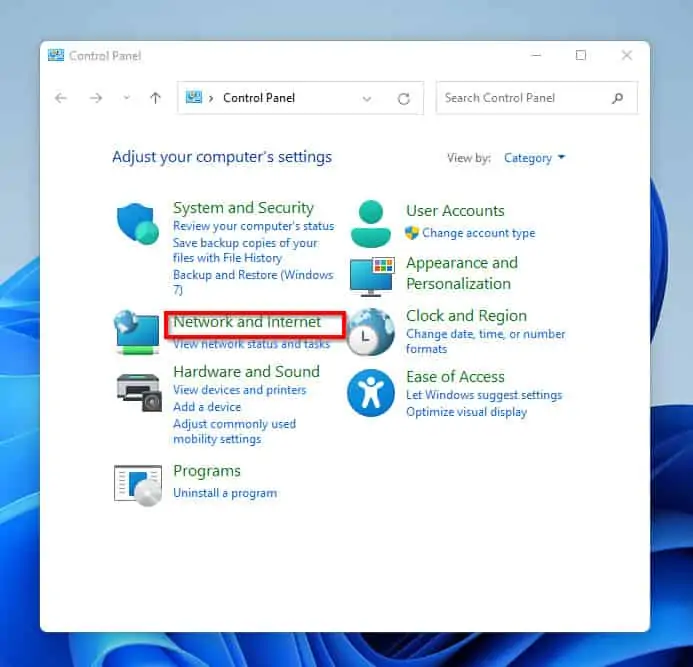
- In Control Panel, click on Network and Internet.
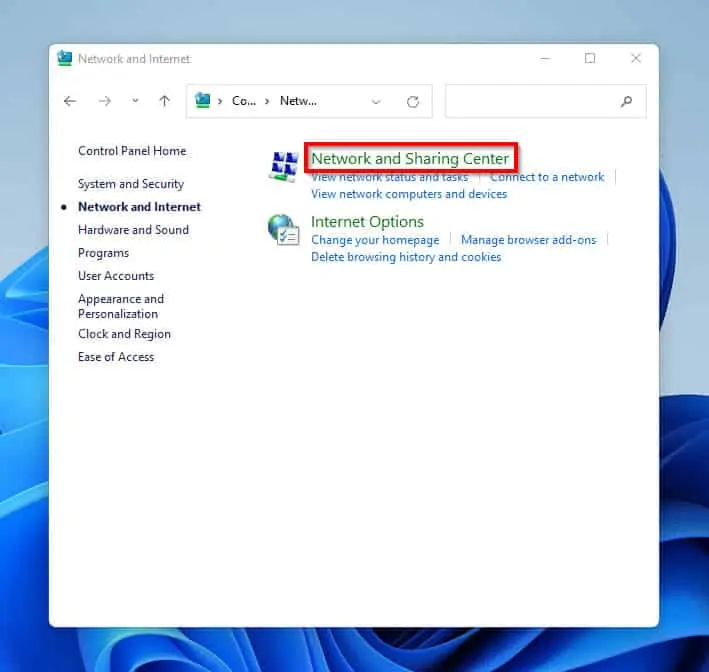
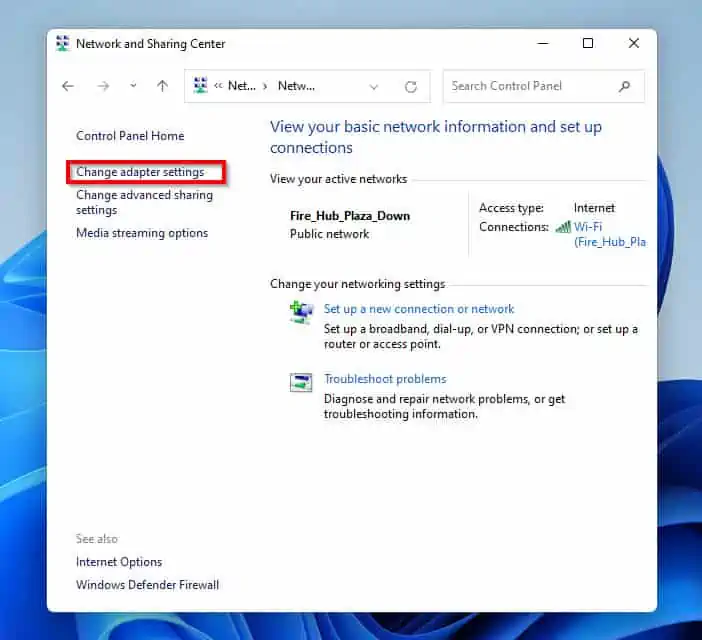
- Then, on the right pane of the Network and Internet screen, click Network and Sharing Centre.
- On the left pane of the Network and Sharing Centre screen, click Change Adapter Settings.
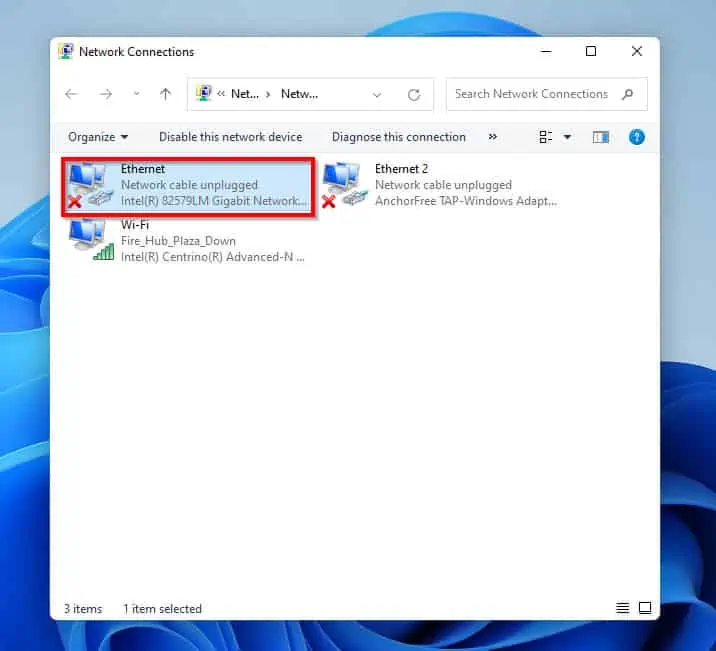
- Then, on the Network Connections pop screen, double-click the network adaptor you wish to disable IPv6 on.
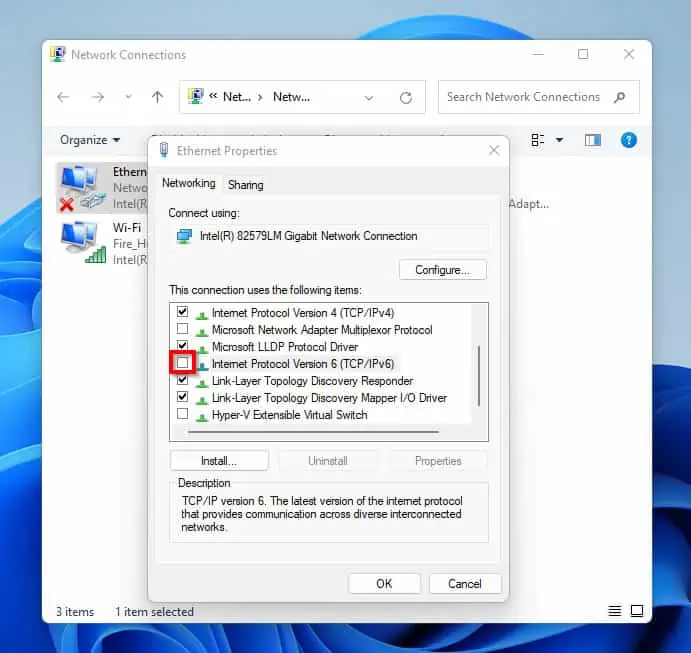
- On the Network properties pop-up screen, uncheck the box beside Internet Protocol Version 6 (TCP/IPv6).
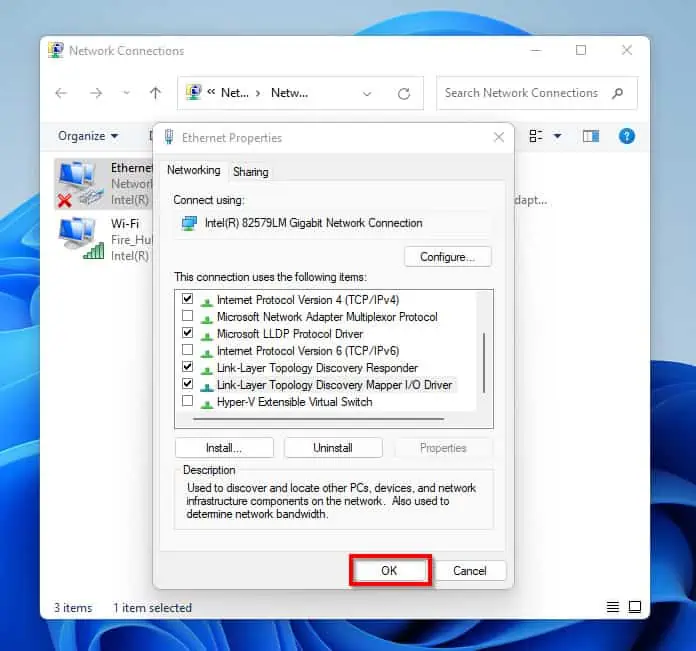
- Then, click OK to save the changes you have made and exit the pop-up menu.
Option 2: Disable IPv6 with PowerShell
The second method I would like to teach you in this guide is to use PowerShell to disable IPv6 in Windows 11. Here are the steps:
- Click on the search icon on the Taskbar of your Windows 11 PC and type powershell in the search box.
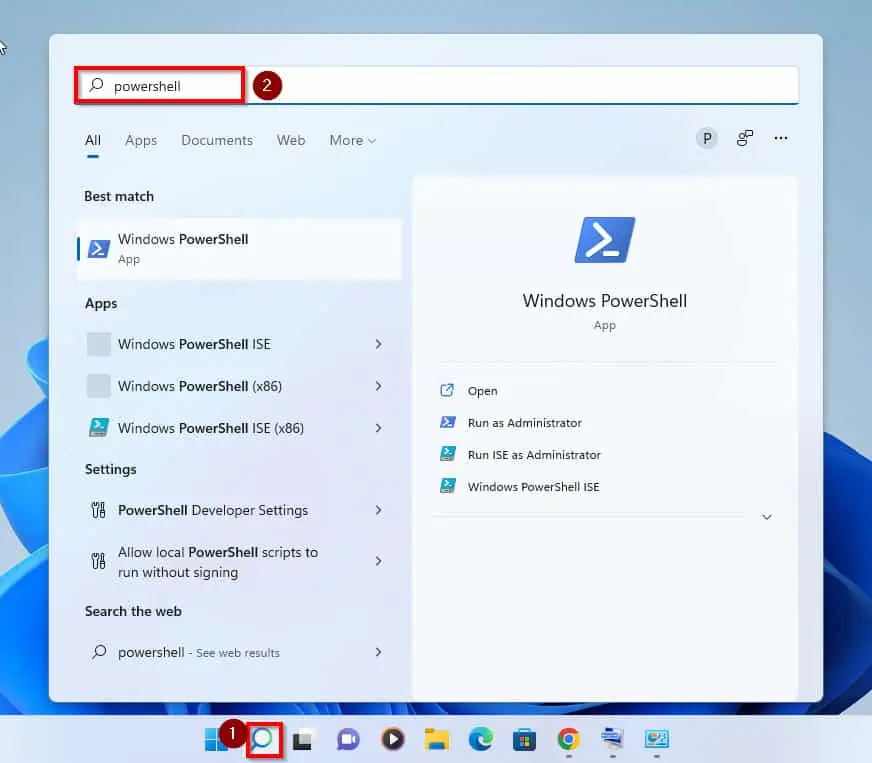
- Then, from the results of your search, right-click Windows PowerShell and select Run as administrator.
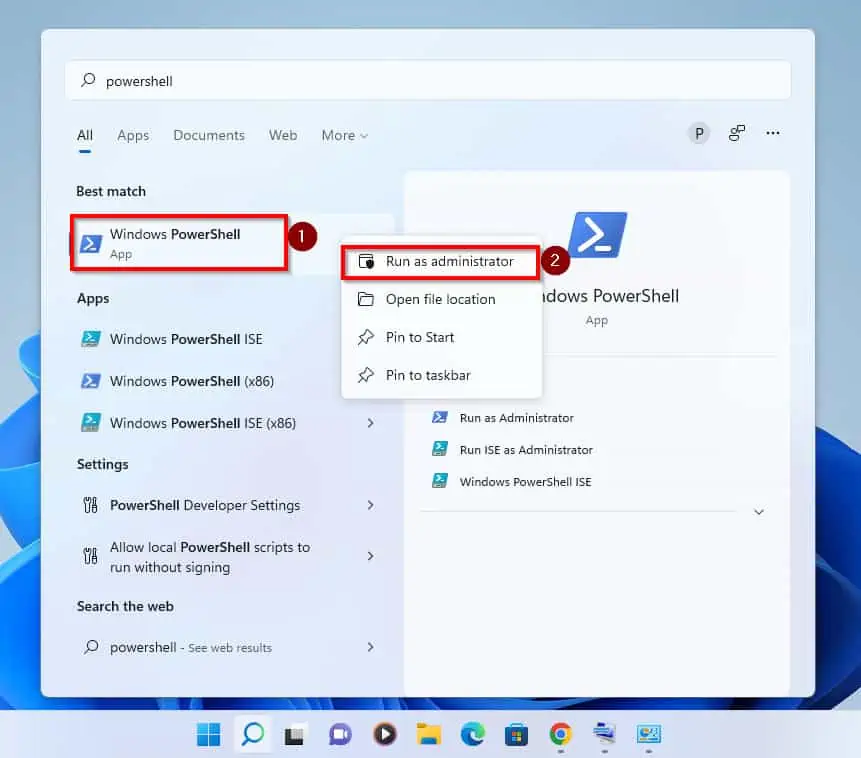
- You will receive a User Account Control prompt asking you to allow PowerShell to make changes to your PC. Click Yes to proceed.
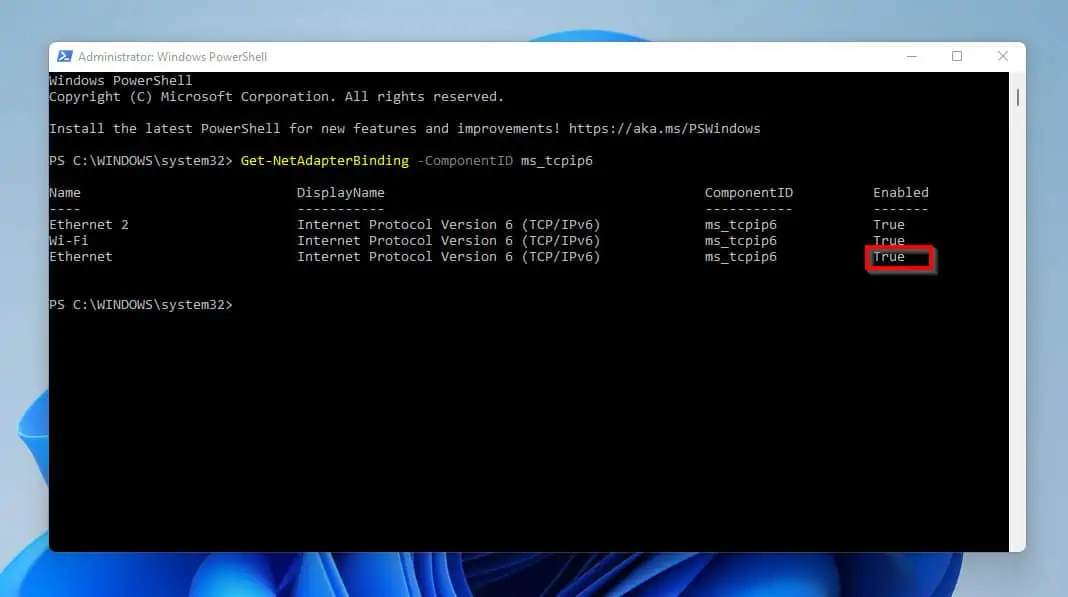
- When PowerShell opens, type the command below and press enter to confirm that IPv6 is enabled. If the enabled column is True, then IPv6 is active.
Get-NetAdapterBinding -ComponentID ms_tcpip6
Furthermore, note the Name of the adapter you want to disable IPv6 on. For this example, mine is Ethernet.
- To disable IPv6 in Windows 11, type the command below and press enter.
Disable-NetAdapterBinding -Name "Ethernet" -ComponentID ms_tcpip6
In the command change “Ethernet” to the name of the network adapter card you want to disable IPv6 on.
- Finally, to confirm that it has been disabled, run the command below.
Get-NetAdapterBinding -ComponentID ms_tcpip6
Option 3: Disable IPv6 with Command Prompt
Moving on, the finally method I will teach you in this guide is to disable IPv6 in Windows 11 by using the netsh command. The steps are shown below:
- Click on the search icon on your Taskbar and type command prompt in the search field. Then, from the result of the search right-click Command Prompt and click Run as administrator.
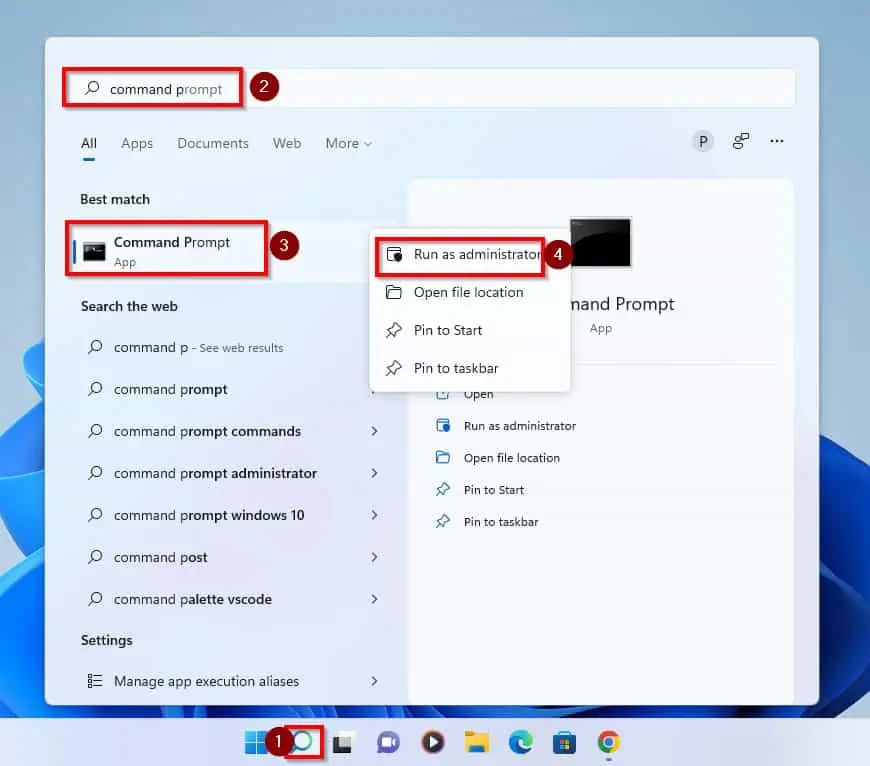
- You will receive a User Account Control prompt requesting you to allow Command Prompt make changes to you computer. Click Yes to proceed.
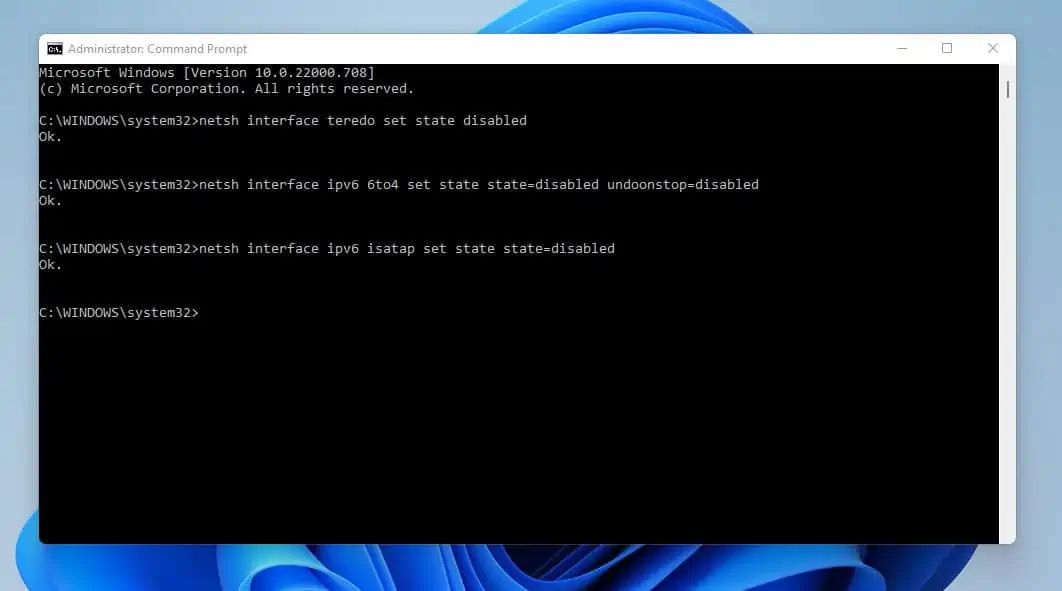
- In Command Prompt, to disable IPv6 from all interfaces, type these command below and press enter one command at a time.
netsh interface teredo set state disabled
netsh interface ipv6 6to4 set state state=disabled undoonstop=disabled
netsh interface ipv6 isatap set state state=disabled
Frequently Asked Questions
Enabling IPv6 on your Windows 11 PC gives you increased speed, better security, efficient connections and supports more devices.
Yes, it does. Windows 11 supports Internet Protocol Version 6 (TCP/IPv6).
If you disable IPv6 on your computer, you might lose access to IPv6-only websites. Also, you might lose some network management advantages as well.
Navigate to Control Panel -> click on network and Internet -> select Network and Sharing Center -> then, click on Change network adapter settings -> double-click on the network adapter you suspect to be disabled -> finally, locate IPv6 and check if the checkbox beside it is checked or not.
If the checkbox is checked that means it is enabled. However, if the checkbox is not checked then IPv6 is disabled.
When it comes to playing online games IPv6 is preferable. This is because it offers more speed and you don’t have to worry about port forwarding.
Conclusion
IPv6 (Internet Protocol Version 6) is the latest Internet Protocol and it is supported by Windows 11. IPv6 was designed to overcome some of the limitations of IPv4.
It is not recommended to disable IPv6 in Windows 11.
Nonetheless, if you choose to disable IPv6 on your Windows 11 computer, you will find the three methods discussed in this guide useful. This guide showed you how to disable IPv6 from Network settings and Powershell.
That’s not all, the article also showed you how to perform the task with Command prompt.
I hope you found this Itechguide helpful. If you did, click on “Yes” beside the “Was this page helpful” question below.
You may also express your thoughts and opinions by using the “Leave a Comment” form at the bottom of this page.
Finally, for more guides on Windows 11 visit our Windows 11 How-To guides page.


