This Itechguide teaches you how to create a restore point in Windows 10. The guide covers 2 steps to create a restore point in Windows 10.
Step 1: Turn on System Protection
Before you can create a restore point in Windows 10 is to enable system protection on the drives. Here are the detailed steps…
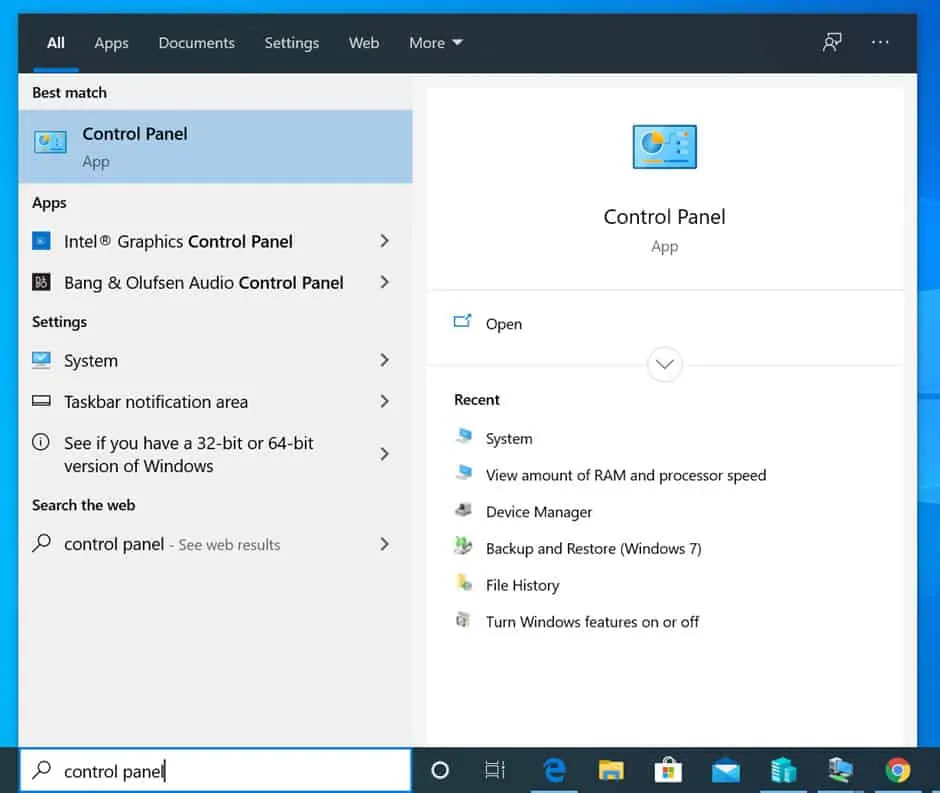
- Type control panel in the search box. Then, from the search results, click Control Panel.
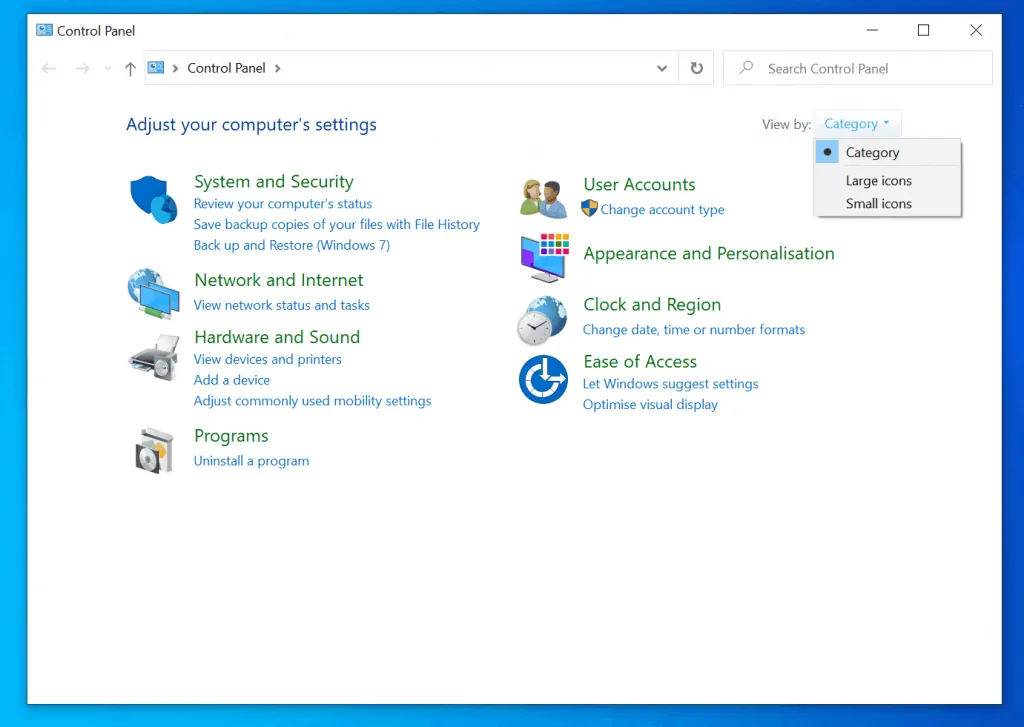
- When Control Panel opens, on the top right, if View by is NOT set to Category, click the drop-down and select Category.
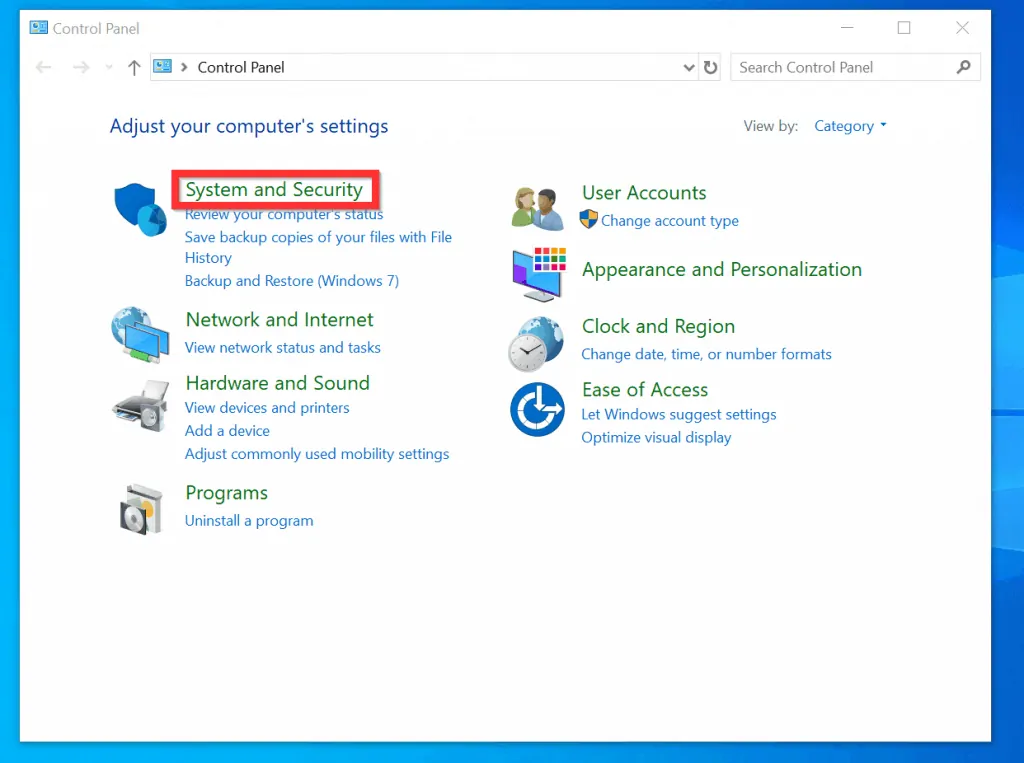
- Then, click System and Security.
- On System and Security screen, click System.

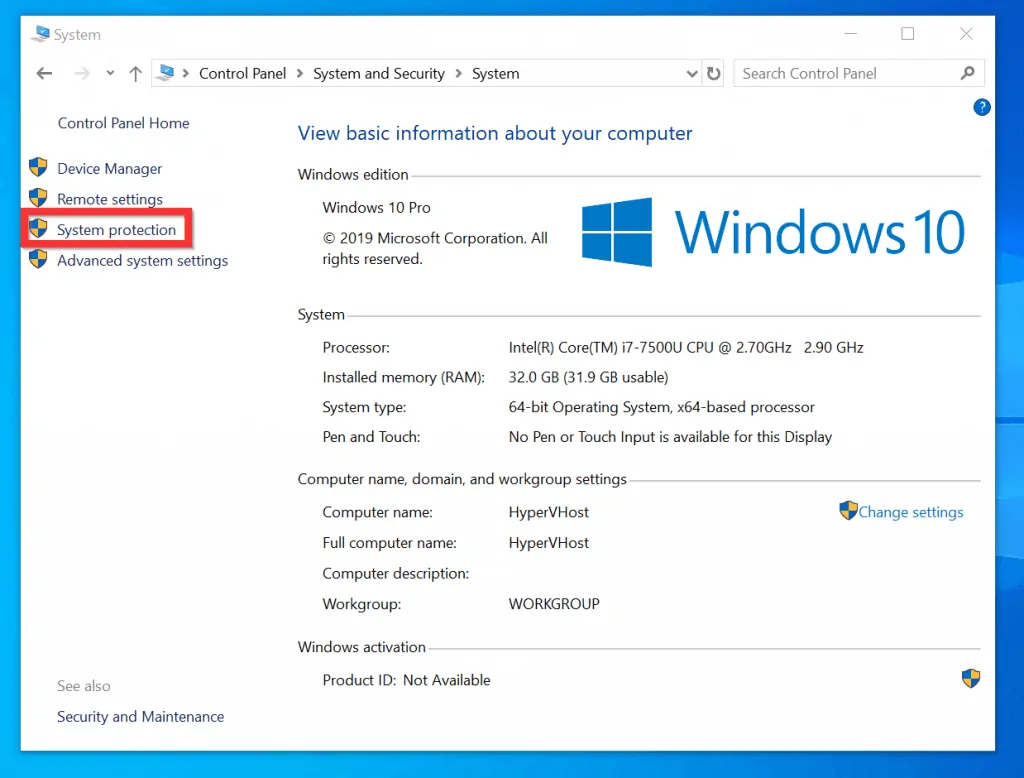
- When the View basic information about your computer screen opens, on the left pane, click System protection.
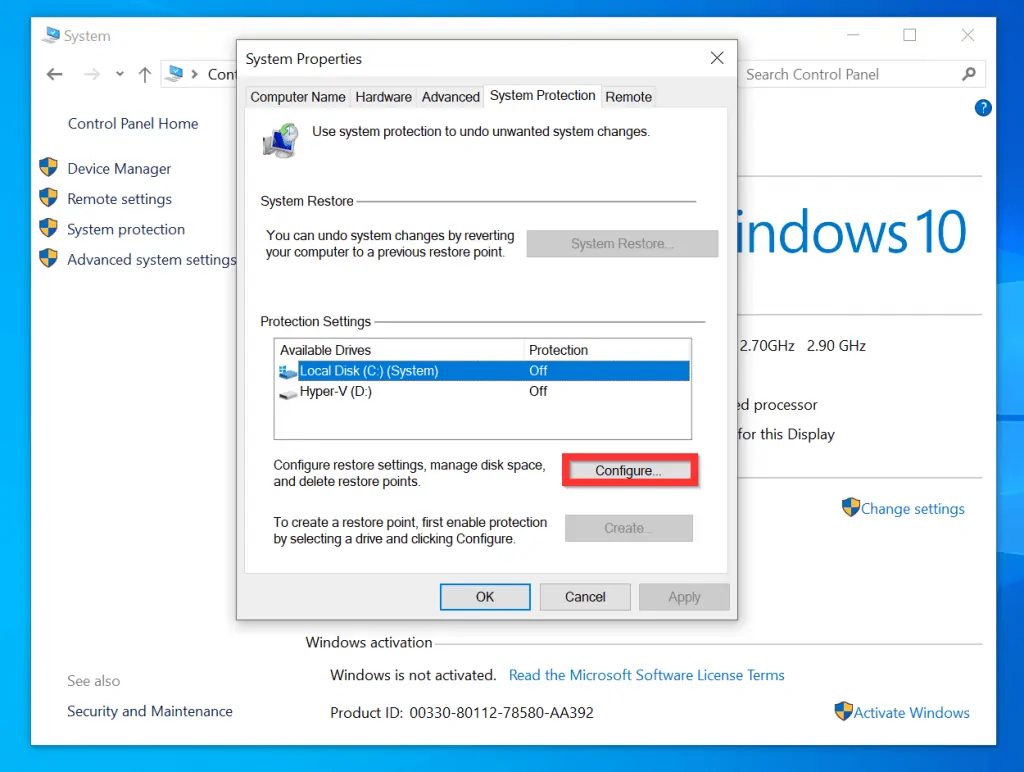
- Finally, on the System Protection tab of System Properties, beneath Protection Settings, select your System drive (usually drive C).
- Then, beside Configure restore settings, manage disk space, and delete restore points, click Configure.
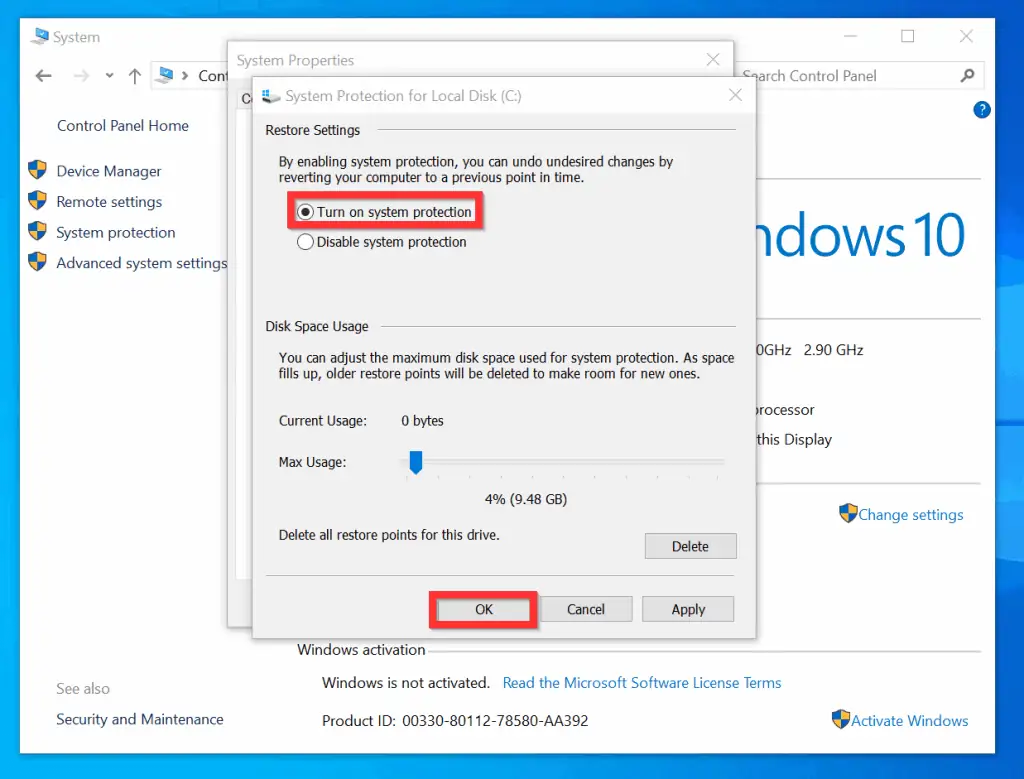
- Then, on the Restore Protection for Local Disk (C:) settings, select Turn on system protection and click OK.
To allocate the System Restore max disk space to store backup files, use the Max Usage slider.
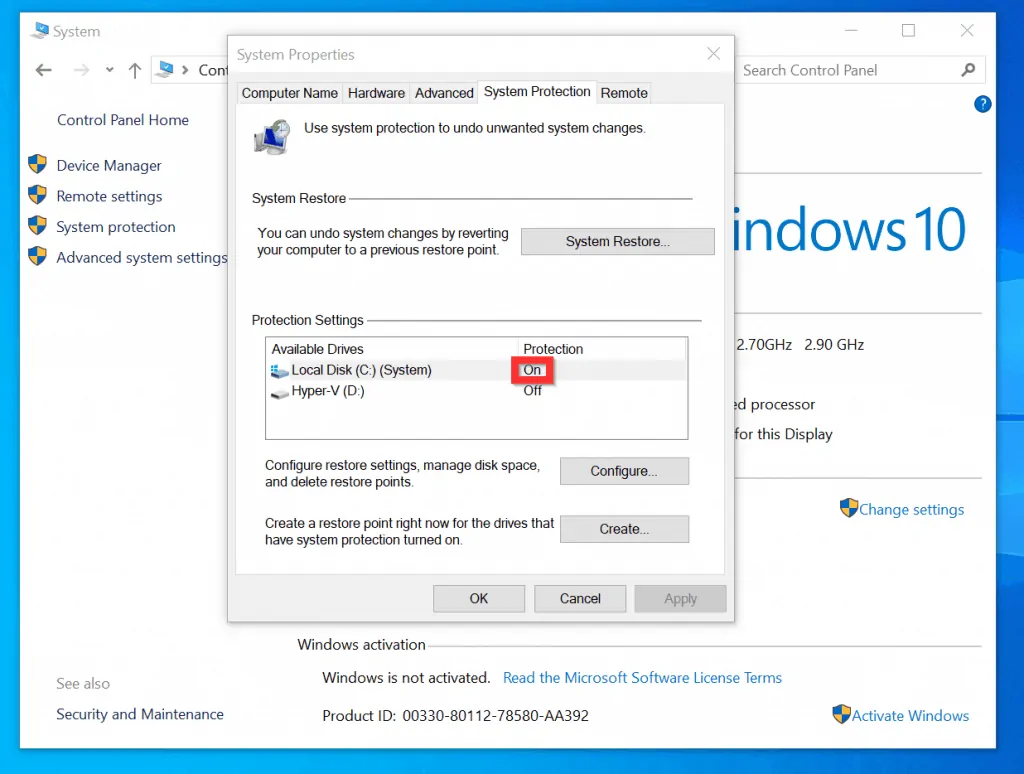
- The protection settings for the System drive will now display On.
- If you want to enable system restore for the other available drives, select the drive, click Configure and select Turn on system protection.
Step 2: Create a Restore Point
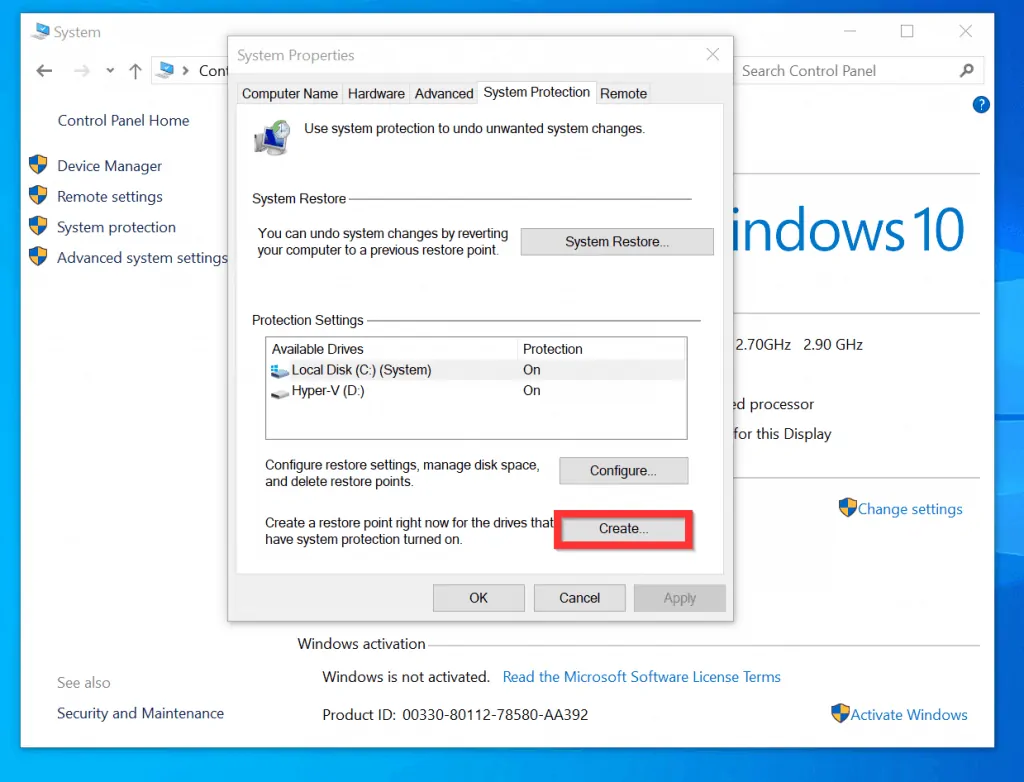
- Follow the steps in step 1 above until you get to the System Protection tab of System Properties.
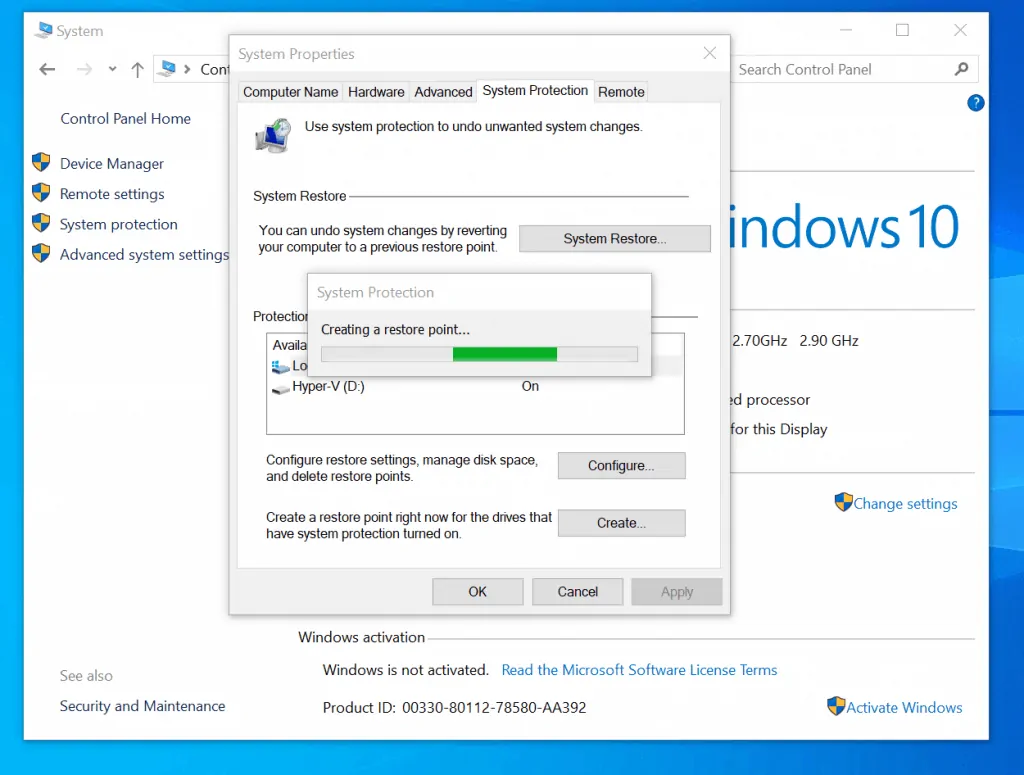
- To create a restore point, beside Create a restore point right now for the drives that have system protection turned on, click Create.
- Finally, Create a restore point screen, enter a name for the restore point and click Create.
You do NOT need to include the date or time to the name of the restore point. These are automatically included in the name.

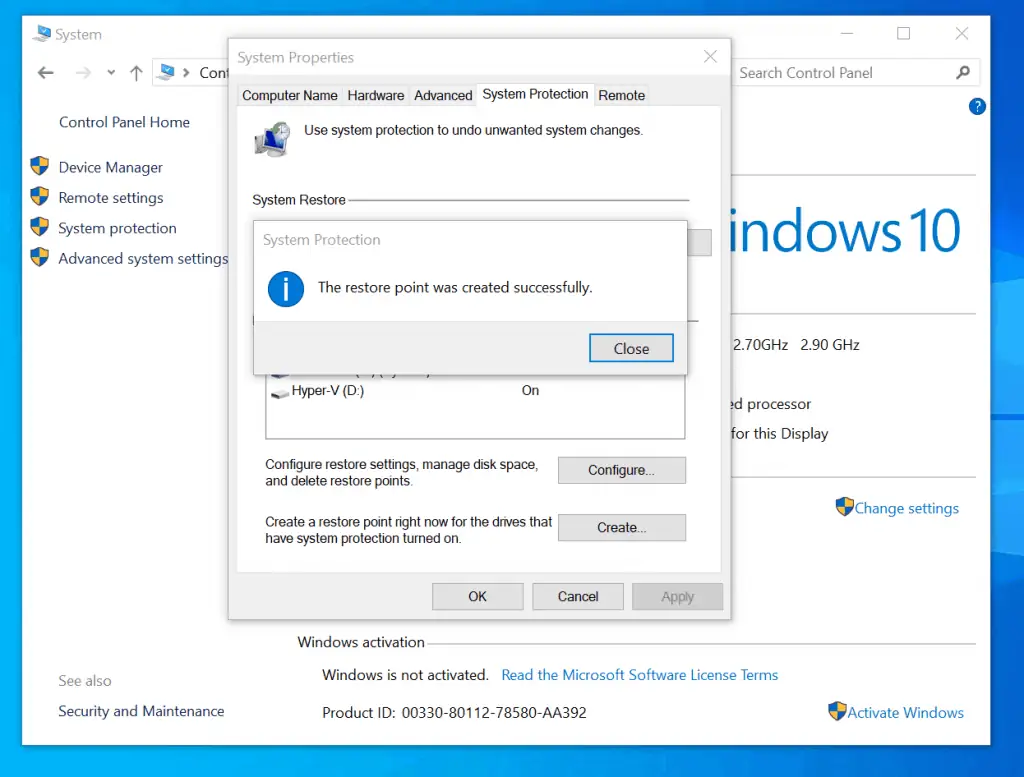
- System Protection will begin creating the requested restore point. When the system restore point is created, click Close.
It is very easy to create a restore point in windows 10! I hope you found this Itechguide helpful. If you found it helpful, click on “Yes” beside the “Was this page helpful” question below.
You may also express your thoughts and opinions by using the “Leave a Comment” form at the bottom of this page.
Finally, for more Windows 10 Itechguides, visit our Windows How-To page.


![How To Run Sysprep (Generalize) In Windows 10 [2 Methods]](https://www.itechguides.com/wp-content/uploads/2022/05/8-2.webp)