Do you want to change the language in WordPress but have no idea how? This guide demonstrates how to accomplish that.
Option 1: Change the Language Through the WordPress Backend
The fastest and easiest way to change the language on the backend of your WordPress website is through the WordPress settings. However, you should know that changing the language in the WordPress backend won’t affect your theme or plugins.
Also, it won’t affect any content written in the WordPress block editor. Hence, only the WordPress menus, settings, notifications, and inscriptions in the backend dashboard will be affected.
Having said that, follow the subsequent step-by-step procedures and screenshot images to change the language in the WordPress backend.
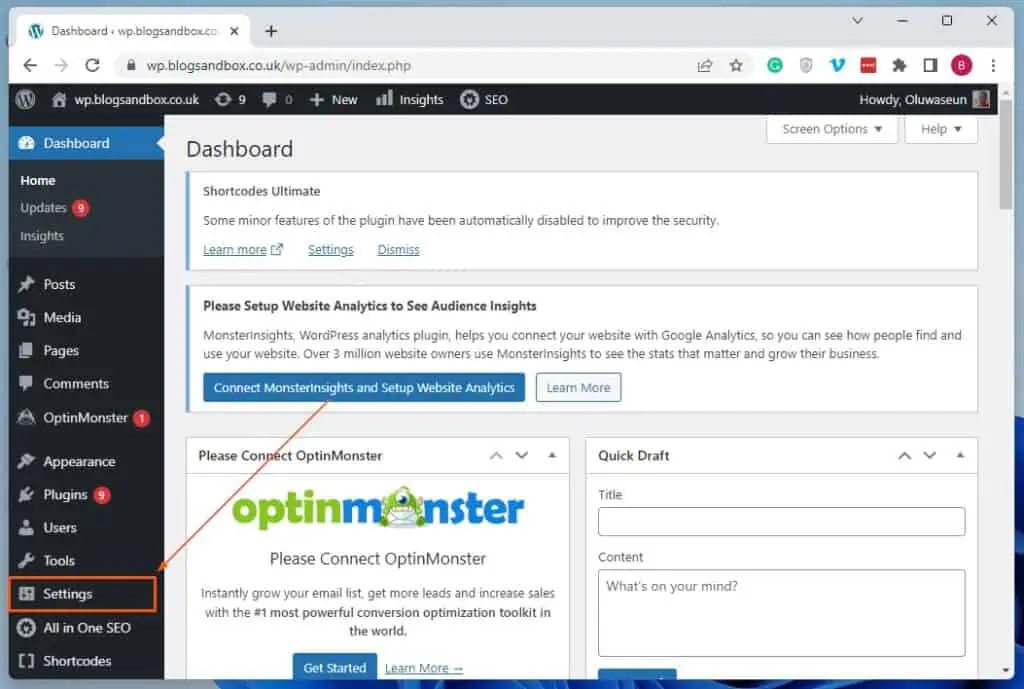
- As an administrator, sign in to the backend of your WordPress site. Then, select Settings among the menus on the left pane of the WordPress backend dashboard.
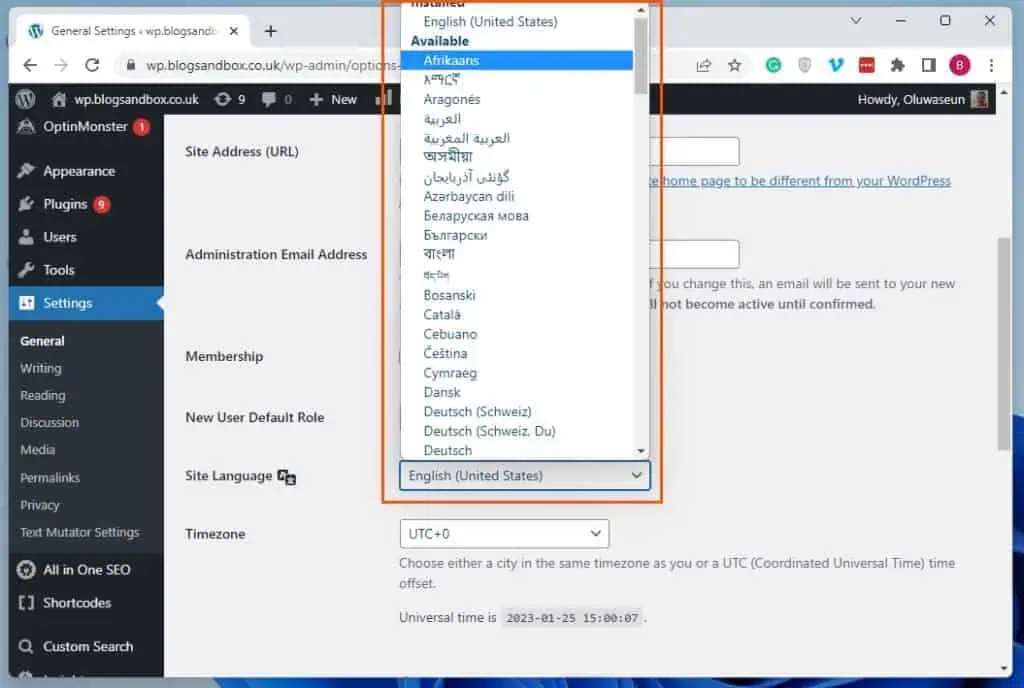
- Afterward, click the Site Language drop-down on the General Settings page and select a preferred language from the displayed options.
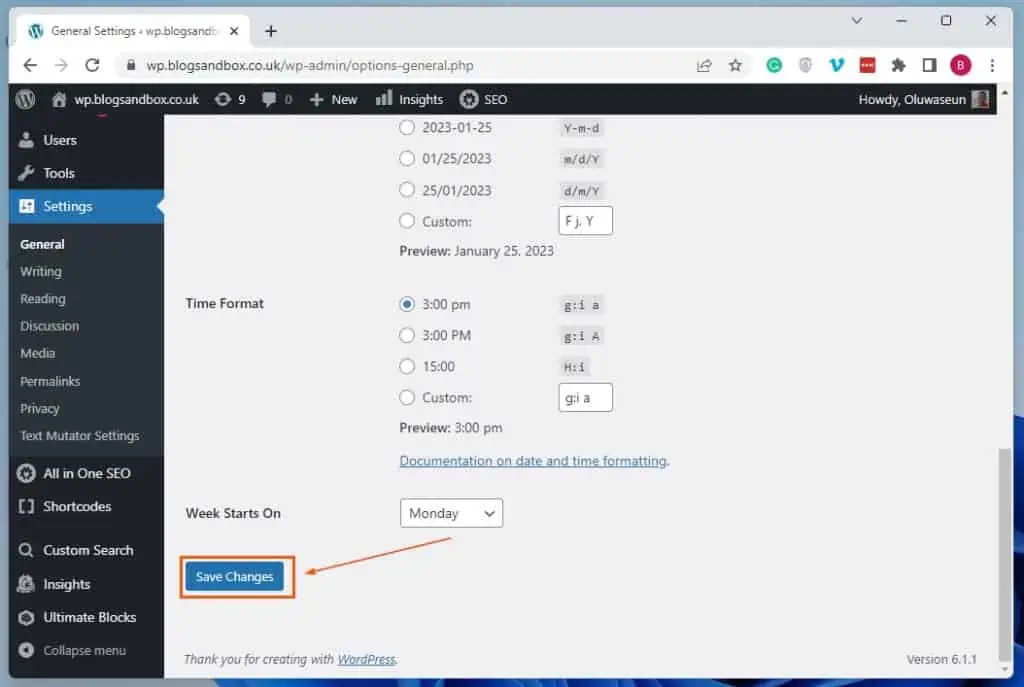
- After doing that, click the blue Save Changes button at the bottom of the page to effect the change.
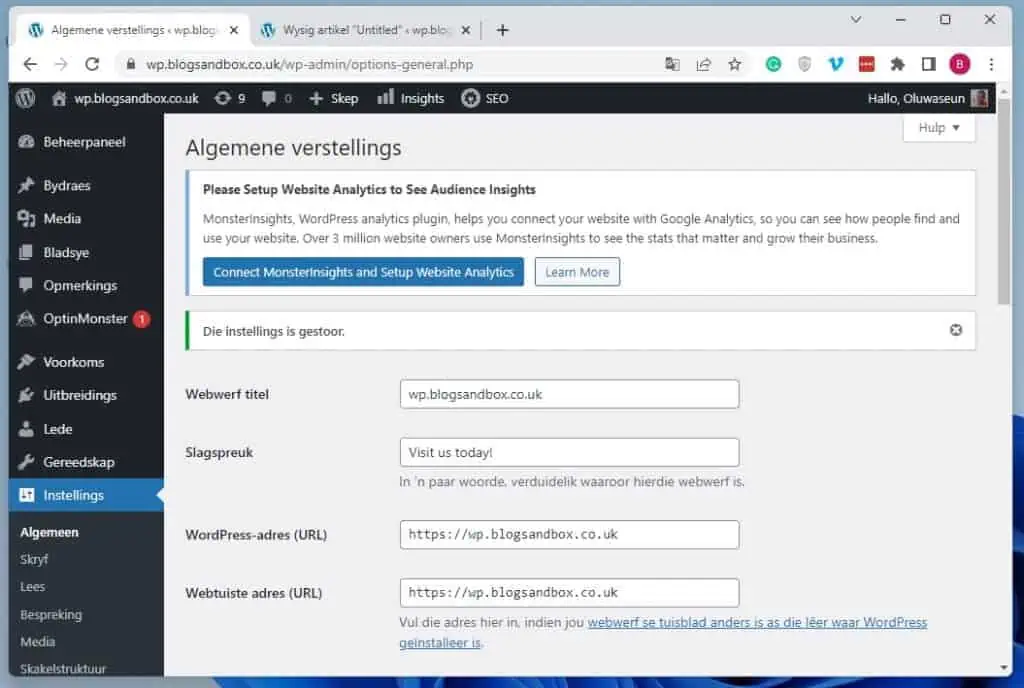
- Subsequently, every WordPress menu, inscription, setting, and notification on your site’s backend dashboard will be changed to the selected language. However, plugins, themes, and content written in the WordPress block editor won’t be affected.
Option 2: Change the Language Through the WordPress Frontend (Live Website)
WordPress doesn’t offer a built-in option to change the language on the front end of your website. However, there are several WordPress plugins that allow you to do that.
Some of these plugins are TranslatePress, Polylang, Weglot, WPML, and GTranslate. However, for this section, we will focus on the GTranslate plugin.
This free and initiative plugin allows you to add a widget on your site’s front end (live website) with multiple language options. Therefore, visitors can easily choose a preferred language when going through your website.
This, in turn, improves user-friendliness and engagement on your WordPress site.
That being said, the first sub-section below will demonstrate how to install and activate the GTranslate plugin on your WordPress site. Meanwhile, the second sub-section teaches how to use the plugin to change the language on your site’s front end (live website).
Step 1: Install and Activate GTranslate Plugin
- Sign in to the backend of your WordPress site as an administrator. Next, hover your mouse on Plugins among the options on the left pane, then select Add new.
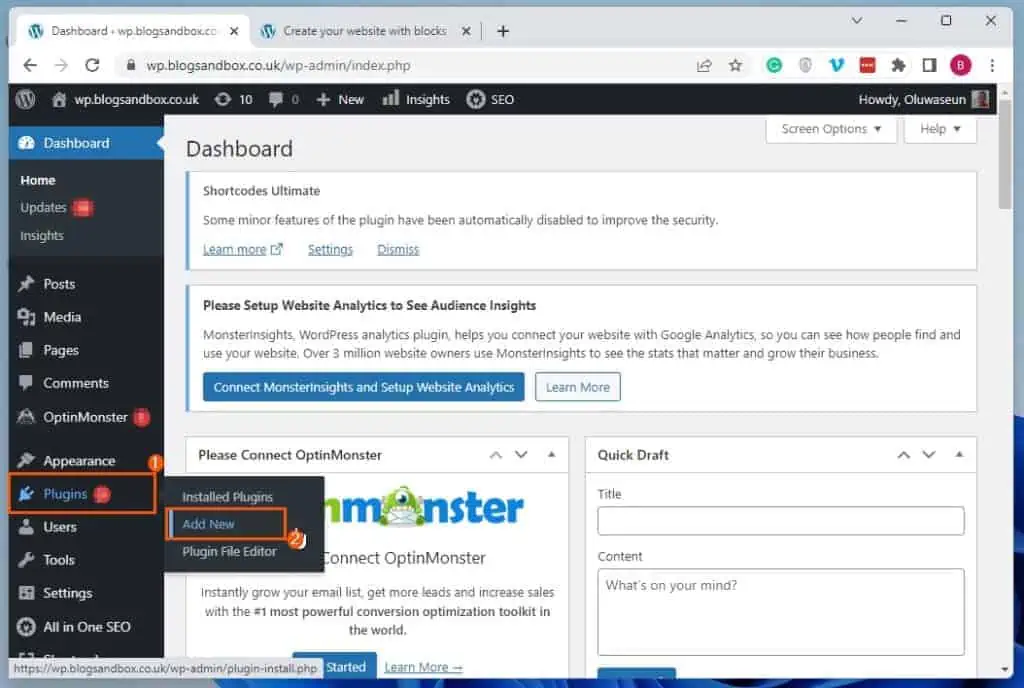
- Following that, input “GTranslate” in the search field on the Add Plugins page.
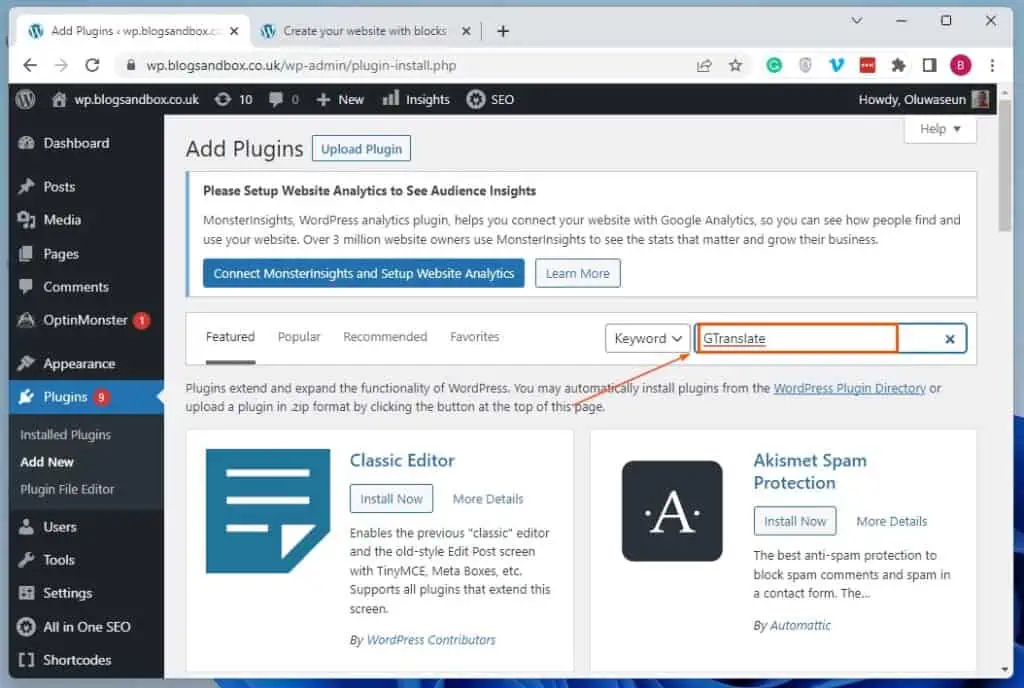
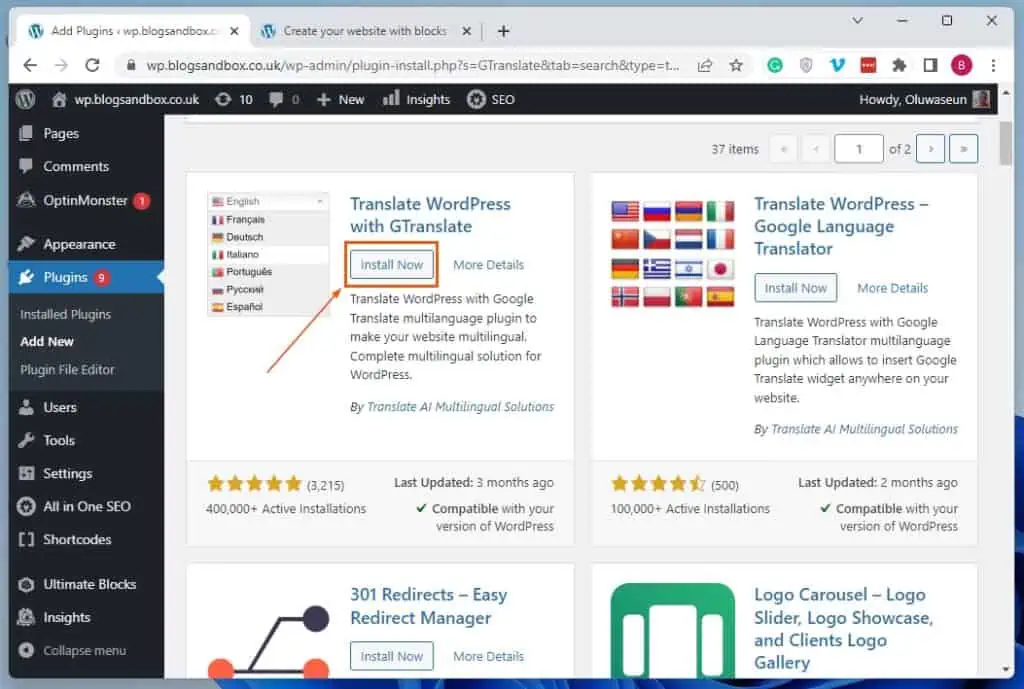
- Afterward, click the Install Now button of the Translate WordPress with GTranslate plugin from the search result.
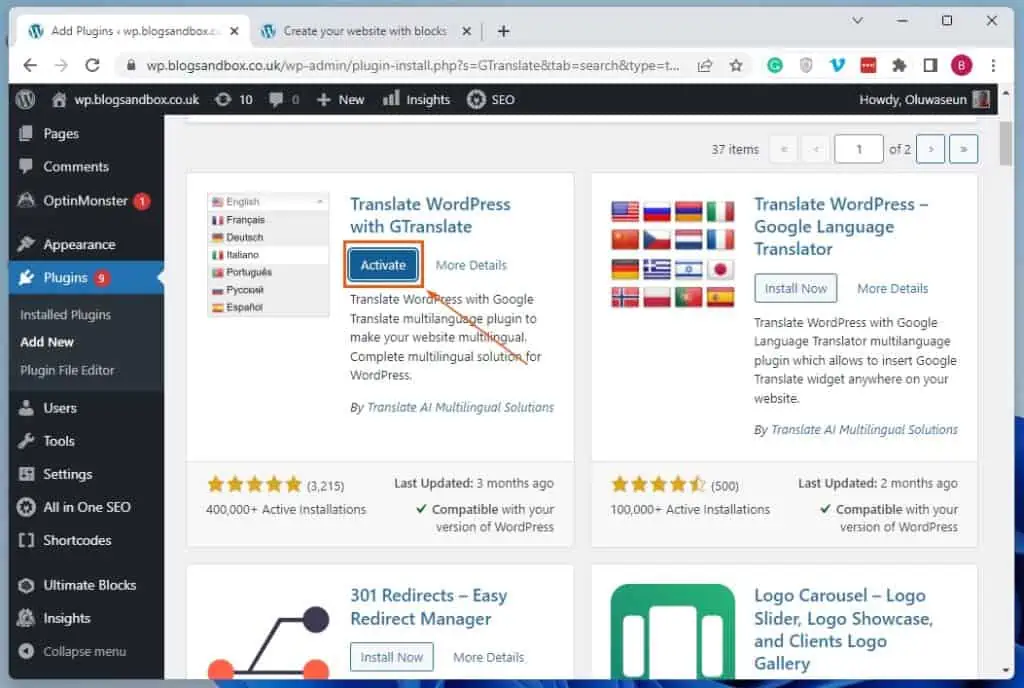
- After installing the plugin, click the Activate button to enable it on your WordPress site.
Step 2: Change the Language from WordPress Frontend Using the GTranslate Plugin
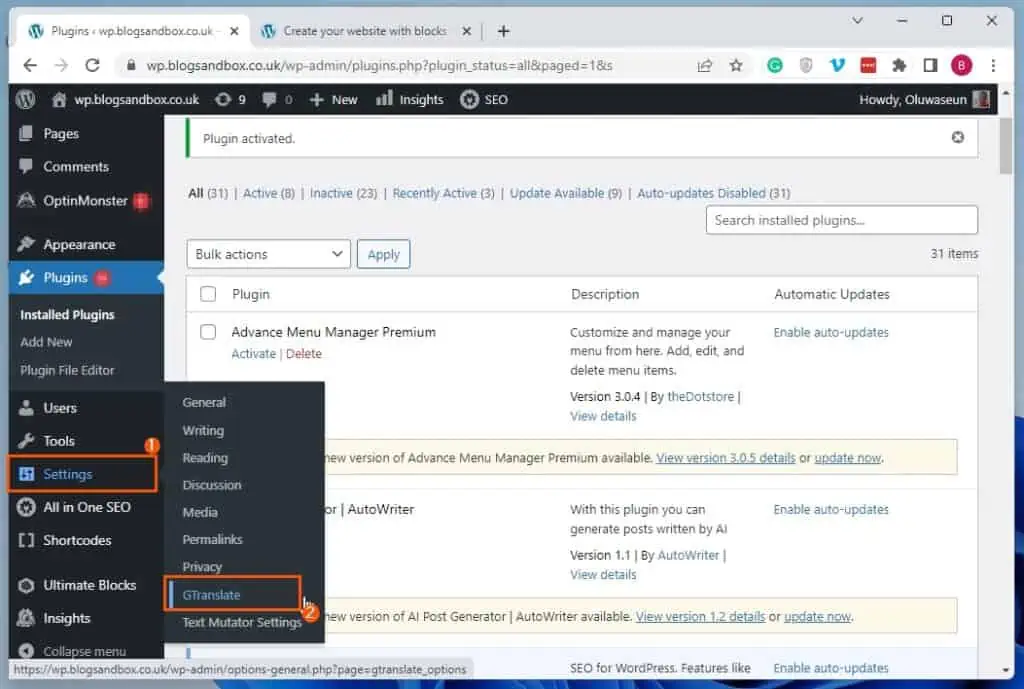
- After you’ve activated the plugin, ensure you’re signed in to your WordPress site’s backend as an administrator. Then, hover your mouse cursor on Settings on the left pane and select GTranslate from the displayed options.
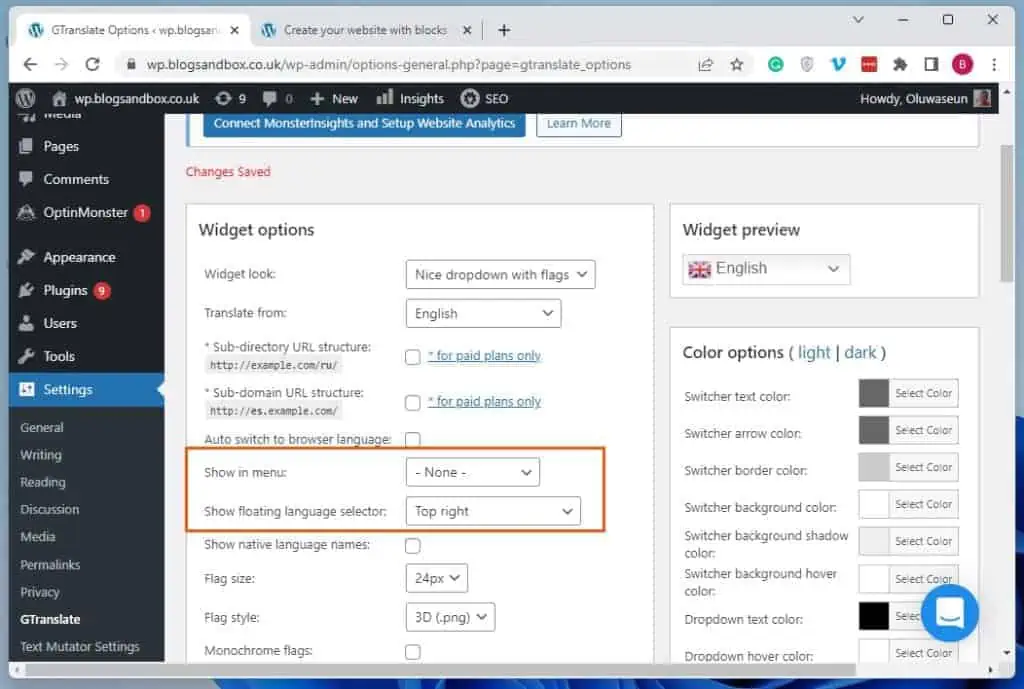
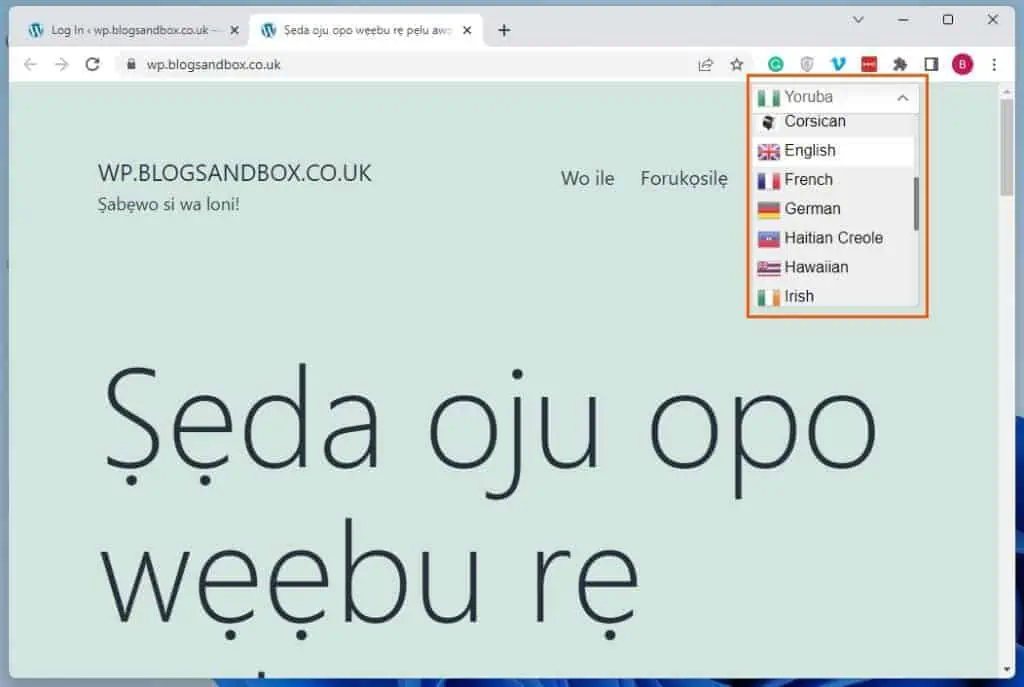
- On the GTranslate page, customize the language widget which you want to appear on your site’s front end using the options in the Widget Options category.
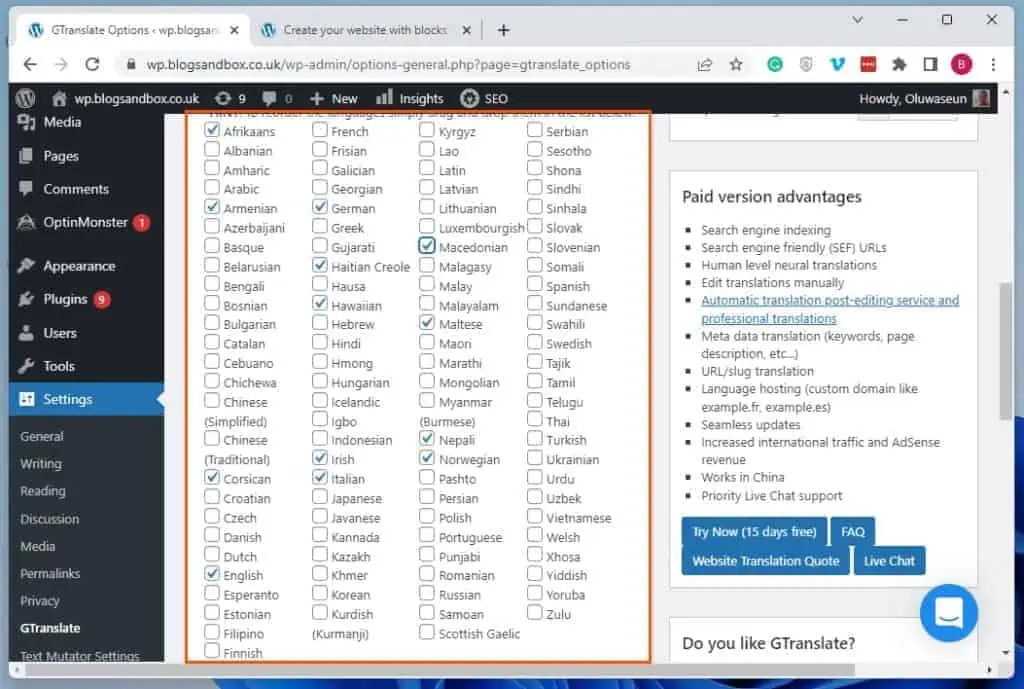
- While customizing the language widget, ensure you check the box of the language(s) you want the widget to offer on your site’s front end.
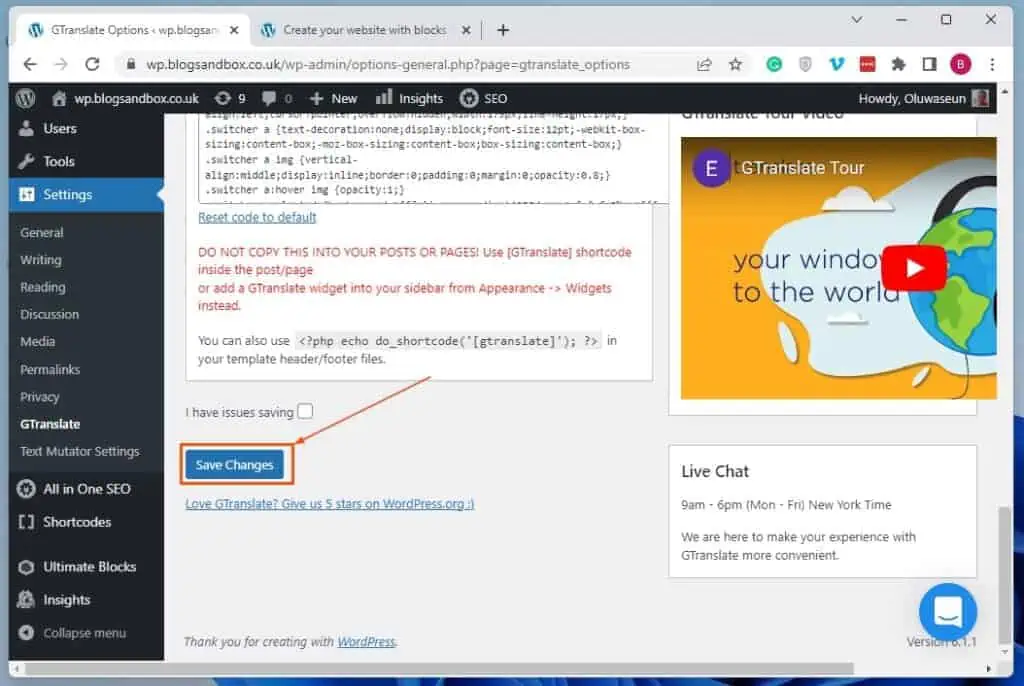
- After customizing the widget to your satisfaction, click the Save changes button at the bottom of the GTranslate page.
- Consequently, whenever someone visits your WordPress site’s front end (live website), he/she will see the language widget. Hence, they will be able to choose a preferred language option from the widget.
Frequently Asked Questions
The default language in WordPress is English.
To change the language of your WordPress site’s backend, follow the steps below.
a) As an administrator, sign in to the backend of your WordPress site.
b) Then, select Settings among the menus on the left pane of the WordPress backend.
c) Afterward, click the Site Language drop-down on the General Settings page and select a preferred language from the displayed options.
d) After doing that, click the blue Save Changes button at the bottom of the page to effect the change.
e) Consequently, every WordPress menu, option, inscription, and notification on your site’s backend will be changed to the selected language. However, plugins, themes, and content written in the WordPress block editor won’t be affected.
Although the default language in WordPress is English, you can choose between 65 languages.
The majority of the core WordPress software is written in the PHP programming language. Thus, PHP is an important language for the WordPress community.
No, it isn’t. WordPress is an open-source content management system (CMS) for developing websites and blogs.
Conclusion
Changing the language in WordPress is a reasonable way to make the platform more accessible to people who speak different languages. Moreover, changing the language can also improve user-friendliness and engagement on your WordPress site.
Fortunately, this guide demonstrates how to change the language on the WordPress backend through the WordPress settings. We also learned how to modify the language in a WordPress site’s front end (live website) using a plugin.
With all that being said, I sincerely hope you found this guide helpful. If you found the guide helpful, click on “Yes” beside the “Was this page helpful” question below.
You may also express your thoughts and opinions by using the “Leave a Reply” form at the bottom of this page.
Finally, visit our WordPress & Websites How-To page for more WordPress guides like this.
![WordPress Lost Password Redirects to Page Not Found [Fixed]](https://www.itechguides.com/wp-content/uploads/2024/03/WordPress-Lost-Password-Redirects-to-Page-Not-Found-Fixed.webp)