This Itechguide teaches you how to change password on Windows 10. The guide covers steps for 3 methods to change password on Windows 10.
Option 1: Change Password with Ctrl + Alt + Del
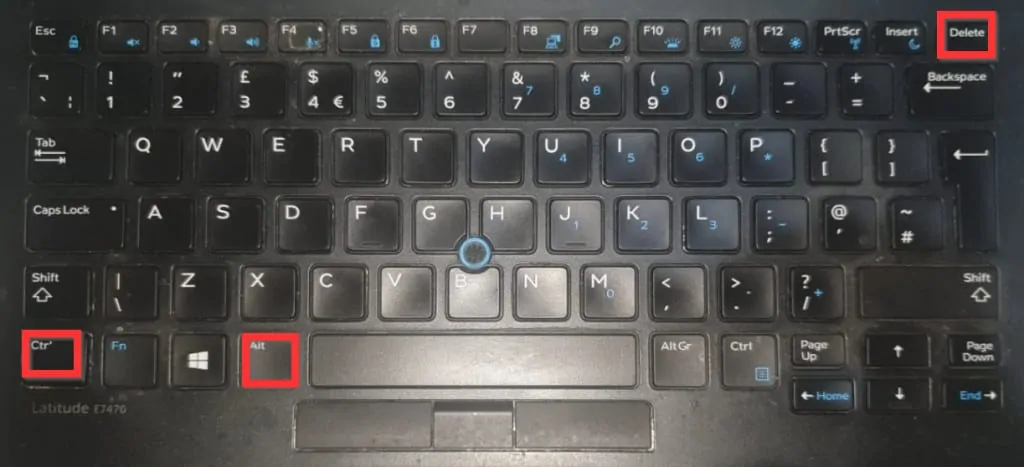
- Press Ctrl Alt Del keys on your keyboard simultaneously.
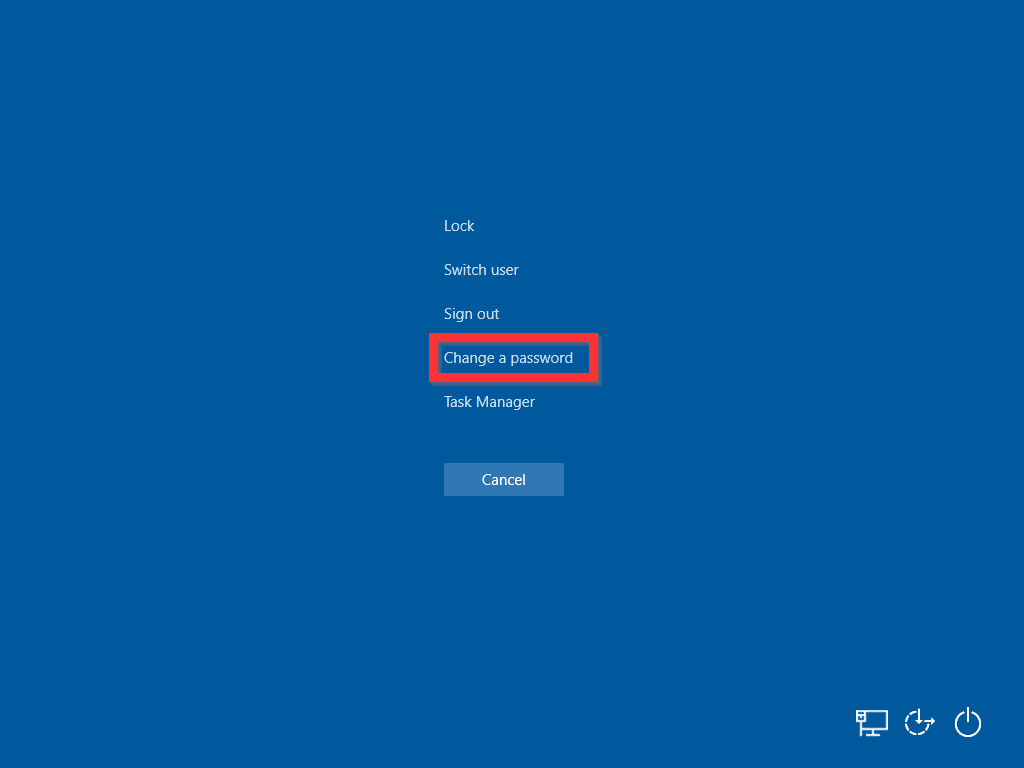
- Then, click Change a password. The Change a password screen will be displayed.
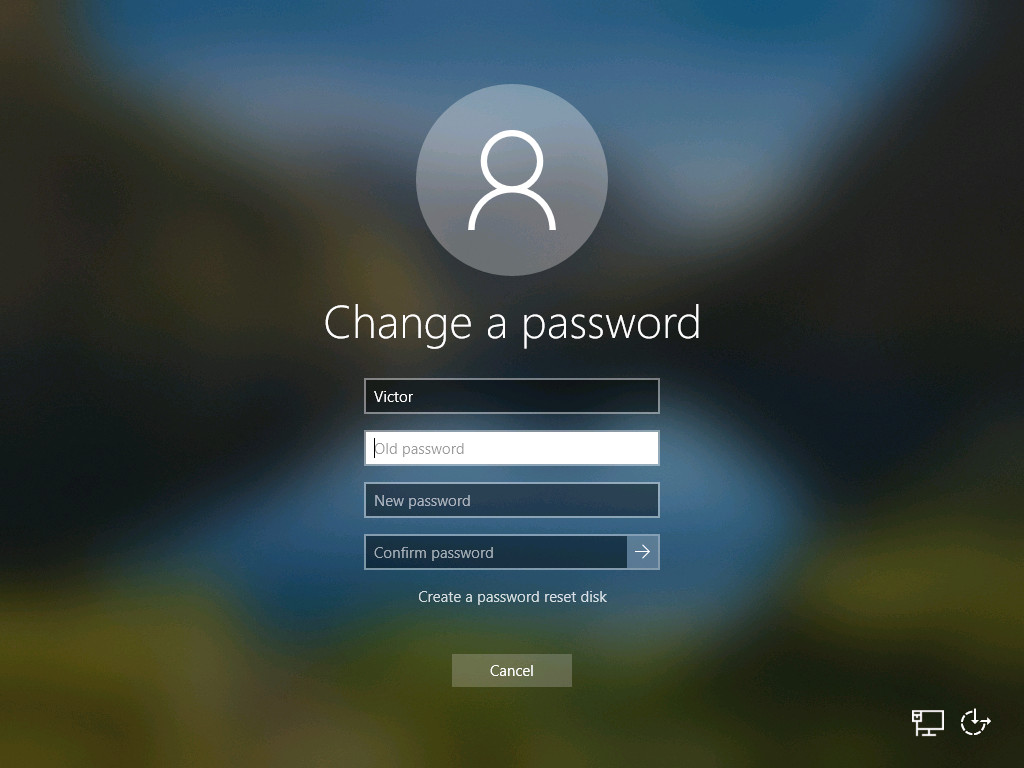
- By default, you will be changing the password for the singed in the account. To change the password for another account, enter the account’s username on the 1st field.
- Then type the current password for the account on the 2nd field. Finally, enter the new password on the 3rd filed and re-enter the password on the 4th field.
- When you finish, click the arrow beside the 4th field.
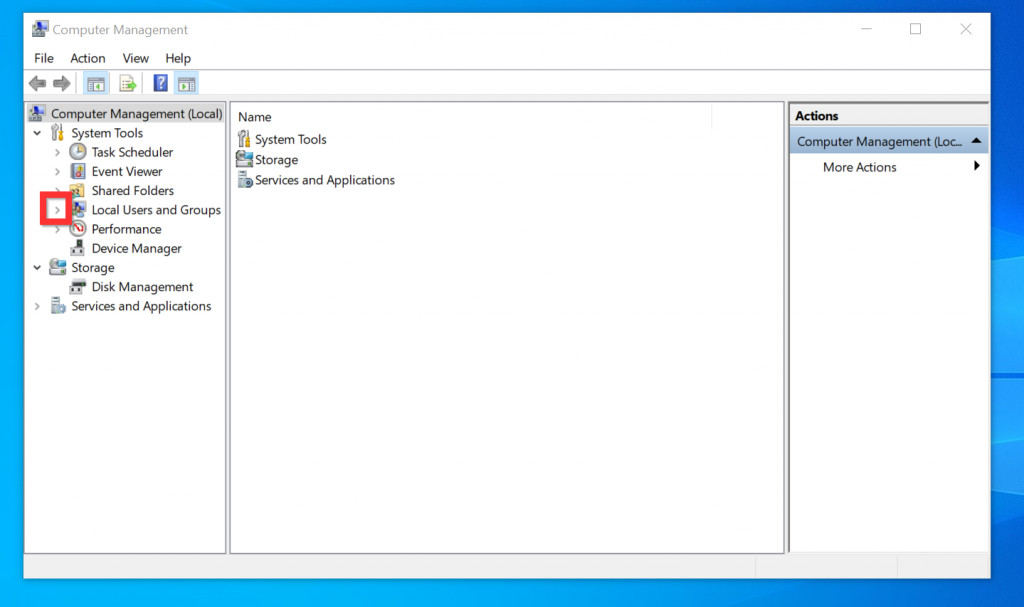
Option 2: Change Password from Local Users and Groups
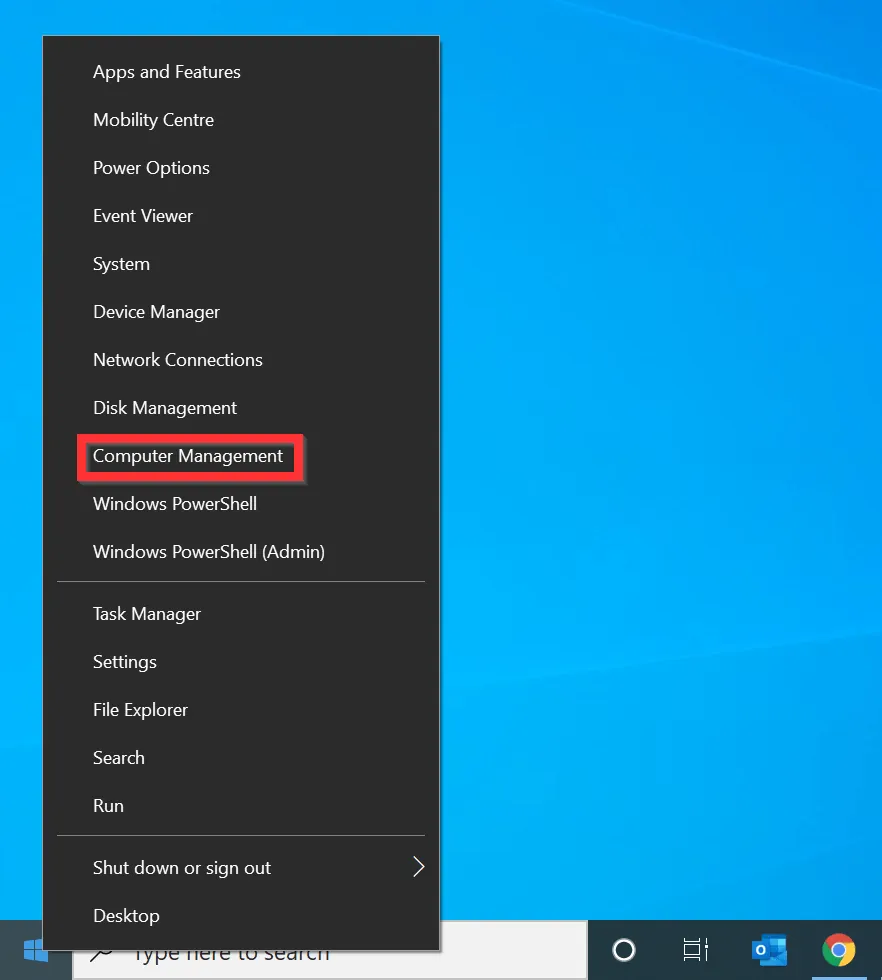
- Right-click Windows 10 Start menu and click Computer Management.
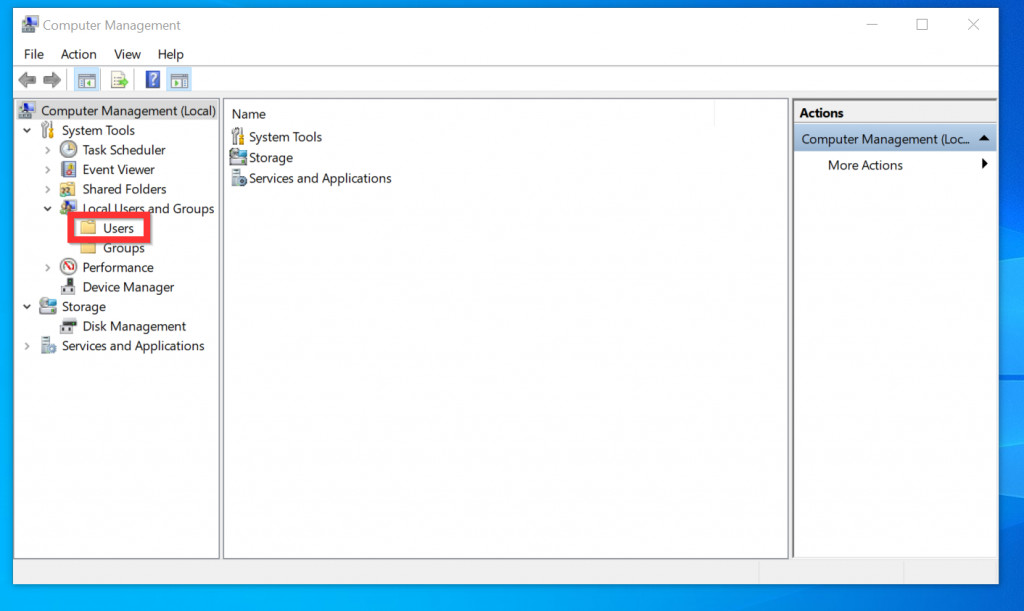
- When Computer Management opens, click the arrow on the left side of Local Users and Groups to expand it.
- Then click the Users node. All users on the computer will be listed on the details pane of the Users node.
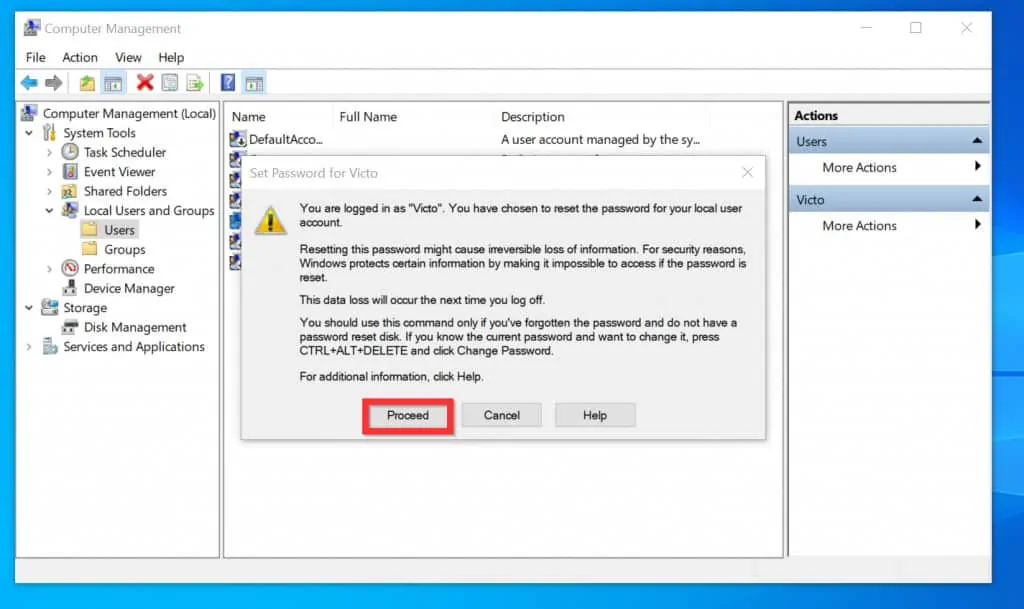
- Right-click the account you want to change its password and select Set Password. You will receive a warning asking you to use Ctrl + Alt + Del instead.

- On the warning screen, click Proceed.
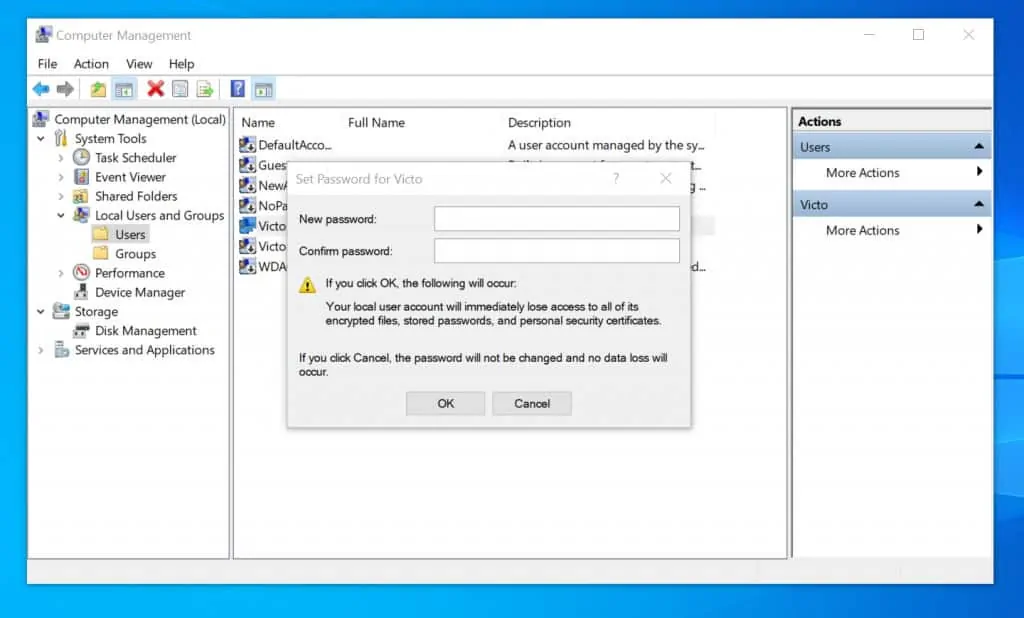
- Finally, on the Set Password pop-up window, enter your new password on the 1st field. Then, re-enter the new password on the 2nd field and click OK.
Option 3: Change Password with Command Prompt
- Type cmd in the search box. Then, on the search result, beneath Command Prompt, click Run as administrator.
- If you receive a User Account Control prompt, click Yes.

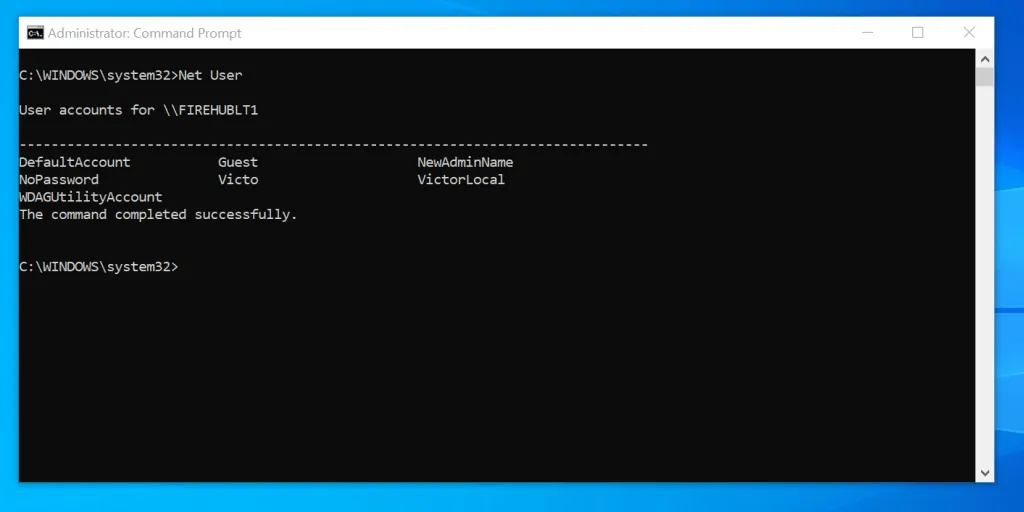
- On the command prompt, to list all the users on the local computer, type the command below and press enter.
Net User
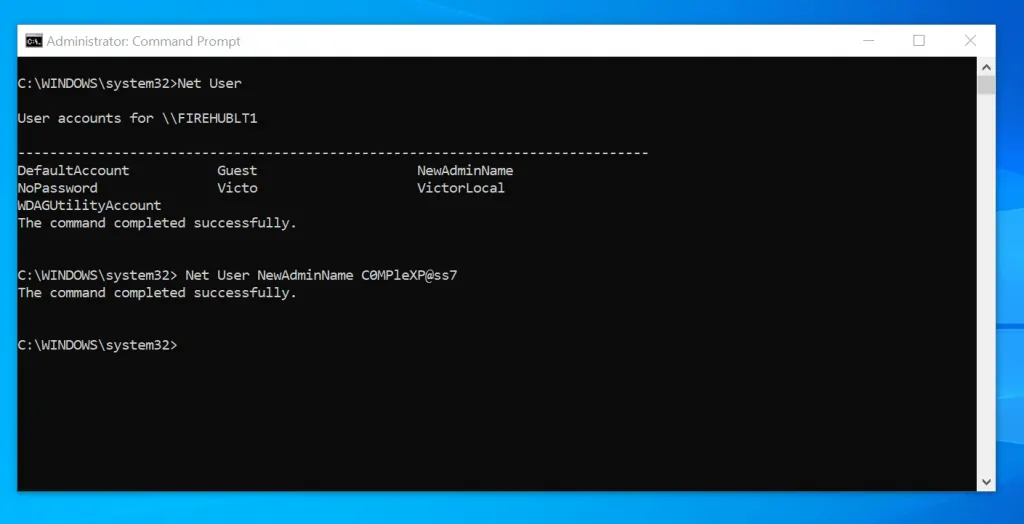
- To change password with the “Net User” command, type the command in the format shown below.
Net User <UserName> <New Password>
- Replace <UserName> with a username from the previous command and <New Password> with the new password for the account.
- Here is an actual command to change the password for a user called, “NewAdminName”.
Net User NewAdminName C0MPleXP@ss7
- If you receive “The command completed successfully.” message, it means that the password for the user account has changed successfully.
- Alternatively, if you receive Access Denied, it may be that you did not open Command Prompt prompt as administrator or that your logged-in account does not have the permission to change the password from command prompt.
Option 4: Change Password with PowerShell
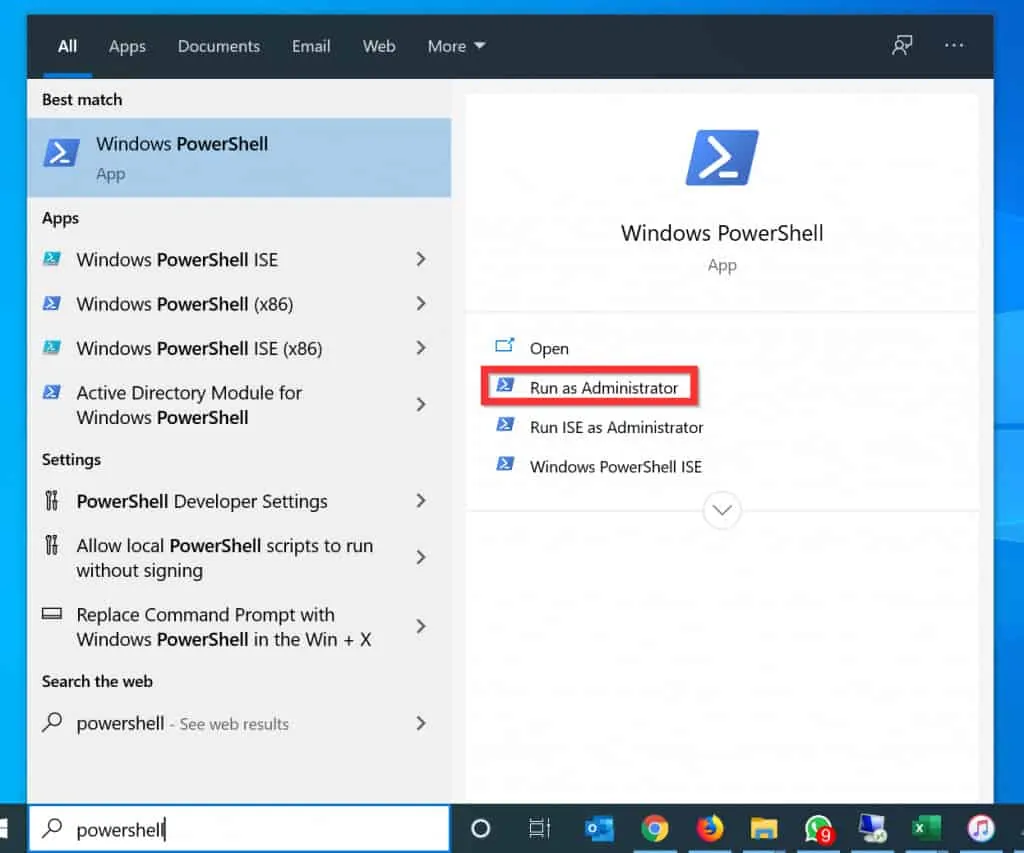
- Type powershell in the search box. Then, on the search result, beneath Windows PowerShell, click Run as administrator.
- If you receive a User Account Control prompt, click Yes.
- On the PowerShell prompt, type the command below and press enter.
Get-LocalUser
- The command lists all the users on the local computer.

- Next, type the command below and press enter.
$Password = Read-Host -AsSecureString
- When you press enter, the cursor will move to the next line. Type the new password. The password will be hidden.
- When you finish typing the password, press the enter key. Then, proceed to the next step…
The last command stores the password in a variable called “Password”.

- On the PowerShell prompt, type this command and press enter.
$UserAccount = Get-LocalUser -Name "VictorLocal"
Replace “VictorLocal” with the user account you are changing the password for.
The last command retrieves the account information for the user called “VictorLocal” and stores the information in the “UserAccount” variable.

- Finally, to change password on Windows 10 with PowerShell, type the command below and press enter.
$UserAccount | Set-LocalUser -Password $Password
- The last command pipes the user account information stored in the “UserAccount” variable to the Set-LocalUser command then uses the password stored in the “Password” variable as the new password for the user.

If you are a Windows Administrator and wants to learn PowerShell, get my new book “PowerShell for Beginners and Advanced users“. It is available on Amazon.com in both Kindle and paperback versions.
It is very easy to change password on Windows 10!
If you were able to change the password on your Windows 10 computer by following the steps in this guide, click on “Yes” beside the “Was this page helpful” question below.
You may also express your thoughts and opinions by using the “Leave a Comment” form at the bottom of this page.
Finally, for more Windows 10 guides, visit our Windows How-To page.


![How To Run Sysprep (Generalize) In Windows 10 [2 Methods]](https://www.itechguides.com/wp-content/uploads/2022/05/8-2.webp)