This Itechguide teaches you how to change DNS on Windows 10. The guide covers steps for 3 methods to change DNS on Windows 10 – from adapter settings, CMD or PowerShell.
Option 1: Change DNS from Adapter Settings
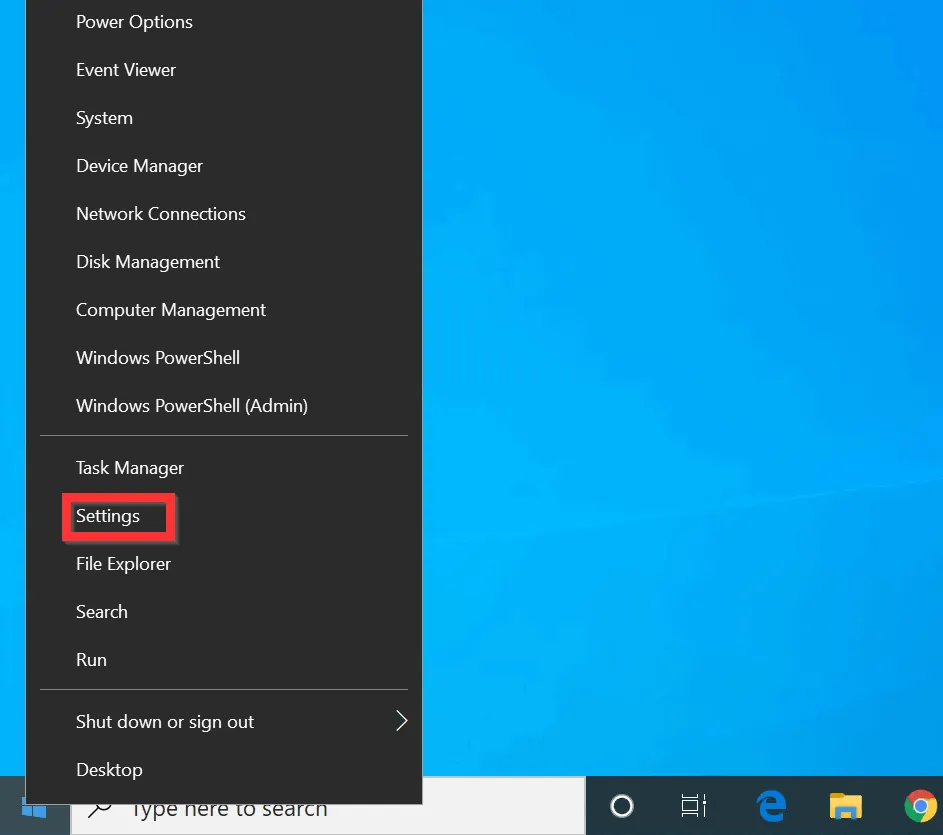
- Right-click the Windows 10 Start menu and click Settings.
- On the Windows Settings screen, click Network & Internet.

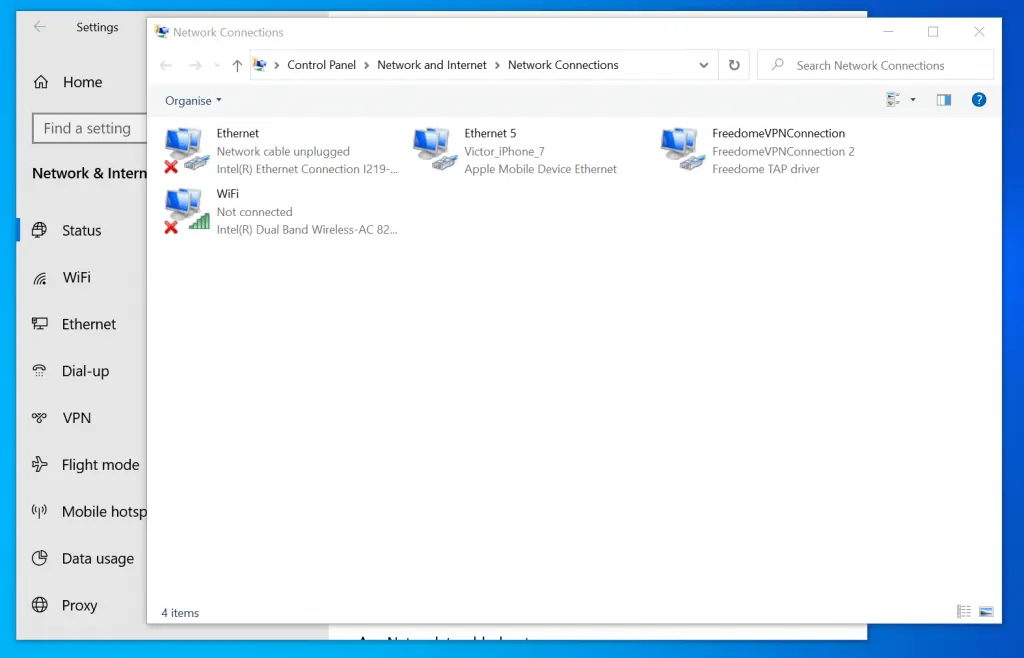
- When Network status setting opens, scroll down to Change your network settings and click Change adapter options. Network connections will open and display all network connections on your computer.

- On Network connections, double-click the adapter you want to change the DNS. The Properties of the adapter will open.
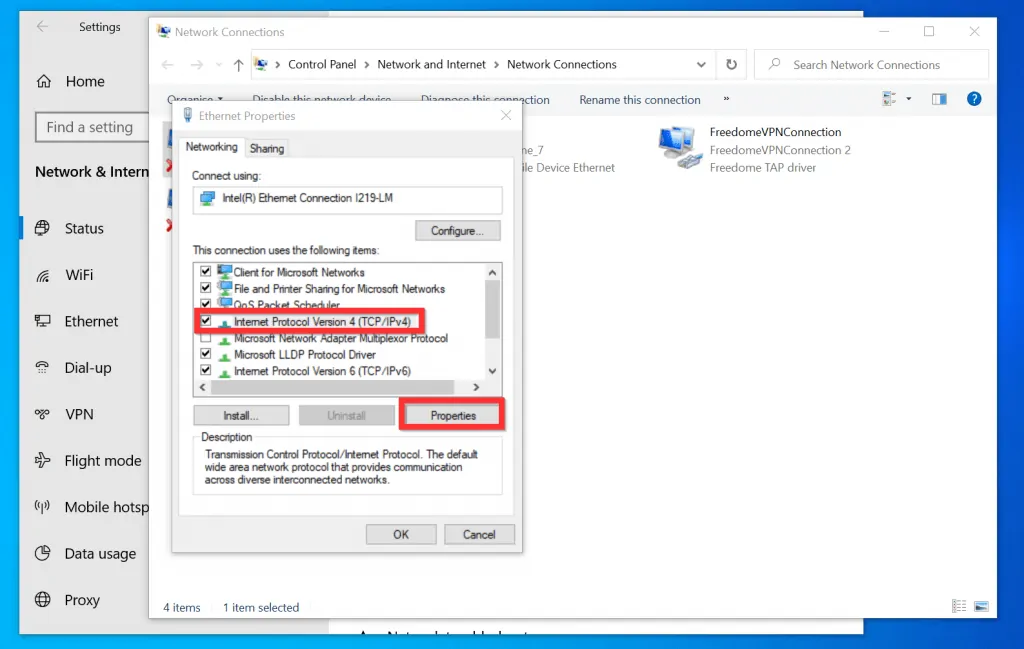
- On the properties of the adapter, click Internet Protocol Version 4 (TCP/IPv4) to highlight it. Then, click Properties.
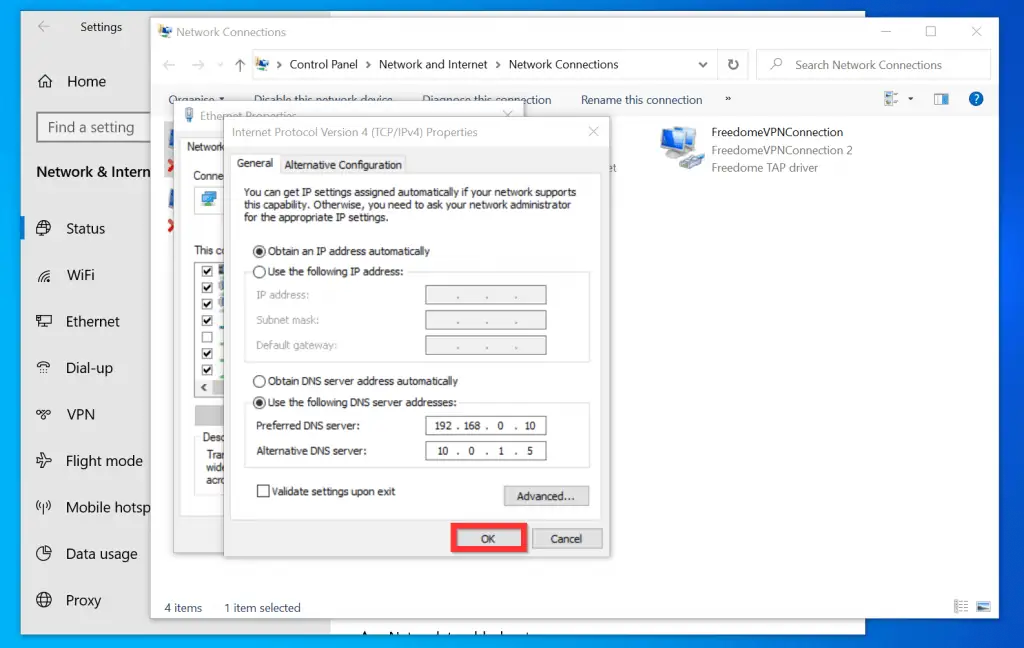
- Finally, on the Internet Protocol Version 4 (TCP/IPv4) Properties, select Use the following DNS server address.
- Then, enter the Preferred DNS server and Alternate DNS server.
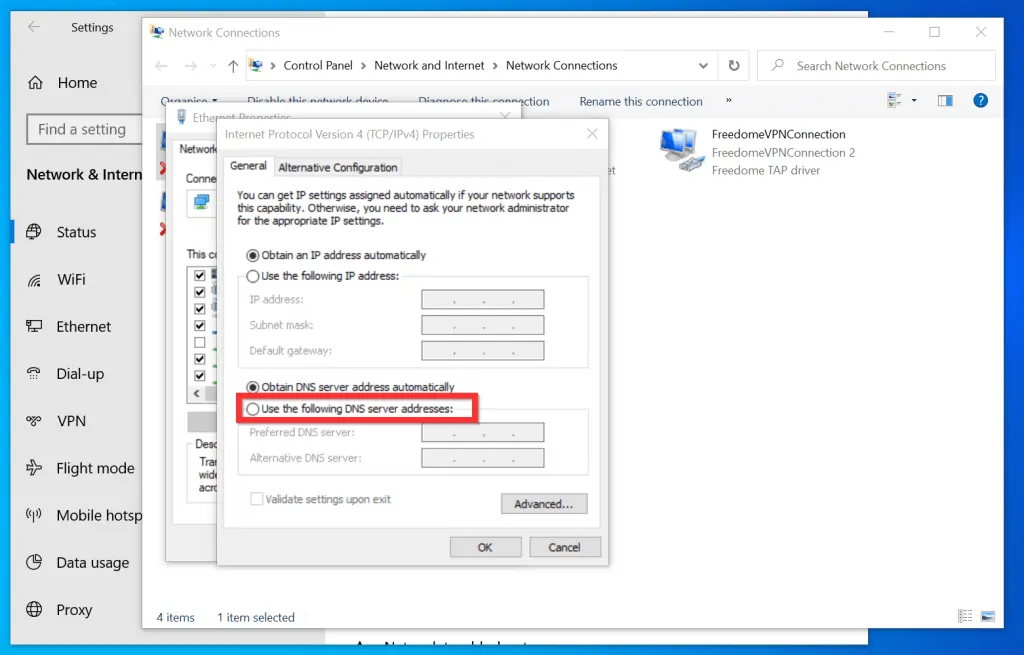
- After adding the IP addresses for the DNS servers, click OK.
Option 2: Change DNS with CMD (Command Prompt)
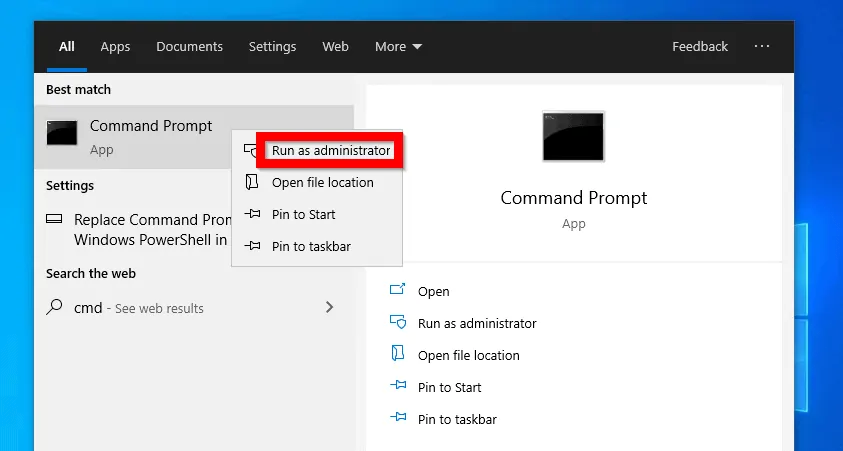
- Type command prompt in the search box. Then, from the search result, right-click Command Prompt and select Run as administrator.
- If you receive a User Account Control confirmation, click Yes.
- On Command Prompt, type the command below and click the enter key on your keyboard.
netsh
- Then, on the netsh prompt, type the command below and press enter.
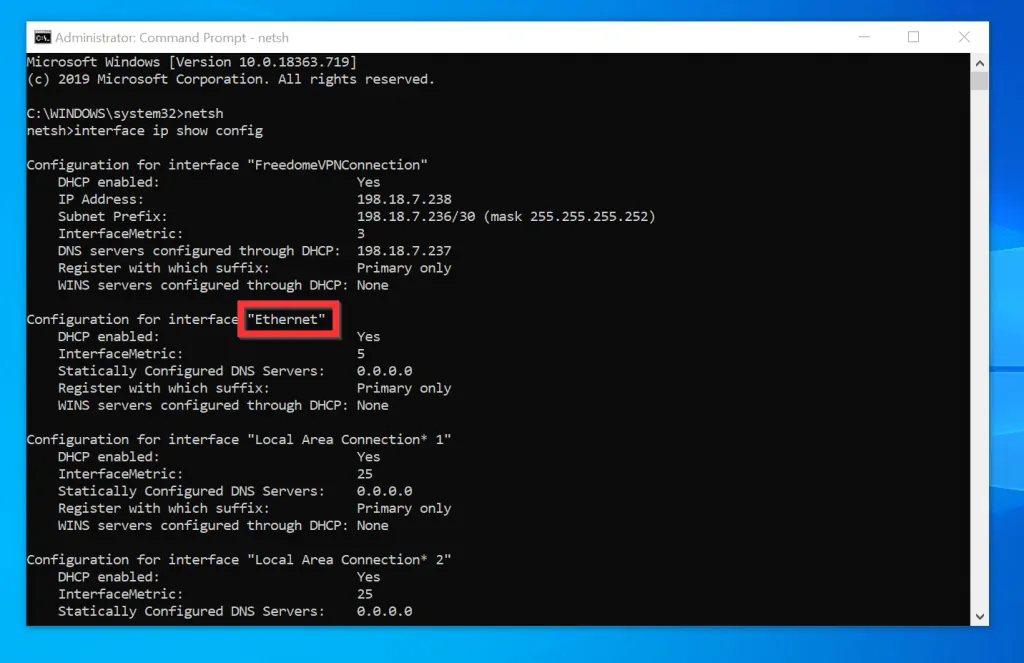
interface ip show config
- The command lists the network information for all the network adapters on your computer. Note the name of the adapter you want to change its DNS.
- In this example, I want to change the DNS for the network adapter, called “Ethernet”.
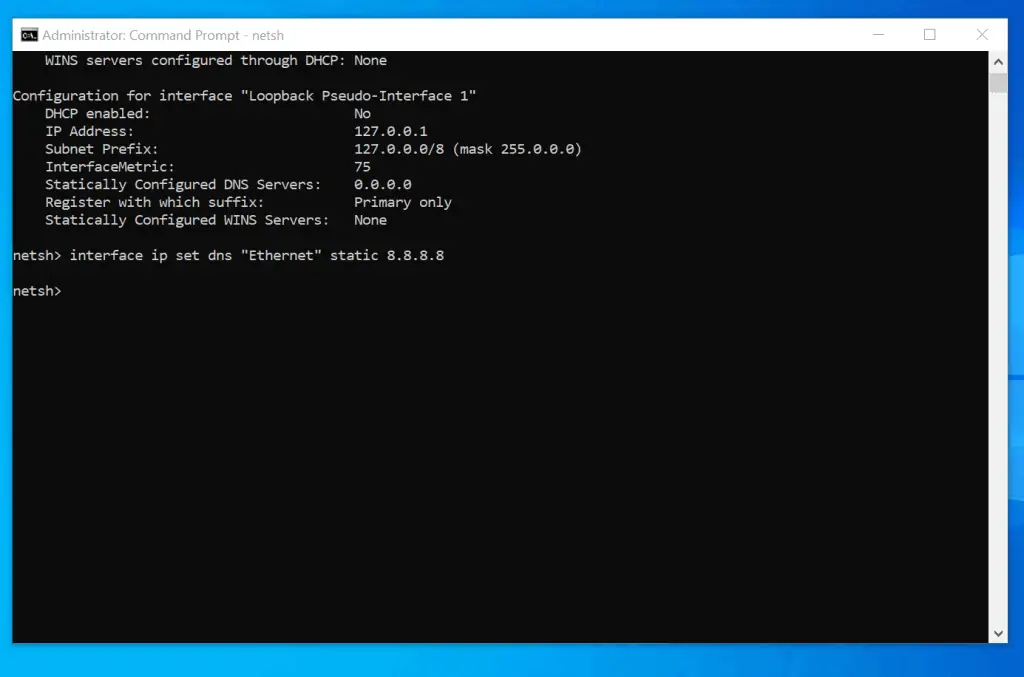
- Finally, to change DNS on Windows 10 with command prompt, type the command below and press enter.
interface ip set dns "Ethernet" static 8.8.8.8
Change “Ethernet” to the name of your adapter and 8.8.8.8 to the IP address of your DNS server.
- When the command completes, it will return to the netsh command prompt. To exit netsh, type exit and press enter.
Option 3: Change DNS with PowerShell
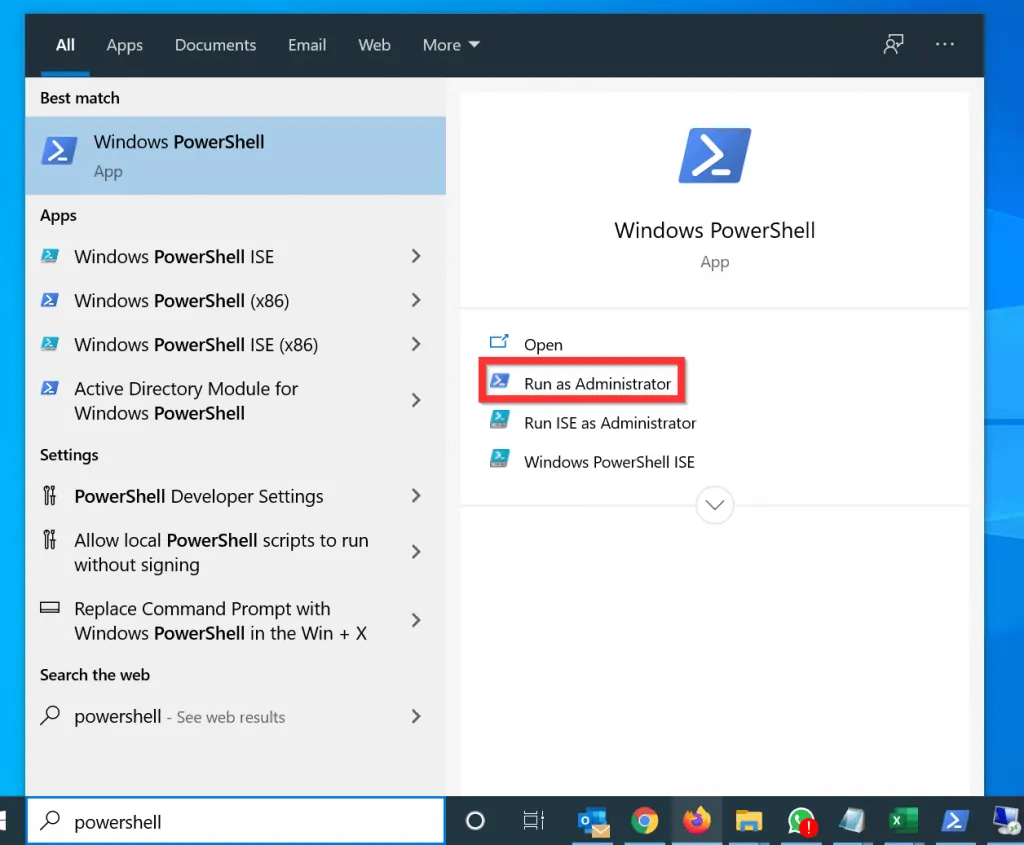
- Type powershell in the Windows 10 search box. Then, beneath Windows PowerShell, click Run as Administrator.
- If you receive a User Account Control confirmation prompt, click Yes.
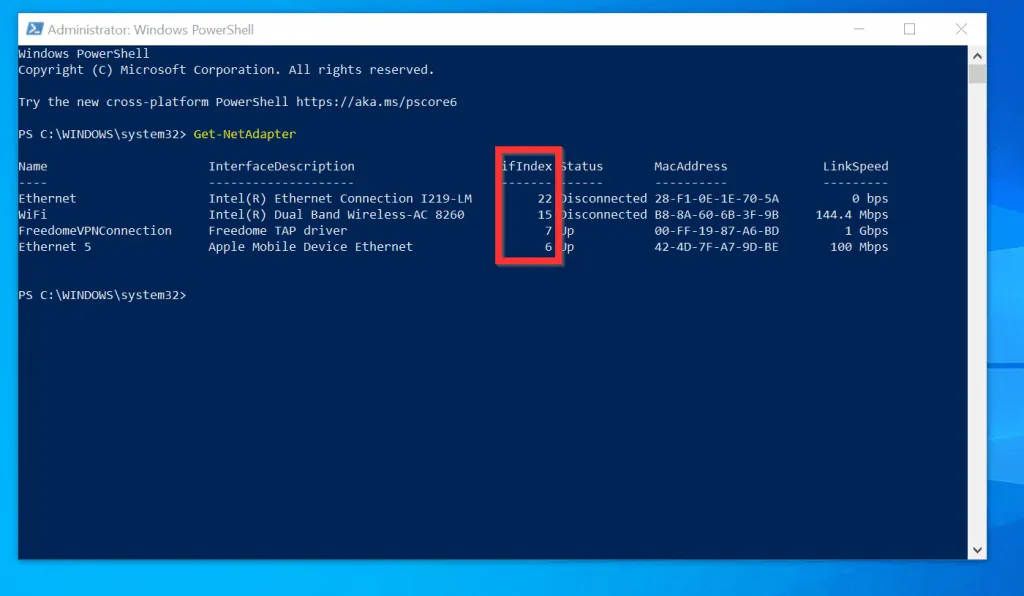
- On the PowerShell prompt, type the command below and press enter.
Get-NetAdapter
- The command lists the basic information for all the network adapters on your PC. Note the interfaceIndex (ifIndex) for the adapter you want to change DNS for.
- In this example, I want to change the DNS for “Ethernet”. The ifIndex is 22.
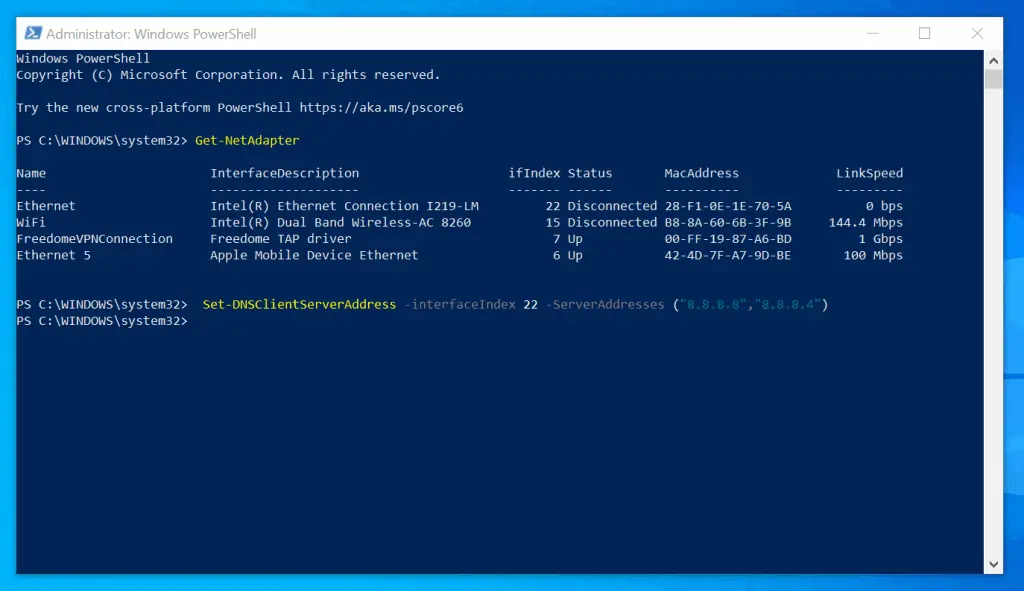
- Finally, to change DNS on Windows 10 from PowerShell, type the command below and press enter.
Set-DNSClientServerAddress –interfaceIndex 22 -ServerAddresses (“8.8.8.8”,”8.8.8.4”)
Change 22 to the interfaceIndex for your adapter. Also, change the IP addresses “8.8.8.8” and ”8.8.8.4” to your primary and secondary DNS server IP addresses. If you want to set the primary DNS without adding an alternative (secondary) DNS server, use a single IP address.
- Here is the above command in PowerShell
It is very easy to change DNS Windows 10! I hope you found this Itechguide helpful. If it was, click on “Yes” beside the “Was this page helpful” question below.
You may also express your thoughts and opinions by using the “Leave a Comment” form at the bottom of this page.
Finally, for more Windows 10 Itechguides, visit our Windows How-To page.


![How To Run Sysprep (Generalize) In Windows 10 [2 Methods]](https://www.itechguides.com/wp-content/uploads/2022/05/8-2.webp)