In this Itechguide, Victor teaches you how to change computer name on Windows 10. The guide covers steps for 4 methods to rename a Windows 10 PC.
Option 1: Change Computer Name From Windows 10 Settings
This is the new way you can change computer name in Windows 10. Here are the steps:
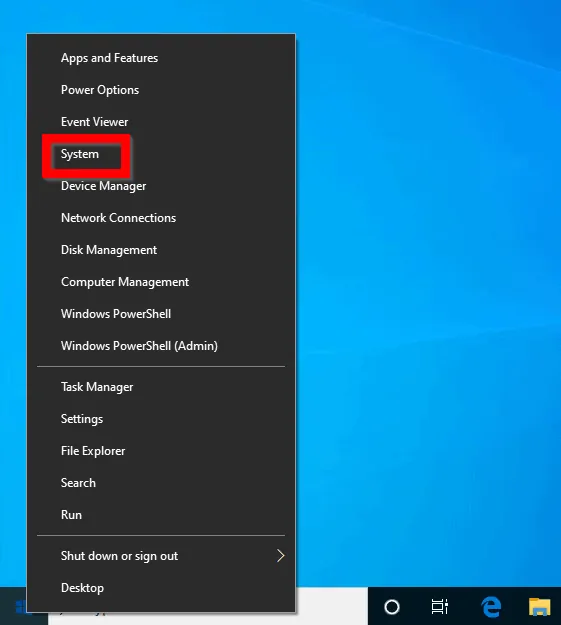
- Logon to the computer. Then right-click start menu. Then click System.
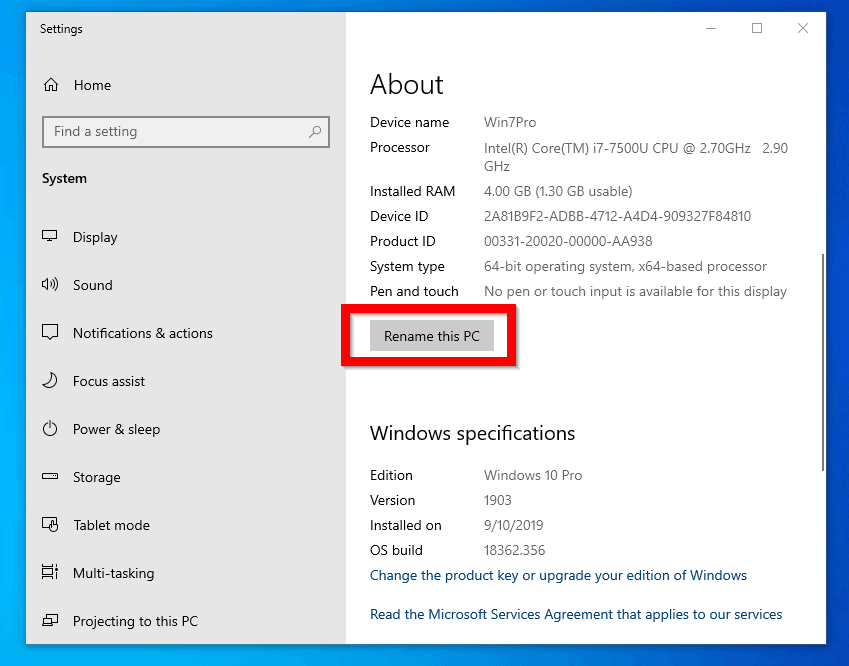
- On the About settings, scroll down and and click Rename this PC.
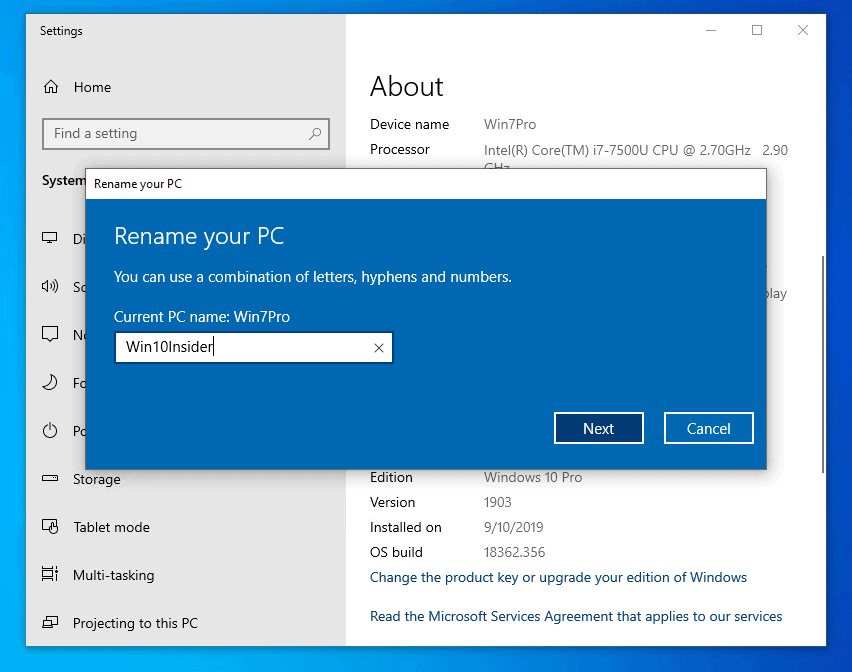
- At Rename your PC, Current PC Name:..field, type the new name for your computer. Then click Next.
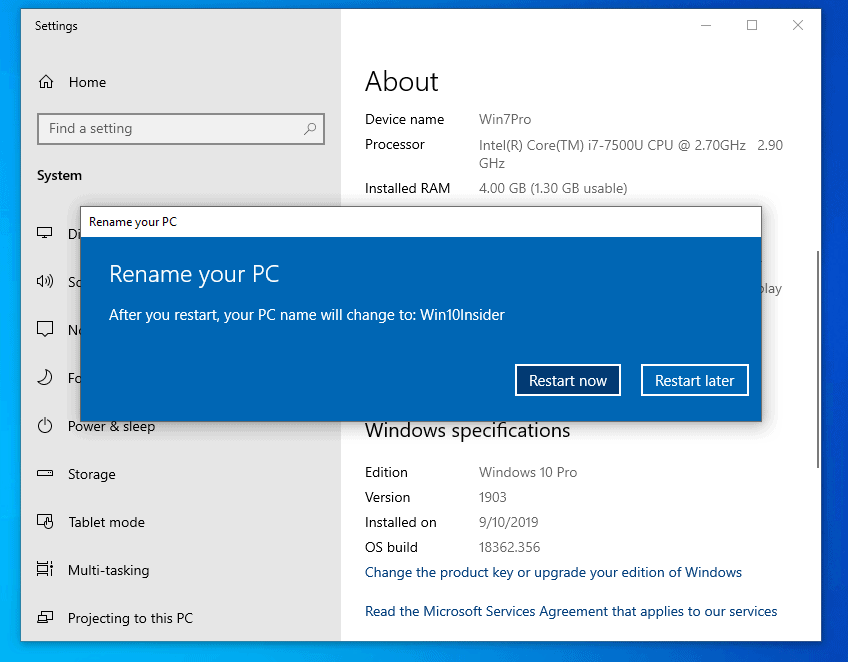
- To change computer name for your Windows 10 PC, click Restart now.
Option 2: How to Change Computer Name From System Settings
If you ever renamed a Windows 7 PC, this was the common way to do it then – from System Settings or Computer Properties. Here are the steps to rename your PC with this method:
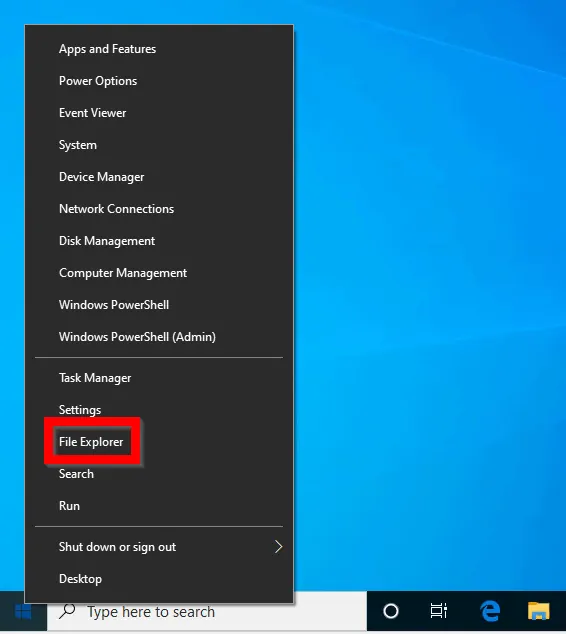
- Right-click Start Menu. Then click File Explorer.
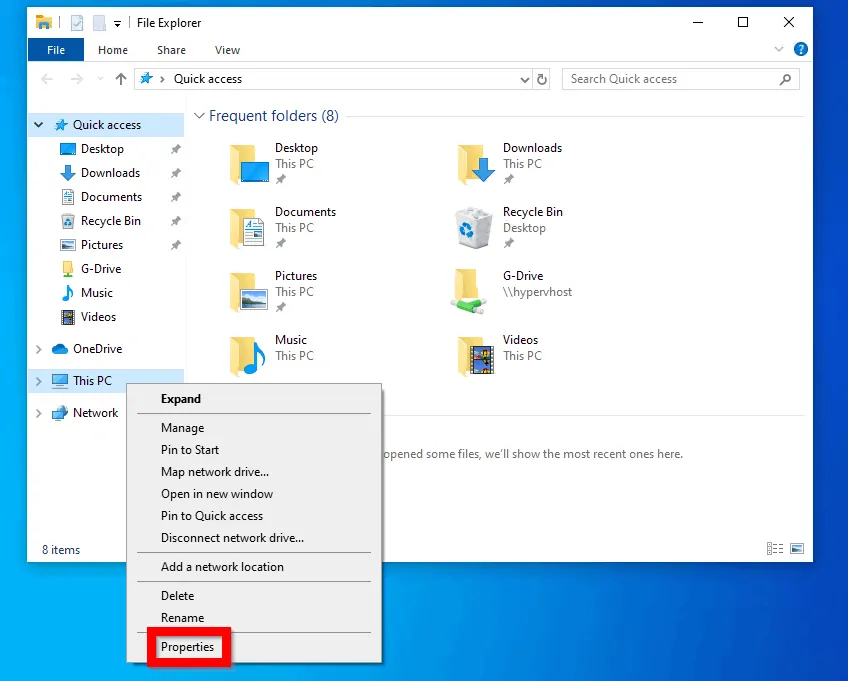
- From File Explorer, right-click This PC. Then select Properties.
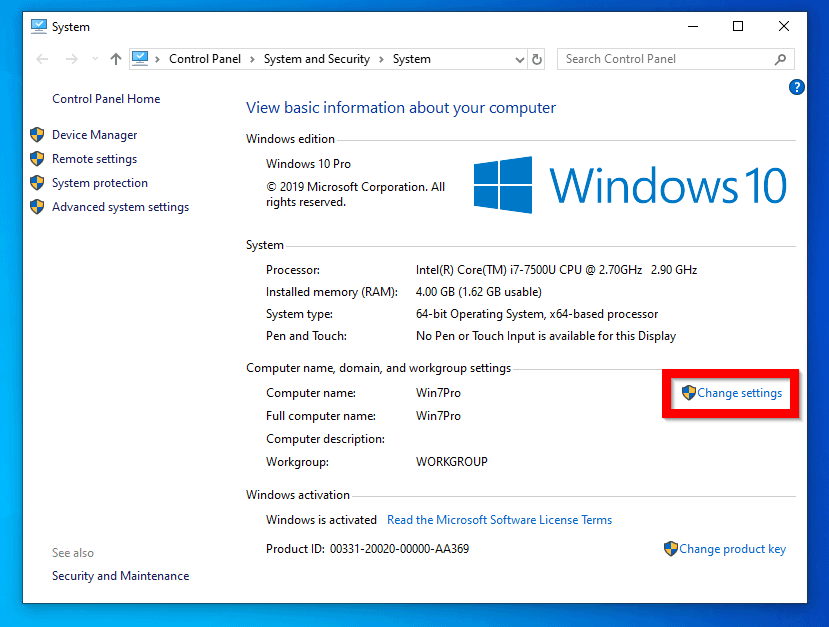
- When View basic information about your computer opens, locate Computer name. Beside it, click Change settings.
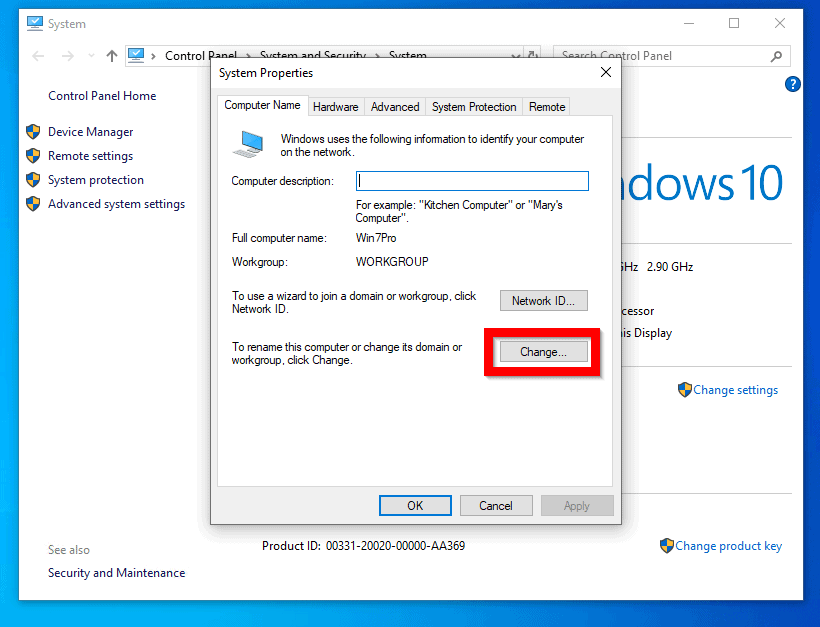
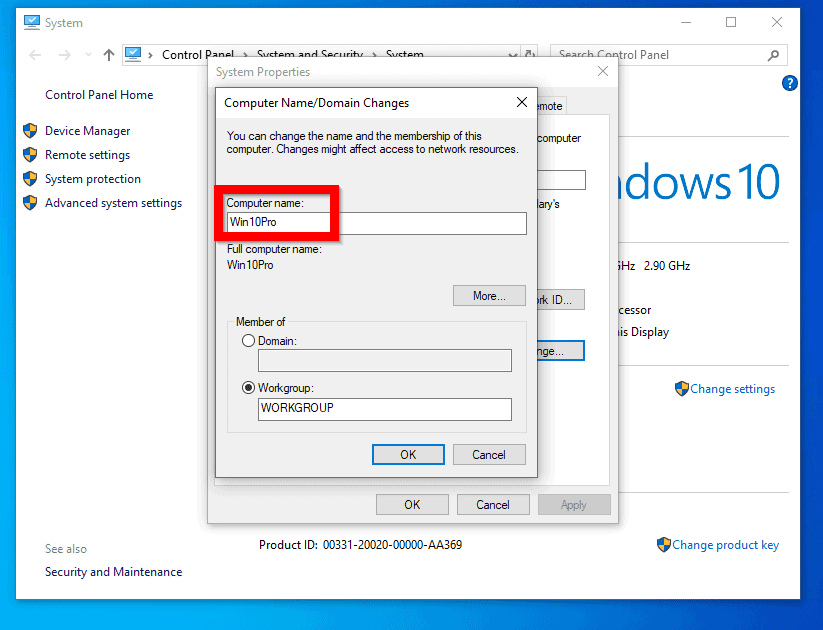
- When System Properties opens, click Change – see the image below.
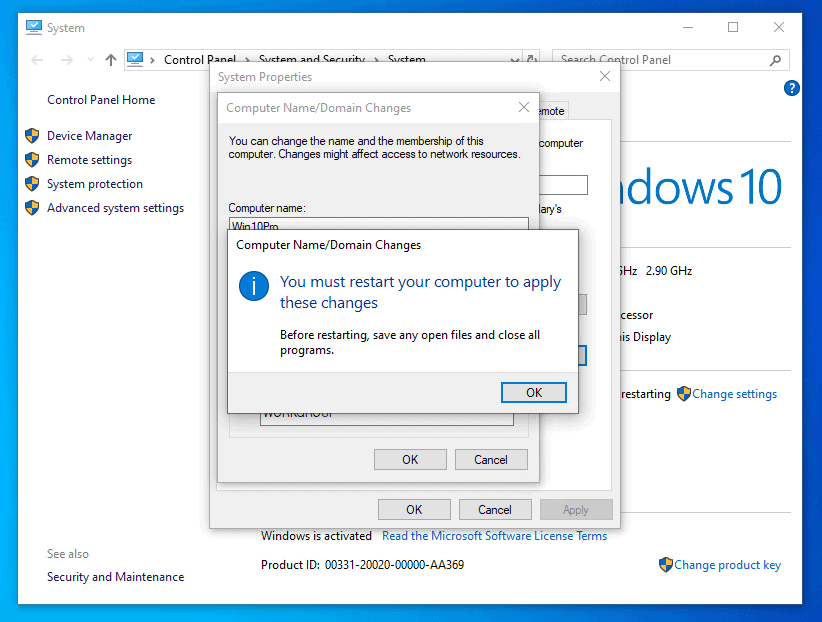
- Then, on the Computer Name/Domain Changes screen, enter a new name in the Computer Name field. When you finish, click OK. At the You must restart your computer to apply these changes prompt, click OK.
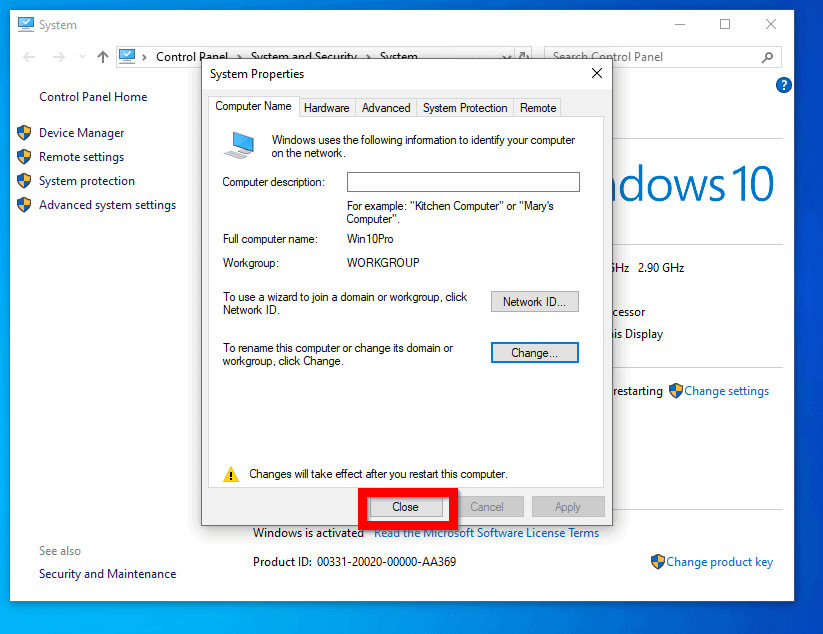
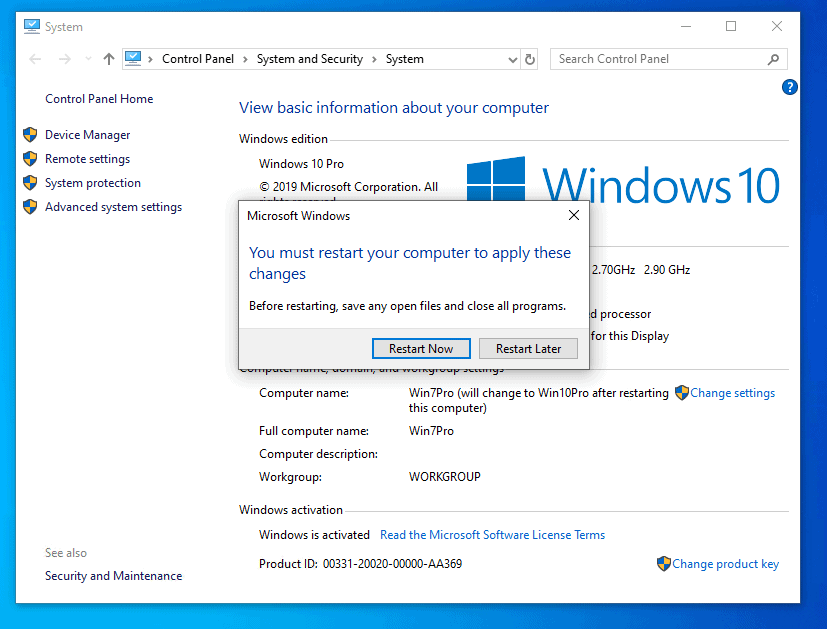
- When you are returned to System Properties, click Close. Then click Restart now.
Option 3: Change Computer Name with PowerShell
You can also rename a Windows 10 PC with PowerShell. Here are the steps:
- Type PowerShell in the search bar. Then Right-click Windows PowerShell and click Run as administrator.
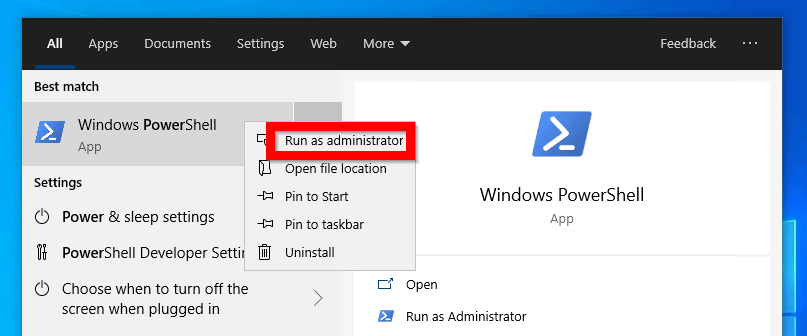
- At the User Account Control prompt, click Yes.

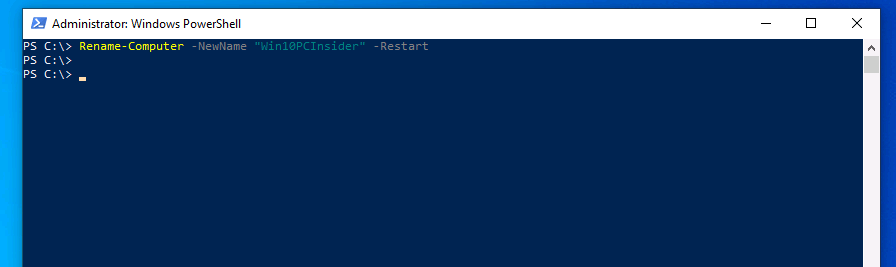
- At Powerhell prompt, type this sample command. Then press enter.
Rename-Computer -NewName "Win10PCInsider" -Restart
To use this command, change “Win10PCInsider” to the actual new name for your computer. When you press enter. The computer will be renamed and restarted.
You can also rename a remote computer with this sample PowerShell command:
Rename-Computer -ComputerName "Current_PC_Name" -NewName "New_PC_Name" -DomainCredential DomainName\AdminUserName -Restart
Option 4: Change Computer Name with Command Line
The last method in this guide is to demo how to change computer name of a Windows 10 PC with command line. Here are the steps:
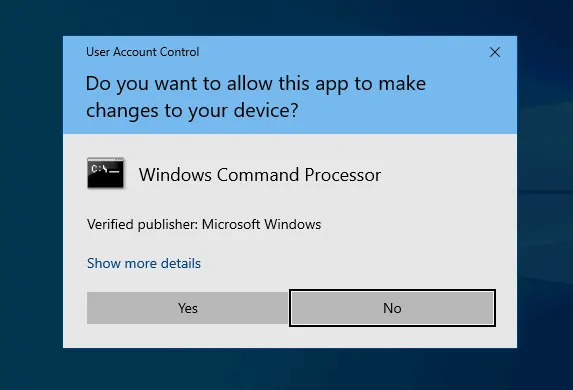
- Type Command Prompt in the search bar. Then Right-click Command Prompt and click Run as administrator.
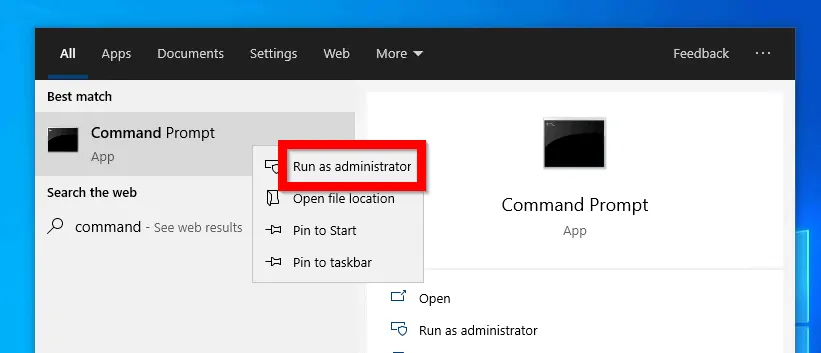
- At the User Account Control pop up, click OK
- At command prompt, type the command below. Then press enter.
WMIC computersystem where caption='current_computer_name' rename new_computer_name replace 'current_computer_name' and new_computer_name
For my demo, I used this actual command below:
WMIC computersystem where caption='Win10PCInsider' rename Win10Insider
- Wait for the command to return “method execution successful”. Then type the command below this image to restart the PC.
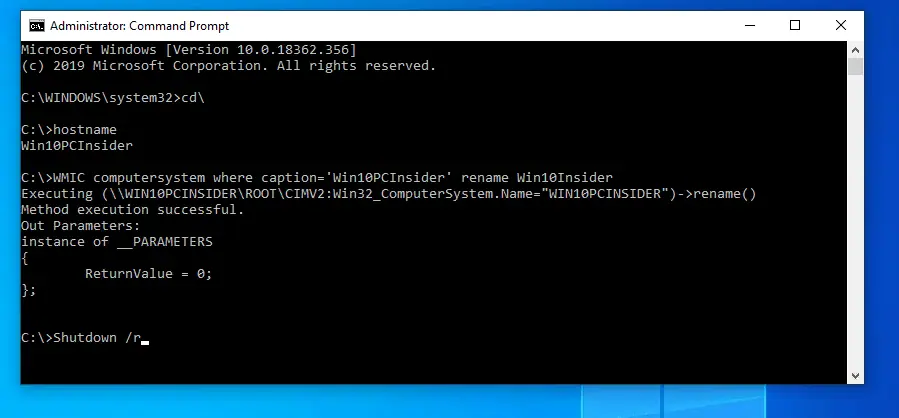
Shutdown /r
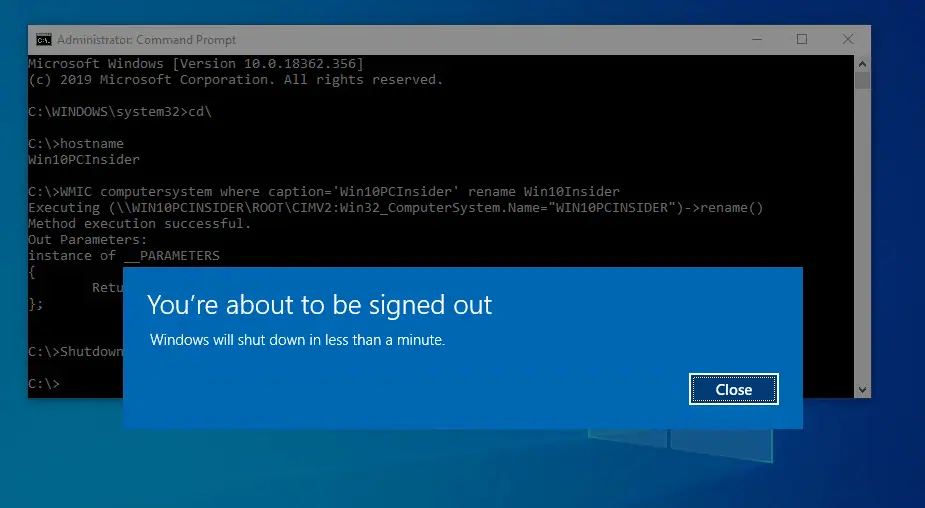
- You will receive a shutdown notification. Click Close then wait for the PC to restart.
Conclusion
Whatever your reason for renaming your Windows 10 PC, I am confident that one of the 4 methods worked for you. by responding to the “Was this page helpful?” question below.
Finally, for more Windows 10 Itechguides, visit our Windows 10 How-To page.


![How To Run Sysprep (Generalize) In Windows 10 [2 Methods]](https://www.itechguides.com/wp-content/uploads/2022/05/8-2.webp)