Need help with the Paint or Paint 3D app on your Windows 11 PC? You’ve come to the right place, as this comprehensive guide covers everything you need to know about Windows 11 Paint and Paint 3D.
However, you can read the entire guide if you are just learning about Paint or Paint 3D.
How to Open Paint and Paint 3D
This section offers several techniques you can use to open the Paint and Paint 3D app on your Windows 11 PC.
Option 1: Open Paint or Paint 3D via Search
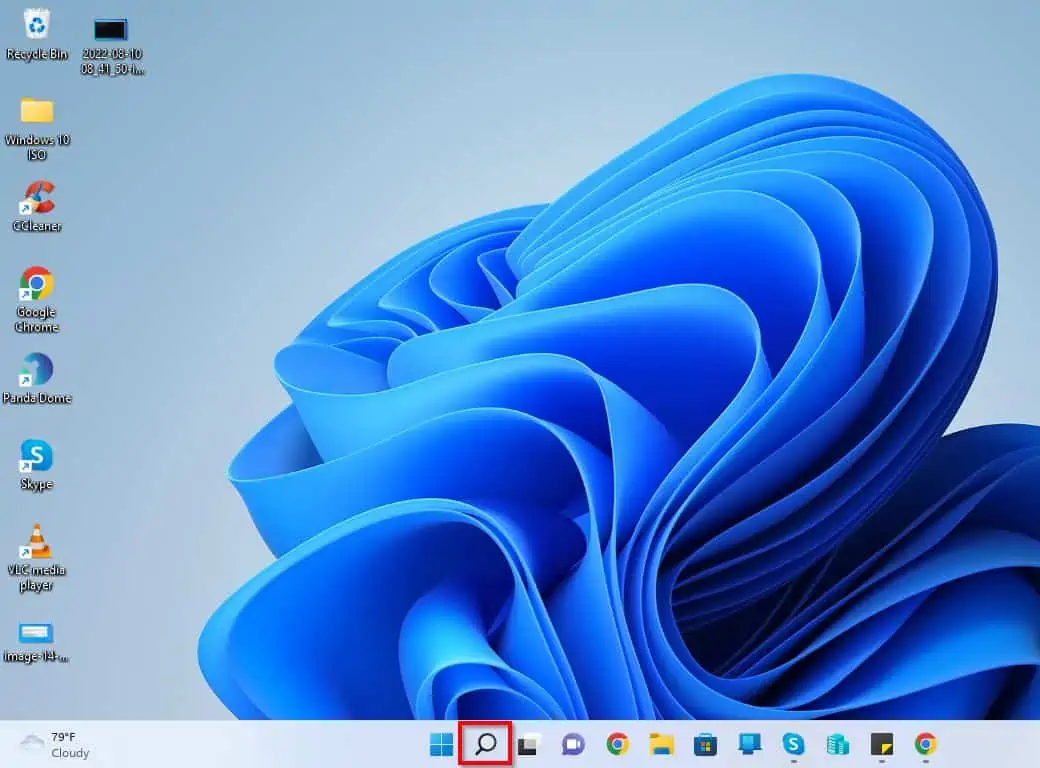
- Click the Windows 11 Search icon on the taskbar.
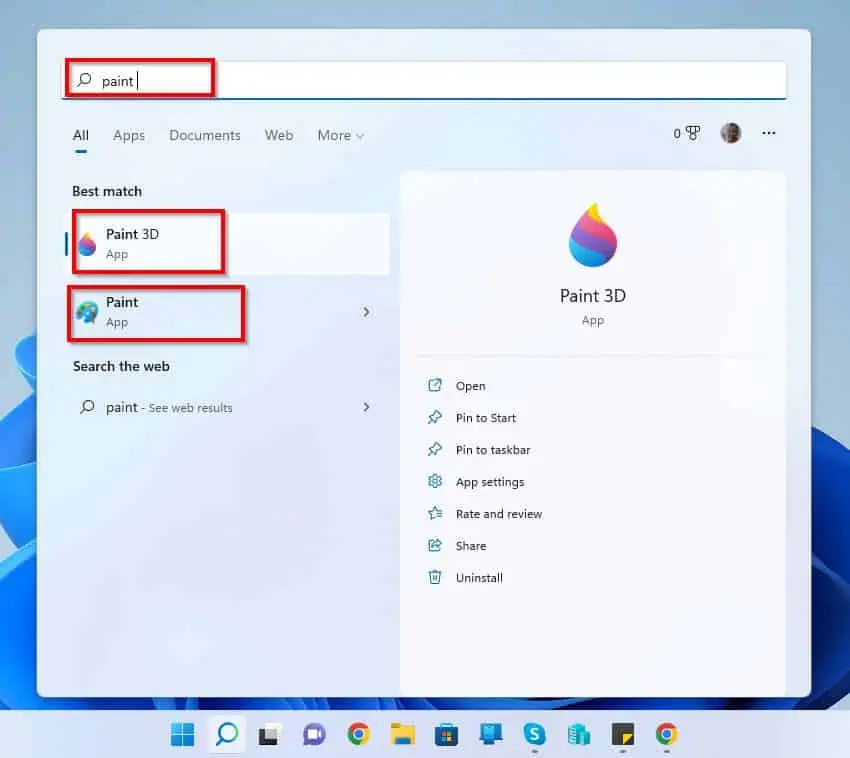
- After that, type “paint” in the search field. Then, you can left-click the Paint 3D or Paint app from the search result to open them.
Option 2: Access Paint or Paint 3D from the Start Menu
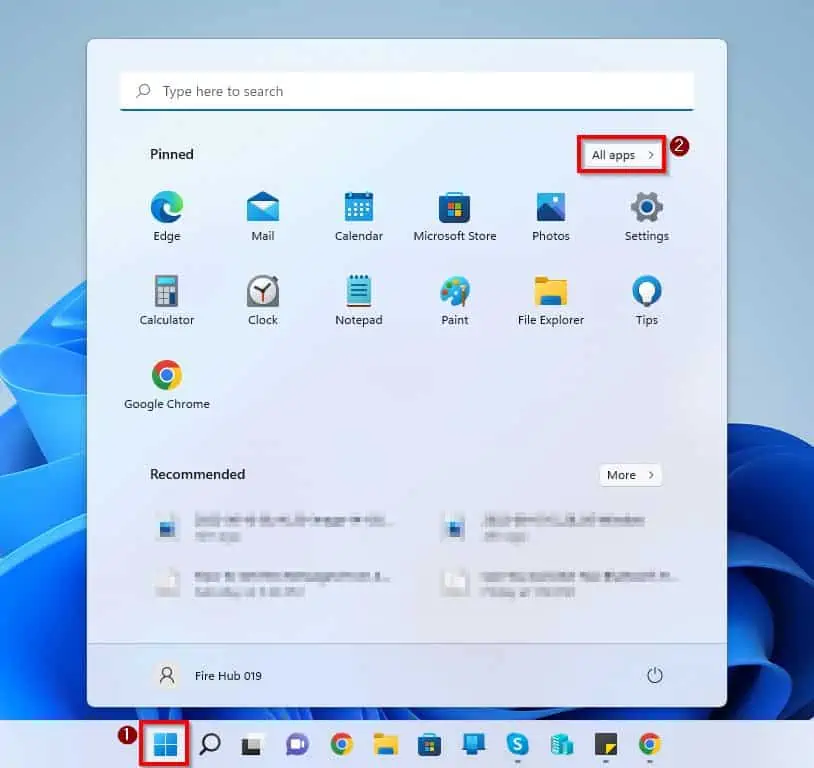
- Click the Windows 11 Start menu and select All apps.
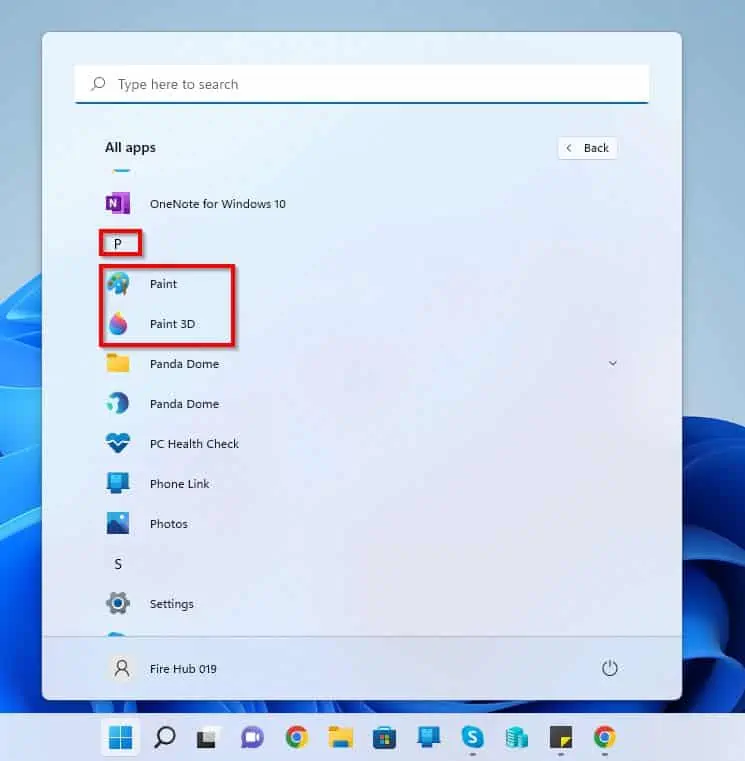
- Then, locate the “P” category on the All apps page. Hence, you will find the Paint and Paint 3D apps from that category – left-click them to open.
Option 3: Open Paint from the Run Command
Interestingly, you can also open the Paint application from the Run command. Follow the steps below to open the Paint app on your Windows 11 PC via the Run command.
- Right-click the Windows 11 Start menu on the taskbar and select Run from the options that pop up.
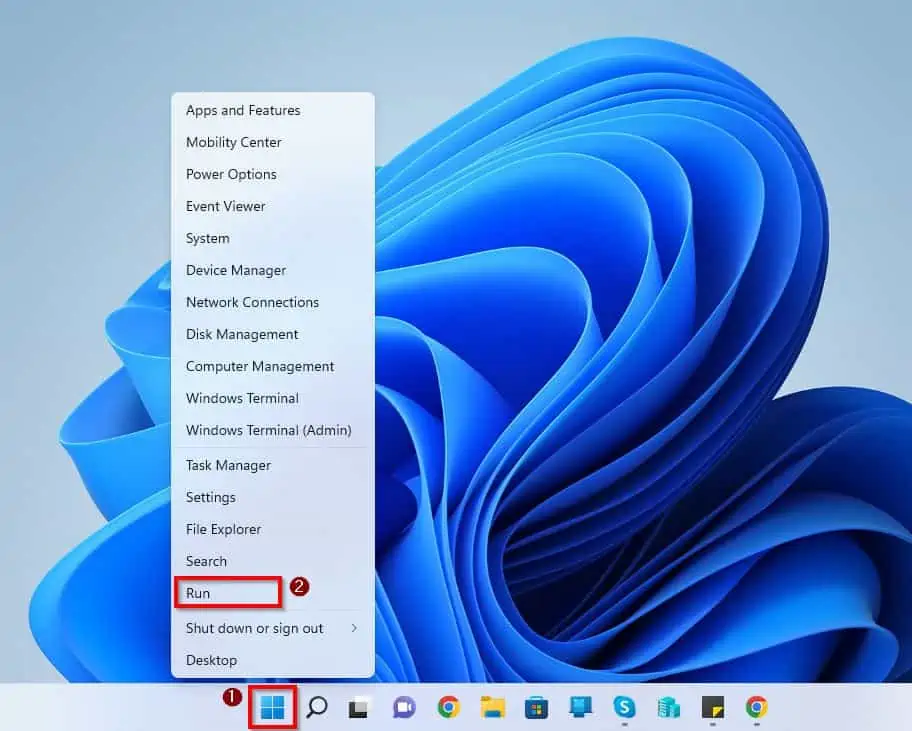
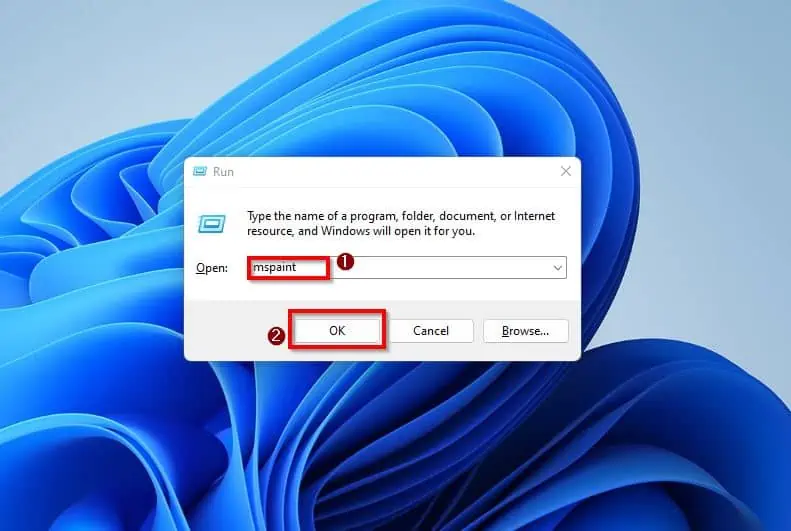
- Then, input “mspaint” on the Run input field, press Enter on your keyboard, or click the OK button.
How to Resize and Manage Canvas
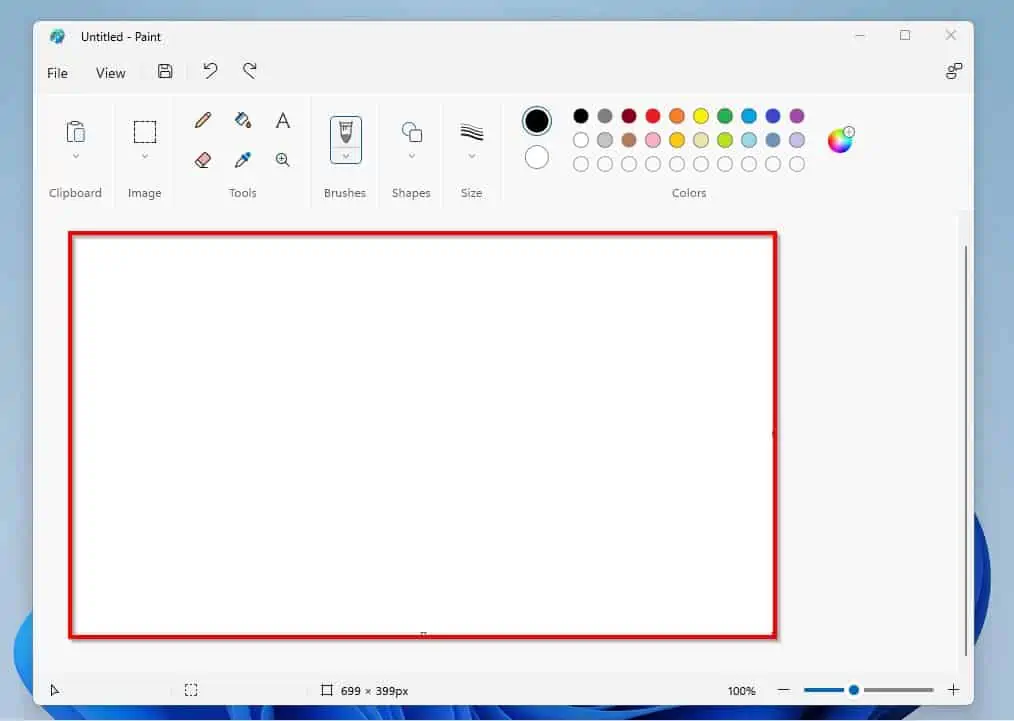
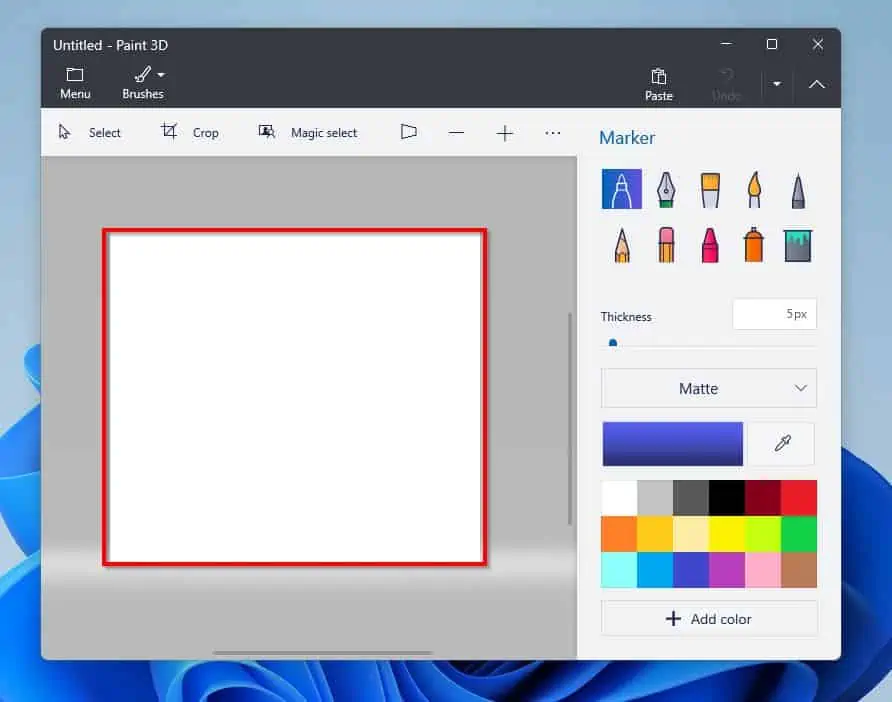
Once you know how to open Paint and Paint 3D, the next thing you probably be asking yourself is how to manage Canvas. For your information, the canvas in Windows 11 Paint and Paint 3D is the portion of the page that holds your image or object.
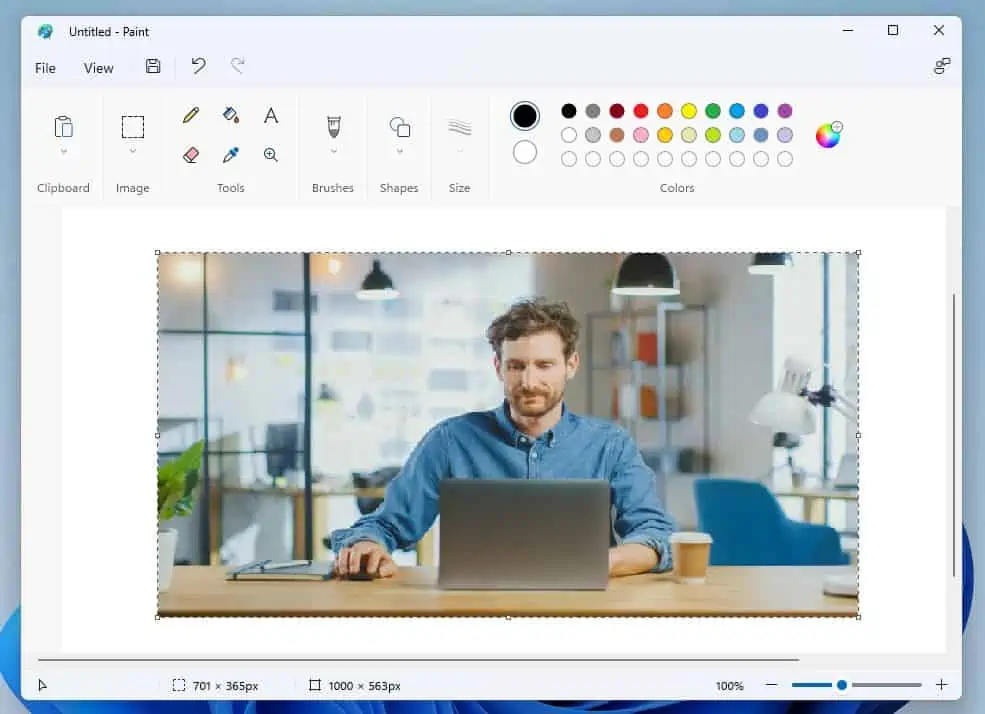
Below are what the canvas looks like in the Paint and Paint 3D apps in Windows 11.
In the sub-sections below, I will teach you how to resize Paint and Paint 3D Canvas in Windows 11. We will also discuss how to include Rulers, Gridlines, or Status Bar in Paint.
1. Resize Canvas
You can use various methods to resize canvas in Windows 11 Paint. Gladly, you will learn all these methods in this sub-section.
Option 1: Adjust Canvas From Image Properties
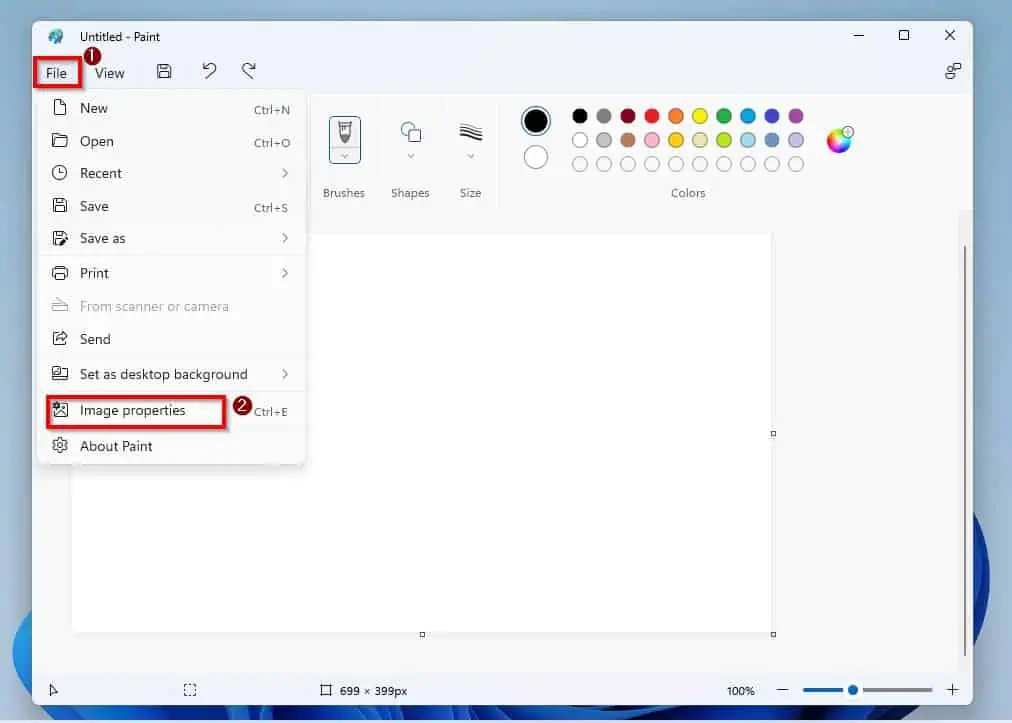
- Click File on the top left corner of the Paint window and select Image properties from the options that appear.
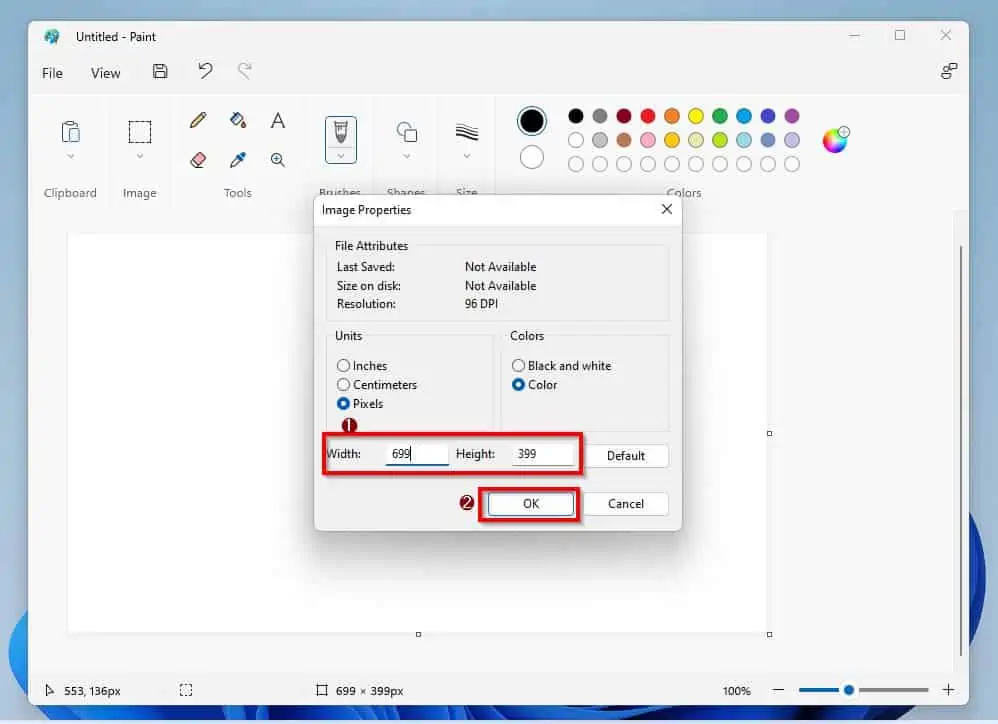
- Then, you can adjust the width and height of the Paint canvas using the Width and Height input fields. After doing that, click the OK button to save the changes.
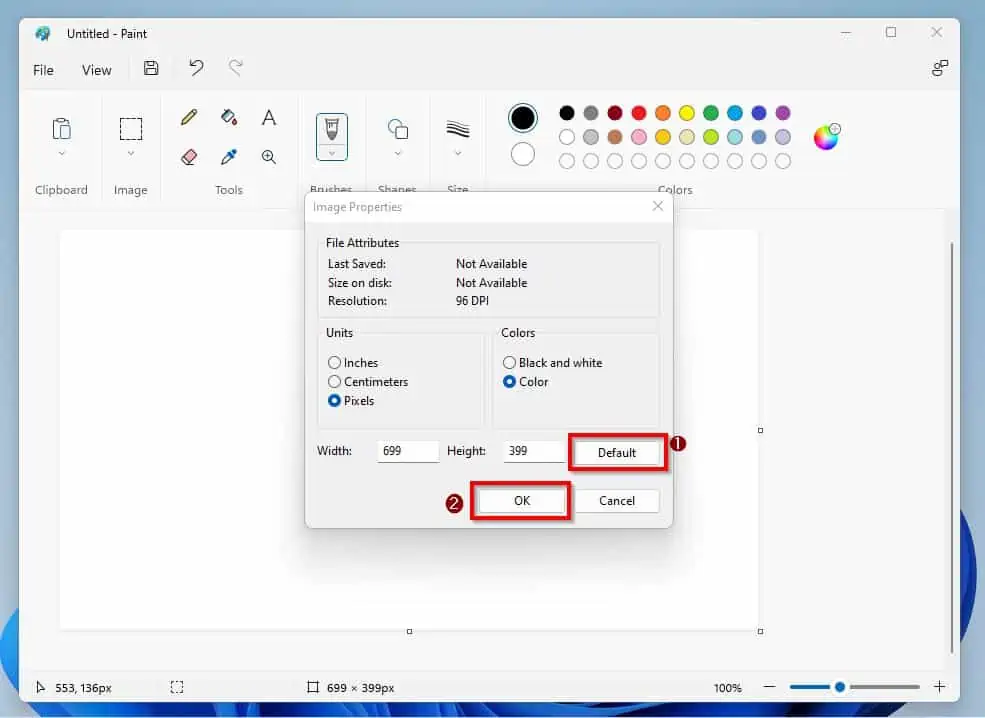
- However, if you wish to adjust the Paint canvas back to the default settings, simply click the Default button. Then, click OK.
Option 2: Adjust Canvas with the Mouse Cursor
Apart from adjusting the Paint canvas from Image properties, you can also adjust it using the mouse cursor on your screen. You can do that by simply hovering your mouse cursor on the canvas’ bottom right corner till it turns into two pointing arrows.

Finally, press and hold your mouse’s left-click button, and drag it downwards to increase the size of the canvas. You can also drag the mouse upward while holding the left-click button to decrease the size of the canvas.
2. Resize Canvas
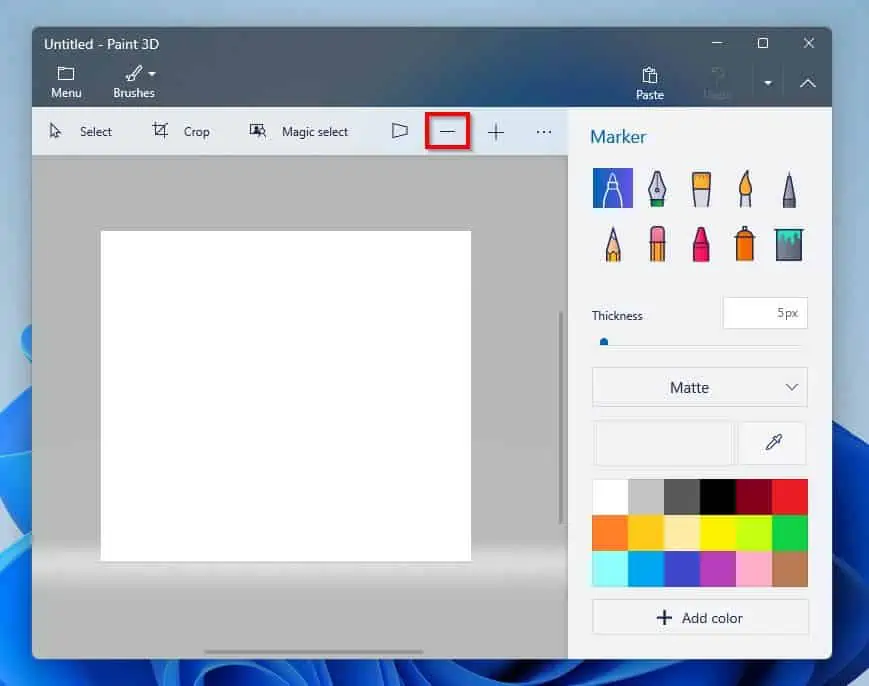
Resizing the canvas in Windows 11 Paint 3D application is pretty easy. To increase the size of the canvas, you just have to click the Zoom in icon (+).
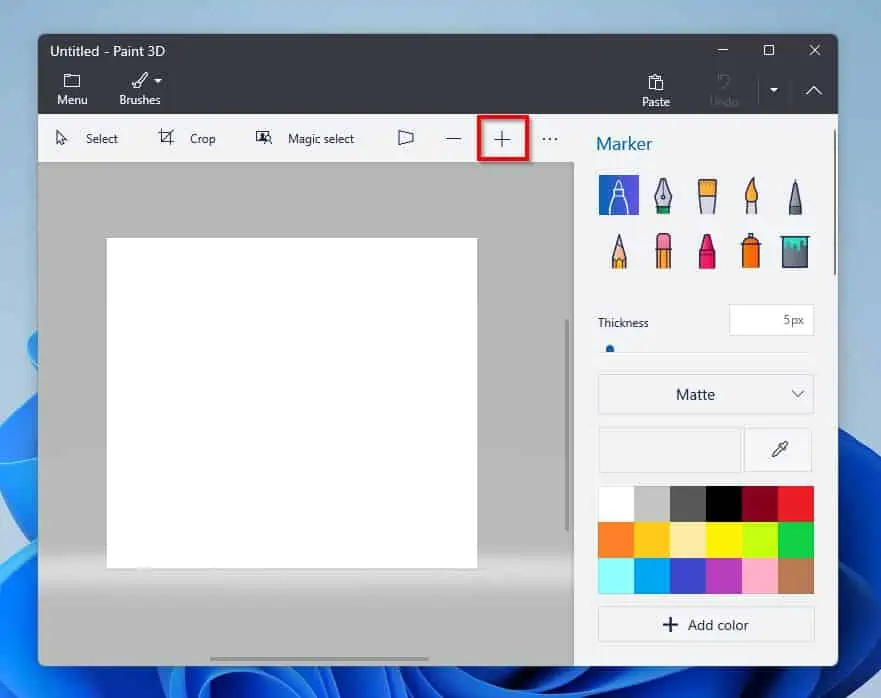
Meanwhile, the Zoom out icon (–) is used to – you guessed it – decrease the size of the Paint 3D canvas.
3. Add Rulers, Gridlines, or Status Bar
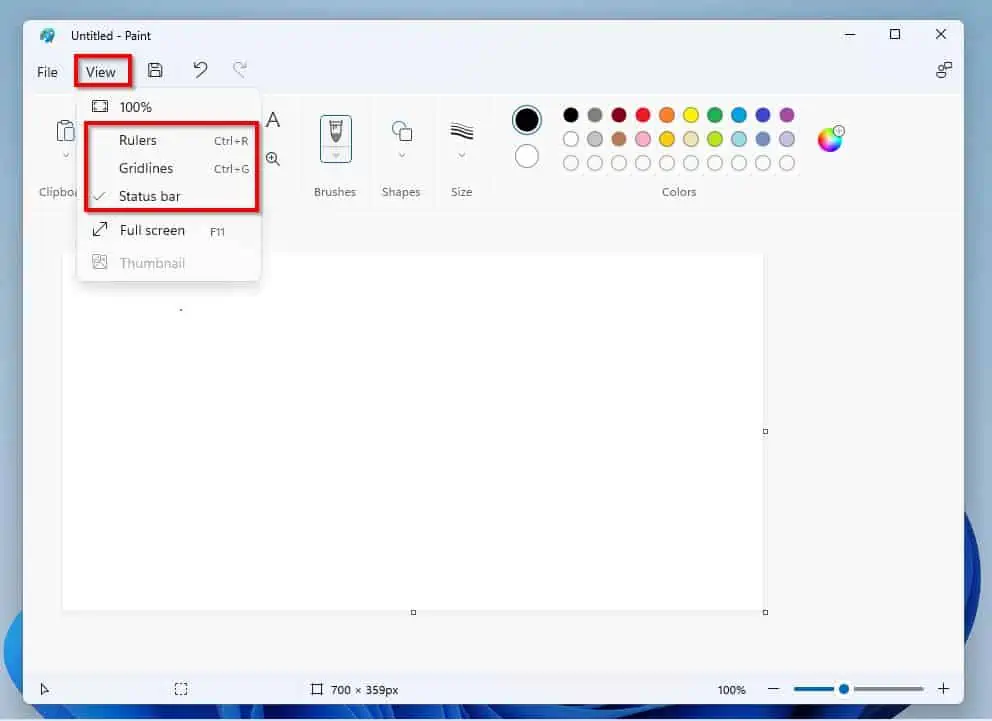
Rulers and Gridlines are disabled by default in the Windows 11 Paint application. However, the Status Bar is enabled by default.
Nonetheless, you can enable or disable Rulers, Gridlines, and Status Bar from the View tab in the Paint window. Essentially, when you click on the View tab at the top left of the Paint window, you will see Rulers, Gridlines, and Status Bar.
Hence, you can click on them to either enable or disable them.
How to Draw and Erase
Drawing and erasing are some of the essential things people do in Paint and Paint 3D. Fortunately, this section teaches how to draw and erase in Paint and Paint 3D.
1. Draw Free Lines in Paint
Before drawing in Paint, don’t you think it is ideal to understand the available drawing features? Well, the features you will need to draw in Paint are highlighted in the screenshot below.
Also, I will be discussing each of the features in this sub-section.

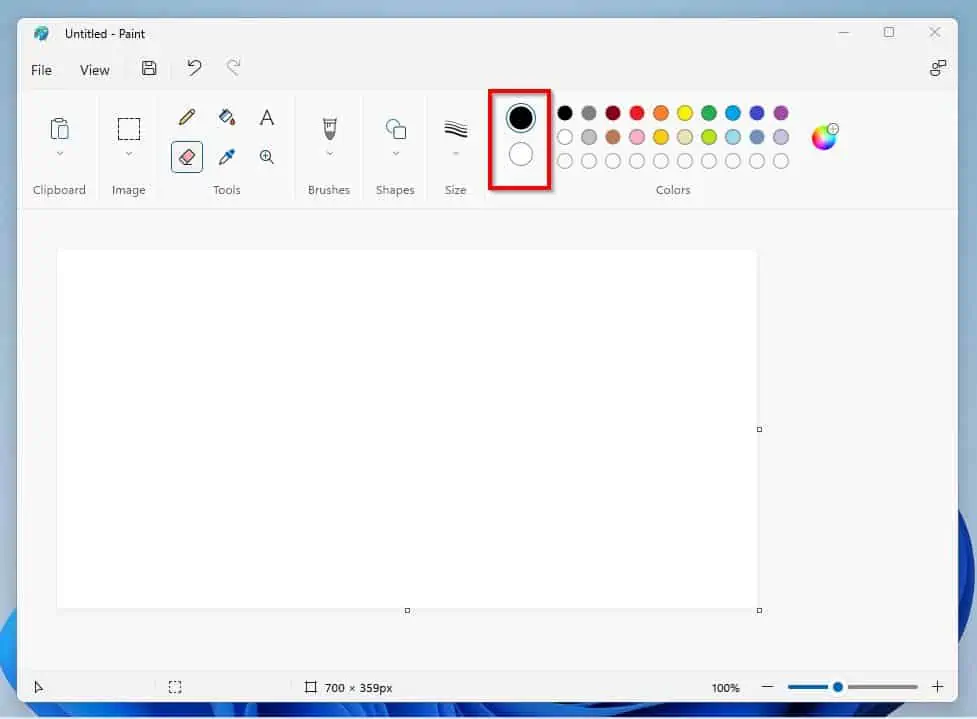
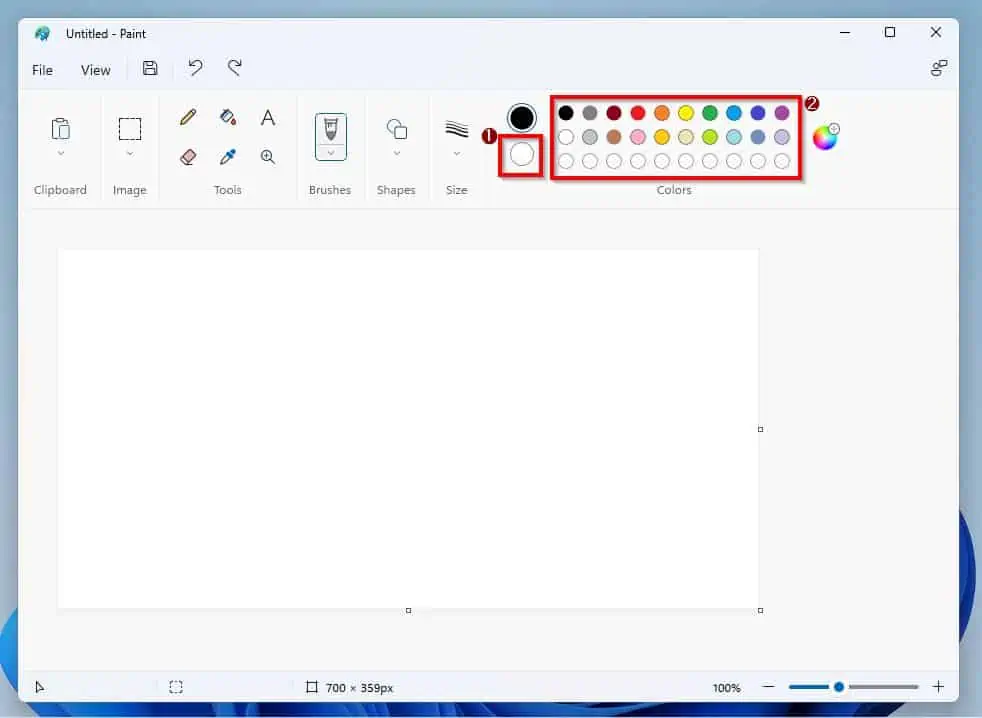
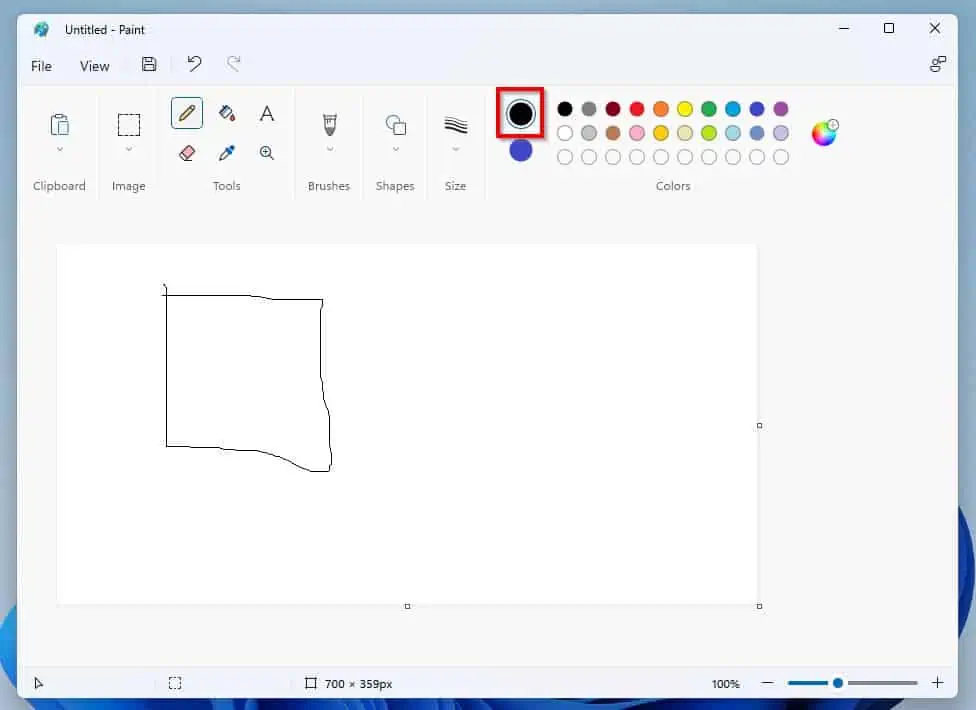
The first thing you might want to do before starting to draw is to modify the colors. You can set two colors in Windows 11 Paint – Color 1 (black by default) and Color 2 (white by default).
By the way, left-click works for Color 1. Meanwhile, right-click works for Color 2.
In essence, to use Color 1, you must press the left-click button of your mouse or trackpad. On the other hand, you must press the right-click button of your mouse or trackpad to use Color 2.
To modify Color 1, simply click on it and select your preferred color from the displayed colors.
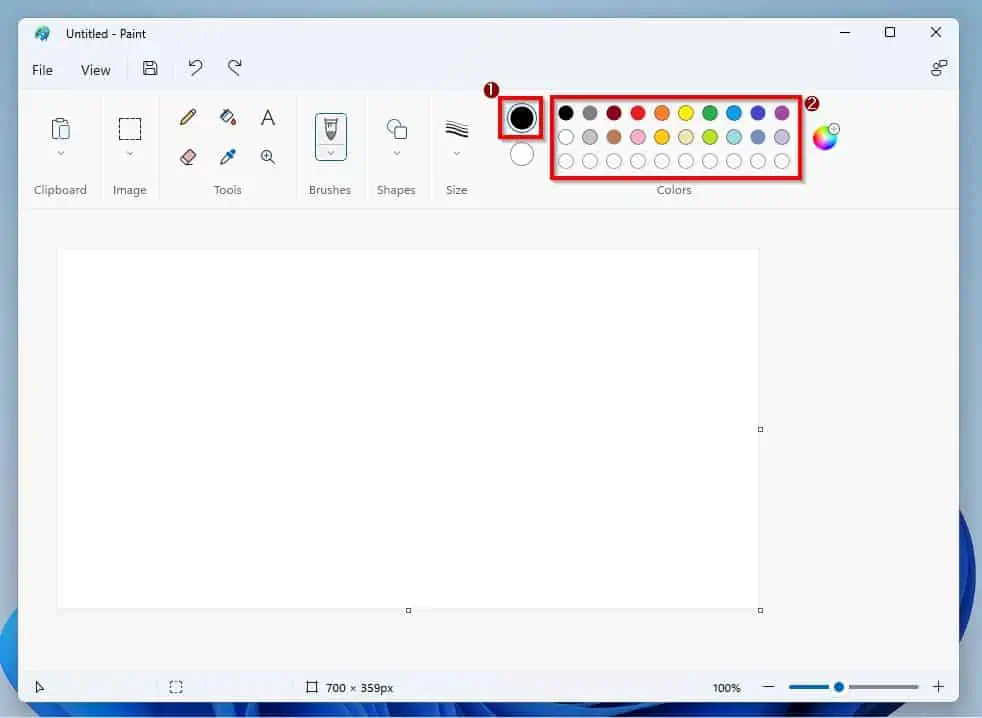
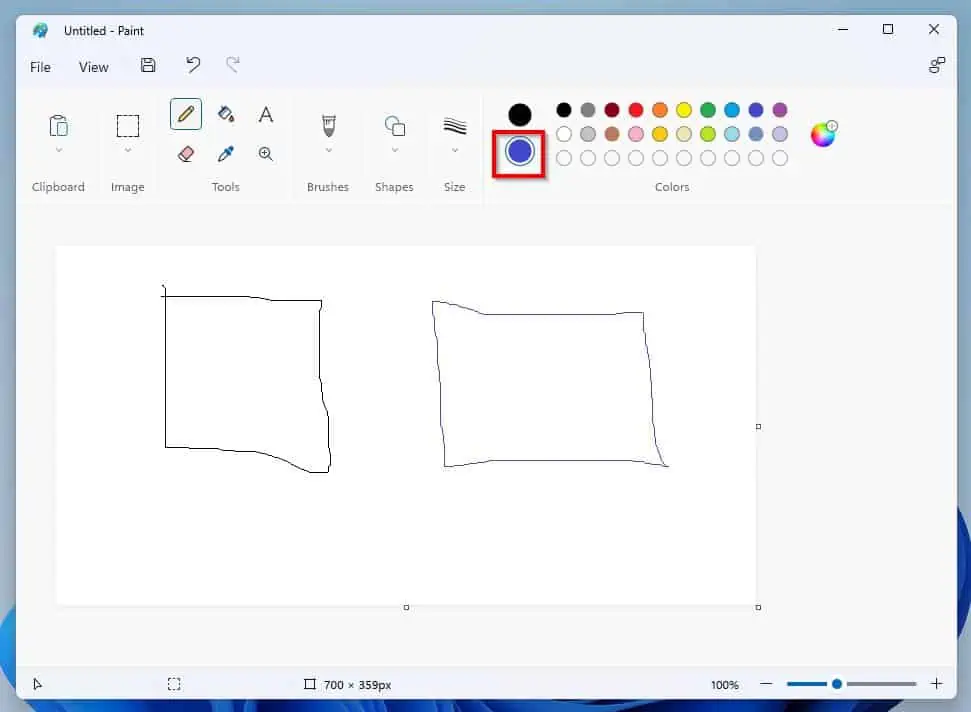
Similarly, to modify Color 2, click on it and select your preferred color from the displayed color options.
After setting your Color 1 and Color 2, you may want to change the color of your Paint canvas. Follow the steps below to change the color of the canvas in Windows 11 Paint.
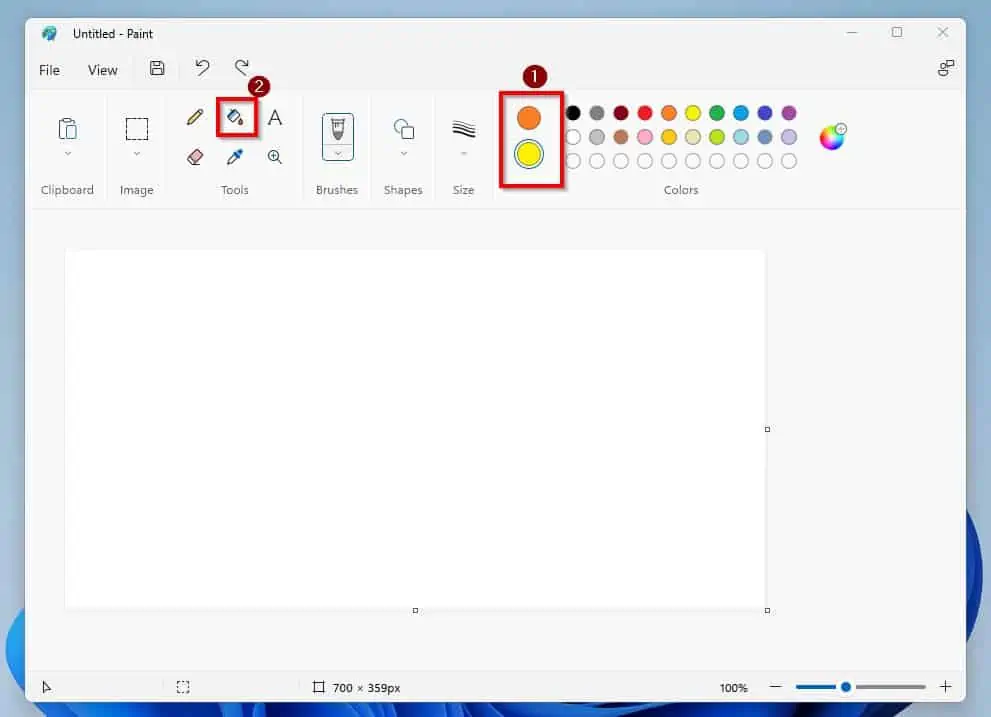
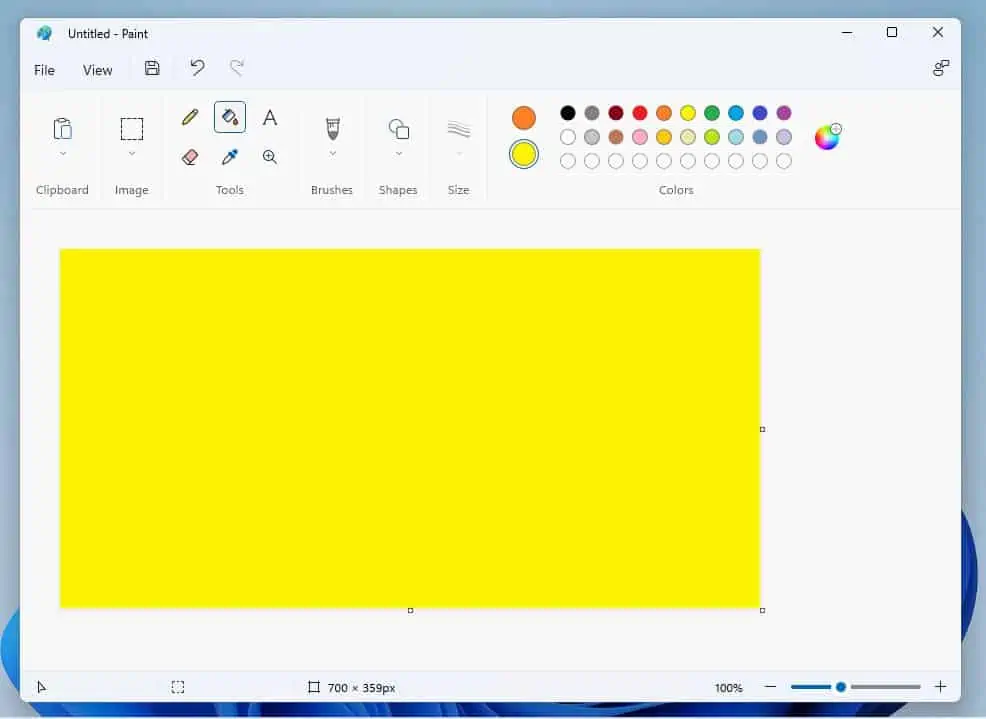
- Click either Color 1 or Color 2 to select your preferred color. Then, click the Fill icon on the Tools section.
- Finally, left-click the canvas if you selected Color 1. However, if you selected Color 2, right-click the canvas.

Now that we know how to set colors and change the canvas color, let’s move to the main reason for this sub-section – learning how to draw in Paint!
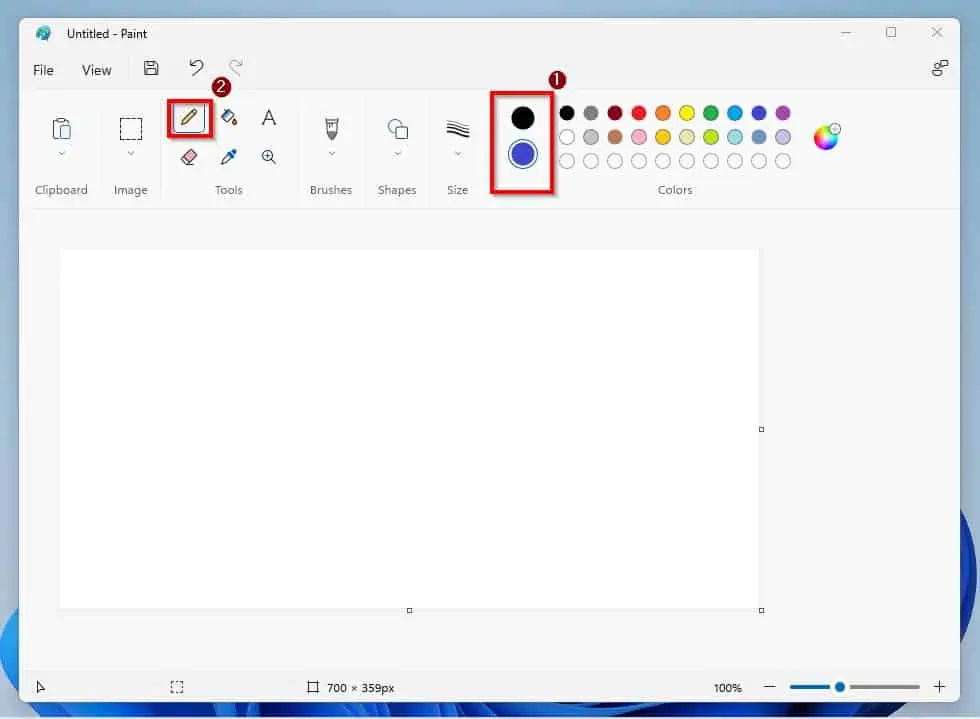
To free-hand draw in Paint, you must first select a color for your drawing between Color 1 and Color 2. Then, click the Pencil icon on the Tools section.
If you selected Color 1, press and hold the left-click button of your mouse or trackpad while dragging to draw freely.
However, if you selected Color 2, press and hold the right-click button of your mouse or trackpad while dragging to draw freely.
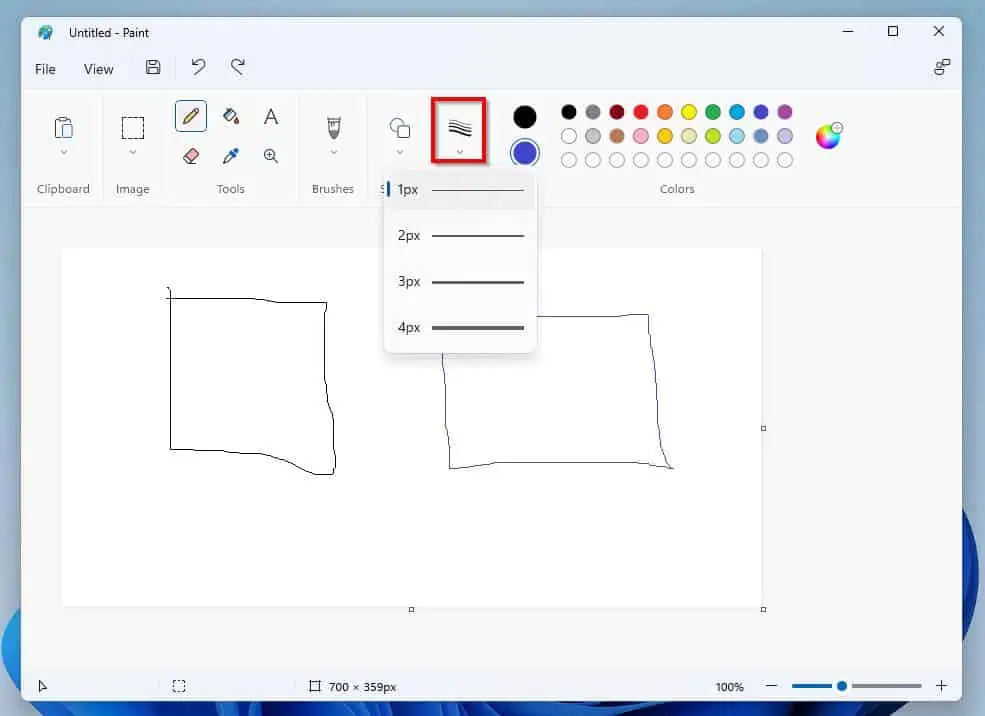
To adjust the line width of the pencil, select the Size drop-down and choose your preferred line width.
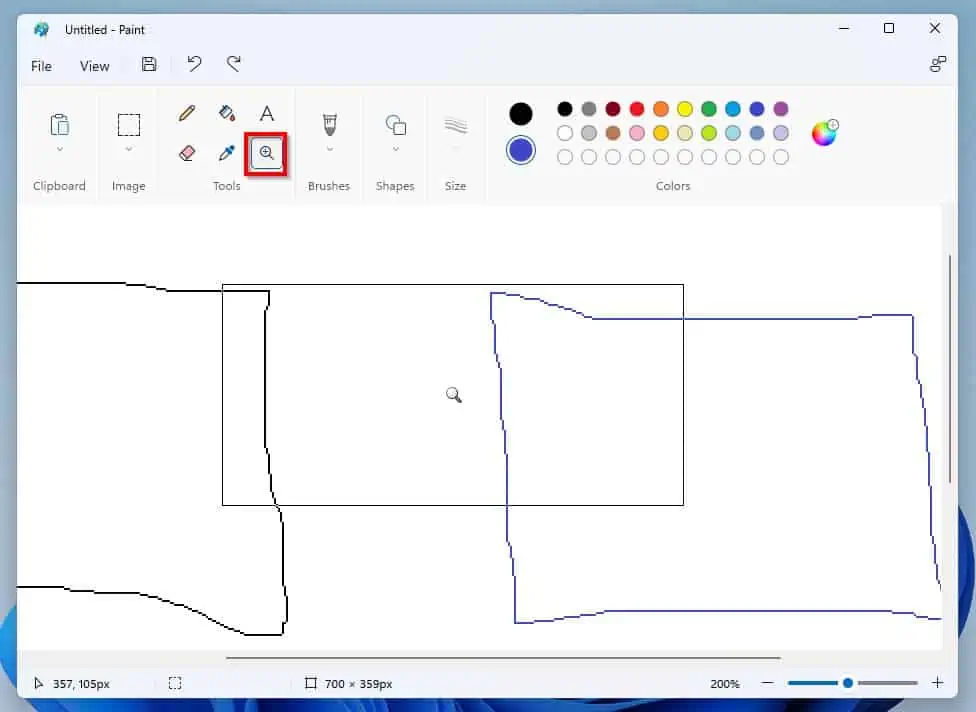
Lastly, you can expand your drawing by clicking the Magnifier icon and selecting where you want to expand on the canvas.
2. Draw Shapes in Paint
Follow the steps below to draw shapes in Paint.
- Click the Shapes drop-down and select your preferred shape from the options that appear.
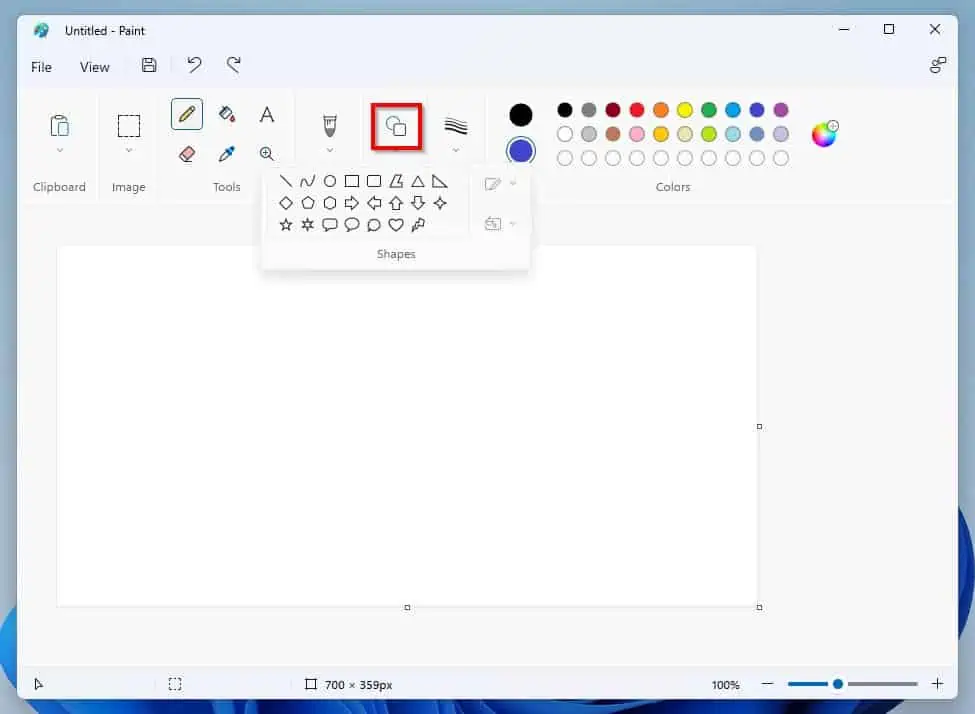
- After that, press and hold the left-click button on your mouse or trackpad. Then, drag your mouse cursor over the part of the Paint canvas that you wish to draw the shape.
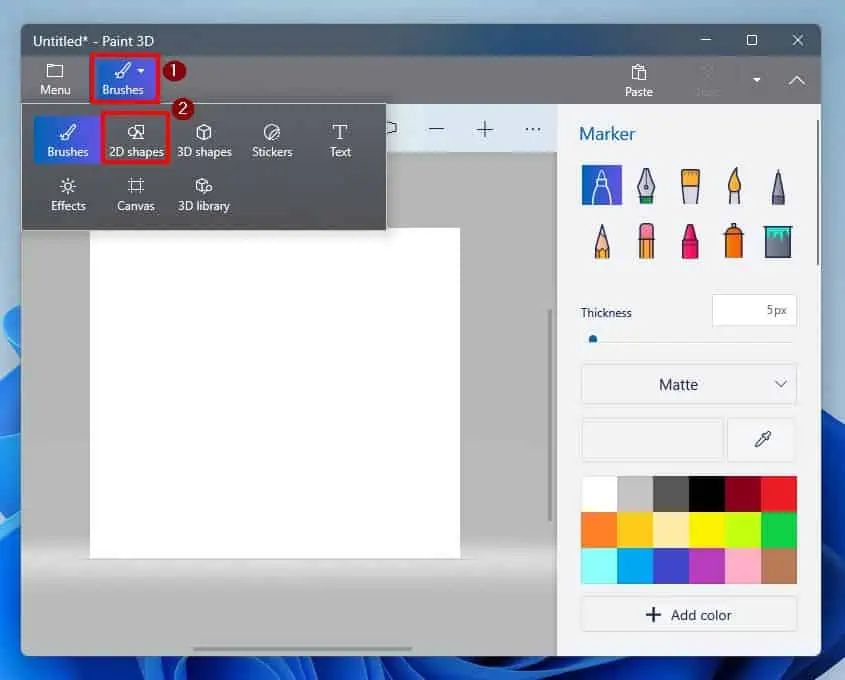
3. Draw Free Lines in Paint 3D
- Click the drop-down beside Menu and select 2D shapes – the drop-down is usually set to Brushes by default.
- Afterward, click the line or curve you want to draw from the Line and curve section on the right pane. Then, draw freely on the Paint 3D canvas by dragging your mouse while pressing down the left-click button.
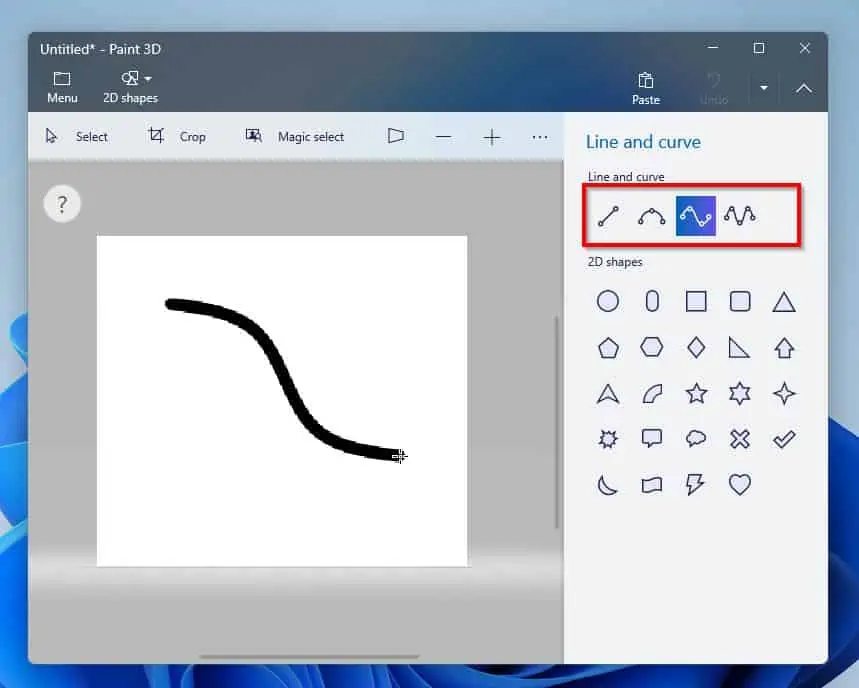
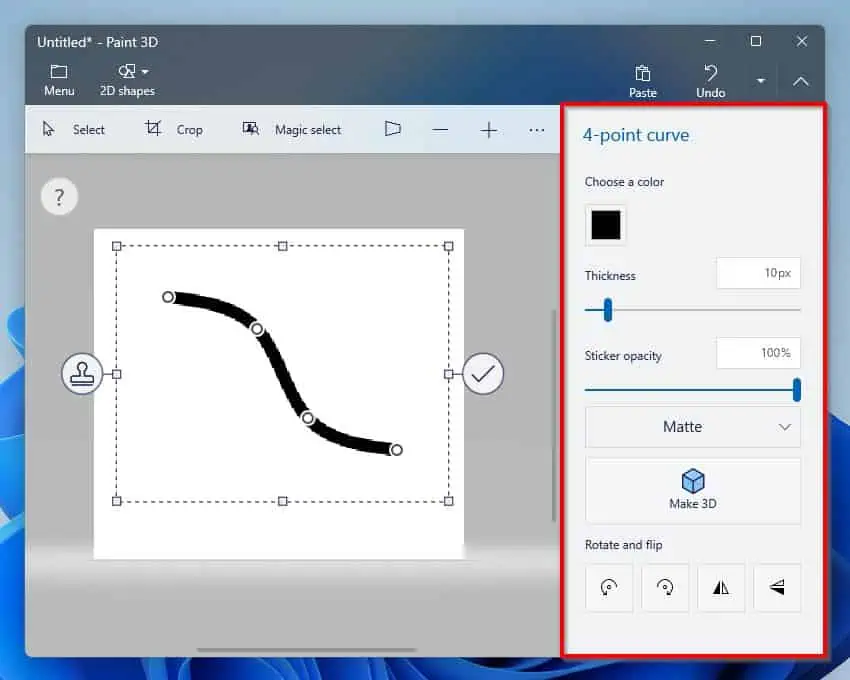
- Once you are done drawing your line or curve, another set of customizable options will appear on the right pane. With these options, you can modify the line’s or curve’s color, opacity, and thickness.
You can also rotate and flip the line or curve. As a matter of fact, you can also change the line or curve to a 3D shape.
4. Draw 2D Shapes in Paint 3D
This sub-section teaches how to draw 2D shapes in Paint 3D. So, follow the steps below to draw a 2D shape in the Windows 11 Paint 3D application.
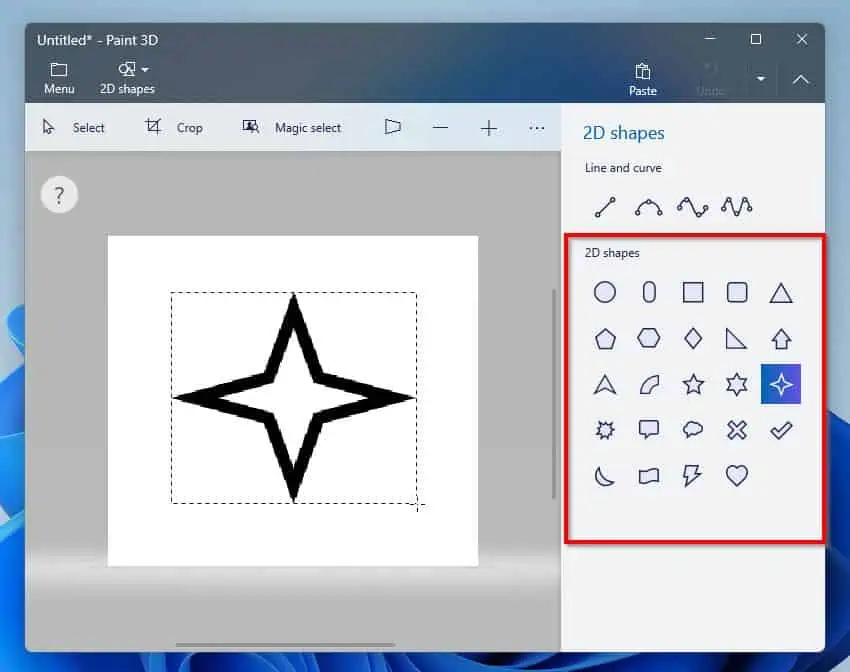
- Click the drop-down beside Menu and select 2D shapes from the options that appear.
- After that, select your preferred shape in the 2D shapes section on the right pane. Then, draw the shape anywhere on the canvas by dragging your mouse while pressing down the left-click button.
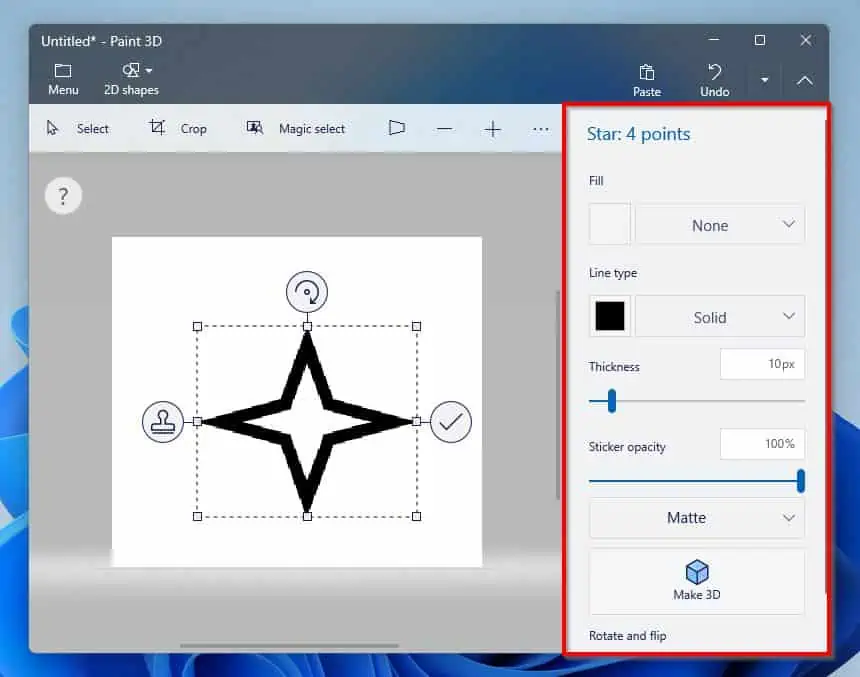
- As with drawing lines or curves, another set of customizable options will appear on the right pane after drawing your 2D shape. As expected, you can modify a lot of things about the shape with these options, like the shape’s color and thickness.
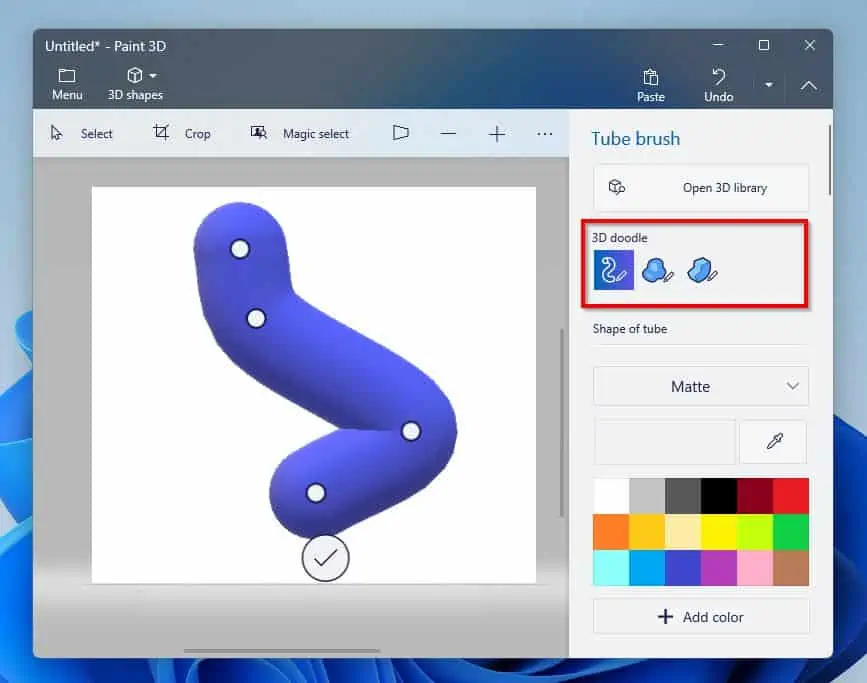
5. Draw 3D Shapes in Paint 3D
One of the main purposes of the Windows 11 Paint 3D application is to create 3D shapes. No wonder the name of the application is Paint “3D”.
Follow the steps below to draw 3D shapes on the Paint 3D application on your Windows 11 computer.
- Click the drop-down beside the Menu icon and select 3D shapes from the options that pop down.
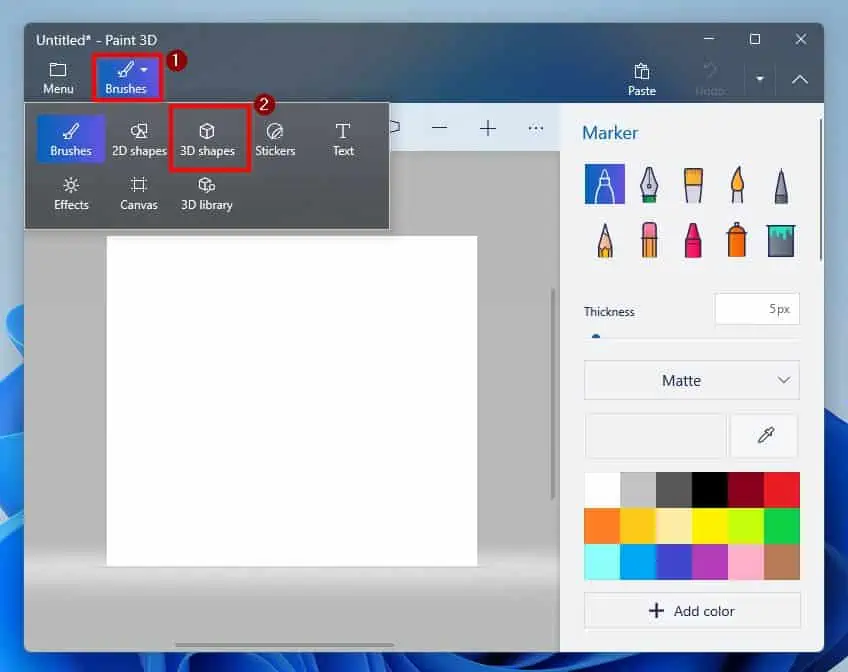
- After that, select your preferred 3D shape in the 3D doodle category on the right pane. Then, draw the shape freely on the canvas by dragging your mouse while pressing the left-click button.
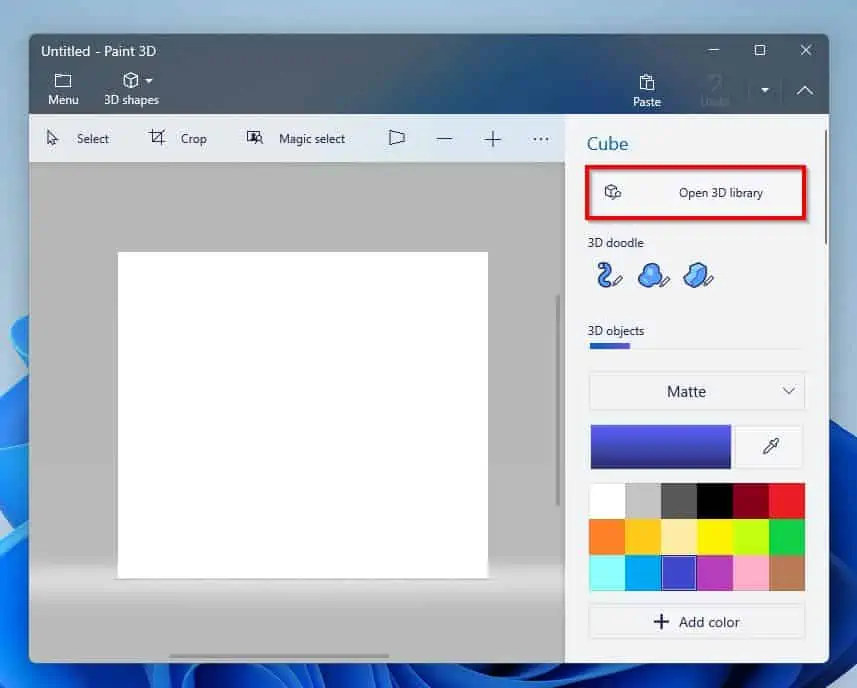
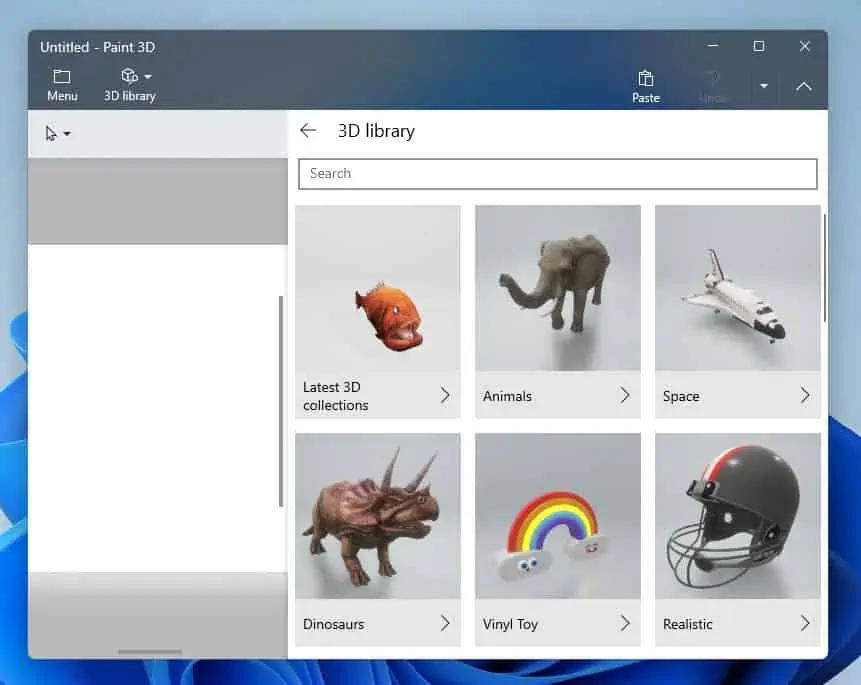
- You can also draw more cool 3D shapes or objects by clicking the Open 3D library on the right pane. Then, choose from the options that appear.
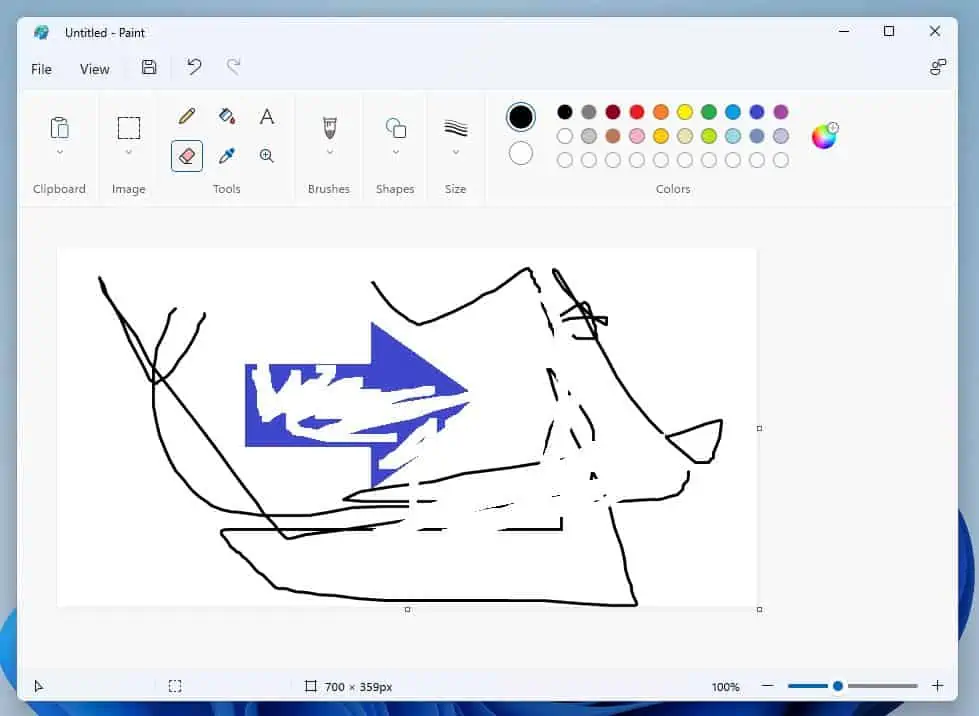
After drawing various shapes and lines in the Paint application, you might need help erasing them. Not to worry, the next sub-section teaches how to erase in Paint.
5. Erase in Paint
Follow the steps below to erase anything in the Paint application on your Windows 11 computer.
- Click the Eraser icon in the Tools section.
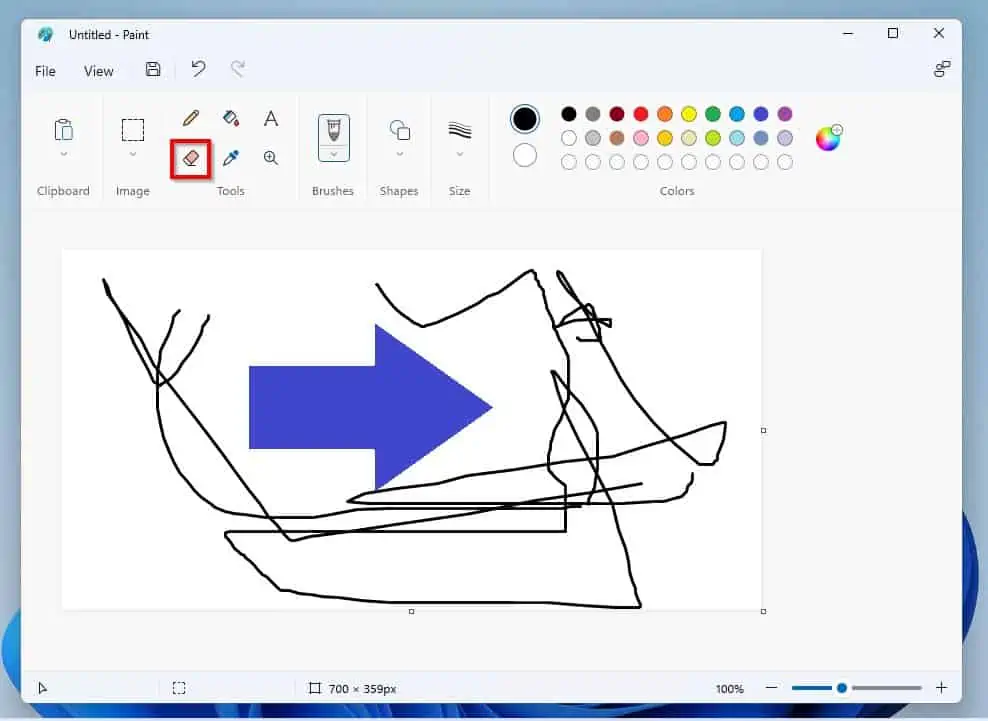
- Then, run your mouse through the part(s) of the drawing you want to erase while pressing down the left-click button.
How to Add Texts
This section is divided into two sub-sections. The first sub-section discusses how to add text in Paint.
Meanwhile, in the second sub-section, we will discuss how to add text in Paint 3D.
1. Add Texts in Paint
- Select the Text icon in the Tools section.
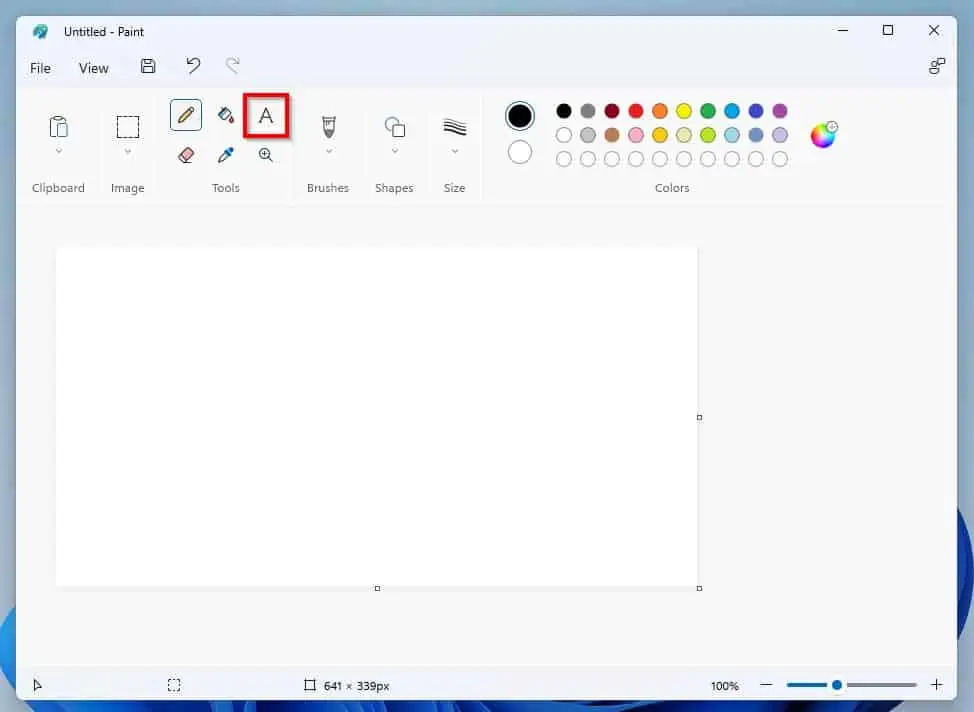
- Then, select anywhere on the Paint canvas that you wish to insert your text and start typing.
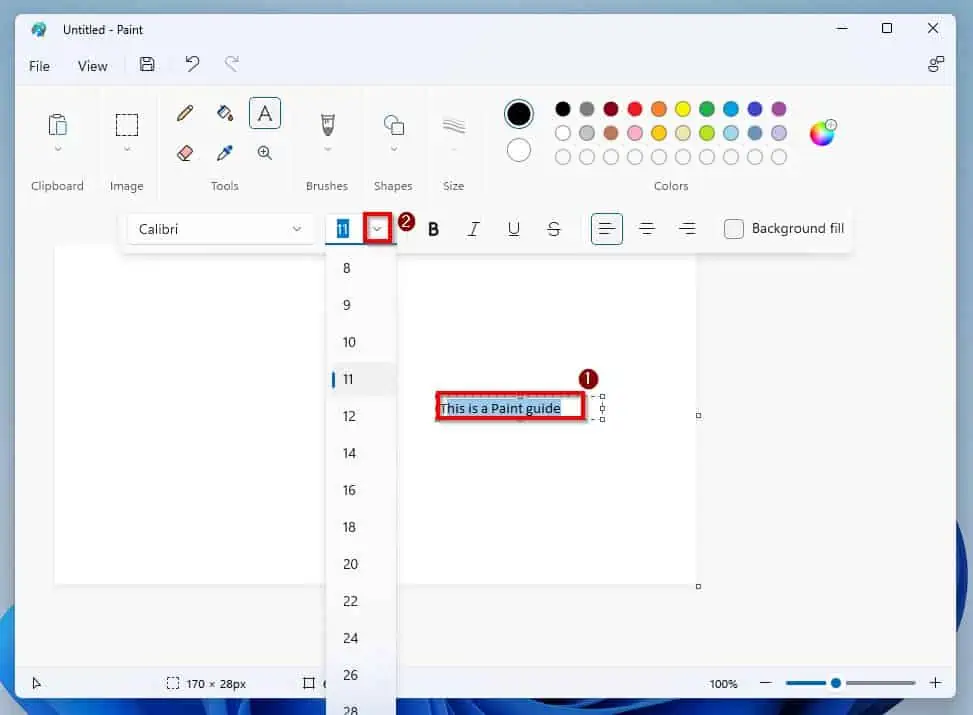
In fact, you can also increase the font size and do so much more using these text formatting tools.

- To increase the font of your text, simply highlight the text and click the Font size drop-down. Then, select your preferred font size from the list that appear.
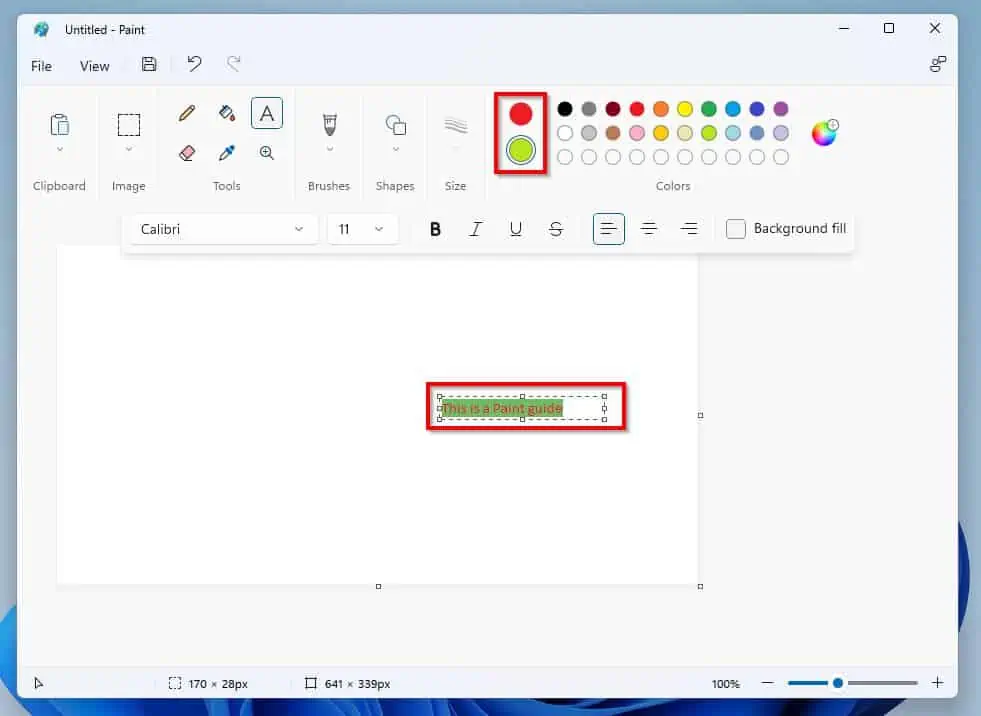
- You can also modify the text color and background color. To do this, highlight the text and select either Color 1 or Color 2 – Color 1 is for the text color, while Color 2 is for the background color.
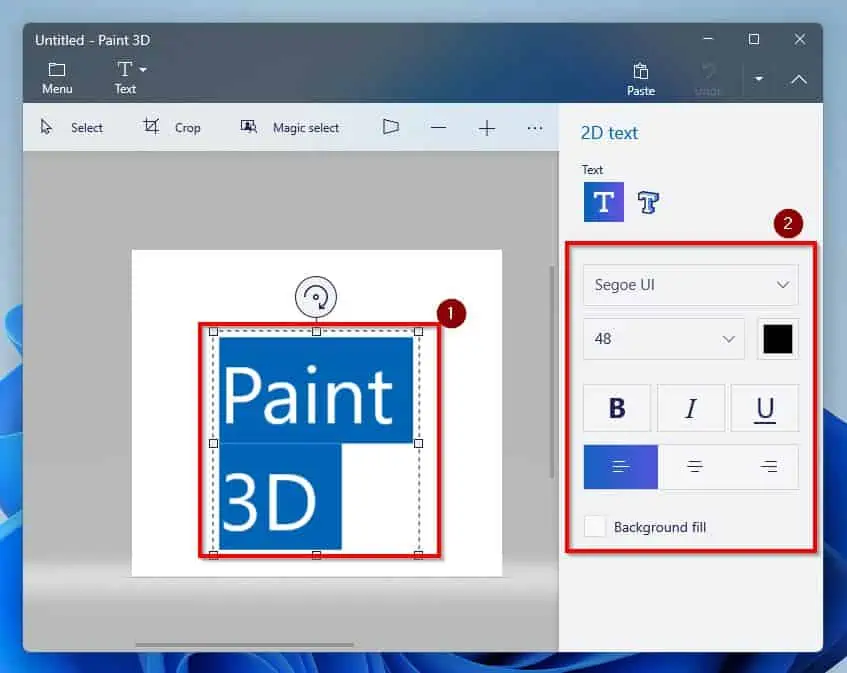
2. Add Texts in Paint 3D
- Click the drop-down beside the Menu icon and select Text from the options that pop down.

- After doing that, select or drag the portion of the canvas that you wish to insert your text and type freely.

- You can modify your text – like changing the font, size, and color – by highlighting it and using the text formatting tools on the right pane of the page.
How to Copy and Paste Images
This Windows 11 Paint help section teaches various methods to copy and paste images both in the Paint and Paint 3D apps.
1. Copy and Paste in Paint
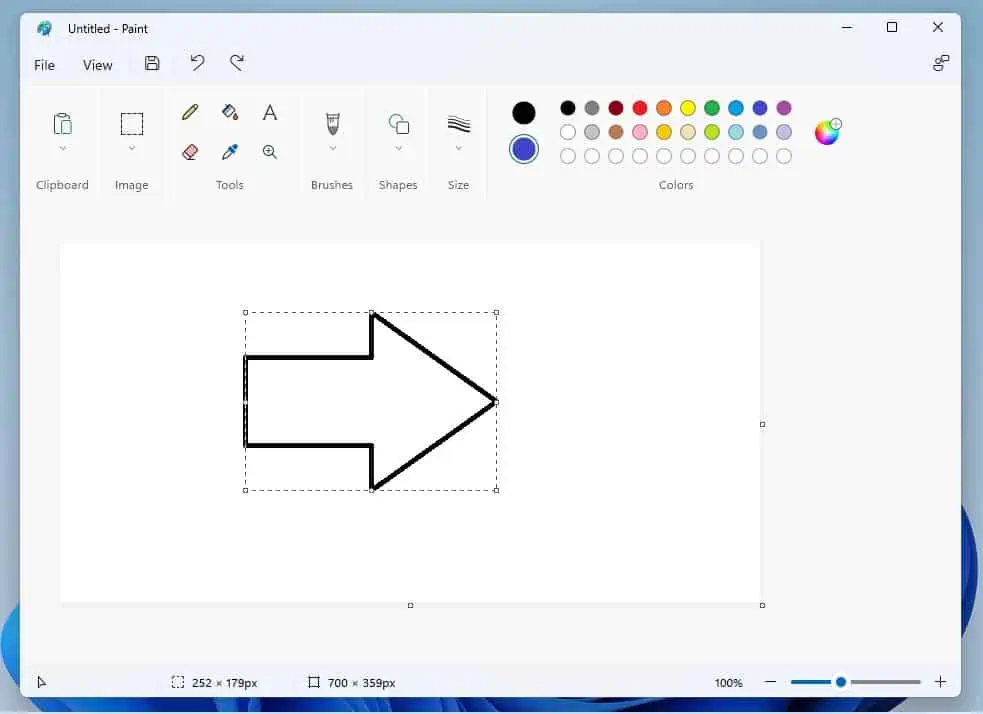
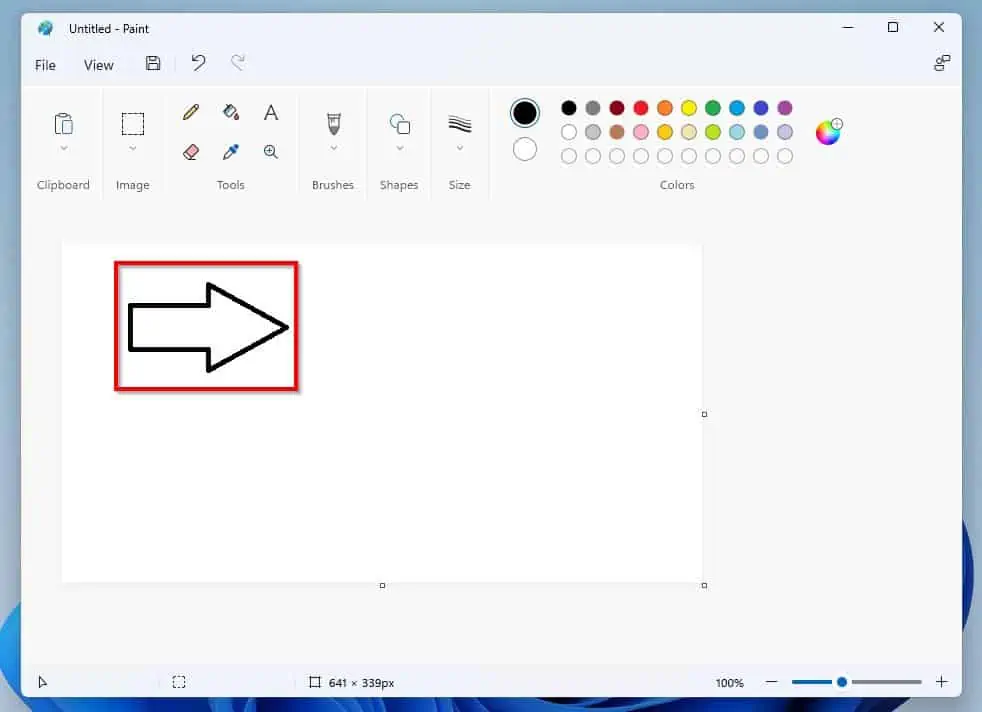
There are numerous ways you can copy and paste in the Paint app. Firstly, you can copy an object or shape you previously drew in Paint and paste it somewhere else on the canvas.
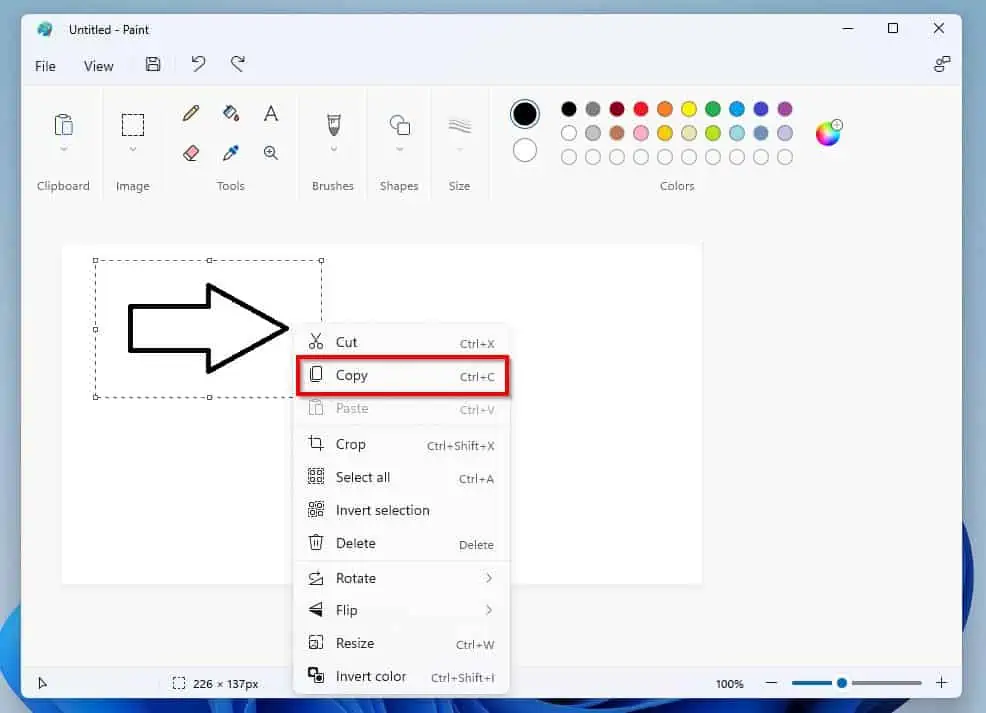
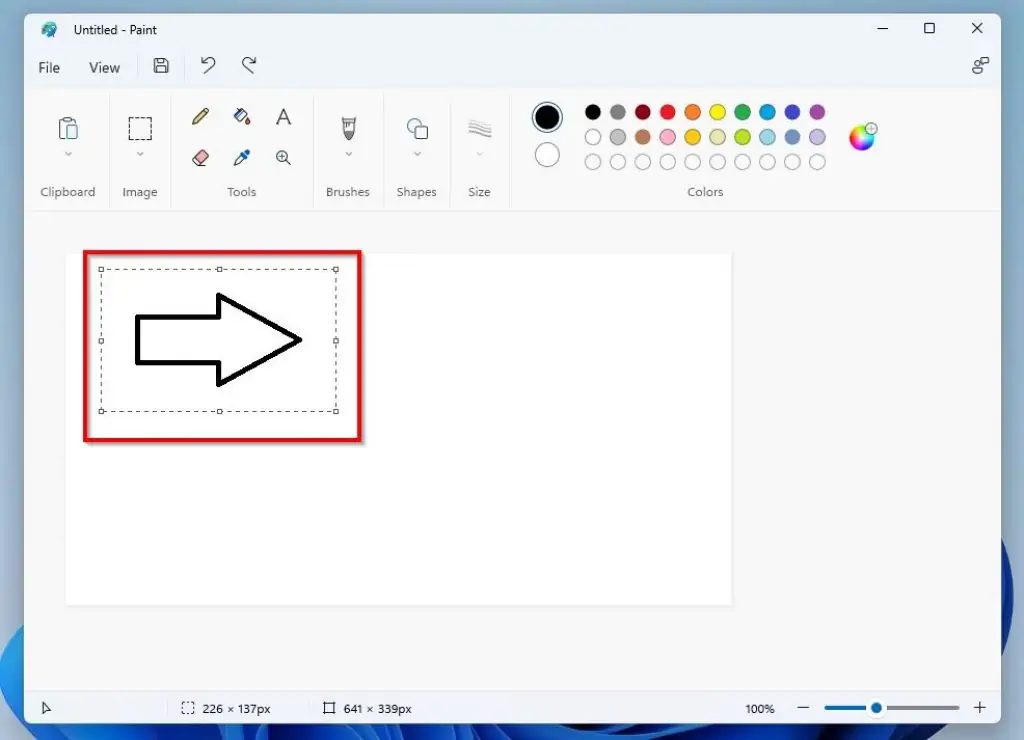
For this demonstration, I will copy and paste the right arrow shape and paste it onto another part of the Paint canvas.
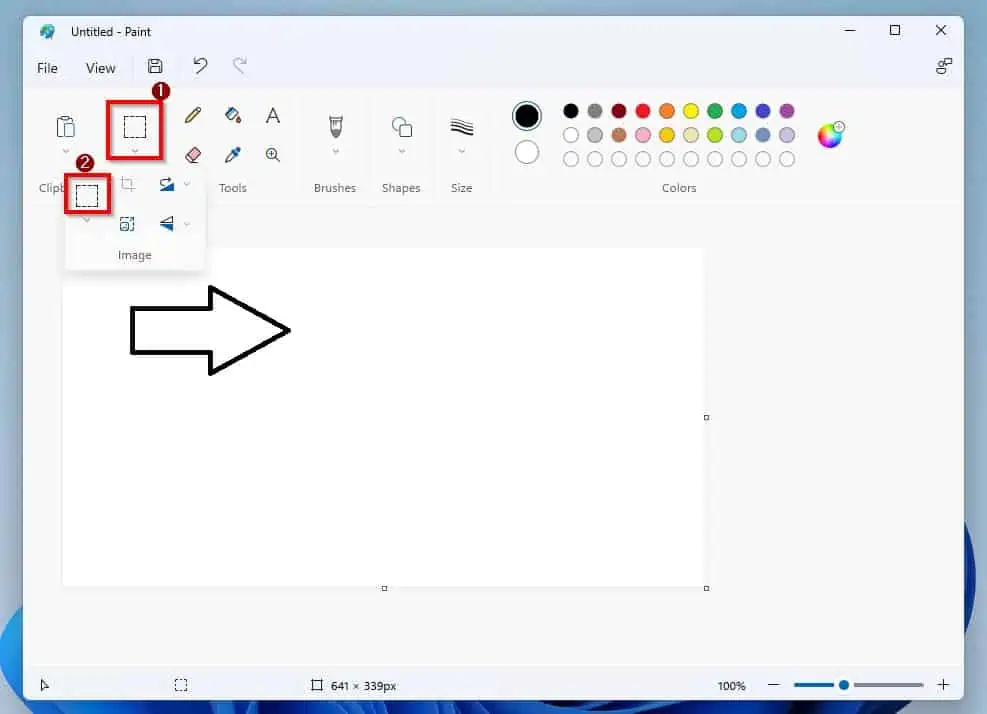
- Begin by clicking the Image drop-down and selecting the Select tool icon.
- Press down the left-click button of your mouse and drag around any part of the object that you want to copy with the Select tool. By doing that, the object should have some dotted rectangular lines around it.
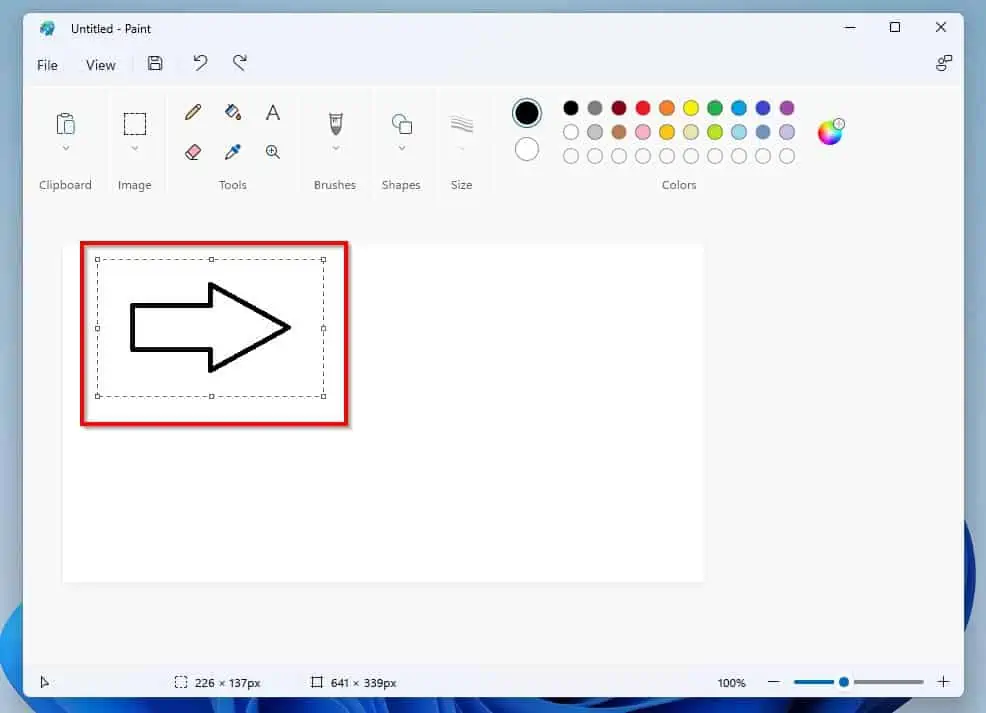
- Finally, right-click the selected object and click Copy.
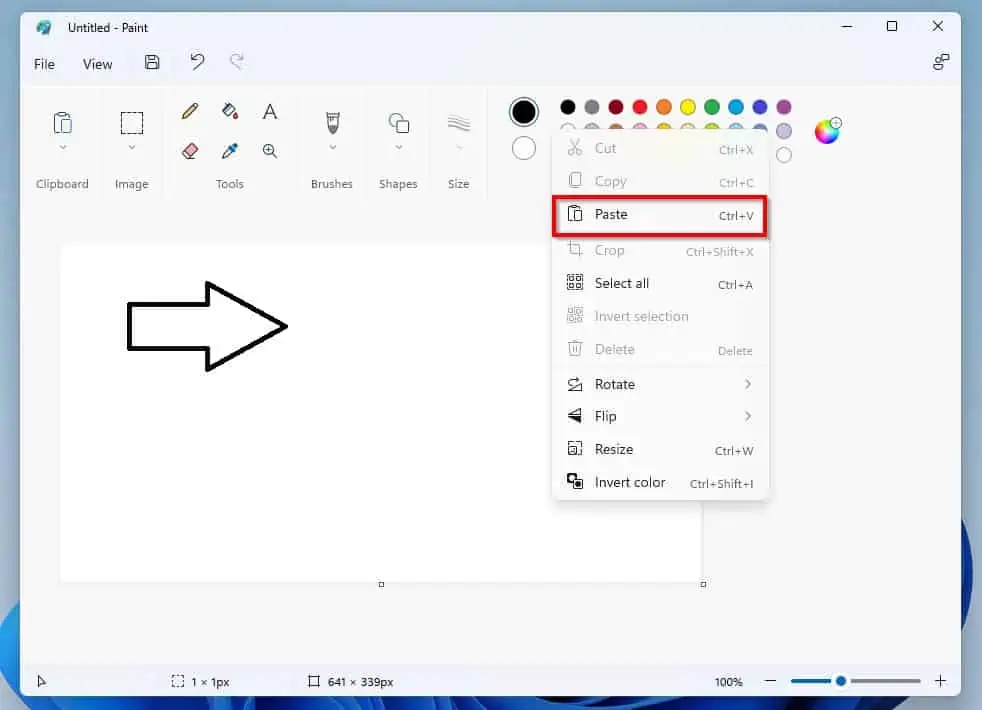
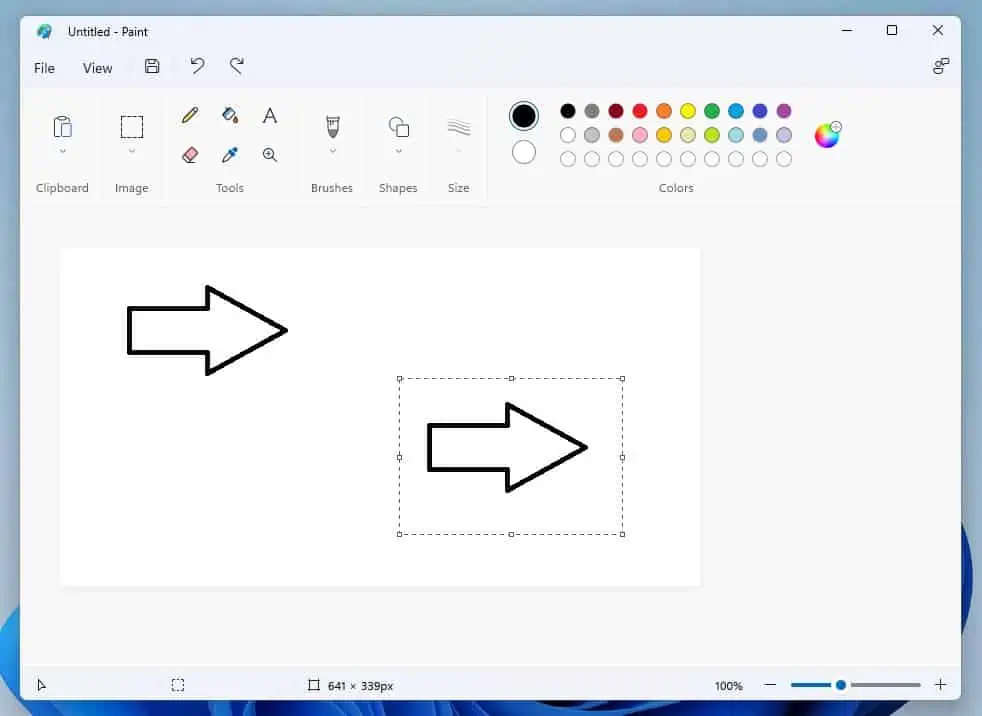
- After copying the object or shape, right-click any free space on the canvas and select Paste. Then, move the newly pasted object or shape to where you want it on the canvas.
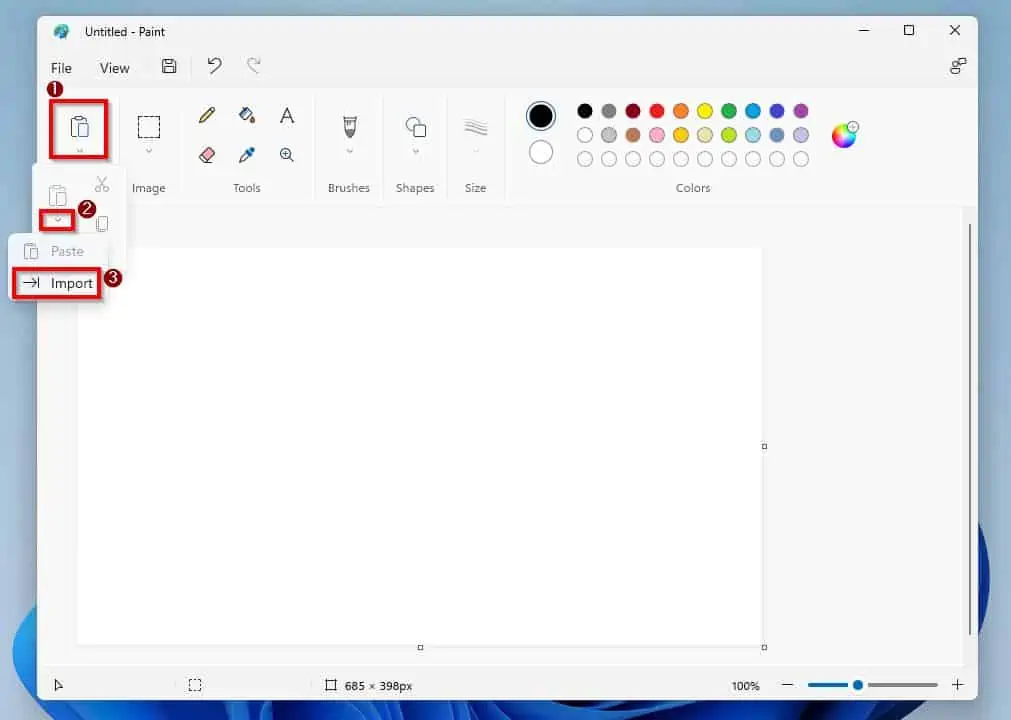
Do you know you can also copy an image externally and paste it into the Paint canvas? To do that, simply click the Clipboard drop-down and click the Paste drop-down.
Then, select Import.
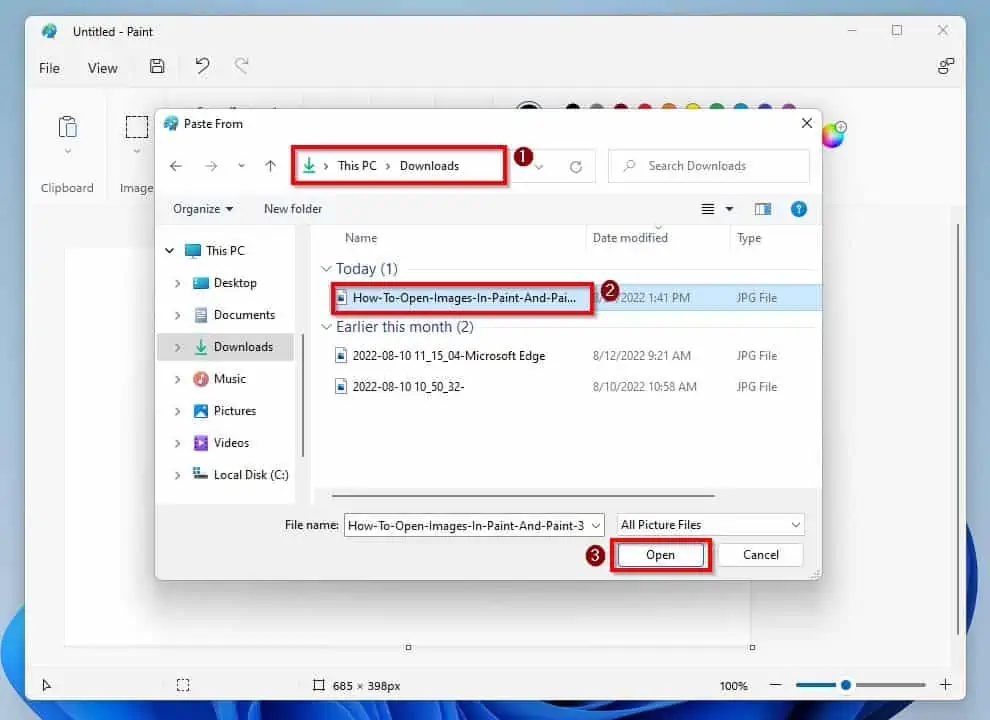
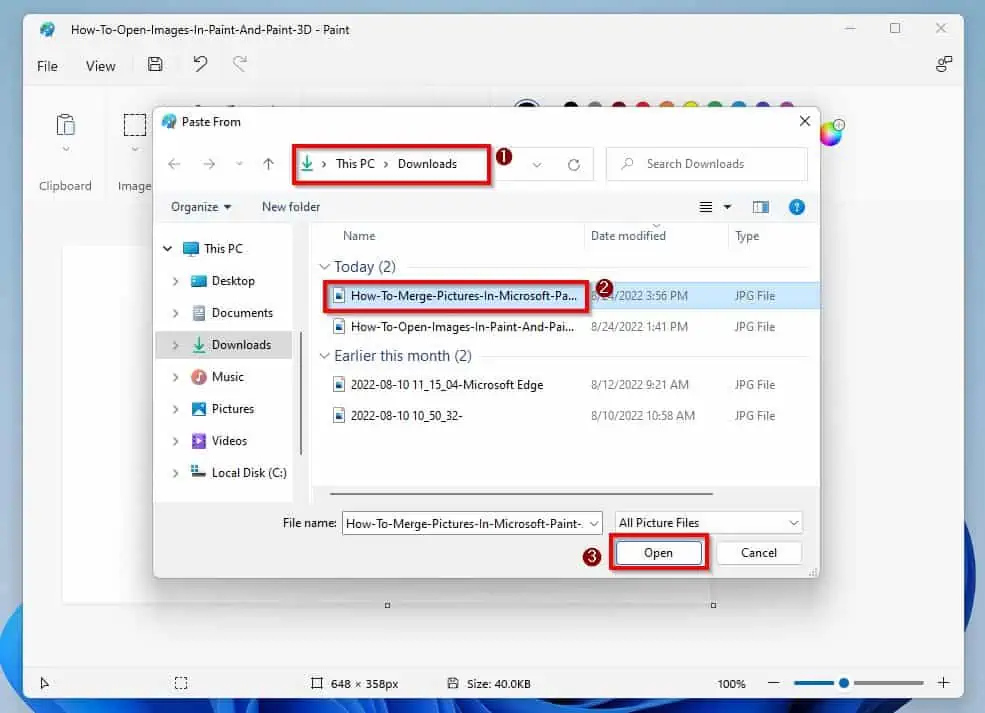
After that, on the Paste From window, locate and open the folder that contains the image you want to paste into the Paint canvas. Then, select the image and click the Open button – the image should automatically paste into the Paint canvas after doing that.
2. Copy and Paste in Paint 3D
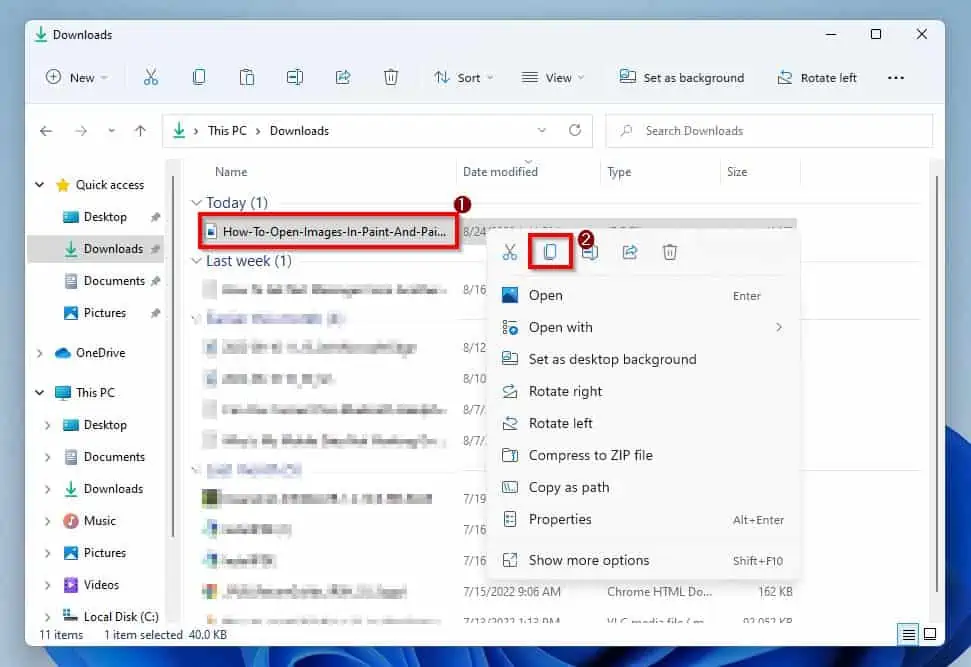
Copying and pasting in Paint 3D is pretty advanced compared to Paint. Essentially, you can just right-click the image you want to copy outside Paint 3D and select the Copy icon.
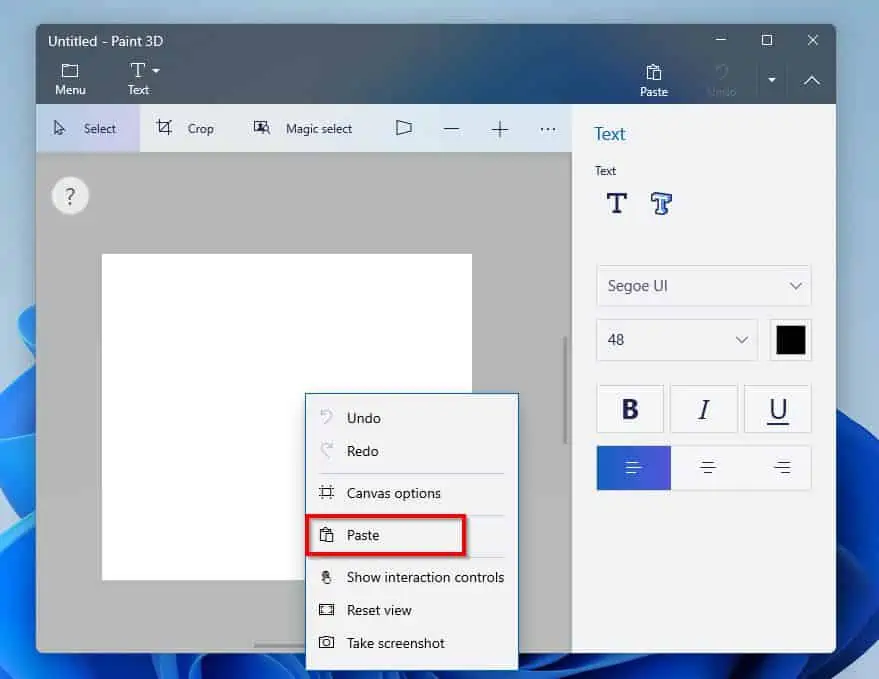
Then, simply right-click any free space on your Paint 3D canvas and click Paste.
How to Open Images
In the following sub-sections, I will teach you how to open images in the Paint app and Paint 3D app on your Windows 11 PC.
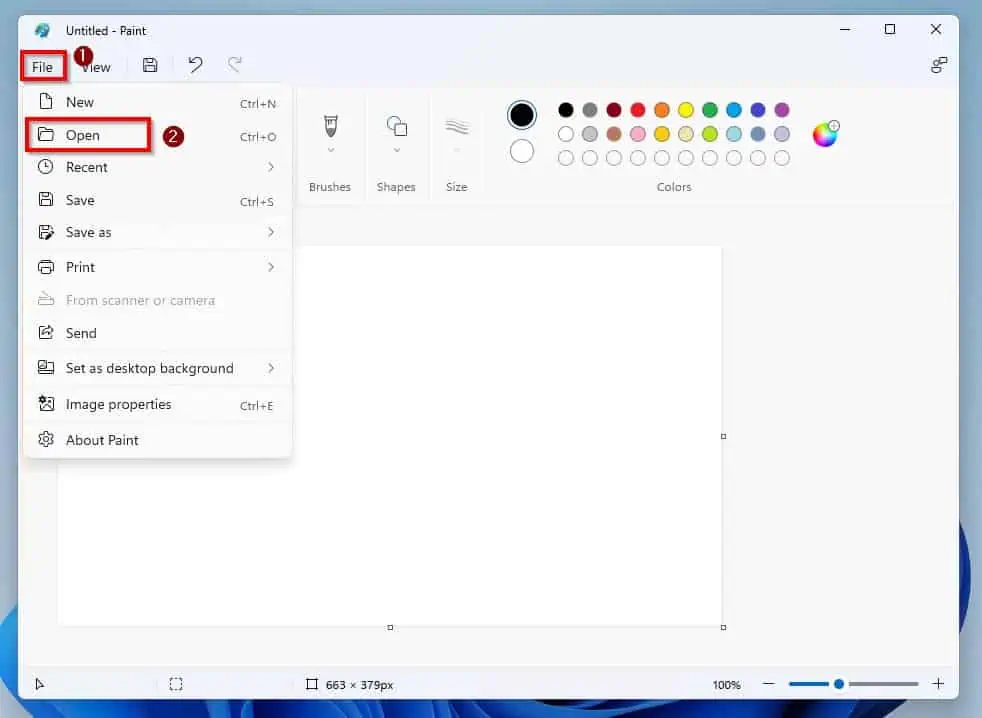
1. Open Images in Paint
- Click File at the top left corner of the Paint window and select Open.
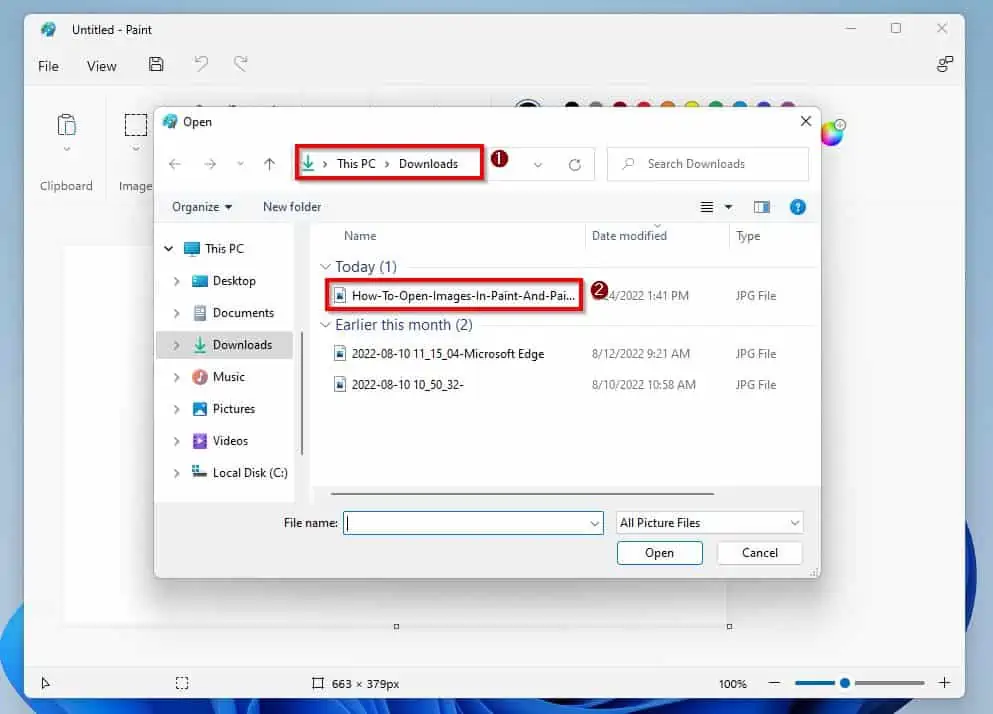
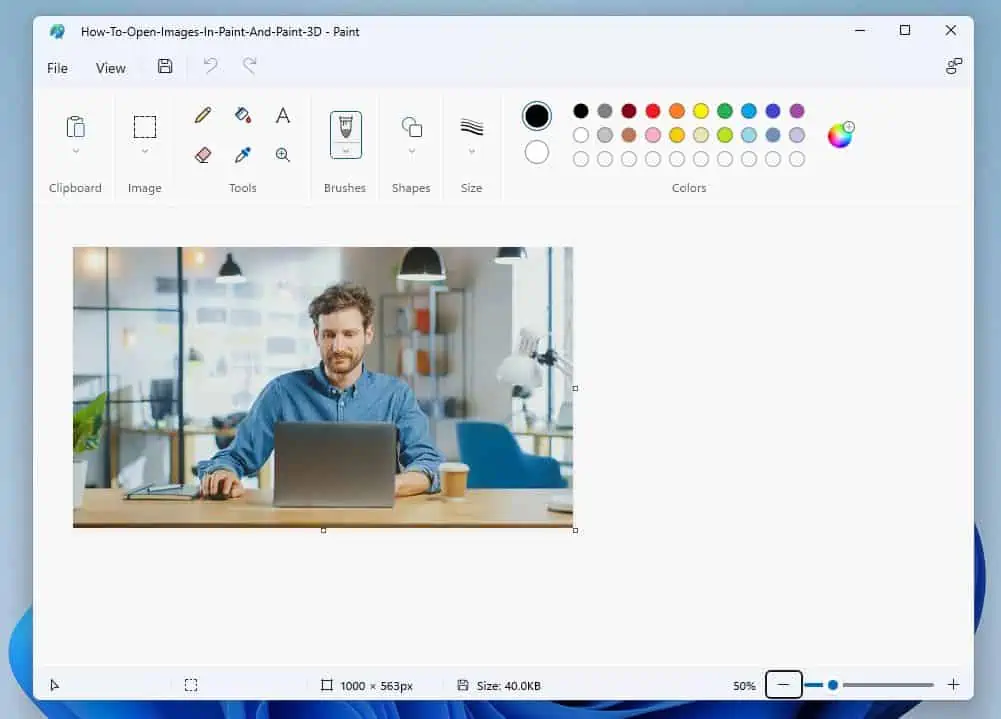
- After doing that, locate the folder where the image you want to open is stored on the Open window. Then, double-click the image to open it in the Paint canvas.
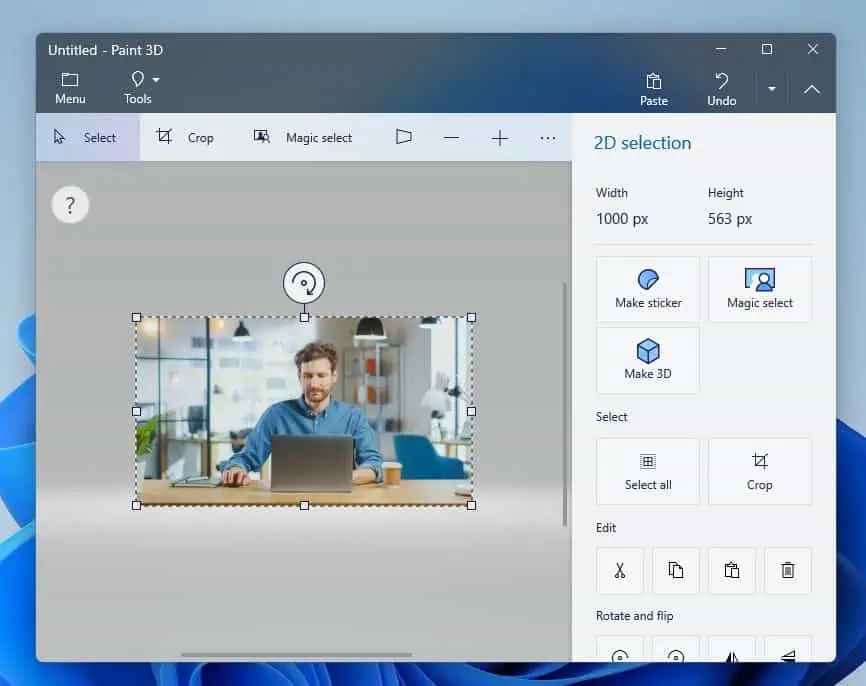
2. Open Images in Paint 3D
Follow to steps below to open images in the Paint 3D application on your Windows 11 PC.
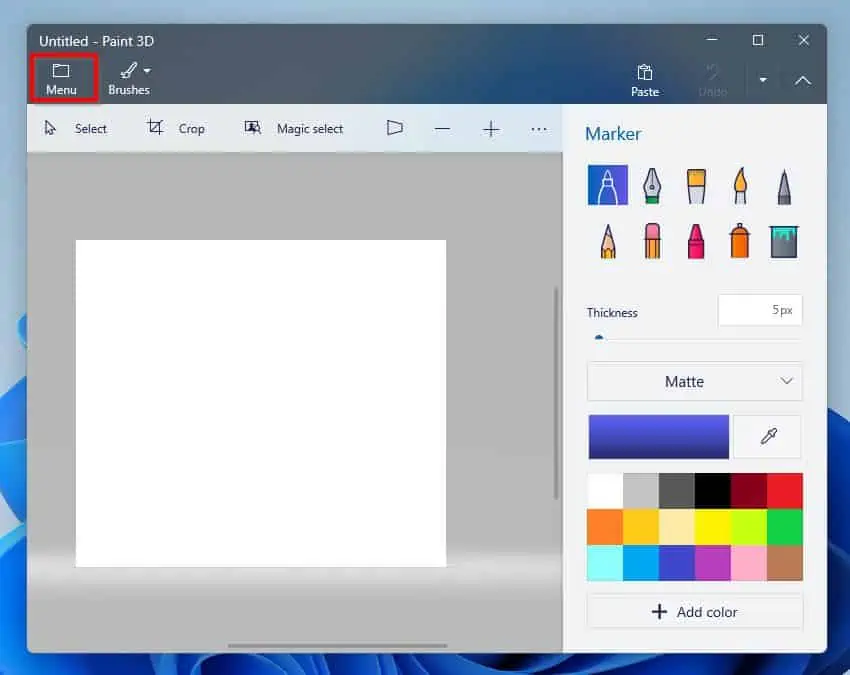
- Click the Menu icon at the top left corner of the Paint 3D window.
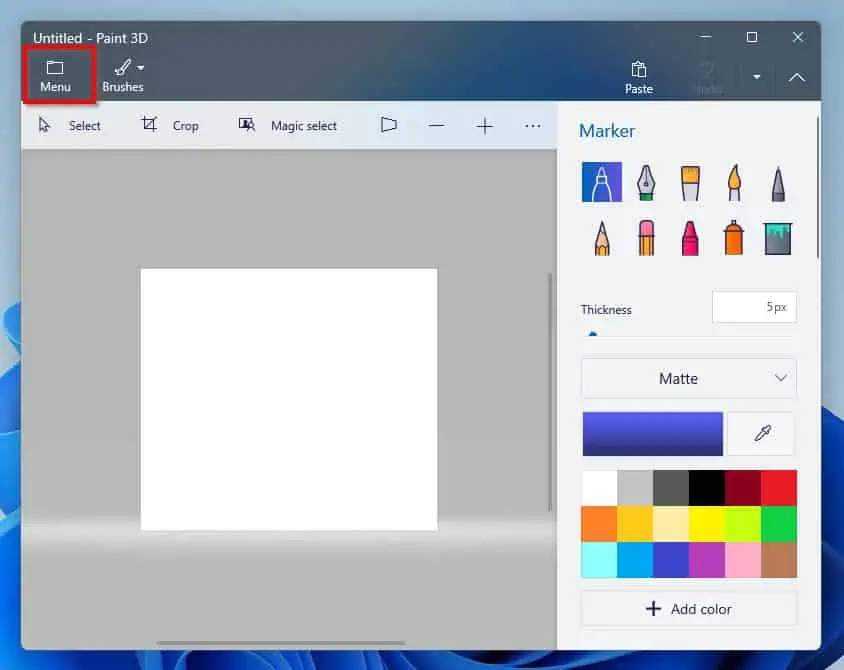
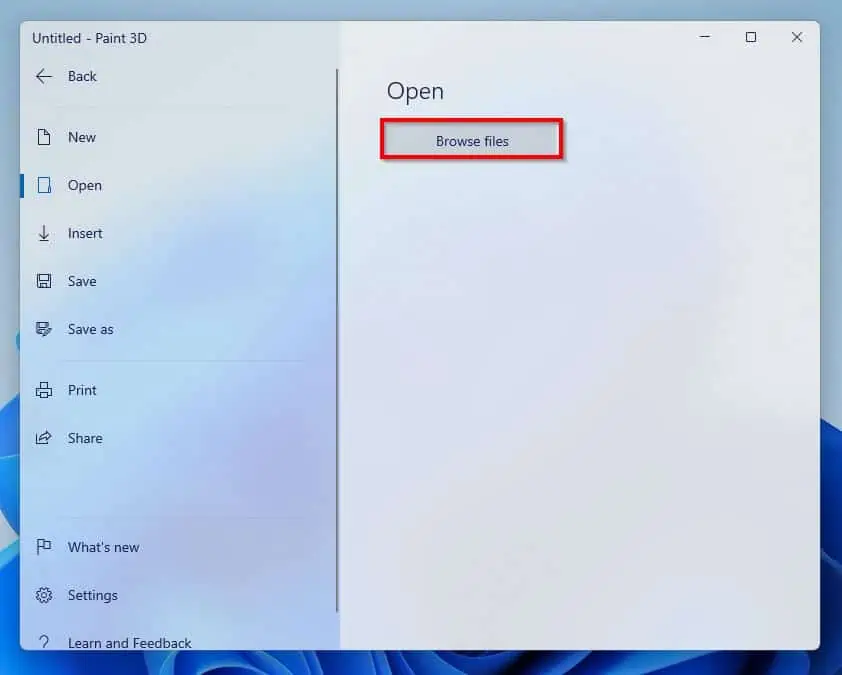
- After doing that, the Open tab should be selected by default. Hence, click the Browse files button on the right pane.
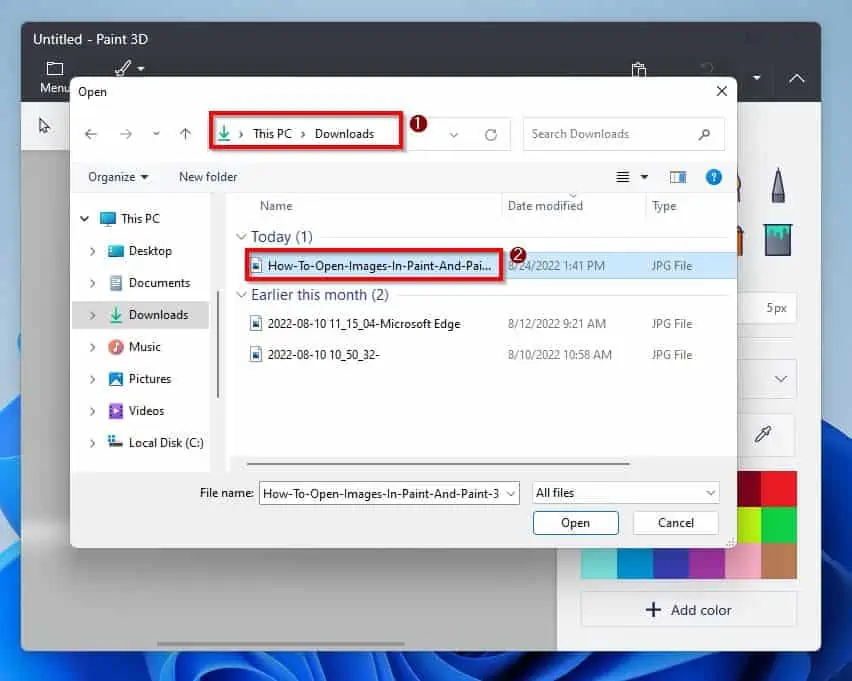
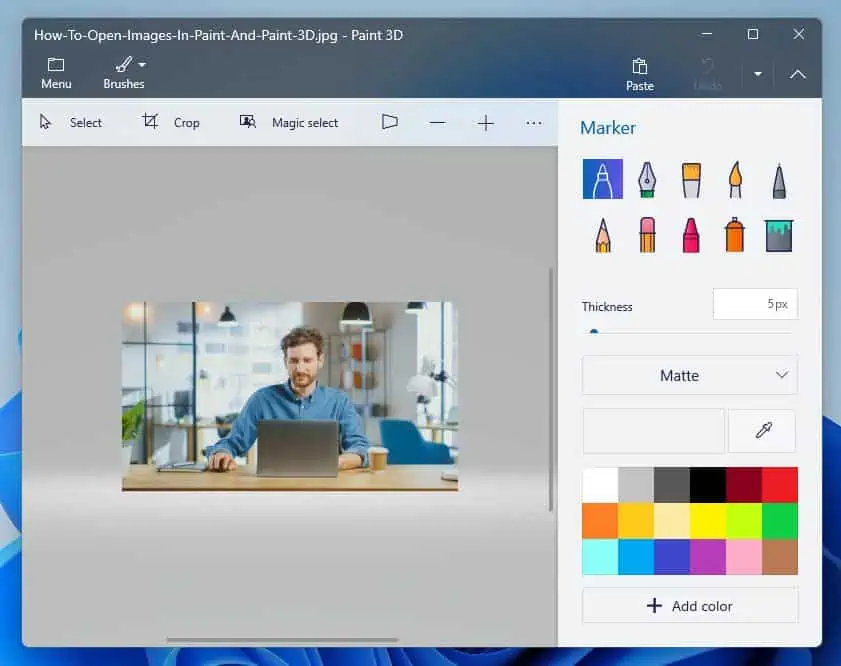
- Afterward, on the Open window, go to the location of the image that you want to open. Then, double-click the image to open it in Paint 3D.
How to Delete Objects
In this section of the Windows 11 Paint help guide, you will learn how to delete objects in Paint and Paint 3D.
1. Delete Objects in Paint
Follow the steps below to delete an object in the Paint app on your Windows 11 computer.
- Click the Image drop-down and select the Select tool icon.
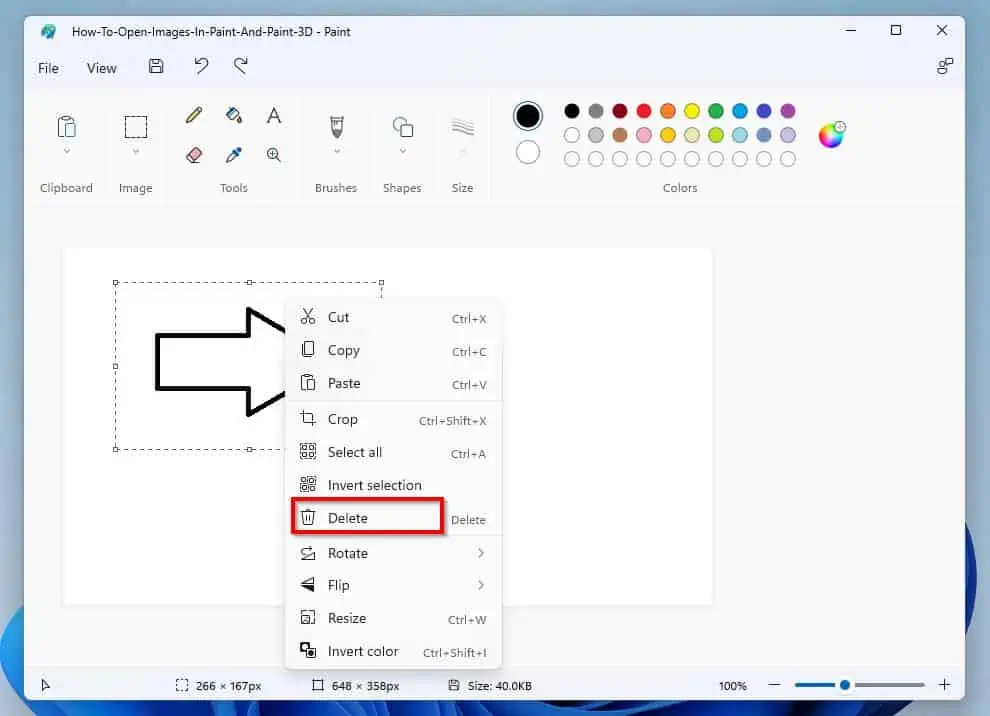
- Then, press and hold the left-click button of your mouse and drag over the object that you want to delete. Hence, the object will have dotted rectangular lines around it.
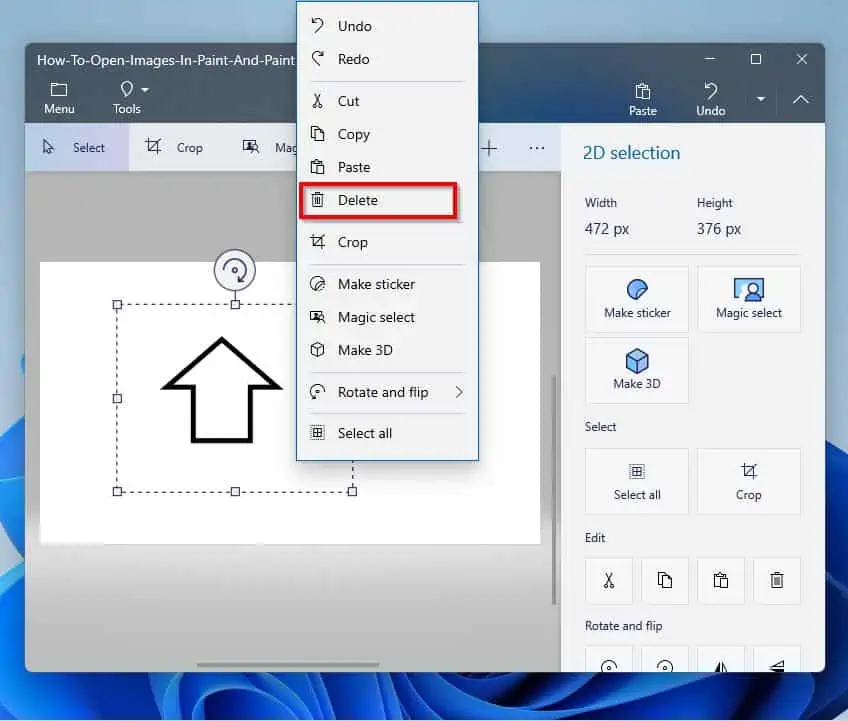
- Then, right-click the selected object and click Delete from the options that appear. Alternatively, you can also press the Delete key on your keyboard to delete the selected object.
2. Delete Objects in Paint 3D
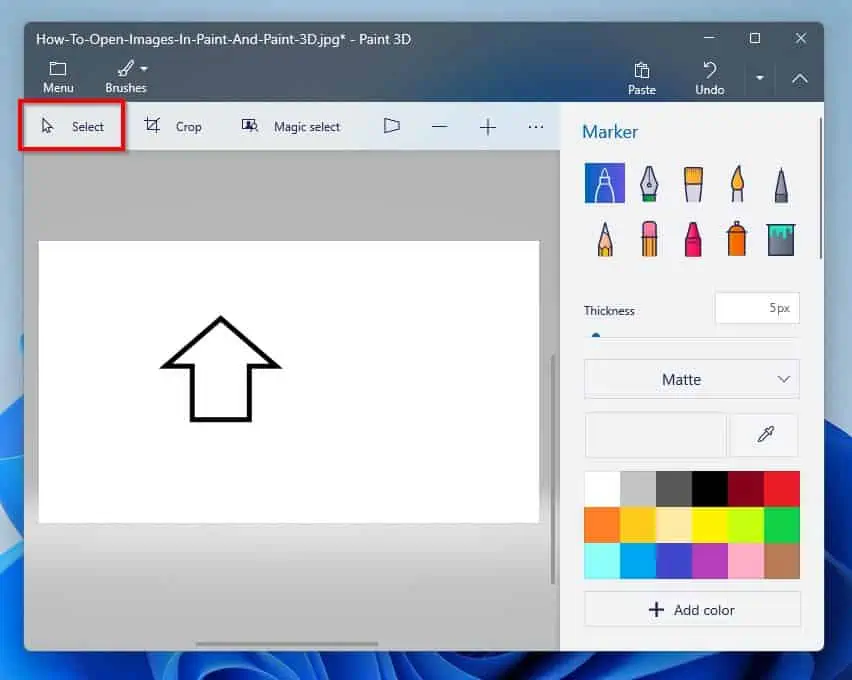
- Click Select from the options above the Paint 3D canvas.
- Then, drag your mouse over the object you want to delete while pressing the left-click button. Hence, as with the Paint app, the object will be surrounded by numerous dotted rectangular lines.
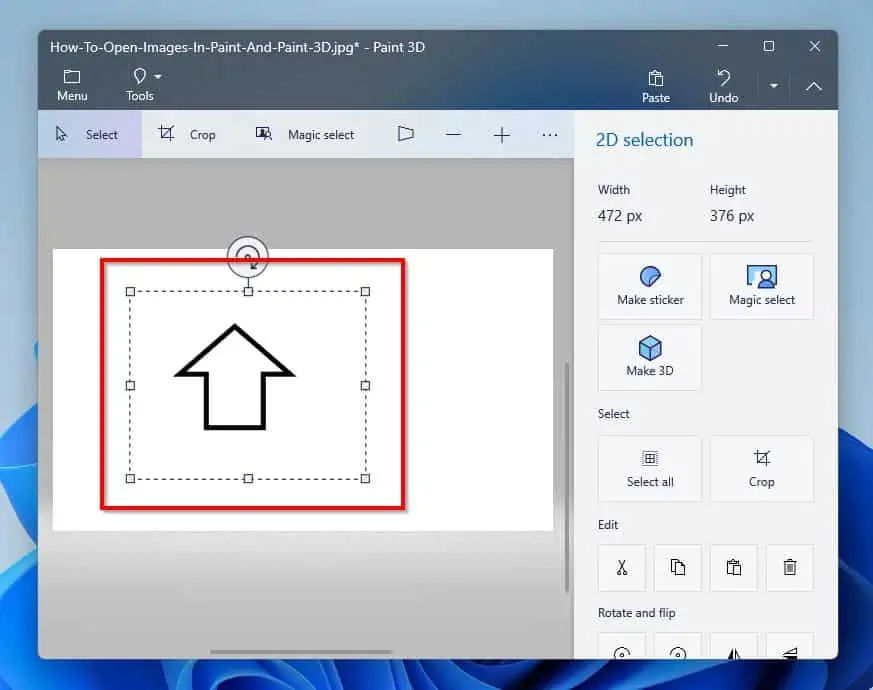
- Then, right-click the selected object and select Delete from the options that appear. You can also press the Delete key on your keyboard to delete the selected object.
How to Merge Pictures
Merging pictures is a cool function that the Paint and Paint 3D apps offer. So, in the sub-sections below, you will be learning how to merge pictures in Windows 11 Paint and Paint 3D apps.
1. Merge Pictures in Paint
- To import the first picture to Paint you want to merge, click the Clipboard drop-down and click the Paste drop-down. Then, select Import.
- Afterward, find and open the folder containing the first picture you want to merge on the Paste From window. Select the image after that, and then click Open to insert the picture on the Paint canvas.
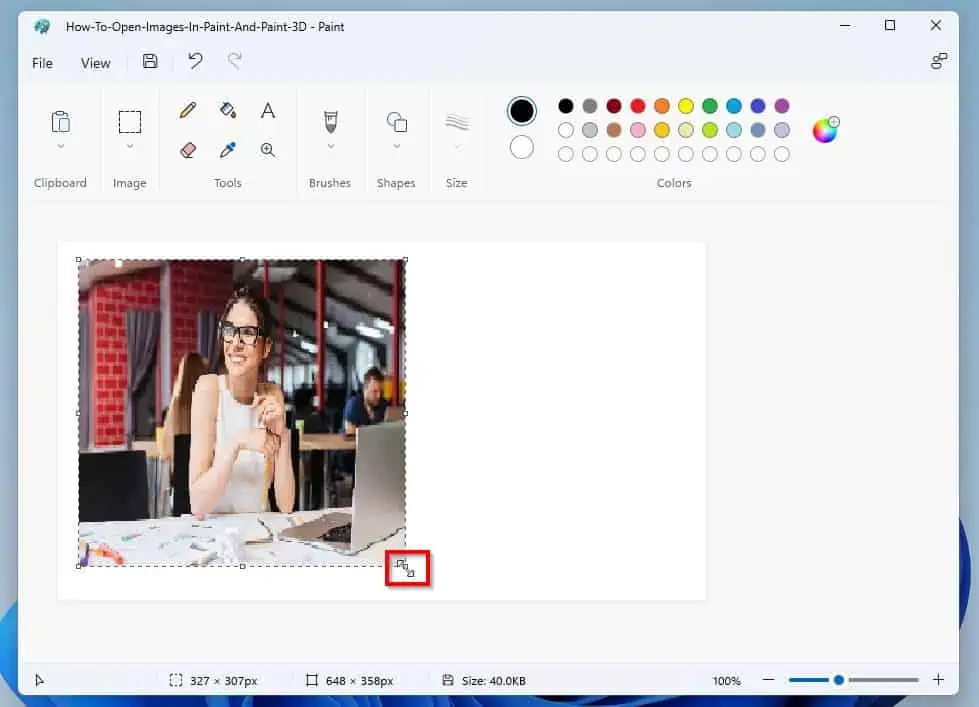
Making the first picture smaller allows the Paint canvas to accommodate both pictures we are planning to merge.
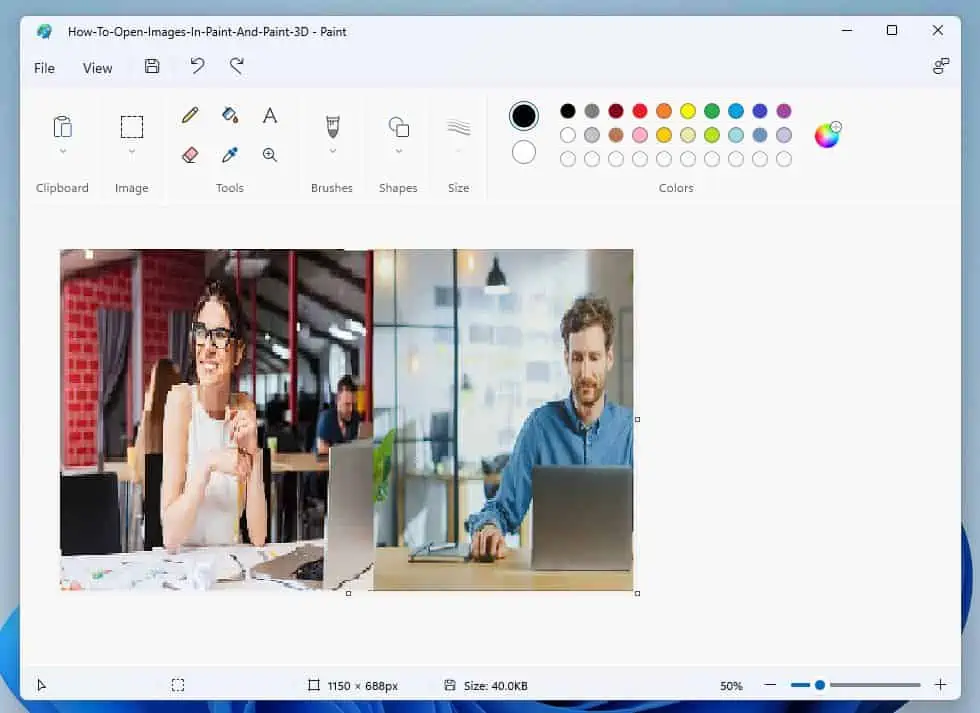
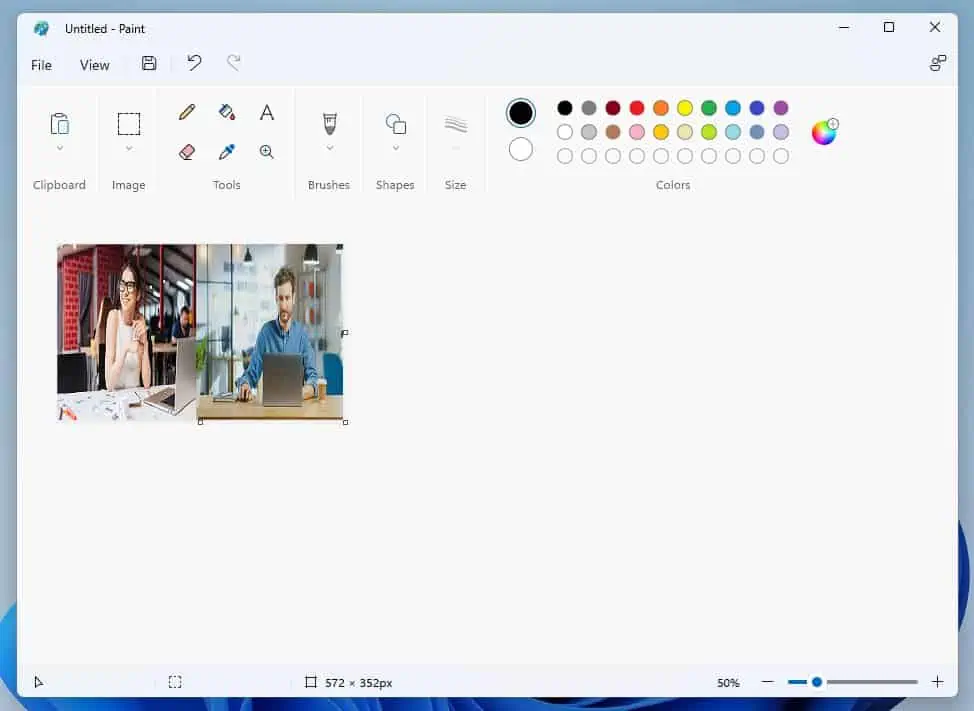
- Repeat the first and second steps above to import the second picture that you wish to merge. Then, resize the second picture to your taste and save or use Ctrl + A to select the merged pictures and copy.
There you have it – I simply imported the pictures I wanted to merge and save/copy.
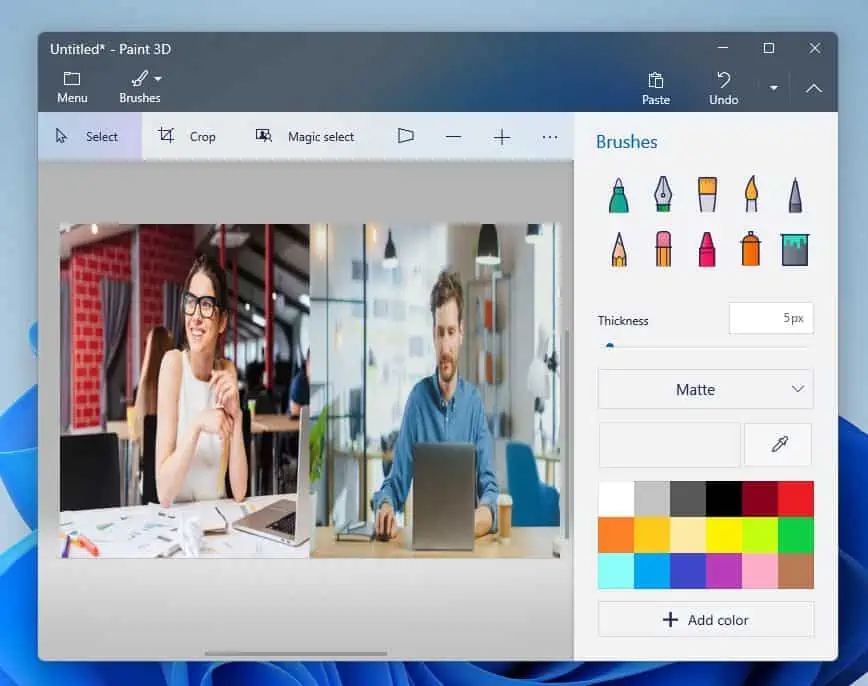
2. Merge Pictures in Paint 3D
Below are the steps to merge pictures in the Paint 3D app on your Windows 11 computer.
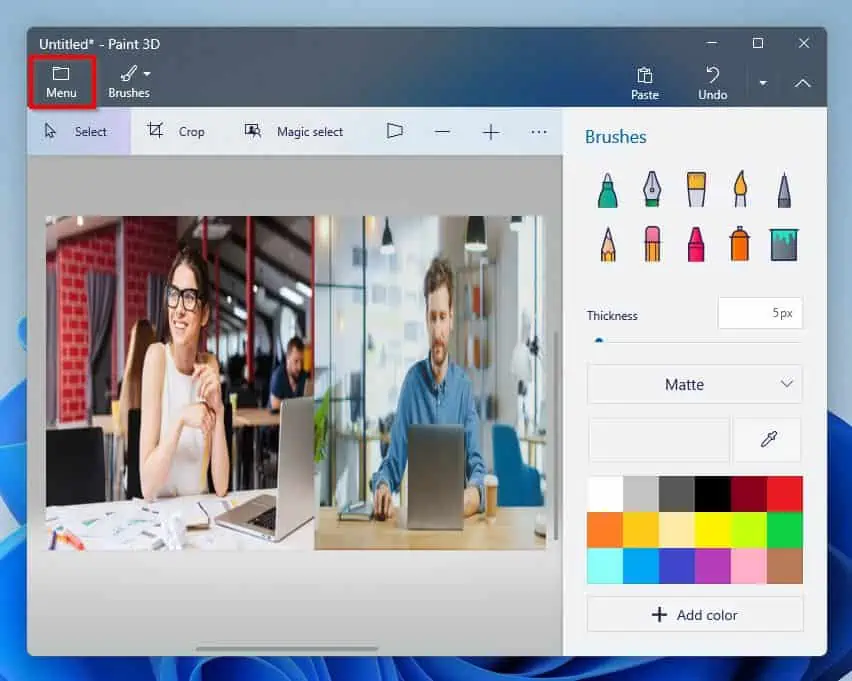
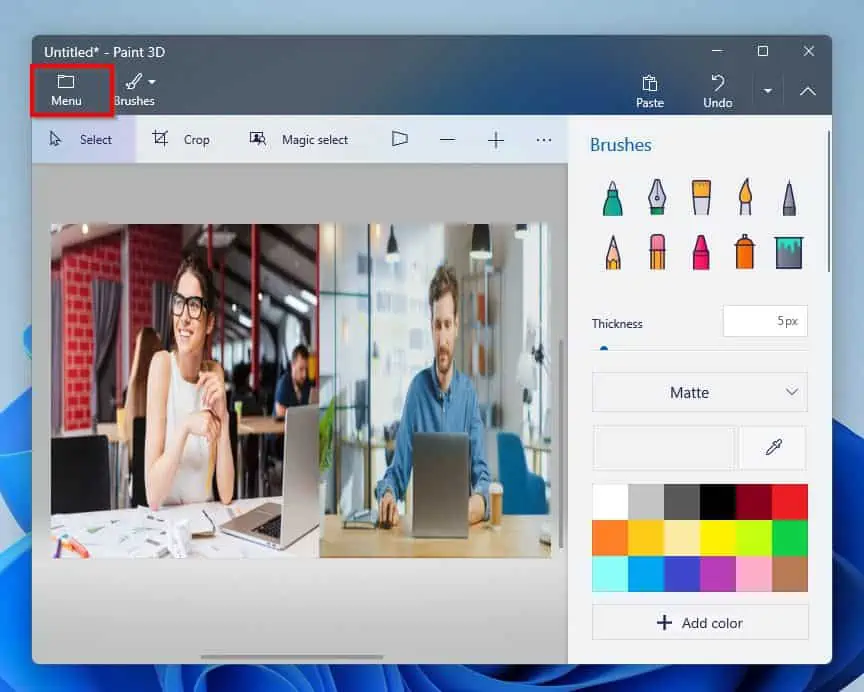
- Click Menu on the top left corner of the Paint 3D window.
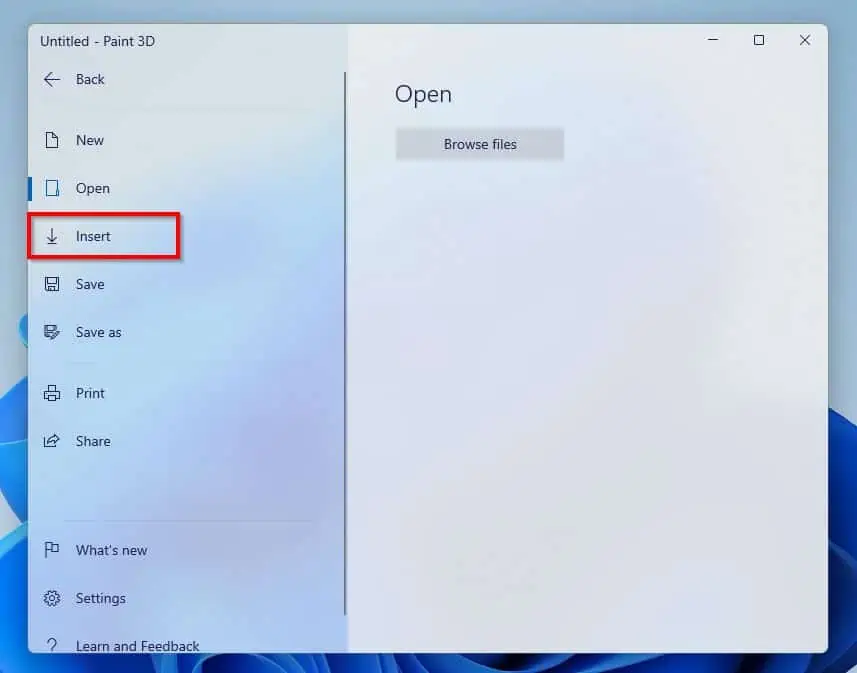
- Then, select Insert on the left pane of the page.
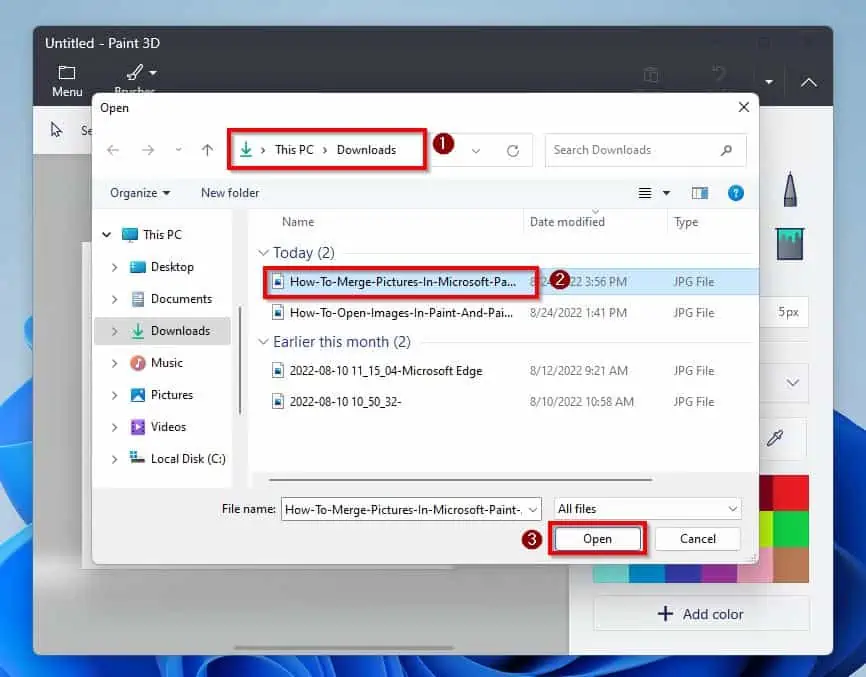
- Afterward, locate the folder that features the first picture you want to merge on the Open window. Then, click the picture and click the Open button at the bottom of the window.
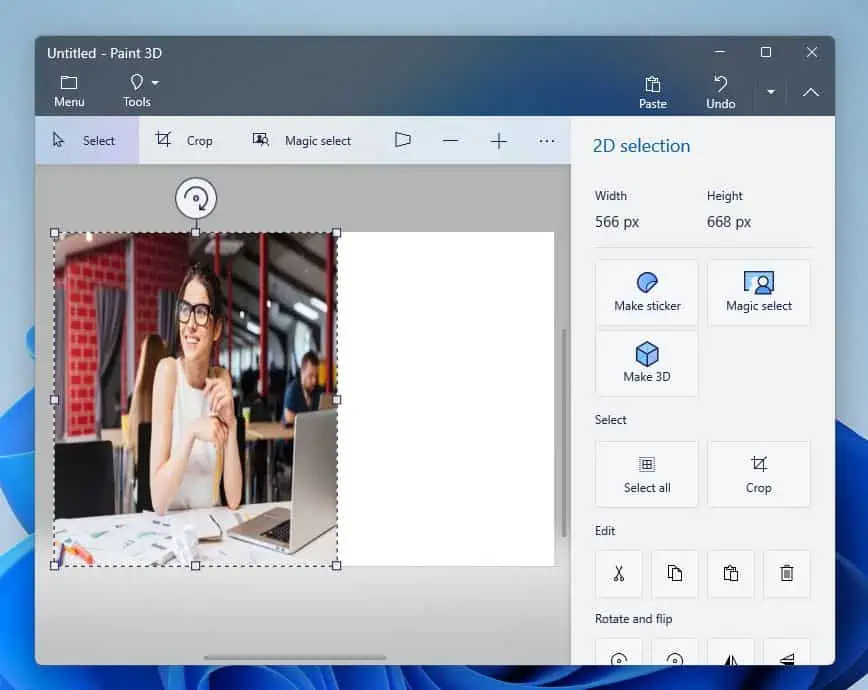
- Repeat the first, second, and third steps above for the second picture. Then, drag and re-size it the way you want it in the merged photo and save or copy.
There you have it – a merged picture.
How to Crop, Rotate and Resize Images
In this comprehensive Windows 11 Paint help guide section, you will learn how to crop, rotate, and resize an image in Paint and Paint 3D.
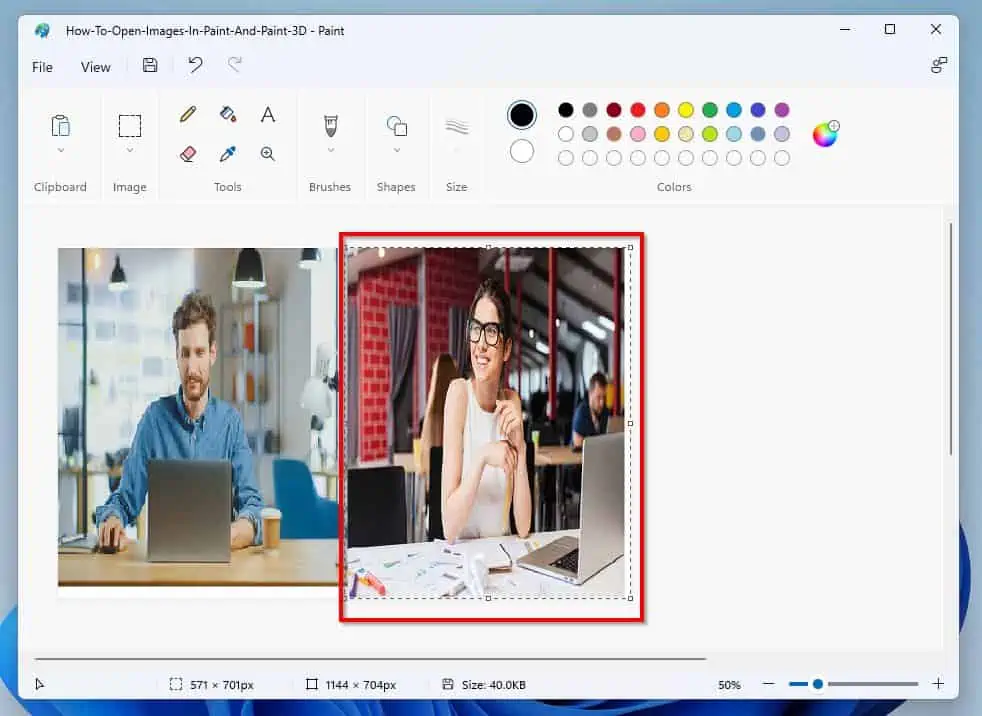
1. Crop Image in Paint
Follow the steps below to crop an image in the Paint application on your Windows 11 computer.
- Click the Images drop-down and select the Select tool icon.

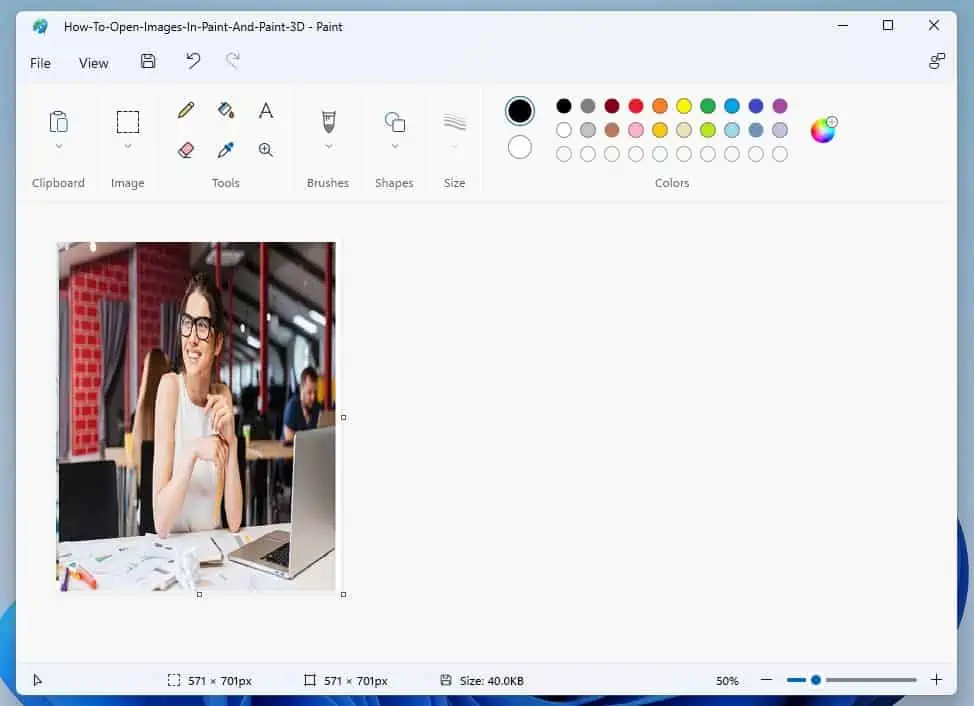
- With the Select tool, use your mouse to drag around the part of the image you want to retain. For this demonstration, I will be retaining the image on the right part of the merged image.
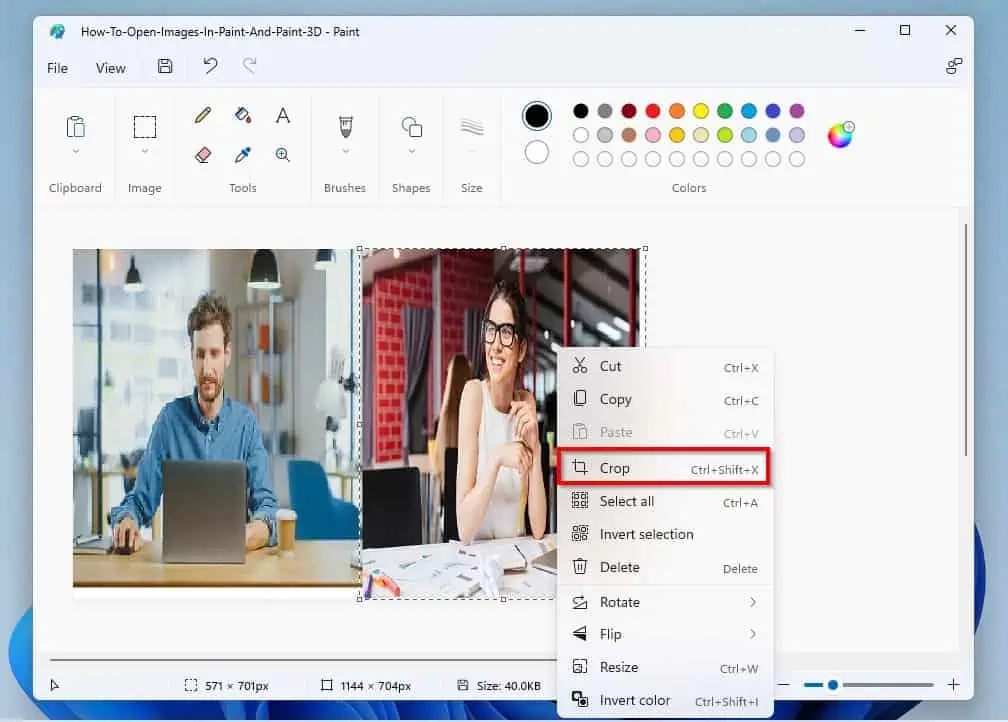
- Then, right-click the selected part of the image and select Crop.
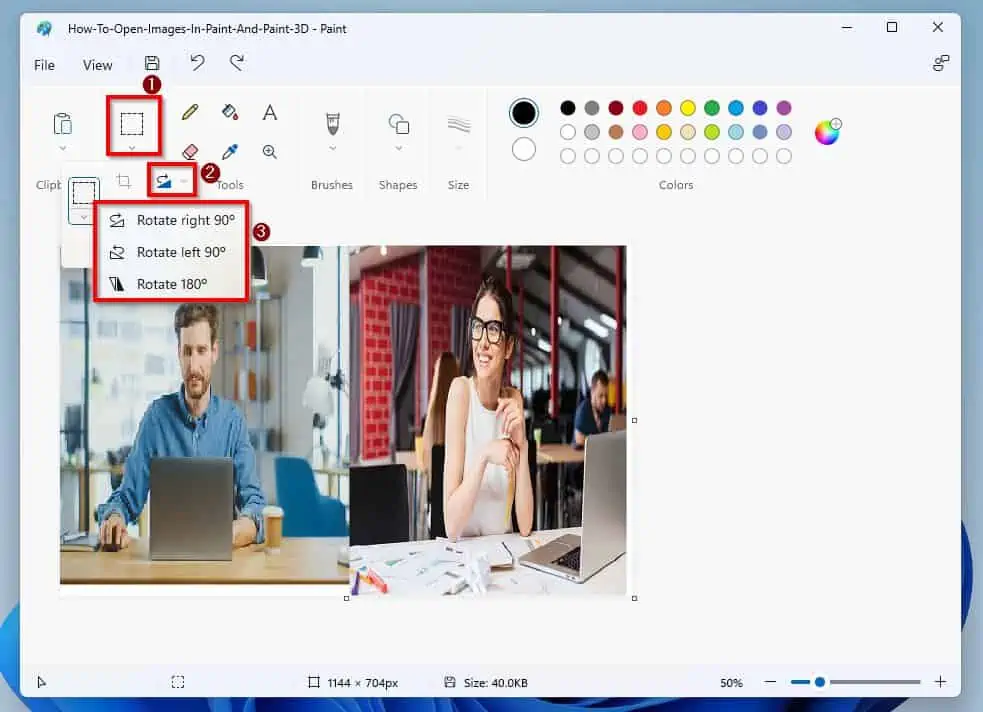
2. Rotate or Flip an Image in Paint
To rotate an image in Paint, simply click the Image drop-down and select the Rotate drop-down. Then, from the options that appear, you can either rotate the image right, left, or 180 degrees.
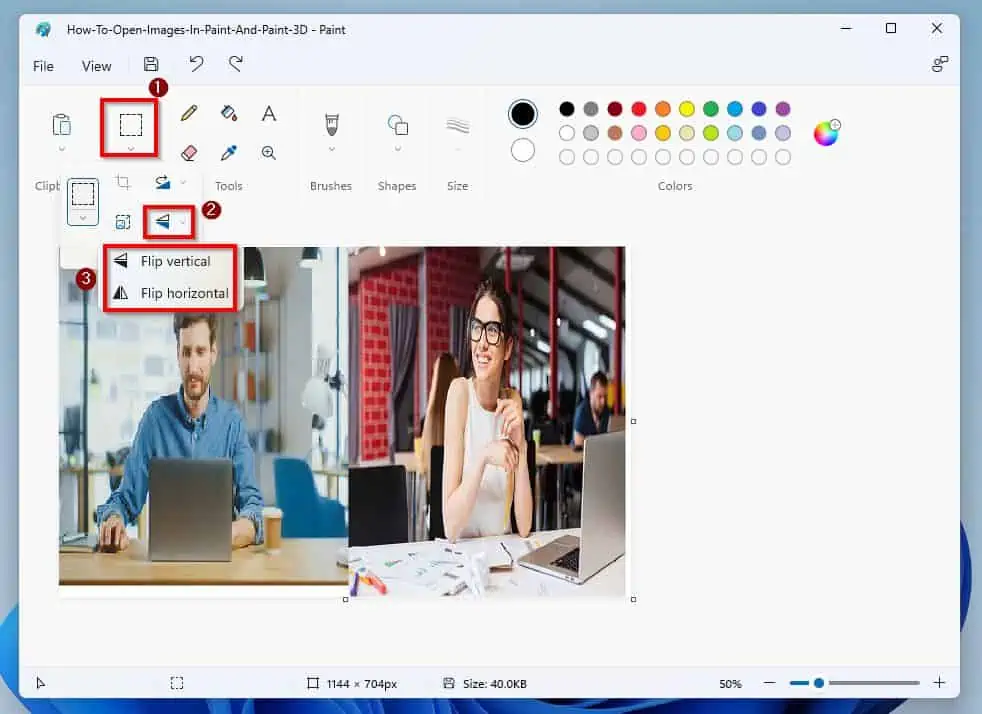
However, if you want to flip an image, you have to select the Flip drop-down after clicking the Image drop-down. Hence, from the options that appear, you can either flip the image horizontally or vertically.
3. Resize an Image in Paint
Follow the procedures below to resize an image in the Paint app on your Windows 11 computer.
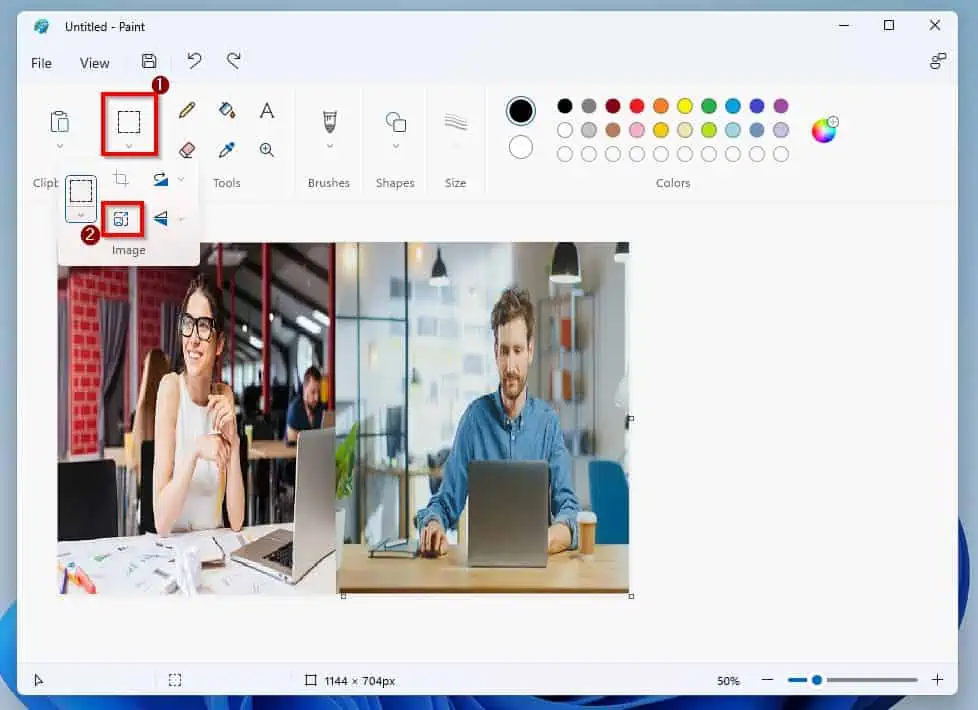
- Click the Image drop-down and select the Resize icon from the options that pop down.
- On the Resize and Skew window, the Paint app offers two resize options – you can either resize by Percentage (default) or Pixels.
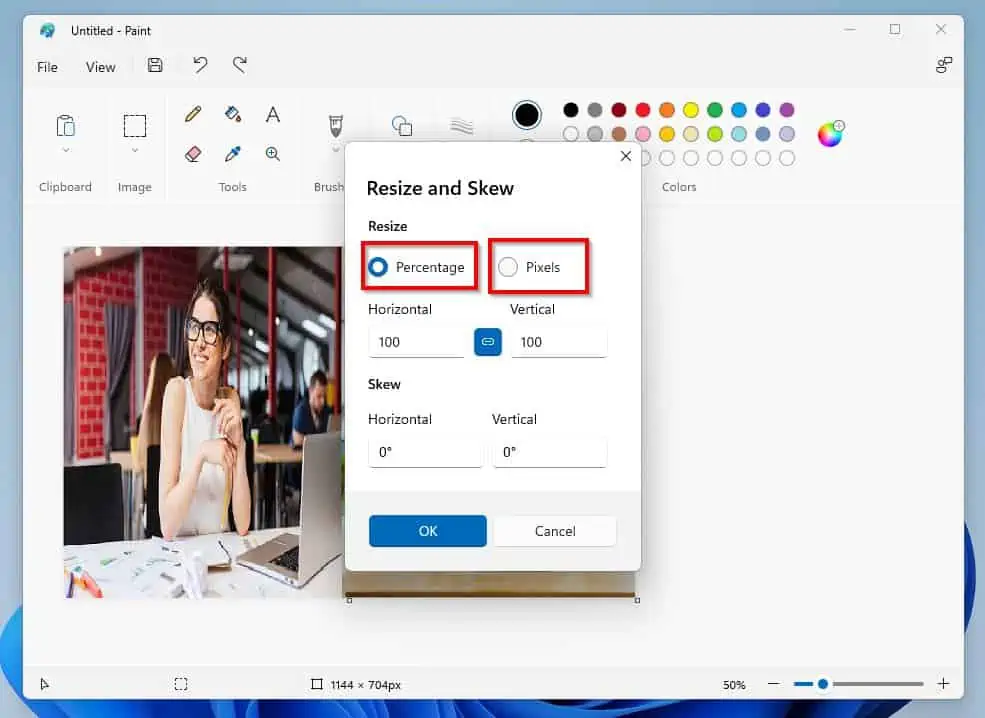
To resize the image using Percentage, change the Horizontal and Vertical % values – the default values are usually 100 each. I will reduce the image to 50% of its current size for this demonstration.
Therefore, I will change the Horizontal % value to 50.
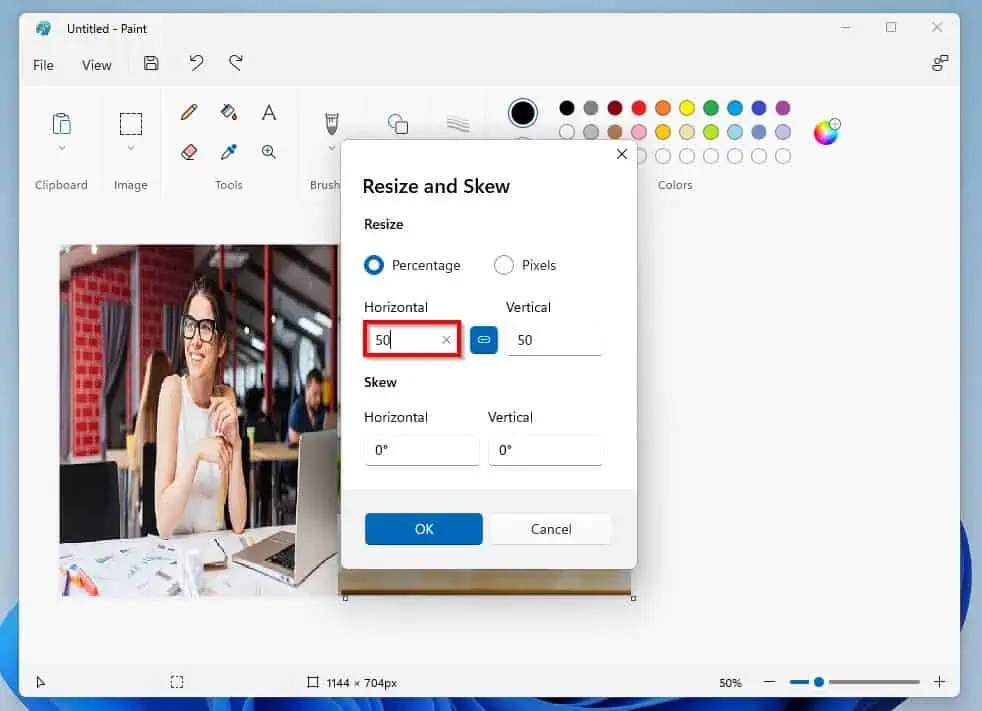
However, because the Maintain aspect ratio feature is activated – see the screenshot below – when I input 50 in the Horizontal field, 50 will also appear in the Vertical field. Finally, click OK to save the new size.
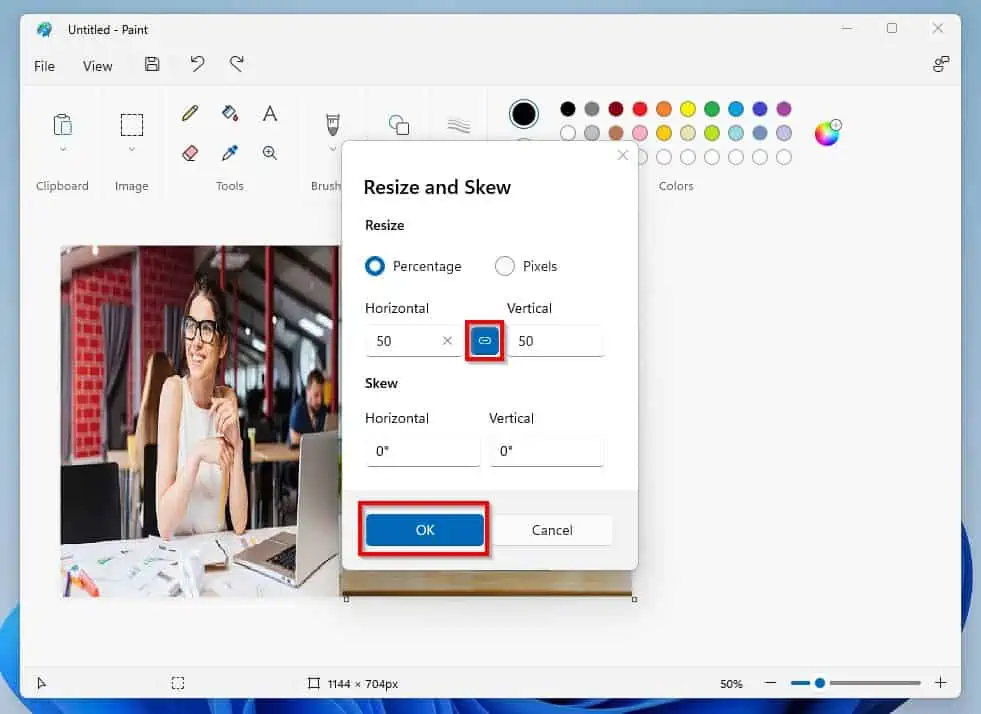
There you have it – I have successfully reduced the size of my image by 50%.
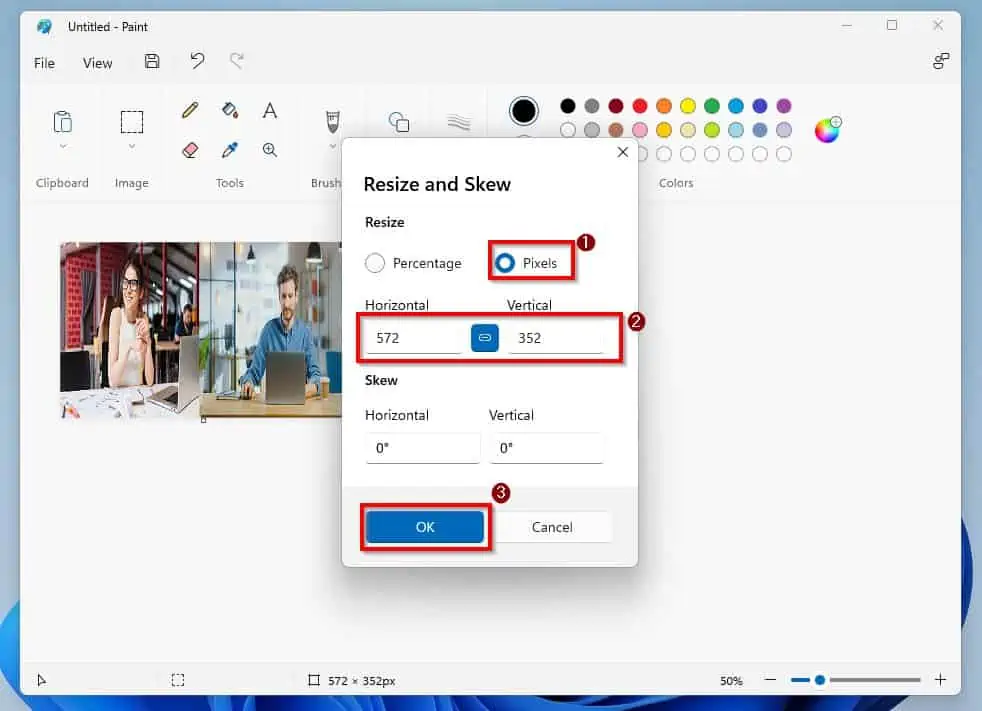
As stated earlier, you can also resize your image with Pixels. To do that, select Pixels in the Resize and Skew window.
Then, enter the new horizontal and vertical Pixel values and click OK.
1. Crop and Resize Images in Paint 3D
The cropping tool in Paint 3D is pretty advanced compared to the Paint application. Well, below are the steps to crop an image in the Paint 3D application on your Windows 11 computer.
- Click Crop at the options above the Paint 3D canvas.
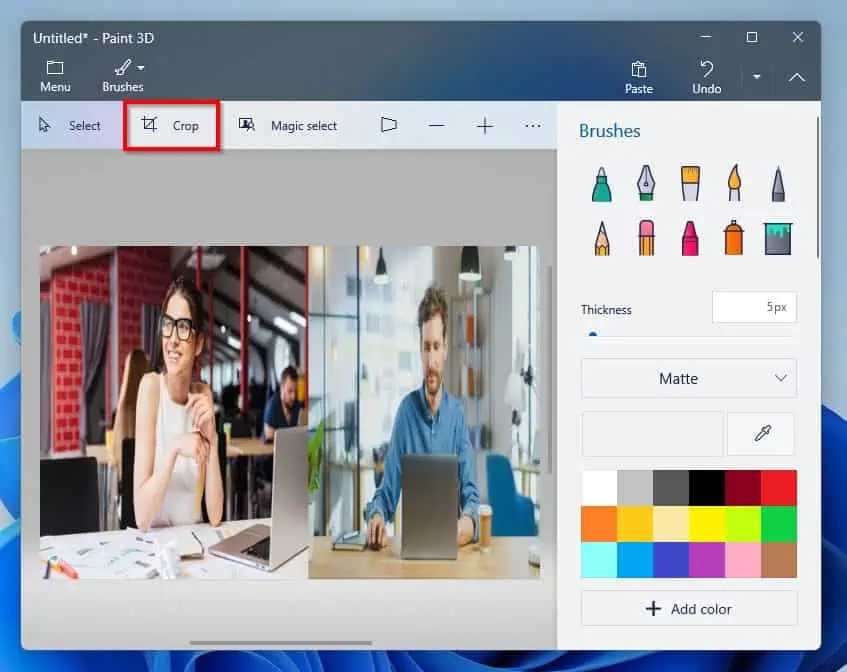
- By doing that, the image will be automatically highlighted, and the cropping options will display on the right pane.
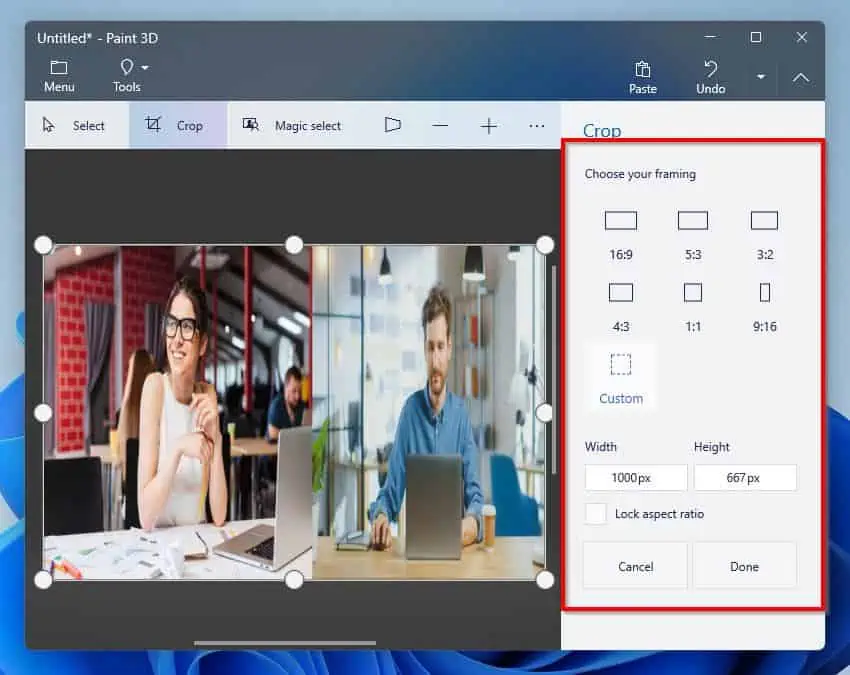
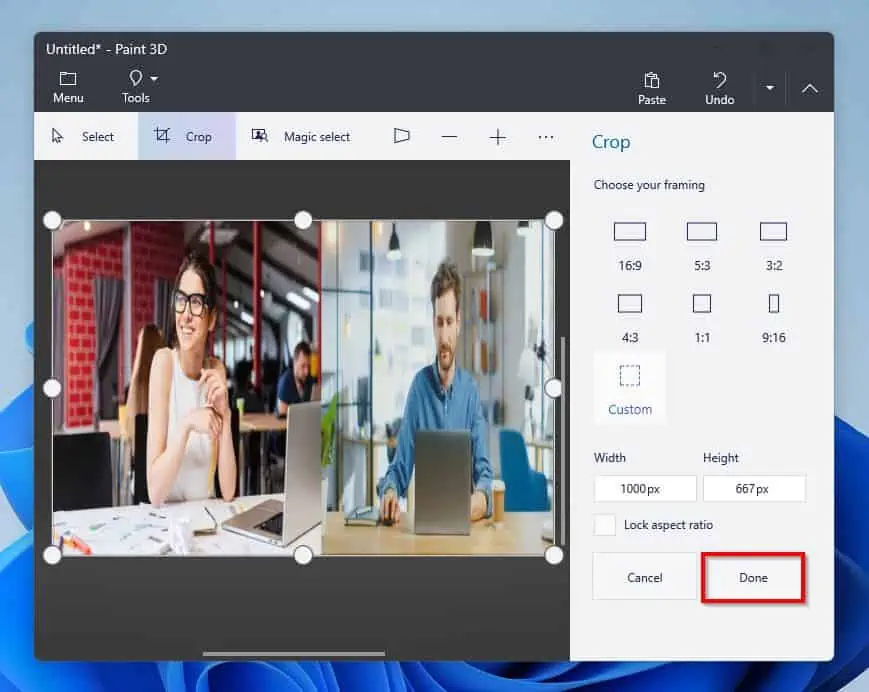
- Choose one of the predefined options in the Choose your framing section from the Crop option on the right pane to crop an image quickly.
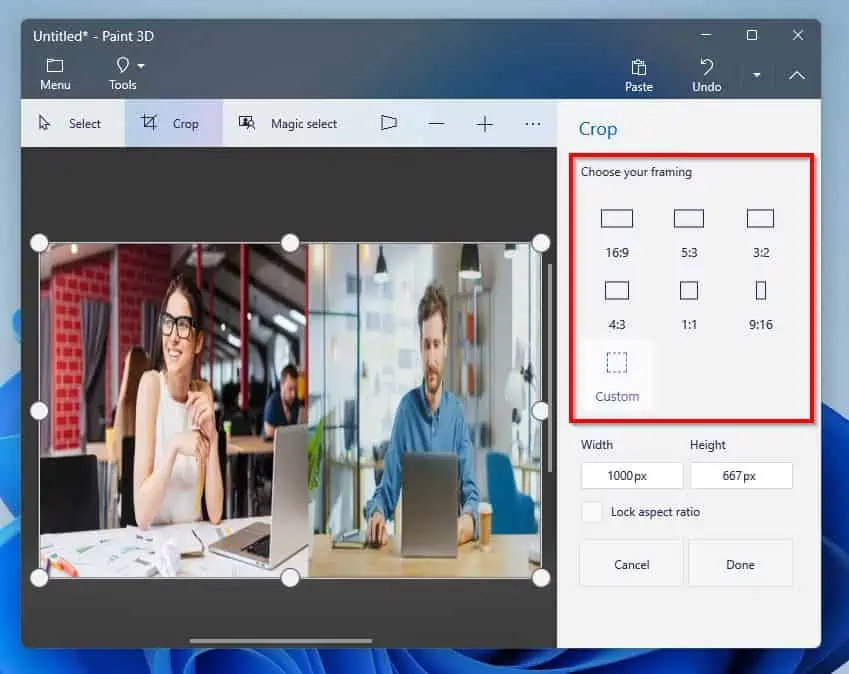
- You can also select Custom in the Choose your framing section to crop the image yourself.

- You may also amend the width and height of the image using the Width and Height input fields. As a matter of fact, there is also a Lock aspect ratio checkbox for activating the lock aspect ratio feature.
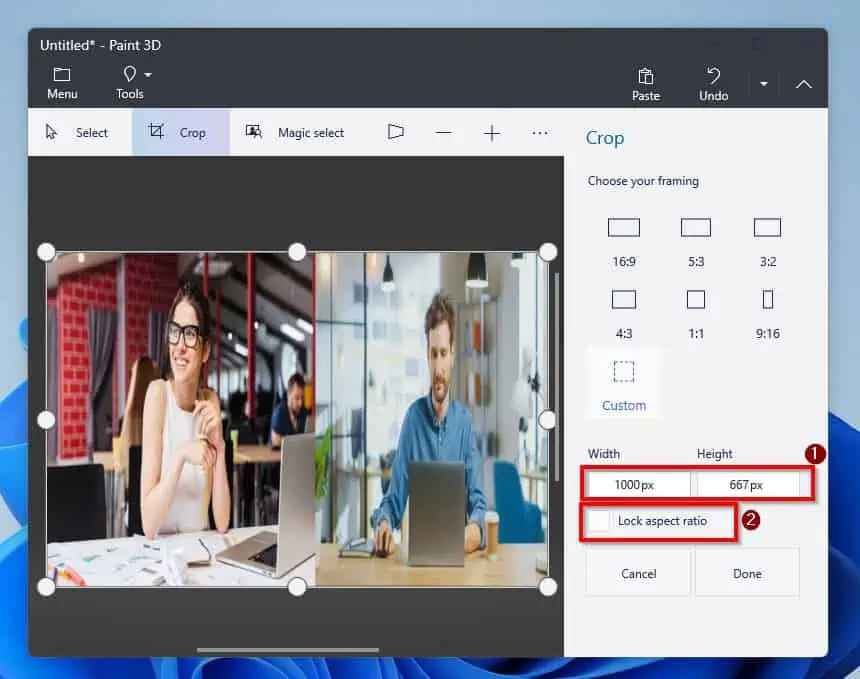
- Finally, click Done at the bottom of the right pane when you are done selecting your cropping options.
2. Rotate or Flip Images in Paint 3D
Follow the procedures and screenshots below to rotate or flip an image in the Paint 3D app on your Windows 11 PC.
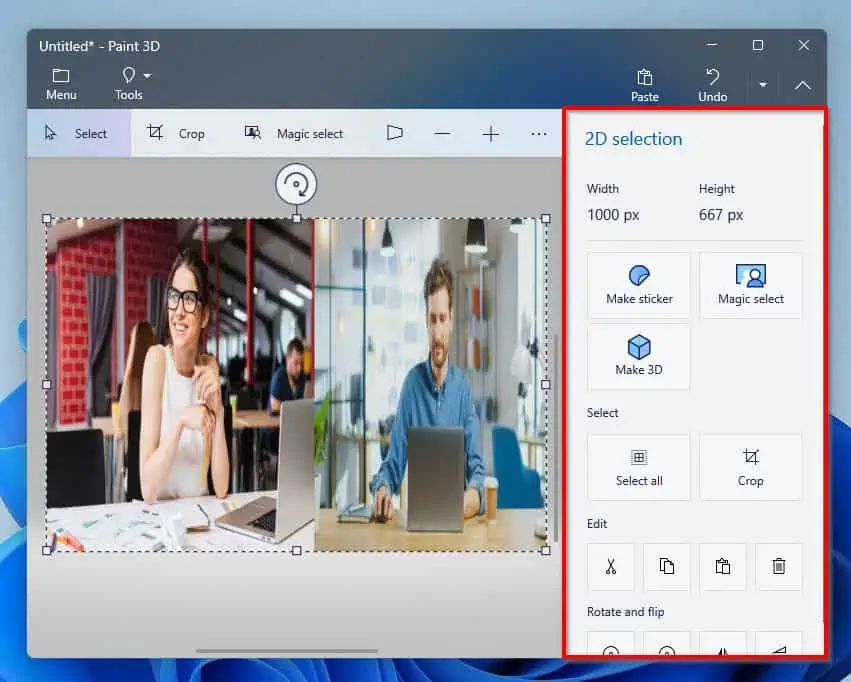
- After inserting the image, you want to rotate or flip, press Ctrl + A keys on your keyboard to select the image. Then, some options will automatically appear on the right pane of the Paint 3D window.
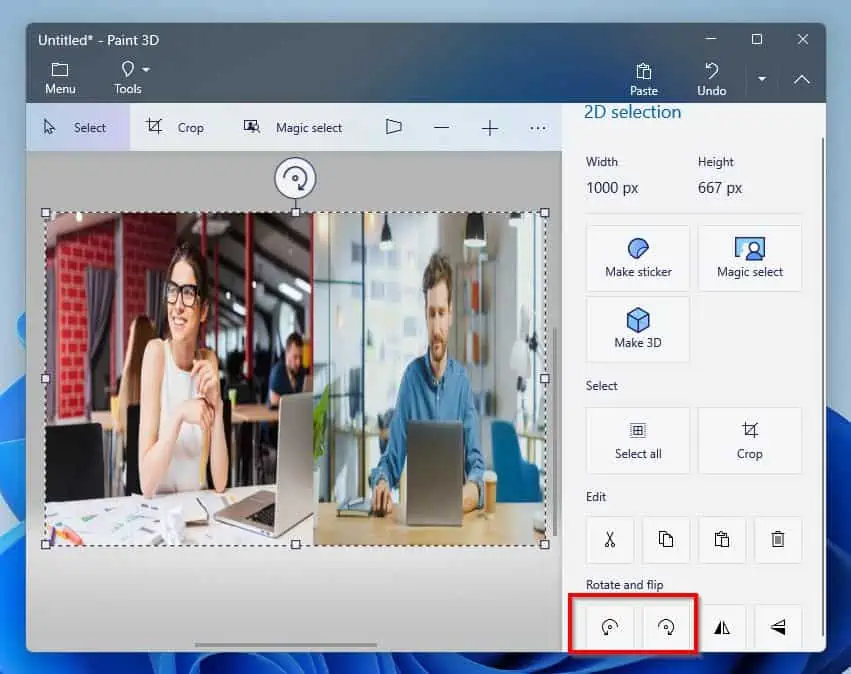
- After doing that, use the first two icons under the Rotate and flip category on the right pane to rotate the image. Essentially, the first icon rotates the image left, while the second icon rotates the image right.
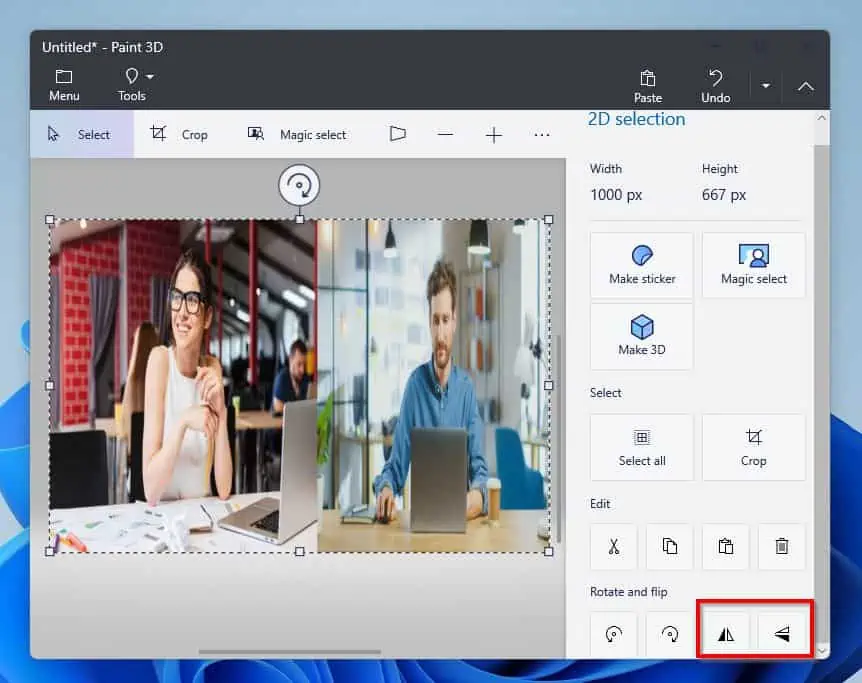
- However, to flip the image, you must use the last two icons under the Rotate and flip category. Specifically, the third icon flips the image horizontally, while the last icon flips the image vertically.
How to Save
Apparently, saving is very important when you are working on a document or file. After all, if you don’t save, you will lose all that you have done.
On that note, this section teaches you how to save in Paint and Paint 3D.
1. Save in Paint
Click File at the top left corner of the Paint window and select Save from the options that appear. Hence, any recent changes you made will be saved if you have previously saved the image.
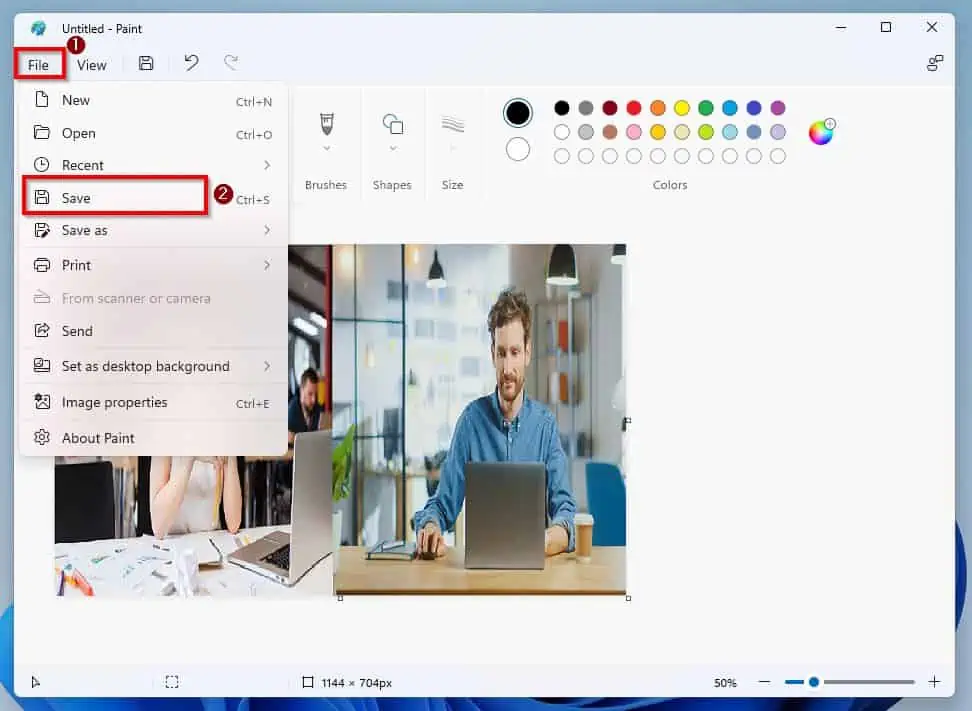
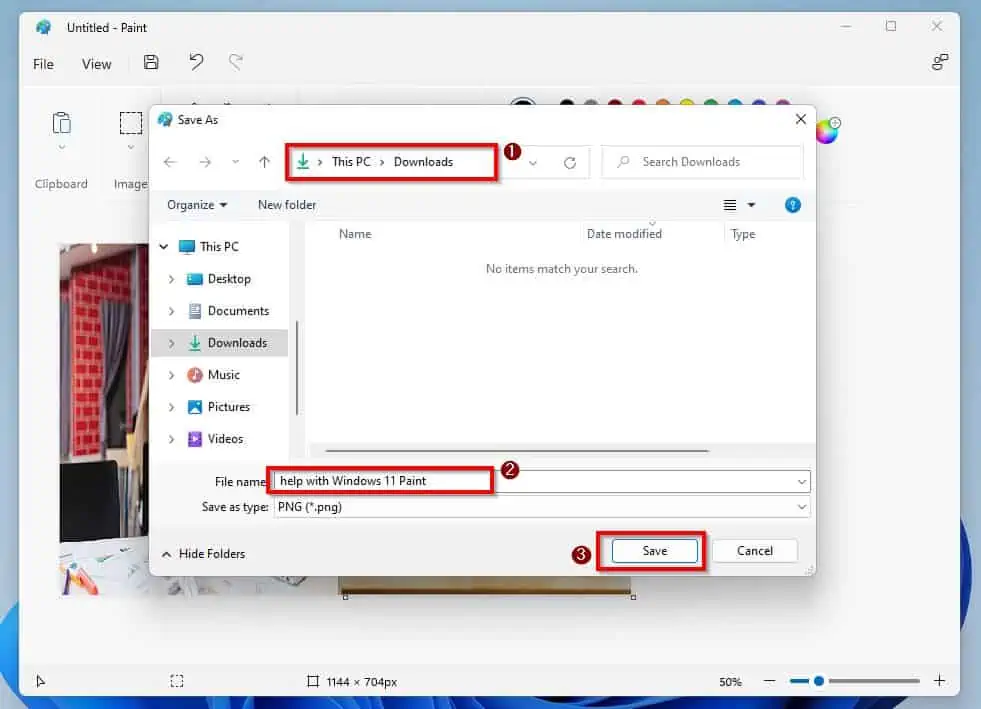
However, if it is the first time you are saving the image, the Save As window will pop up when you select Save from the File menu. Therefore, on the Save As window, choose a folder you want to save the file, name the file, and click the Save button.
2. Save in Paint 3D
Follow the steps below to save in the Paint 3D app on your Windows 11 computer.
- Click Menu at the top left corner of the Paint 3D window.
- Then, select Save from the options on the right pane. Therefore, as with the Paint app, any recent changes you made will be saved if you have previously saved the image.

However, if you are just saving the image for the first time, the Save As window will appear when you click Save. Hence, choose a folder you want to save the file, name the file, and click the Save button on the Save As window.

How to Print
This section will teach you how to print in the Windows 11 Paint and Paint 3D apps.
1. Print in Paint
Click File at the top right corner of the Paint window and hover your mouse on Print. Hence, three options will appear – Print, Page setup, and Print preview.
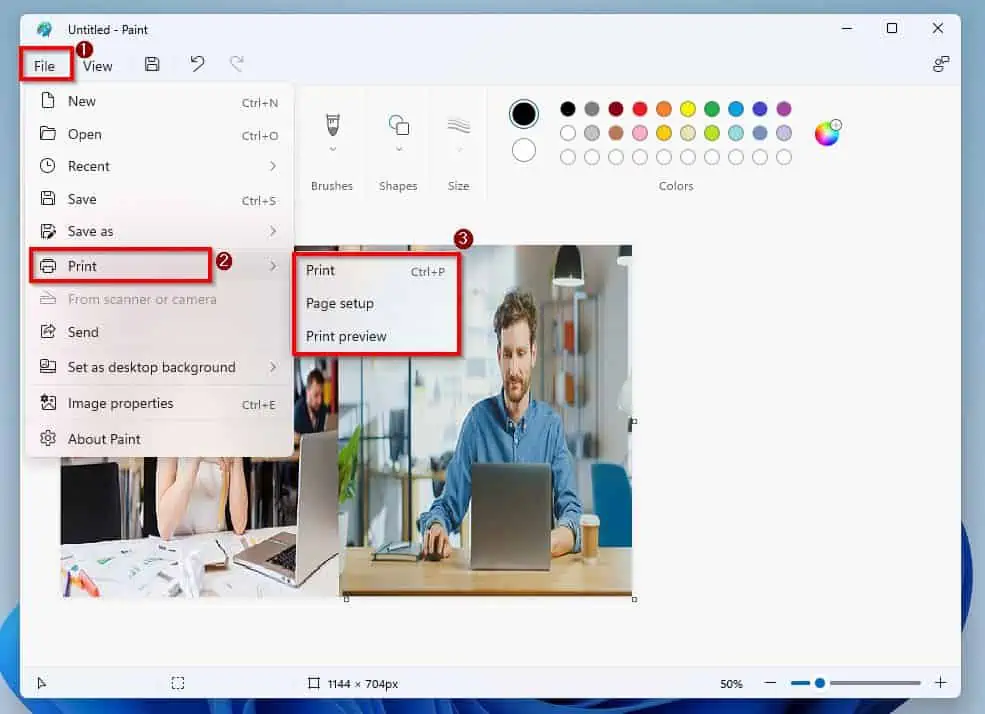
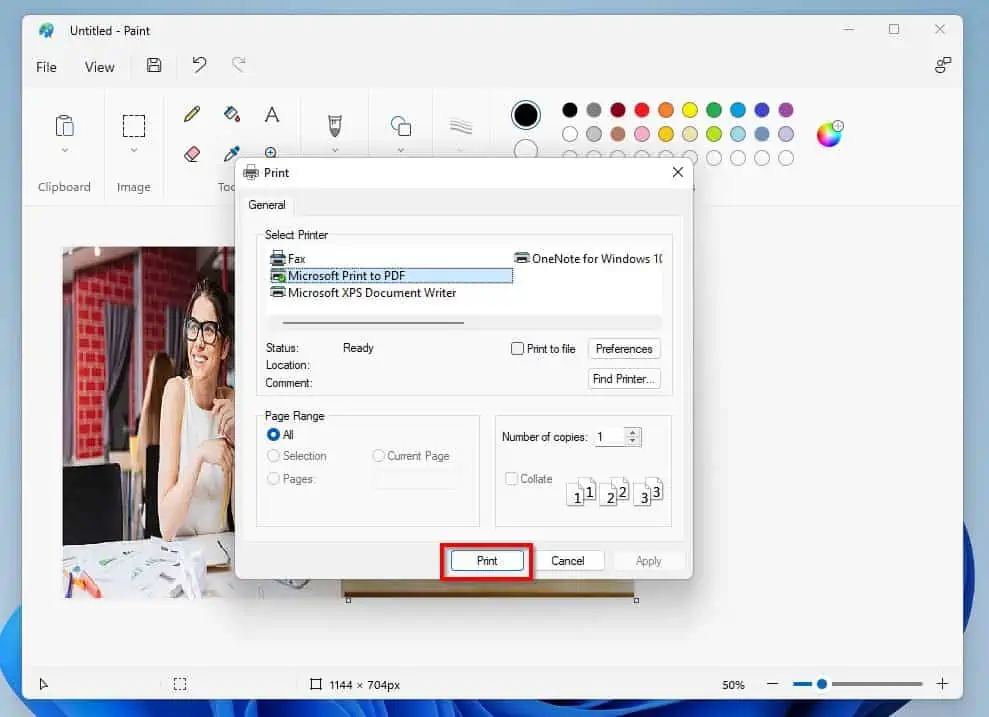
When you select the Print option, the Print dialogue box will appear. You can choose the printer you wish to send the image to from this dialogue box and even set the number of copies you wish to print.
After doing all that, simply click the Print button at the bottom of the page to print the image.
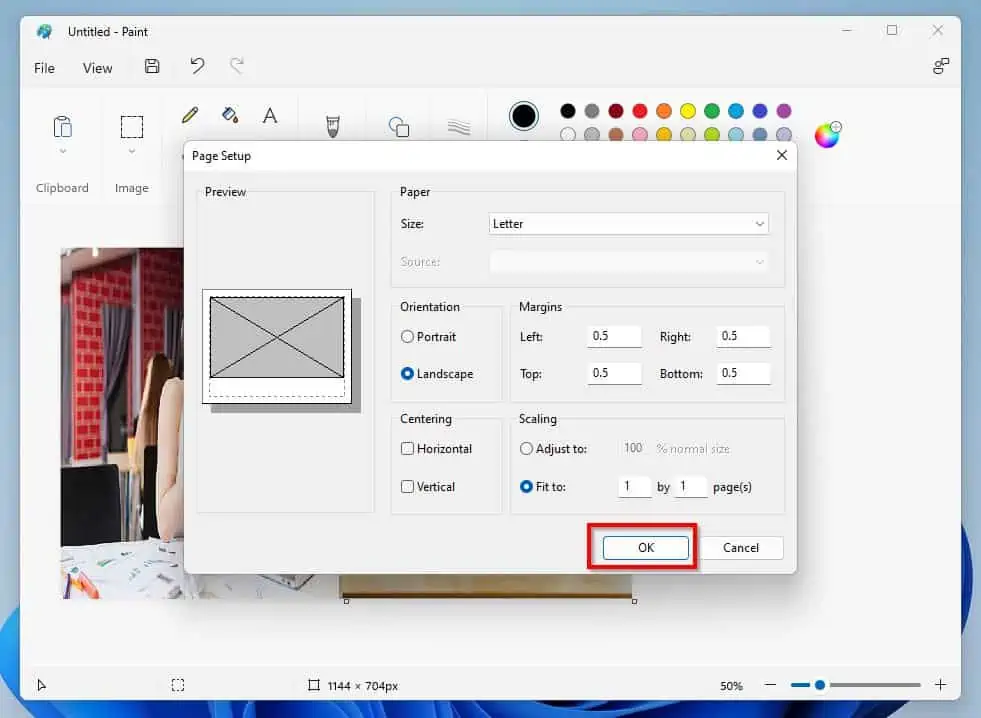
However, click the Page setup option to adjust the page setup before printing. When you do that, the Page setup window will appear.
You can adjust the paper size, margins, orientation, and so much more within this window. After doing all that, simply click the OK button at the bottom of the Page setup window to save the changes you made.
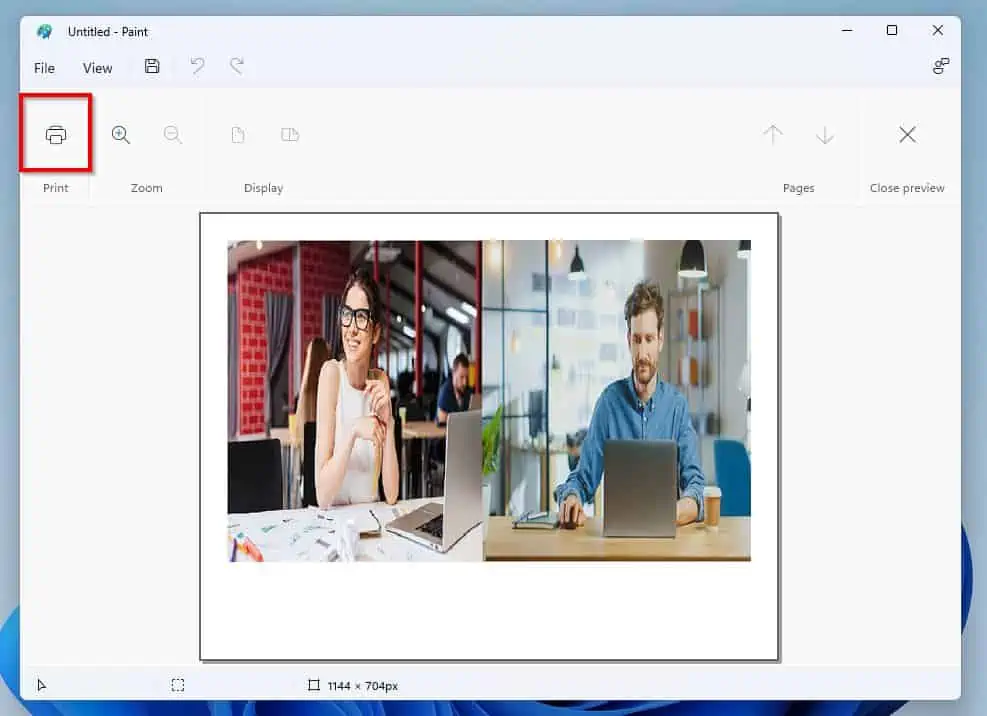
Finally, select the Print preview option to preview the page before printing. Therefore, you can select the Print icon at the top left corner after previewing the page to print.
2. Print in Paint 3D
Follow the steps below to print in the Paint 3D app on your Windows 11 PC.
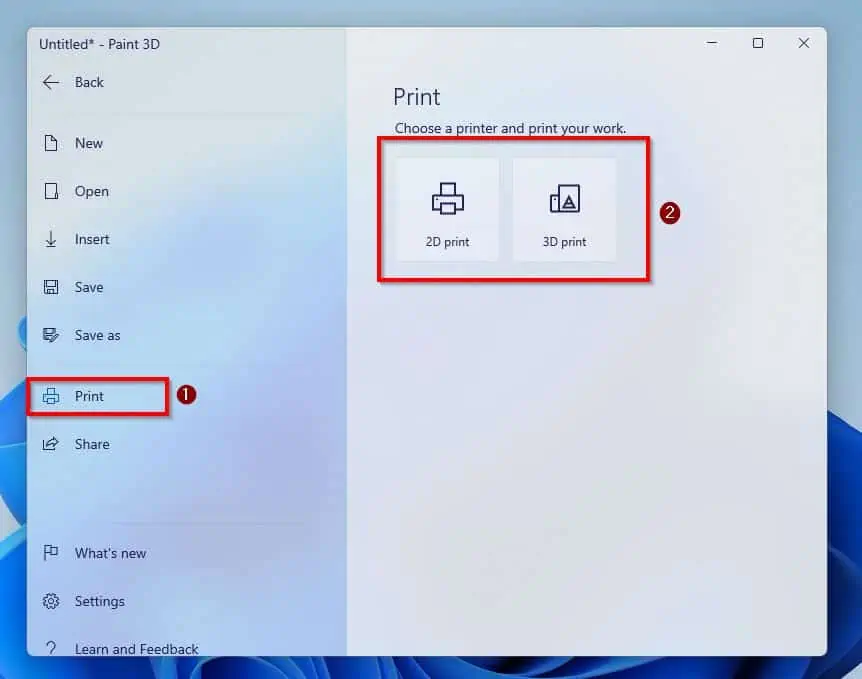
- At the top left corner of the Paint 3D window, click Menu.
- After that, select Print from the options on the left pane of the page. Then, choose whether you want to make a 2D or 3D print on the right pane.
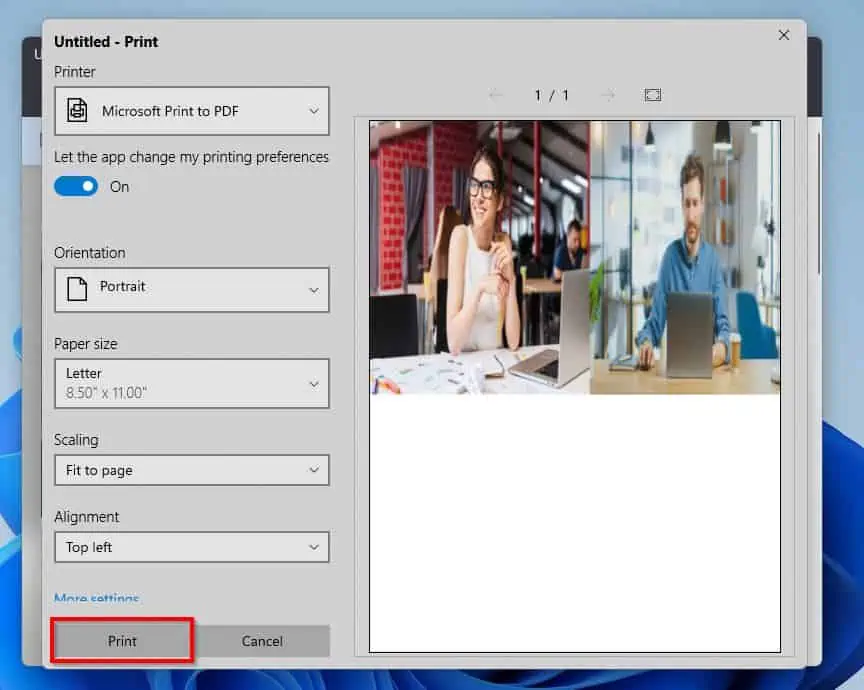
- After doing that, the Print dialogue box will open. You can modify the paper orientation and paper size from this dialogue box.
You can also adjust the scaling, alignment, and number of copies. Finally, click Print on the bottom left when you are ready to print.
How to Send an Image via Email
In this section, I will teach you two ways to send a Paint or Paint 3D image via email.
Option 1. Email an Image by Copy and Paste
The procedures are similar to most email apps, even though I’ll be using the Windows 11 Mail app for this demonstration. So, follow the procedures listed below to send a Paint or Paint 3D image as an email by copying and pasting it.
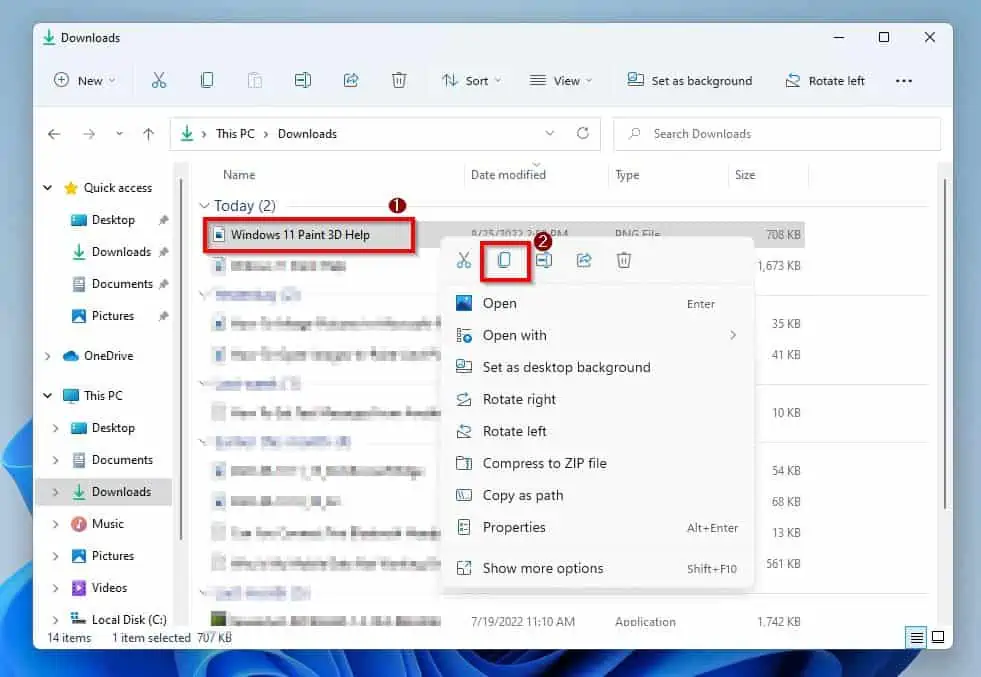
- Right-click the Paint or Paint 3D image in your saved folder and select the Copy icon.
- Then, on a new mail in the Windows 11 Mail app, right-click any free space on the body of the mail and select Paste.
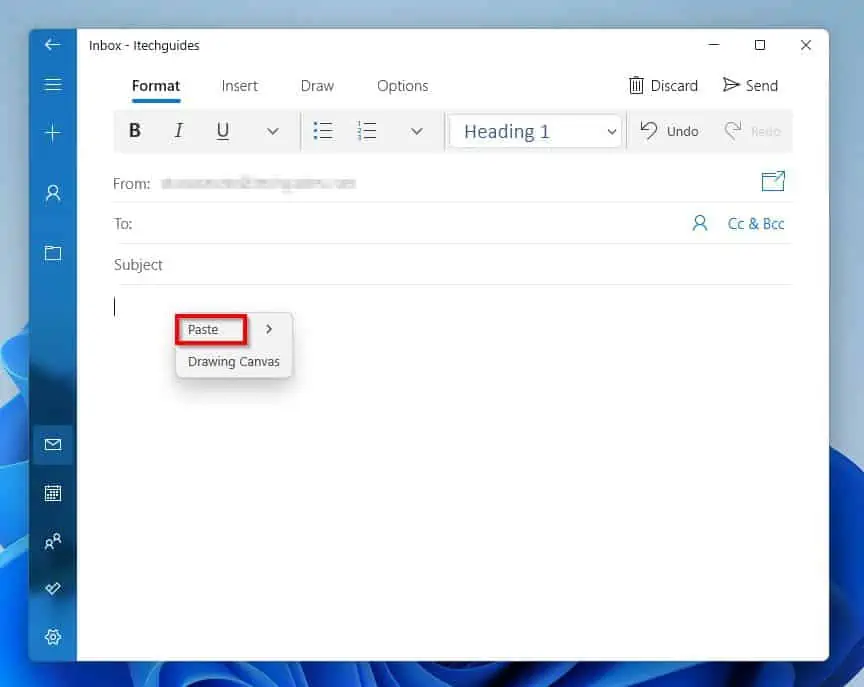
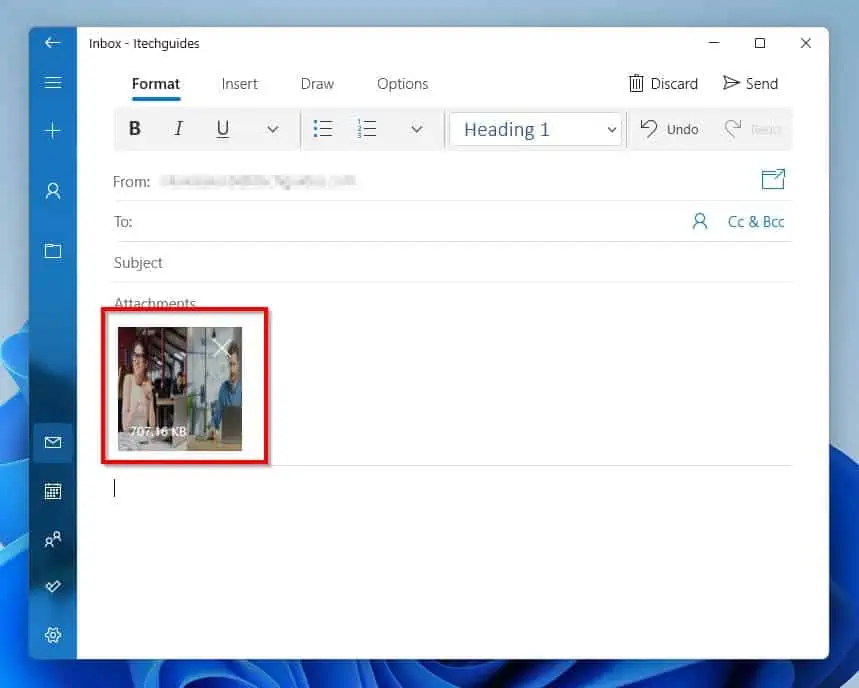
- Finally, select Send at the top right corner after inputting the receiver’s email address.
Option 2: Email an Image by Inserting the Image
Inserting the Paint or Paint 3D image from the email app is another method to email it. For this illustration, I will use the Windows 11 Mail app, as I did in the previous sub-section.
However, the procedures are comparable to most email clients. Thus, follow the steps below to email a Paint or Paint 3D image by inserting the image.
- Go to the Insert tab after opening a new mail in the Windows 11 Mail app.
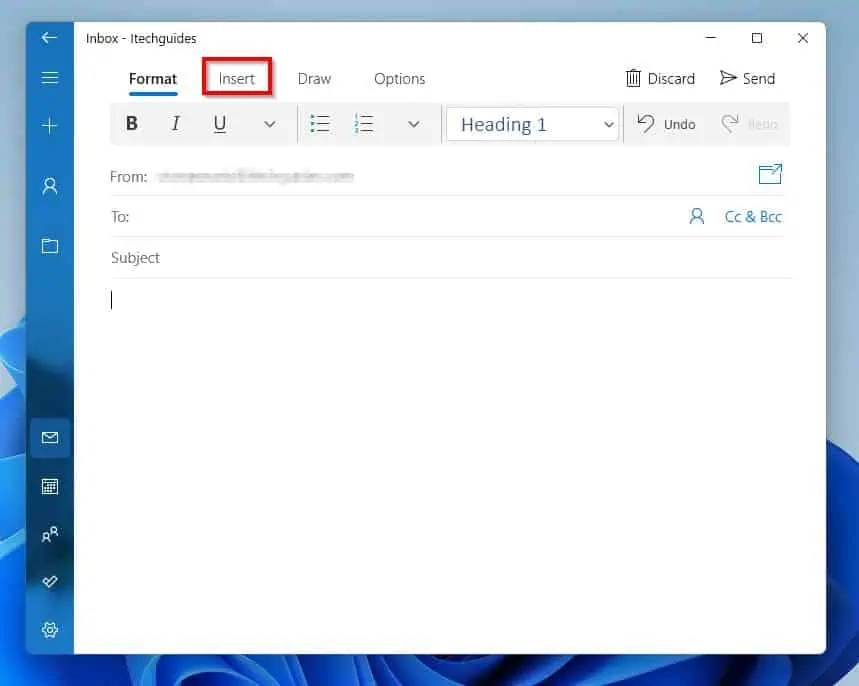
- After that, select the Add files icon.

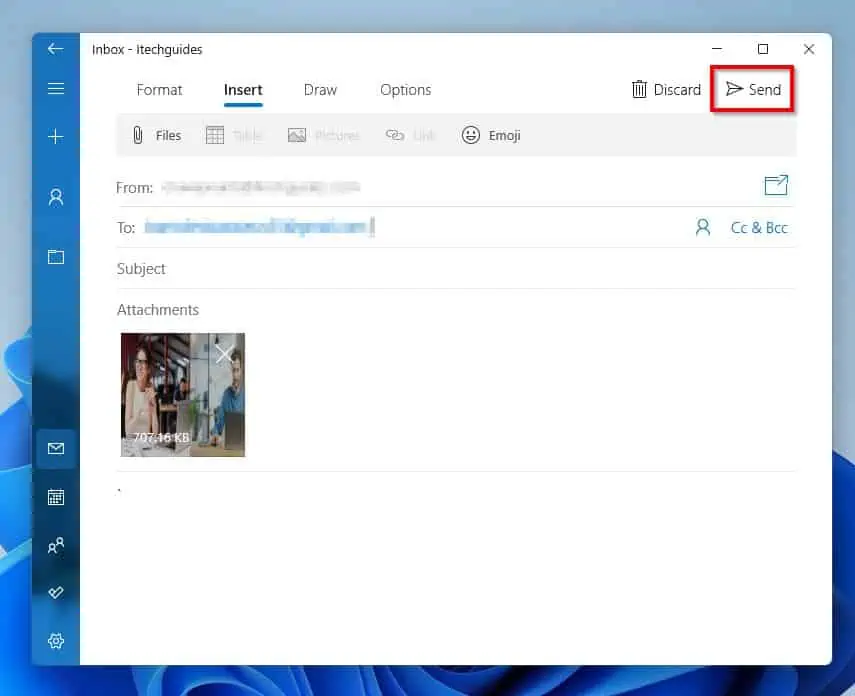
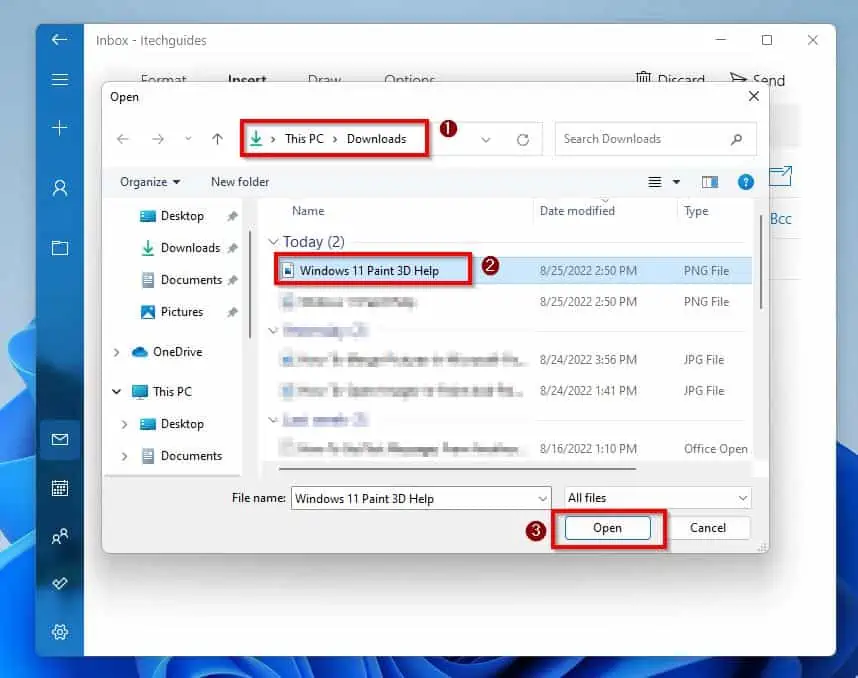
- Next, locate the folder where you saved the Paint or Paint 3D image on the Open window. Then, select the image and click the Open button at the bottom right of the window.
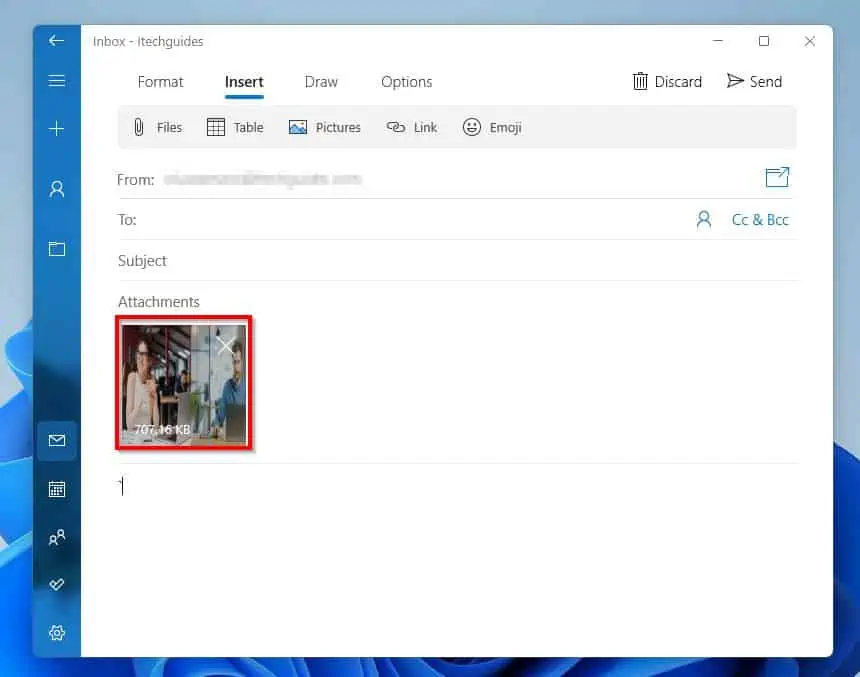
- Finally, click Send after inputting the receiver’s email address.

How to Set a Paint Image as Desktop Background
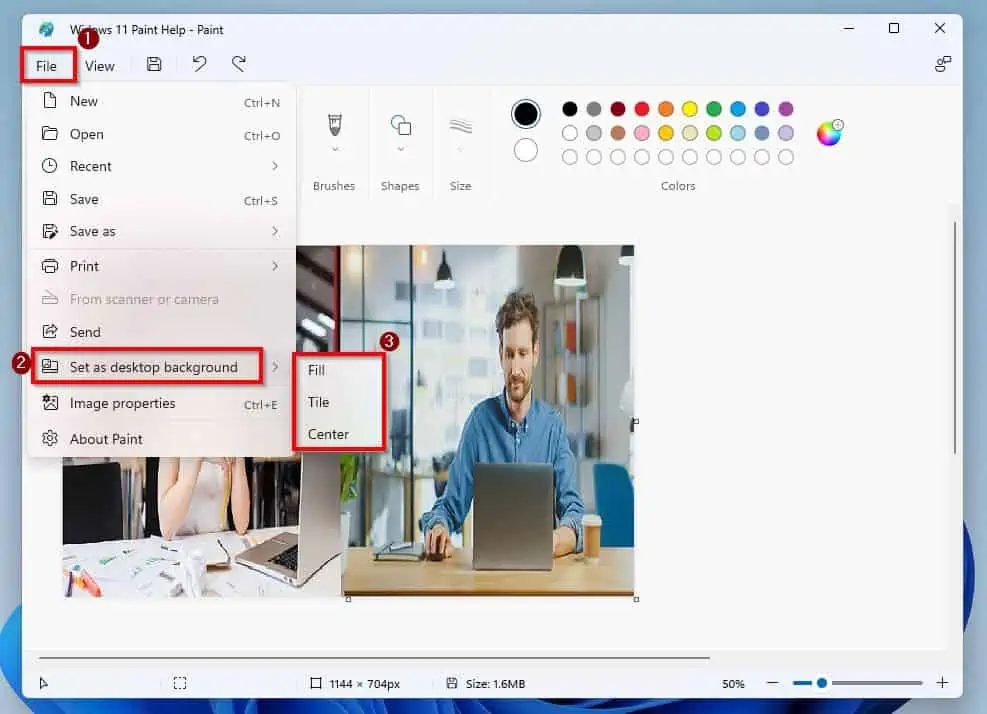
Do you know you can set your Paint image as the desktop background of your Windows 11 PC? To do that, simply click File at the top left corner of the Paint window and hover your mouse cursor on Set as desktop background.
After that, select a background option – you can select Fill, Tile, or Center.
Keyboard Shortcuts
Below is a list of keyboard shortcuts that can enhance your productivity while working on Windows 11 Paint.
| Keyboard Keyboard Shortcut | What the Shortcut Accomplishes |
|---|---|
| Ctrl and W keys | Opens the Resize and Skew settings screen |
| Ctrl and N keys | Closes the current picture and open a new empty canvas |
| Ctrl and O keys | Opens the Paint “Open” dialogue box – so you can open an existing image in Paint. |
| Ctrl and S keys | Saves changes made in Microsoft Paint. |
| F12 key | Opens the Save As dialogue |
| Ctrl and R keys | Shows or hides Ruler – also accessible via the View menu. |
| Ctrl and P keys | Opens the Print dialogue box to print the image in Paint |
| Ctrl and G keys | Adds or removes the Gridlines |
| Alt and F4 keys | Close Microsoft Paint |
| Ctrl and E keys | Displays the Image Properties |
| Ctrl and Z keys | Undo the last action |
| Ctrl and A keys | Selects the entire canvas in Microsoft Paint |
| Ctrl and C keys | Copy a selected area |
| Ctrl and V keys | Pastes the item in the clipboard – Ctrl + V pastes an item whether it was copied from within Paint or another app |
| Ctrl and Page Up keys | Zoom In. Similar to Ctrl and Mouse scroll up |
| Ctrl and Page Down keys | Zoom Out. Similar to Ctrl and Mouse scroll Down |
| Ctrl and U keys | Underline selected text |
| Ctrl and B keys | Bold selected text |
| Ctrl and I keys | Italicize selected text |
| F11 key | View the image in Full-Screen mode |
| Esc key | Cancel existing selection |
| Delete key | Delete a selection |
Frequently Asked Questions
Follow the steps below to open the Paint app on your Windows 11 PC.
a) Click the Search icon on your Windows 11 taskbar.
b) Then, type “paint” in the search field.
c) Select the Paint application from the search result to open it.
Absolutely! The Paint application is available in Windows 11.
The Paint 3D application was introduced on April 5, 2017, alongside Windows 10 version 1703.
Yes, it is. Paint is a free Microsoft application that allows users to create and edit image files on their Windows PC.
Yes, you can. To do that, follow the steps below.
a) Press Ctrl + R keys on your keyboard.
b) Then, type “mspaint” in the Run input field and press the Enter key on your keyboard.
Conclusion
Sometimes, one might need help even with the simplest of things. That’s why this guide was written – to help you navigate your way around the Paint and Paint 3D apps in Windows 11.
In particular, we discussed how to use some of the major features of the Paint and Paint 3D apps in this guide. As a matter of fact, this guide taught us several ways to open the Paint and Paint 3D apps in Windows 11.
Hence, with the detailed steps and screenshots provided in this guide, you shouldn’t have any major problems using Windows 11 Paint or Paint 3D.
Was this Windows 11 guide helpful? If it was helpful, click on “Yes” beside the “Was this page helpful” question below.
You may also express your thoughts and opinions by using the “Leave a Comment” form at the bottom of this page.
Finally, for more Windows 11 how-to guides, visit our Windows 11 How-To page.
In practice, once you leave a text box after including the text, you cannot edit the text anymore. This is due to the fact that the Paint app is just a basic image editing application.
In fact, you cannot edit a completed text in the Windows 11 Paint or Paint 3D app – you can only select it. In order to edit a completed text, you will need a more advanced image editing app like Corel Draw.


