Automating Google Chrome with Group Policy requires the Chrome ADMX (Administrative template). Follow the steps in this guide to download and use this template in your GPOs.
Step 1: Download Chrome ADMX Files
- Open Set Chrome Browser policies on managed PCs.
- Scroll down to Install and configure Chrome policy templates. Then click to expand Windows.
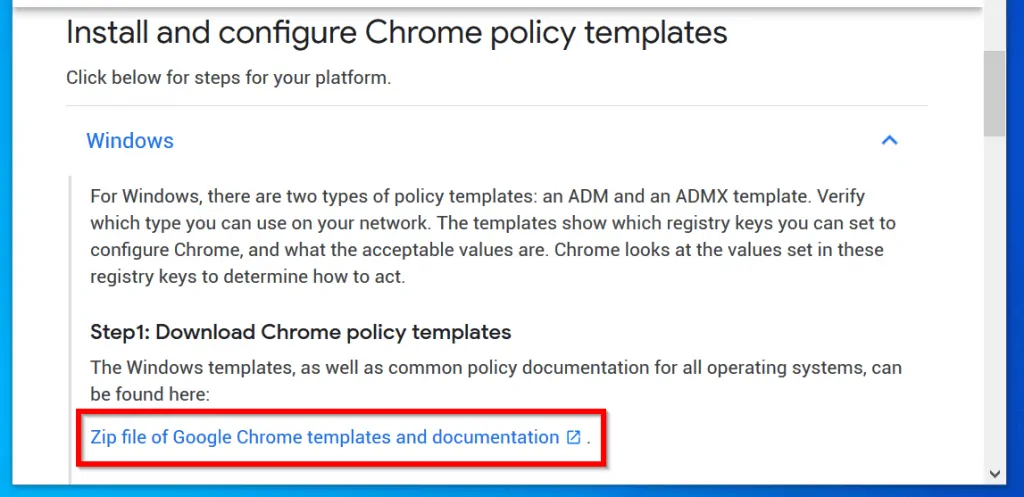
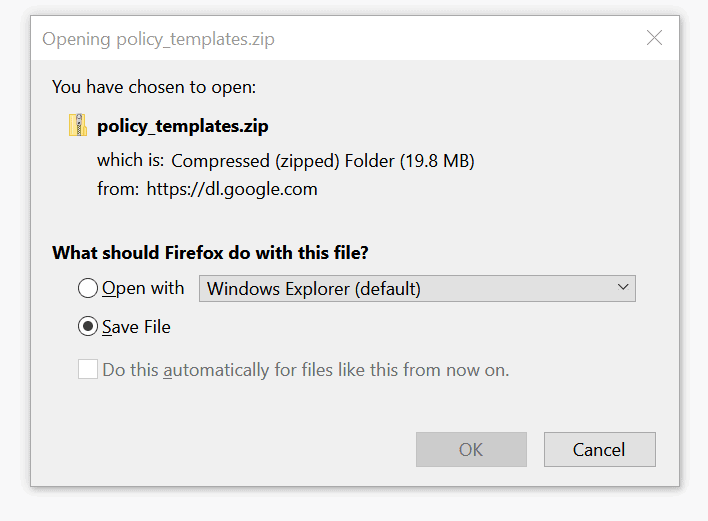
- Next, click the Zip file link. Then save the template file to a location on your computer.
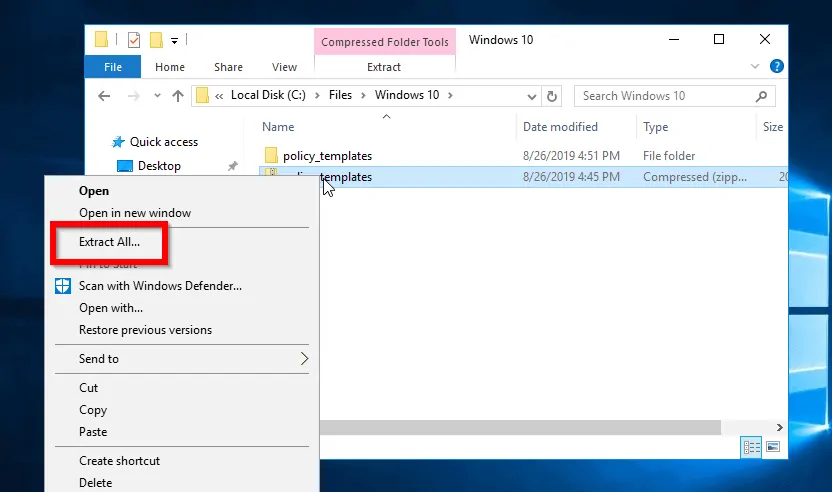
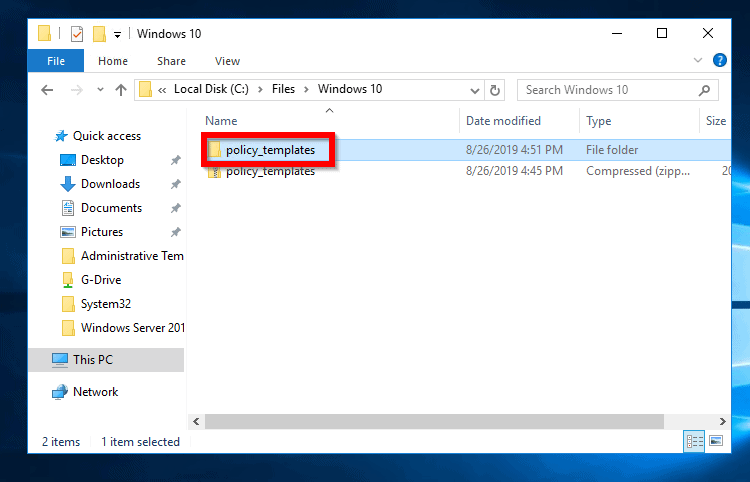
- To unzip the file right-click the zipped file and select Extract All.
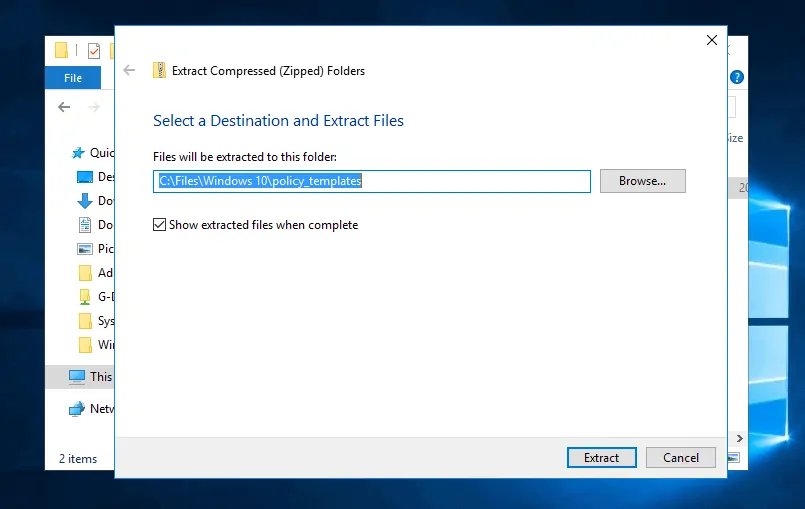
- Select where you want to save the extracted Chrome ADMX files. Then click Extract.
- A folder with the ADMX files will be created.
In the next step, you will add these templates files to Administrative Templates.
Step 2: Add Chrome ADMX to Group Policy
- Login to Windows Sever 2016. Then open Server Manager.
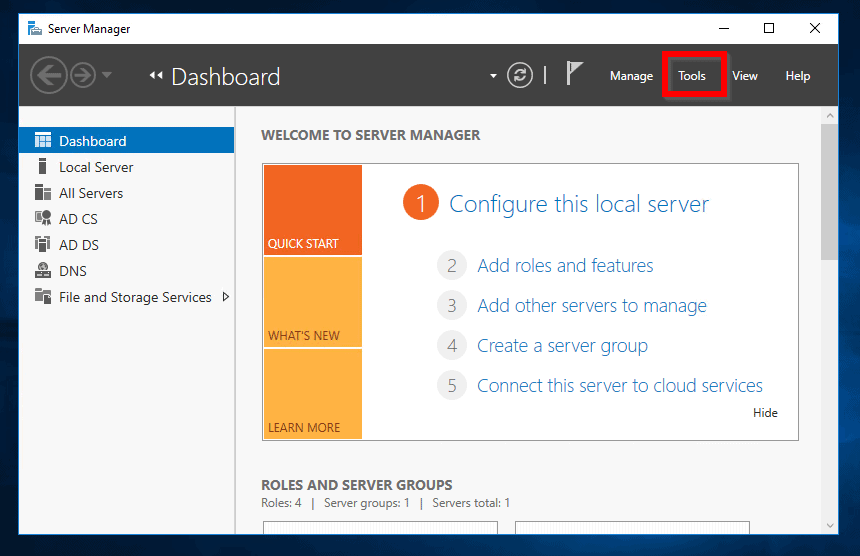
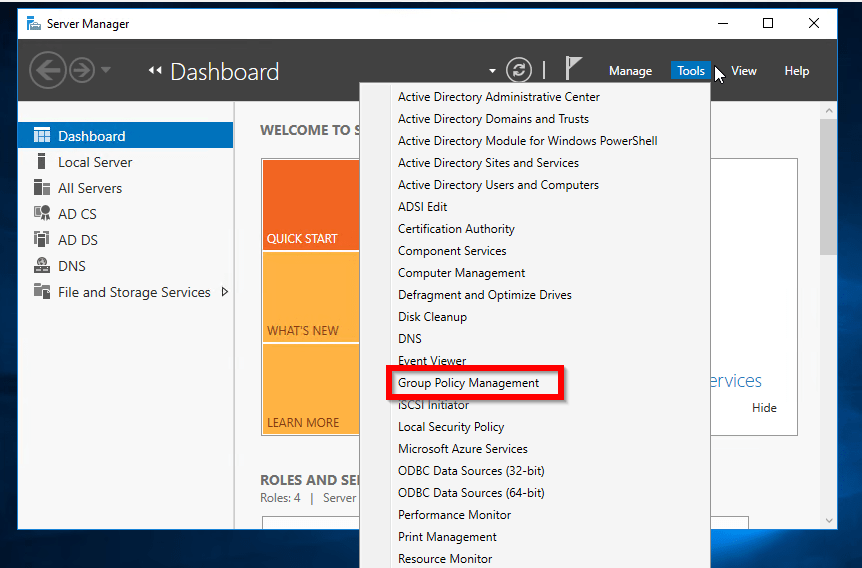
- From Server Manager, click Tools. Then select Group Policy Management.
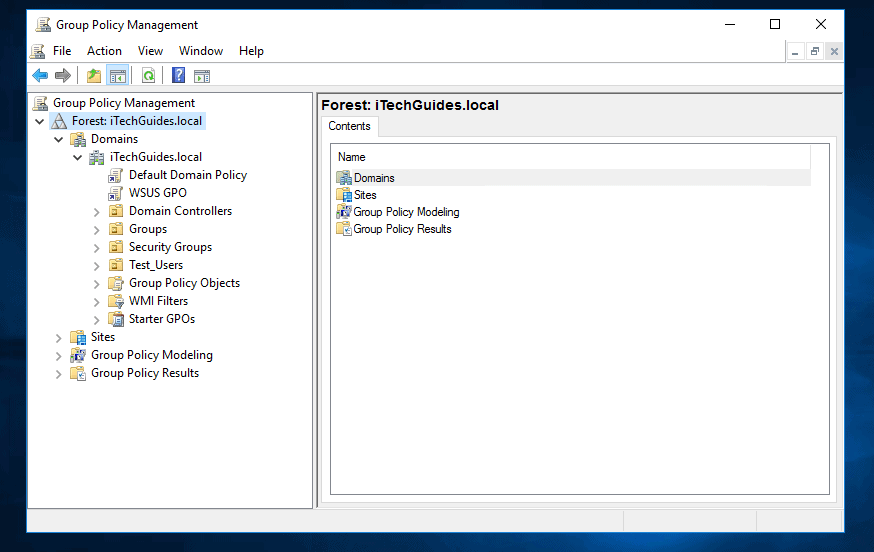
- From Group Policy Management, expand Domains. Then expand your domain name.
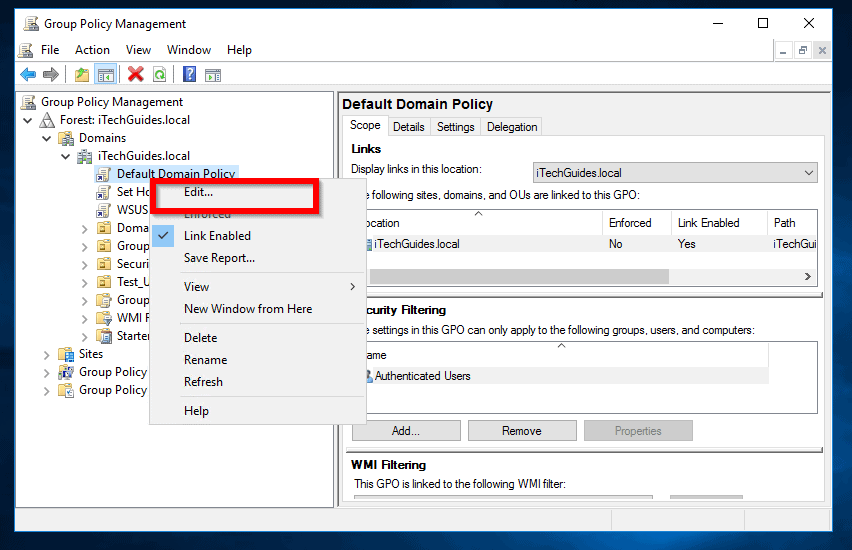
- Right-click Default Domain Policy. Then select Edit…
- When the policy opens for editing, beneath Computer Configuration expand Policies.
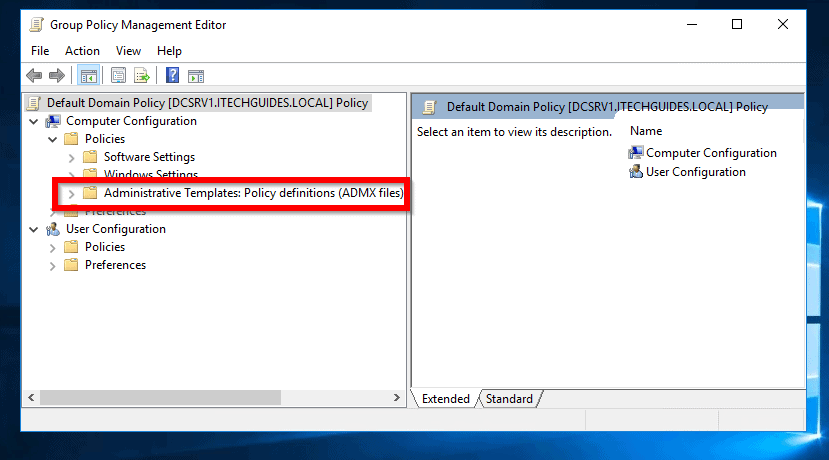
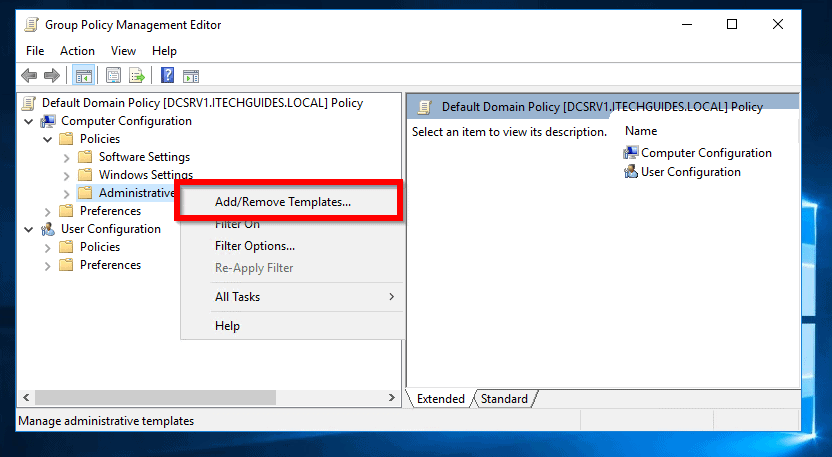
- Then right-click Administrative Templates and select Add/Remove Templates
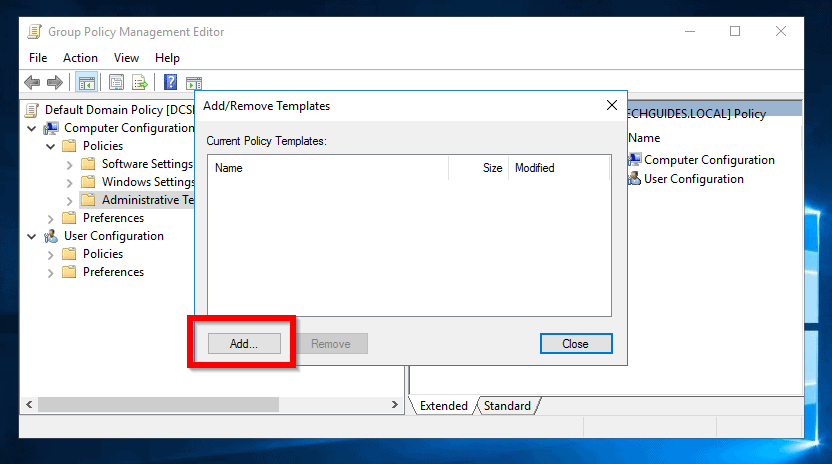
- Then click Add and navigate to the location you extracted Chrome files
- Open Windows folder. Then adm folder.
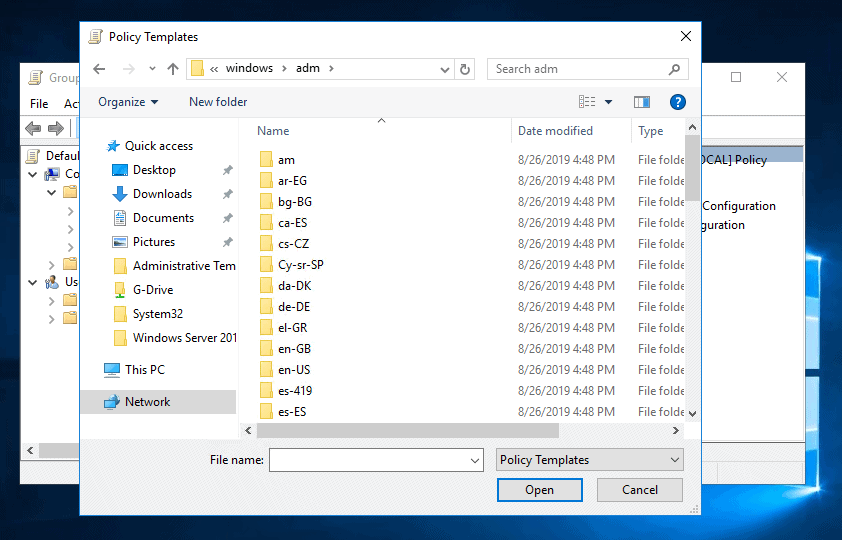
- Within the adm folder, open your language (mine is en-GB).
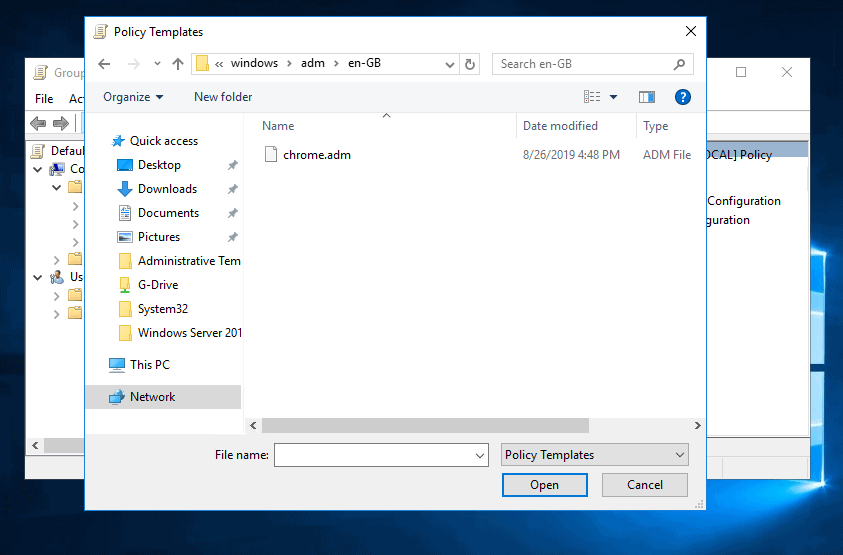
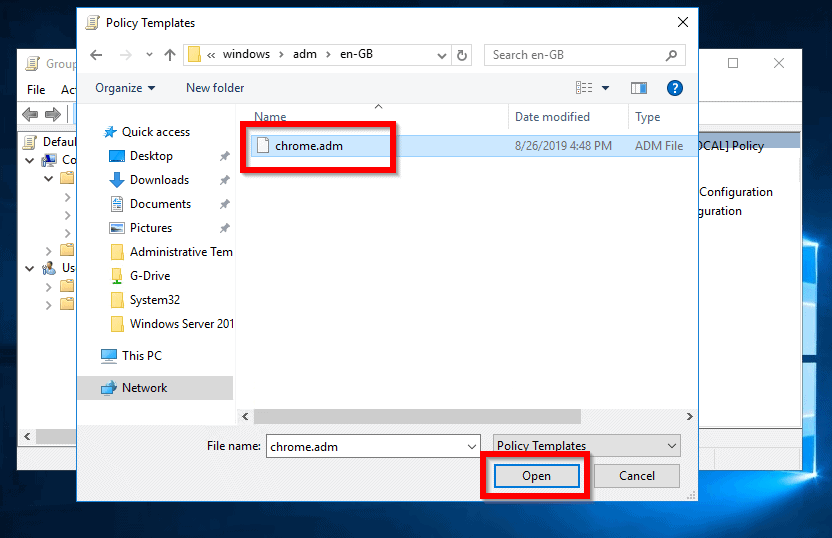
- Finally, click on Chrome.adm file and click Open.
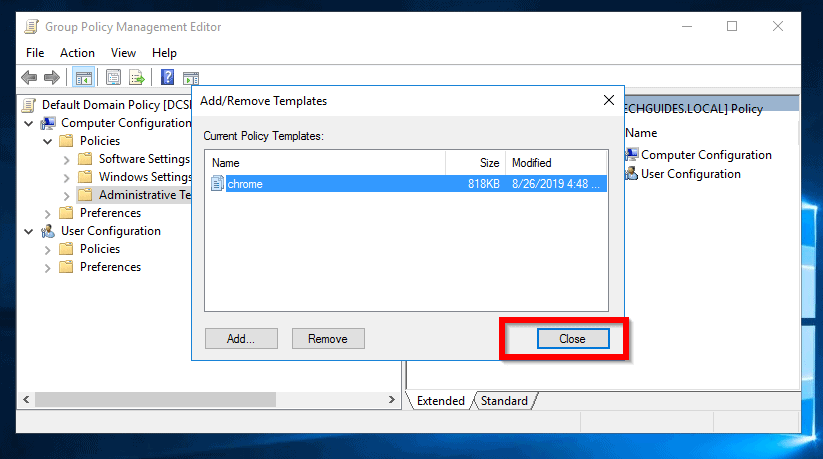
- When the Add/Remove Templates window opens click Close.
The last step is to confirm that Chrome ADMX Templates have been added successfully.
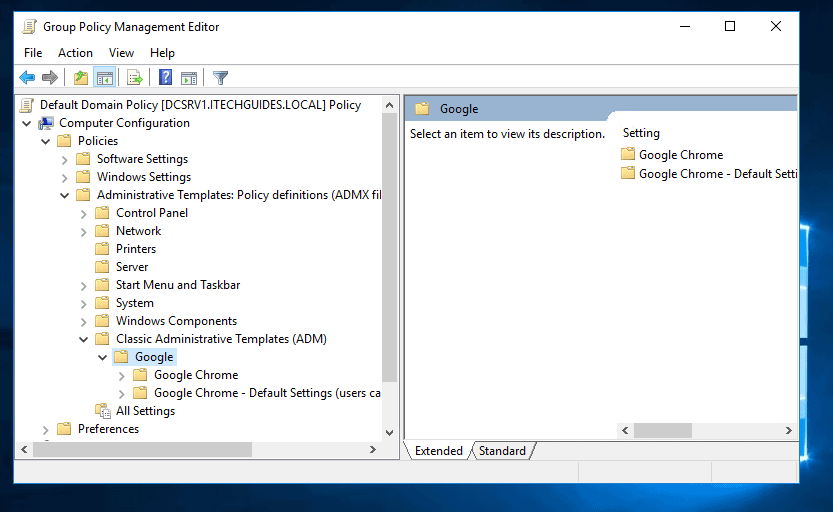
- To do this expand Administrative Templates: Policy definitions (ADMX files). Then expand Classic Administrative Templates (ADM). A Google folder will be beneath ADM. When you expand it it will contain Chrome folders with the policies.
Conclusion
Now that you have Chrome in Policy Management, you can set Policies to control Google Chrome.
I hope you found this guide helpful. If you found this article helpful, kindly spare 2 minutes to share your experience with our community at [discourse_topic_url].
However, if you have any questions regarding this article or if the steps did not fix your problem, please post your question at [discourse_topic_url]. Our team and other community members will come back to you with a fix as soon as possible.
To get more Windows 10 guides, visit our Windows 10 Fix page.


![How To Run Sysprep (Generalize) In Windows 10 [2 Methods]](https://www.itechguides.com/wp-content/uploads/2022/05/8-2.webp)