Does your Windows 10 network discovery keep turning off? Follow the 6 steps in this guide to fix the problem.
Here is the symptom of this problem:
- You click Turn on network discovery. Then click Save changes.
- Then you check again only to discover that Windows 10 network discovery is off again!
Follow the steps below to fix “Windows 10 Network Discovery Keeps Turning Off” problem:
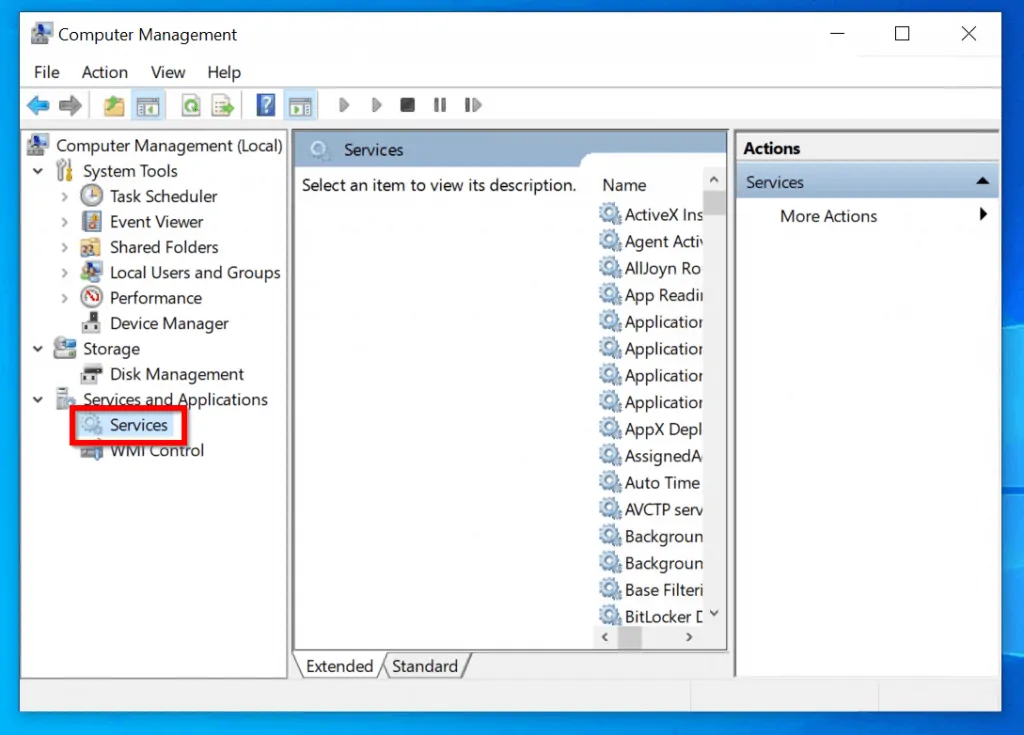
Step 1: Open Services
Here are the steps:
- Right-click Windows 10 start menu.
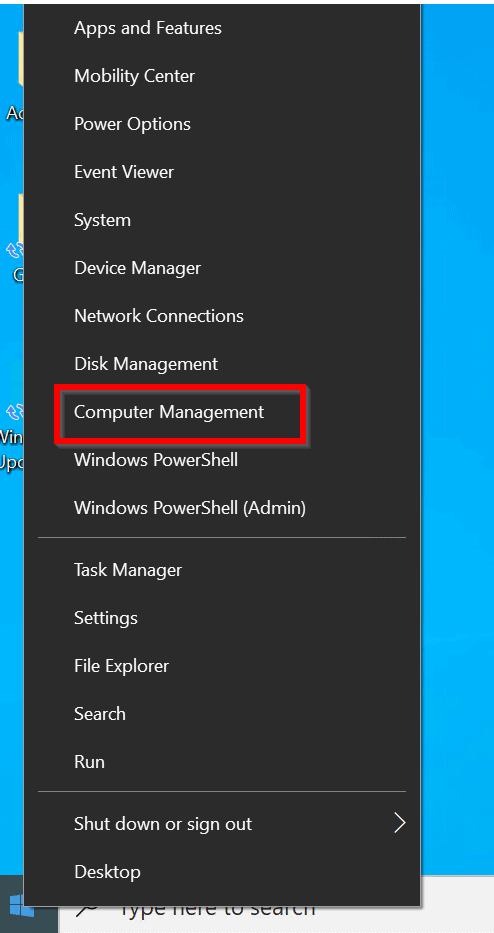
- Then click Computer Management.
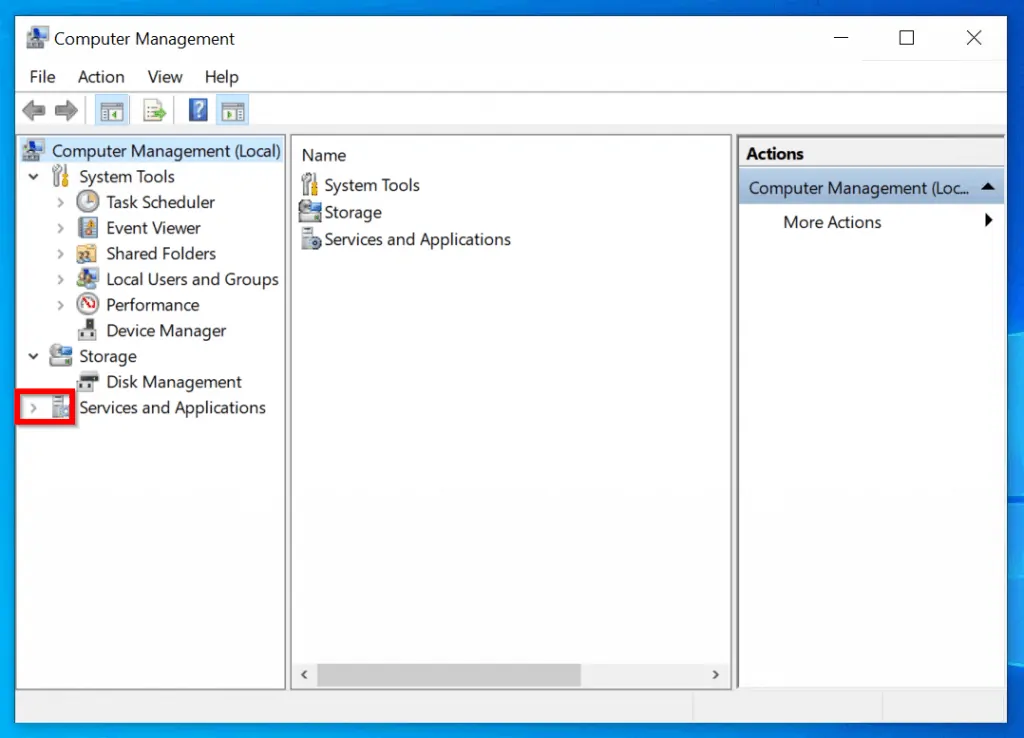
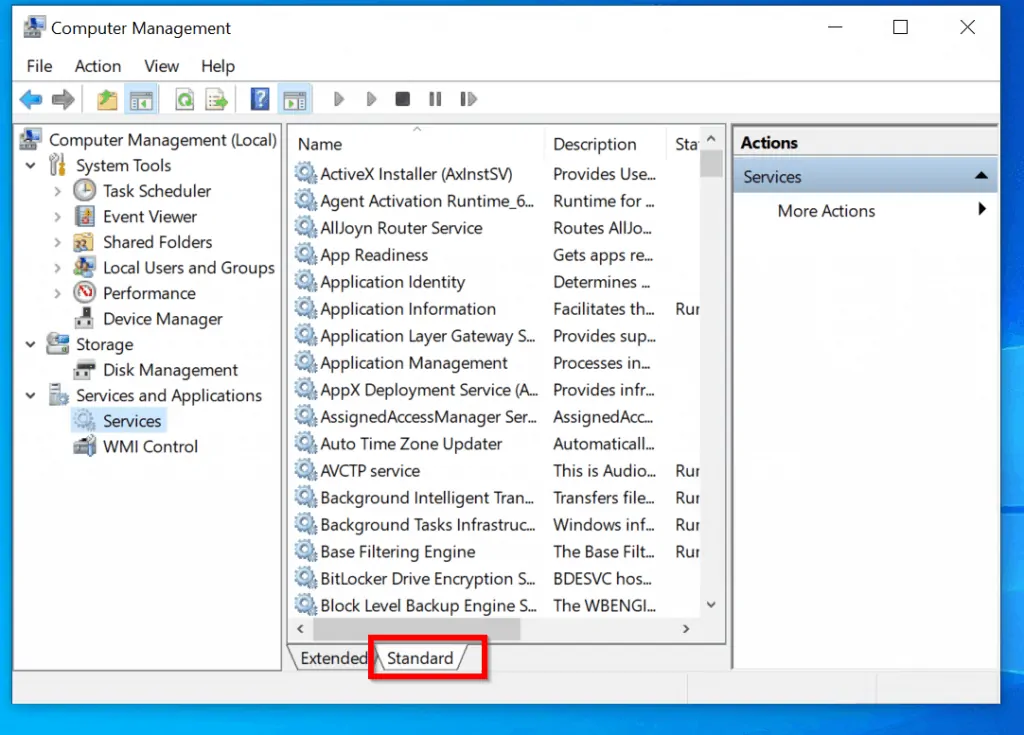
- Next, click the right-ward arrow beside Services and Applications. Then click on Services. It will open in Extended view. To open it in Standard view, click Standard.
Step 2: Check the Status of DNS Client Service
On the Services console, locate a service called DNS Client. Confirm that the status is Running. Also check that the Startup Type is Automatic.
Step 3: Modify the Function Discovery Resource Publication Service
Still on Services console, find a service called Function Discovery Resource Publication. This service is likely to be set to Manual or Disabled. The Status may also be blank, indicating that it is Stopped.
To modify this services:
- Double-click it to open its properties.
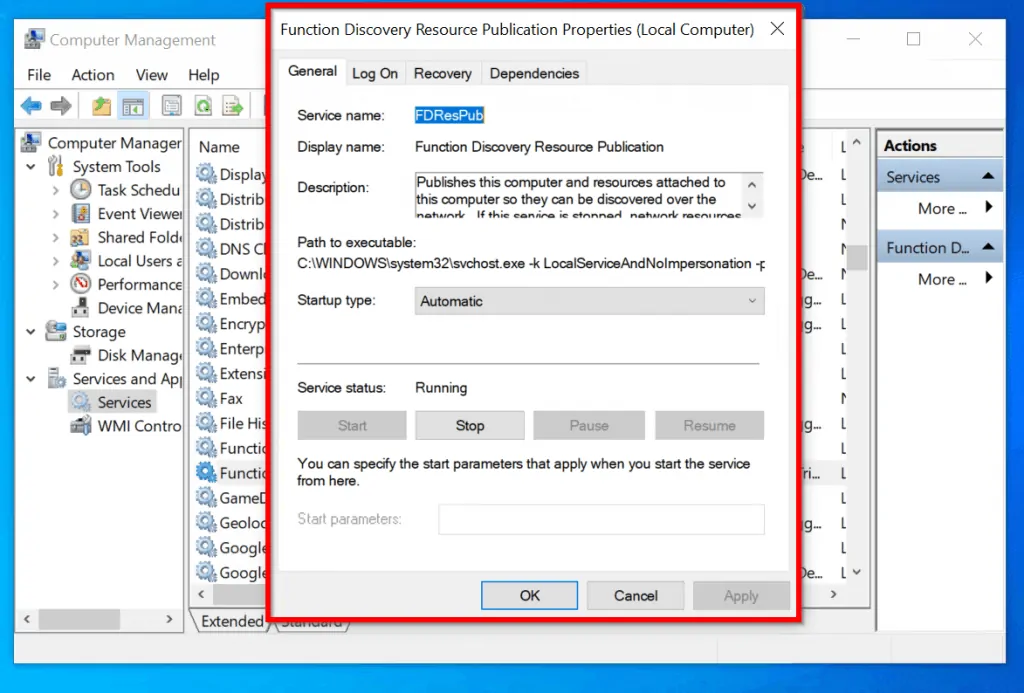
- On the Startup Type, select Automatic. Click Apply. Then click Start to start the service.
Step 4: Change the Status and Startup Type for the SSDP Discovery Service
Locate another dependent service called SSDP Discovery. Check its Startup Type and Status. If they are not set to Automatic and Running respectively, modify the service.
Wondering how much more steps to resolve “Windows 10 Network Discovery Keeps Turning Off” Just one more!
Step 5: Modify the Startup Type and Status of UPnP Device Host Service
If the Startup Type of UPnP Device Host Service is not set to Automatic, modify and change it to Automatic. Then start the service.
At this stage you should have the following services set to start automatically and also Running:
- DNS Client
- Function Discovery Resource Publication
- SSDP Discovery
- UPnP Device Host
Before you proceed to the next and final step, check that all these services are configured as described above.
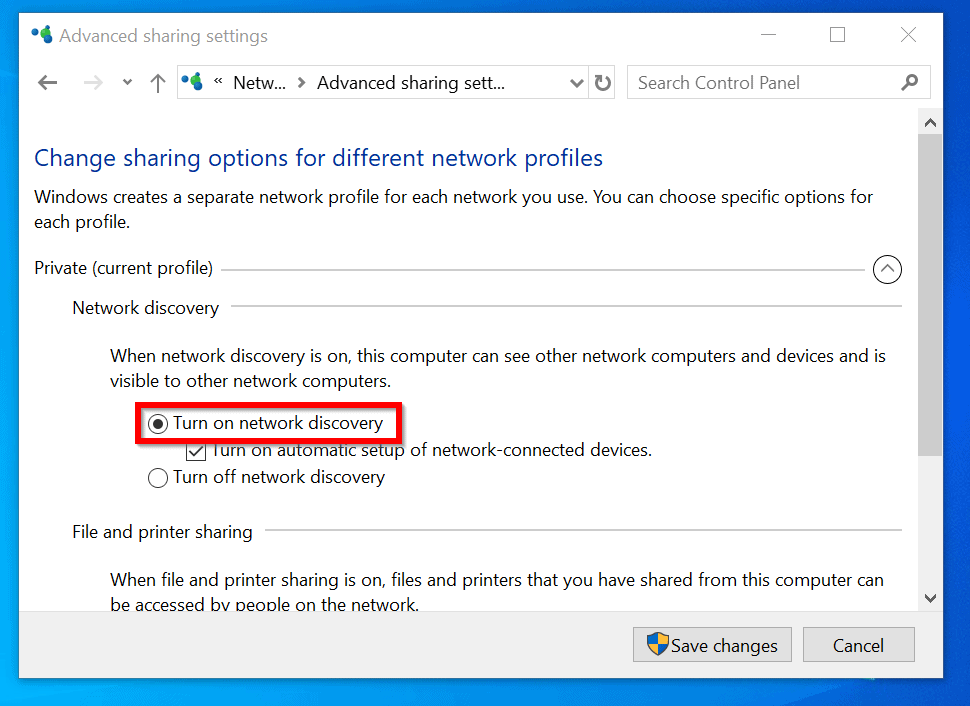
Step 6: Start Windows 10 Network Discovery
Here are steps:
- Search for Control Panel. Then open it.

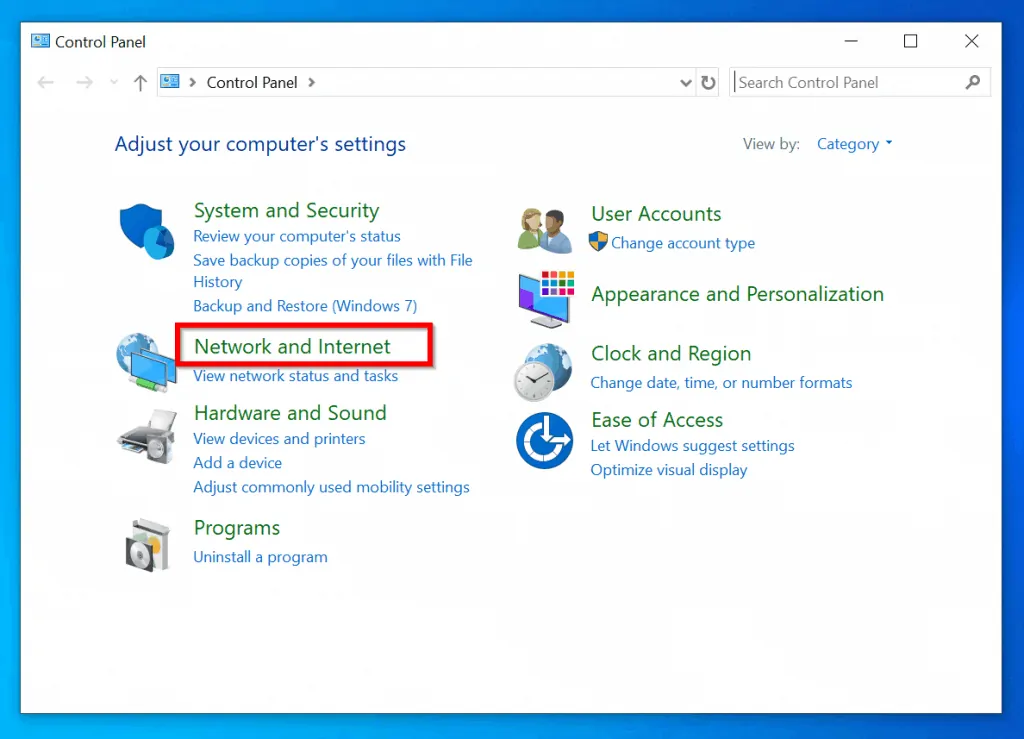
- Next, click Network and Internet.

- Then click Network and Sharing Center.
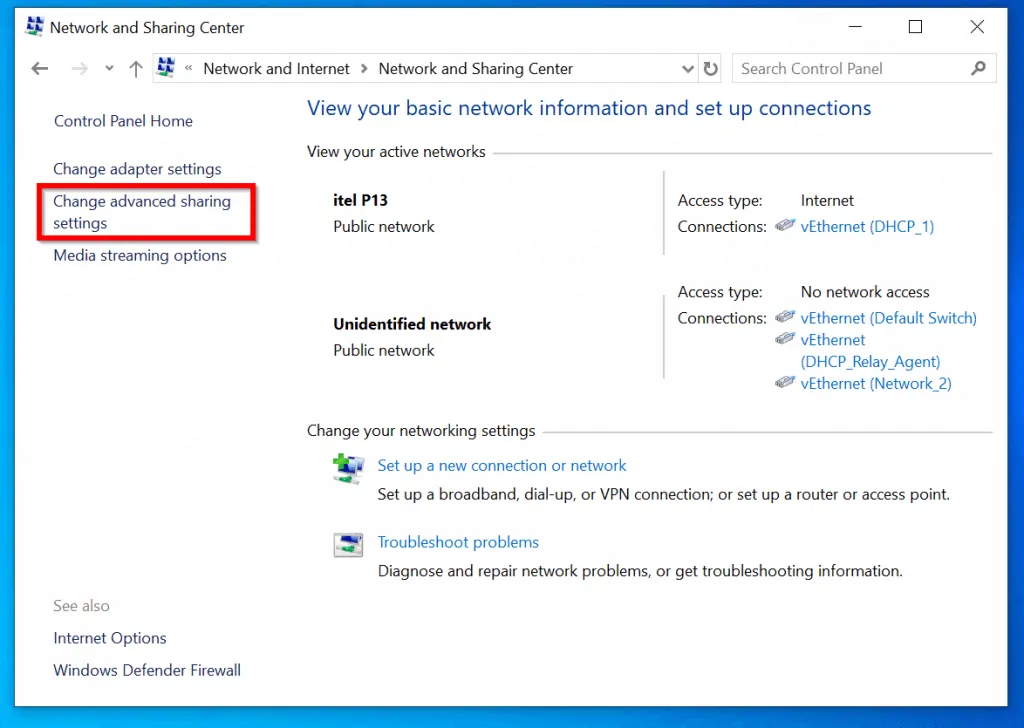
- Click Change change advanced sharing settings. Finally, Turn on network discovery and click Save changes.

Windows 10 network discovery will now stay on!

Did you find this guide helpful? If you did, kindly spare two minutes to share your experience with our community at [discourse_topic_url].
Nonetheless, if the methods in this guide did not resolve the issue, or you have other questions, kindly post them at [discourse_topic_url]. Our community forum team and other community members are willing to find answers to questions raised by our readers.
Lastly, visit our Windows 10 Fix-it guides page for more Windows 10 fix-it guides.


Logon as Administrator!
And when there is no option to start the DNS Client in system console, you do what next? Did not address my problem at all. This changed with the most recent Win 10 update and I’m finding nothing about starting that service or even getting the option to start it back in place.