Have you received the “there has been a critical error on this website” error message on your WordPress website? Do not panic, as this guide offers you a relatively easy fix.
Step 1: Enable Debug Mode
As I mentioned, the first step to fixing the “there has been a critical error on this website” WordPress error is enabling the WordPress to debug mode.
Follow the steps below to enable debug mode in WordPress.
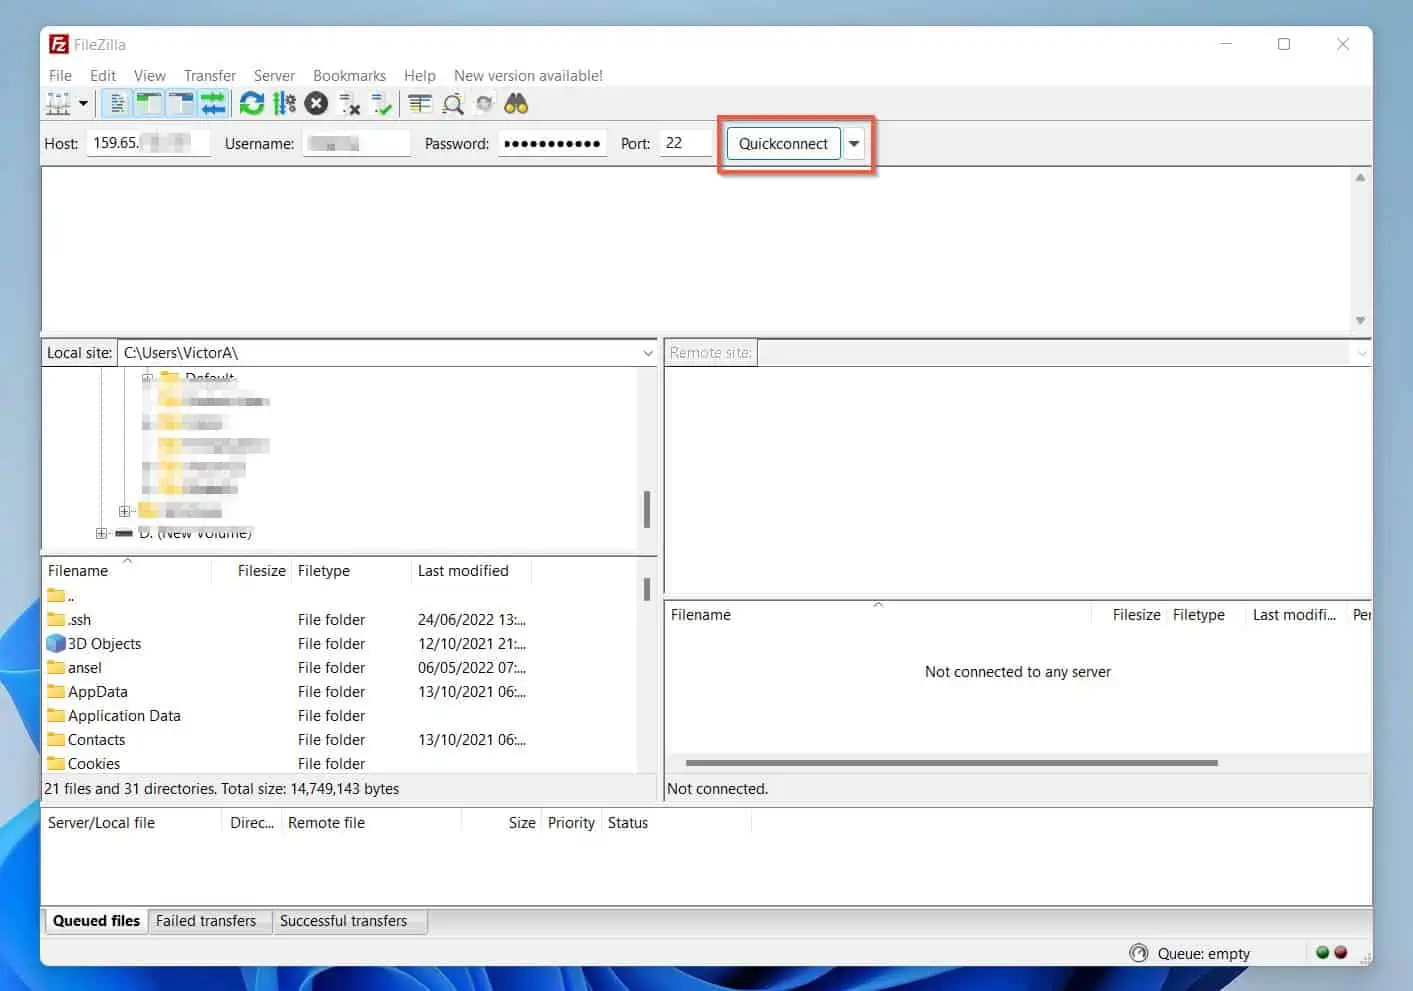
- Use an FTP client like FileZilla to FTP to your website hosting site. If you use FileZilla, you can use Quickconnect at the top of the app.
Enter the IP address of your hosting account in the Host files, then enter your FTP account Username and password.
Finally, enter the port number as 22 (usually for sFTP), then click Quickconnect.
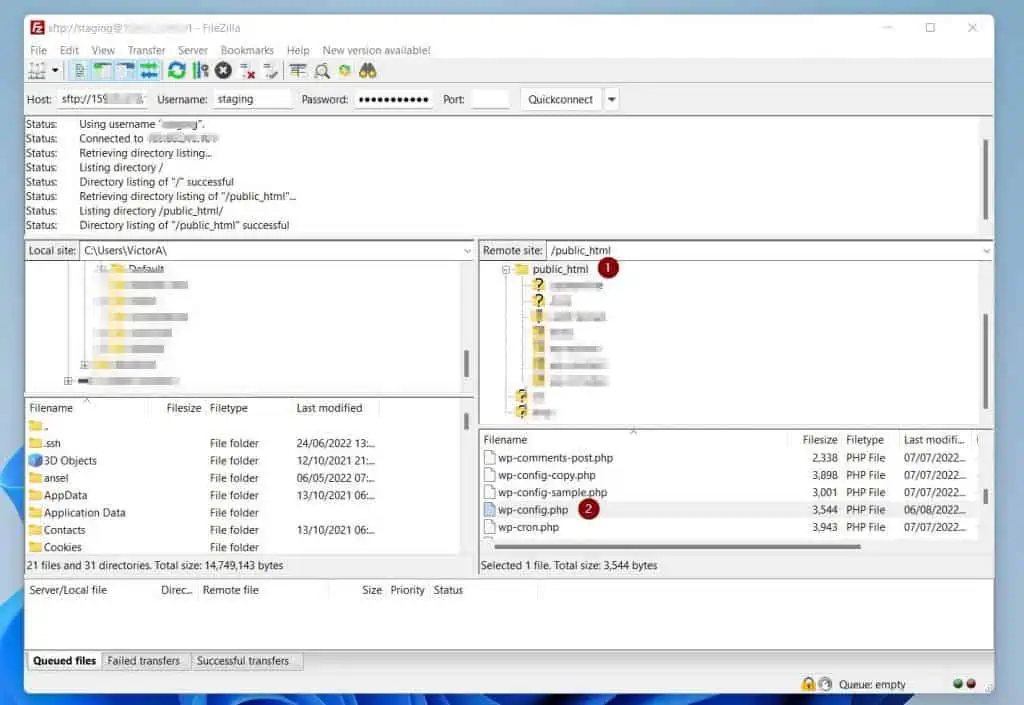
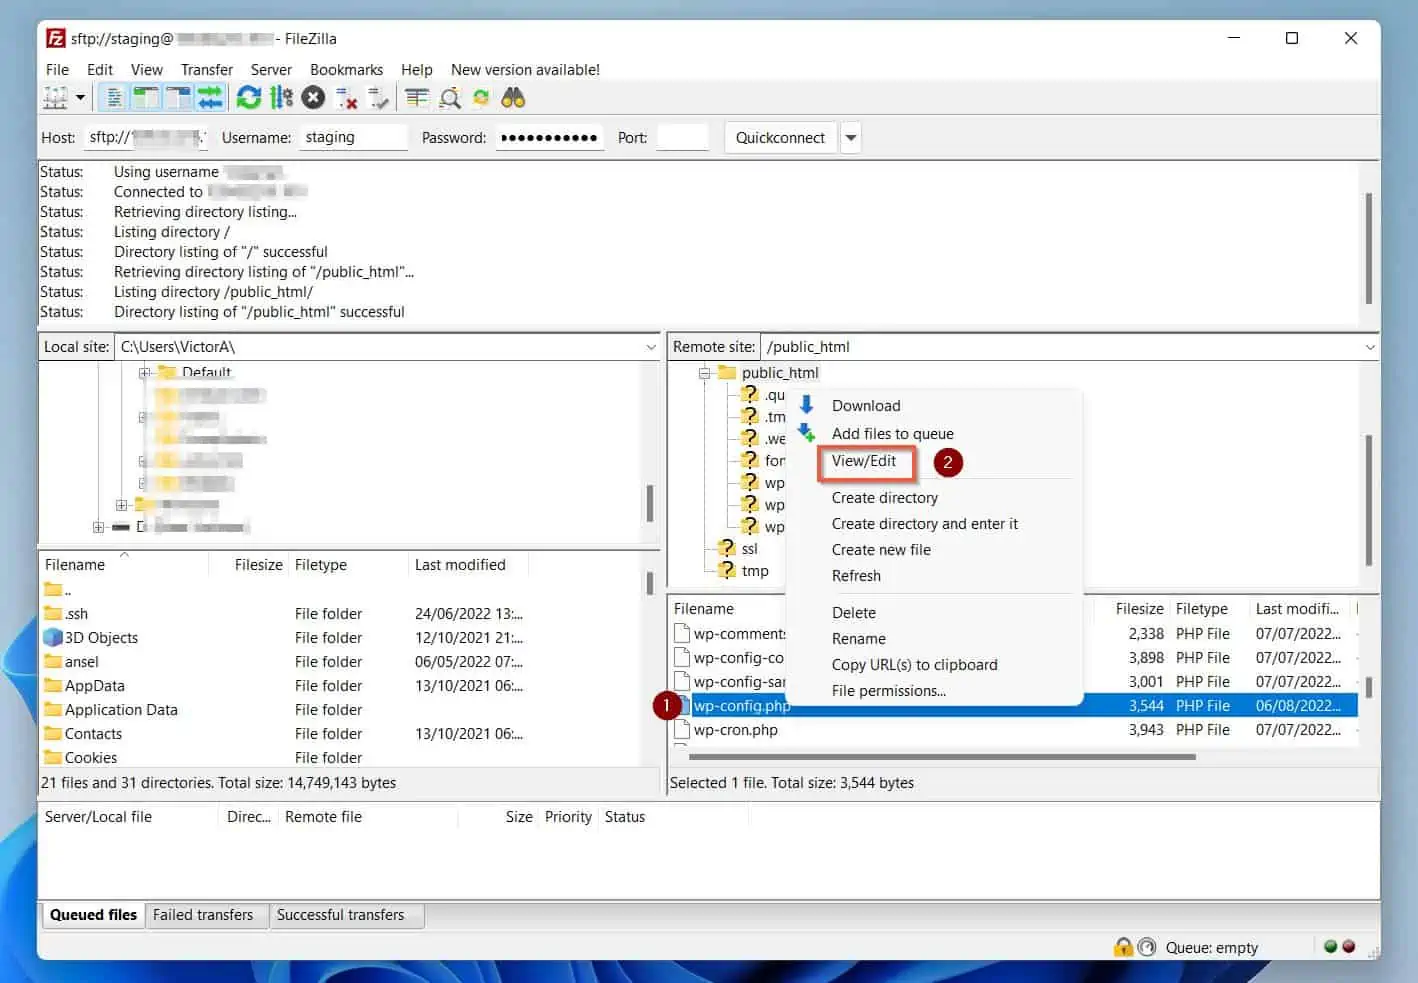
- Once FileZilla successfully connects to your hosting account, click the main folder. Then, on the details pane, right-click wp-config.php and select View/Edit.
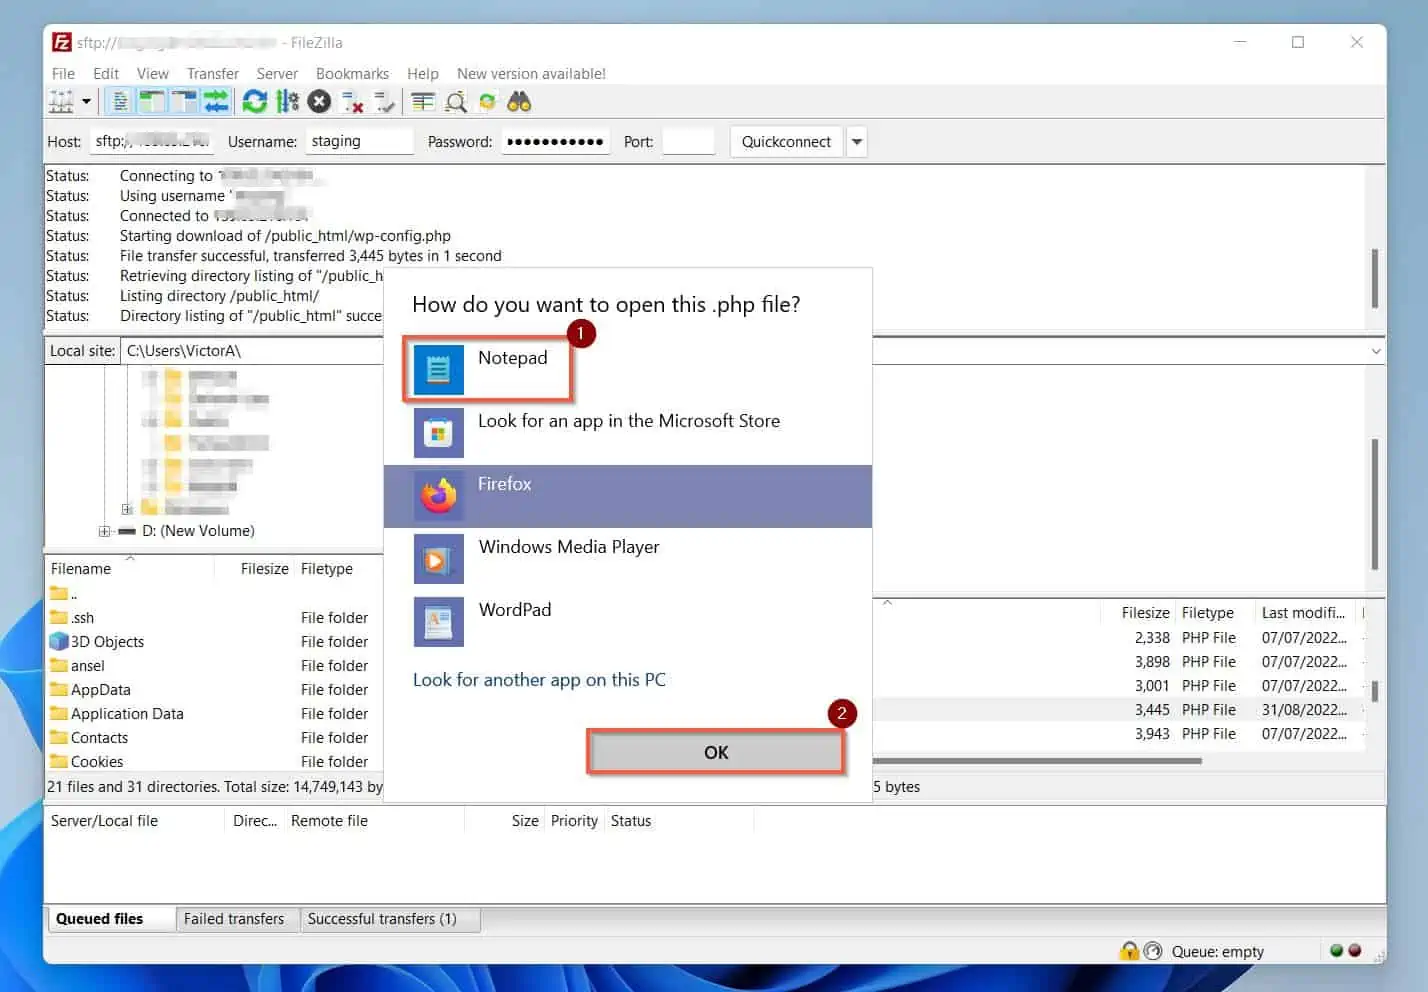
FileZilla will ask you to select a program to
- From the list displayed, click Notepad, then click OK. The wp-config.php file will open in a textile.
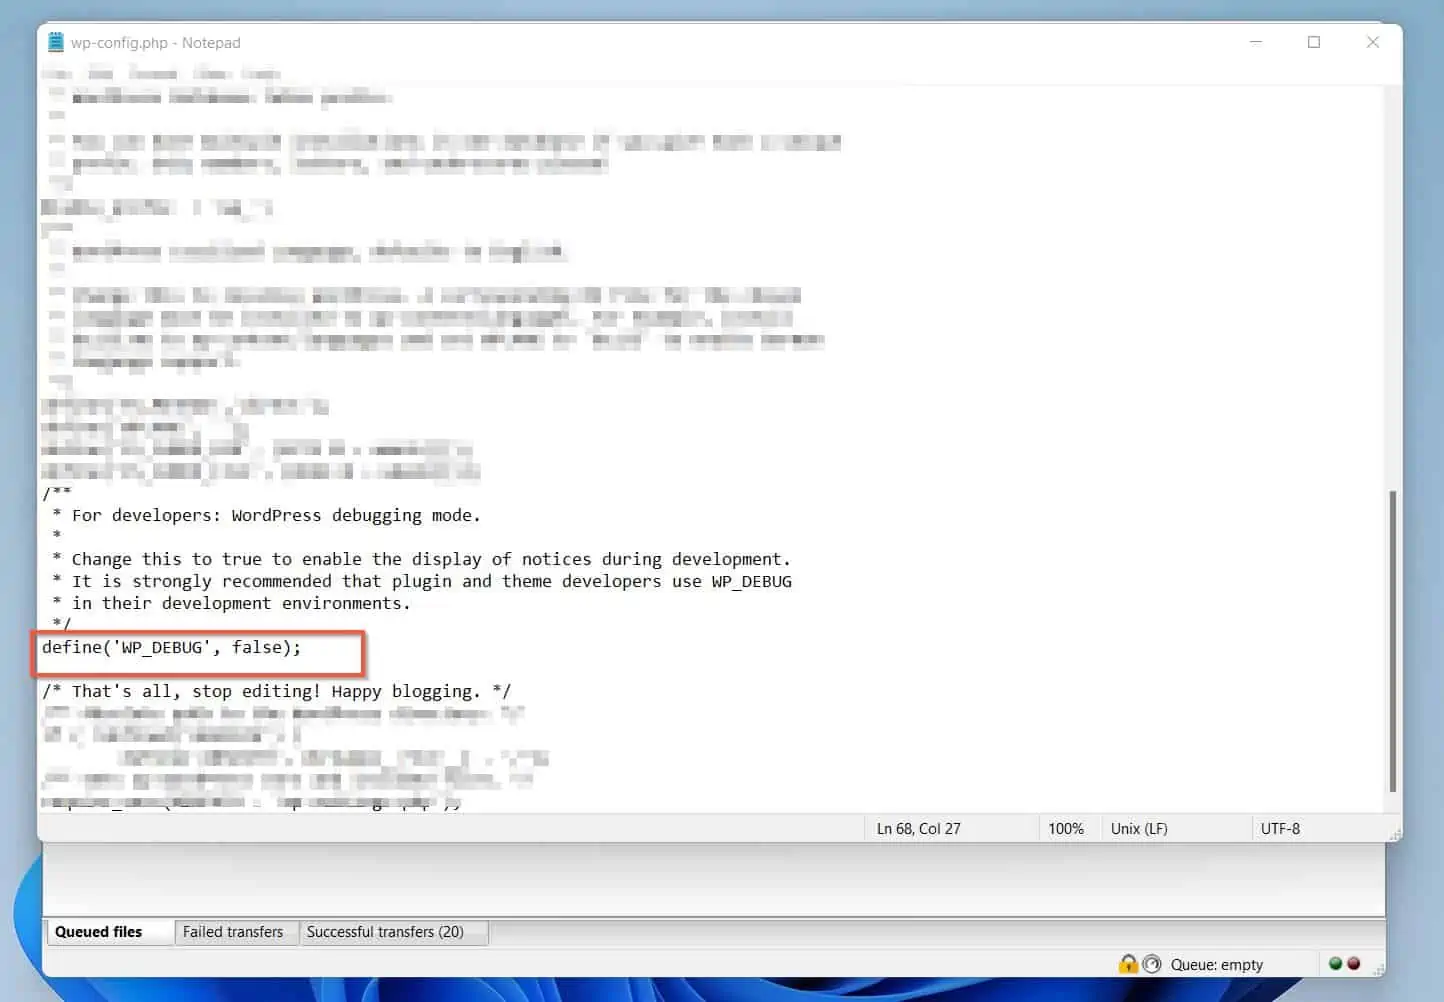
- When the wp-config.php file opens in notepad, press Ctrl and F keys simultaneously, then search WP_DEBUG.
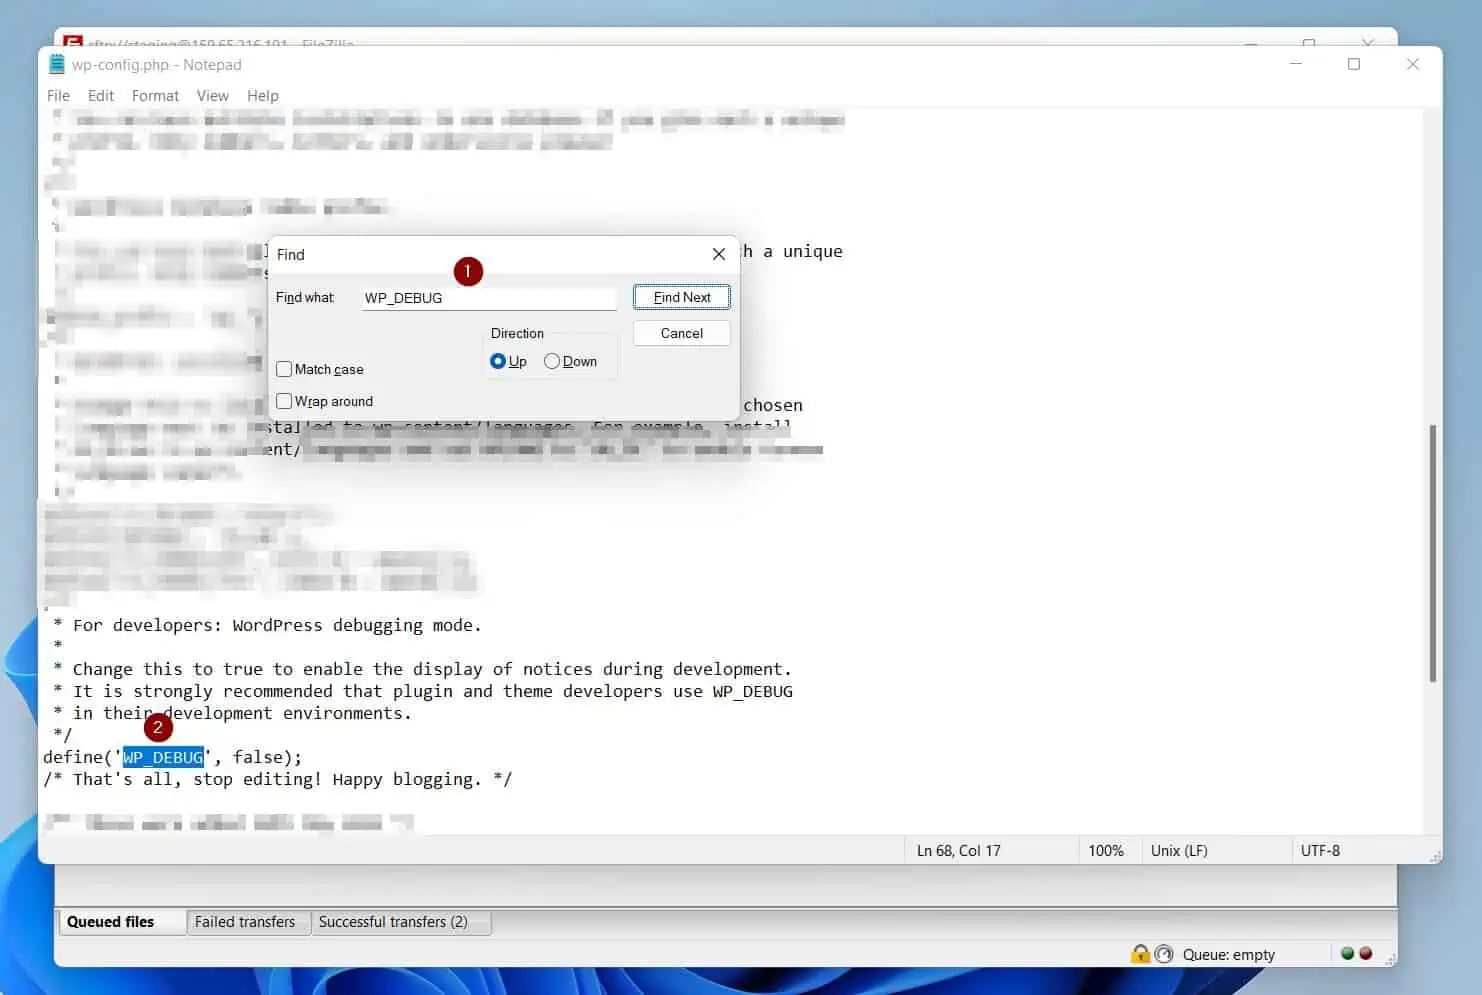
- Then, edit the line define(‘WP_DEBUG’, false); – change false to true. When you finish, the line should look like this…
define('WP_DEBUG', true);
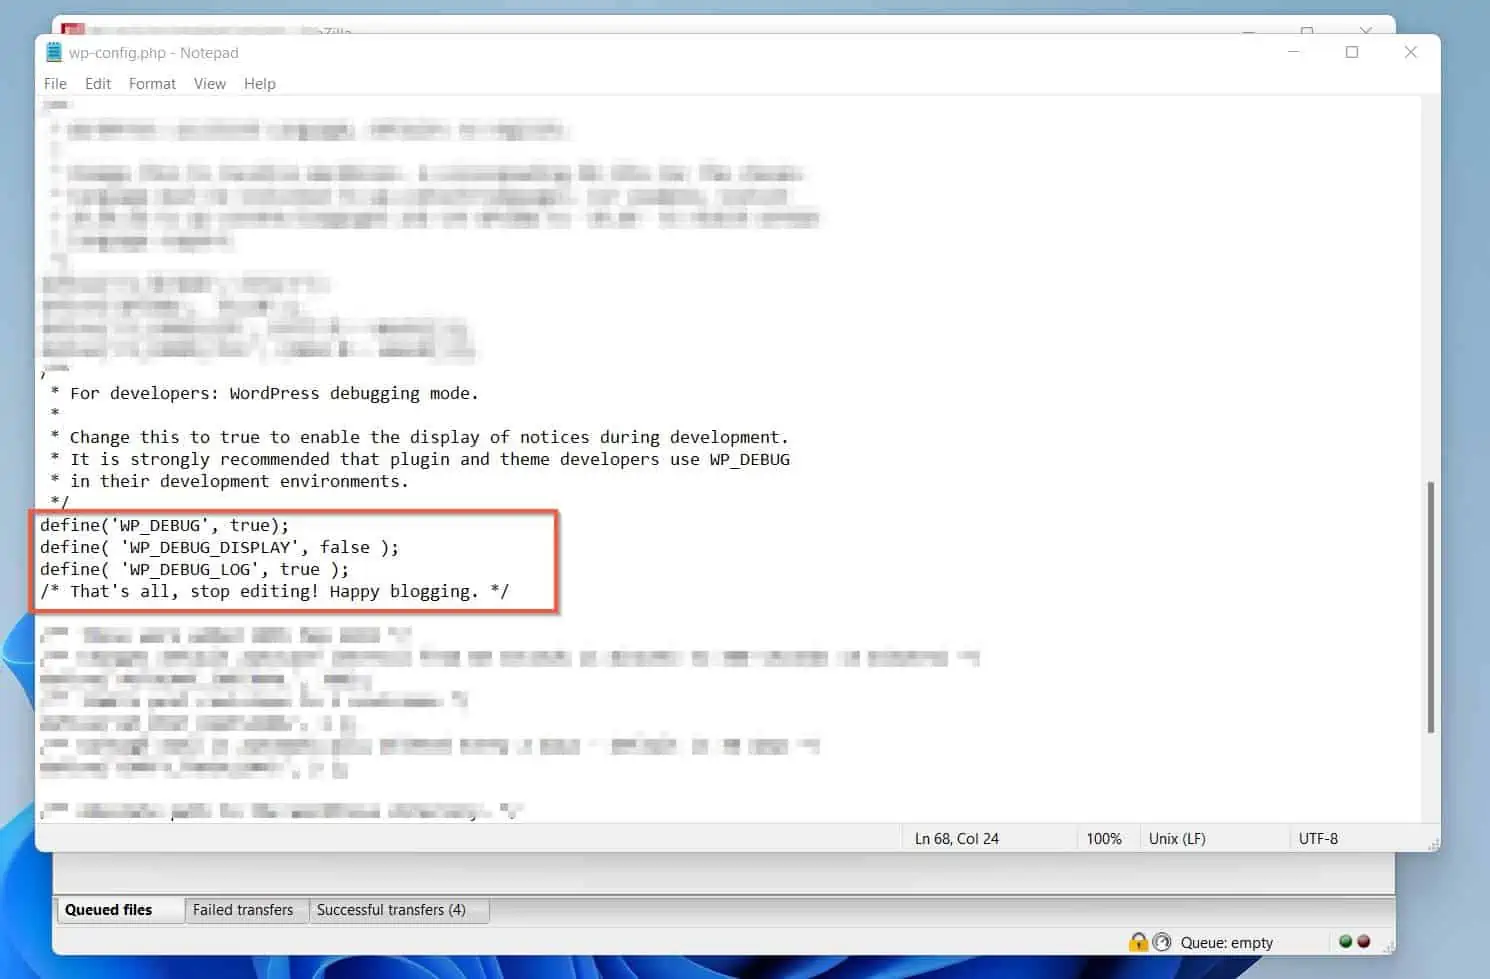
- Beneath define(‘WP_DEBUG’, true); – copy and paste the following codes…
define( 'WP_DEBUG_DISPLAY', false );
define( 'WP_DEBUG_LOG', true );
When you finish adding the codes that enable debug mode in WordPress, the section of the wp-config.php file you edited will look like the highlighted section of mine below…
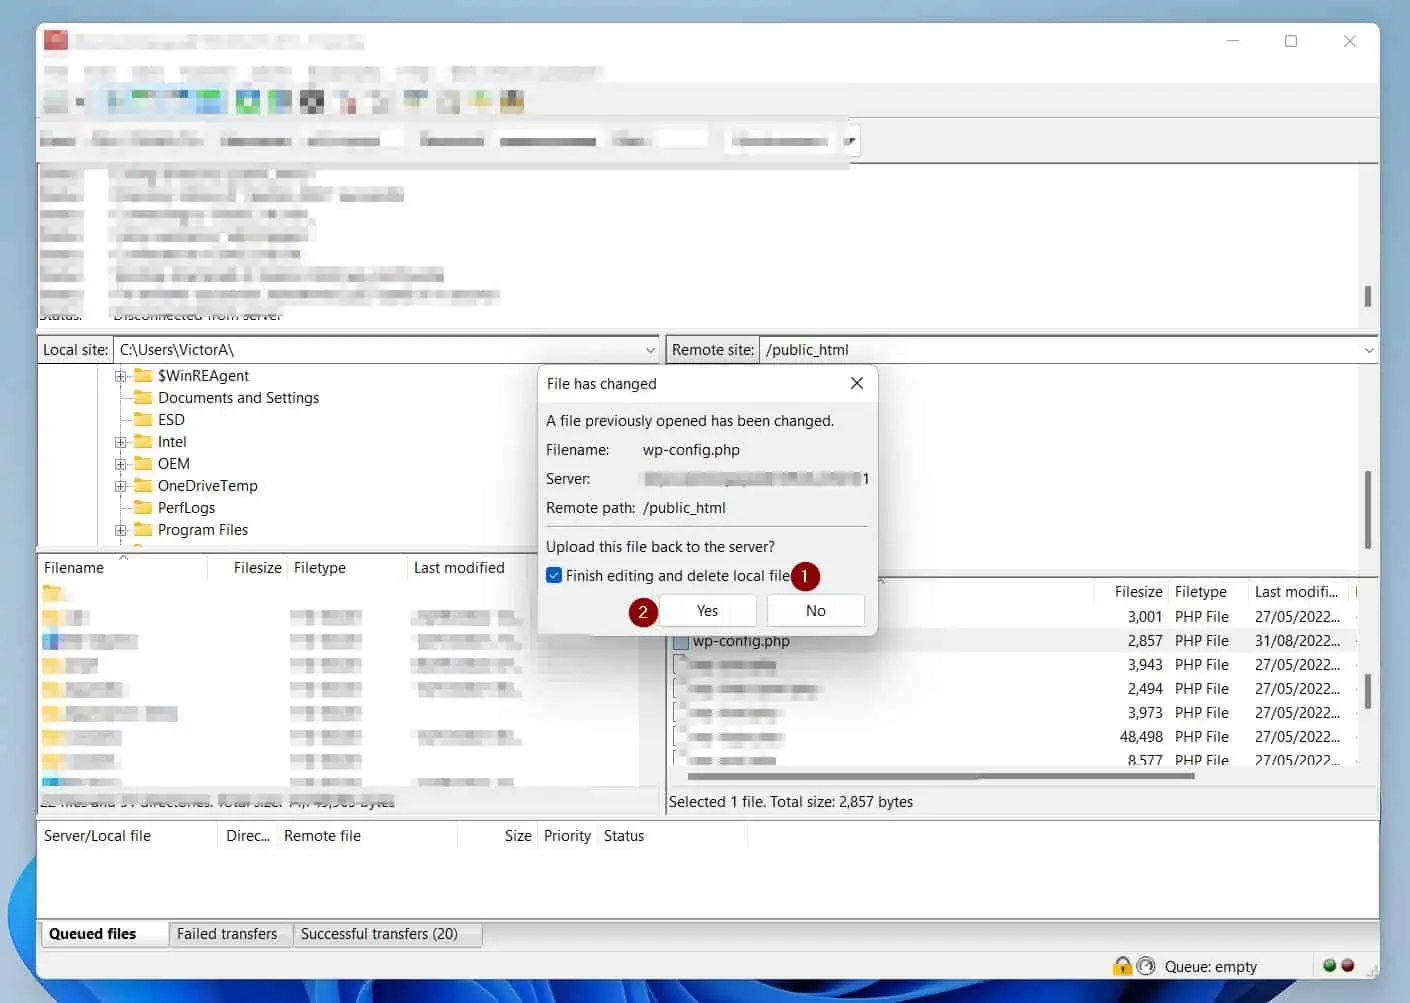
- Finally, to enable WordPress debug mode, save the wp-config.php file, then close it.
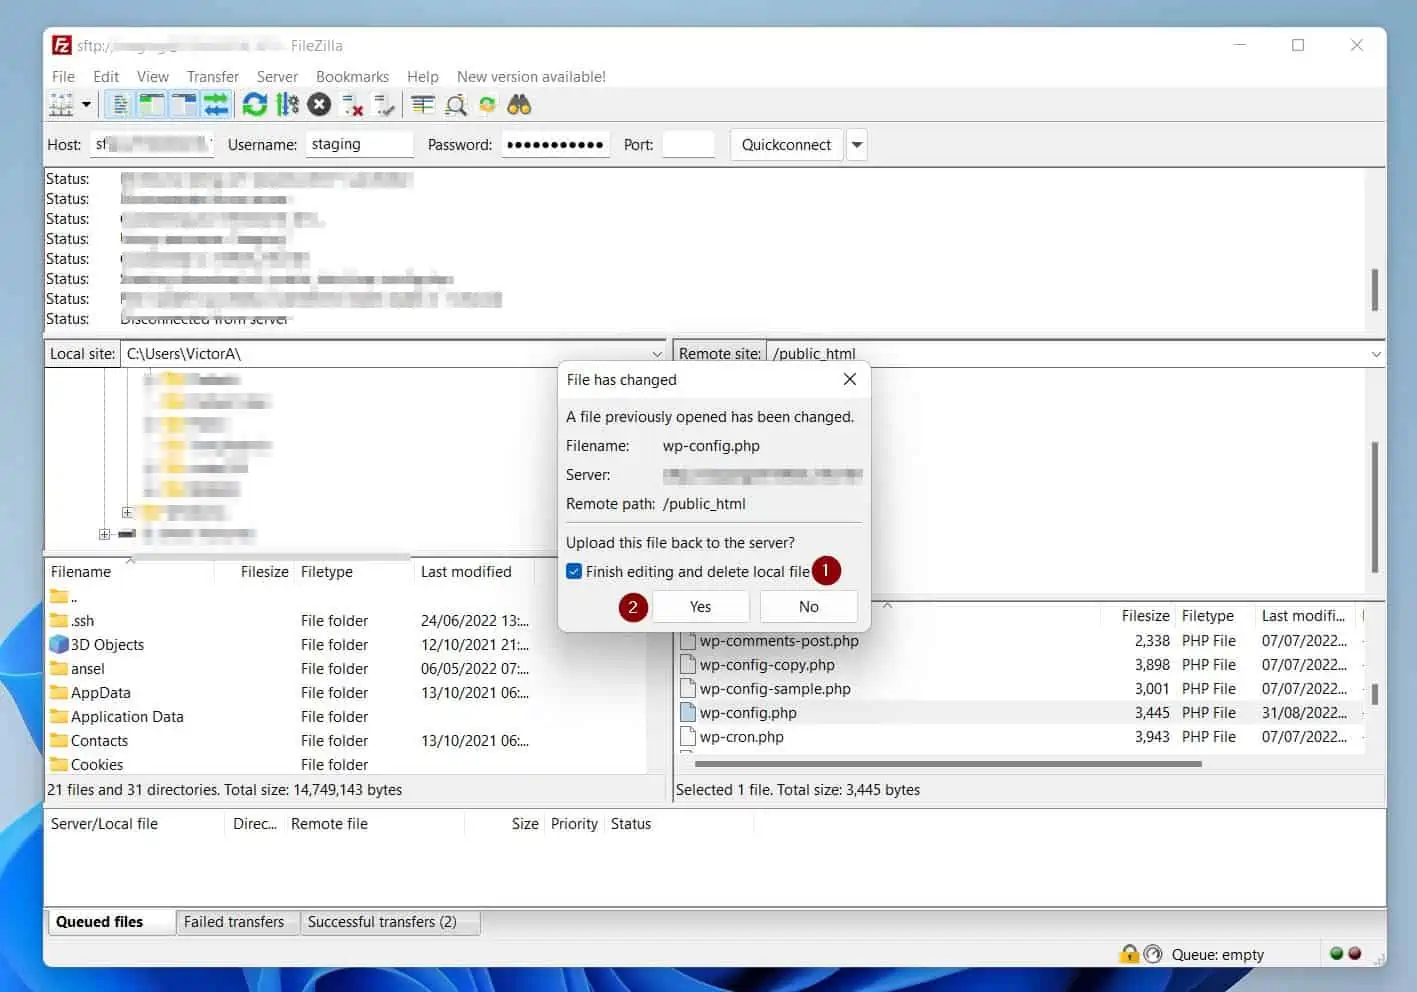
- When you wp-config.php, FileZilla will display a message informing you that the file has changed.
On the popup window, check the Finish editing and delete local file checkbox. Then, click Yes – FileZilla will upload the edited file to the server and delete the downloaded local copy.
You have now enabled the WordPress debug mode for your website. Proceed to step 2 below to use the debug.log file to find out what is causing the “there has been a critical error on this website” error.
Step 2: Use the Debug.log File to Find out What is Causing the Error
Now that you’ve enabled the WordPress debug mode, the next step is to use the debug.log file to figure out what is causing the “there has been a critical error on this website” error.
To open the debug.log file, follow the steps below.
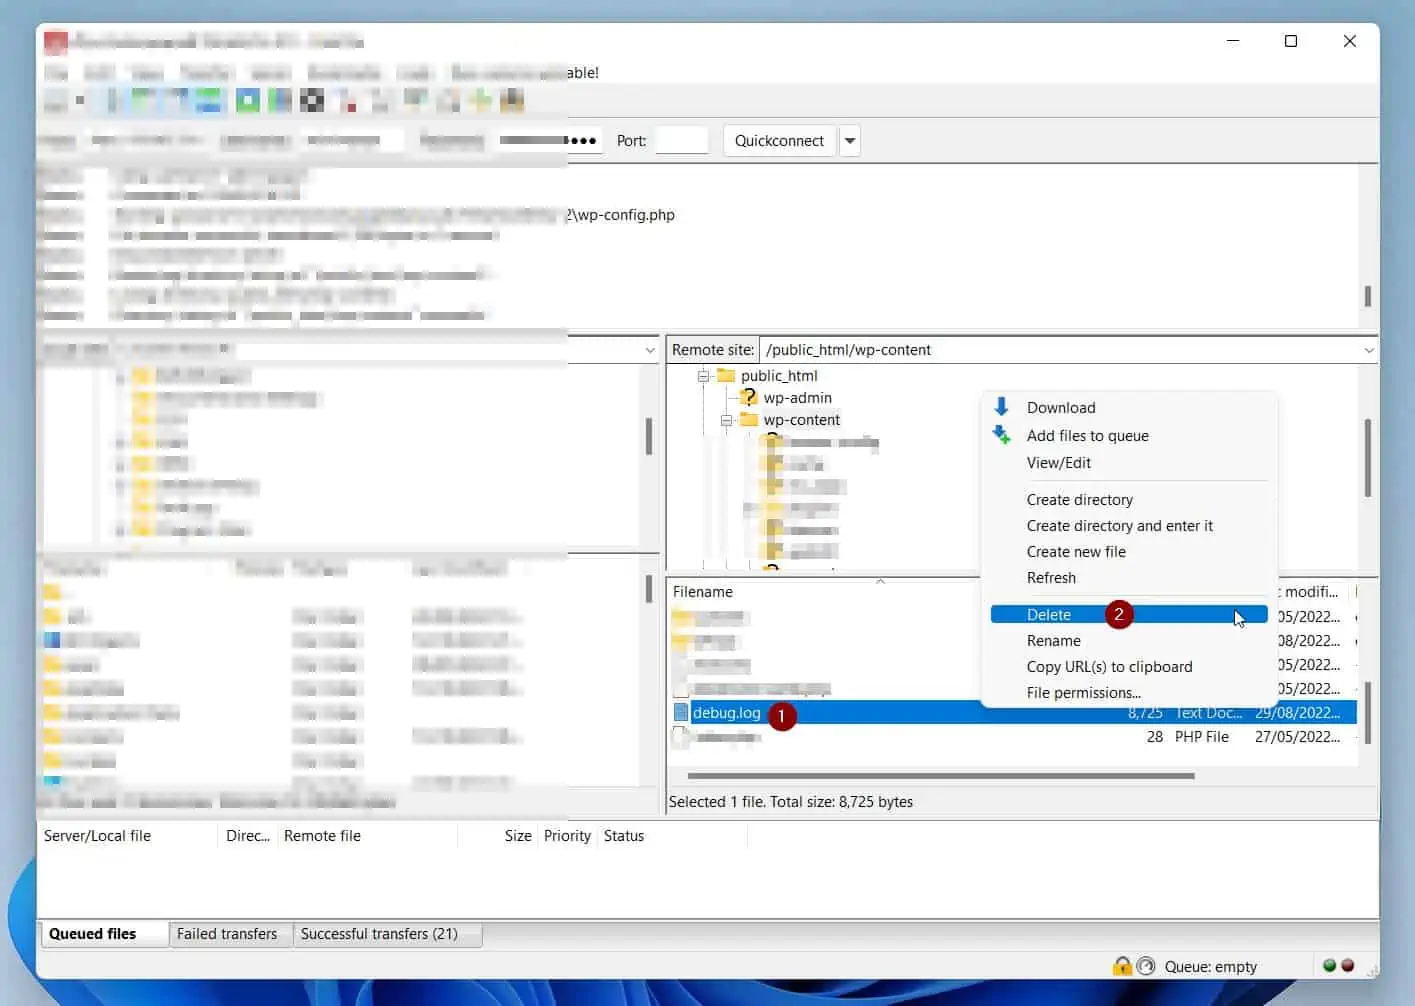
- While still on FileZilla, click the wp-content folder.
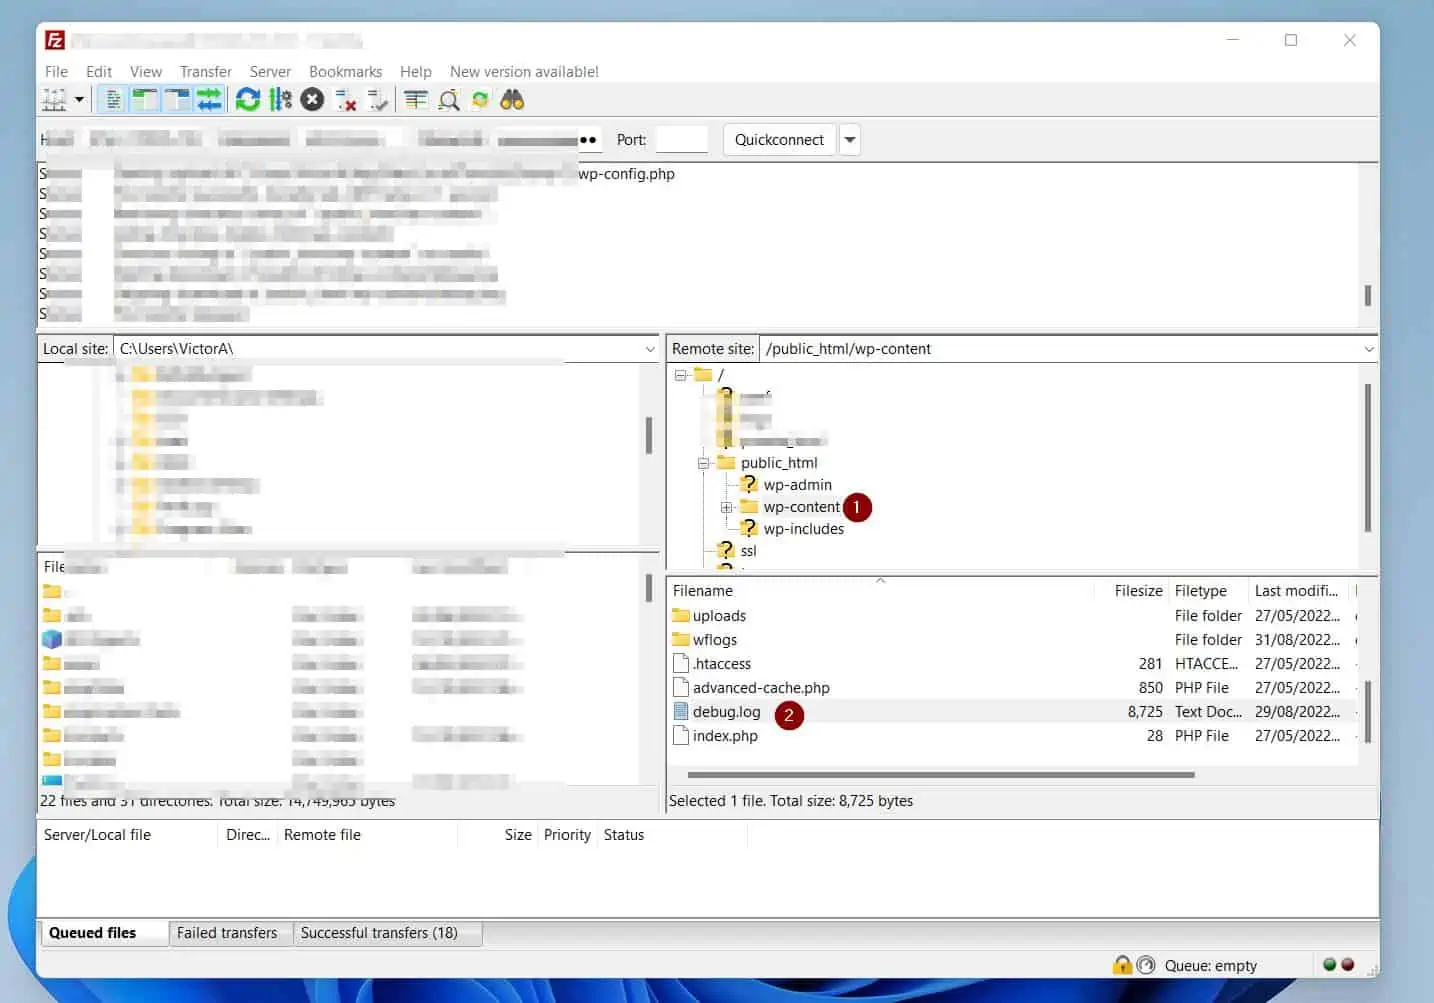
- Then, on the details pane, right-click debug.log and select View/Edit.
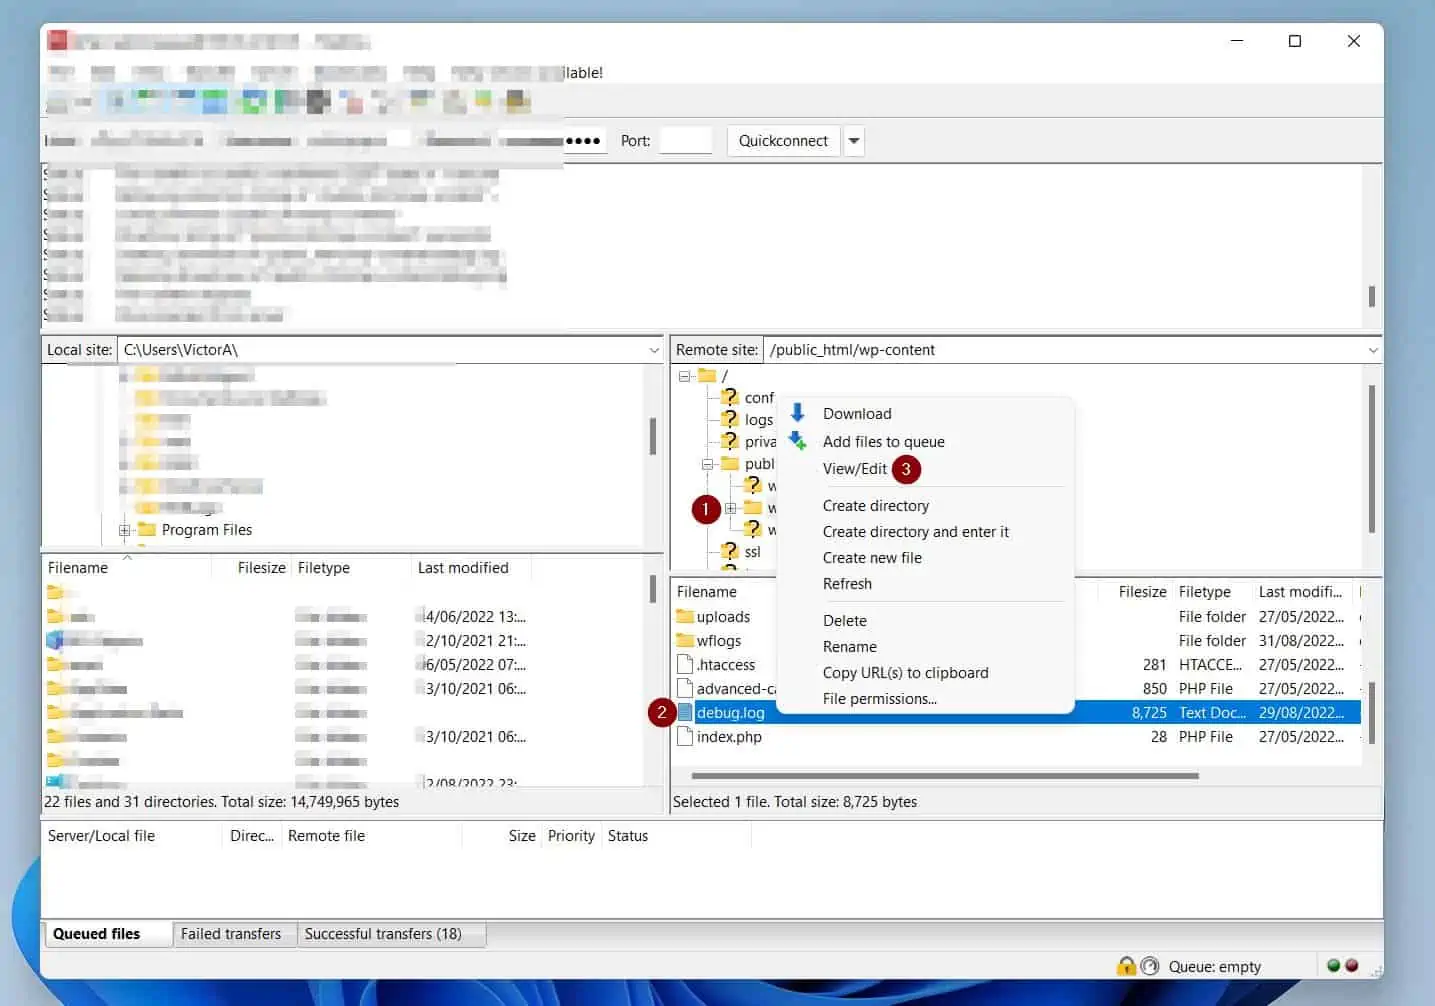
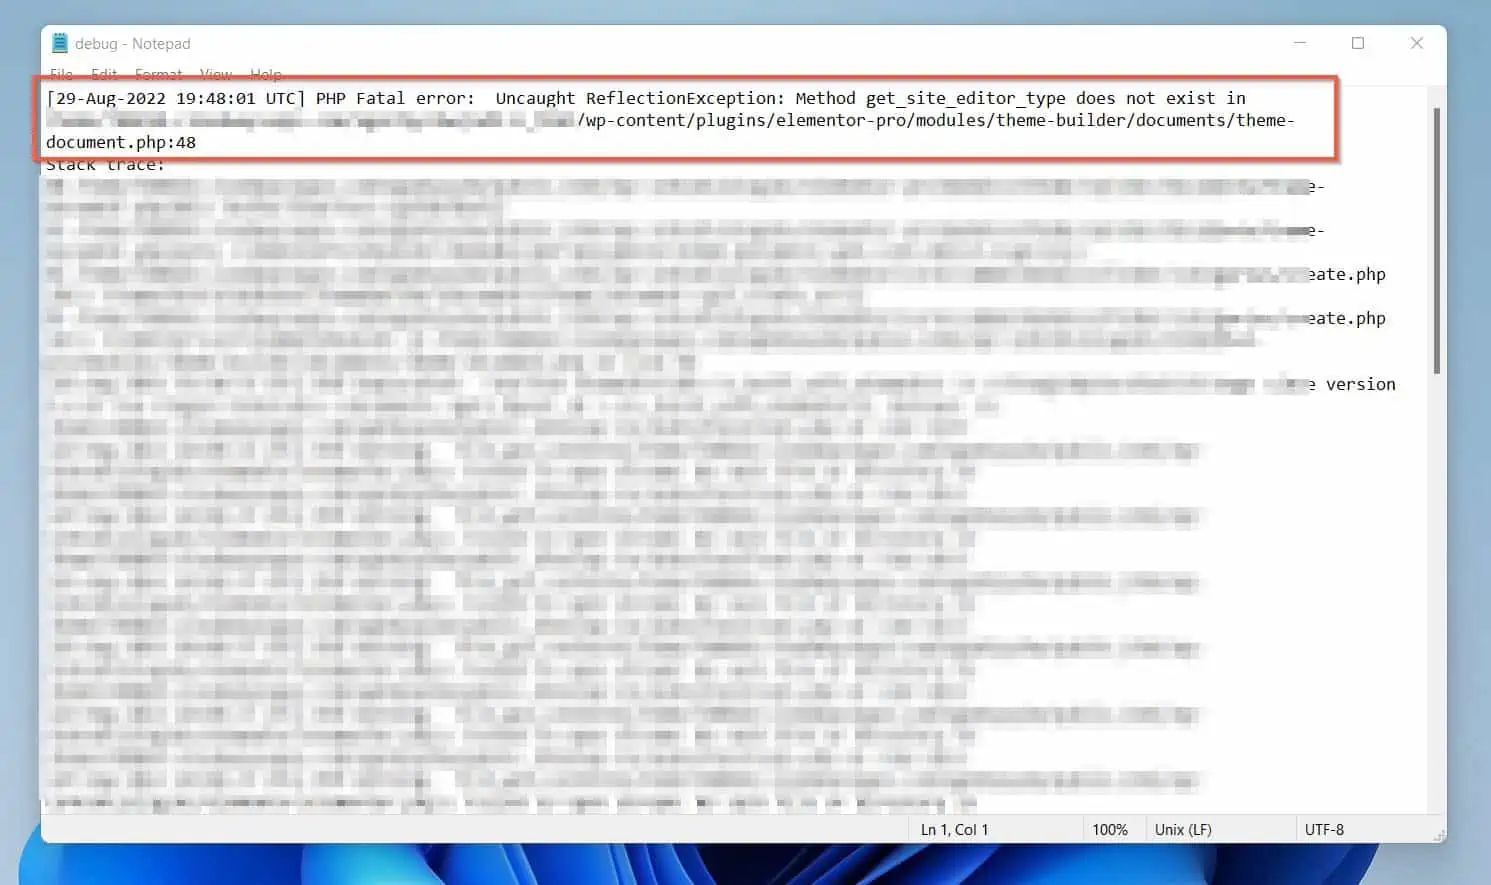
- Finally, look through the debug.log file for errors that may be responsible for the “there has been a critical error on this website” error.
Step 3: Fix the Problem Causing the Error
Once you have identified the cause of this error message, the next step is to fix it. If a plugin caused the error message, follow the steps below to disable the plugin via the FTP login.
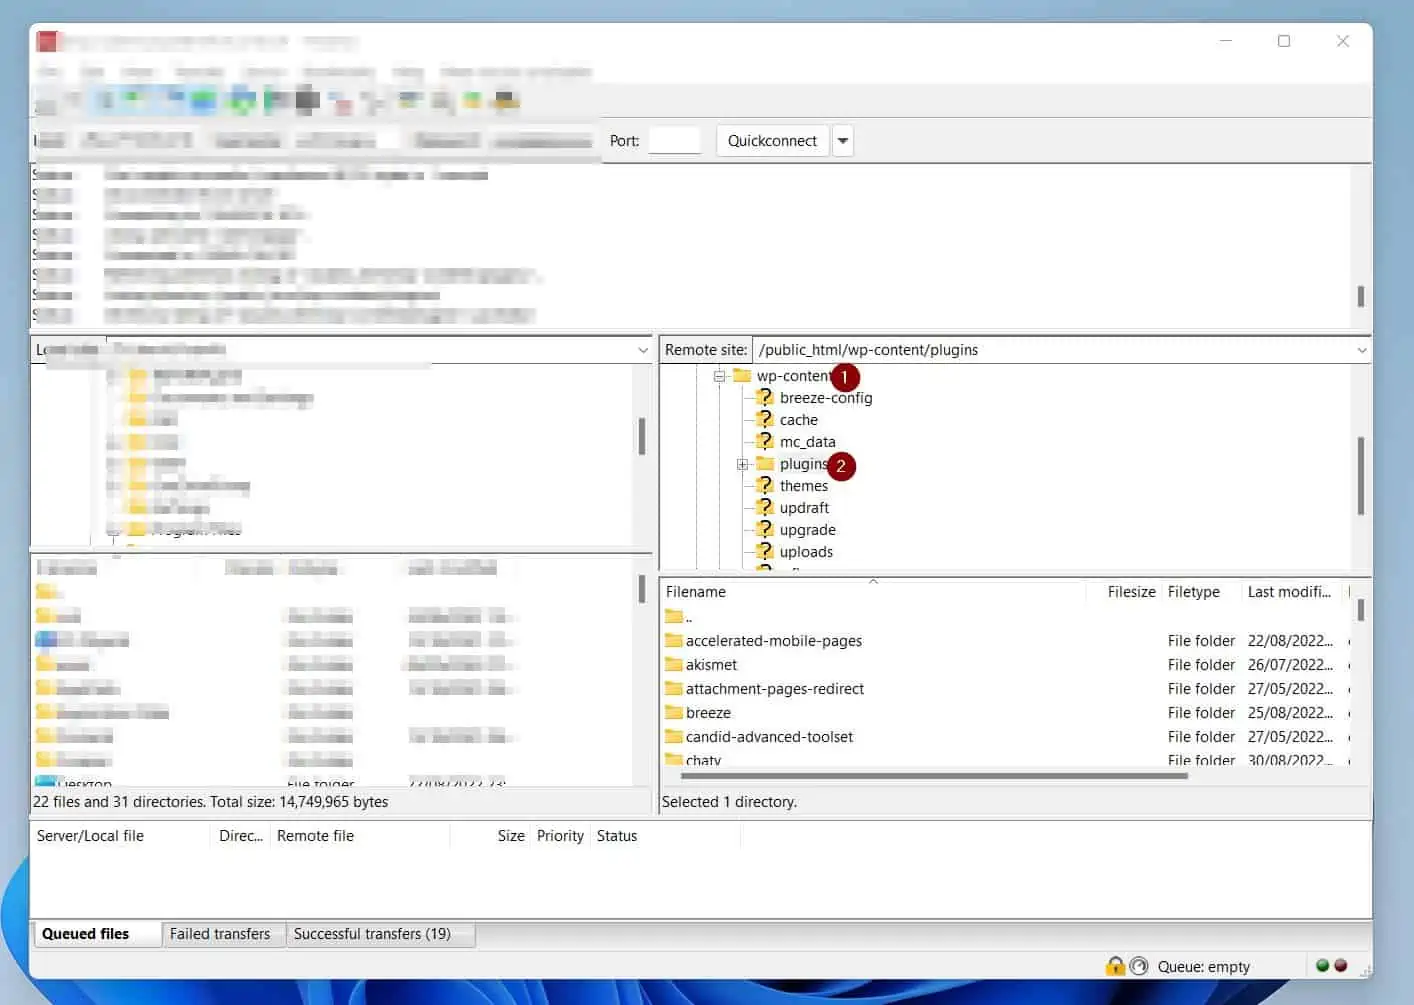
- While still signed in to your hosting account’s FTP, navigate to the /wp-config/plugins folder.
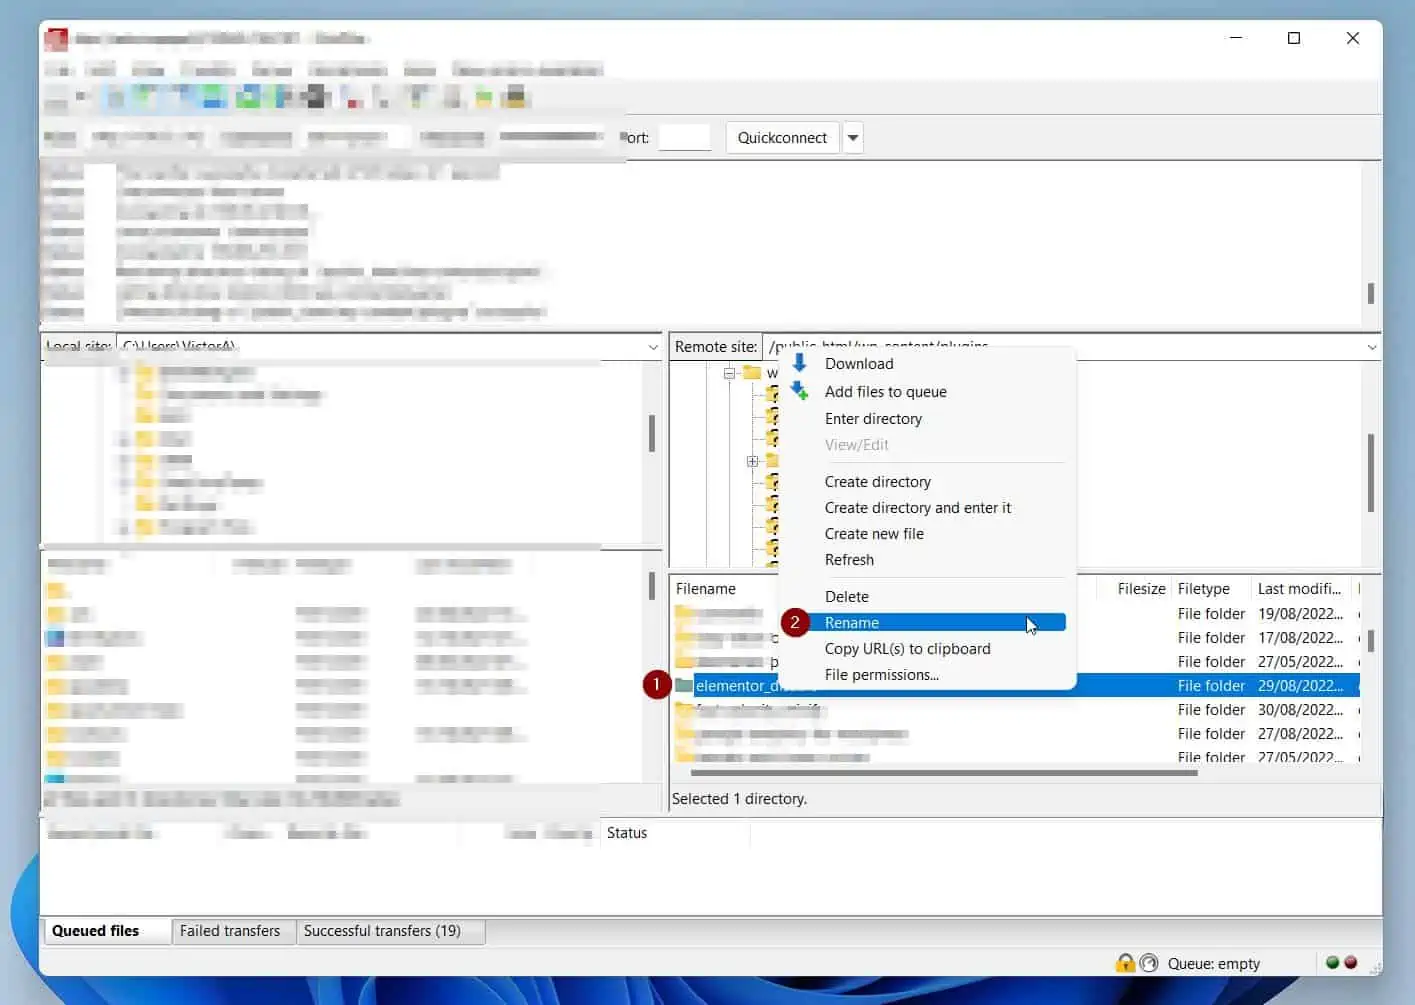
- Finally, to disable the plugin that is causing the problem, right-click the plugin’s folder. Then, click Rename.
You can add “_disable” to the name to rename the folder. It is a good practice to keep the original name so you can easily identify the plugin.
After fixing the problem that caused the “there has been a critical error on this website” error, you should be able to log in to your WordPress site.
However, before you celebrate with a cup of tea, please follow the steps in the last section below to delete the debug.log file and disable the debug mode.
Step 4: Disable the Debug Mode and Delete the Debug.log File
When you’ve resolved the issue and the “there has been a critical error on this website” error, you MUST delete the Debug.log File.
Then, disable the WordPress debug mode.
- While still on FileZilla, navigate to the root of your website’s folder. Then, open the wp-config.php file and delete the following lines.
define( 'WP_DEBUG_DISPLAY', false );
define( 'WP_DEBUG_LOG', true );
- Then, modify define(‘WP_DEBUG’, true); to define(‘WP_DEBUG’, false);
- When you finish, the section of the wp-config.php file you modified should have the line highlighted in my screenshot below…
- Save the file and close it; then, FileZilla prompt, check the Finish editing and delete local file checkbox; then, click Yes.
- Finally, navigate to the wp-config folder and delete the debug.log file.
Frequently Asked Questions
The primary cause of the “there has been a critical error on this website” error on WordPress is “PHP Fatal error”. This error cold be triggered by problems with plugins or a custom code you add to your site.
The first step to resolving the “there has been a critical error on this website” error on WordPress is to roll back any recent change you made to your website.
For example, if you installed a plugin before your website displayed this error message, FTP to your website’s hosting account. Then, navigate to \wp-content\plugins folder and rename the folder of the plugin you installed before your site displayed the error.
However, if you did not make any recent change, follow the steps below to determine what may have caused the problem:
i) Enable WordPress debug mode. Then, enable debug logging
ii) Open the debug.log file in the \wp-content folder
iii) Scan through the log file for any errors that may have caused the error message.
As a guide, if you see a line that has “PHP Fatal error”, it is likely to be the culprit
iv) Finally, fix the problem. If a plugin caused the “there has been a critical error on this website” error message, disable the plugin by renaming its folder.
FTP to your website host’s account to turn off PHP warnings in WordPress. Then, open the wp-config.php file in your website’s root folder.
Finally, locate the line below and change true to false; save the changes to your file and upload the modified file.
define(‘WP_DEBUG’, true);
Follow the steps below to disable WordPress debugging:
i) FTP to your WordPress website hosting account
ii) Open the wp-config.php file on the root of your website account
iii) Locate the line below and change true to false.
define(‘WP_DEBUG’, true);
iv) Finally, save the wp-config.php file.
To Check the PHP version of your website, follow the steps below:
i) Login to your website as admin via YourDomainName.com/wp-admin
ii) Then, on the left pane of the WordPress dashboard, hover over Tools and select Site Health.
iii) When Site Health opens, click the Info tab. Then, scroll down to the Server section and expand it.
iv) WordPress will display the PHP version under “PHP version.”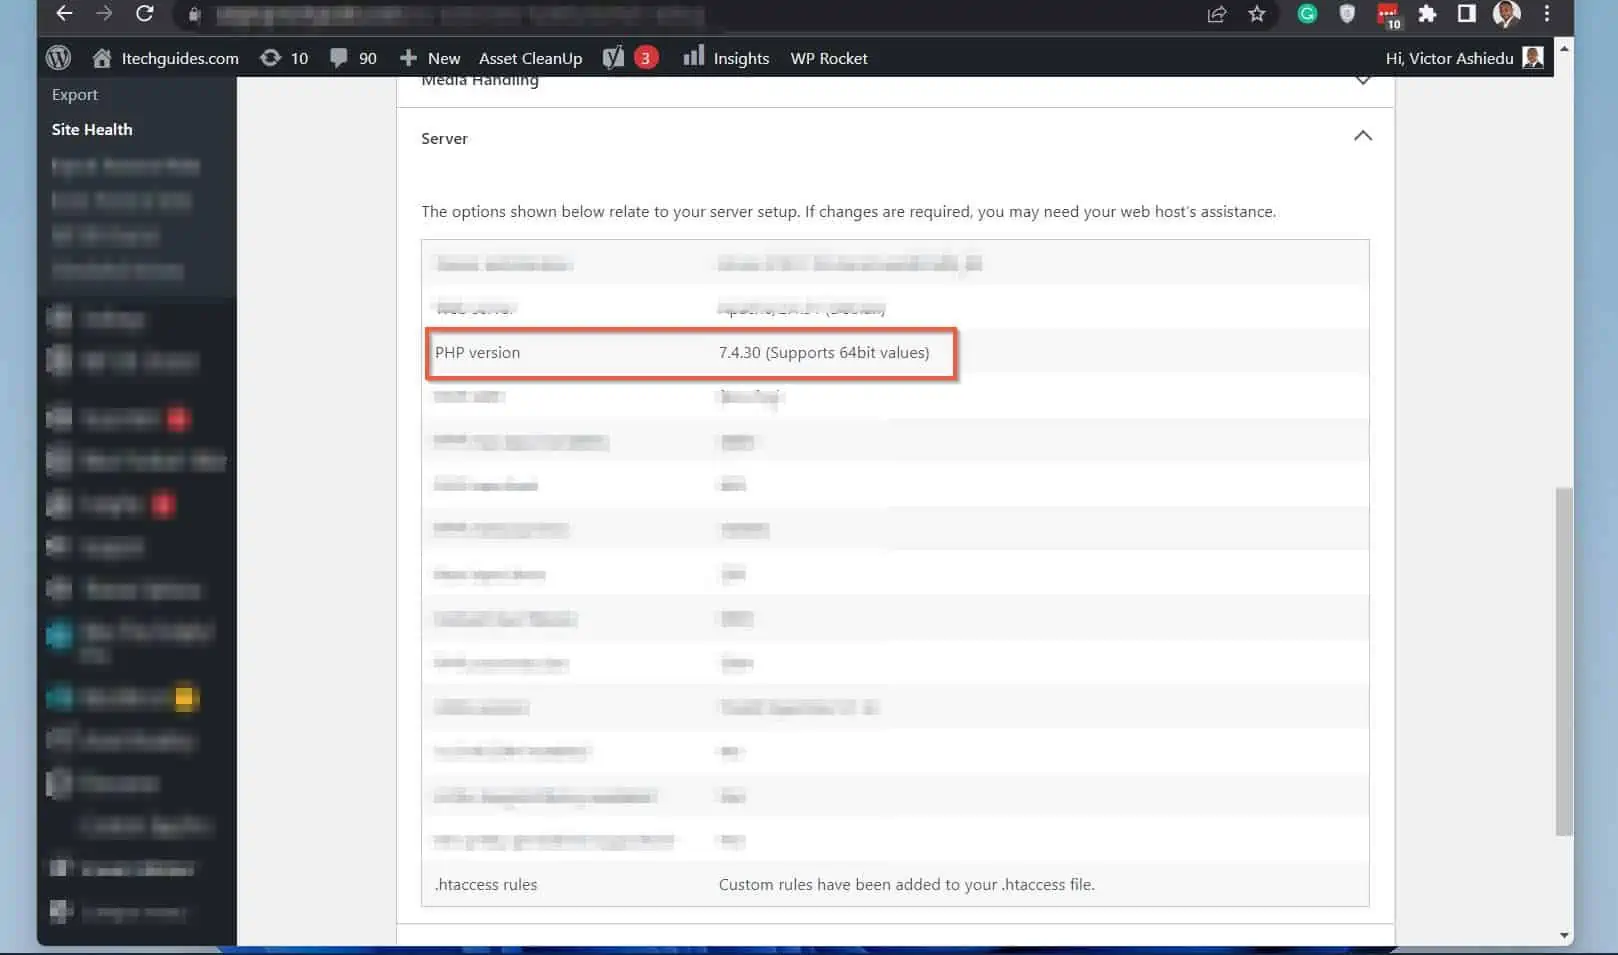
Conclusion
If your WordPress site displays the “there has been a critical error on this website”, you’ll not be able to sign in to the backend. This will understandably lead to panic.
As I have discussed extensively in this guide, what usually causes this error is “PHP Fatal error”. Furthermore, this error may be triggered by a plugin malfunction.
Since so many plugins (or even other things) may trigger this error, the best way to approach solving the problem is to enable WordPress debug logging. Then, review the debug.log file to find out what is causing the problem.
Once you find out the culprit, you can then fix it. For example, if a plugin triggered the error, you can fix the problem by disabling the plugin via FPT.
I hope you were able to get your website up and running by following the steps in this guide! If you did, click on “Yes” beside the “Was this page helpful” question below.
You may also express your thoughts and opinions by using the “Leave a Comment” form at the bottom of this page.
![WordPress Lost Password Redirects to Page Not Found [Fixed]](https://www.itechguides.com/wp-content/uploads/2024/03/WordPress-Lost-Password-Redirects-to-Page-Not-Found-Fixed.webp)