Do you wish to set up Windows Deployment Services in Windows Server 2016? This guide teaches you how to do that.
Overview
WDS (Windows Deployment Services) is a server role that provides a simplified and secure means of remotely deploying Microsoft Operating Systems to computers over the network.
For a WDS to install OS on a remote computer, the computer must be PEE-enabled.
This guide covers the following:
- Setup WDS Server 2016 (Install and Configure the WDS)
- Configure and Manage Boot, Install and Discover images.
Setup WDS Server 2016 (Installation Options)
WDS can be installed as a Transport or Deployment Server, or both. These options are available when installing the role using Server Manager.
Transport Server
This option provides a subset of the functionality of WDS. It contains only the core networking parts which you can use to transmit data on a stand-alone server. Transport server uses multicasting for data transmission.
You can also use transport server if you want to have a PXE server that allows clients to PXE boot and download your own custom setup application. You should use this option if you want to use either of these scenarios, but you do not want to incorporate all the components of WDS.
Deployment Server
This option provides the full functionality of Windows Deployment Services. Provides all the options to configure and remotely install Windows operating systems. Deployment Server is dependent on the core parts of Transport Server.
You can install WDS server role via Server Manager or by using Windows PowerShell. After the Windows Deployment Services role is installed, the server has to be configured before it can be used for automated Windows Operating system deployment.
WDS can be configured as a stand-alone or Active Directory-integrated server. This guide demos how to setup WDS Server 2016 as an Active Directory-integrated WDS server.
Requirements to Setup WDS Server 2016
- A Deployment Server requires DNS and DHCP servers on the network.
- Both the Deployment and Transport server require an NTFS partition for the file store.
- After installation, you must configure WDS either by using WDSUtil.exe or running Windows Deployment Services Configuration wizard.
- You must add at least one boot image and one install image to the image store.
If you follow this tutorial step-by-step, I will walk you through how to meet the outlined requirements. This tutorial does not include DNS and/or DHCP setup.
Steps to Setup WDS Server 2016
There are 3 major steps to Setup WDS Server 2016:
- Install WDS role
- Configure WDS
- Configure and Manage Boot, Install, and Discover Images
Here are the detailed steps:
Step 1: Install the Windows Deployment Services Role
The first step t setup WDS Server 2016 is to install the WDS server role.
Here are the steps:
- Log on to the server and open Server Manager (should launch by default).
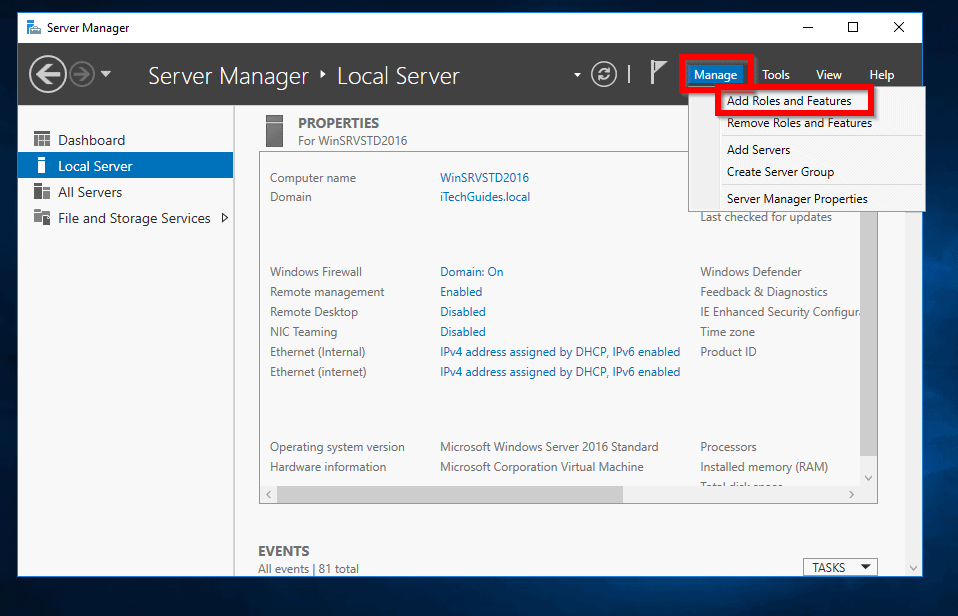
- From Server Manager click Manage then select Add Roles and Features.
- On the Before you begin screen, click Next.
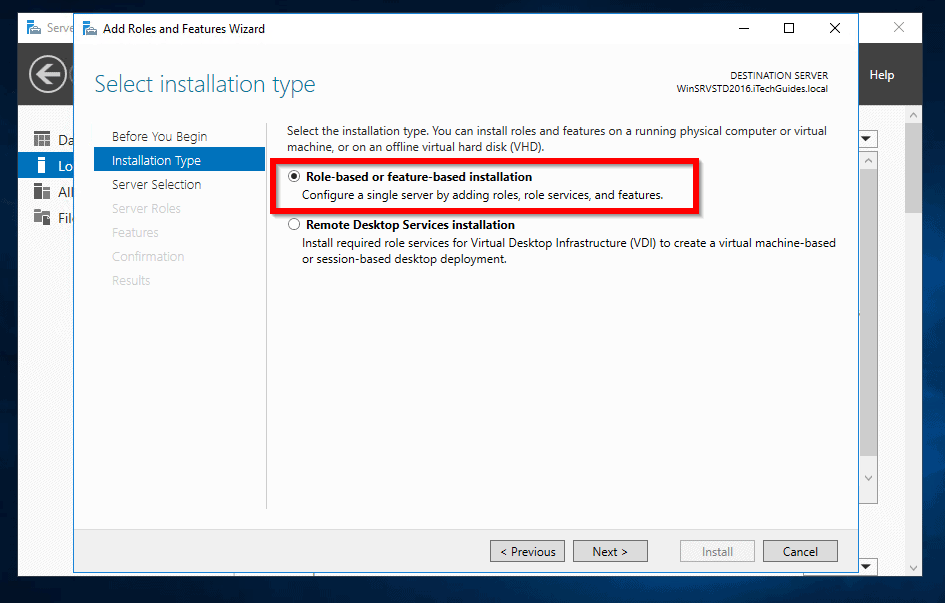
- Next, select Role-based or feature-based installation and click Next.
- Next, on the Select Destination server page, select the server you wish to setup WDS Server 2016.
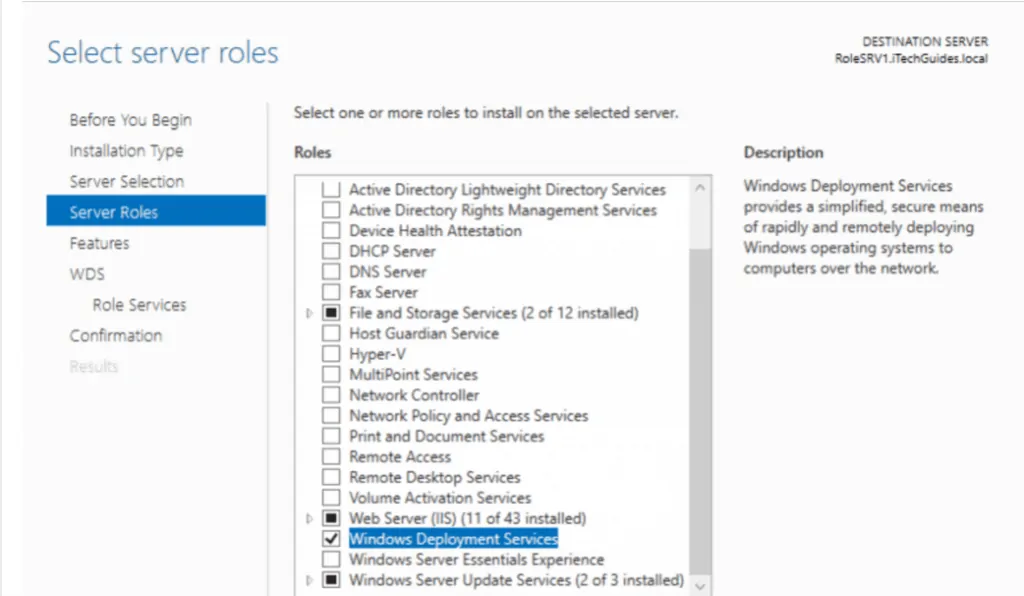
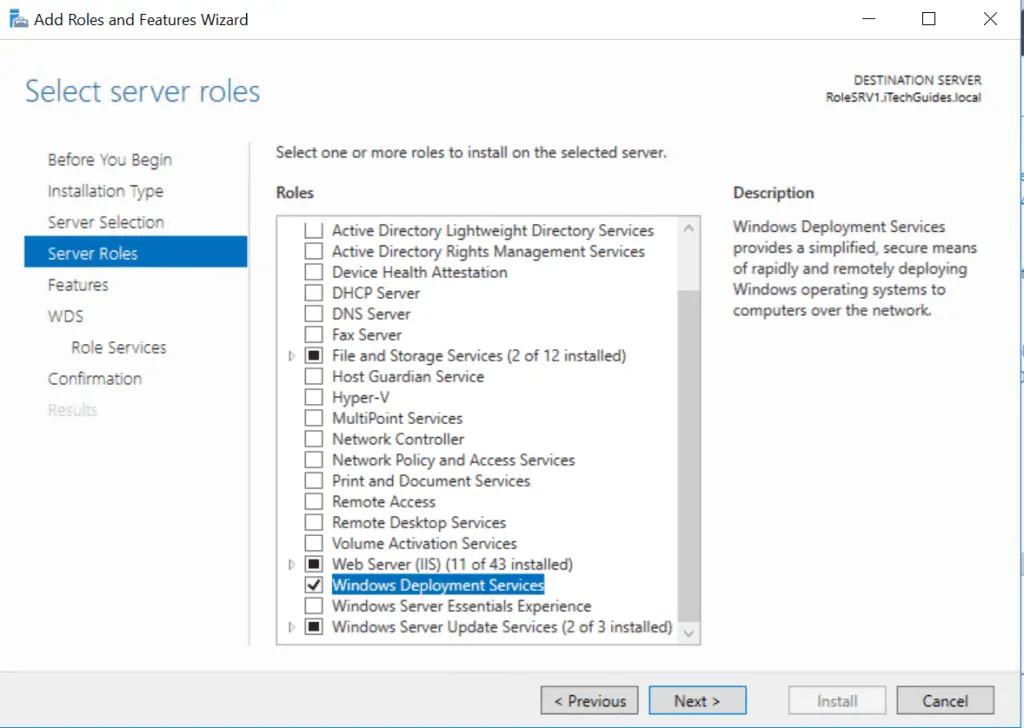
- On the Server Role page, check the box beside Windows Deployment Services. A page will load asking you to confirm additional features to install. Click Add Features. Then click Next.
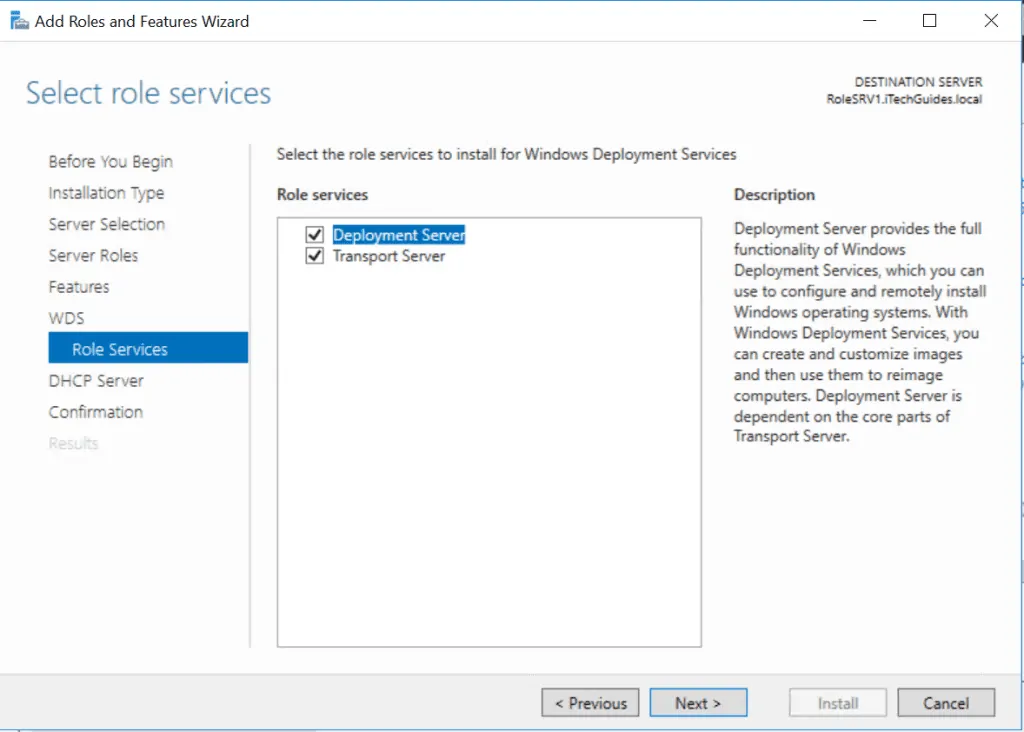
- On the Select roles services page, check both Deployment Server and Transport Server. Note that if you check Deployment Server you MUST also check Transport Server. However, you can check Transport Server without checking Deployment Server.
- When you get to the Confirmation page, review your selections then click Install.
To install the Windows Deployment Services role with Windows PowerShell, run the command below:
Install-WindowsFeature –Name WDS –IncludeManagementTools
Step 2: Setup WDS Server 2016 (Configure Windows Deployment Services)
After installing the role, the next step to set up WDS Server 2016 is to configure the role.
Here are the steps
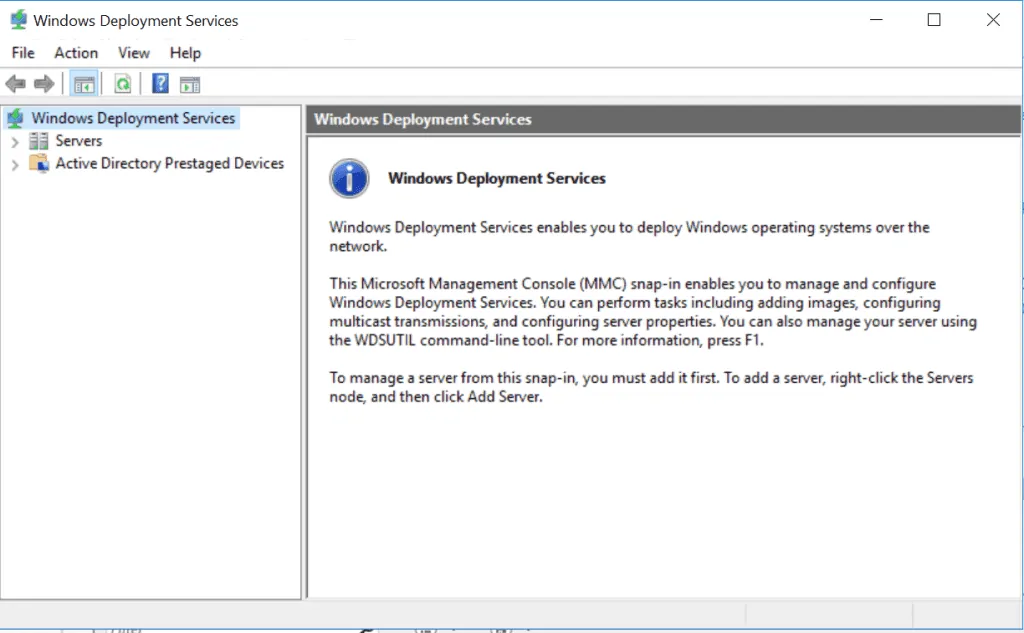
- Open Server Manager. Then click Tools and select Windows Deployment Services. The WDS management console opens.
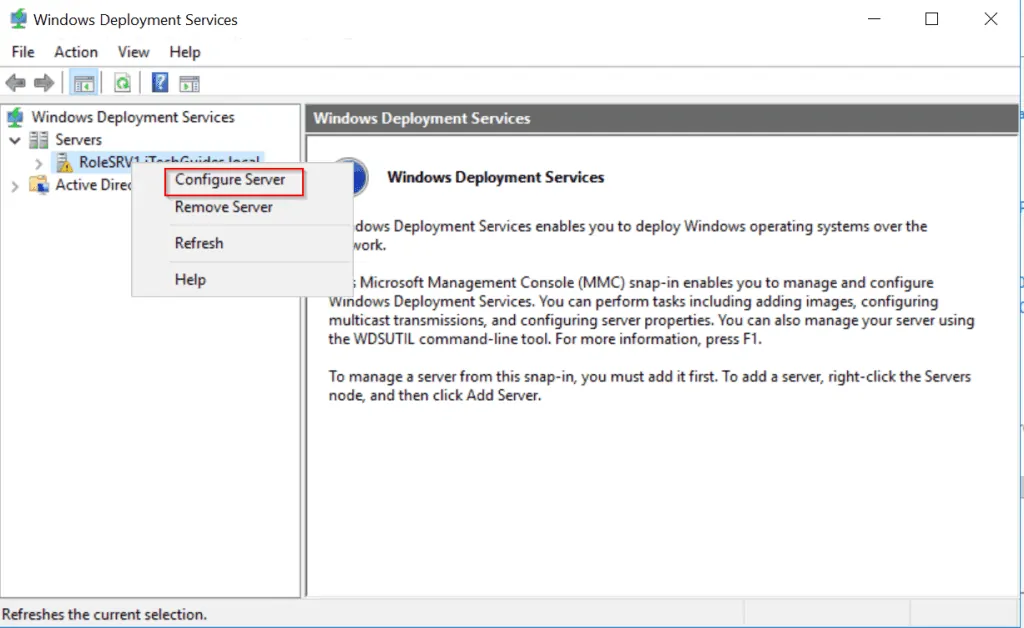
- Expand Servers. Then right-click the WDS server and select Configure Server. The configuration wizard opens.
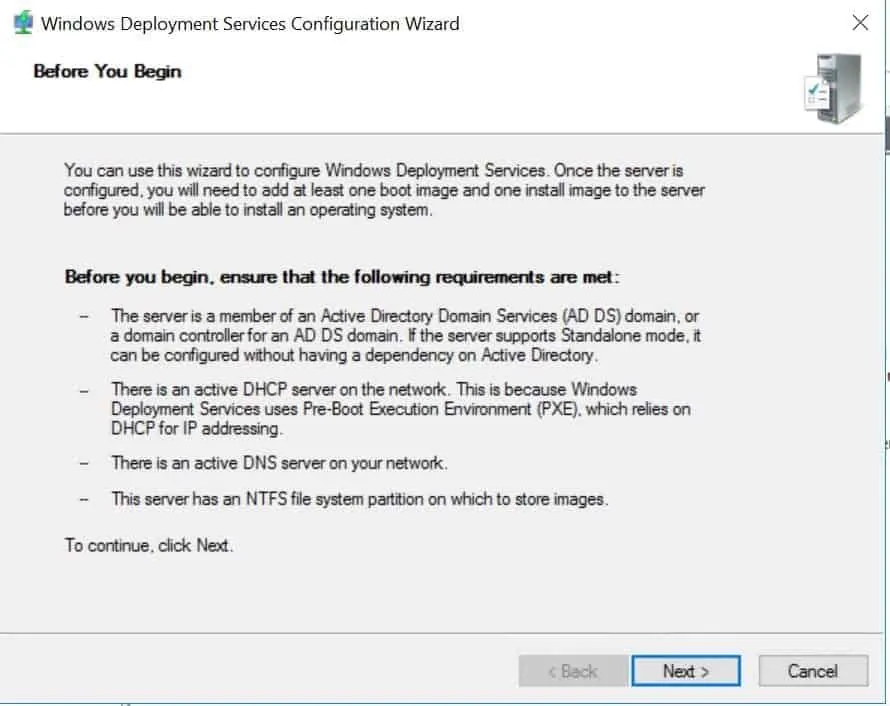
- On the Before You Begin page, read the requirements then click Next.
- Select the integrate with Active Directory option. Click Next.

- Enter a path for your remote installation folder or accept the default.
In a production environment, I strongly recommend having your remote installation folder in a drive other than C.

- Note the information on the Proxy DHCP Server page then click Next.

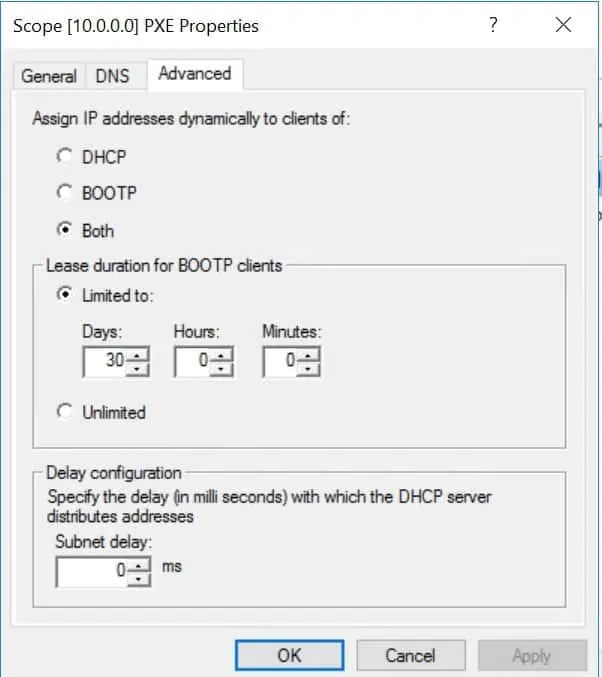
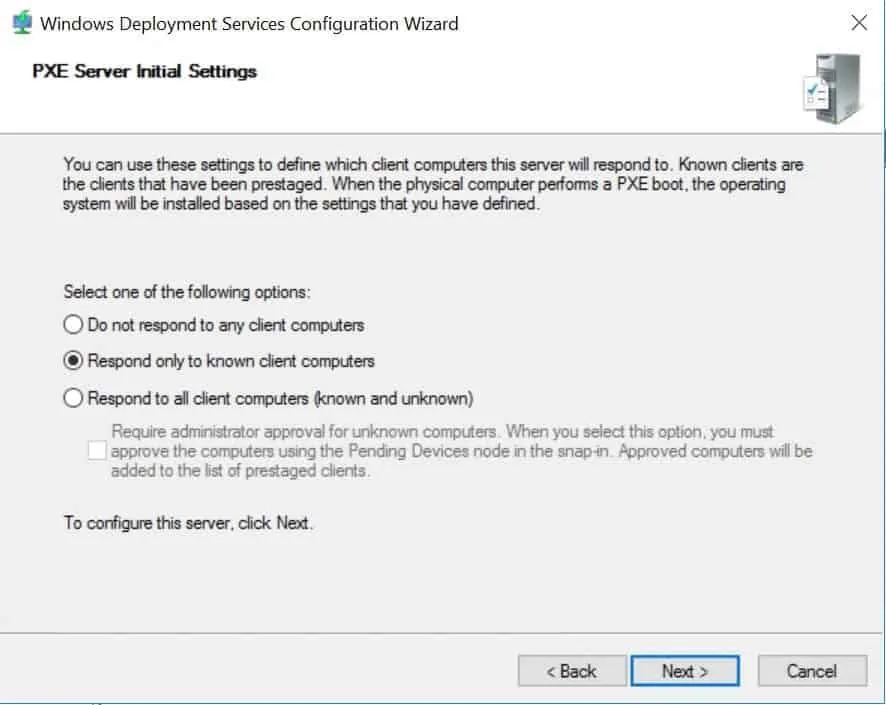
- Configure settings for the PXE server.
- Finally, wait for the wizard to complete the configuration. Click Finish.

- Start the Windows Deployment Services (WDS) service: Right-click the server, point to All Tasks and click Start.

The above task can also be accomplished by running the following command:
WDSUtil.exe /Initialize-Server /Server:RolesSRV1 /REMINST:"D:\RemoteInstall"
To revert changes made during the server configuration or Initialization, execute the command:
WDSUtil.exe /UnInitialize-Server /Server:RolesSRV1
Step 3: Configure and Manage Boot, Install, and Discover Images
After configuring Windows Deployment Services server, the final step to completely setup WDS Server 2016 is to add the necessary image files.
The following images are required:
Boot Images: Boot images are Windows PE images that you boot a client computer into to perform an operating system installation. In most scenarios, you should use the Boot.wim file from the OS installation media.
Install Images: Install images are the operating system images that you deploy to the client computer. You can also use the Install.wim file from the OS installation media.
Discover Images: In some circumstances, A computer might not have PXE-enabled network cards. In this situation, discover images may be created and used to install operating system on those computers.
A discover image may be saved on a media (CD, DVD, or USB drive), and a client computer may then be booted with the media. The discover image on the media locates a Windows Deployment Services server, and the server deploys the install image to the computer.
Prepare Boot and Install Images for Windows Deployment Services
- Copy boot.wim from Windows 10 DVD (if you have a Windows 10 ISO, mount it. Boot.wim is located in the sources folder.
To create install.wim from Windows 10 DVD, follow the steps below:
- Open command prompt with administrator privileges (search command prompt, right-click it then select run as administrator)
- Run the command below:
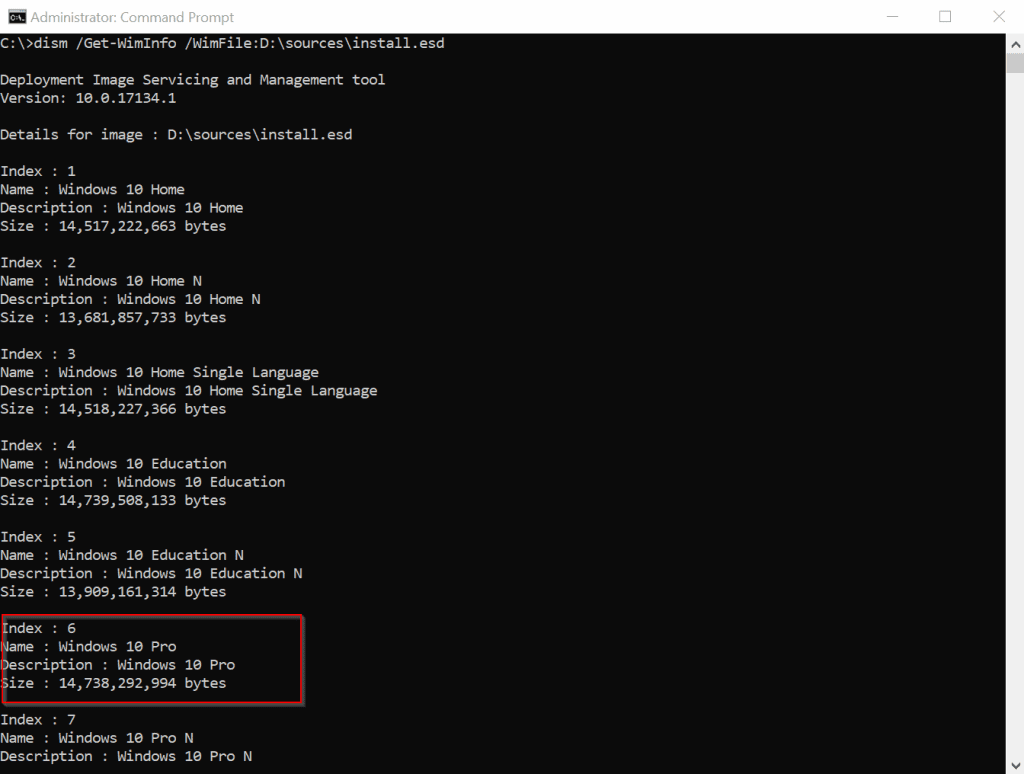
dism /Get-WimInfo /WimFile:D:\sources\install.esd
Below is the output of the command. Note the index number of the edition you wish to create install.wim for. I am creating a install.wim file for Windows 10 Pro. Index number is 6.
- To create install.win for Windows 10 pro, execute the command below:
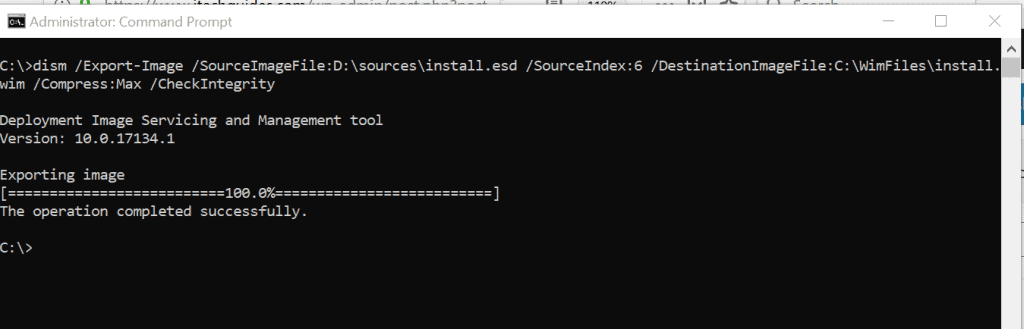
dism /Export-Image /SourceImageFile:D:\sources\install.esd /SourceIndex:6 /DestinationImageFile:C:\WimFiles\install.wim /Compress:Max /CheckIntegrity
The export process will commence. See image below. When it reaches 100%, the wim file is ready.
Add Boot and Install Images to Windows Deployment Services (WDS)
To add an install image, follow the steps below:
- From Server Manager, open Windows Deployment Services. Expand the Servers Node. Then expand your WDS server name.
- Right-click Install Images then click Add Install Image.

- On the Image Group window, enter a name then click Next.

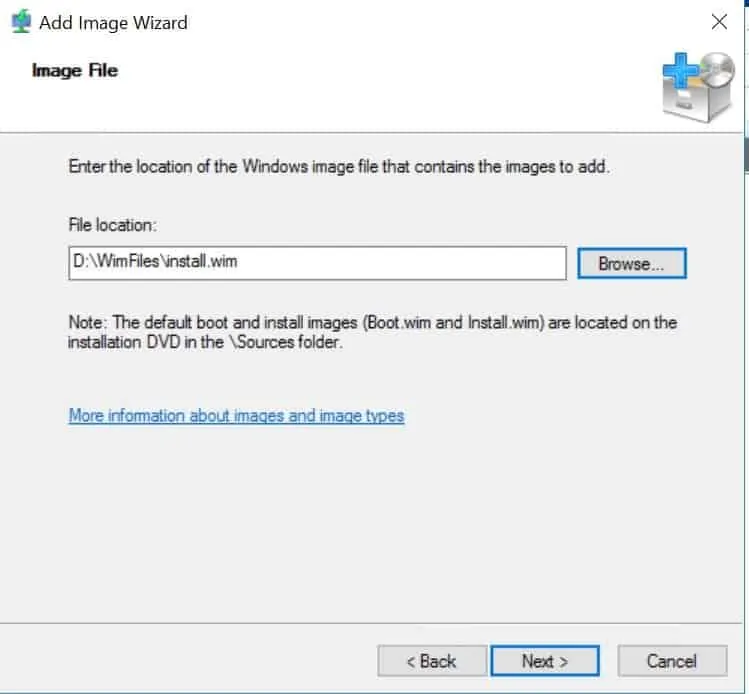
- Enter path to your install.wim then click Next.
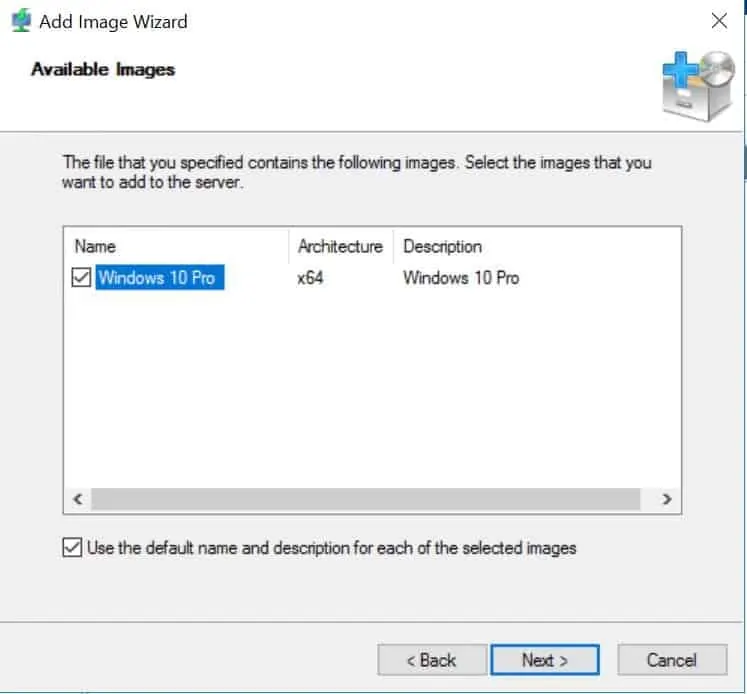
- Select the Operating System Image then click Next.
- On the Summary page, click Next. Wait for the image to be added.
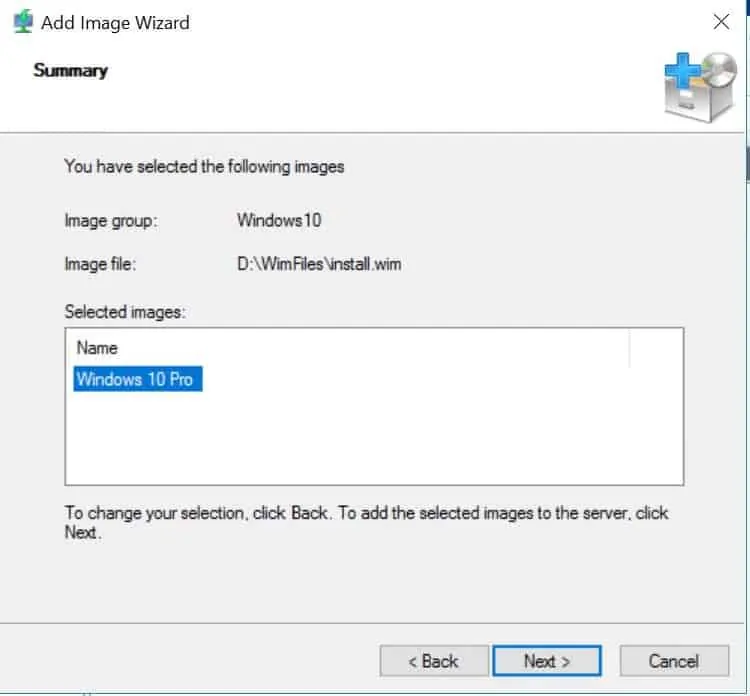
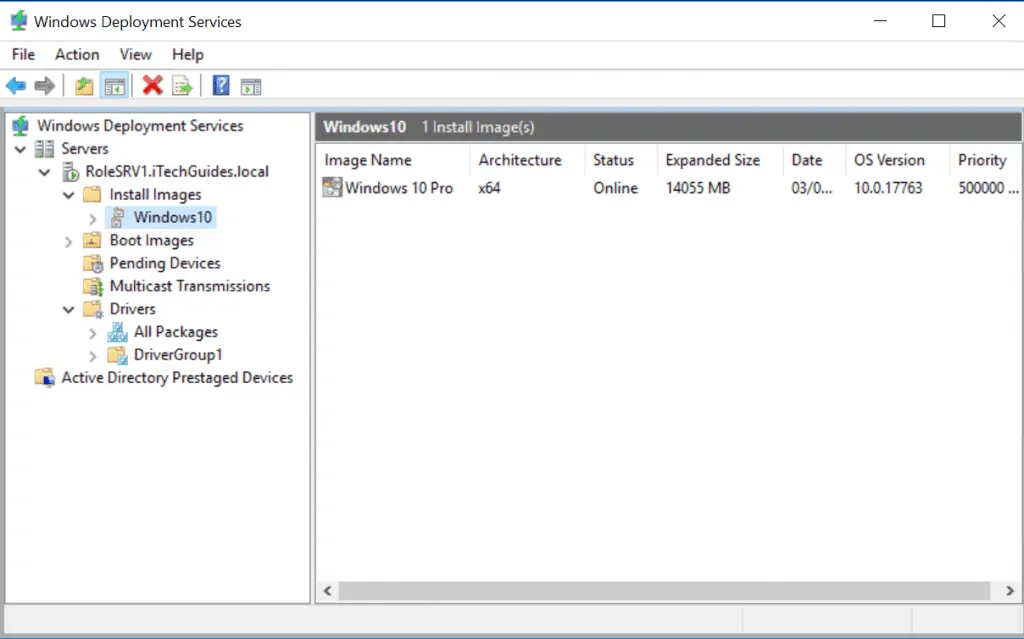
- Windows 10 install image is now available in Windows Deployment Services!
The steps below will walk you through adding a boot image.
- From the WDS console, right-click Boot Images and select Add Boot Image.
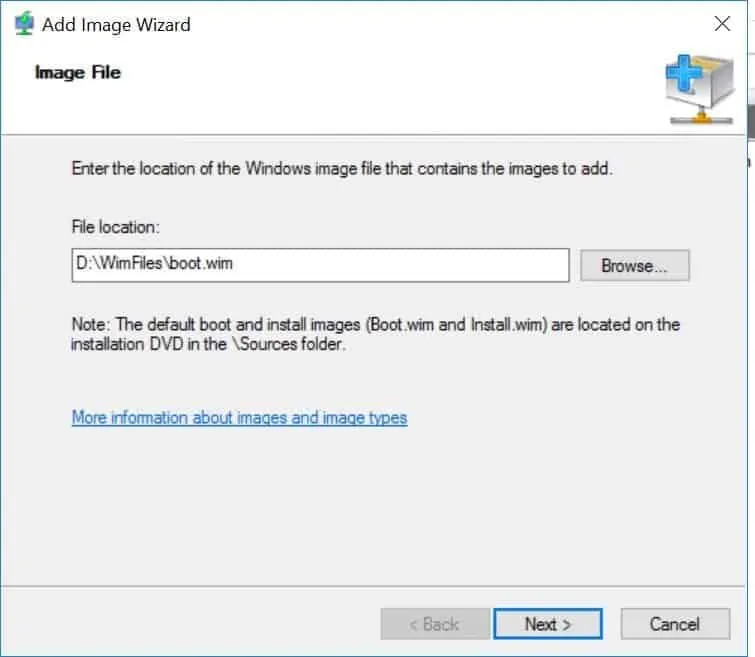
- Enter the path to your boot.wim file. Click Next.
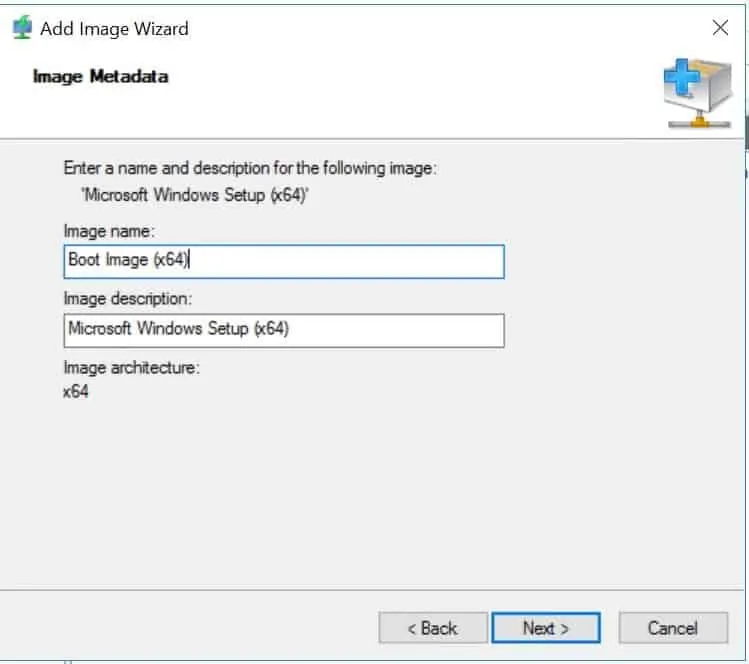
- Rename the boot image to a more user-friendly name. The image name will be displayed for selection during a PXE-boot.
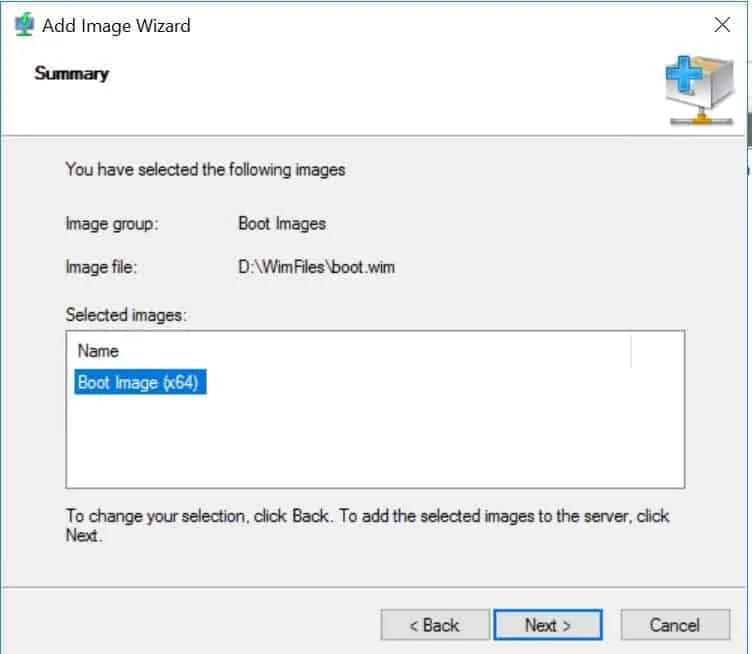
- On the Summary page, click Next. Then wait for the image to be imported.
- The boot image is now available.

Create Discover Images
To create a discover image follow the steps below:
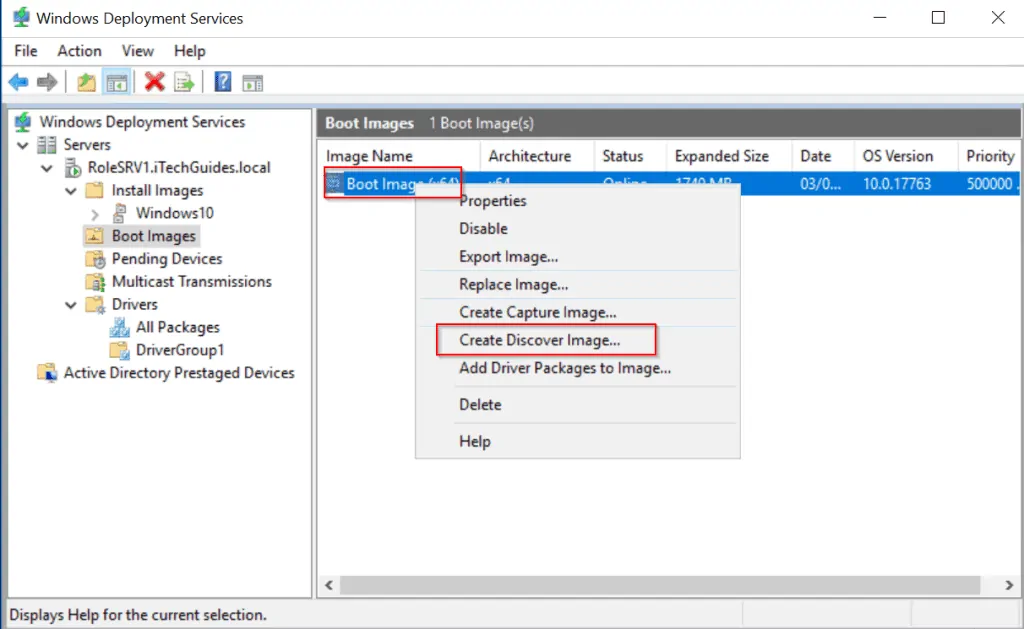
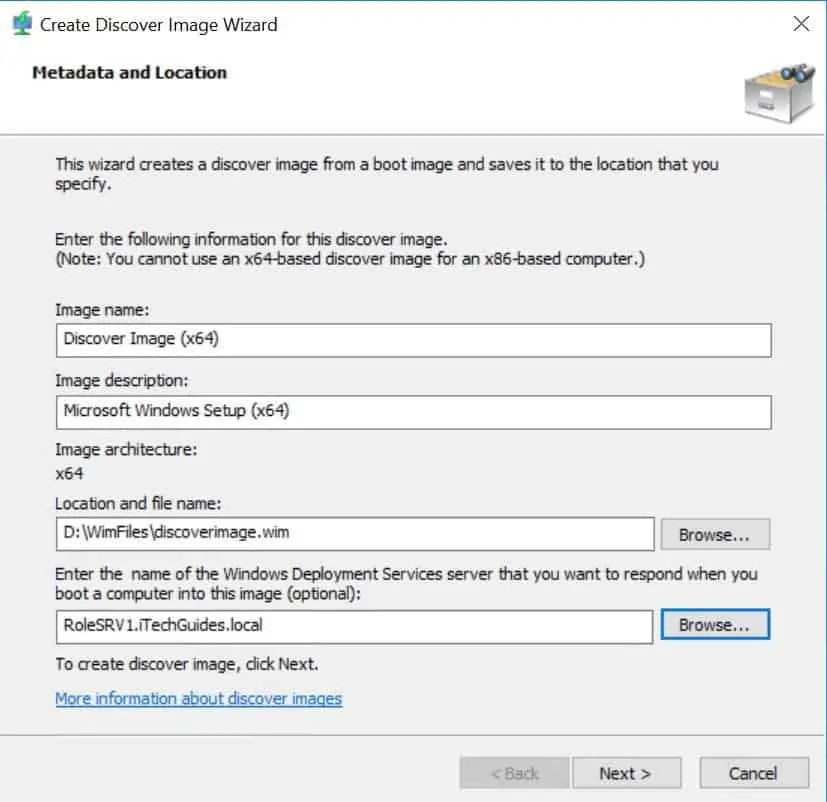
- Right-click the boot image you created earlier and select Create Discover Image.
- On the Metadata and Location page, enter all information. For the name of the Windows Deployment Services server, click Browse then use the Active Directory search tool to search for the server. When you finish click Next.
Conclusion
This guide presented a demo to setup WDS Server 2016.
I hope you found this guide helpful. If you found it helpful, kindly take 2 minutes to share your experience with our community using the comments form at the bottom of this page.
Alternatively, you can respond to the “Was this page helpful?” question below.
Finally, if you want more Windows server guides, visit our Windows Server How To page.


Many many any thanks!!!
Glad to be of help!