If you have an app connecting to a Microsoft SQL data source, you may need to confirm that the source (app) server can successfully connect to the SQL server.
This guide teaches you the two methods for performing this test.
Option 1: Test Connection with ODBC Data Sources Driver
Microsoft provides an app on every Windows computer for making SQL test connections. The app is called “Set up ODBC data sources”.
Here are the steps to use this app to test whether you can successfully connect to a Microsoft SQL server.
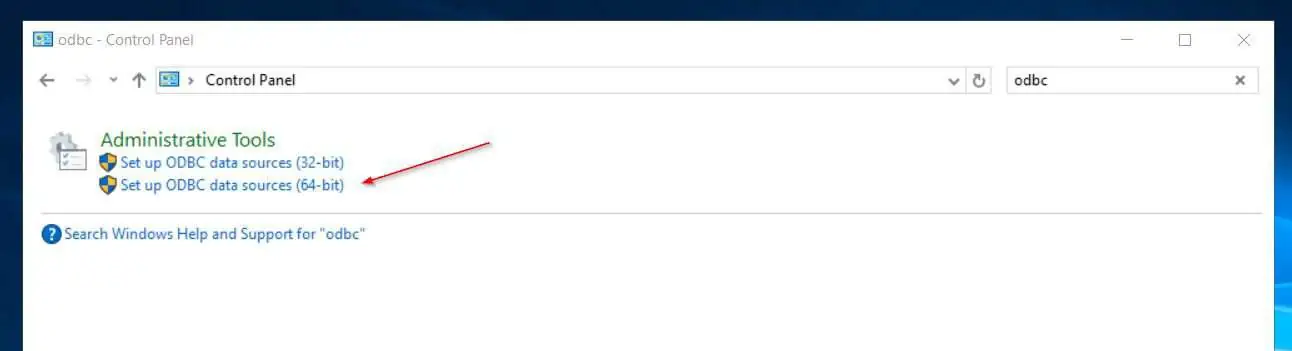
- Sign in to the server or computer you’re testing the connection from. Then, search for and open the Control Panel.
- When Control Panel opens, search odbc and open “Set up ODBC data source” – there is a 32-bit and 64-bit version – select the one you want to use.
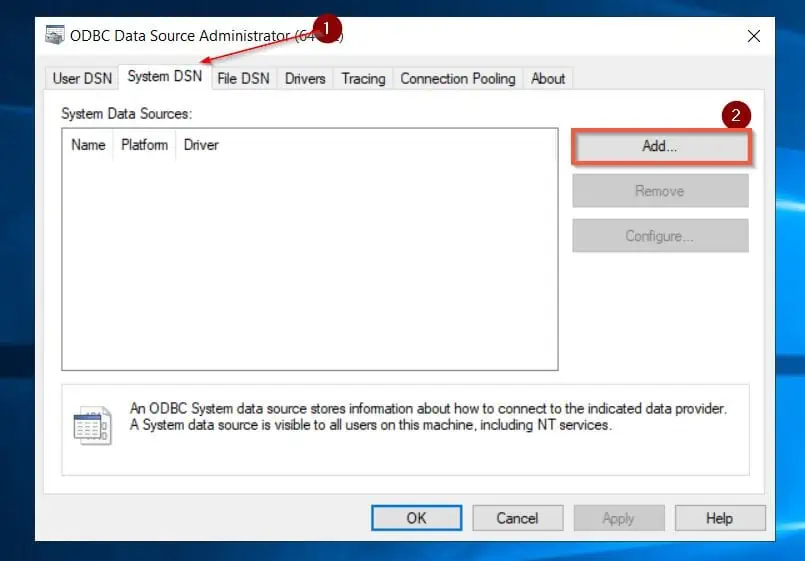
- When the ODBC Data Source Administrator opens, click the System DSN tab. Then, click Add.
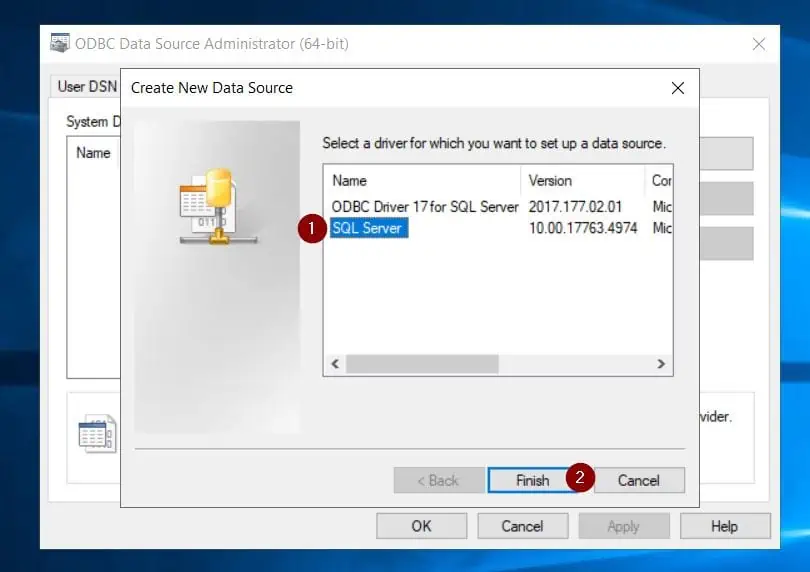
- Select SQL Server and click Finish.
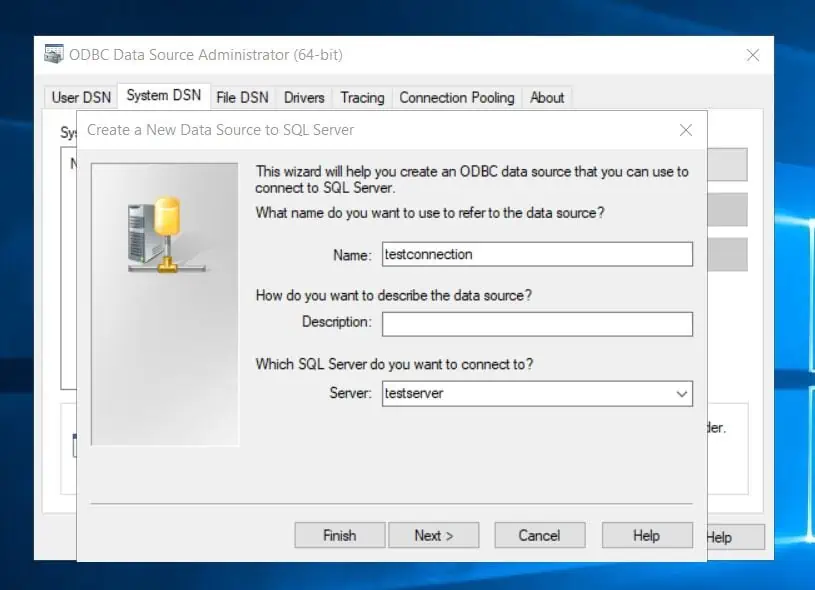
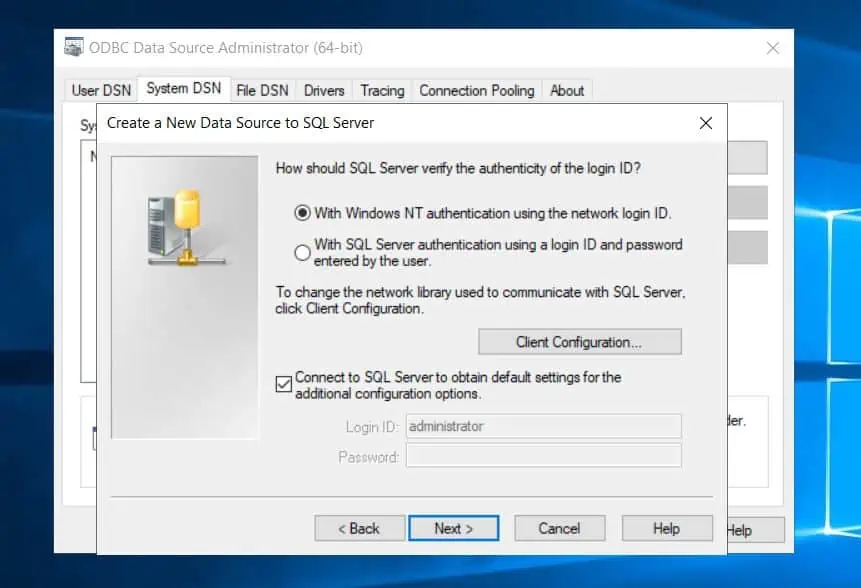
- Enter a name for the connection in the Name field. Then, enter the name or IP address of the Microsoft SQL server you want to connect to in the Server field – click Next to continue.
- Finally, select the credential type to use for the connection and click Next.
Option 2: Test SQL Connection Using a .udl File
If you do not want to use the inbuilt ODBC connector app, you can create any file name with the .udl extension. Then, use the file to test your connection.
The three subsections below explain the detailed steps.
Step 1: Change File Explorer Settings
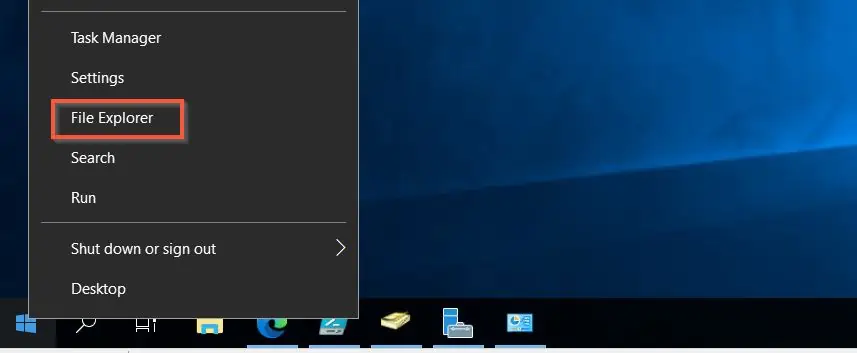
- Right-click the Windows Start menu and select File Explorer.
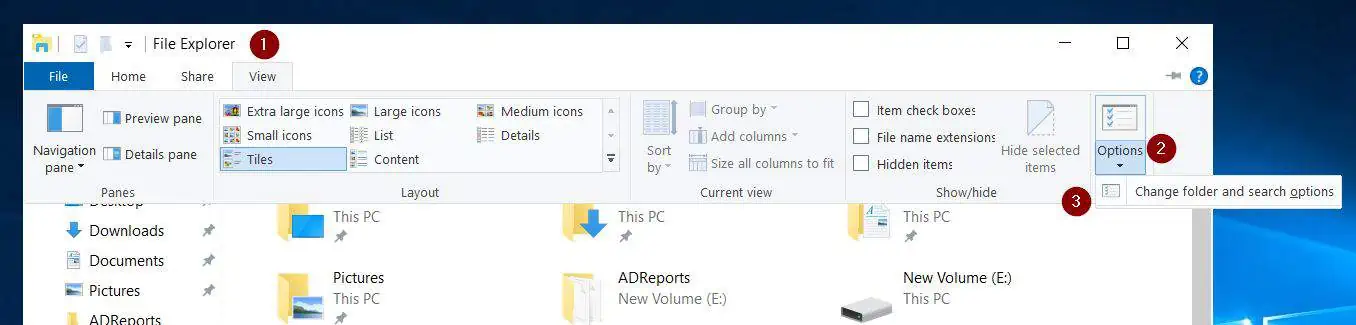
- Click the View tab, then the Options drop-down, and select “Change folder and search options.”
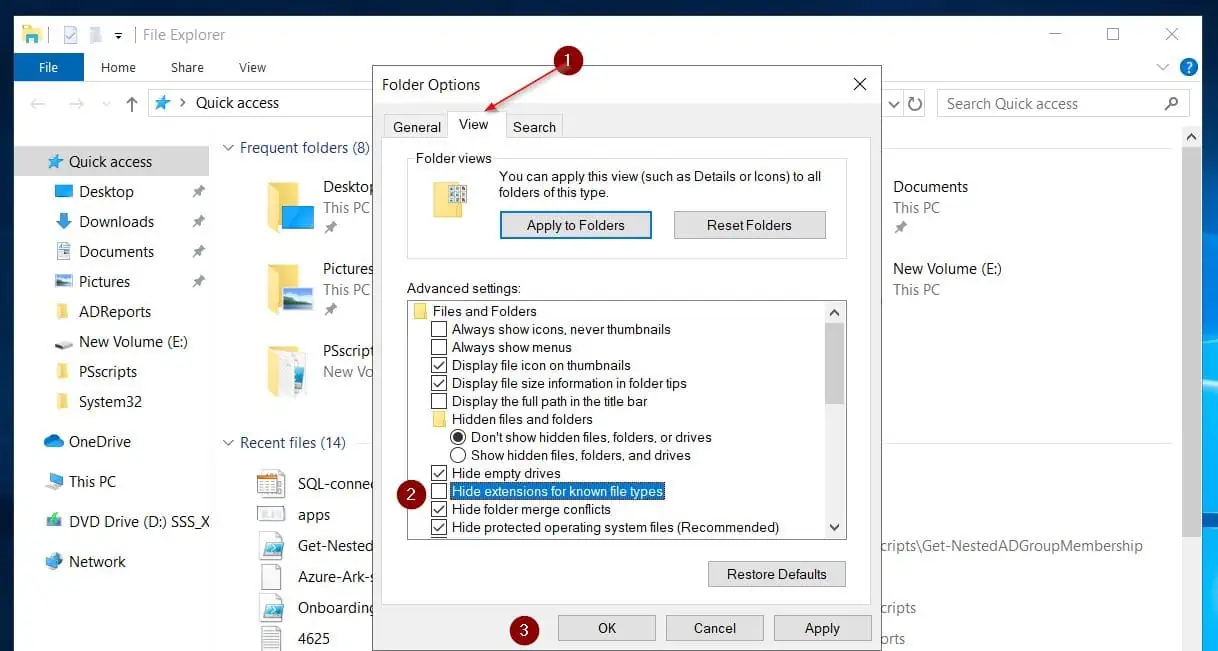
- Finally, on the Folder Options screen, click the View tab and uncheck the Hide extensions for known file types option – then click OK.
Step 2: Create a .udl File
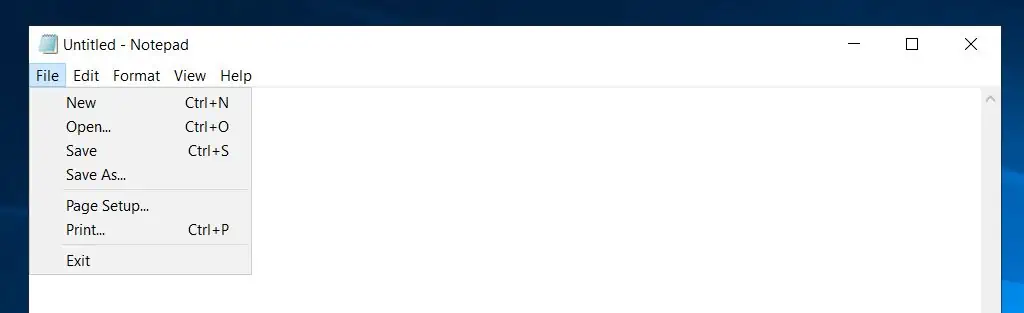
- From the computer you want to test the connection from, open Notepad. Then, click File -> Save As.
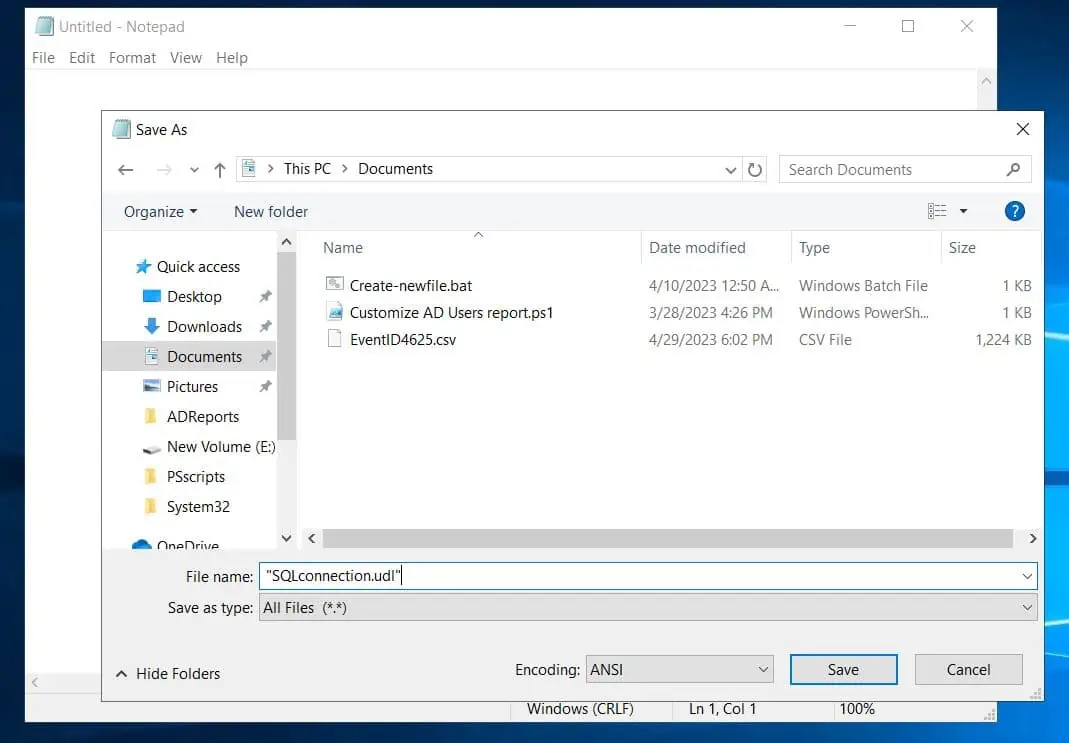
- Next, select the folder you want to save the file. Then, enter any name with the .udl extension.
You MUST enter the name in double quotation marks. Here is a sample that I am using for my demonstration. Finally, click Save to save the file.
"SQLconnection.udl"
Step 3: Test an SQL Connection Using the .udl File
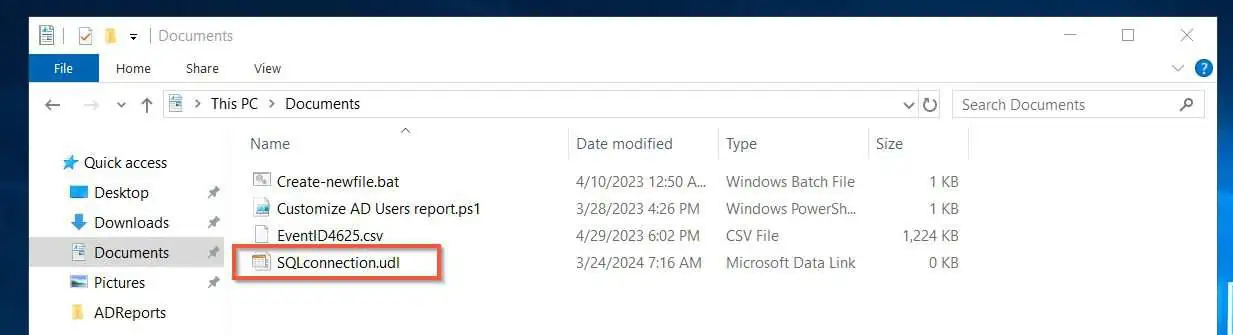
- Open the location you saved the file in step 1 and double-click it.
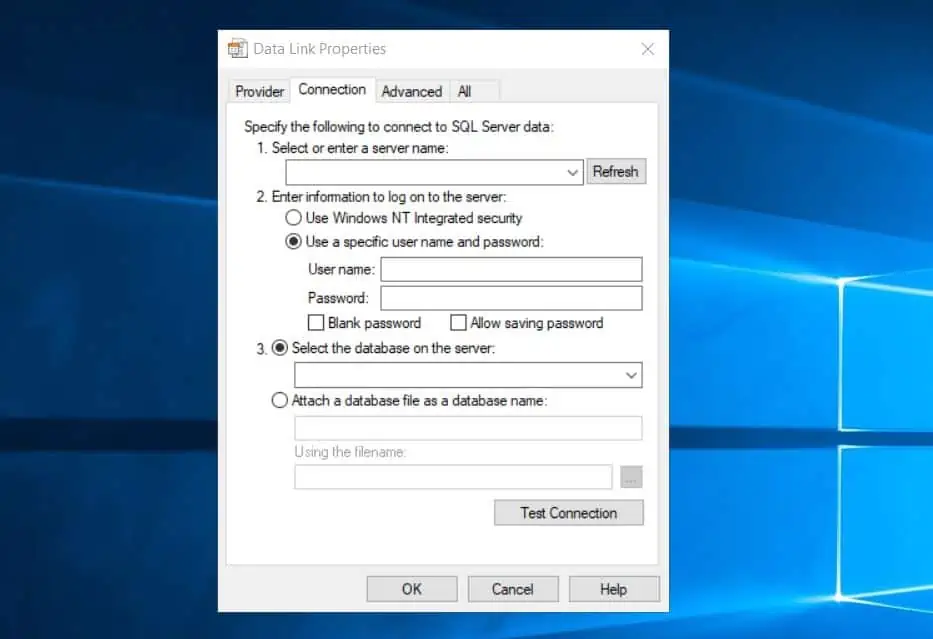
- On the “Data link properties” settings that open, enter the name or IP address of the SQL server. Then, select the login type and enter the sign in credentials.
After entering the details, click “Test Connection.”
Conclusion
Testing connections to a Microsoft SQL database server is an essential troubleshooting step in trying to figure out why an app may be having trouble working as expected. I have shown two methods to complete this essential troubleshooting step in this guide.
Specifically, I explained how to test a Microsoft SQL connection using the built in ODBC Data Sources Driver and by using a .udl file.
Let me know the method you preferred using the “Was this page helpful?” question below.
Before you run, you may benefit from browsing our Windows Server how-to guides page.