Outdated Drivers Are Slowing You Down
One free scan finds every outdated or missing driver and matches the right update for your exact hardware.Free scan · exact hardware matchPC Slower Than It Used to Be?
A free scan shows the junk files, broken settings and background clutter dragging Windows down - then fixes them in one click.Free scan · Windows 10 & 11iTechGuides is reader-supported. When you buy through links on our site, we may earn an affiliate commission. As an Amazon Associate I earn from qualifying purchases. Learn more
Read this guide to learn how to configure a Windows Server 2022 server as a router – connecting two separate networks.
Overview and Requirements
Configuring a Windows Server as a router requires two network adapters on the server. One network adapter should be connected to each network that the router will be routing traffic to and from.
For this guide, I am configuring a Windows Server to route traffic to and from my AZ-800 lab (172.16.0.0/24) and my home network (192.168.0.0/24).
Do these 3 things before closing this tab:
1Scan for outdated or missing drivers - takes under a minute2Repair Windows errors before they cause bigger problems3Fix the driver behind crashes, sound loss and screen glitchesAfter setting up the Windows Server as a router, the computers in the 172.16.0.0/24 network will use the IP address of the server (172.16.0.1) as their default gateway.
Popular on Amazon

- Dual band router upgrades to 1200 Mbps high speed internet (300mbps for 2.4GHz plus 900Mbps for 5GHz), reducing buffering and ideal for 4K stream
- Full Gigabit Ports - Gigabit Router with 4 Gigabit LAN ports, ideal for any internet plan and allow you to directly connect your wired devices
- Boosted Coverage - Four external antennas equipped with Beamforming technology extend and concentrate the Wi-Fi signals
- MU-MIMO technology - (5GHz band) allows high speeds for multiple devices simultaneously
- Access Point Mode - Supports AP Mode to transform your wired connection into wireless network, an ideal wireless router for home
Step 1: Configure Network Adapters
In this section, I will rename the network adapter connected to the 172.16.0.0/24 network as AZ-800-net. Similarly, I’ll rename the network adapter connected to the 192.168.0.0/24 network as home-net.
After that, I’ll configure the TCP/IP settings of each adapter with the configurations shown below:
| Network Adapter | IP Address | Subnet Mask/Default Gateway | DNS Server |
|---|---|---|---|
| AZ-800-net | 172.16.0.1 | 255.255.255.0 | 172.16.0.12 |
| home-net | 192.168.0.120 | 255.255.255.0/192.168.0.1 | 192.168.0.80 |
Step 1.1: Rename the Network Adapters
- Open PowerShell or CMD and run the IPConfig command to determine the network adapter connected to each network.
The result of the command shows that “Ethernet 2” is connected to my home network. On the other hand, “Ethernet 3” is connected to my AZ-800 lab network.
Quick wins for a faster PC:
Fix the driver behind crashes, sound loss and screen glitchesFind Drivers →Repair Windows errors before they cause bigger problemsFix Now →Scan for outdated or missing drivers - takes under a minuteDriver Scan →Also popular on Amazon
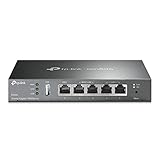
- 【Five Gigabit Ports】1 Gigabit WAN Port plus 2 Gigabit WAN/LAN Ports plus 2 Gigabit LAN Port. Up to 3 WAN ports optimize bandwidth usage through one device.
- 【One USB WAN Port】Mobile broadband via 4G/3G modem is supported for WAN backup by connecting to the USB port. For complete list of compatible 4G/3G modems, please visit TP-Link website.
- 【Abundant Security Features】Advanced firewall policies, DoS defense, IP/MAC/URL filtering, speed test and more security functions protect your network and data.
- 【Highly Secure VPN】Supports up to 20× LAN-to-LAN IPsec, 16× OpenVPN, 16× L2TP, and 16× PPTP VPN connections.
- Security - SPI Firewall, VPN Pass through, FTP/H.323/PPTP/SIP/IPsec ALG, DoS Defence, Ping of Death and Local Management. Standards and Protocols IEEE 802.3, 802.3u, 802.3ab, IEEE 802.3x, IEEE 802.1q

To rename the network adapters, complete these steps:
- From Server Manager, click the Local Server node, then, click the IPv4 address assigned by DHCP link.

- From the result of the IPConfig command, I know that that “Ethernet 2” is connected to my home network while “Ethernet 3” is connected to my AZ-800 lab network.
So, I’ll rename “Ethernet 2” to home-net and “Ethernet 3” to AZ-800-net. To rename a network adapter, right-click it and choose Rename.


Step 1.2: Configure the NIC’s TCP/IP
Configure the TCP/IP settings of the net adapters based on the table your created earlier. Here is a copy for your reference.
Also popular on Amazon
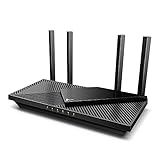
- Wi-Fi 6 Speeds: Up to 2402 Mbps on 5 GHz and 574 Mbps on 2.4 GHz bands ensure smoother streaming and faster downloads; support VPN server and VPN client¹. Actual speeds cannot exceed your internet plan and vary based on conditions, distance, & obstacles.
- A More Responsive Experience: Enjoy smooth gaming, video streaming, and live feeds simultaneously. OFDMA makes your Wi-Fi stronger by allowing multiple clients to share one band at the same time, cutting latency and jitter.²
- Expanded Wi-Fi Coverage: 4 high-gain external antennas and Beamforming technology combine to extend strong, reliable, Wi-Fi throughout your home.
- Improved Battery Life: Target Wake Time helps your devices to communicate efficiently while consuming less power.
- Improved Cooling Design: No heat ups, no throttles. A larger heat sink and redefined case design cools the WiFi 6 system and enables your network to stay at top speeds in more versatile environments.
| Network Adapter | IP Address | Subnet Mask/Default Gateway | DNS Server |
|---|---|---|---|
| AZ-800-net | 172.16.0.1 | 255.255.255.0 | 172.16.0.12 |
| home-net | 192.168.0.110 | 255.255.255.0/192.168.0.1 | 192.168.0.80 |
The fastest way to configure the TCP/IP settings is to run the following PowerShell commands – open PowerShell as administrator.
What’s actually slowing this PC down?
Pick the symptom - the matching free tool is one click away.
#Configure IP settings for the "home-net" adapter

Get-NetAdapter -Name "home-net" | New-NetIPAddress -IPAddress 192.168.0.110 -PrefixLength 24 -DefaultGateway 192.168.0.1

#Assign the DNS server to the "home-net" adapter

Get-NetAdapter -Name "home-net" | Set-DnsClientServerAddress -ServerAddress 192.168.0.80

#Configure IP settings for the "AZ-800-net" adapter

Get-NetAdapter -Name "AZ-800-net" | New-NetIPAddress -IPAddress 172.16.0.1 -PrefixLength 24

#Assign the DNS server to the "AZ-800-net" adapter

Get-NetAdapter -Name "AZ-800-net" | Set-DnsClientServerAddress -ServerAddress 172.16.0.12
Step 2: Install the Routing Role
Open PowerShell as Administrator and run the command below to install the Windows Server routing role.
Install-WindowsFeature -Name Routing -IncludeManagementTools -IncludeAllSubFeature
Wait for the role to install and return a confirmation message.
Also popular on Amazon

- 【Flexible Port Configuration】1 Gigabit SFP WAN Port + 1 Gigabit WAN Port + 2 Gigabit WAN/LAN Ports plus1 Gigabit LAN Port. Up to four WAN ports optimize bandwidth usage through one device.
- 【Increased Network Capacity】Maximum number of associated client devices – 150,000. Maximum number of clients – Up to 700.
- 【Integrated into Omada SDN】Omada’s Software Defined Networking (SDN) platform integrates network devices including gateways, access points & switches with multiple control options offered – Omada Hardware controller, Omada Software Controller or Omada cloud-based controller(Contact TP-Link for Cloud-Based Controller Plan Details). Standalone mode also applies.
- 【Cloud Access】Remote Cloud access and Omada app brings centralized cloud management of the whole network from different sites—all controlled from a single interface anywhere, anytime.
- 【SDN Compatibility】For SDN usage, make sure your devices/controllers are either equipped with or can be upgraded to SDN version. SDN controllers work only with SDN Gateways, Access Points & Switches. Non-SDN controllers work only with non-SDN APs. For devices that are compatible with SDN firmware, please visit TP-Link website.

Step 3: Configure the Server as a Router
- While logged in to the server you installed the routing role, open Server Manager. If it was already open when you installed the Routing role, refresh Server Manager.
- After that, click the Server Manager’s Tools menu and choose Routing and Remote Access.

- Then, right-click the Server node and choose Configure and Enable Routing and Remote Access. On the first page of the wizard, click Next.

- Then, select Network Address Translation (NAT) option. On the NAT Internet connection page, click on the network adapter that is connected to the internet to select it.


- Finally, review the settings and click Finish to set up NAT on the selected network adapter. If you receive a warning about the wizard not being able to configure Windows Firewall ports, click OK.


Step 4: Configure Windows Firewall
- Search for an open Windows Defebder Firewall. Then, click Advanced settings.

- Click the Inbound Rules node, then locate the Routing and Remote Access rule group, hold down the shift key and select all. After that, right-click the rules and choose Enable Rule.

Step 5: Test the Router
To confirm that the router works, I created a VM in the 172.16.0.0/24 network and configured its TCP/IP settings as shown in the screenshot below. As seen in the screenshot, the VM is connected to the internet.

To confirm that the VM connects to the intert via the router, 172.16.0.1, see the result of my tracert command. As shown in the result, the connection’s first hop is the router IP address.

Conclusion
Windows Server offers a simple router that you can use to separate your home from your lab network. In this guide, I explained the steps to configure Windows Server 2022 as a router.
Also popular on Amazon

- DUAL-BAND WIFI 6 ROUTER: Wi-Fi 6(802.11ax) technology achieves faster speeds, greater capacity and reduced network congestion compared to the previous gen. All WiFi routers require a separate modem. Dual-Band WiFi routers do not support the 6 GHz band.
- AX1800: Enjoy smoother and more stable streaming and gaming with 1.8 Gbps total bandwidth (up to 1200 Mbps on 5 GHz and up to 574 Mbps on 2.4 GHz). Actual speeds cannot exceed your internet plan and vary based on conditions, distance, and obstacles.
- CONNECT MORE DEVICES: Wi-Fi 6 technology communicates more data to more devices simultaneously using revolutionary OFDMA technology
- EXTENSIVE COVERAGE: Achieve the strong, reliable WiFi coverage with Archer AX1800 as it focuses signal strength to your devices far away using Beamforming technology, 4 high-gain antennas and an advanced front-end module (FEM) chipset
- OUR CYBERSECURITY COMMITMENT: TP-Link is a signatory of the U.S. Cybersecurity and Infrastructure Security Agency’s (CISA) Secure-by-Design pledge. This device is designed, built, and maintained, with advanced security as a core requirement.
Thank you for reading the guide and I hope you found it helpful. If you did, let me know by responding to the “Was this page helpful?” feedback request below.
You may also find the articles in the “Related Articles” section below super helpful. Thanks again for stopping by.