Do you want to remove an AD (Active Directory) group member but are not sure how to do that? This guide teaches you 4 methods to remove a member of an Active Directory Group.
Option 1: Remove an AD (Active Directory) Group Member with Active Directory Users and Computers
One of the most used tools for managing Active Directory is Active Directory Users and Computers (ADUC). Although there are some tasks you cannot perform with ADUC, you can use it to manage AD groups.
In this section I will show you how to remove a group member from the properties of the AD group. Secondly, you’ll learn how to remove an Active Directory group member from the user’s property.
Method 1: Remove an Active Directory Group Member from the Group Properties with Active Directory Administrative Center
Follow the steps below to remove an Active Directory group member from the group’s properties sheet.
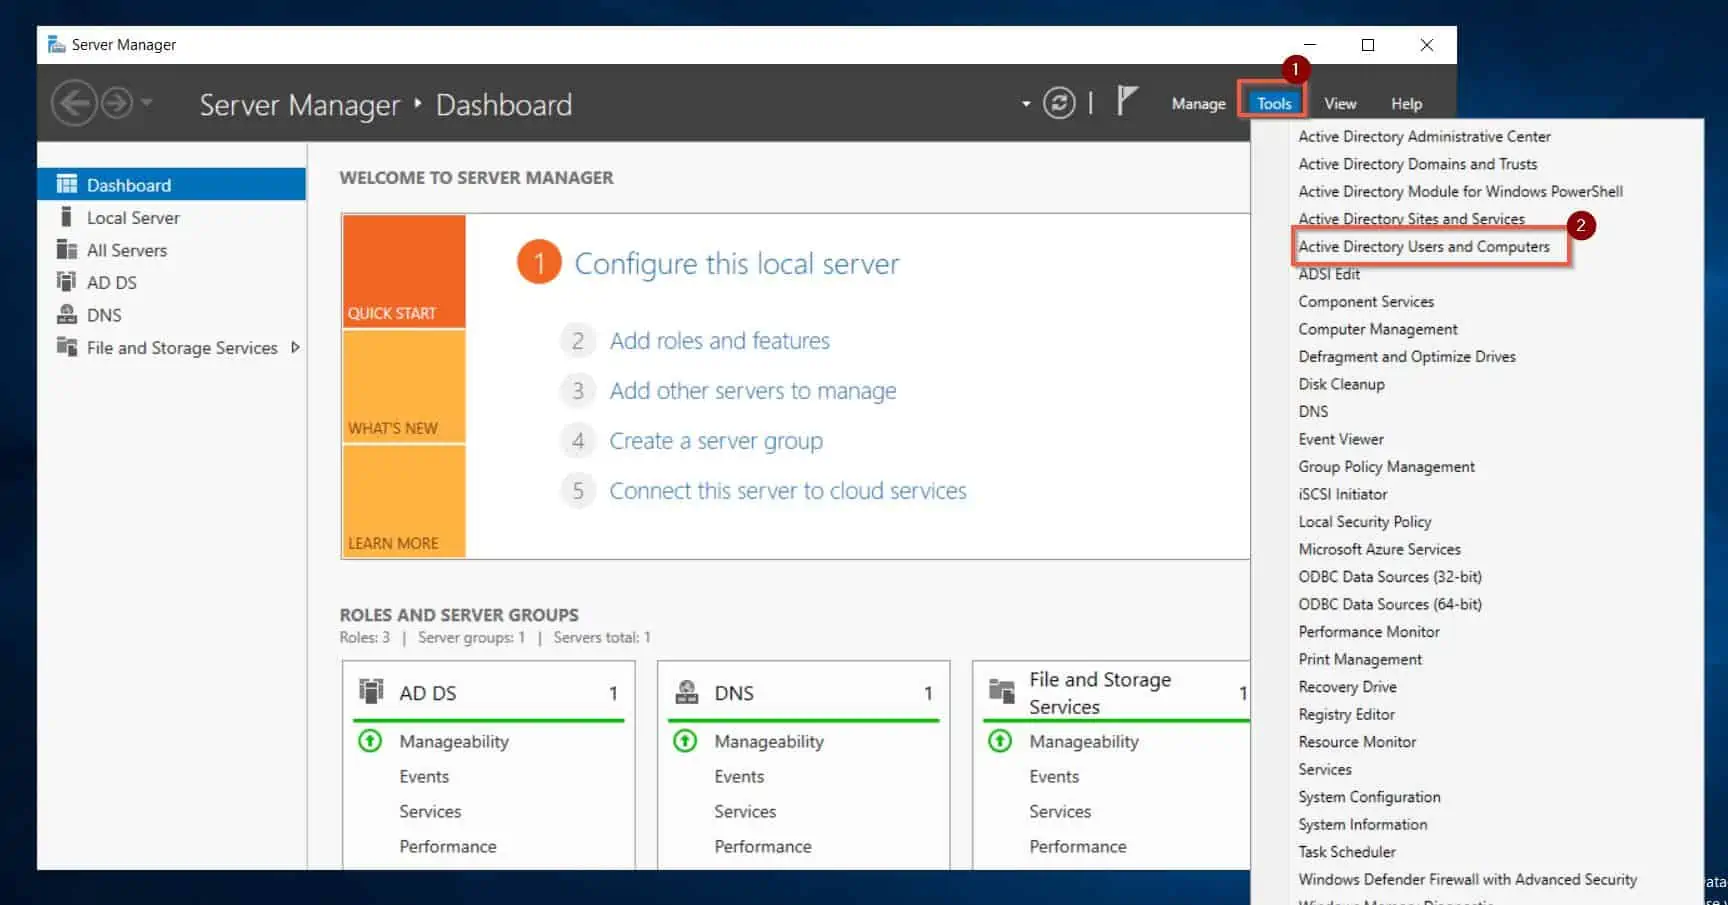
- Open Active Directory Users and Computers. If you installed RSAT for Active Directory on your Windows 10/11 PC, you could search for ADUC.
Alternatively, if you’re working from a Domain Controller (not recommended), open Server Manager. Then, on the Server Manager menu, click Tools and select Active Directory Users and Computers.
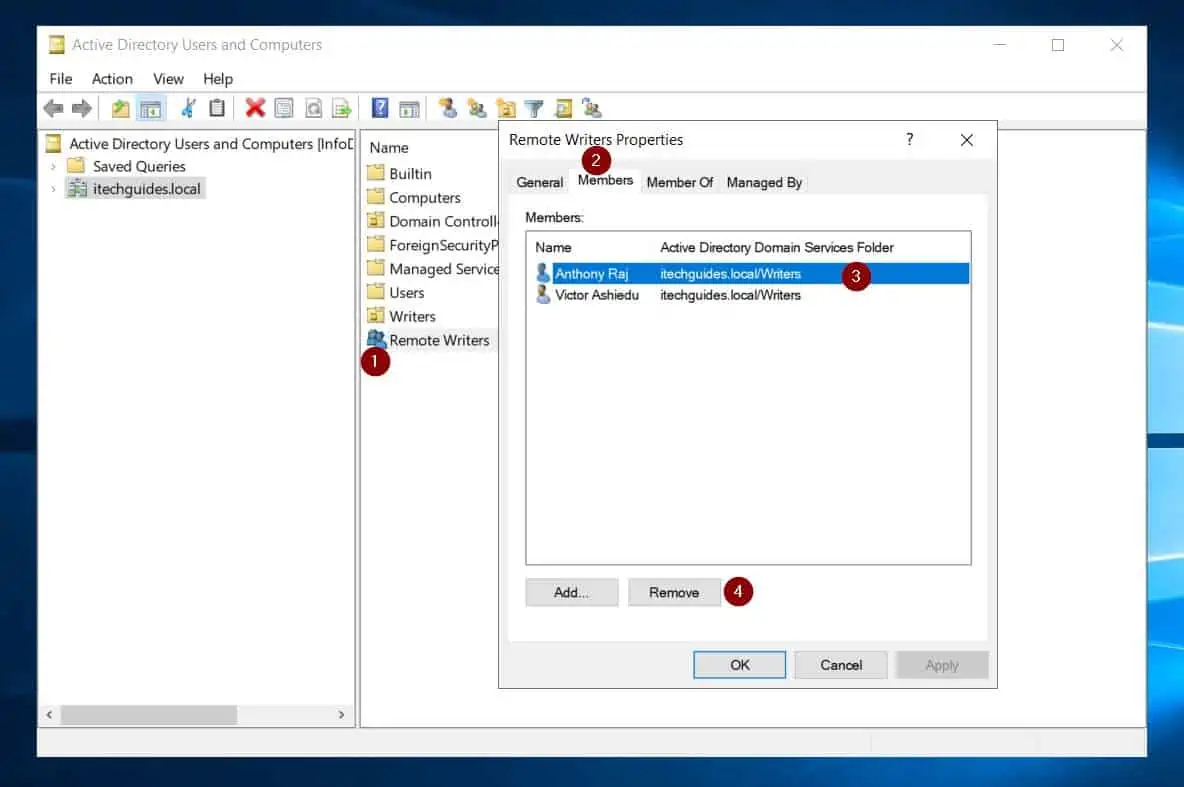
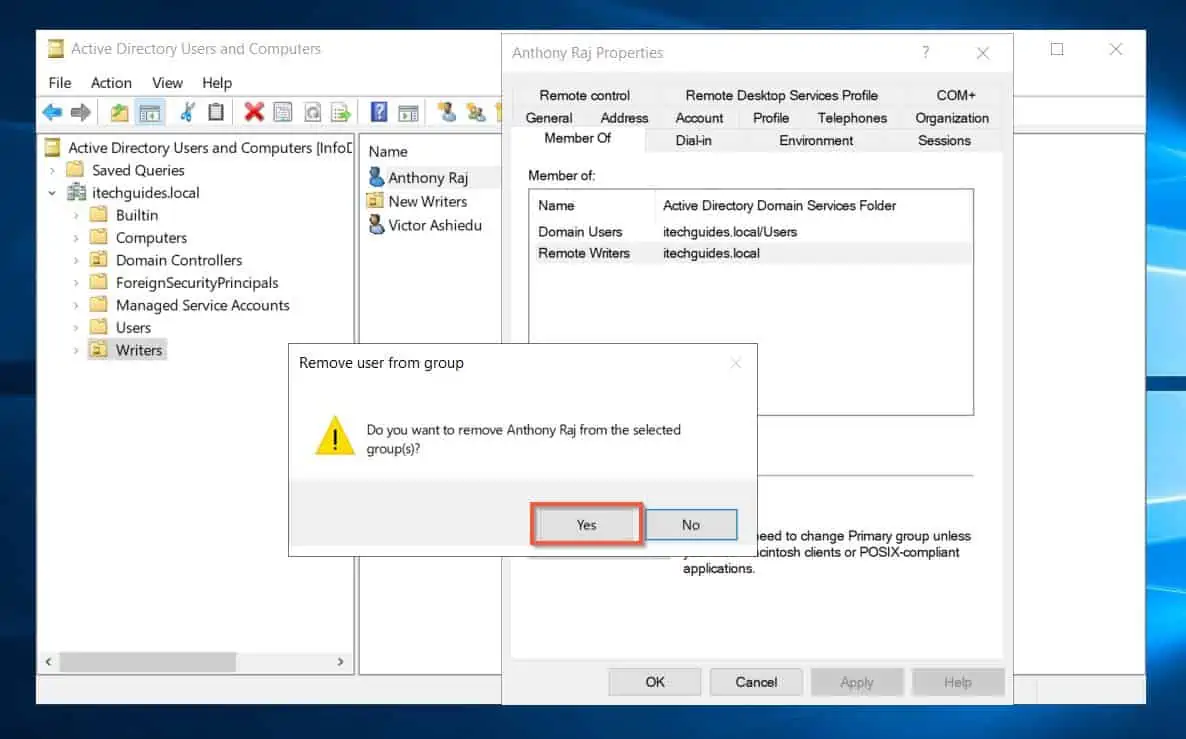
- Then, when ADUC opens, double-click the AD group to open its properties. Next, click the Members tab of the AD group.
Finally, to remove the AD group member, highlight (left-click the member once), then click Remove.
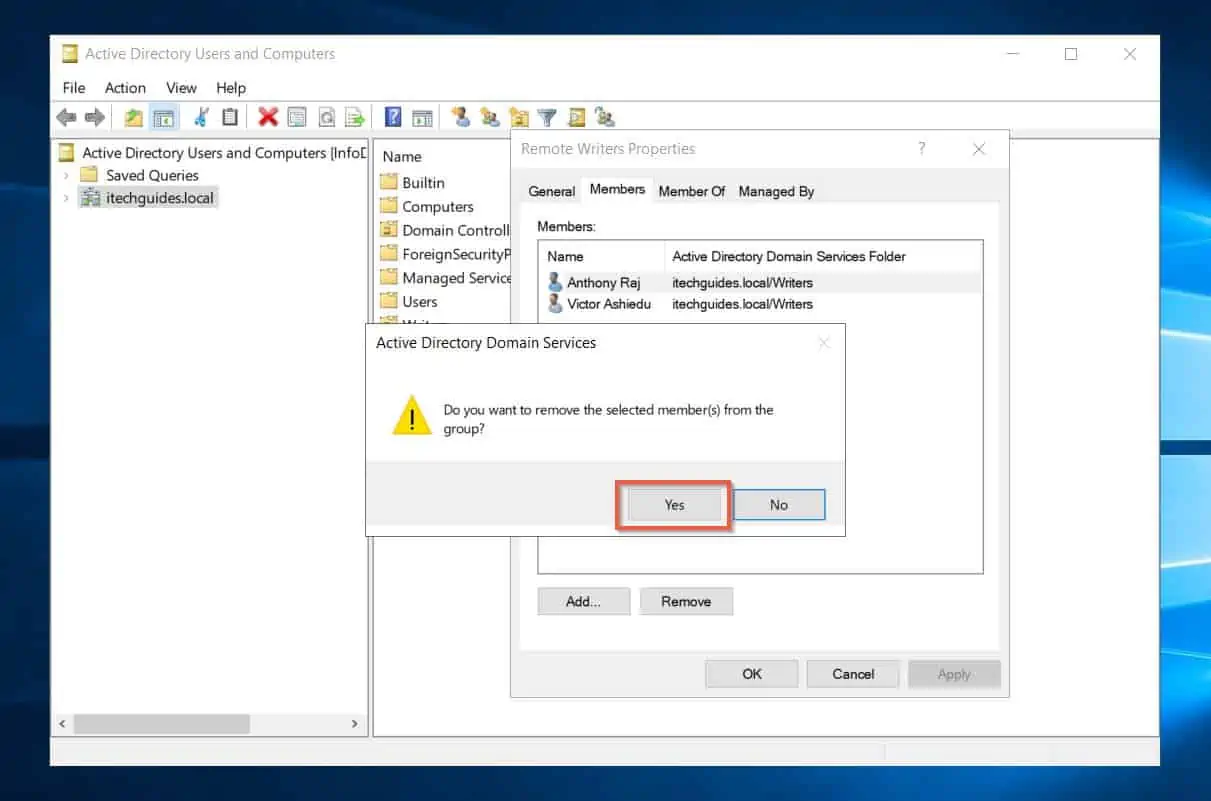
- Active Directory will prompt you to confirm that you wish to remove the user from the group. If you want to proceed, click Yes.
Method 2: Remove an Active Directory Group Member from the User’s Properties with Active Directory Administrative Center
You can also remove an AD group member from the users’ properties sheet. Here are the steps…
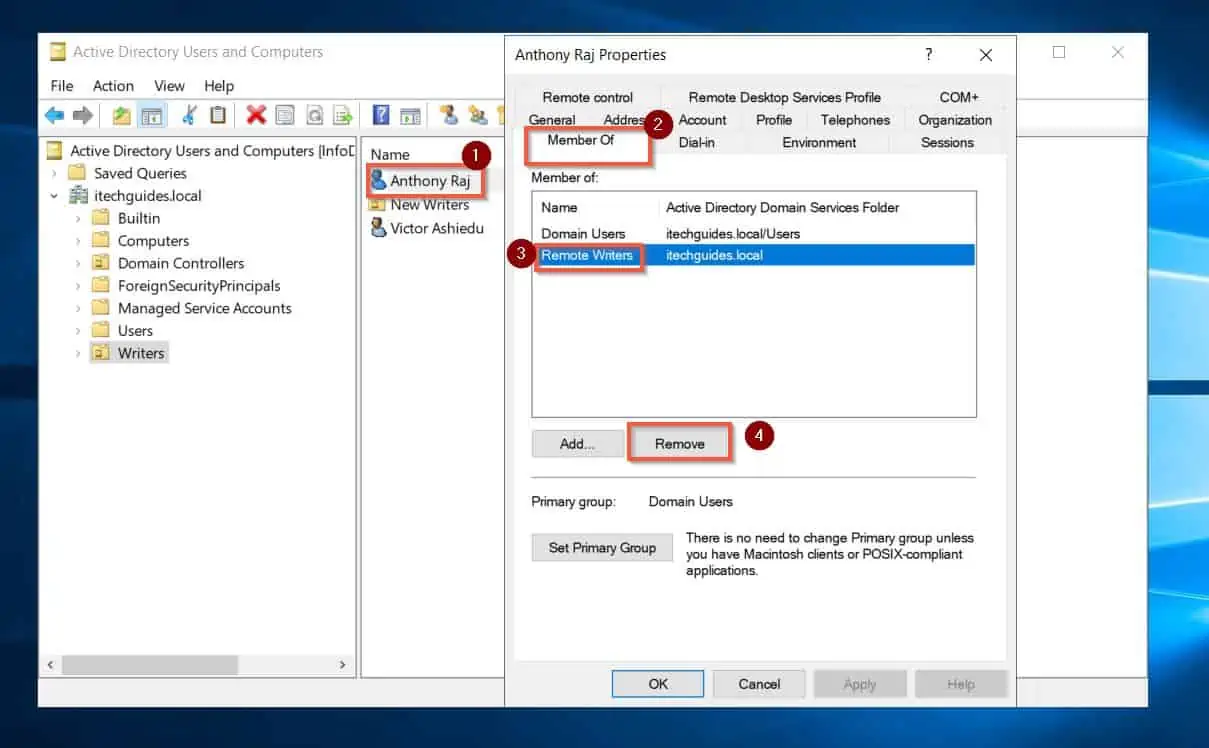
- Find the user in ADUC and double-click the user to open its properties sheet.
- When the user’s properties sheet opens, click the Member of tab. Then, left-click the AD group you want to remove the user from.
Finally, click the Remove button. AD will require you to confirm the action – click Yes.
Option 2: Remove an AD (Active Directory) Group Member with Active Directory Administrative Center
Although Active Directory Administrative Center may not be as commonly used as ADUC, it is an essential AD management tool.
You can use this tool to add or remove AD users to and from a group. Like the ADUC tool, you can also perform this task from the group’s properties sheet.
Similarly, you can remove an AD user from a group from the user’s property sheet in Active Directory Administrative Center.
Remove an Active Directory Group Member from the Group Properties with Active Directory Administrative Center
- Open Active Directory Administrative Center from either your Windows 10/11 PC or a Domain Controller (not recommended).
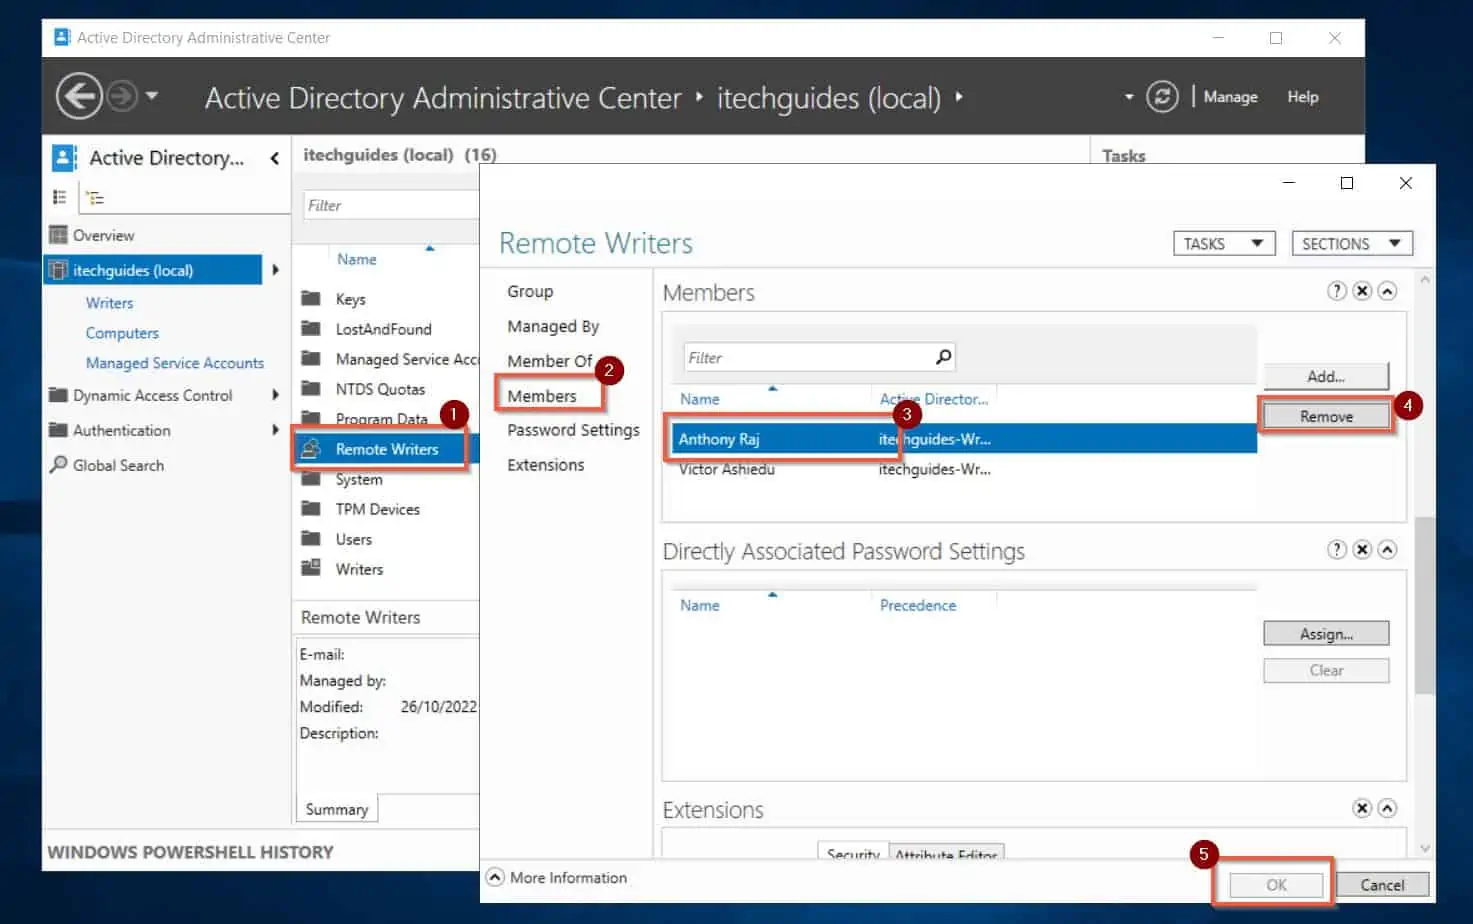
- Then, locate the group you want to remove a member from and double-click the group.
When the group’s properties sheet opens, click the Members tab. Then, left-click the group member you want to remove.
Finally, on the far right of the page, click Remove, and click OK.
Option 3: Remove an AD (Active Directory) Group Member with PowerShell and Command Prompt
If you prefer to perform SysAdmin tasks with command prompts and PowerShell, you’ll love this section. In the first subsection below, you can follow the steps to remove an AD group member with PowerShell.
Then, in the second subsection, you have the steps to perform the same task with the NET GROUP command prompt command.
Method 1: Remove an Active Directory Group Member with PowerShell
- Search for and open powershell.
- Then, run a command similar to the one below to remove a group member from an AD group
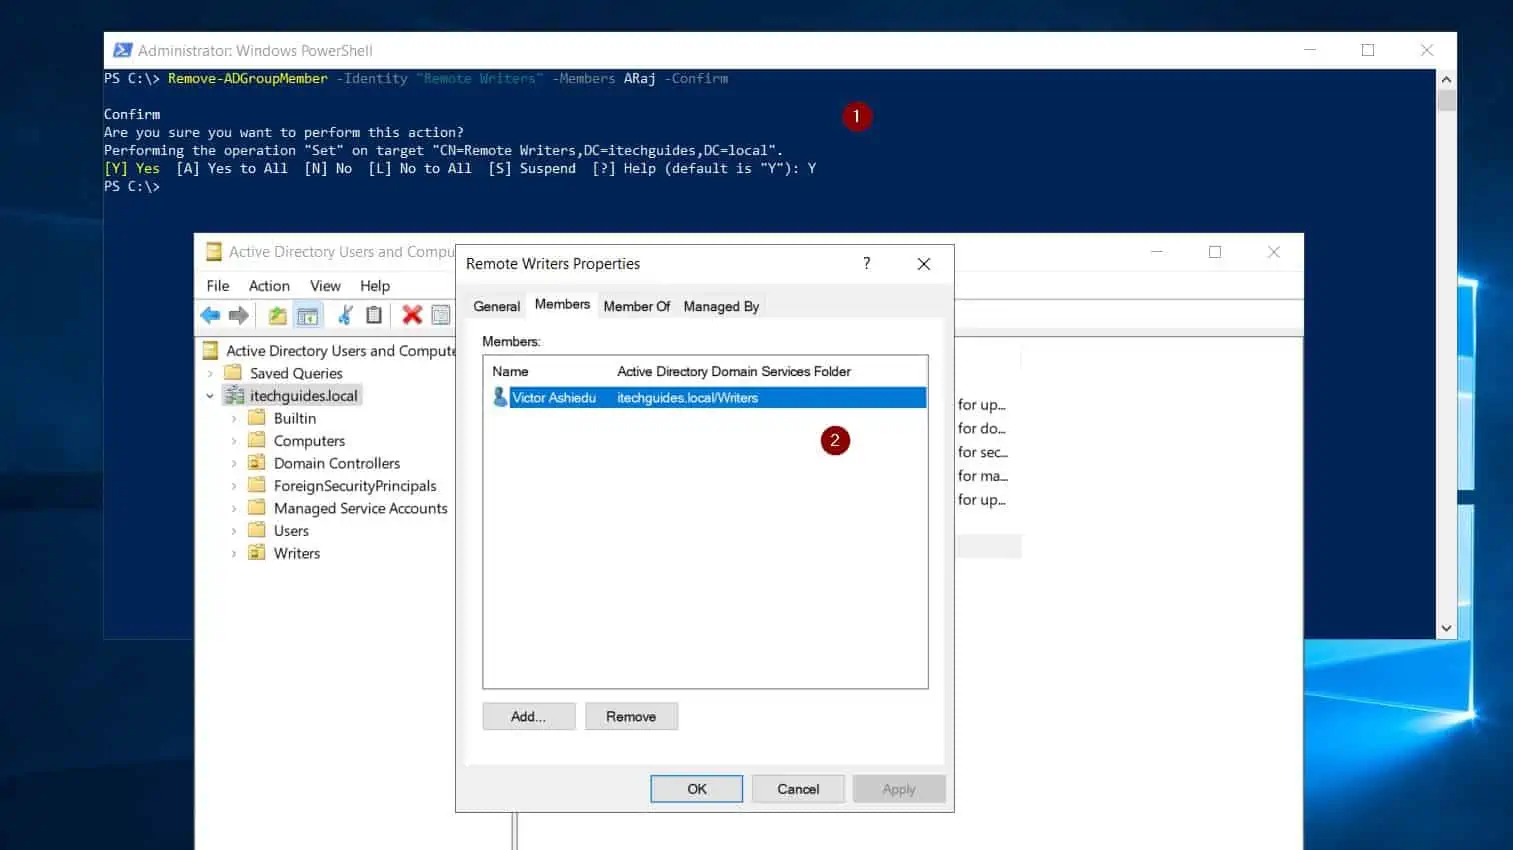
Remove-ADGroupMember -Identity "Remote Writers" -Members ARaj -Confirm
Since I added the –Confirm parameter to the command, PowerShell will prompt me to confirm the action. Type Y, then press the Enter key on your keyboard.
As you can see from the second part of the screenshot below, the user ARaj is no longer a member of the “Remote Writers” AD group.
Method 2: Remove an Active Directory Group Member with the NET GROUP Command
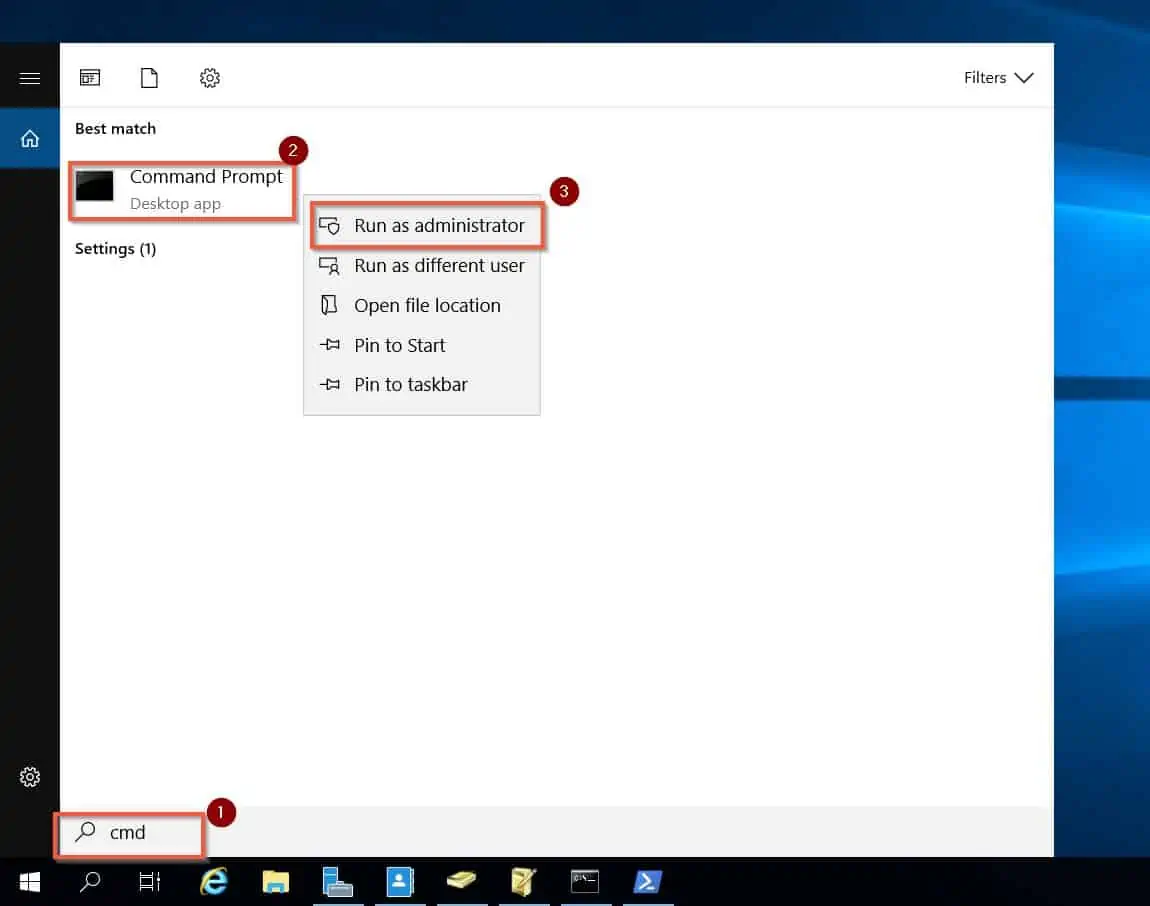
- Search cmd, then right-click Command Prompt and select Run as administrator.
- When the Command Prompt opens, run a command similar to the command below.
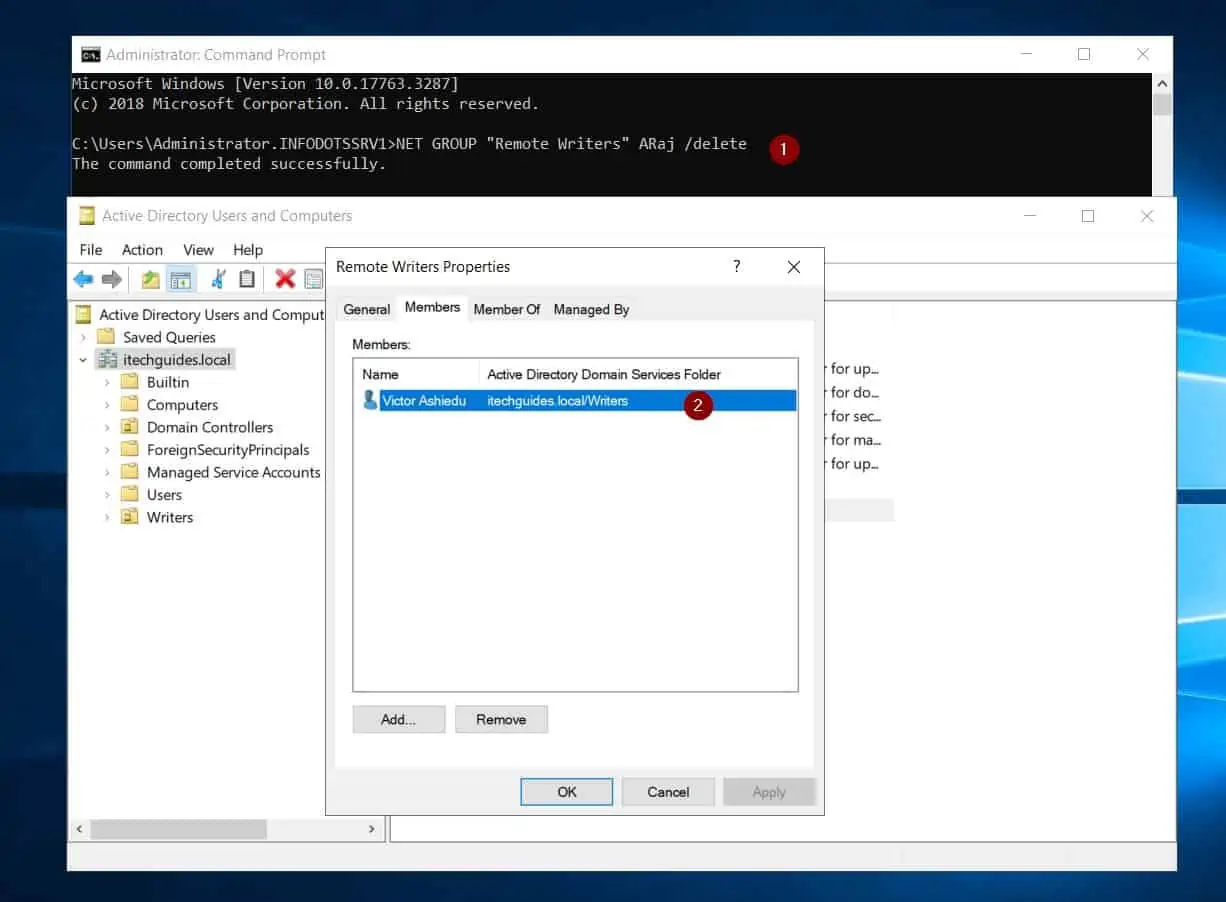
NET GROUP "Remote Writers" ARaj /delete
If the command returns “The command completed successfully.”, it means that the AD group member has been successfully removed from the AD group.
I included the image of my group in the screenshot below. As you can see, the user ARaj is no longer a member of the Remote Writers group.
Frequently Asked Questions
To remove an AD group member in PowerShell, run the Remove-ADGroupMember PowerShell command. For example, the command below removes a user with the SamAccountName, ARaj from the Remote Writers AD group.
Remove-ADGroupMember -Identity “Remote Writers” -Members ARaj -Confirm
You can use PowerShell to list all members of an AD group. For example, the PowerShell command below lists the names and SamAccountNames of all members of the Remote Writers AD group.
Get-ADGroupMember “Remote Writers” | Select-Object name, SamAccountName
You can delete an Active Directory group with the Remove-ADGroup command. Alternatively, to delete a local Windows group, use the Remove-LocalGroup command.
To change a domain user to a local admin, add the domain user to the local Administrators group from Computer Management.
Follow the steps below to remove a user from the Administrator group in Windows 10:
i) Right-click the Start menu and select Computer Management.
ii) Then, on the left pane of Computer Management, expand the Local Users and Groups node.
iii) Next, click the Groups sub-node and double-click Administrators.
iv) Finally, left-click the user you want to remove from the Administrator group in Windows 10, then click Remove and click OK.
Conclusion
Adding and removing AD group members is a normal SysAdmin task. The need to add or remove Active Directory group members arises from users joining or leaving a department or unit, leaving or joining the company.
No matter the reason you need to remove a user from an AD group, I hope you found the methods in this guide helpful.
If you found this guide helpful, click on “Yes” beside the “Was this page helpful” question below. You may also express your thoughts and opinions by using the “Leave a Comment” form at the bottom of this page.
Finally, if you’re keen to take your understanding of Active Directory to a Pro level, read more Active Directory articles on our Active Directory Guides page.