Do you want to move an image in Google Docs but are not sure how to? This Itechguide teaches you how to move images in Google Docs.
The purpose of this guide is to place two images side-by-side in Google Docs. Though with the steps, you can move images however you want to…
Step 1: Resize the Images
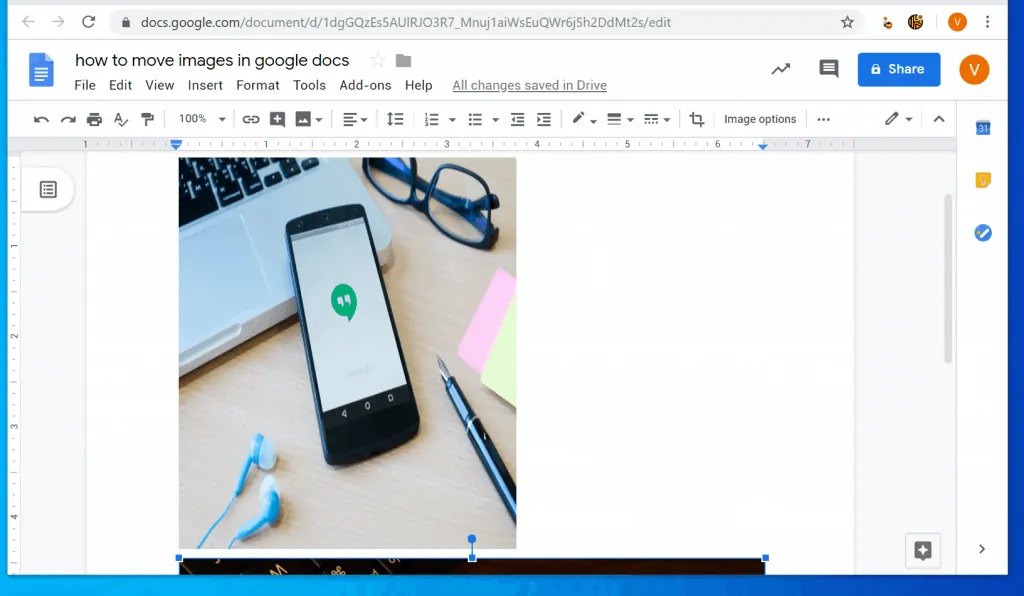
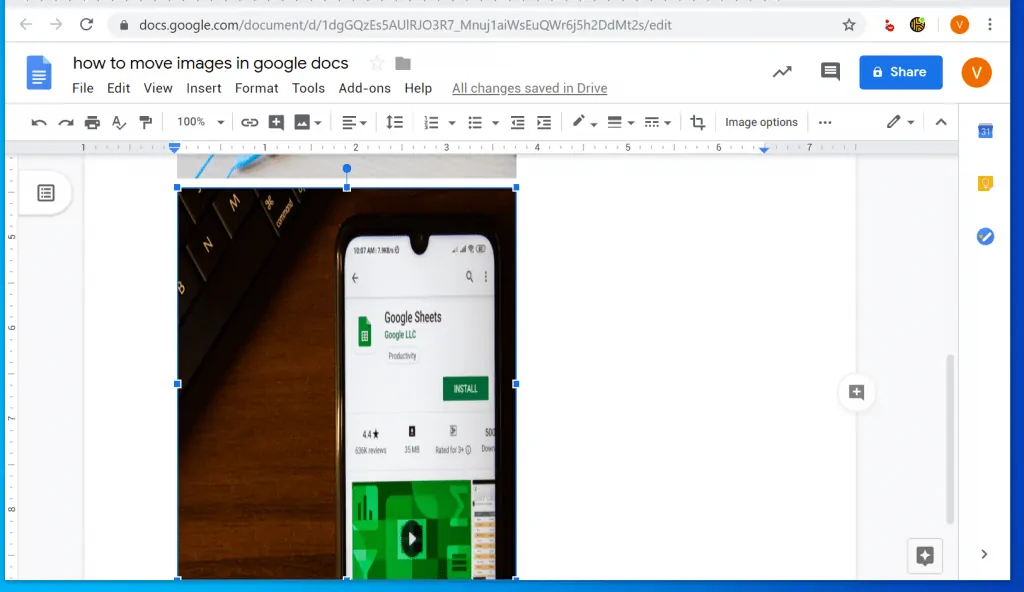
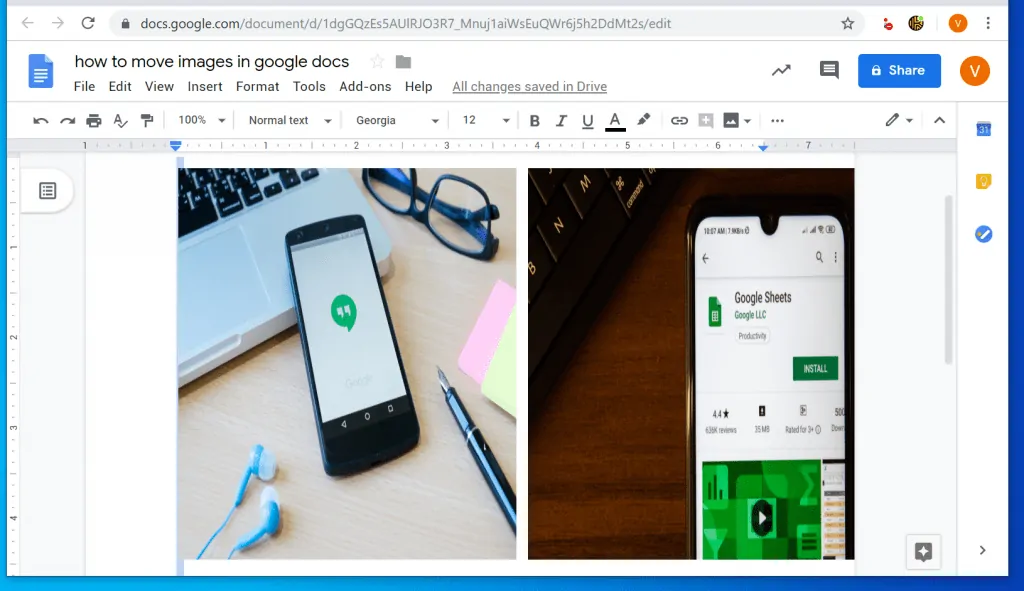
The first step in moving images in Google Docs is to resize the images. Take a look at these two images.
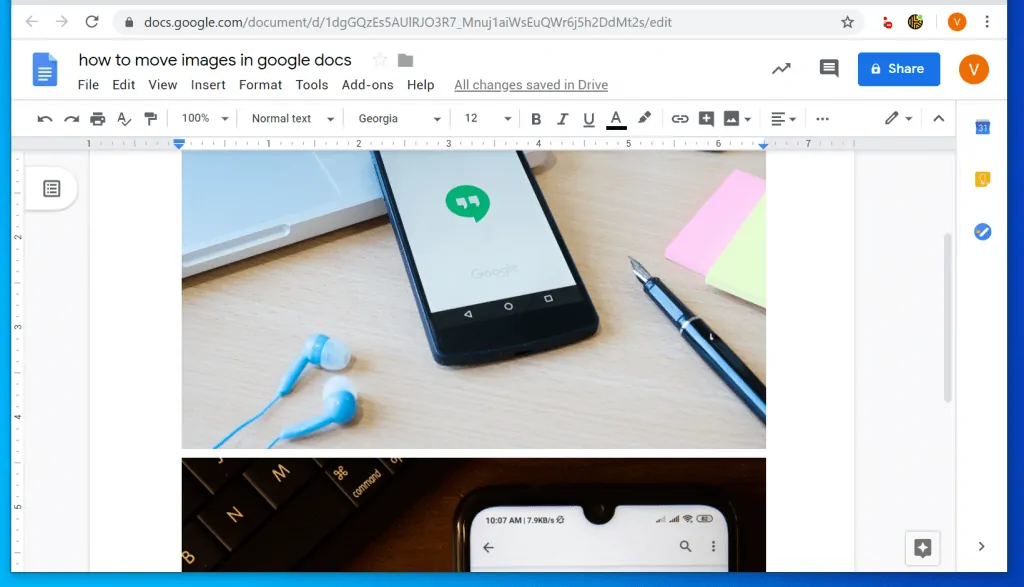
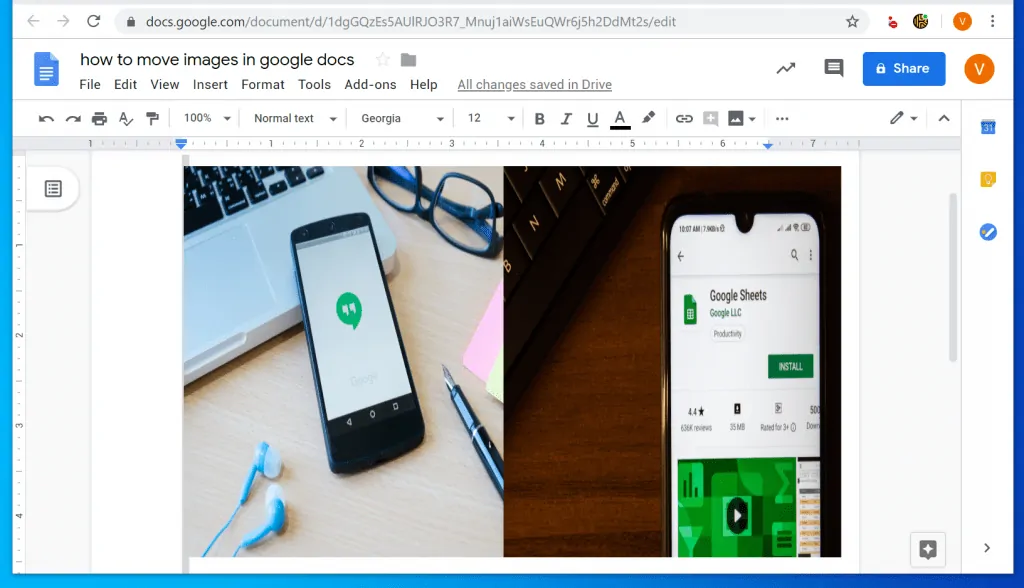
For the two images to fit side-by-side, you have to reduce their sizes. Here are the steps:
- Open Docs.Google.com and login with your Google account.
- Then open the Google Docs document with the images you want to move.
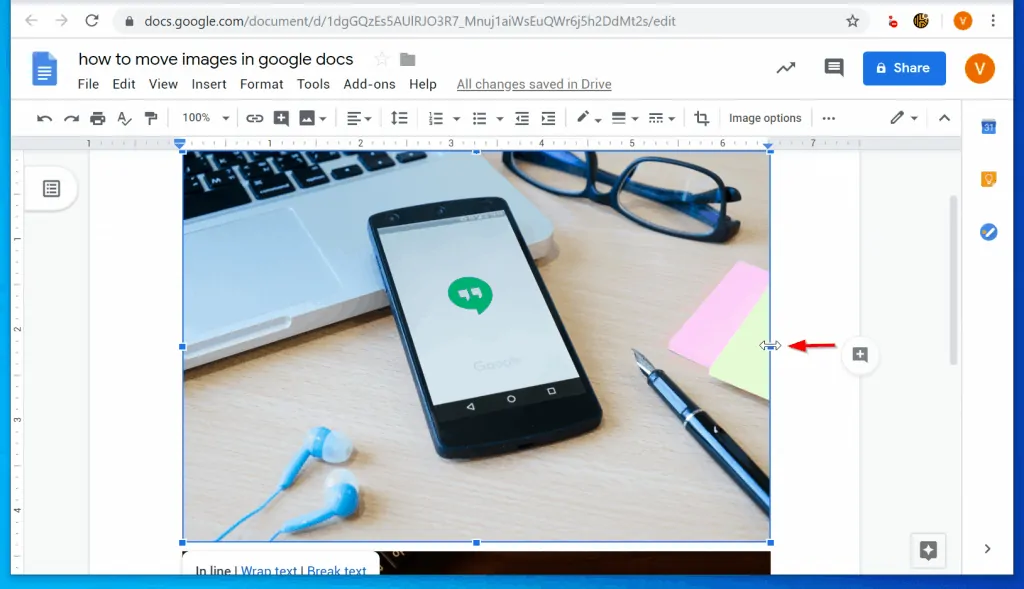
- Click on the first image. The edges of the image will have 8 tiny squares around it.
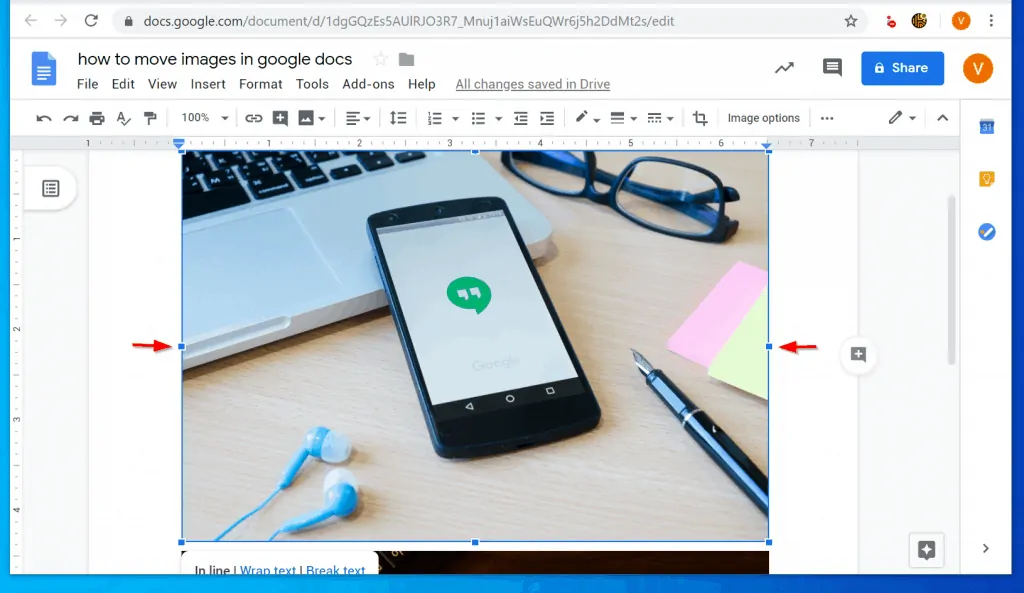
- Hover over the tiny square on the right side of the image. Two-edge arrows will be displayed. To reduce the image, drag that arrow inwards.
- Repeat the same for the second image.
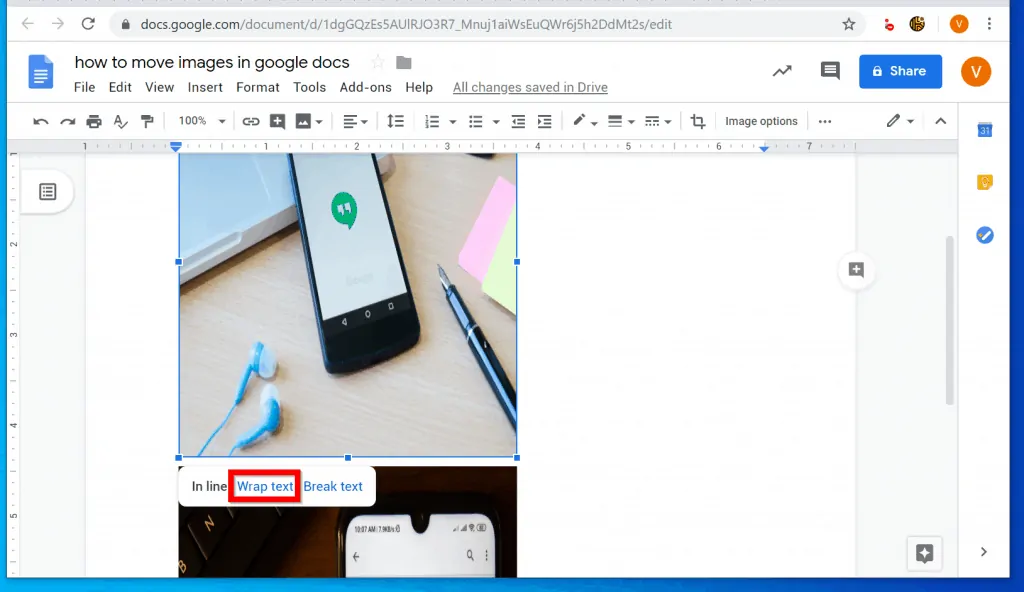
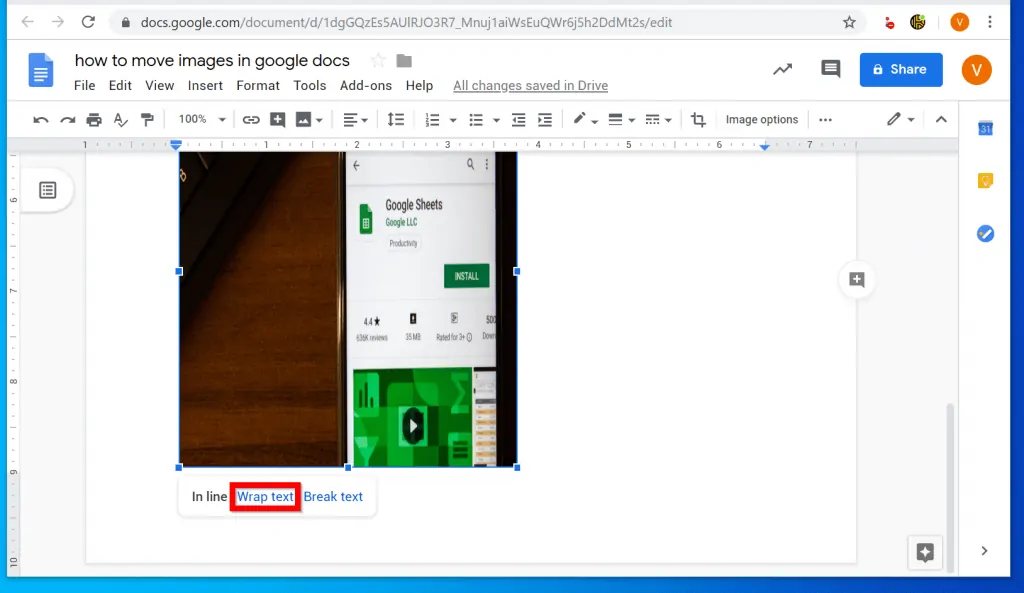
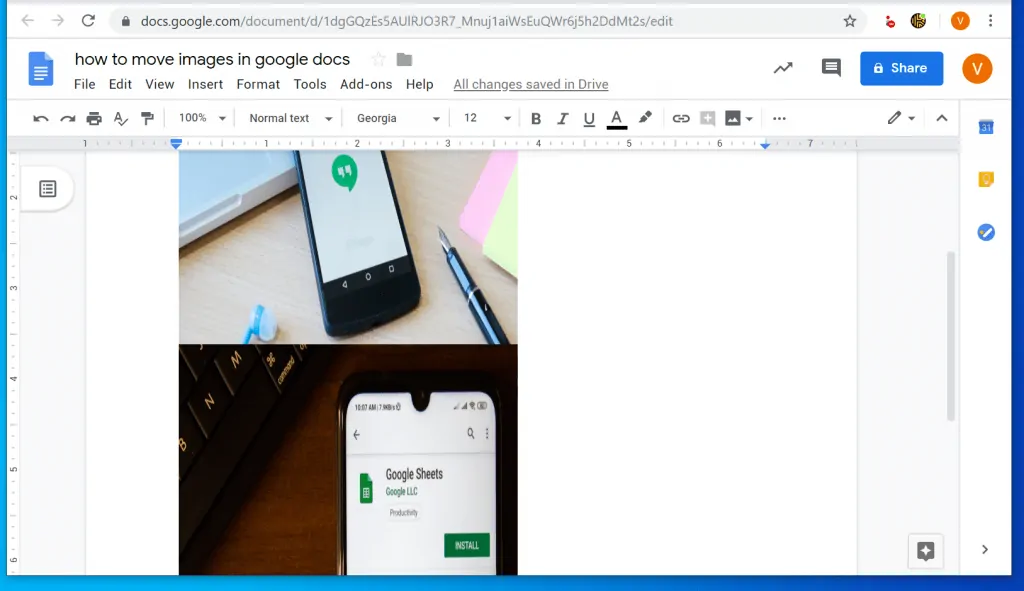
Step 2: Set the Images to ‘Wrap Text’
Once you have resized the images, the next step is to set the images to ‘Wrap Text’. Here is how…
- Click on the first image. Then beneath the image, click Wrap Text.
- Repeat the same step for the second image.
Step 3: Drag the Images Side-by-side
Once you have resized the images and set them to ‘Wrap Text’, you are set to move them side-by-side. Here are the detailed steps.
- Scroll down to the second image and click on it.
- Then drag the image towards the right side of the first image and drop it beside it.
- You can even overlap the images sideways or the second beneath the first.
It may be a bit tricky to move images in Google Docs but there is a way around it. I hope this Itechguide did the trick for you!
If it did, click on “Yes” beside the “Was this page helpful” question below. You may also express your thoughts and opinions by using the “Leave a Comment” form at the bottom of this page.
Finally, for more Google guides, visit our Google How-To page.