Do you wish to install or uninstall the Dropbox application on your Ubuntu computer? Go through this guide as it demonstrates how to achieve that.
How to Install Dropbox
There are two major ways you can install the Dropbox application on your Ubuntu computer. You can either install the app through the Ubuntu Software Center on the GUI or use the apt command in the terminal.
Well, the following sub-sections will demonstrate how to add the app to your Ubuntu computer using those methods.
Option 1: Add Dropbox Through the GUI
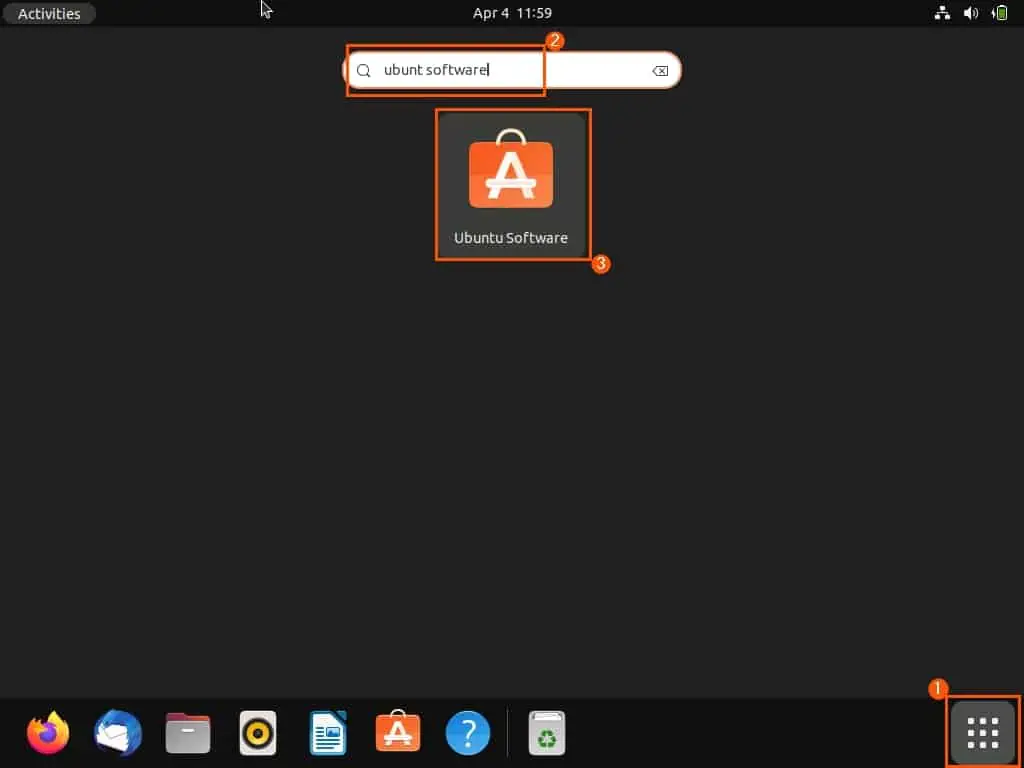
- Click the Show Applications button (nine dots icon) on the Ubuntu dock. Then, input “ubuntu software” in the search field above and left-click the Ubuntu Software Center app from the search result.
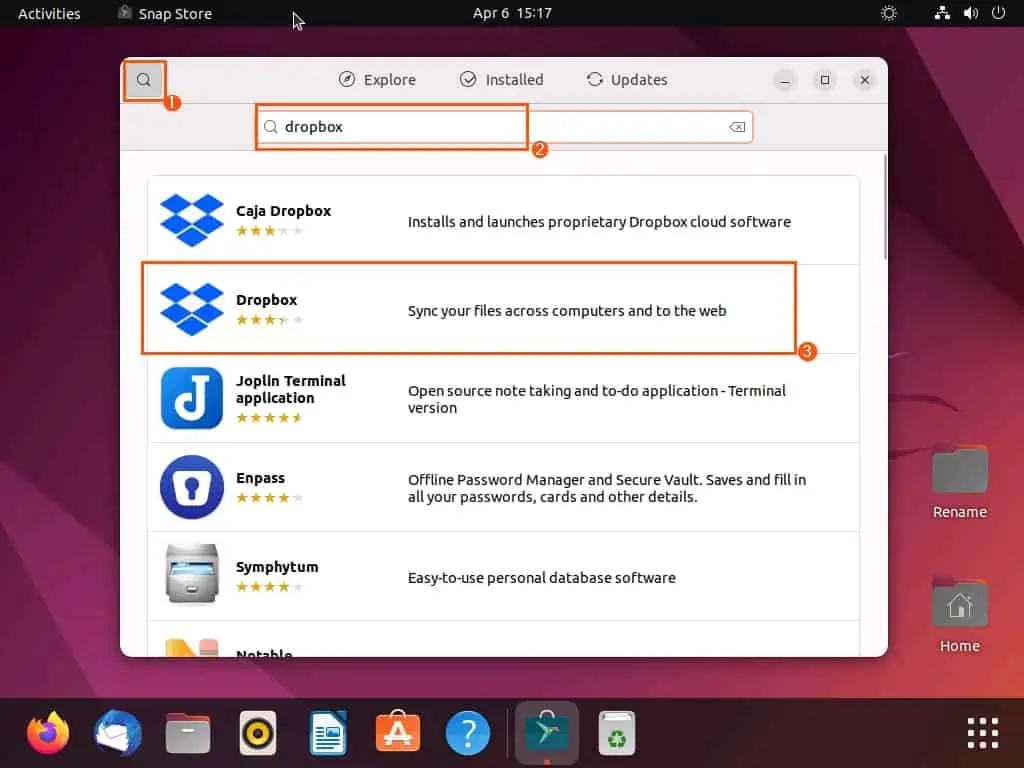
- In the Ubuntu Software Center, click the Search icon at the top left corner. Next, type “dropbox” in the search field that appears, then select the Dropbox app from the search result.
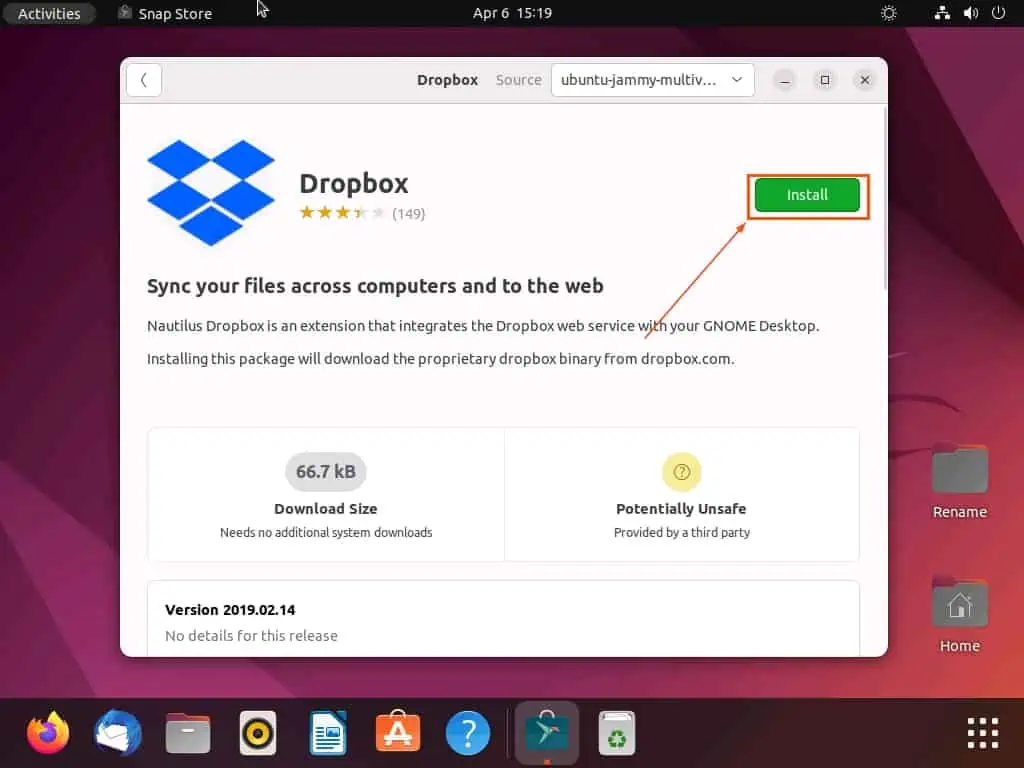
- On the next page, click the green Install button.
- By doing that, you should receive a prompt requesting your computer’s password for authentication before installation. Hence, input your computer’s password and click the Authenticate button.

- Consequently, the Dropbox application should begin to install.

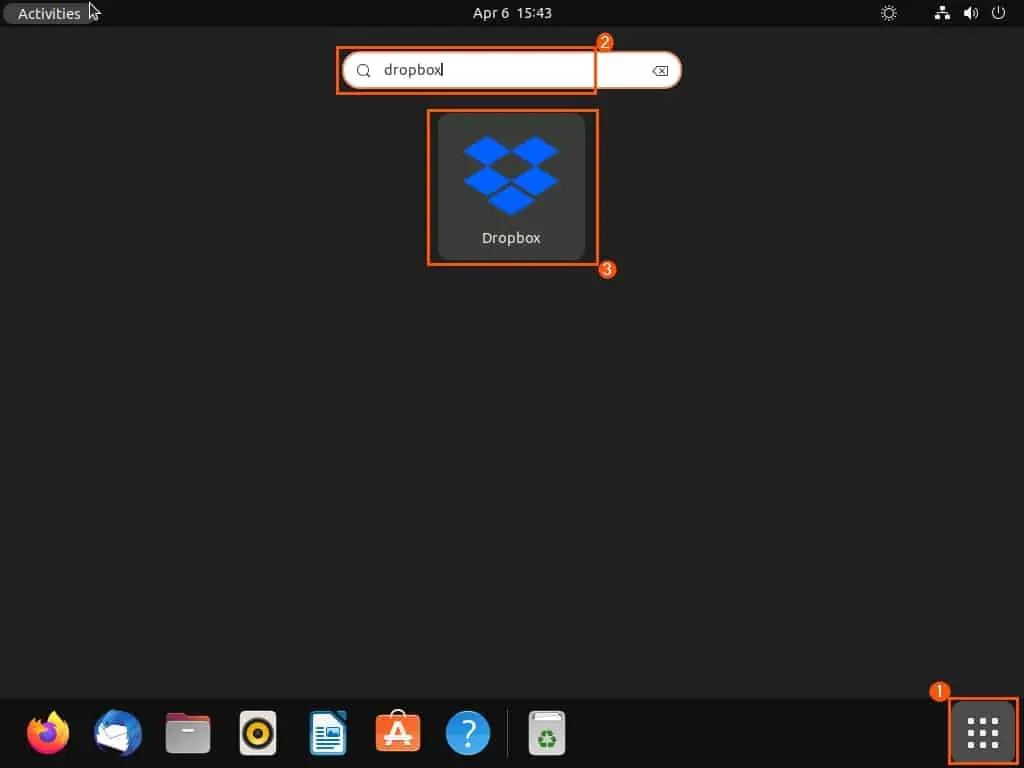
- When the app has been installed, click the Show Applications button on the Ubuntu dock. Then, type “dropbox” in the search field and select the Dropbox app from the search result to open it.
- By opening the app, you should see the Dropbox installation dialogue box. Hence, click the OK button on this dialogue box to proceed.
- After doing that, Dropbox should begin the final installation process.

Option 2: Install Dropbox via the Terminal
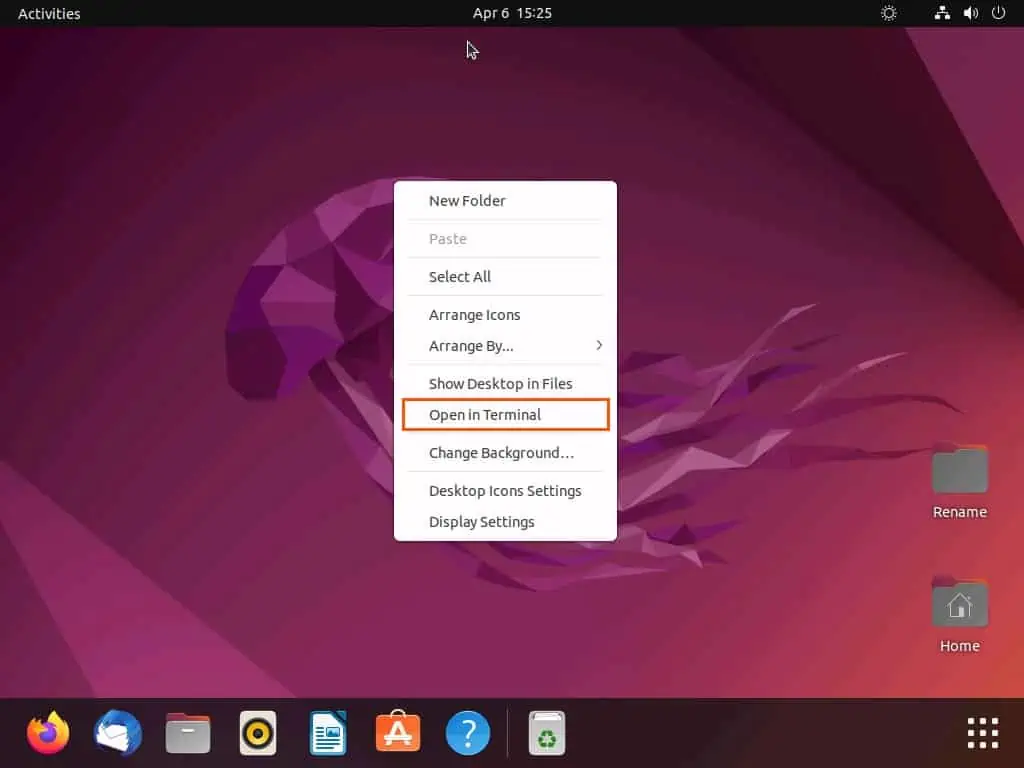
- Right-click a free area on your Ubuntu desktop, then select Open in Terminal from the context menu that appears. You can also simultaneously press the Ctrl + Alt + T keys to open the Ubuntu terminal.
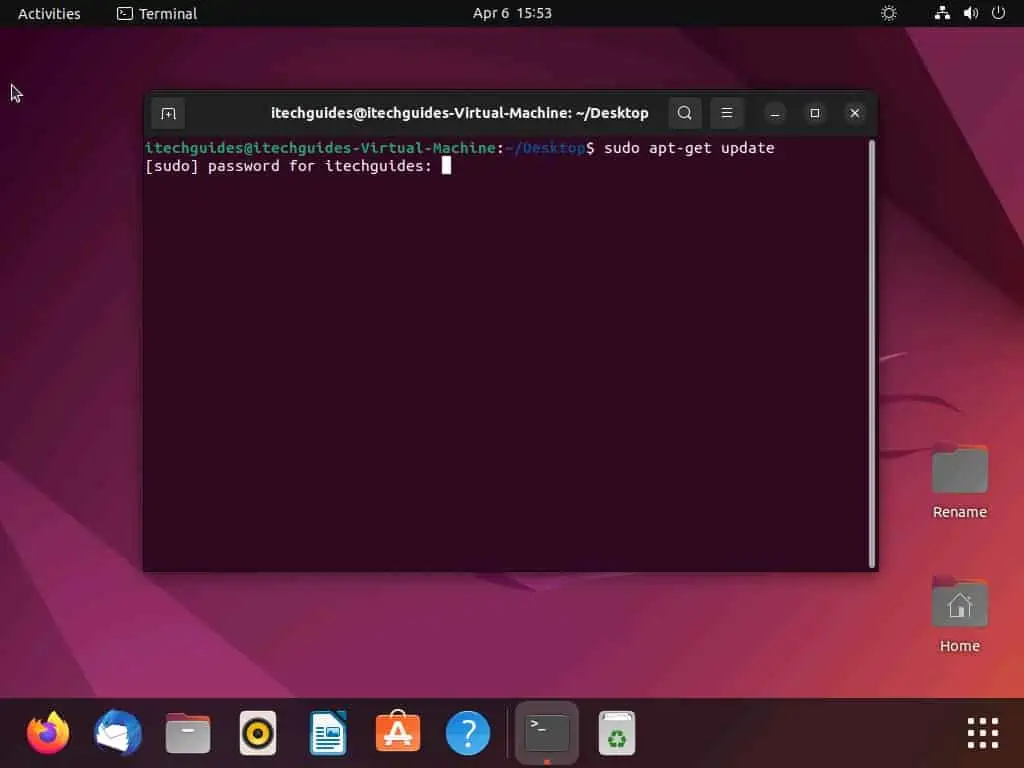
- When the Ubuntu terminal opens, first execute the command below to update your Ubuntu repositories package list. However, before the command executes, you will be asked to input your PC’s password – do that and press the enter key.
sudo apt-get update
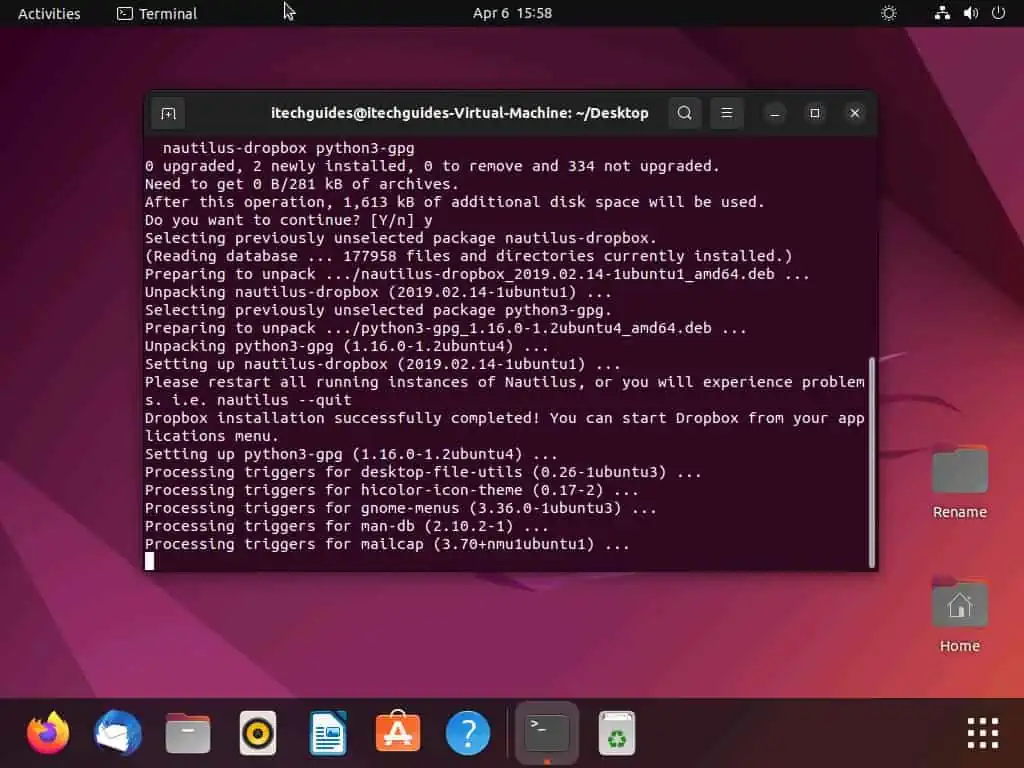
- After updating the Ubuntu repositories package list, run the subsequent command to start the installation process for Dropbox.
sudo apt-get install nautilus-dropbox

- After doing that, you will receive a couple of information about the installation. Then, you will be requested if you want to proceed with the installation – type “y” and press the enter key to proceed.

- Consequently, the app should begin to install.
- After installing the app, click the Show Applications button on the Ubuntu dock. Then, input “dropbox” in the search field and select the Dropbox app from the search result to open it.
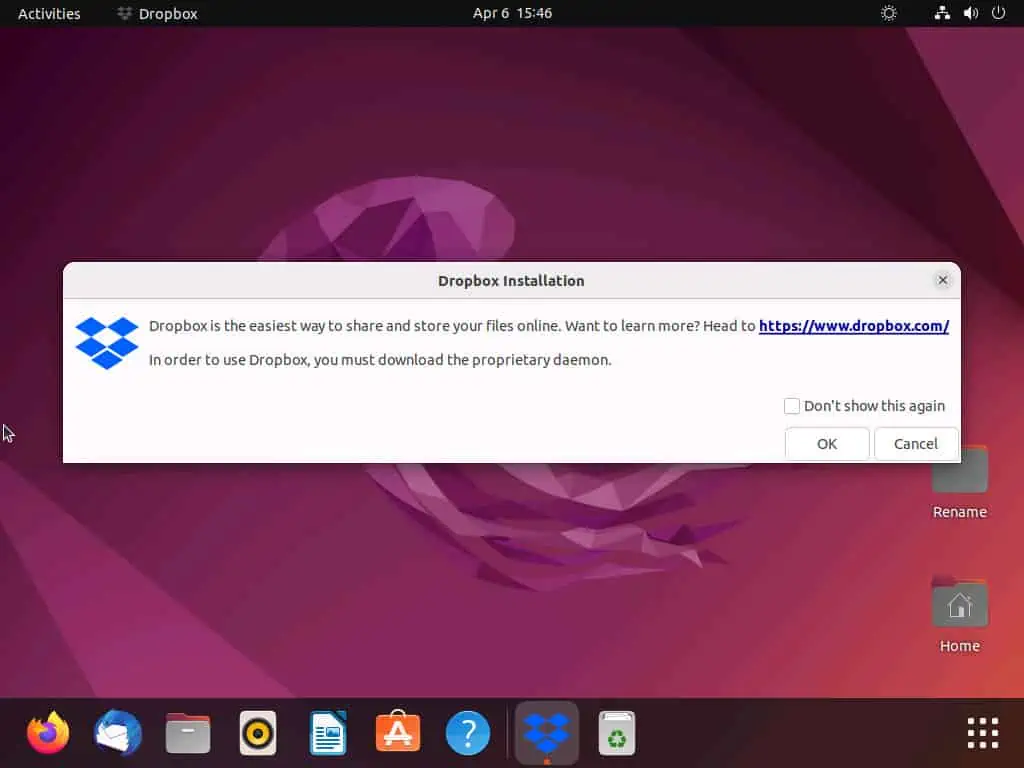
- By opening the app, you should see the Dropbox installation dialogue box. Hence, click the OK button on this dialogue box to proceed.
- Finally, the last installation process of Dropbox should begin.
How to Uninstall Dropbox
The same methods used to install the Dropbox application on your Ubuntu computer can also be used to uninstall it. To be more specific, you can uninstall the app via the Ubuntu Software Center in the GUI or by using apt command in the terminal.
So, follow the procedures in the sub-sections below to learn how to delete the application using those methods.
Option 1: Remove Dropbox through GUI
- On the Ubuntu dock, left-click the Show Applications button. Next, type “ubuntu software” in the search field and left-click the Ubuntu Software Center from the search result.
- In the Ubuntu Software Center, select Installed at the top.

- Among the Installed applications, click the Uninstall button opposite the Dropbox application.
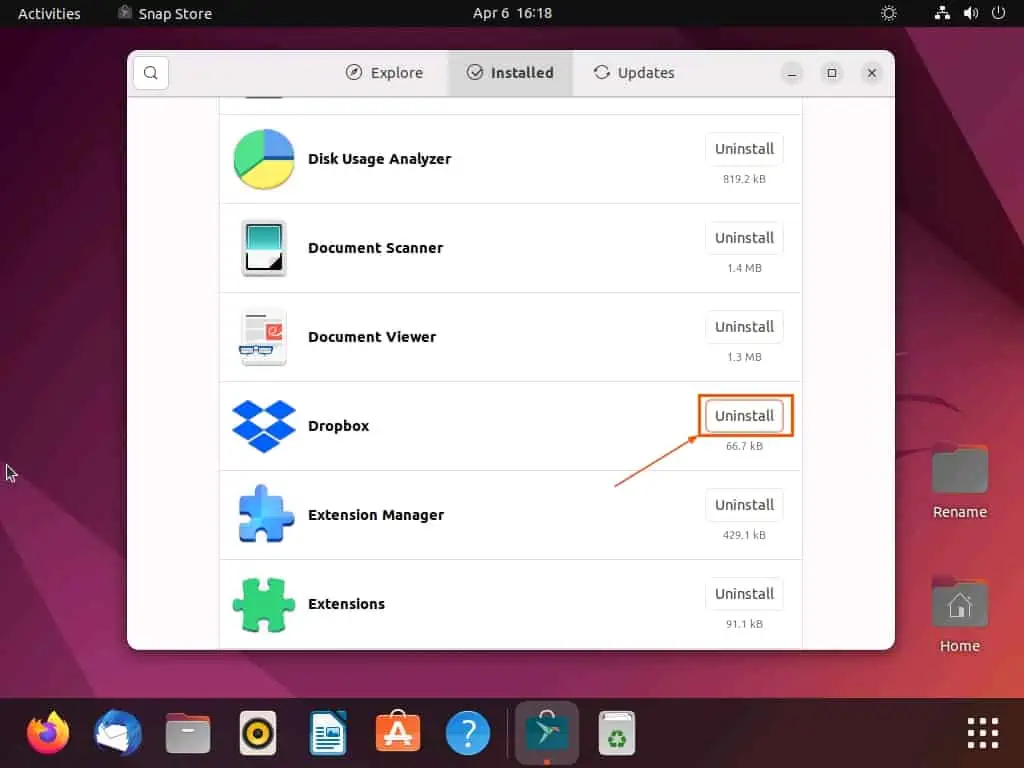
- By doing that, you will receive a dialogue box asking if you’re sure you want to uninstall the app. Click the red Uninstall button on the dialogue box to proceed.

- Consequently, you will be required to input your password for authentication. Hence, input your password and click the Authenticate button to uninstall the application.

Option 2: Delete Dropbox through the Terminal
- Right-click a free area on your Ubuntu desktop, then select Open in Terminal from the context menu that appears. You may also simultaneously press the Ctrl + Alt + T keys to open the Ubuntu terminal.
- In the Ubuntu terminal, run the subsequent command below to uninstall the application from your computer. However, before the command works, you will be prompted to input your password – do so and press the enter key.
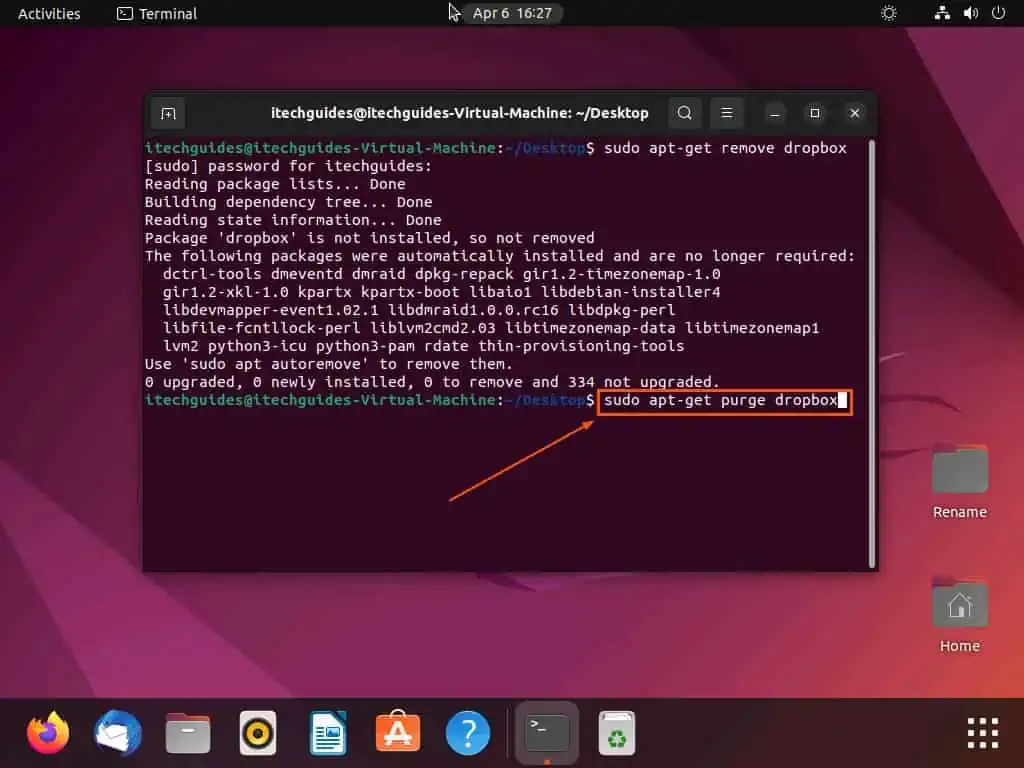
sudo apt-get remove dropbox

- After doing that, execute the command below to remove the configuration files of the Dropbox app.
sudo apt-get purge dropbox
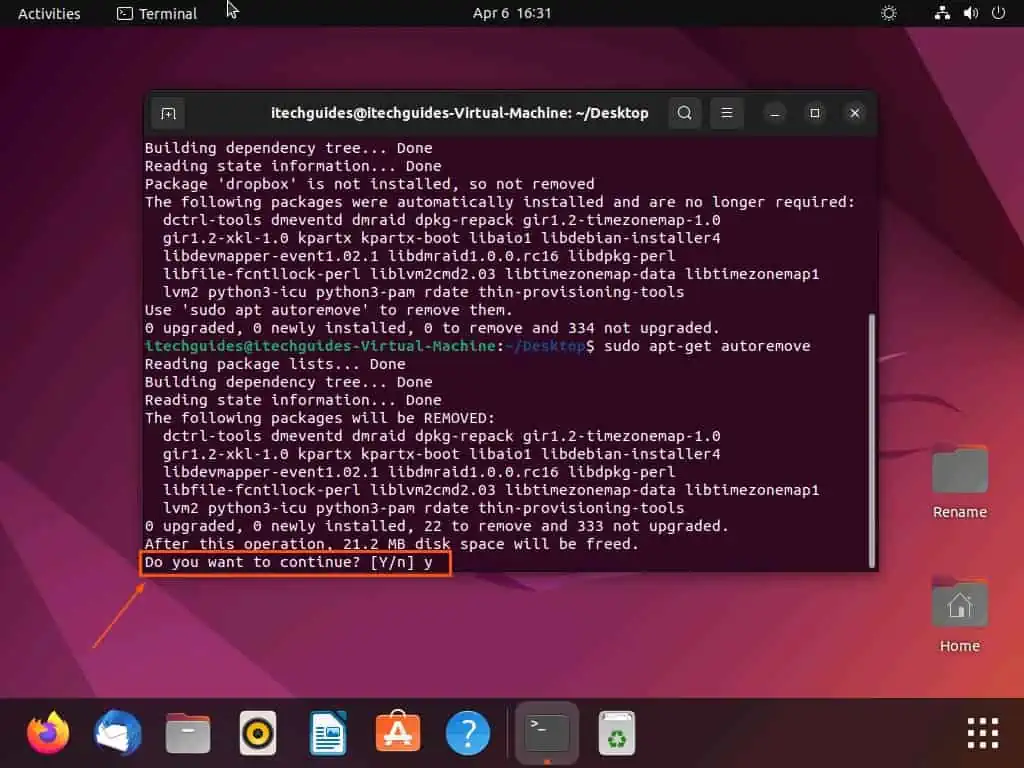
- Finally, run the subsequent command to remove any dependencies that were installed along with Dropbox.
sudo apt-get autoremove

- By doing that, you will be asked if you want to continue – type “y” and press the enter key to continue.
Frequently Asked Questions
Yes, it is totally free to install Dropbox.
To install Dropbox on Ubuntu, follow the steps below.
a) Click the Show Applications button (nine dots icon) on the Ubuntu dock.
b) Then, input “ubuntu software” in the search field above and left-click the Ubuntu Software Center app from the search result.
c) In the Ubuntu Software Center, click the Search icon at the top left corner.
d) Next, type “dropbox” in the search field that appears, then select the Dropbox app from the search result.
e) On the next page, click the green Install button.
f) By doing that, you should receive a prompt requesting your computer’s password for authentication before installation.
g) Hence, input your computer’s password and click the Authenticate button.
h) Consequently, the Dropbox application should begin to install.
i) When the app has been installed, click the Show Applications button on the Ubuntu dock.
j) Then, type “dropbox” in the search field and select the Dropbox app from the search result to open it.
k) By opening the app, you should see the Dropbox installation dialogue box – click the OK button on the dialogue box.
l) After doing that, Dropbox should begin the final installation process.
Yes, Dropbox is available for Ubuntu.
Dropbox offers 2 GB of storage space for free. Hence, to get more storage space, you will have to pay a certain amount or subscribe.
Google Drive offers a free storage space of 5 GB. Dropbox, on the other hand, offers 2 GB of free storage space.
Hence, Google Drive offers more free storage space.
Conclusion
Dropbox is a cloud-based storage service that enables users to store and share files and folders online. Fortunately, this guide illustrated multiple ways to install or uninstall Dropbox in Ubuntu.
Specifically, we discussed how to install or uninstall Dropbox in Ubuntu through the Ubuntu Software Center in the GUI. This guide also demonstrated how to perform these tasks by using the apt command in the Ubuntu terminal.
I hope you found this guide helpful. If you did, click on “Yes” beside the “Was this page helpful” question below.
You may also express your thoughts and opinions by using the “Leave a Reply” form at the bottom of this page.
Lastly, visit our Linux how-to page for more Linux how-to guides.