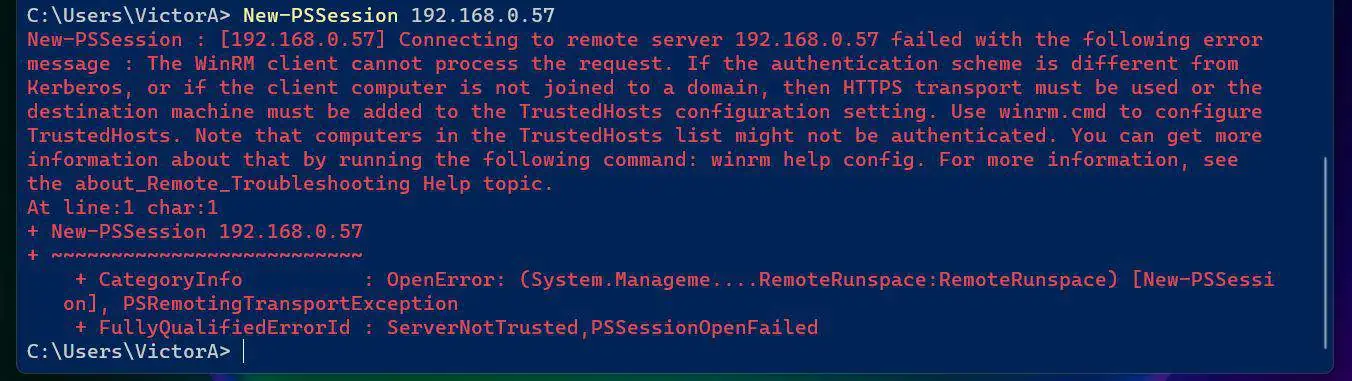
If you try making a remote PowerShell connection to a computer but the WinRM is not enabled, you’ll receive the error message in the screenshot below.
If you receive this error message, use the three steps below to enable WinRM and configure the necessary Windows Firewall rules.
Step 1: Set Network Connection Profile to Domain or Private
Part of the process of enabling WinRM is to configure WinRM firewall exception.
Unfortunately, the setup will not configure firewall exceptions if the network interface connection profile is set to Public.
To fix this problem, you must configure all network interfaces on the remote computer to either Domain or Private.
But, if you need to set the network connection to Private for a non-domain-joined computer, follow these steps:
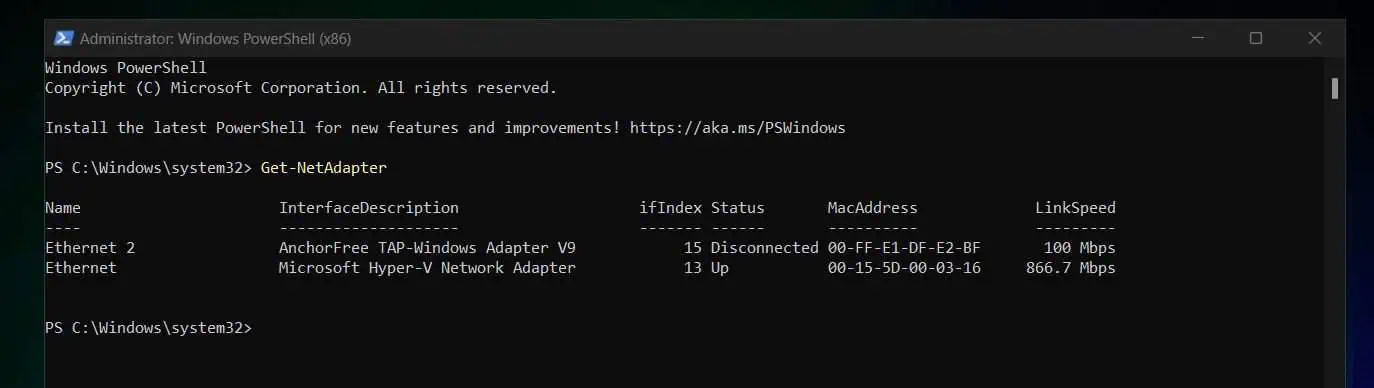
- Open PowerShell as administrator. Then, get the name of the network interface with the command below:
Get-NetAdapter
The command displays all network adapters on the computer, including their Name. My screenshot below shows two network adapters – “Ethernet 2” and “Ethernet.”
In this example, I’ll be configuring the “Ethernet” network card.
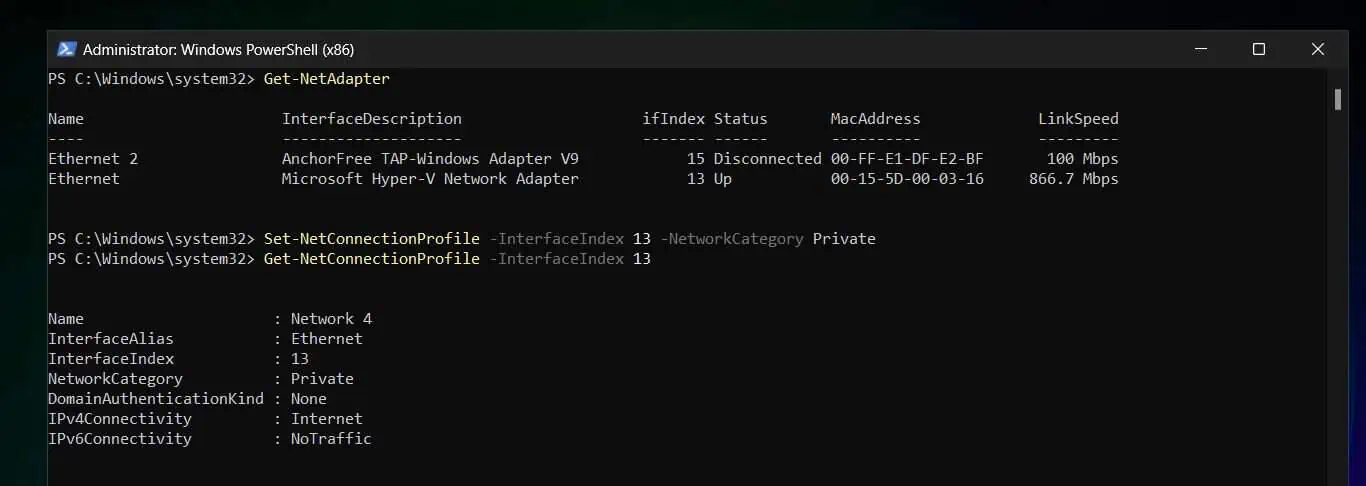
- Finally, set the network connection profile to Private with the command below:
Set-NetConnectionProfile -InterfaceIndex 13 -NetworkCategory Private
Here are the commands – to confirm that the connection profile has changed, I executed the Get-NetConnectionProfile command.
Step 2: Enable WinRM with the WinRM quickconfig Command
The fastest way to enable WinRM and open the necessary Windows Firewall ports is by running the “winrm quickconfig” command.
To run this command, open CMD as administrator. Then, proceed with the steps below.
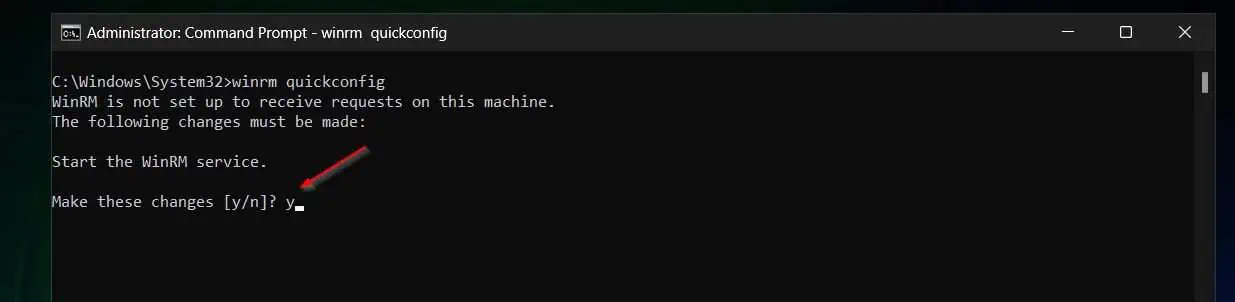
- Run the “winrm quickconfig” command.
winrm quickconfig
- You’ll be prompted to confirm that you’re happy to start the WinRM service. Type y and press the enter key.
- In the next step, the process will prompt you to confirm “Enabling the WinRM firewall exception.” Type y and press enter.
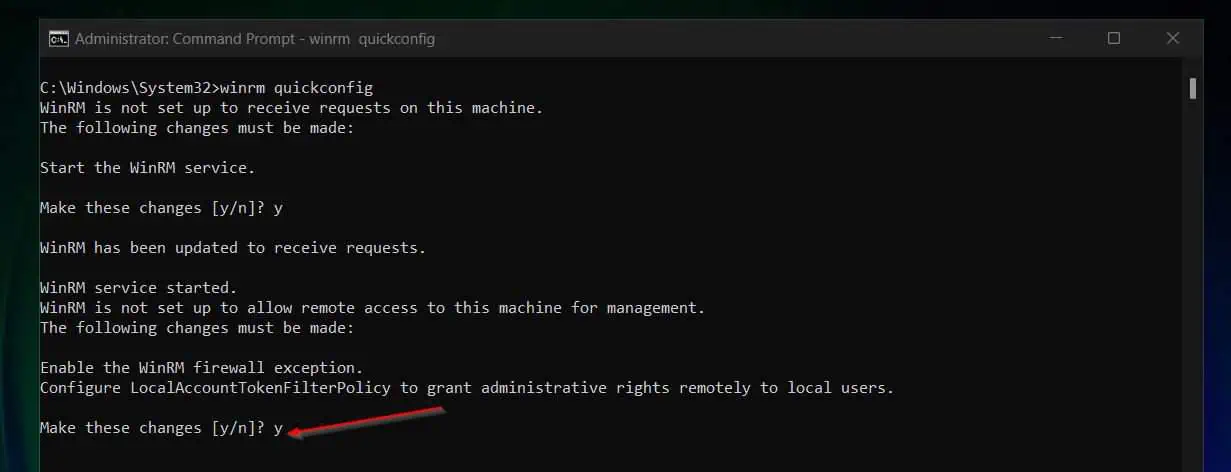
The process is very quick and you should receive a confirmation that the configuration is completed.

Step 3: Add Both Computers to the TrustedHosts Lists
This final step is required if the authentication scheme on the computers is different from Kerberos, or if the client computer is not joined to a domain.
So, if you’re configuring a non-domain-joined computer, you must add the source and destination computers to the others’ TrustedHosts lists.
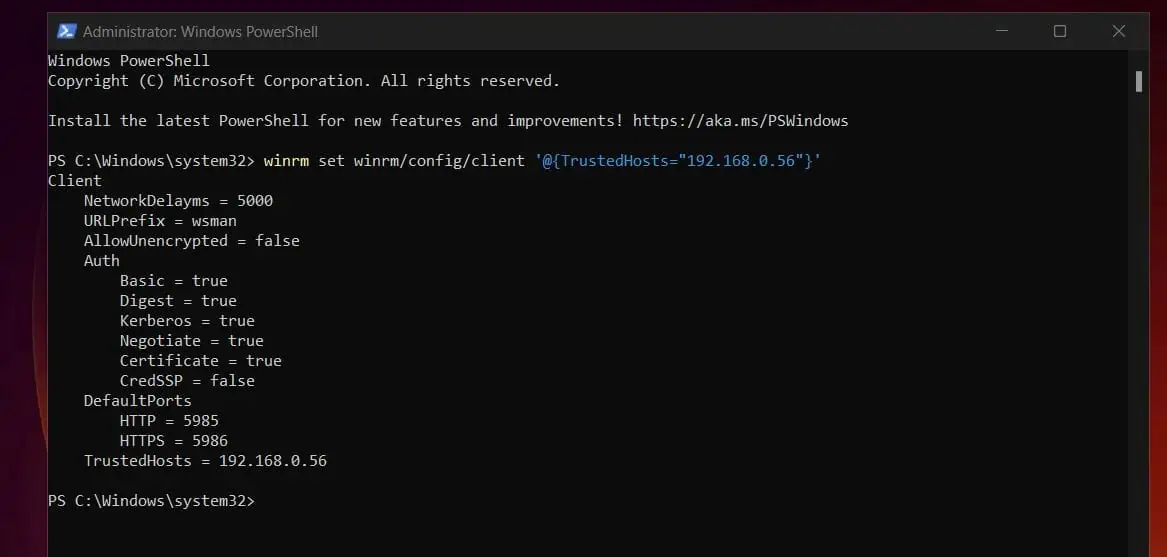
Open PowerShell as administrator and run the commands below:
winrm set winrm/config/client '@{TrustedHosts="192.168.0.58"}'
winrm set winrm/config/client '@{TrustedHosts="192.168.0.56"}' 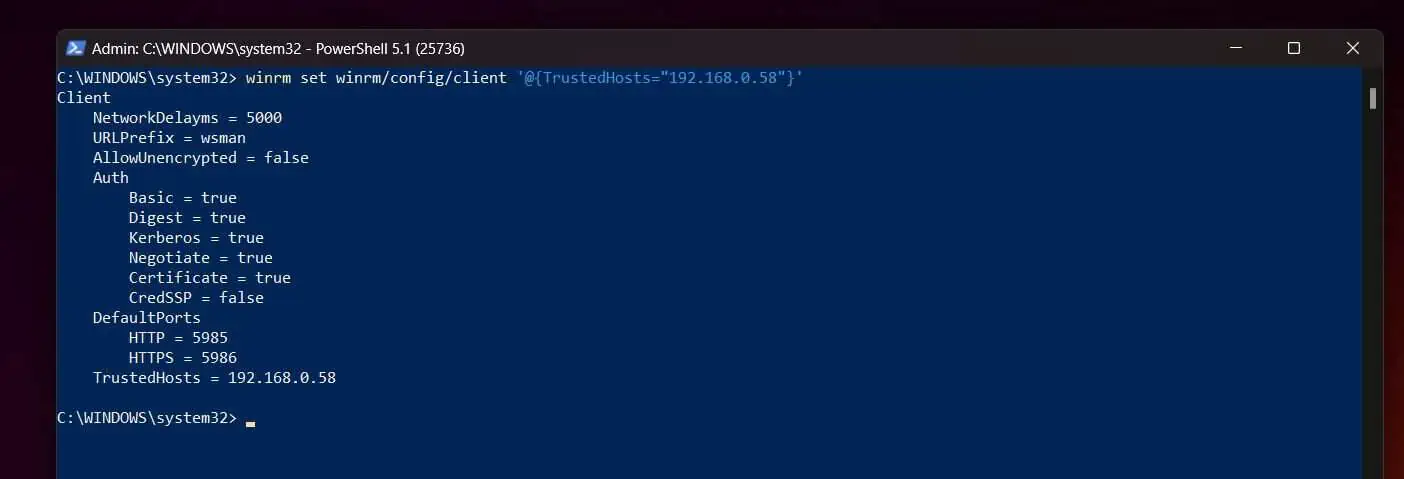
Conclusion
Configuring WinRM is a prerequisite to making a remote connection with PowerShell. As I discussed in this guide, this is a three-step process.
Firstly, you must set the network connection profile for the interface on the remote computer to Domain or Private. Additionally, enable WinRM by running the “WinRM quickconfig” command.
Finally, you must add the source and destination computers to the TrustedHosts lists on each computer.
Once you finish these three configurations, you can make a remote PowerShell connection using the New-PSSession or Enter-PSSession commands.
Thank you for reading!
If this article fixed the problem you intended it to, click Yes to the “Was this page helpful?” question below.
However, if it does not meet your expectations, click No and give us as much information as possible – we take your feedback very seriously.
Before you go, you may want to browse our Windows PowerShell how-to guides for more exciting PowerShell hands-on articles.