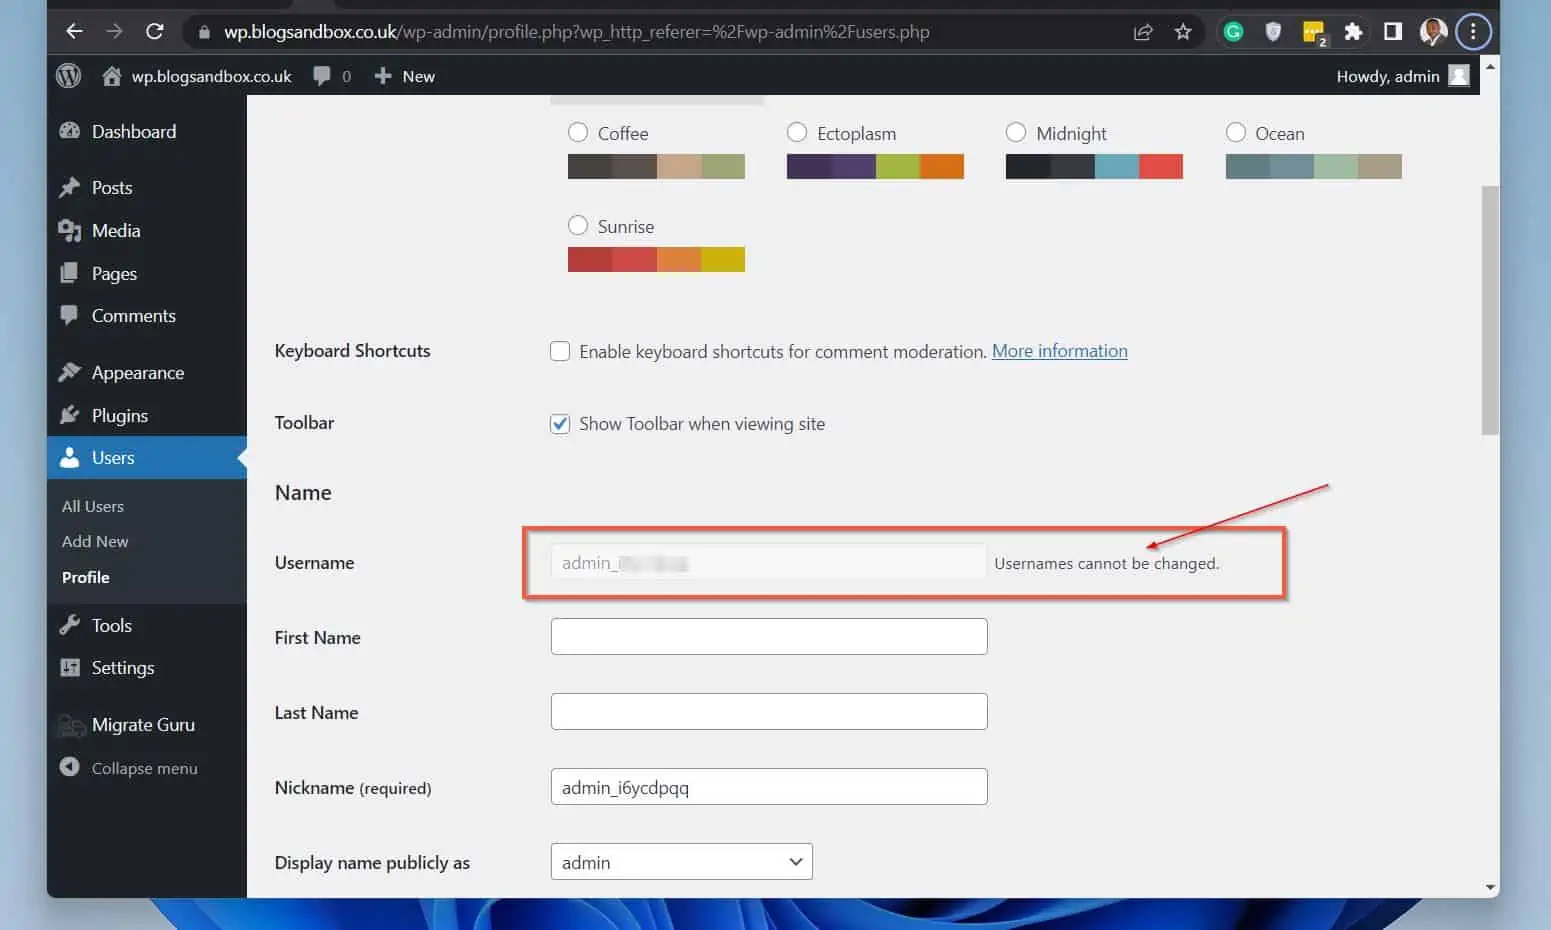
Have you tried to change your username in WordPress and discovered you could not do it from your user profile? While you cannot perform this task from your profile, there are other ways to accomplish it.
The image below confirms that you cannot change your username from the WP backend.
In this guide, you’ll learn three methods to change the default WordPress admin username or any other username. Specifically, the first section shows you how to create a new account and delete the old one.
Then, in section two, you’ll learn how to perform the task with a plugin. Following that, I’ll also show you how to change a WP user name with phpMyAdmin.
Finally, I have an FAQ section where I answer common questions WordPress users ask about this topic.
Option 1: Change Username by Creating a New User
The first method to change a username in WordPress is to create a new account with the same privilege. Then, delete the old account.
When you try to delete a WordPress account, WordPress gives you the option to transfer the account’s content to another account.
At this point, you can select the new account you created as the new owner of the previous account’s content. Follow the steps in the sub-sections below to change a username in WordPress with this method.
Step 1: Create a New WordPress User
If you need help creating a new user in WordPress, follow the steps below. Otherwise, create a new account yourself, grant it the required privilege, and proceed to the next sub-section.
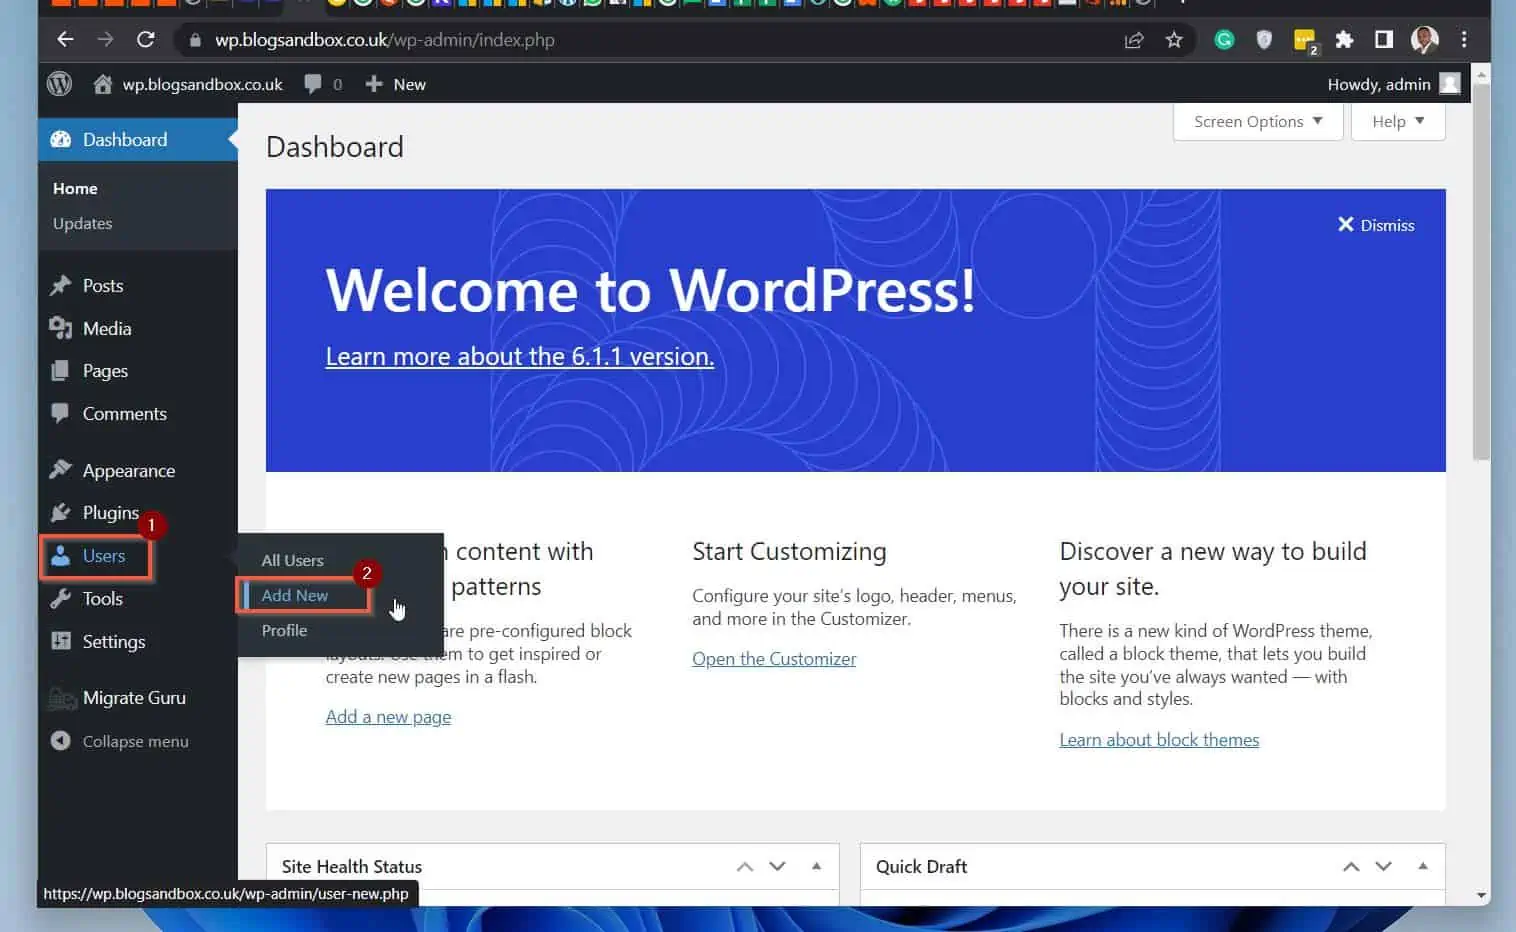
- Sign in to your WordPress admin dashboard with an admin account. In this example, I’ll sign in to my test site – https://wp.blogsandbox.co.uk/wp-admin.
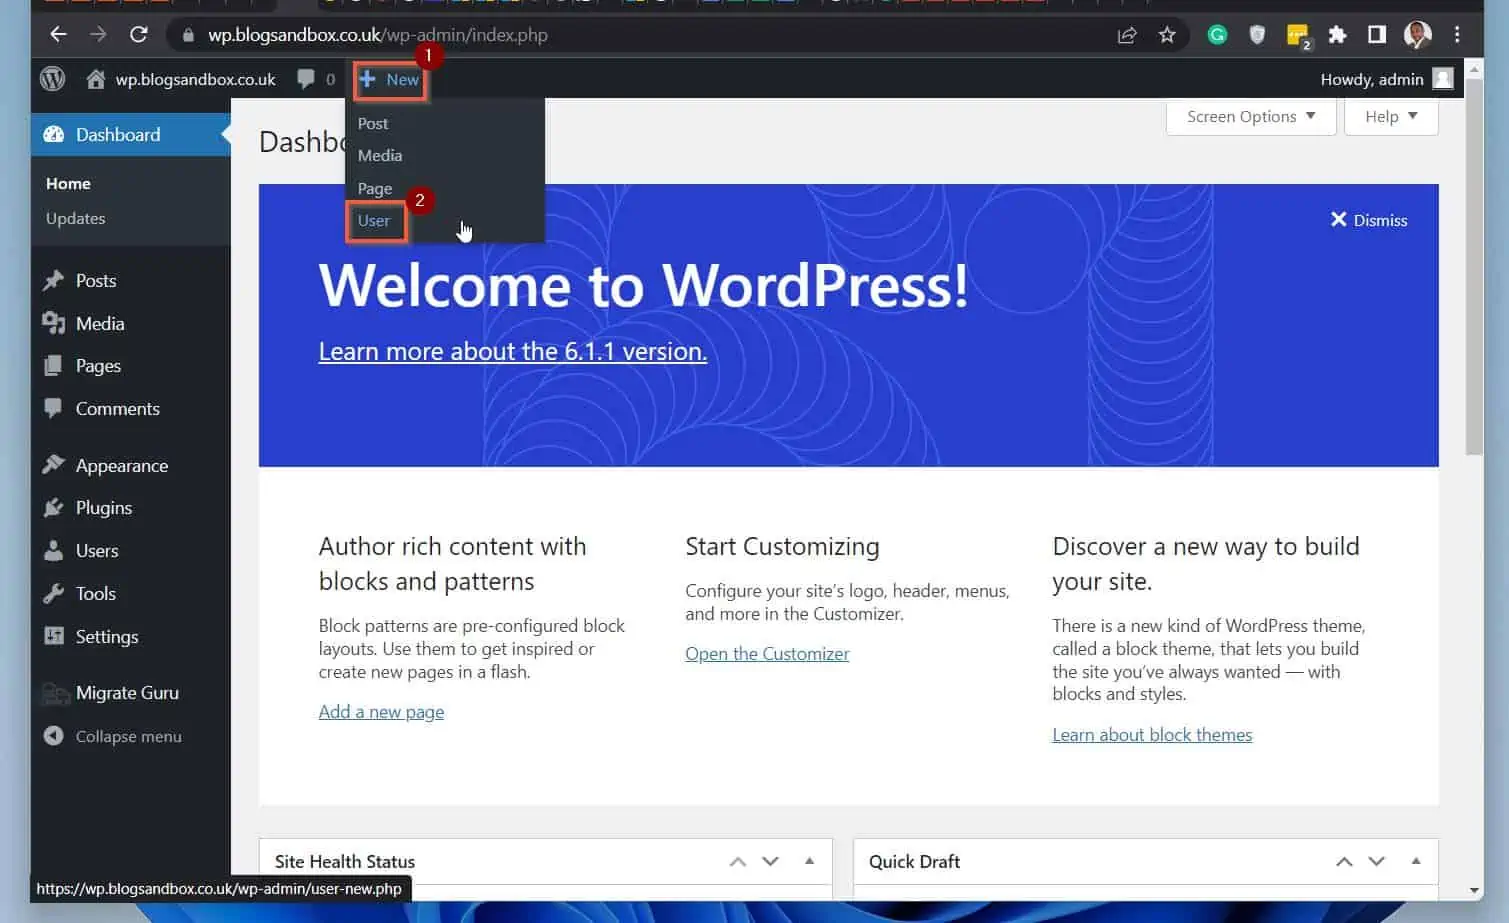
- Then, on the left pane, hover over Users, then select Add New. Alternatively, you can hover over New on the top menu and select User – see the second screenshot below.
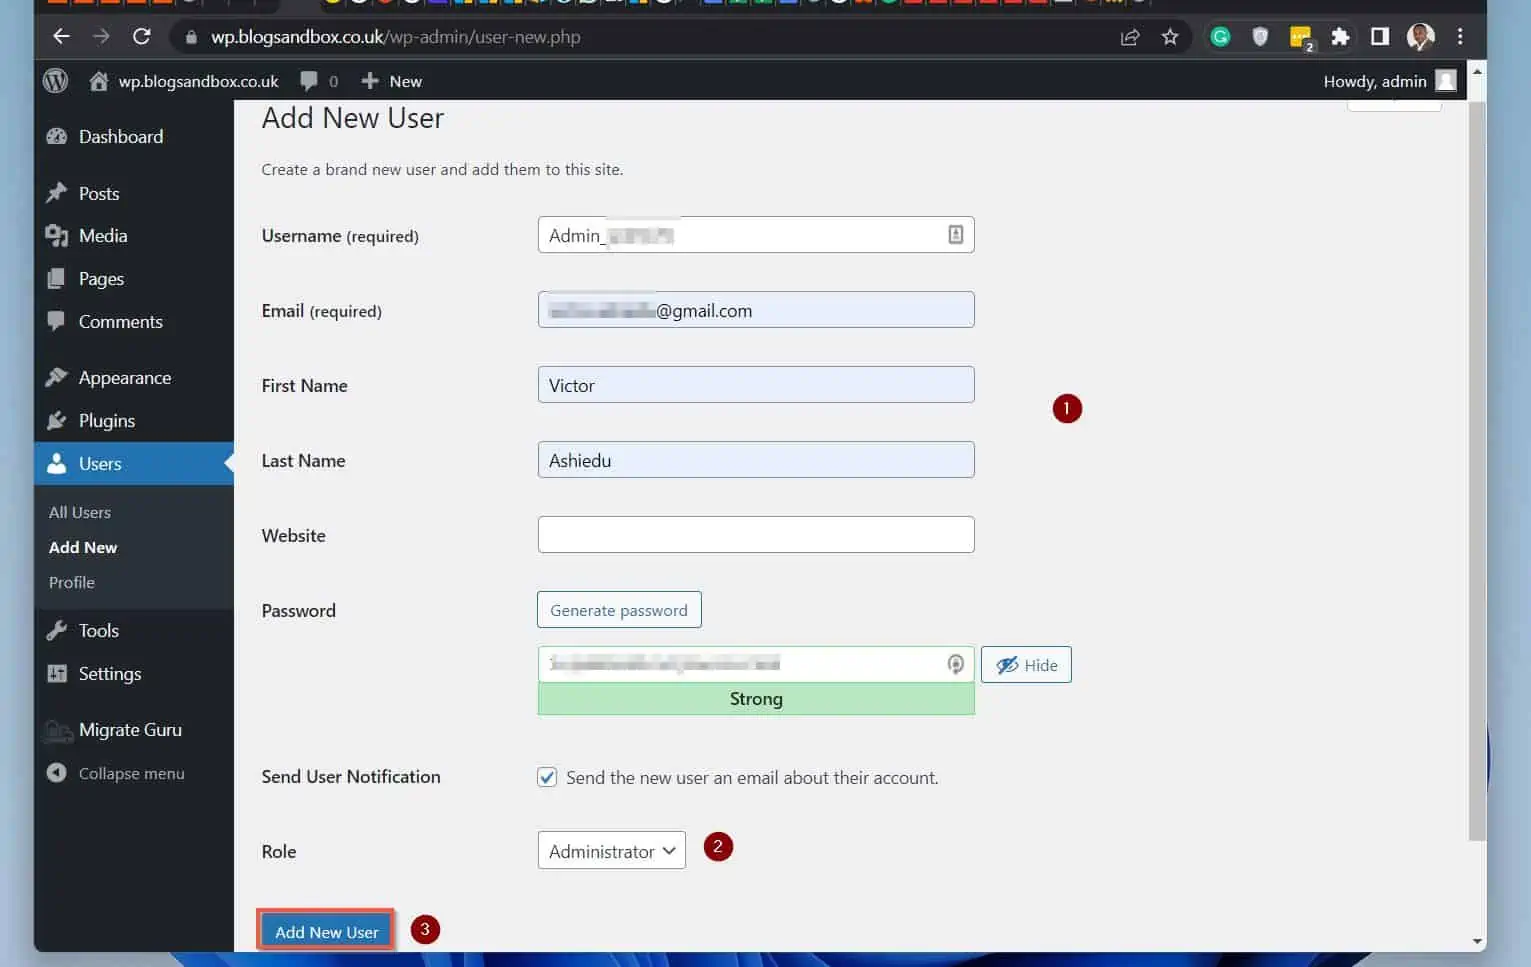
- When the “Add New User” page opens, enter all the relevant information in the portion I labeled (1) in the screenshot below. WordPress generates a password automatically.
Then, on the Role drop-down, select the role you want to grant the new user (2). When you finish, click Add New User (bottom left of the form) (3).
Step 2: Delete the Old WordPress Account and Attribute All Content to the New Account
Once you have created a new WordPress account, follow the steps below to change the completely old username to the new one.
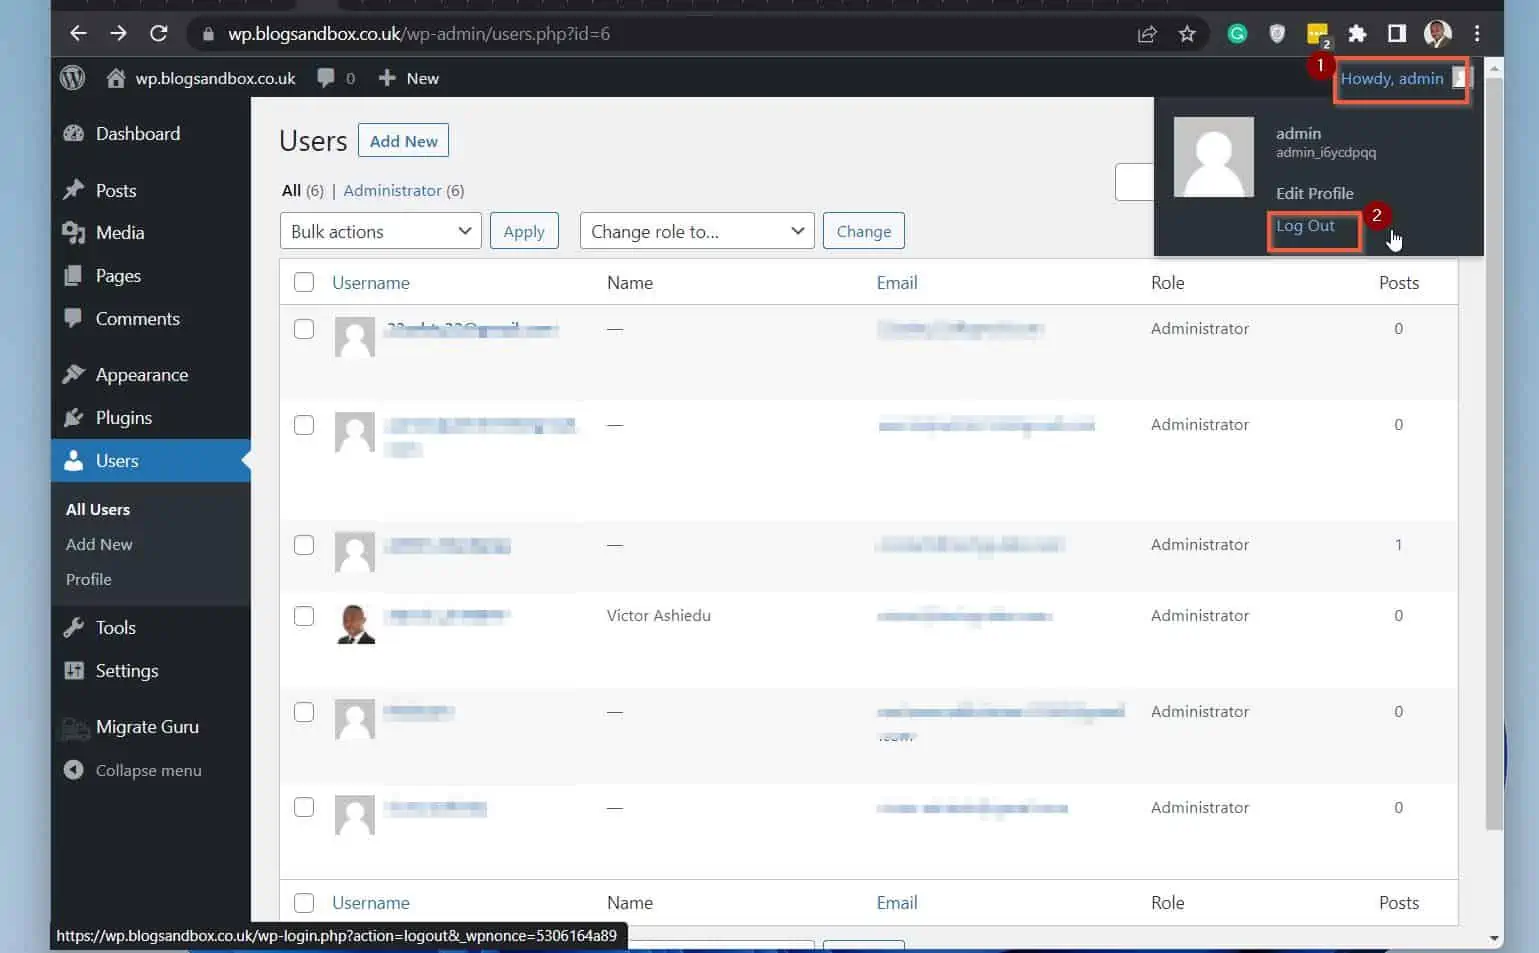
- Sign out of the old account. To do this, hover over your profile name on the top right of the page – then select Log Out.
- Next, sign in to your WordPress website with the new account you created in the last sub-section.
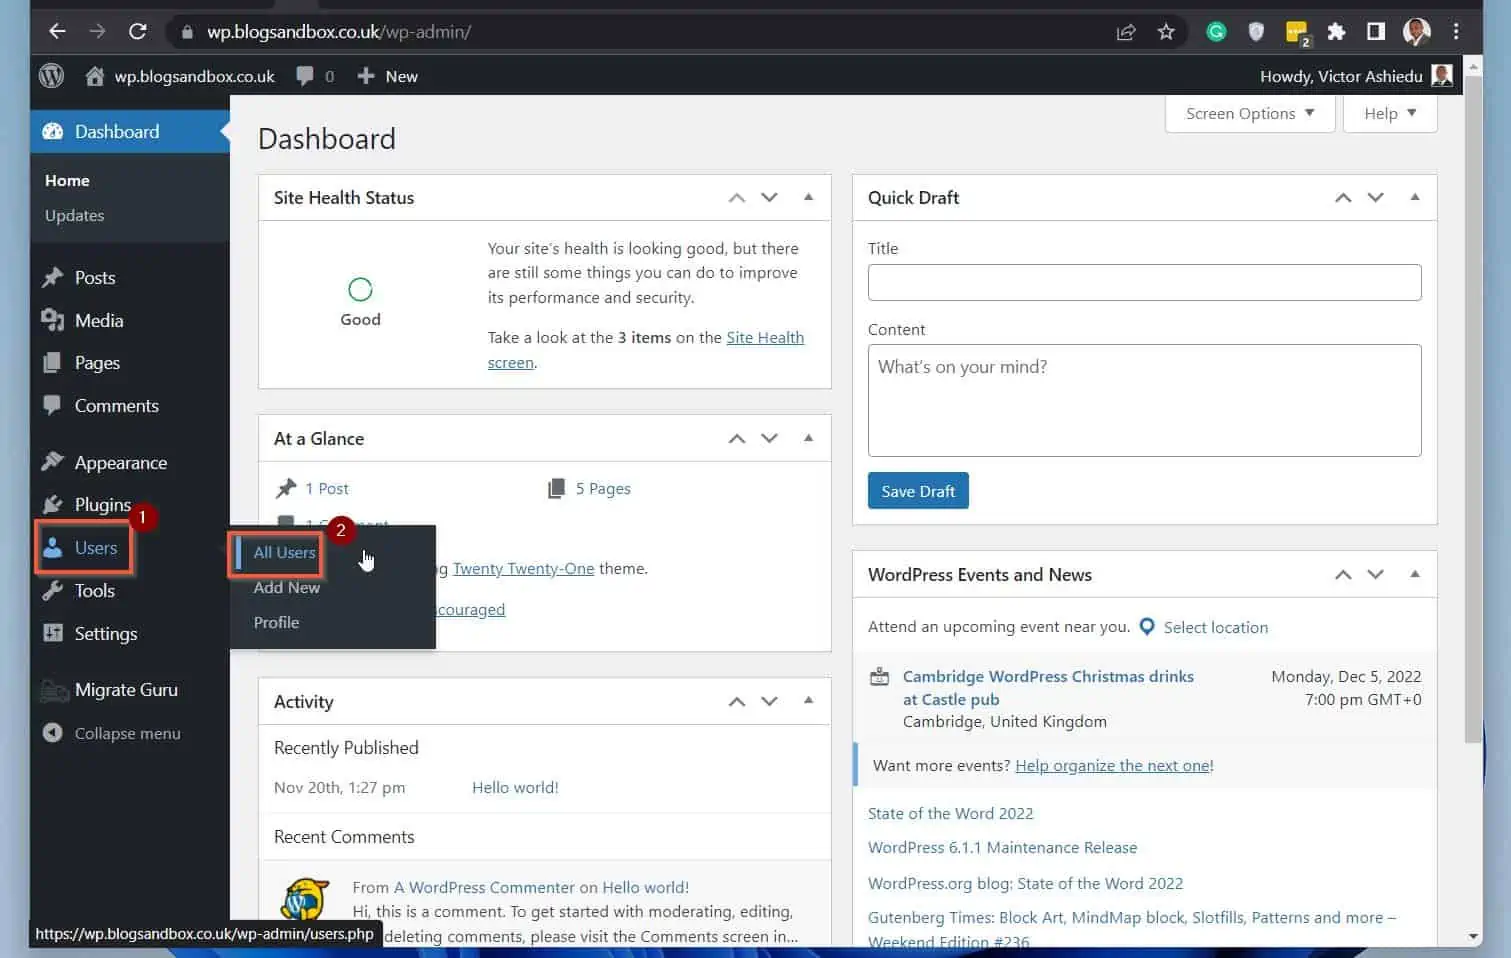
- Then, hover over Users and select All users.
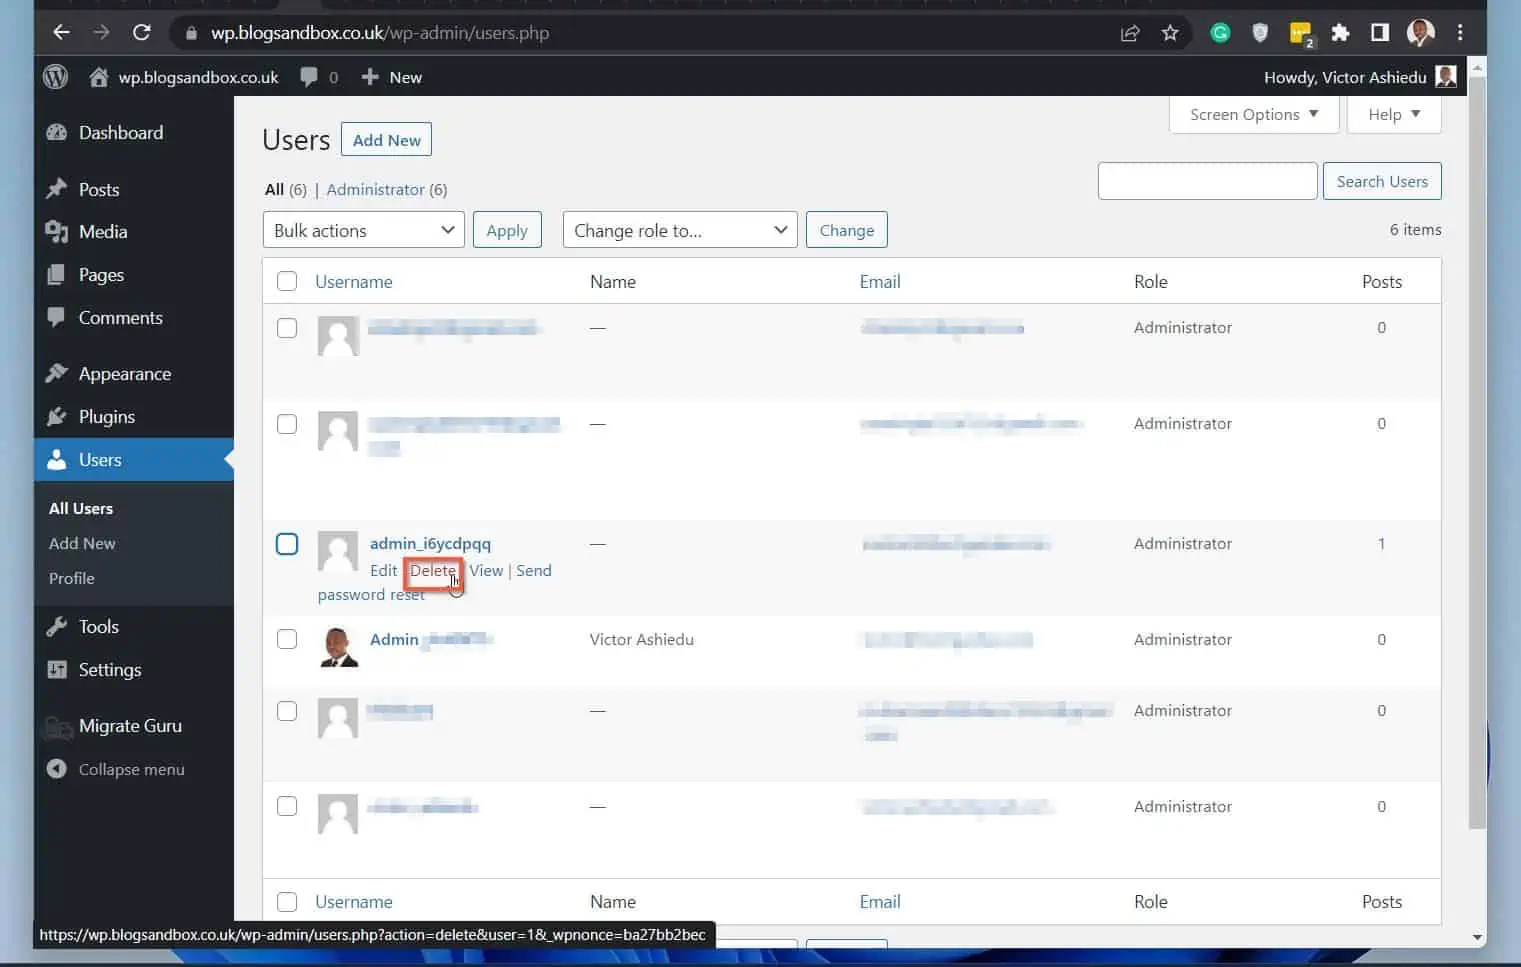
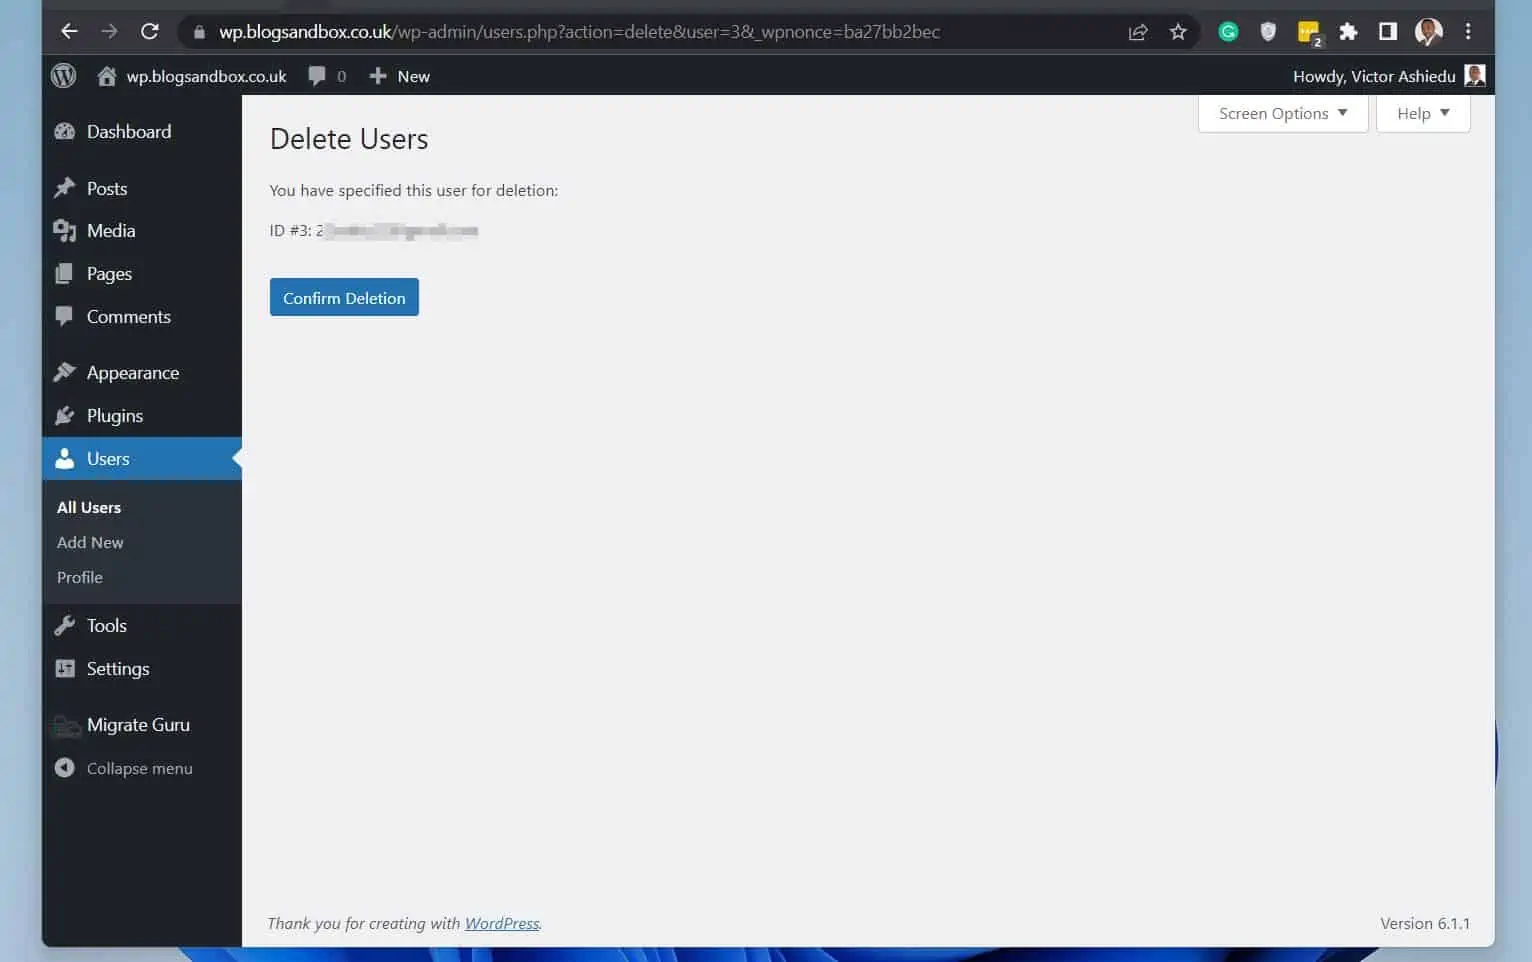
- Once you’re in the Users dashboard, hover over the old WordPress username you want to change to the new one and select Delete.
When you click Delete, WordPress will display a page with two options – see the second screenshot below.
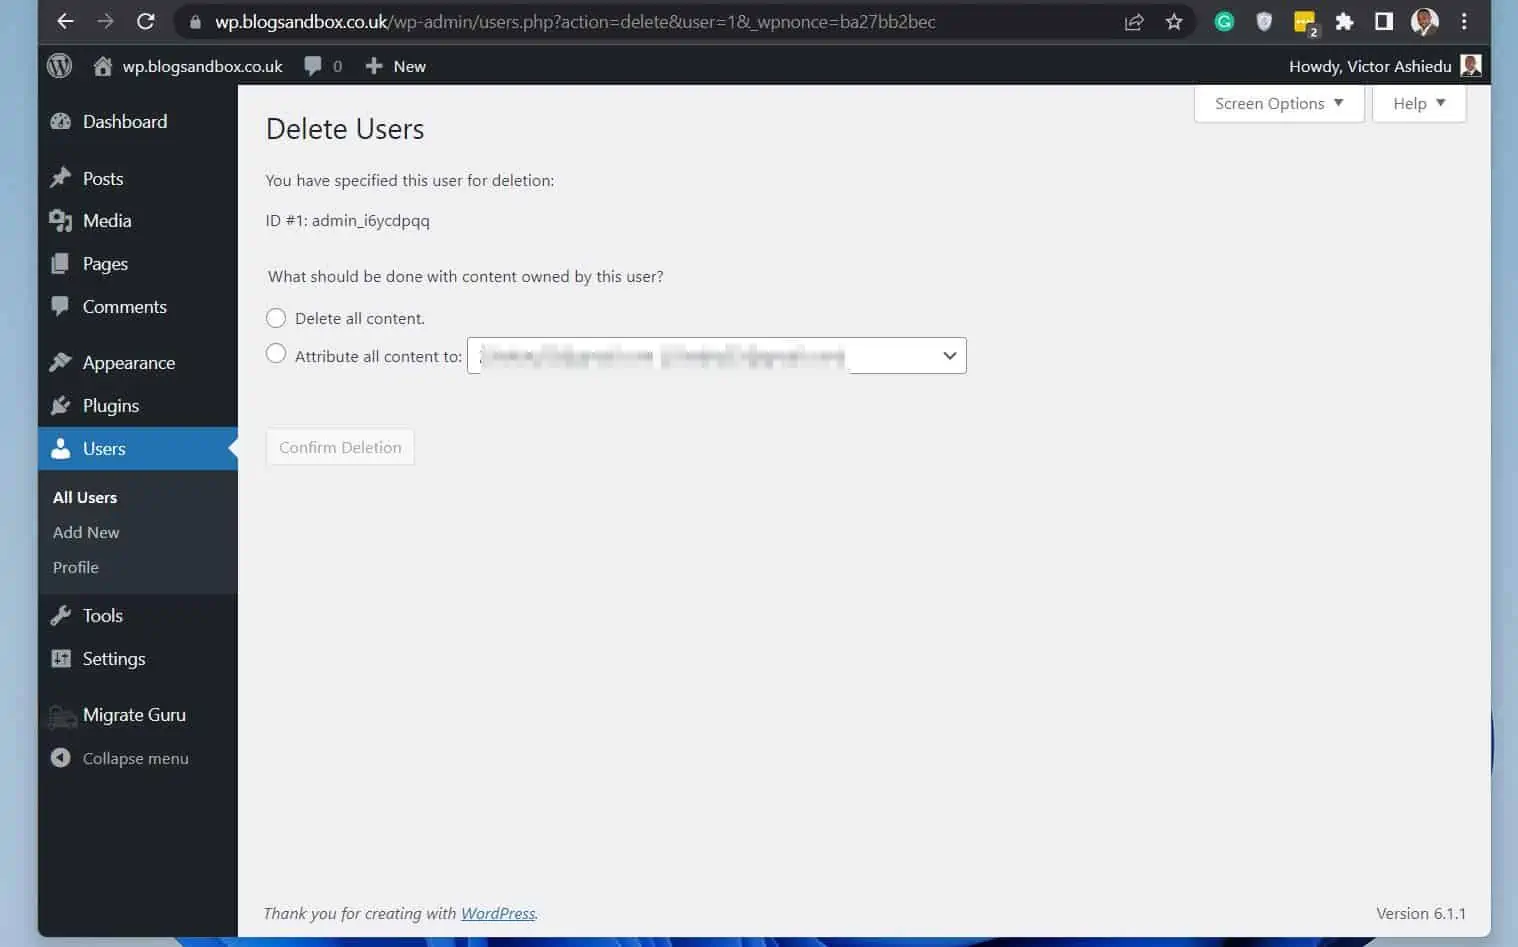
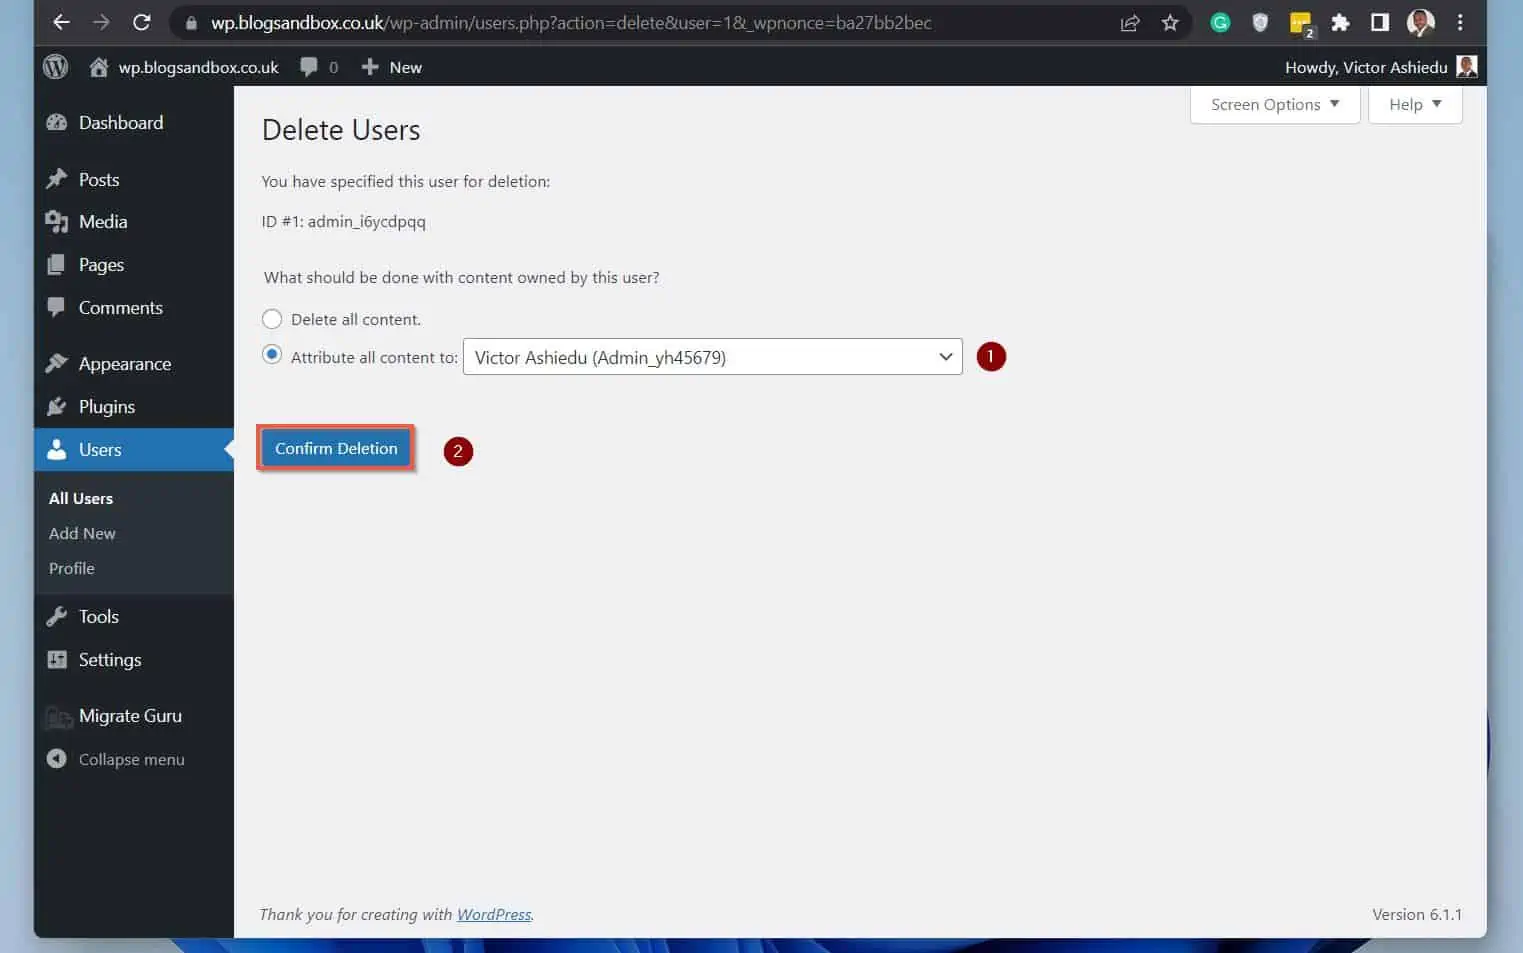
- If your old username has existing content, on the Delete Users confirmation page, select the Attribute all content to: option. Then, click the drop-down and select the previous WordPress username you intend to change to the new account you created earlier.
When you finish, click the Confirm Deletion button. The old username will be deleted, and all the content created by that account will be transferred to your new account.
Congratulations! You’ve successfully changed your username in WordPress by creating a new user and transferring the content from the old username.
Option 2: Change Username With the Easy Username Updater Plugin
You will not be surprised to learn that you can use a plugin to change a username in WordPress. There are numerous WordPress plugins you can use to change your username but I decided to use the Easy Username Updater plugin.
Obviously, before you can use this plugin, you need to install it first. So, if you need help installing the plugin, follow the steps in the first sub-section below.
However, if you’re comfortable installing plugins, install the plugin, then proceed to the second sub-section below.
Step 1: Install the “Easy Username Updater” WordPress Updater Plugin
- Sign in to your WordPress website with an account with admin privileges.
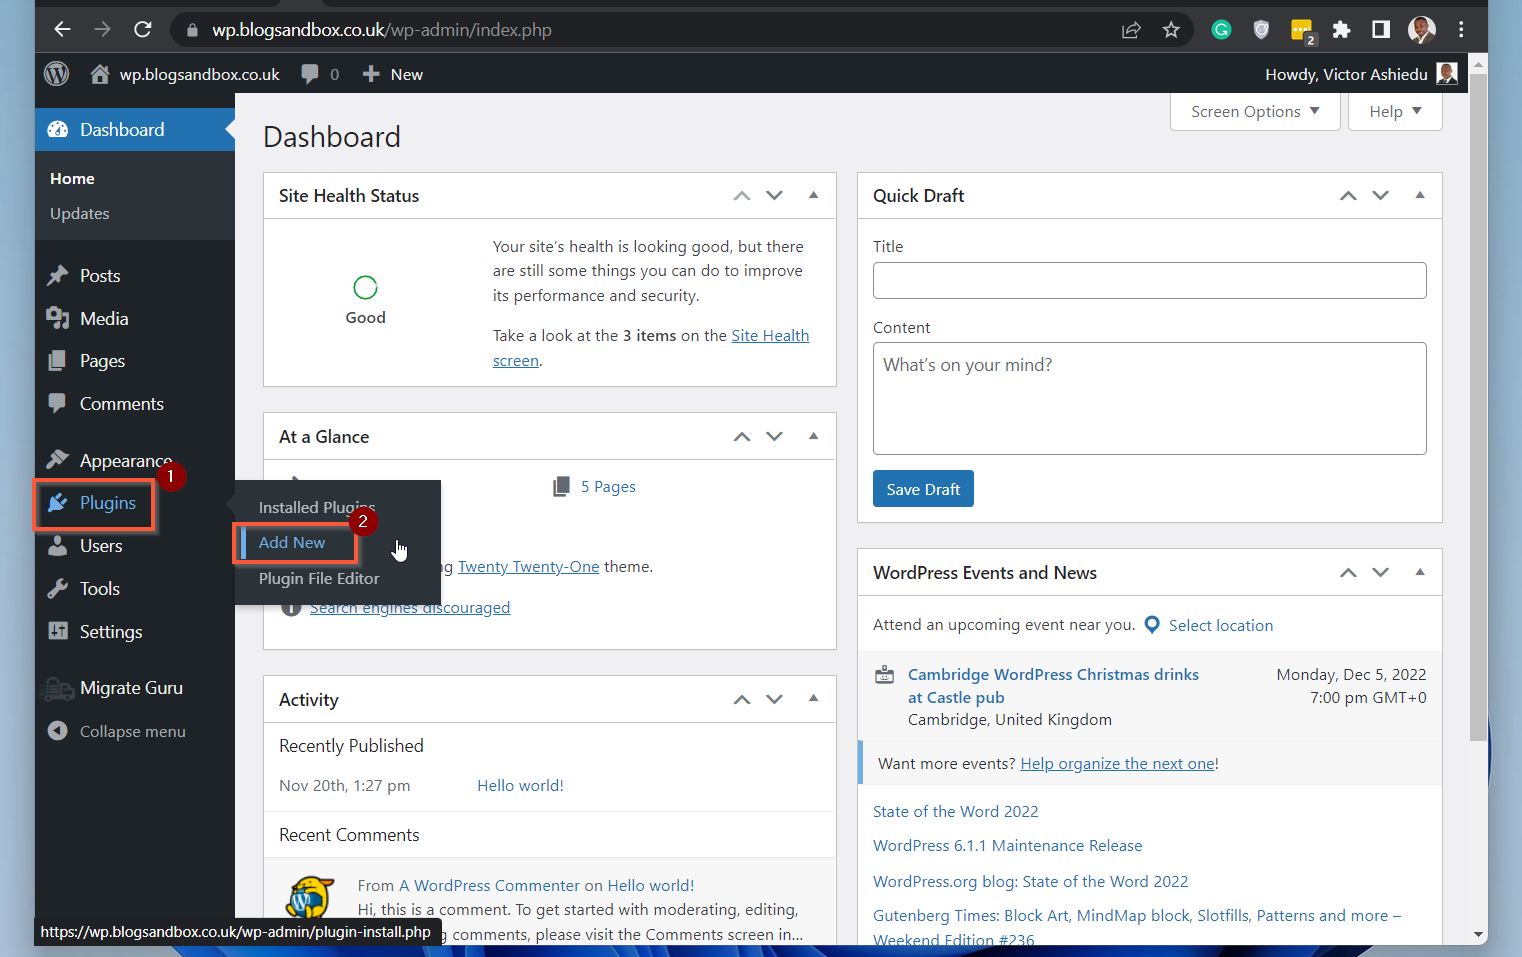
- Then, on the left pane, hover over Plugins and select Add New.
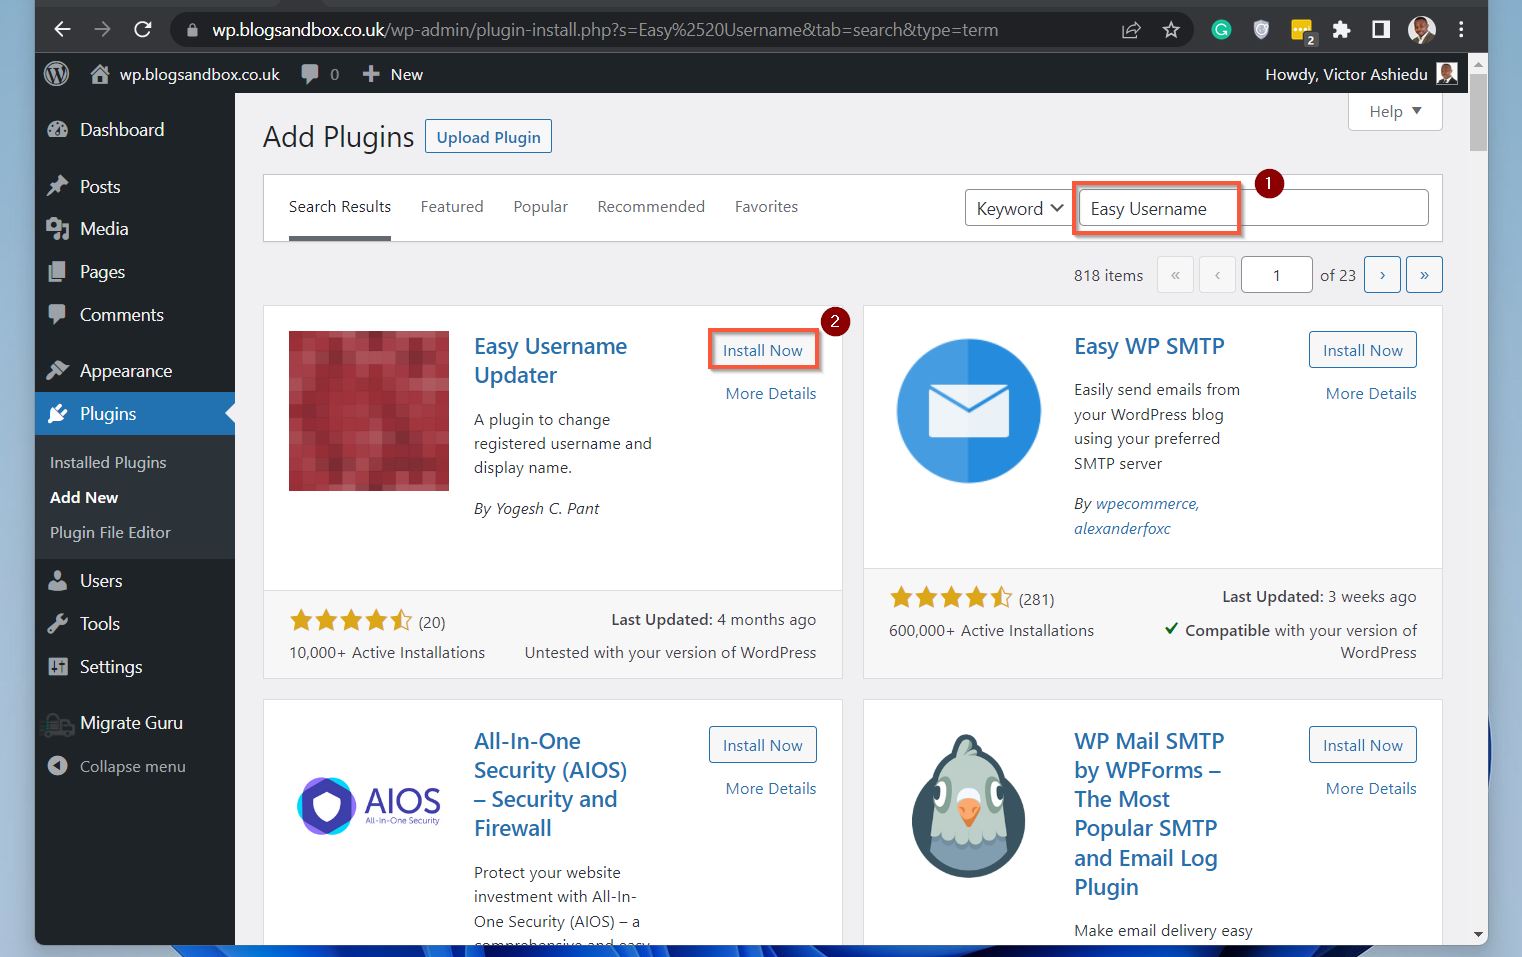
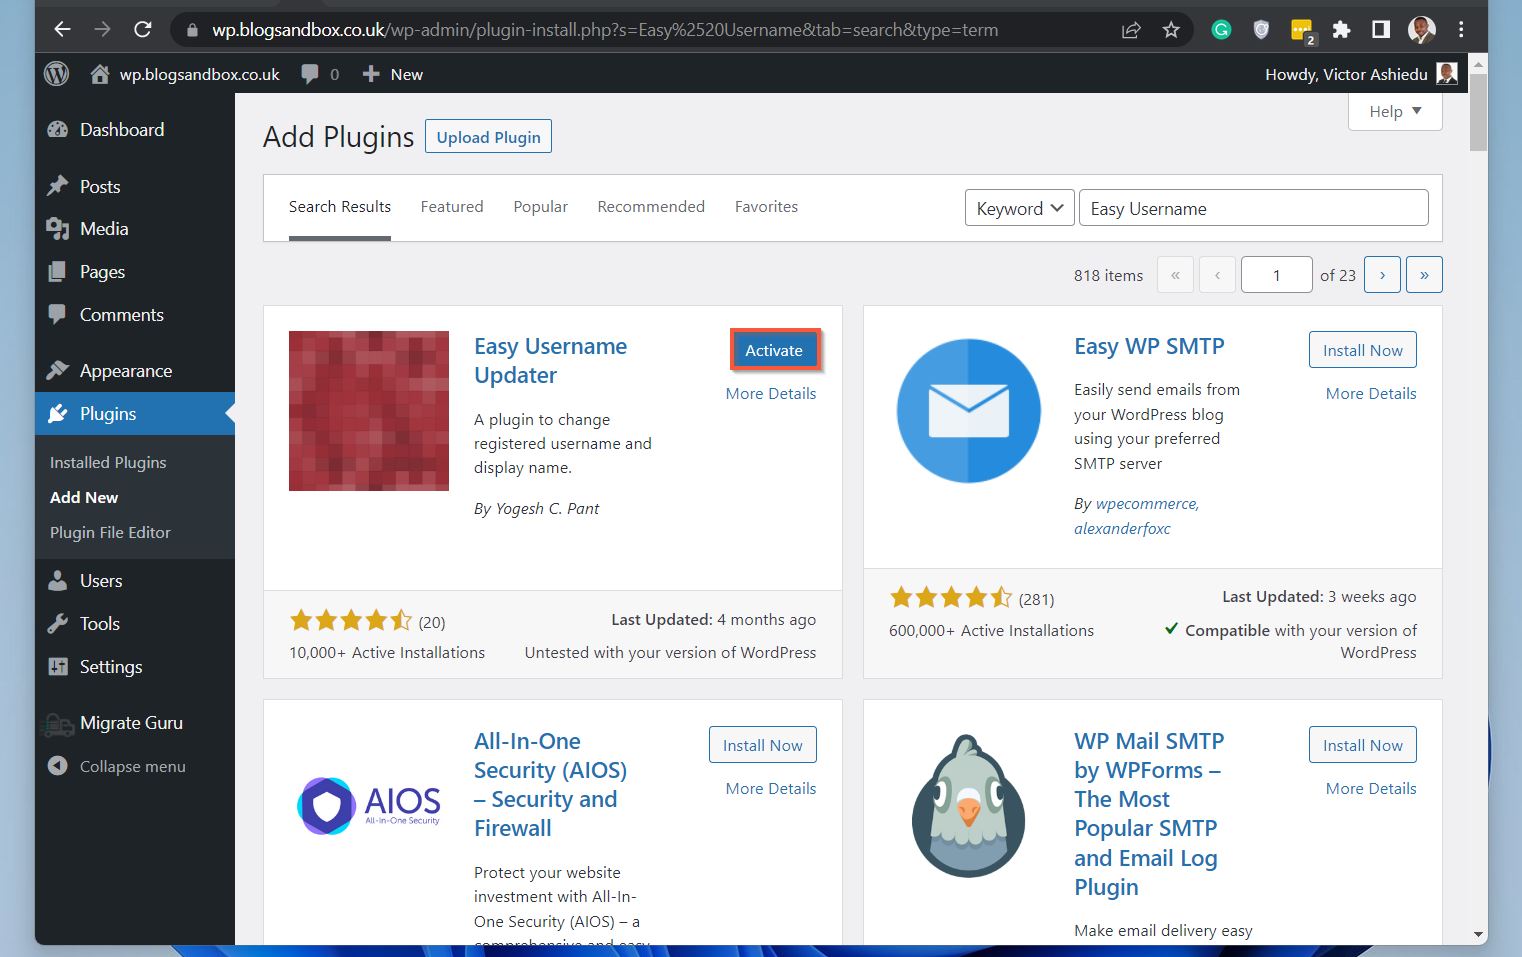
- Then, on the Add Plugins page, enter Easy Username in the search field (top right corner of the page). Next, on the top right of the Easy Username Updater, click Install Now – then wait for the plugin to install.
- When the plugin finishes installing, click the Activate button. Then, proceed to the next sub-section below.
Step 2: Use the Easy Username Updater Plugin to Change your Username
Once you have installed and installed the Easy Username Updater Plugin, follow the steps below to change a username with the plugin.
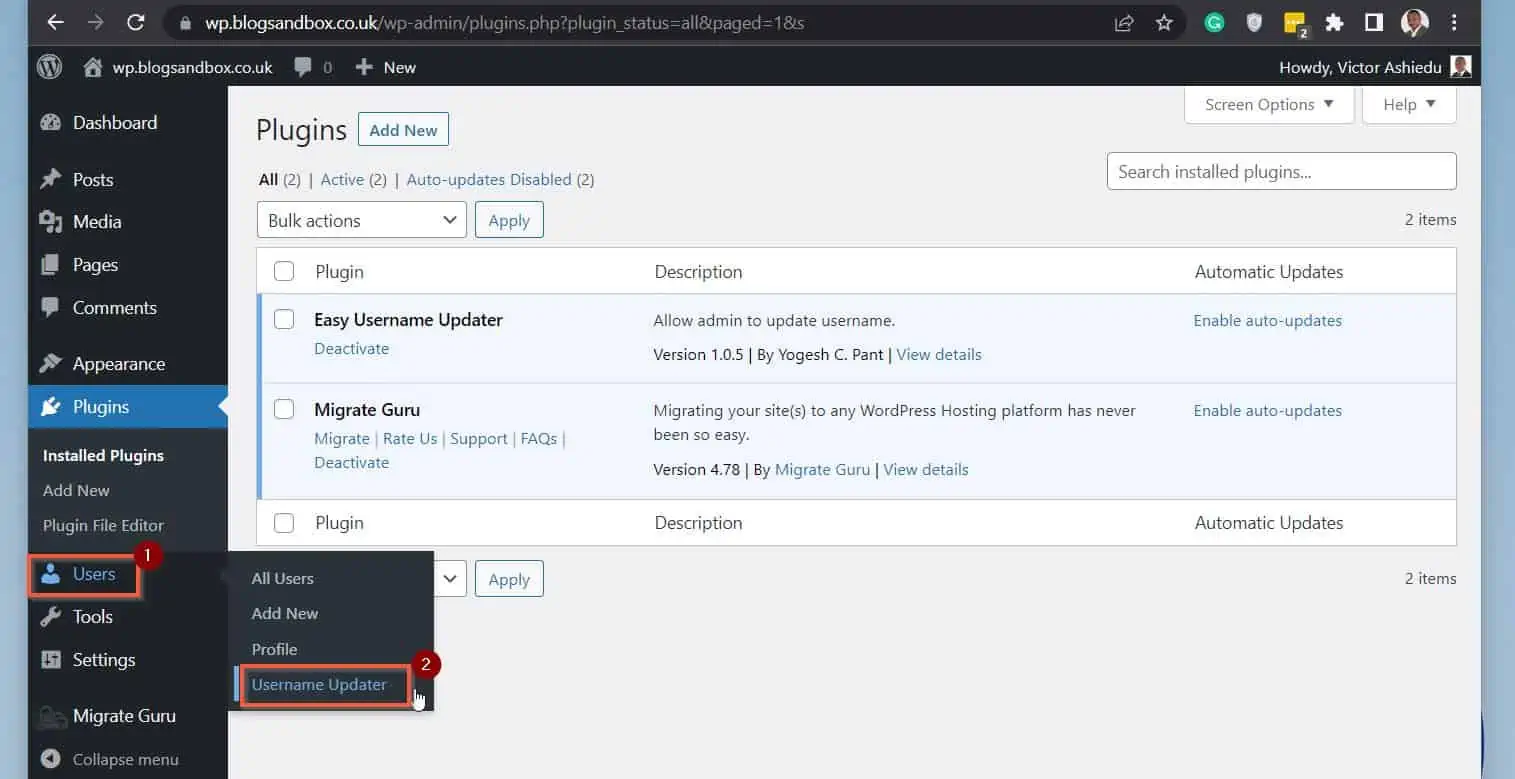
- Sign in to your WordPress website with an admin account. Then, on the left pane, hover over the Users node and select Username Updater.
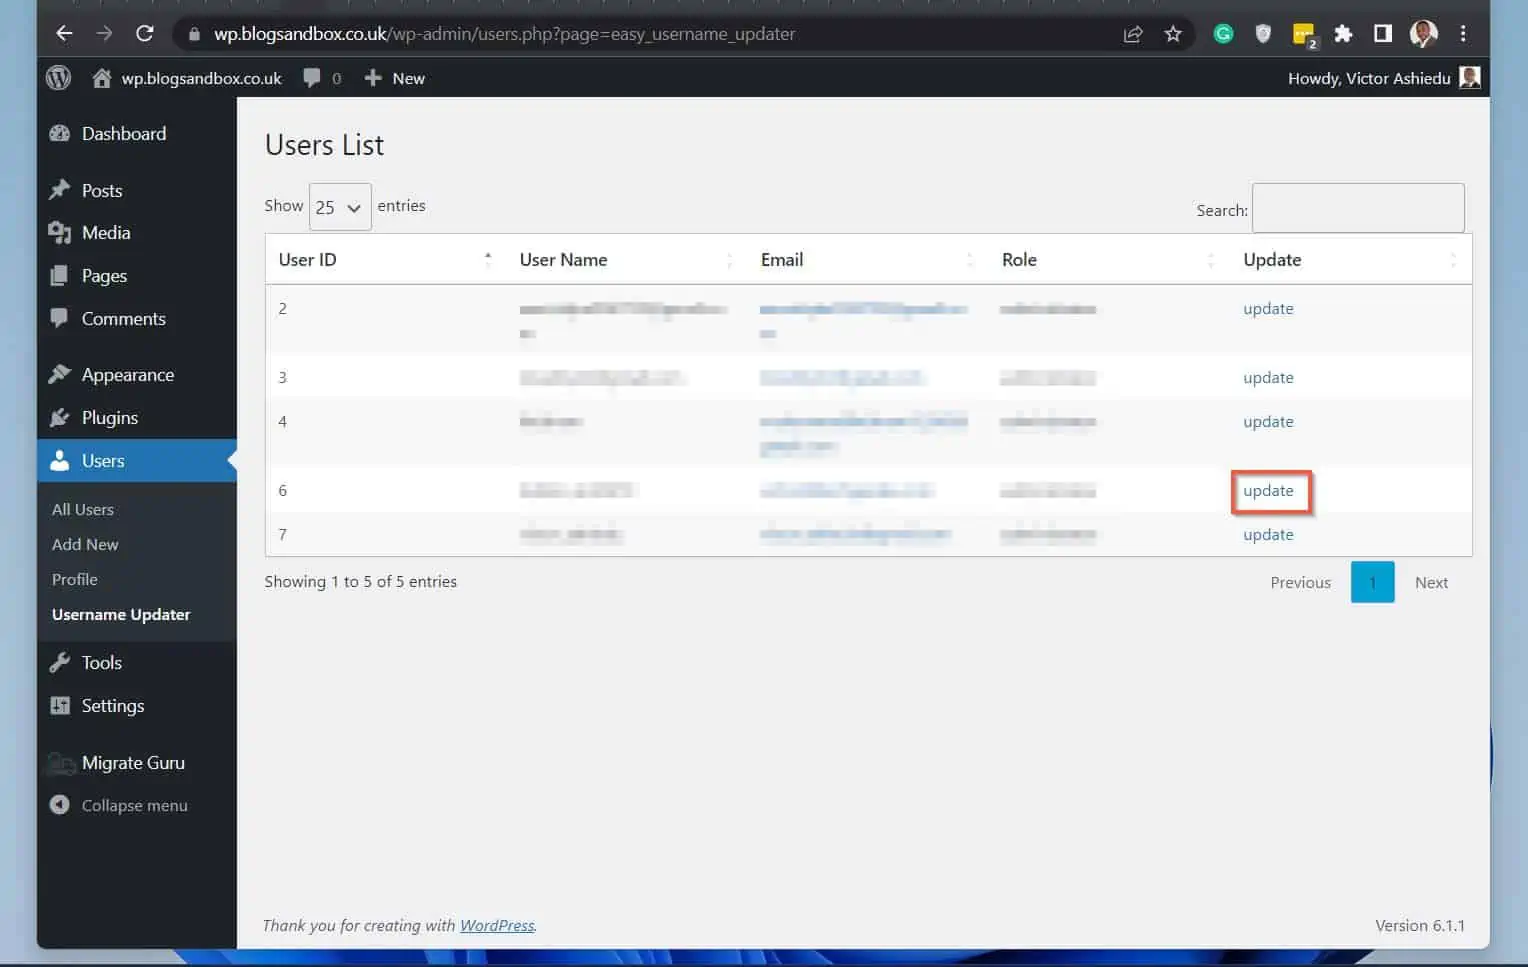
- The plugin displays a list of all the users on your website. Click the update button on the Update column for the username you want to change.
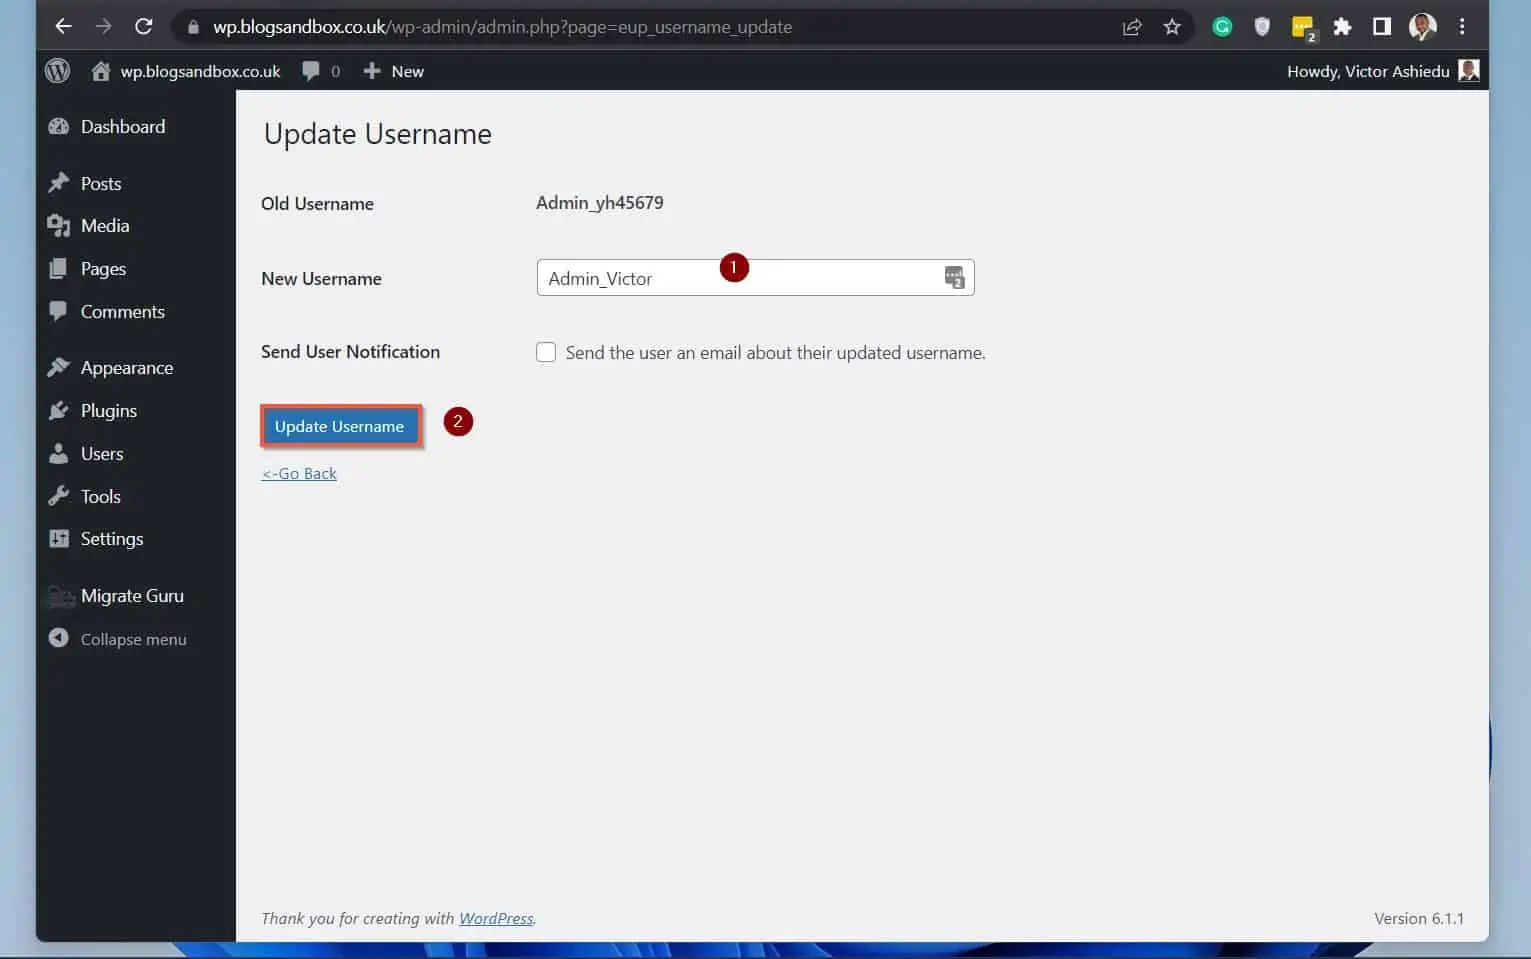
- Then, on the Update Username page, enter a new username for the WordPress user you want to change the username. After entering your preferred username, click the Update Username button.
Option 3: Change Your Username by Updating the WordPress Database via phpMyAdmin
In the first section of this article, I showed you how to change a username in WordPress by creating a new user. Then, in the second section, I showed you how to perform the task using a plugin.
In this section, you will learn how to modify a WordPress username directly in the WordPress database using phpMyAdmin. Follow the steps below to complete this task.
- Sign in to your WordPress site’s hosting account. Then, open cPanel.
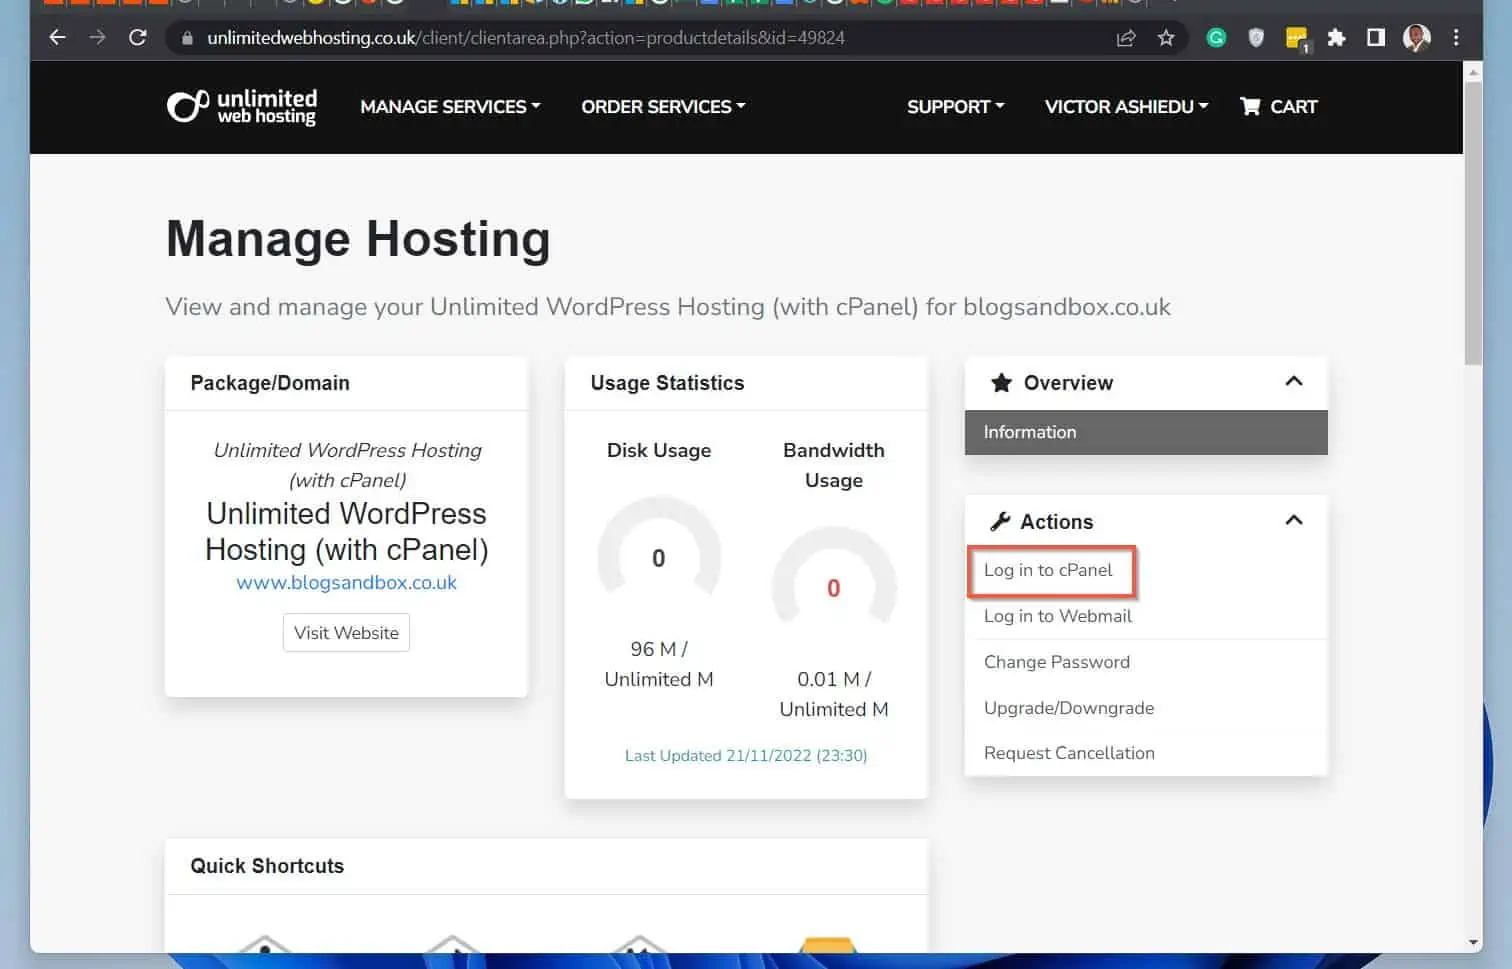
- Then, when cPanel opens, locate the Databases section and click phpMyAdmin.
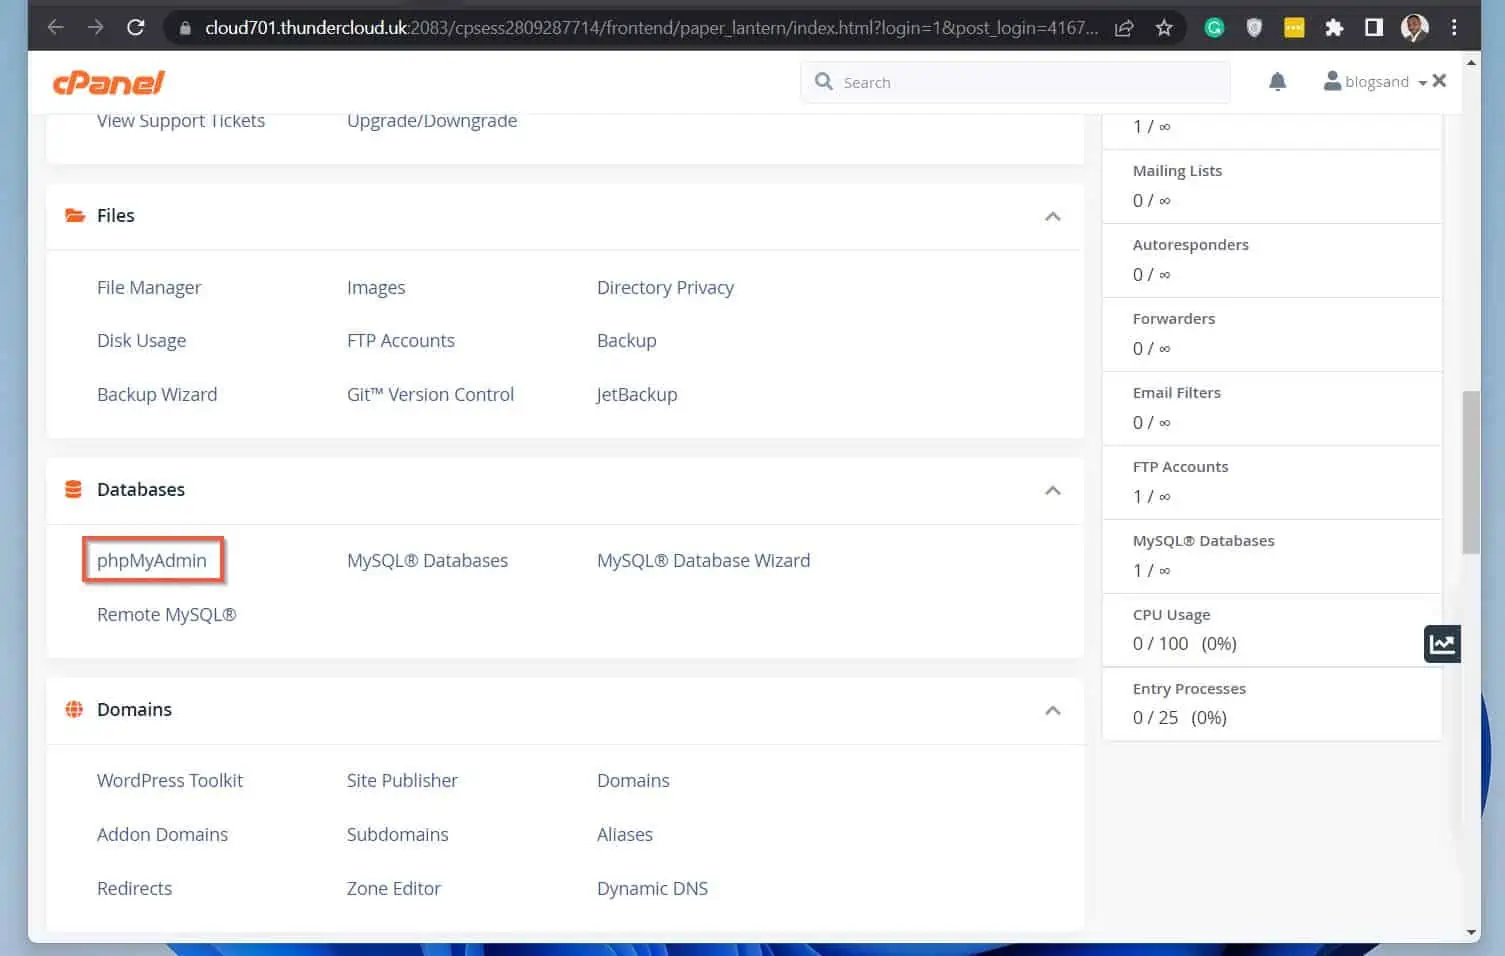
- When phpMyAdmin opens, on the left pane of the page, click the database. If you have more than one database, make sure that you click the right one for the site you’re changing a username.
The database will expand, listing the tables.
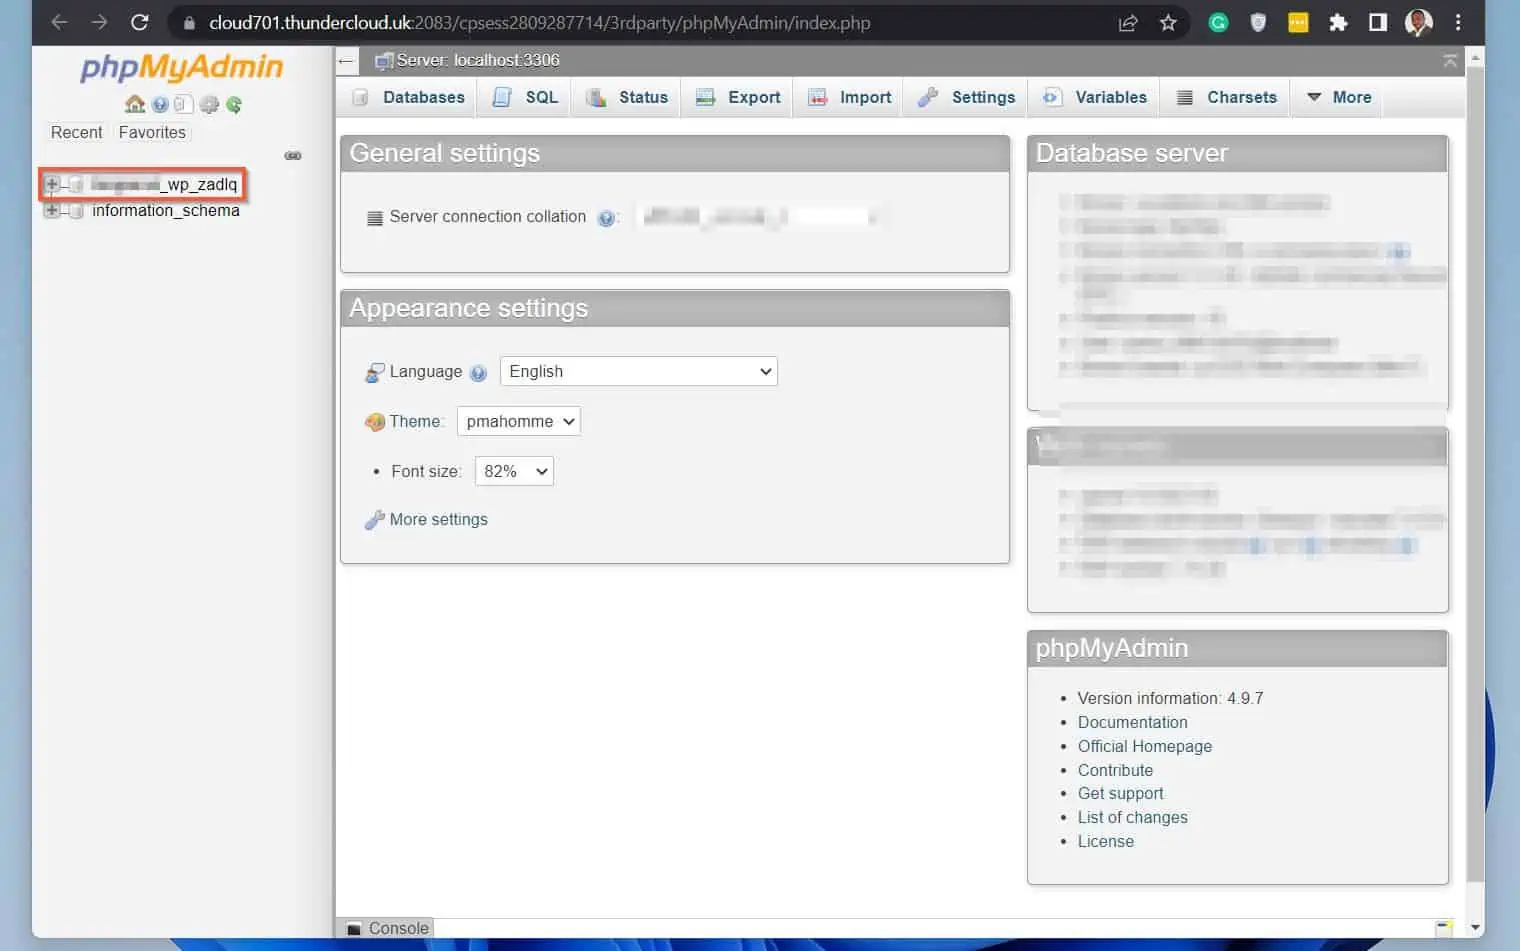
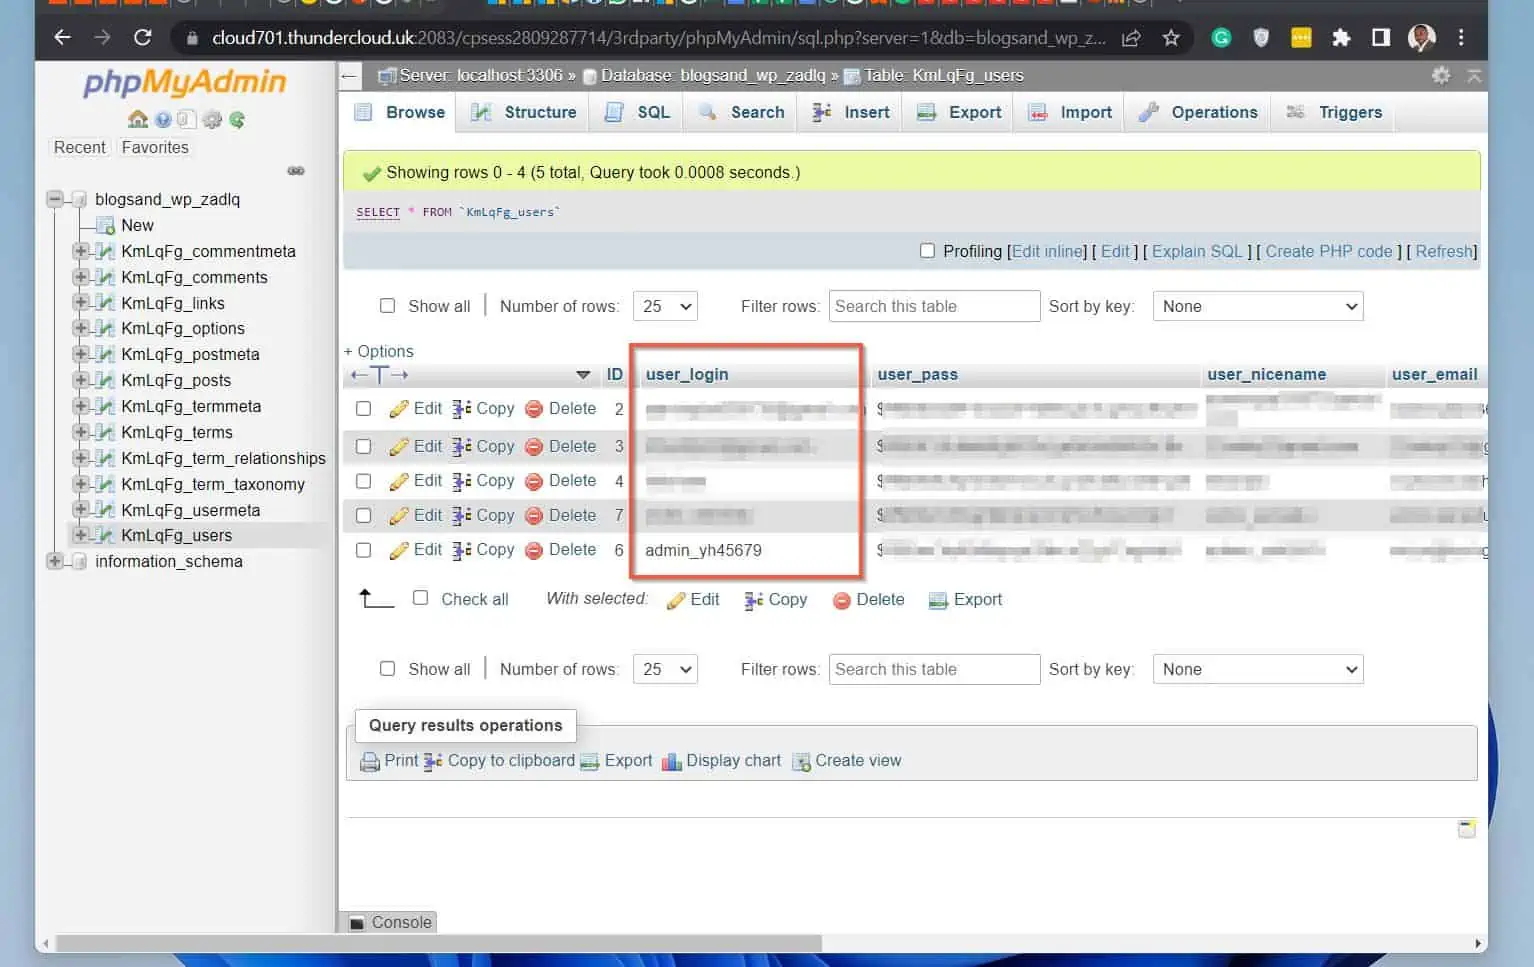
- On the list of tables, locate the table that wends with “_users” (without the quotes). Then, click the table.
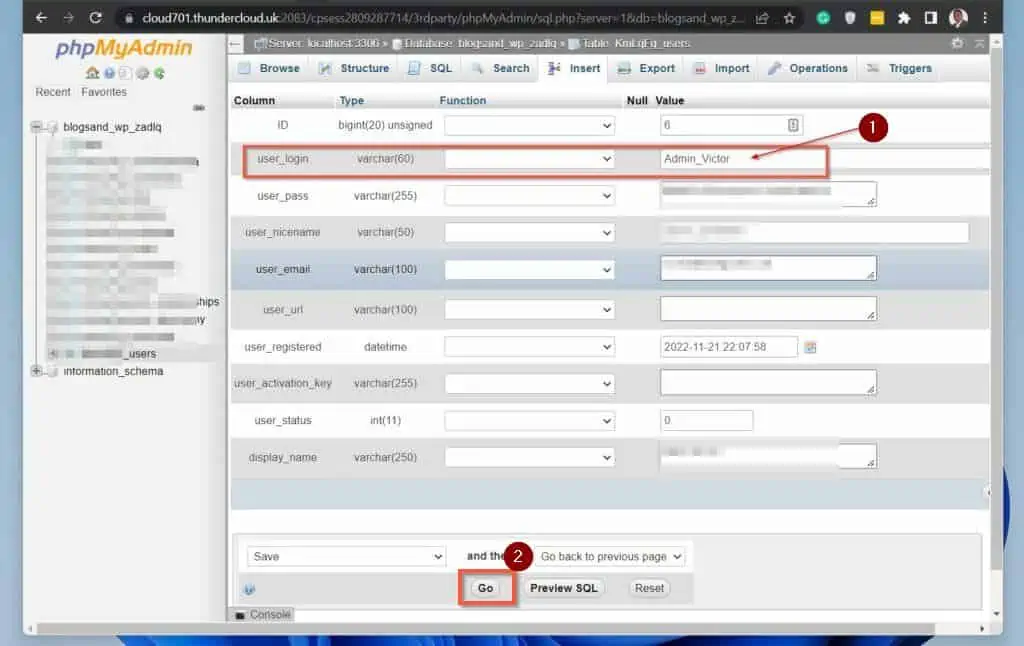
The Users table displays all the users on your WordPress website. - Locate the WordPress user you want to change its username and click the Edit button. The user account will open for editing.
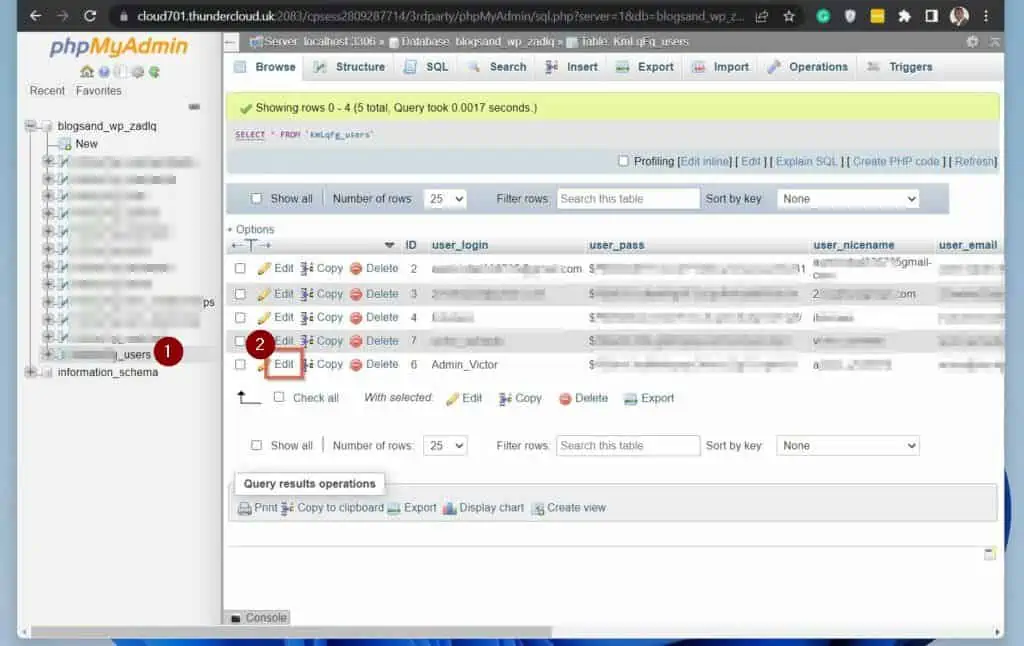
- On the user edit page, locate the user_login, then on the Value column, change the old username to the new username you wish to change it to. When you finish, at the bottom left of the page, click the Go button.
Frequently Asked Questions
The easiest way to change the default username in WordPress is to create a new user, then delete the old user. When you try deleting the old username, WordPress will give you the option to attribute the user’s content to an account.
Select the new account you created.
Alternatively, you can change the default username in WordPress using the Easy Username Updater plugin. Finally, you can also change the default WordPress username by editing the Users table in phpMyAdmin.
To change your WordPress username in cPanel, follow the steps below:
i) Sign in to your WordPress cPanel hosting account and open cPanel.
ii) Then, in the cPanel dashboard, locate Databases and click phpMyAdmin.
iii) When phpMyAdmin opens, click on the WordPress website’s database on the left pane, then locate a table that ends with _users and click on it.
iv) When the Users table opens, locate the username you want to change and click Edit.
v) Finally, change the username by editing the value column of the user_login for the username.
vi) When you finish, click the Go button on the bottom left of the page.
To change my profile in WordPress, hover over the Users node, then click Profile. When your profile opens, edit any part of your profile you want to change, scroll down to the bottom of the page and click the Update Profile button.
There are multiple ways you can create a profile in WordPress.
Firstly, if you’re an admin on the WordPress site, sign in with the admin account. Then, hover over the Users node and select Add New.
Finally, complete the new user form and click the Add New User button.
Alternatively, if you’re not an admin and the website allows users to create a profile on the front end, locate the “Register” or “Sign Up” button, click on it and complete the form to create a profile on the WordPress website.
If you’re signed in to the WordPress site, to find your username, hover over the Users node and select Profile. Then, when your profile opens, your username is located in the Username field.
Conclusion
If you have ever tried changing your username in WordPress, you’ll be shocked to find out that you cannot do that on your profile. However, as I have shown in this guide, that is not the end of the world, as there are other ways to perform this all-important task.
Specifically, you can change your username in WordPress by creating a new account. Then, delete the old account and assign all content previously owned by the old account to the new user.
Alternatively, you can change a username in WP using a plugin. I showed how to do this with the Easy Username Updater plugin. Finally, you can also update your WordPress username via phpMyAdmin.
I covered these three methods in this guide and I hope you were able to use one of the methods to change your WP username. If I made your day, click on “Yes” beside the “Was this page helpful” question below.
You may also express your thoughts and opinions by using the “Leave a Comment” form at the bottom of this page.
Finally, to grow your WordPress knowledge, read more articles on our WordPress & Websites How-Tos page.
![WordPress Lost Password Redirects to Page Not Found [Fixed]](https://www.itechguides.com/wp-content/uploads/2024/03/WordPress-Lost-Password-Redirects-to-Page-Not-Found-Fixed.webp)