Do you desire to add a user to sudoers in the Ubuntu Linux-based OS but have no clue how to go about it? This guide is for you, as it illustrates several methods to do that.
Option 1: Add User to Sudoers Through Settings
One way to grant a user sudo privileges in Ubuntu is through the settings in the Ubuntu GUI. To learn how to do that, follow the procedures listed below.
- First, ensure you log into your Ubuntu Linux-based computer using an account with sudo privileges.
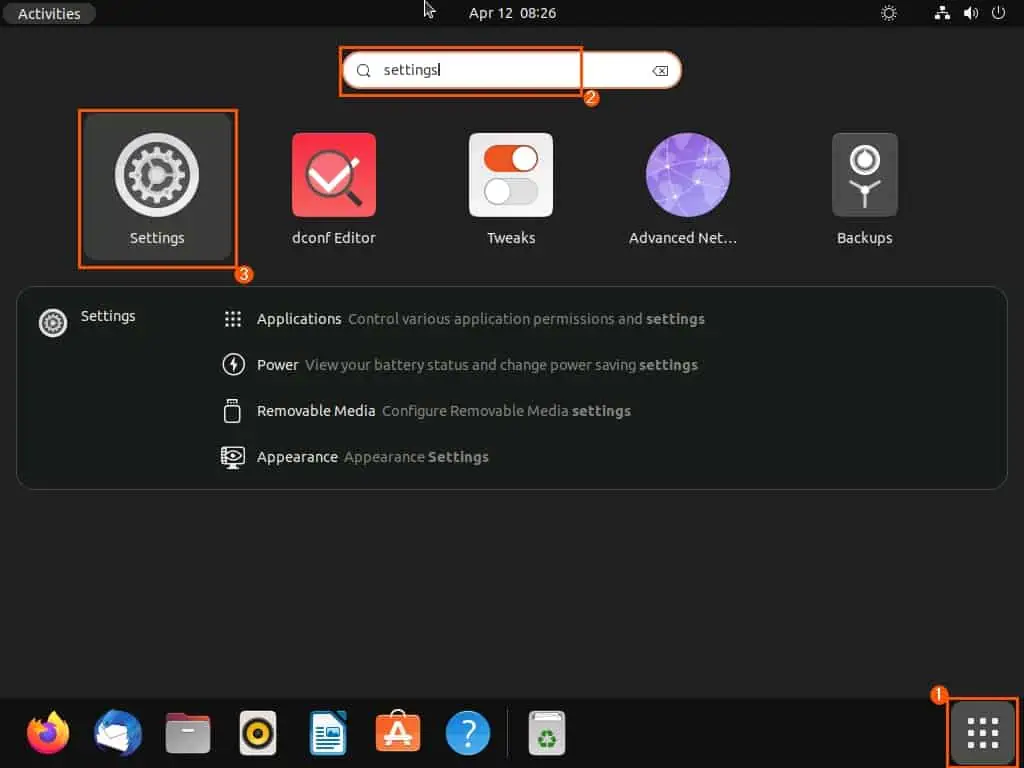
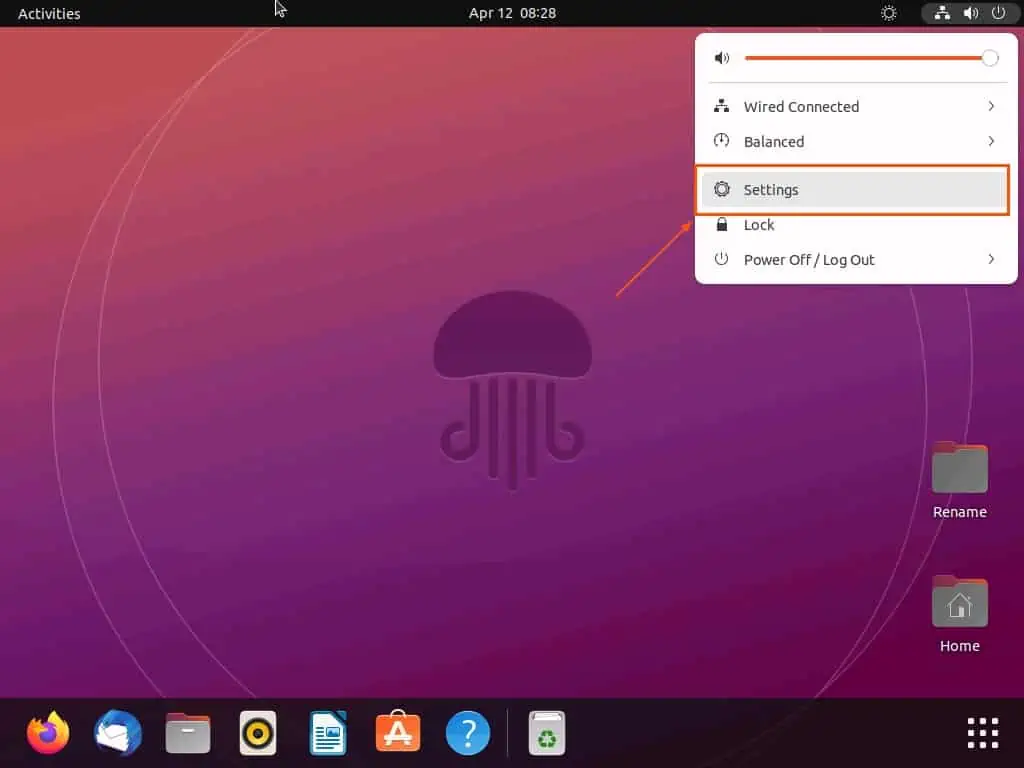
- Afterward, click the Show Applications icon on the Ubuntu dock. Now, open the settings in Ubuntu by inputting “settings” in the search field and selecting the Settings icon from the search result.
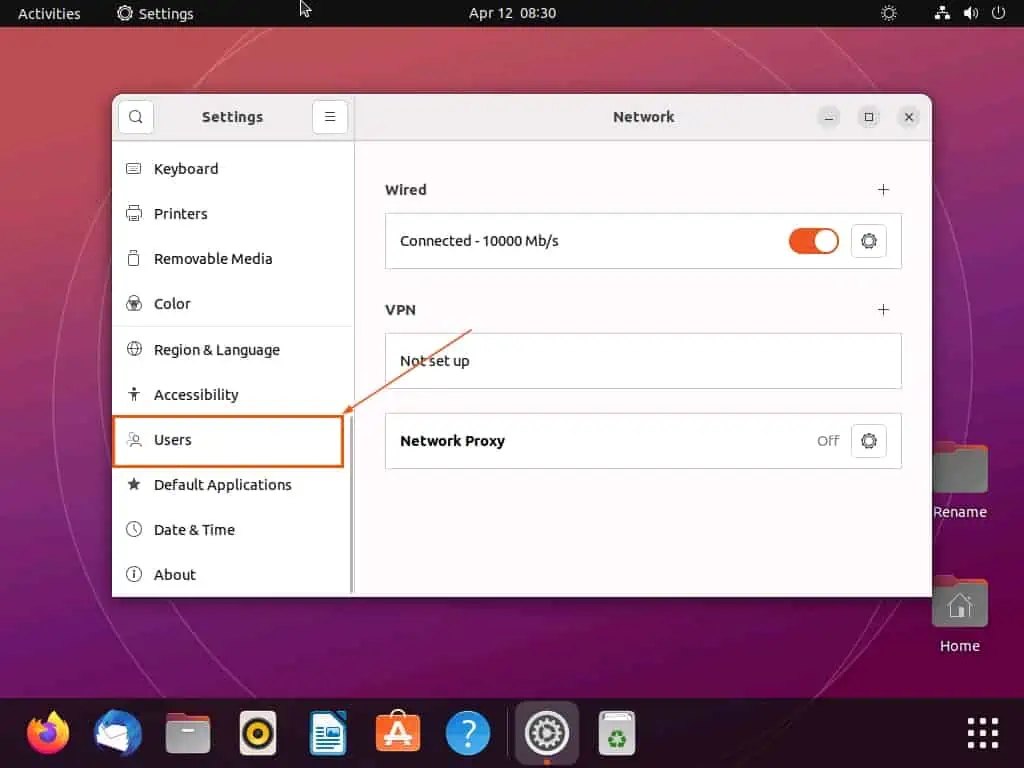
- In the Ubuntu Settings window, select Users among the menus on the left pane.
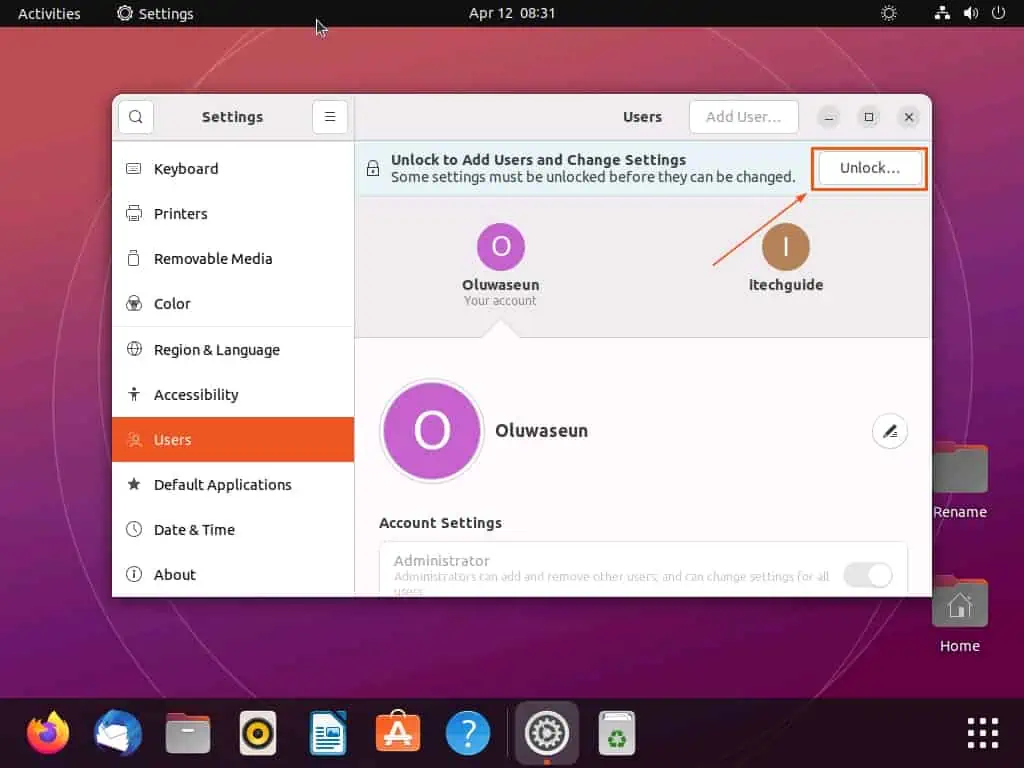
- Following that, click the Unlock… button at the top of the Users page to add users and change settings.
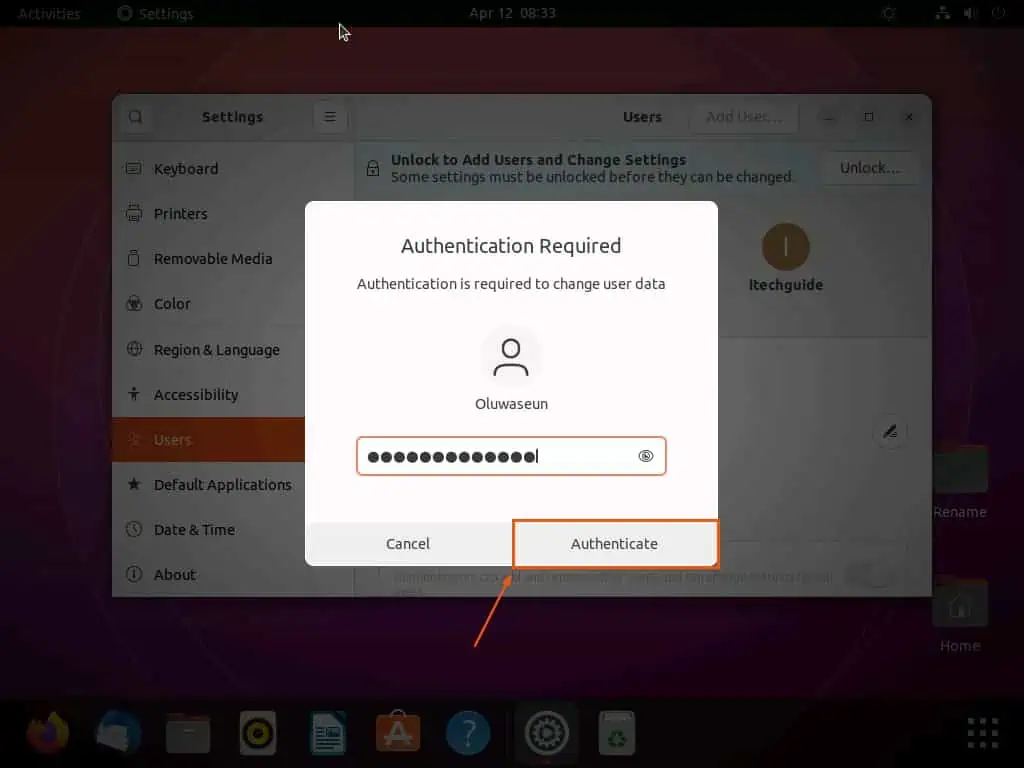
- Accordingly, you will be prompted to input your password for authentication. Hence, input your password in the provided input field, then click the Authenticate button.
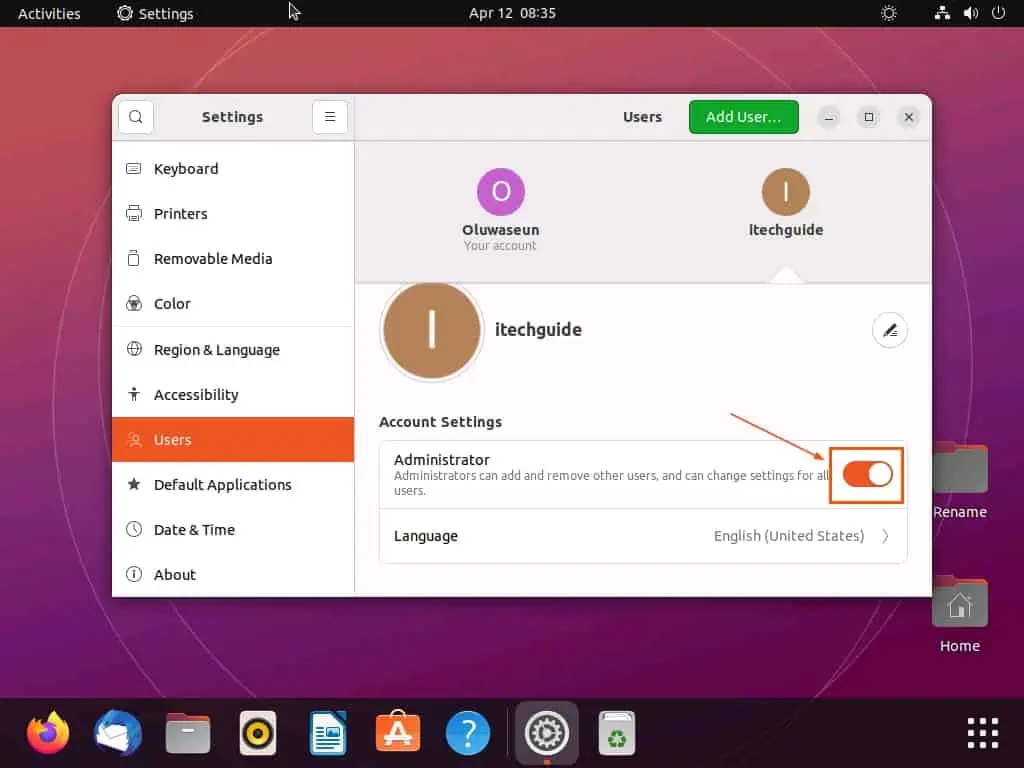
- Now, select the user you wish to add to sudoers, then turn on the Administrator toggle under Account Settings.
Option 2: Add User to Sudo Group Through Terminal
Another way you can add a user to the sudo group in Ubuntu is by running a particular command in the terminal. As a matter of fact, there are various commands you can use to add a user to the sudo group in Ubuntu.
However, we will focus on only two commands in this section. These commands are the usermod command and gpasswd command.
Thus, the following sub-sections will show you how to use these commands to grant a user sudo privileges in Ubuntu.
Add User to Sudo Group Using the Usermod Command
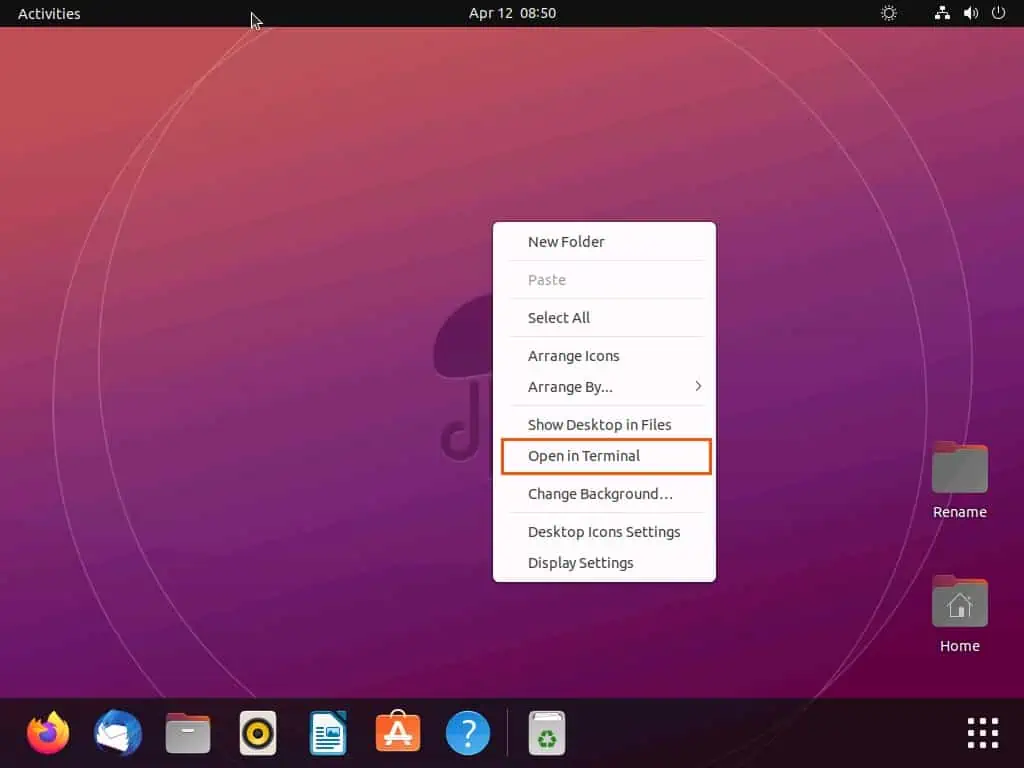
- Ensure you’re logged into your Ubuntu system as a root user or with an account with sudo privileges. Then, right-click any free area on the Ubuntu desktop and choose Open in Terminal from the context menu.
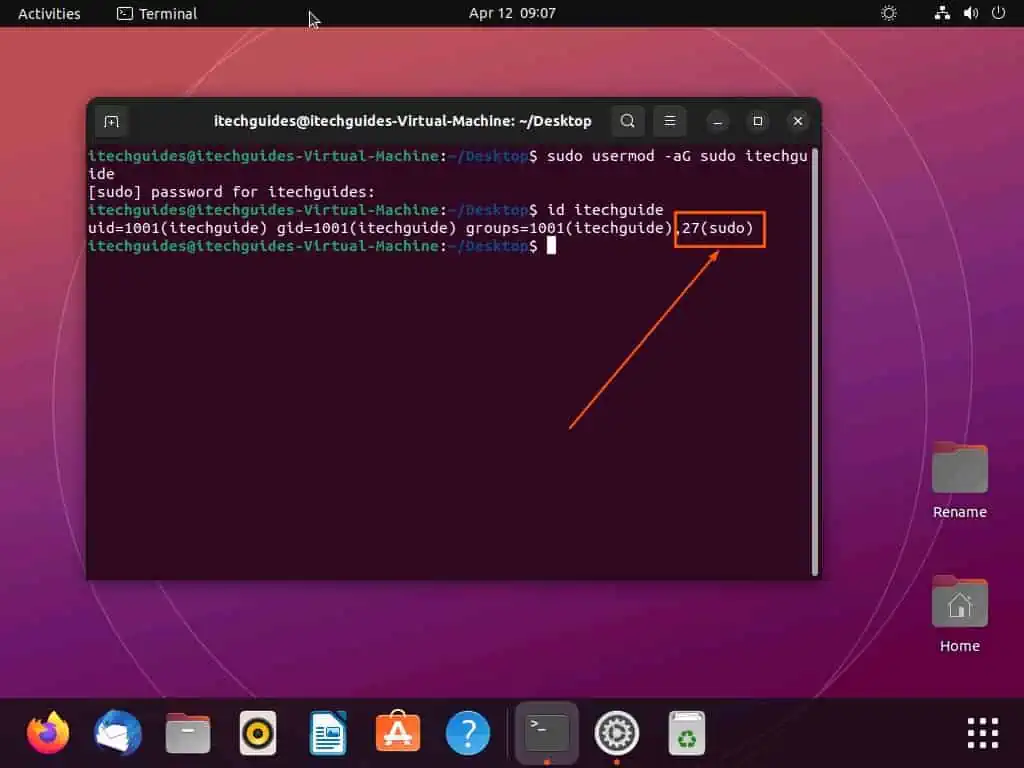
- When the terminal opens, execute the command below. However, replace “username” in the command with the username of the user you wish to add to the sudo group.
sudo usermod -aG sudo username
For instance, if I wish to add a user named “itechguide”, below is what the command should look like.
sudo usermod -aG sudo itechguide
Also, note that characters won’t be visible while typing your password in the Ubuntu terminal.

- After doing all that, you can confirm if the user has been added to the sudo group by executing the command below. However, replace “username” with the username of the user.
id username
For this demonstration, the username of the user is “itechguide”. So, below is what the command should look like.
id itechguide
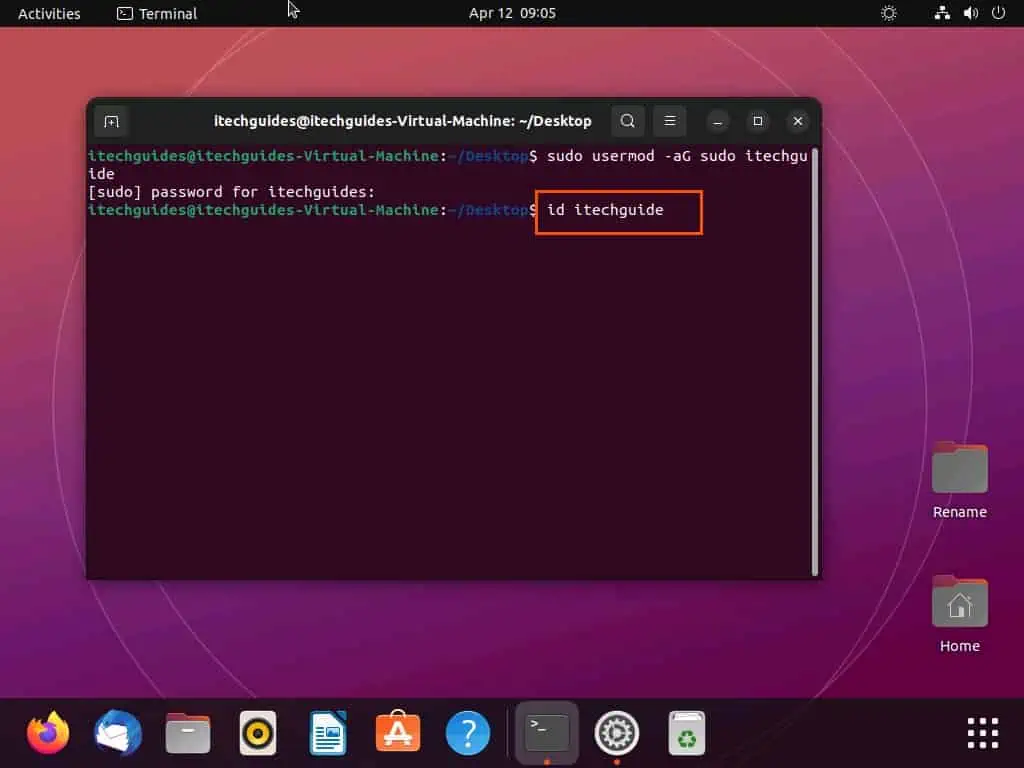
- After running the prior command, the output should include “27(sudo)”, indicating the user has been added to the sudo group.
Add User To Sudo Group Using the Gpasswd Command
- Sign into your Ubuntu computer as a root user or with an account in the sudo group.
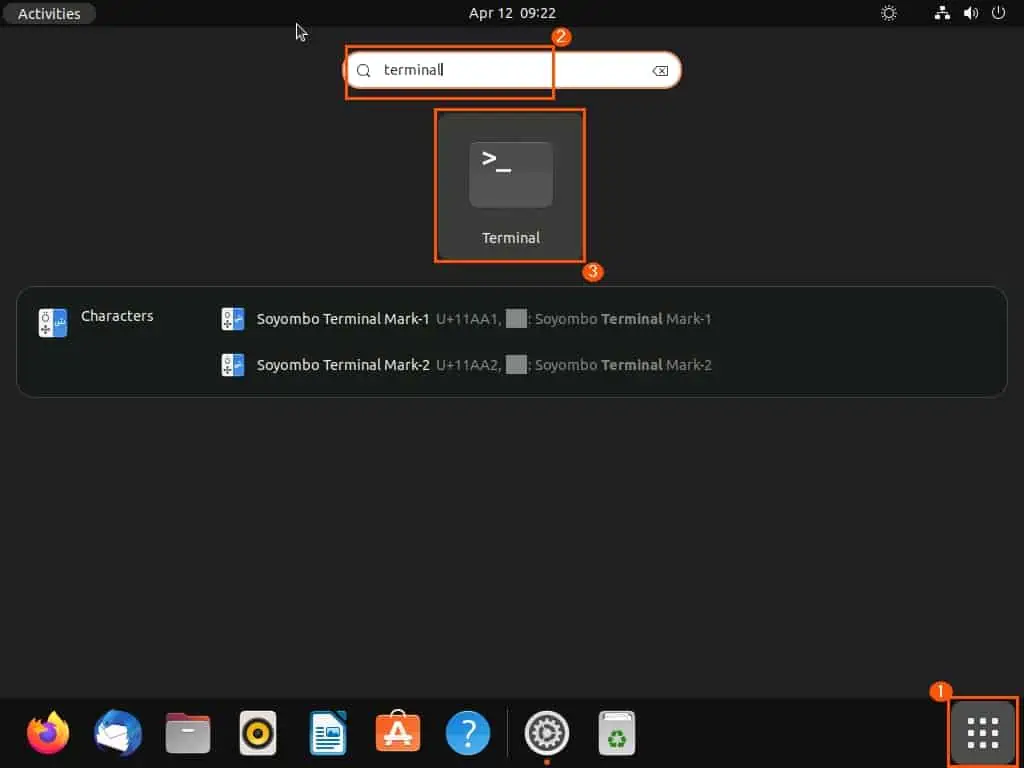
- Next, open the app menu by clicking the Show Applications icon on the Ubuntu dock. Then, input “terminal ” in the search field and choose the Terminal program from the search result.
- In the Ubuntu terminal, type the following command and press the enter key. However, replace “username” with the username of the user you wish to add to sudoers.
sudo gpasswd -a username sudo
For example, if I want to add a user with a username of “John” to the sudoers, below is what the command should look like.
sudo gpasswd -a john sudo

- By doing that, you will be prompted to input your password – do so and press the enter key on your keyboard. Hence, the user should be added to sudo group.

Frequently Asked Questions
A sudo user is a regular Linux user with administrator privileges to run commands and perform tasks as a root user. Basically, a sudo or a root user can do things in Linux that a regular user can’t.
For example, a sudo user can add a new user and also access sensitive files. As a matter of fact, a sudo user can add another user to the sudo group in Linux.
To add a user to the sudo file in Ubuntu, follow the steps below.
a) First, ensure you log into your Ubuntu Linux-based computer using an account with sudo privileges.
b) Afterward, click the Show Applications icon on the Ubuntu dock.
c) Now, open the settings in Ubuntu by inputting “settings” in the search field and selecting the Settings icon from the search result.
d) In the Ubuntu Settings window, select Users among the menus on the left pane.
e) Following that, click the Unlock… button at the top of the Users page to add users and change settings.
f) Consequently, you will be prompted to input your password for authentication. Hence, input your password in the provided input field, then click the Authenticate button.
g) Now, select the user you wish to add to sudoers, then turn on the Administrator toggle under Account Settings.
The sudo command in Ubuntu allows sudo users to run commands with root privileges.
The command to add a user to sudo in Linux is “sudo usermod -aG sudo username” (without the quotes). However, “username” in the command should be replaced with the username of the user you wish to add to sudo.
Sudo is the acronym for “superuser do” or “substitute user do”.
Conclusion
Adding a user to sudoers in Ubuntu gives the user administrative/sudo privileges. Thus, the user will be able to perform administrative tasks, run programs as a root user, and execute commands with sudo privileges.
However, only trusted users can be added to the sudo group in Ubuntu. Fortunately, this guide demonstrated multiple methods to add a user to sudoers in the Ubuntu Linux-based operating system.
Precisely, we learned how to execute this task through the settings in the Ubuntu GUI. this guide also taught us two commands to grant a user sudo privileges through the Ubuntu terminal.
Hopefully, you enjoyed this article and found it helpful. If you did, click on “Yes” beside the “Was this page helpful” question below.
You may also express your thoughts and opinions by using the “Leave a Reply” form at the bottom of this page.
Finally, you can visit our Linux how-to page to find other helpful Linux how-to guides.