Do you want to add Azure blob storage as a Veeam backup repository? In this article, I walk you through the step-by-step with screenshots so you can follow along.
Step 1: Create a “Cool Access tier” Azure Blob Storage
A “cool access tier” Azure blob storage account is recommended for storing infrequently used files like backups. Moreover, it is cheaper than the “hot tier,” which is used to save frequently used files.
Follow the steps below to create an Azure “cool tier” storage account suitable as a Veeam backup repository.
- Sign in to portal.azure.com and search “storage accounts.”
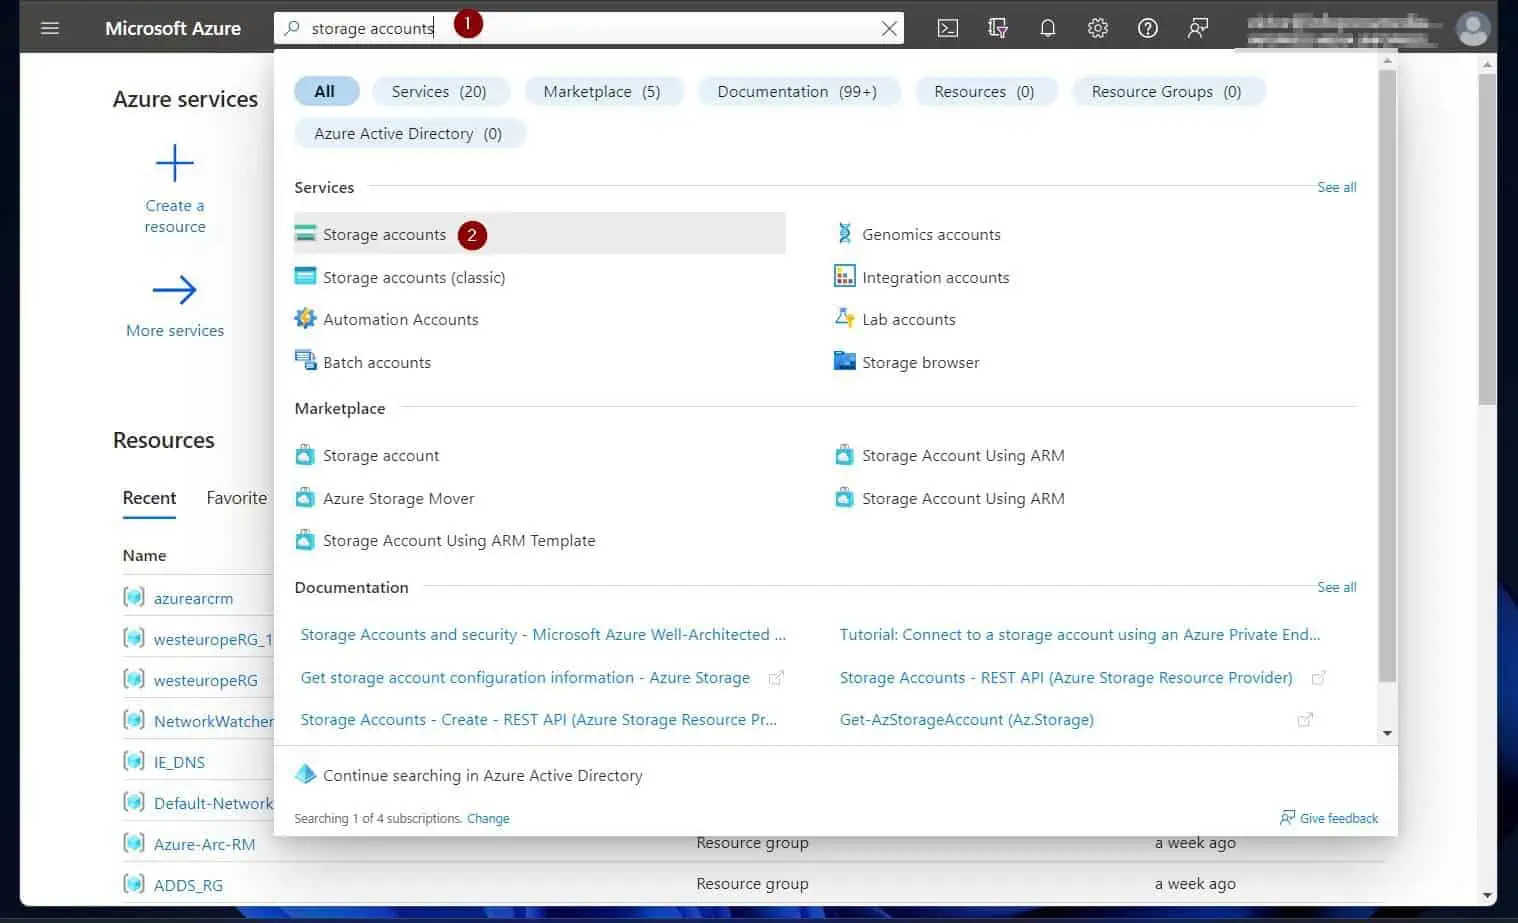
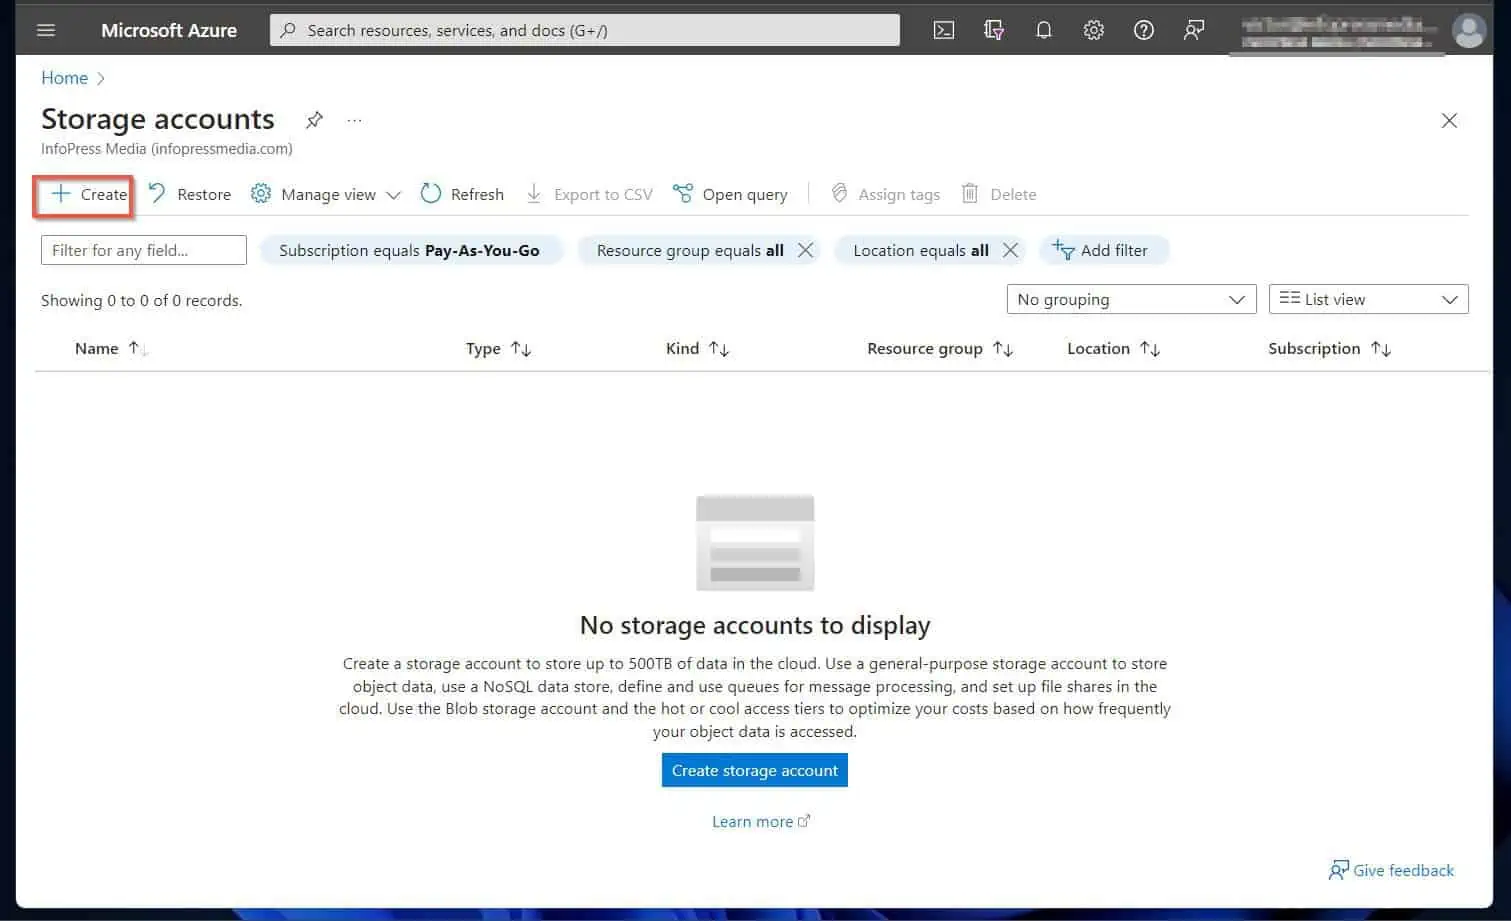
- On the Storage accounts page, click “+ Create.”
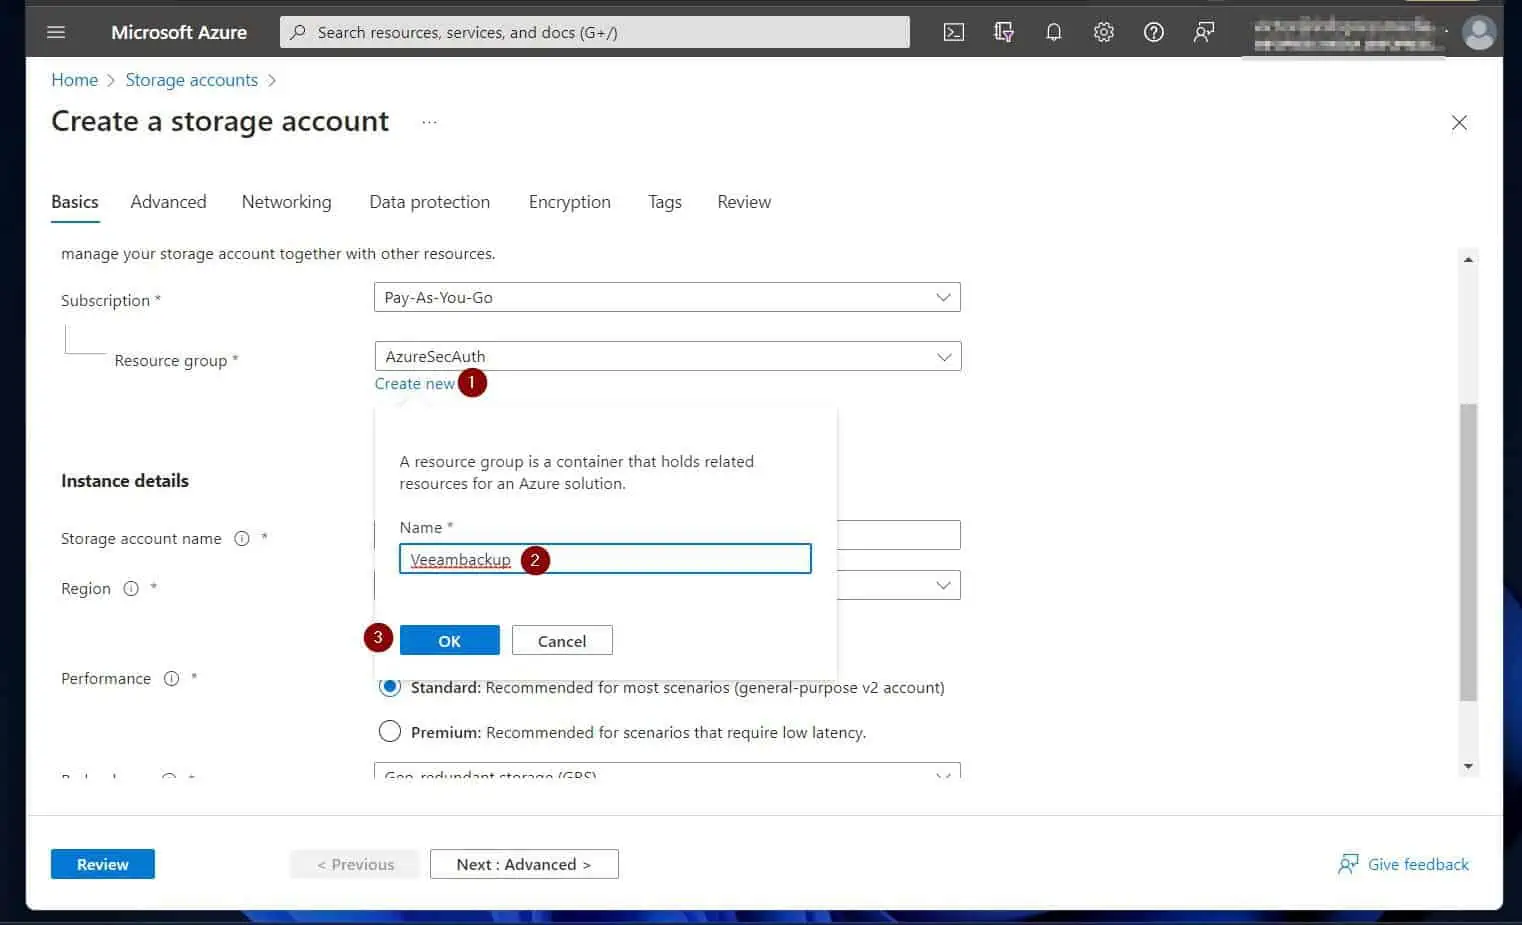
- Once the Create a storage account page opens, if you have an existing Resource group, select it. Otherwise, click “Create new,” give it a name and click OK.
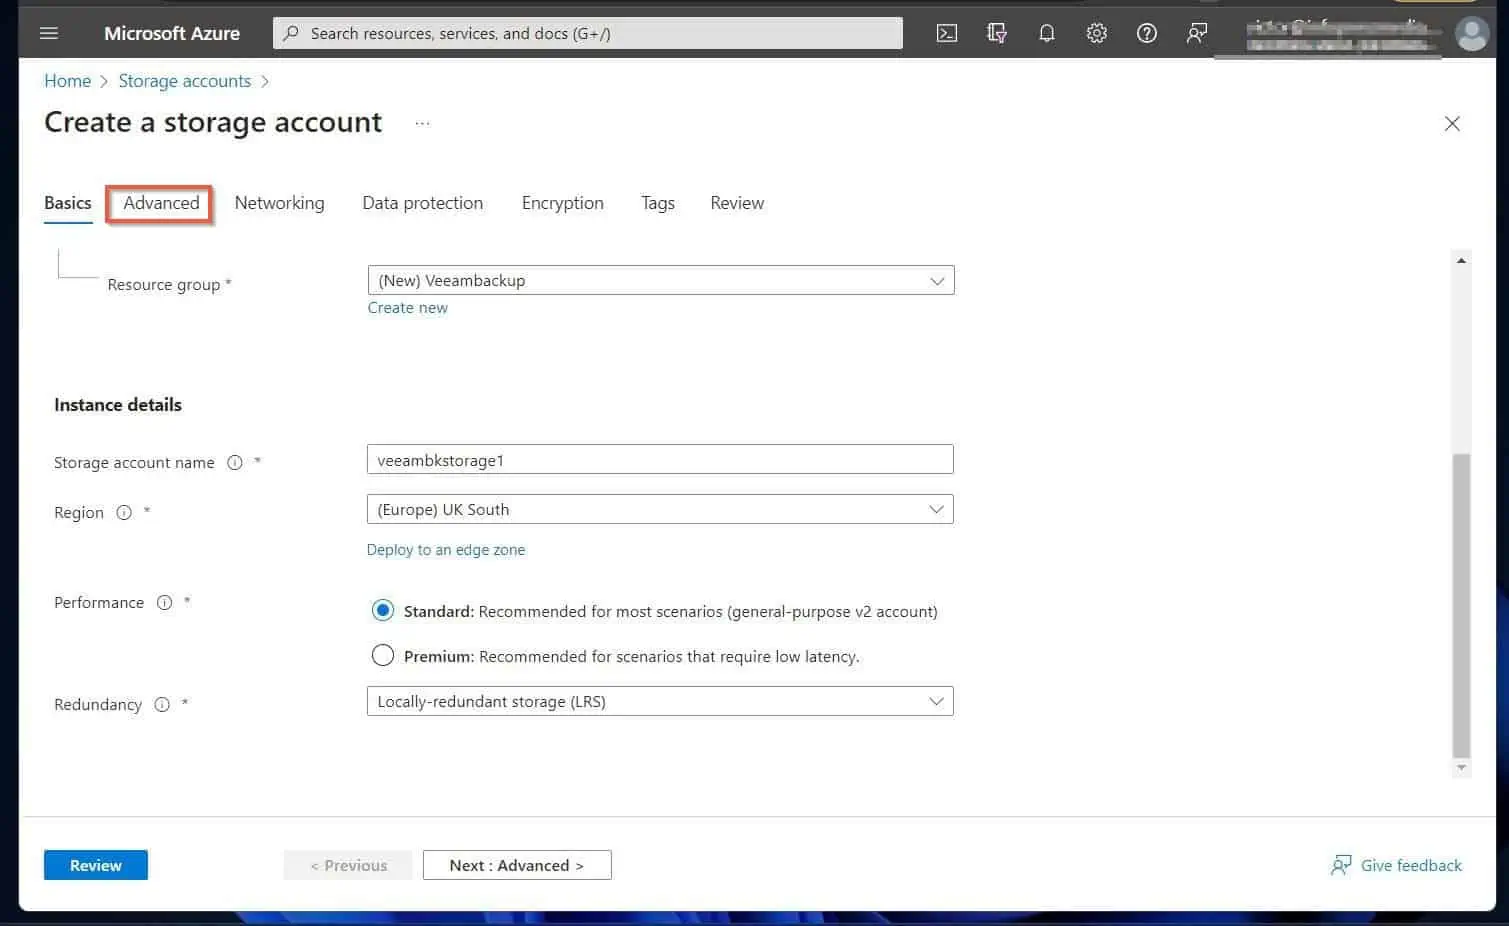
- After that, in the Instance details section, give the storage account a unique name. Also, select an Azure region, storage account Performance, and Redundancy.
The default redundancy is “Geo-redundant storage (GRS). However, for this demo, I am using the “Locally-redundant storage (RRS) redundancy.
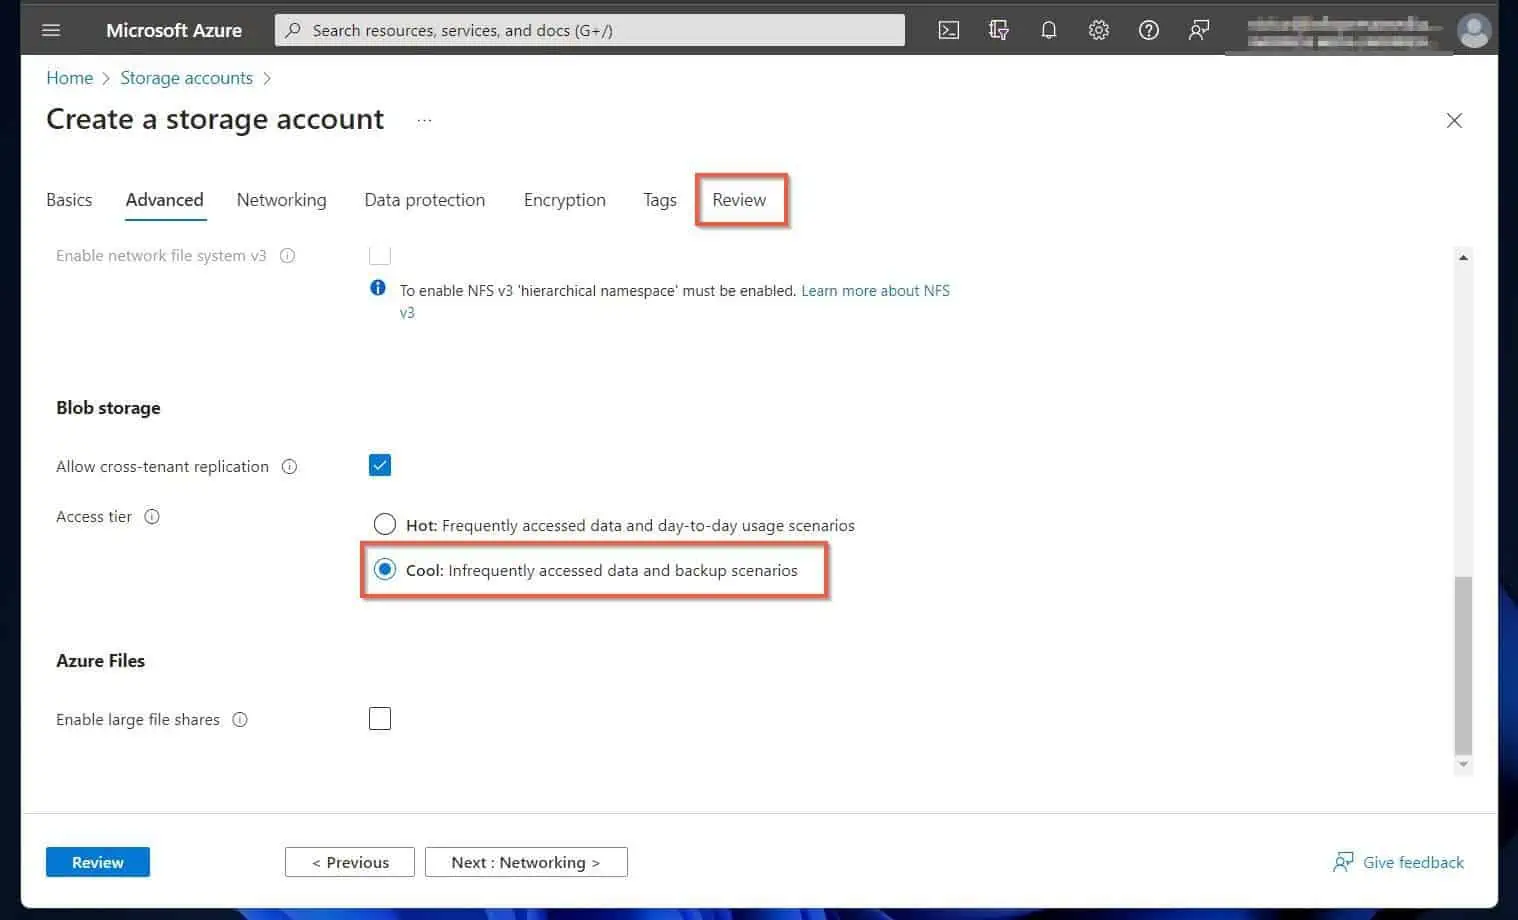
When you finish with the Basic tab, click the Advanced tab.
- On the Advanced tab, scroll to the WBlob storage” section and choose “Cool: infrequently accessed data and backup scenarios.”
After that, click the Review tab, then click “Create.”
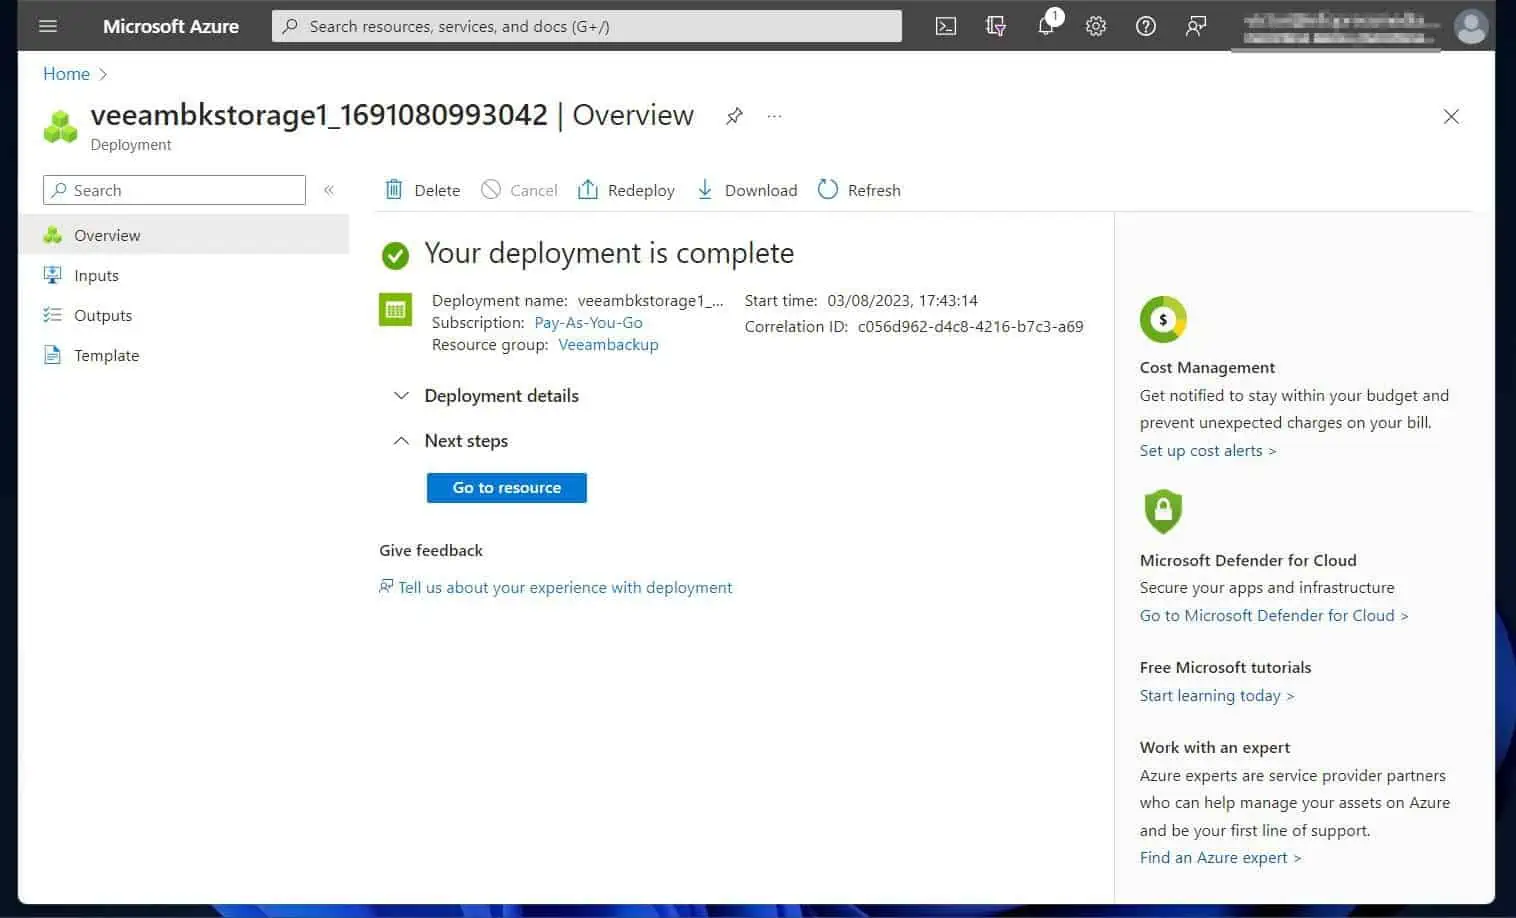
- When the storage account finishes deploying, click “Go to resource.”
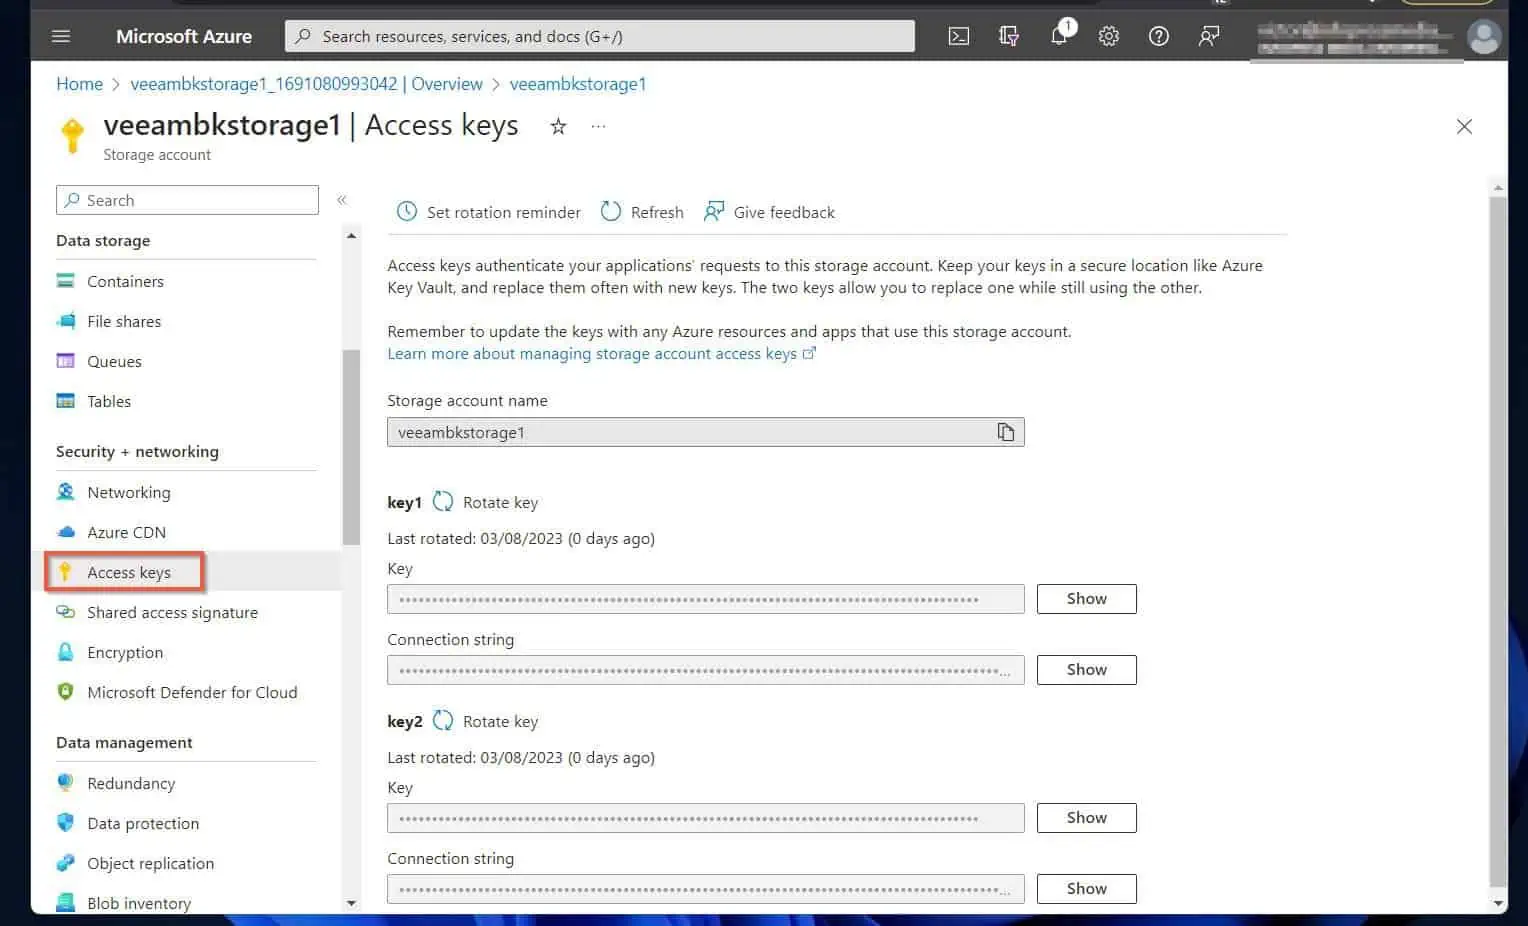
- Once the Azure storage account opens, click the Access keys in the “Security + networking” menu. Keep this page open as you’ll need it when you add the Azure blob storage as a Veeam backup repository.
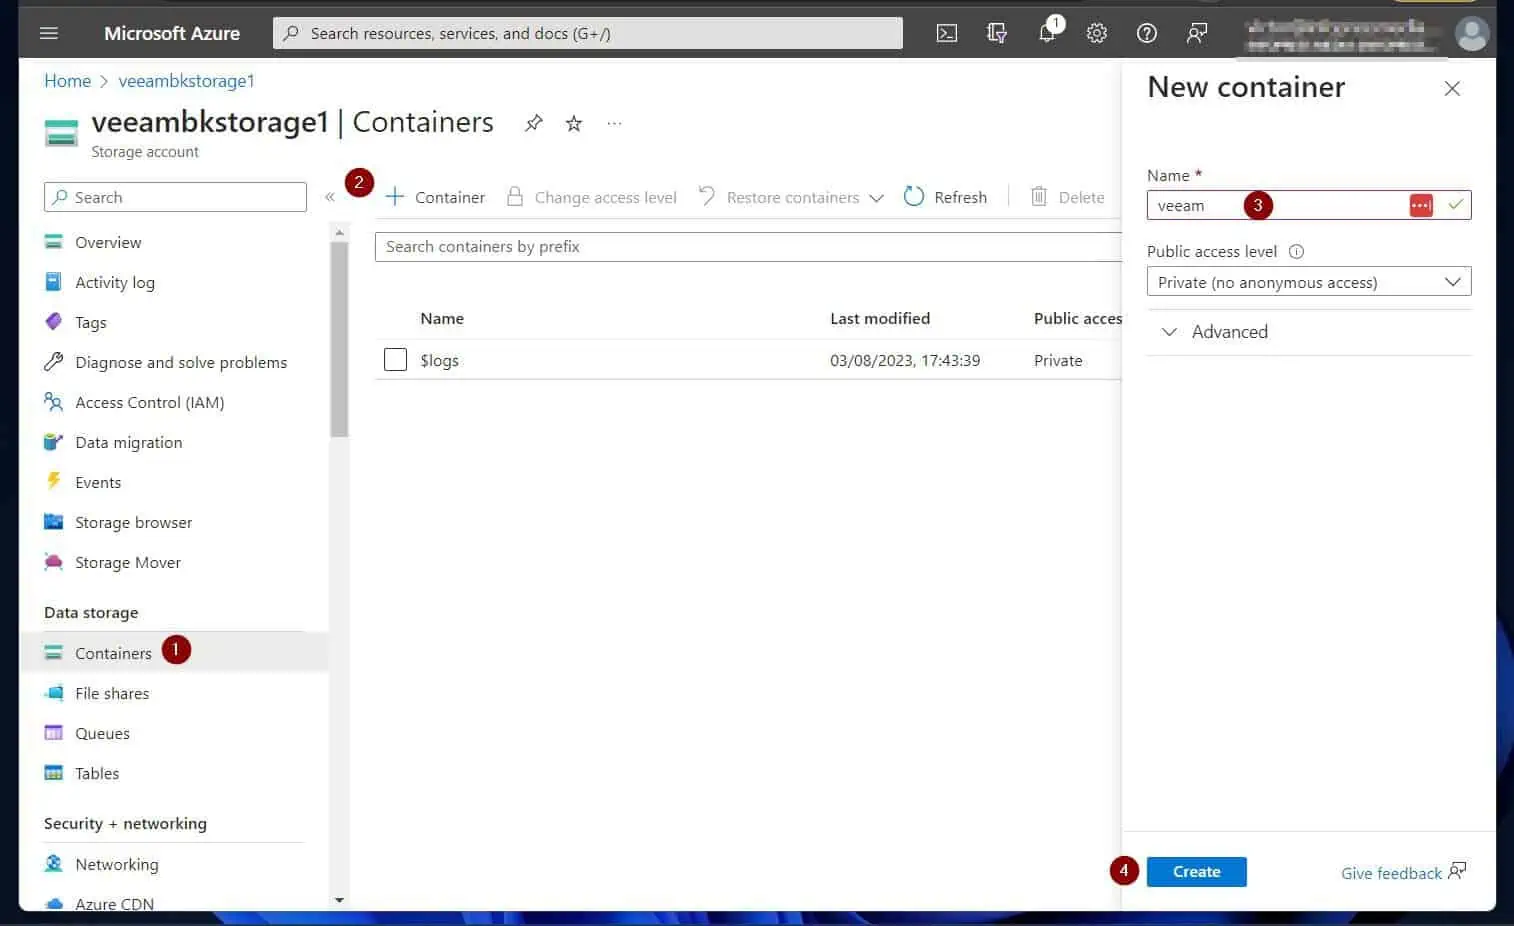
- Then, click Containers in the “Data storage” menu. After that, click “+ Container,” give the container a name, and click Create.
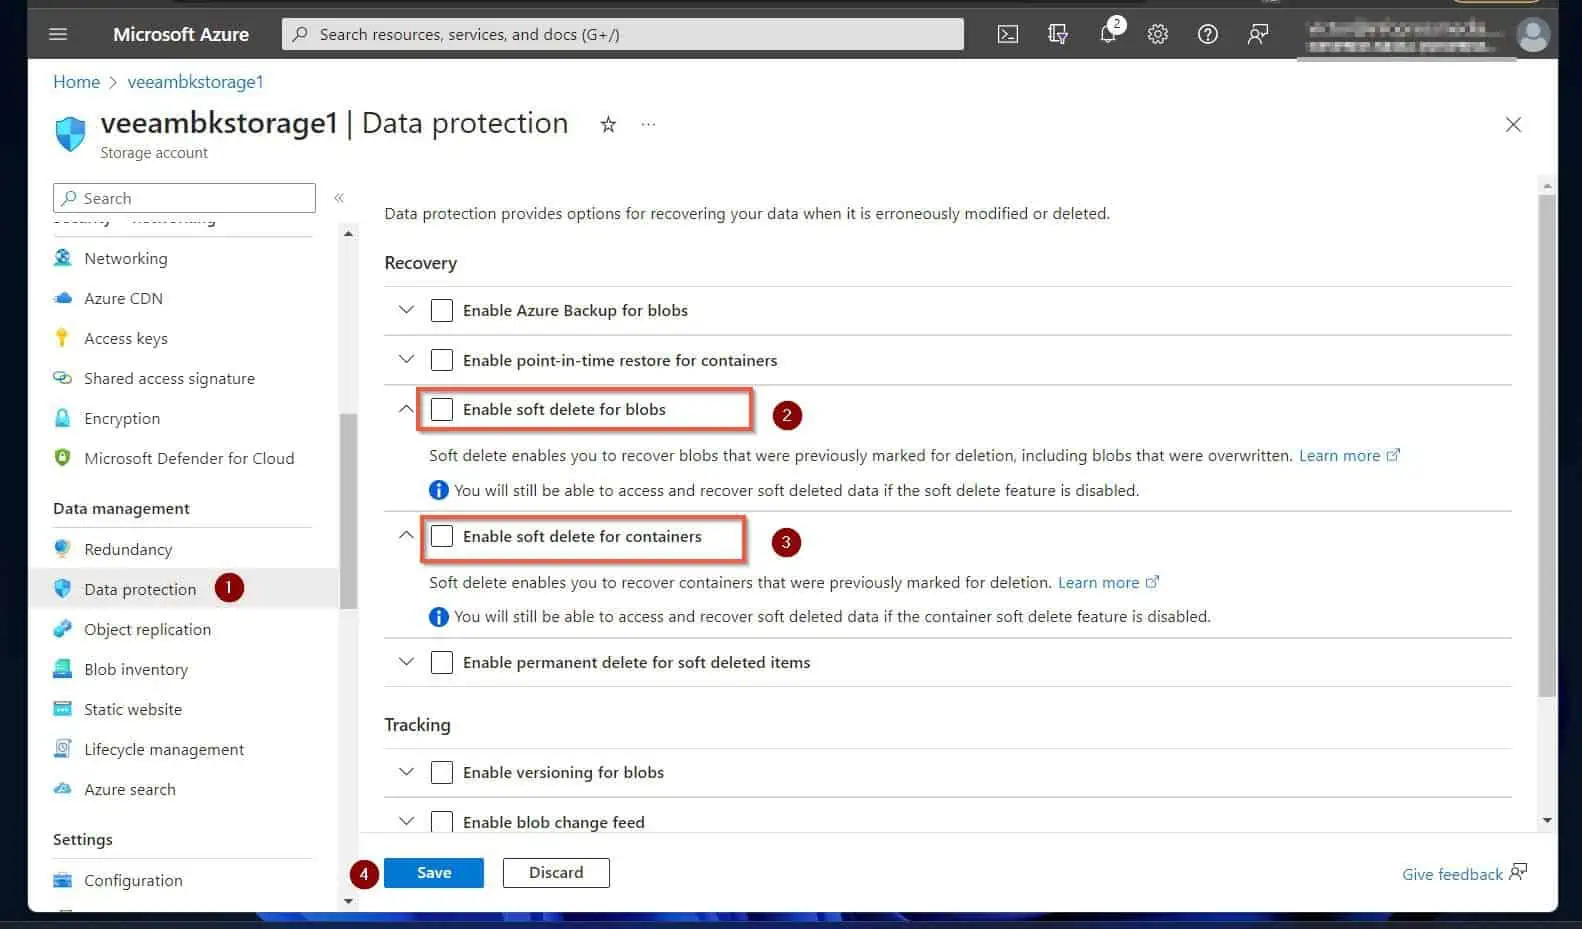
- Finally, click Data protection in the “Data management” menu and deselect Enable soft delete for blobs, Enable soft delete for containers. After changing the settings, click Save.
Step 2: Configure Azure Blob Storage as Veeam Backup Repository
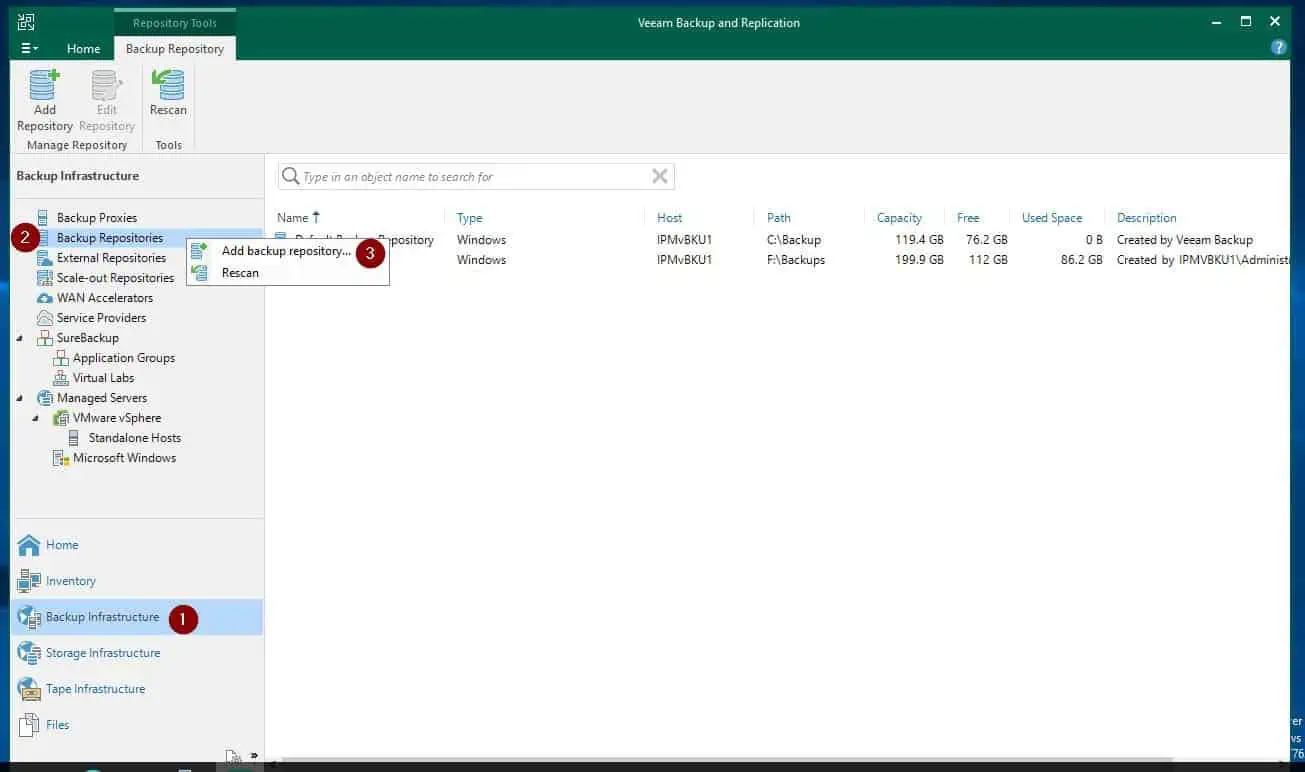
- Sign in to the Veeam backup server and open the Veeam Backup & Replication Console.
- After that, click Backup Infrastructure -> right-click Backup Repository and choose add backup repository.
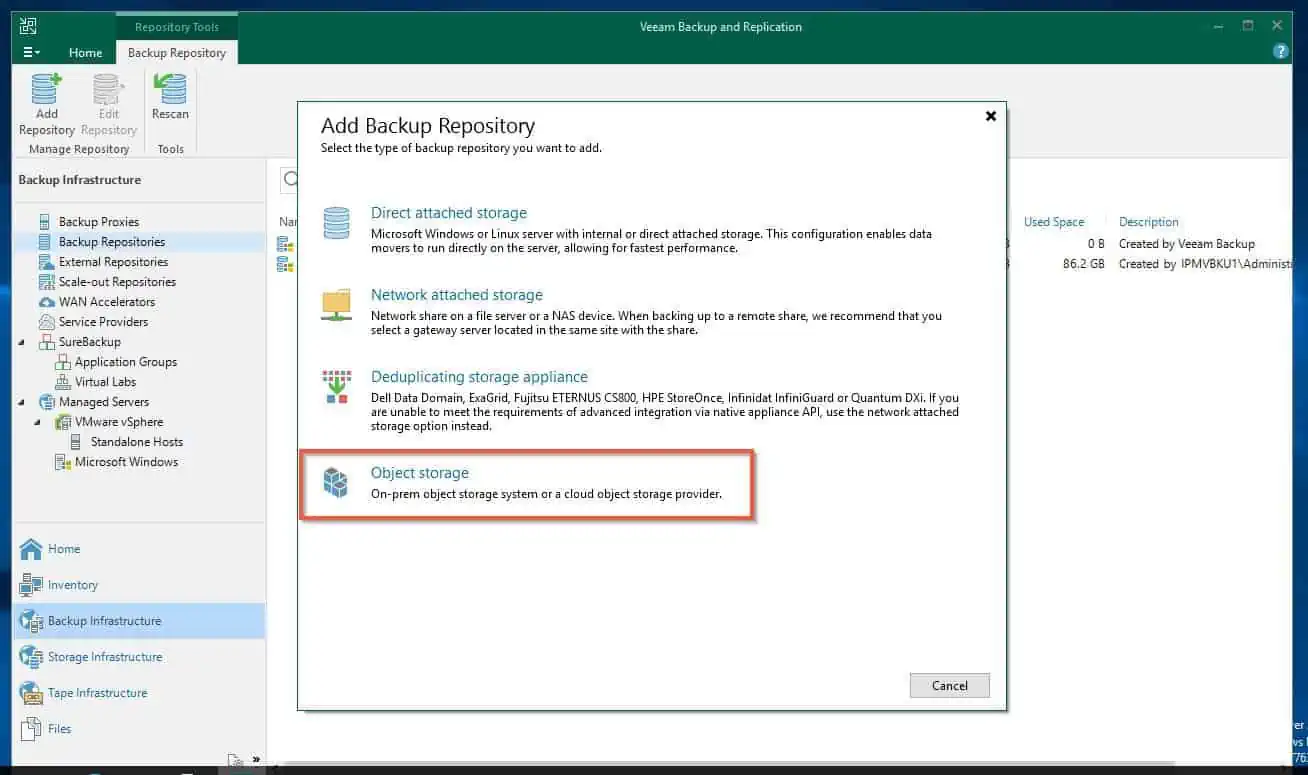
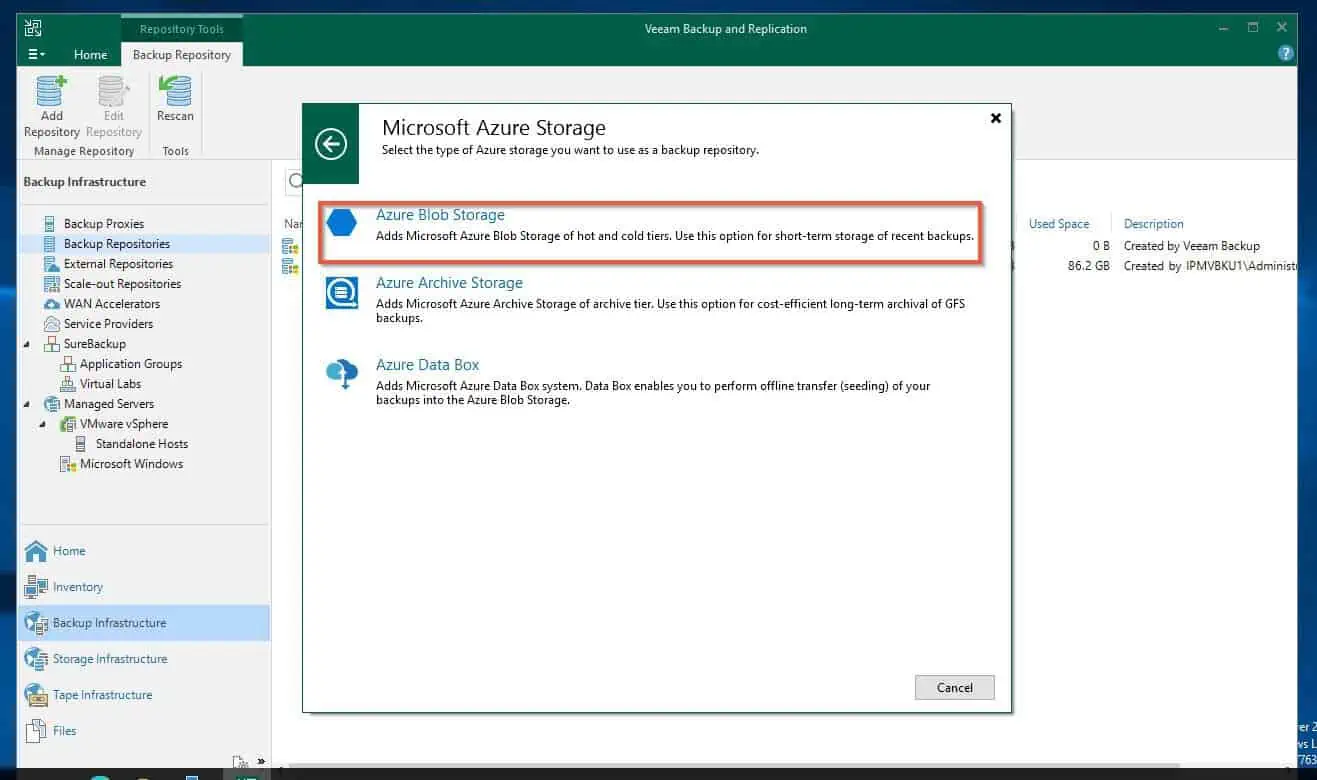
- Then, on the first page of the “Add Backup Repository” wizard, choose Object storage.
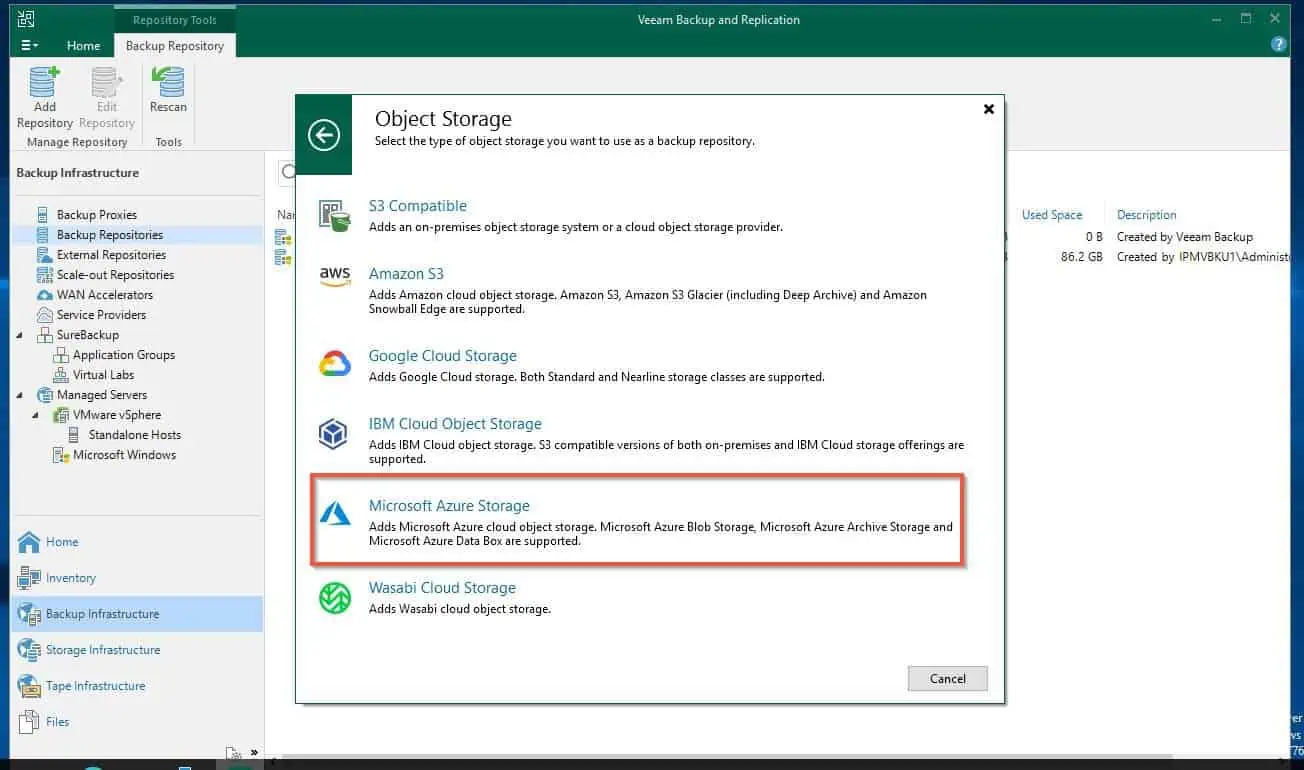
- After that, select Microsoft Azure Storage, then Azure Blob Storage. Wait for the New Object Storage Repository wizard to open, then proceed to step 5.
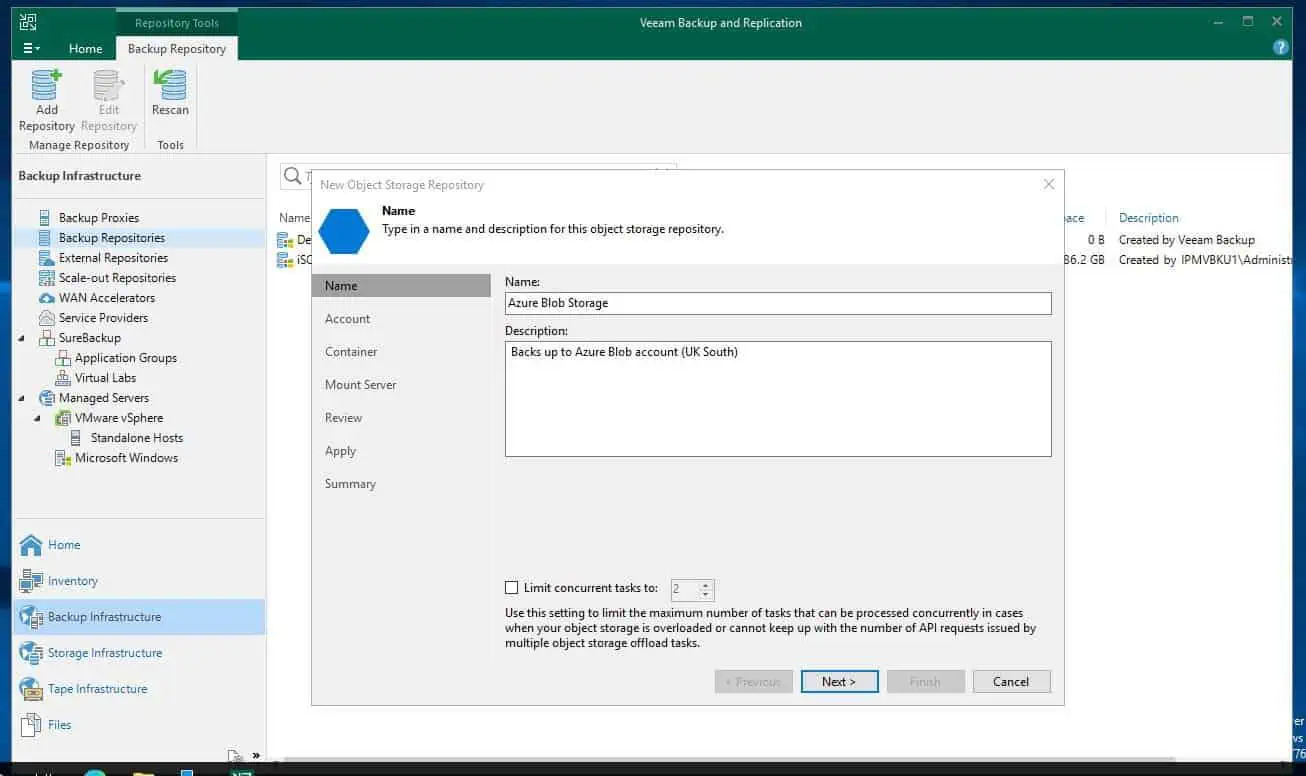
- On the first page of the Azure New Object Storage Repository wizard, give the Veeam backup repository a name and optional description. After that, click Next.
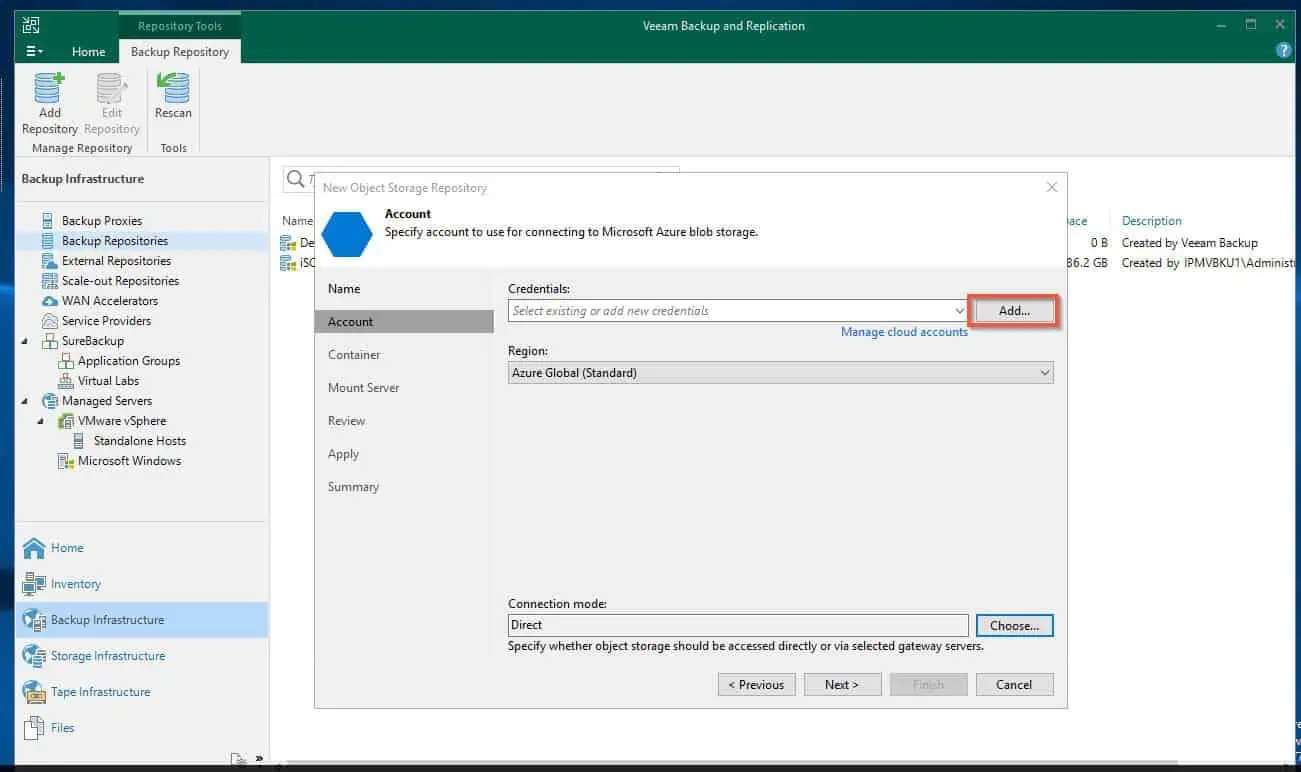
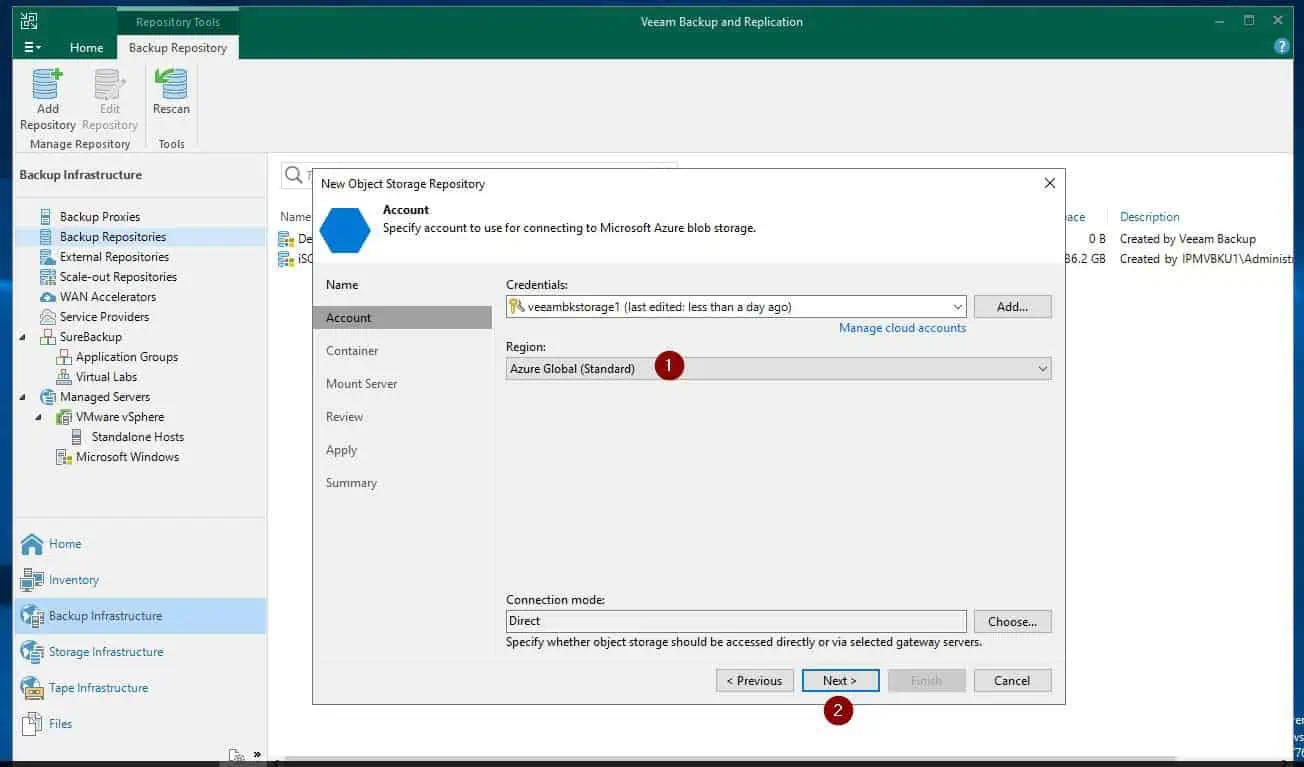
- The next page allows you to add an account to connect to Azure. To add a new account, click Add.
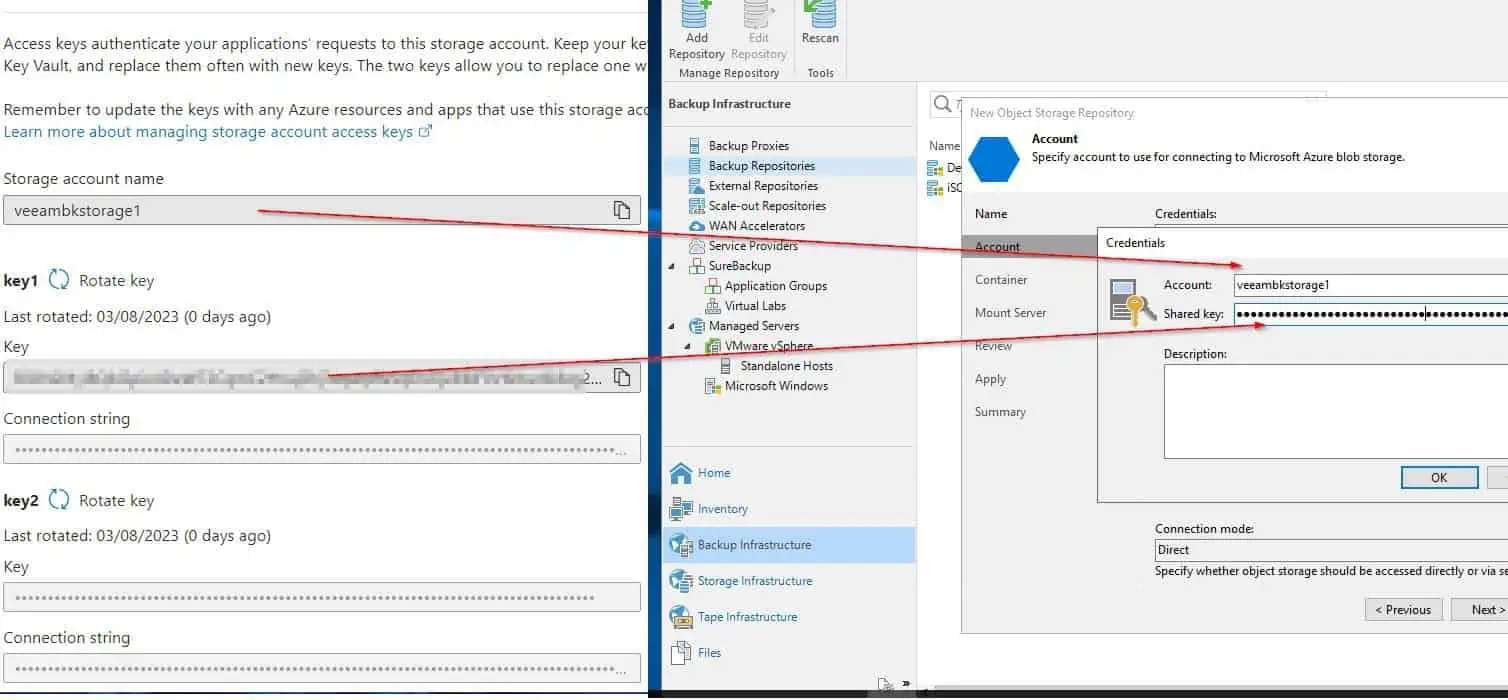
- Enter the storage account name in the Account field and its Key in the Shared key field. In the screenshot below, I have mapped the fields.
To view the Azure storage account’s secret key, click the “Show” button. Then, click the copy icon to copy the key.
When you finish entering the storage account access details, click OK.
- The wizard will return to the Azure account page, select the Azure region – default is Azure Global (standard) – then click Next to proceed.
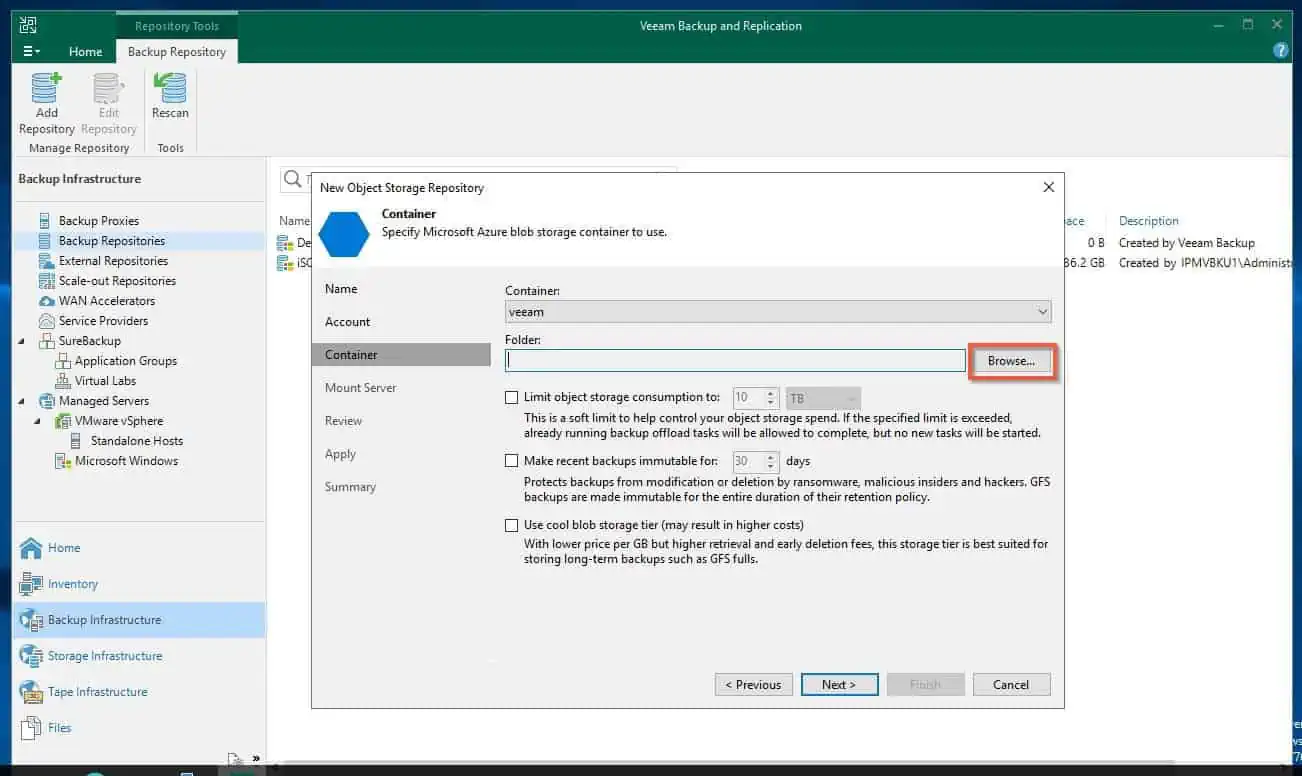
- On the next page, Veeam automatically chooses the container you created in the Azure storage – see step 8 of the previous section. To create a new folder in the Azure blob container, click Browse.
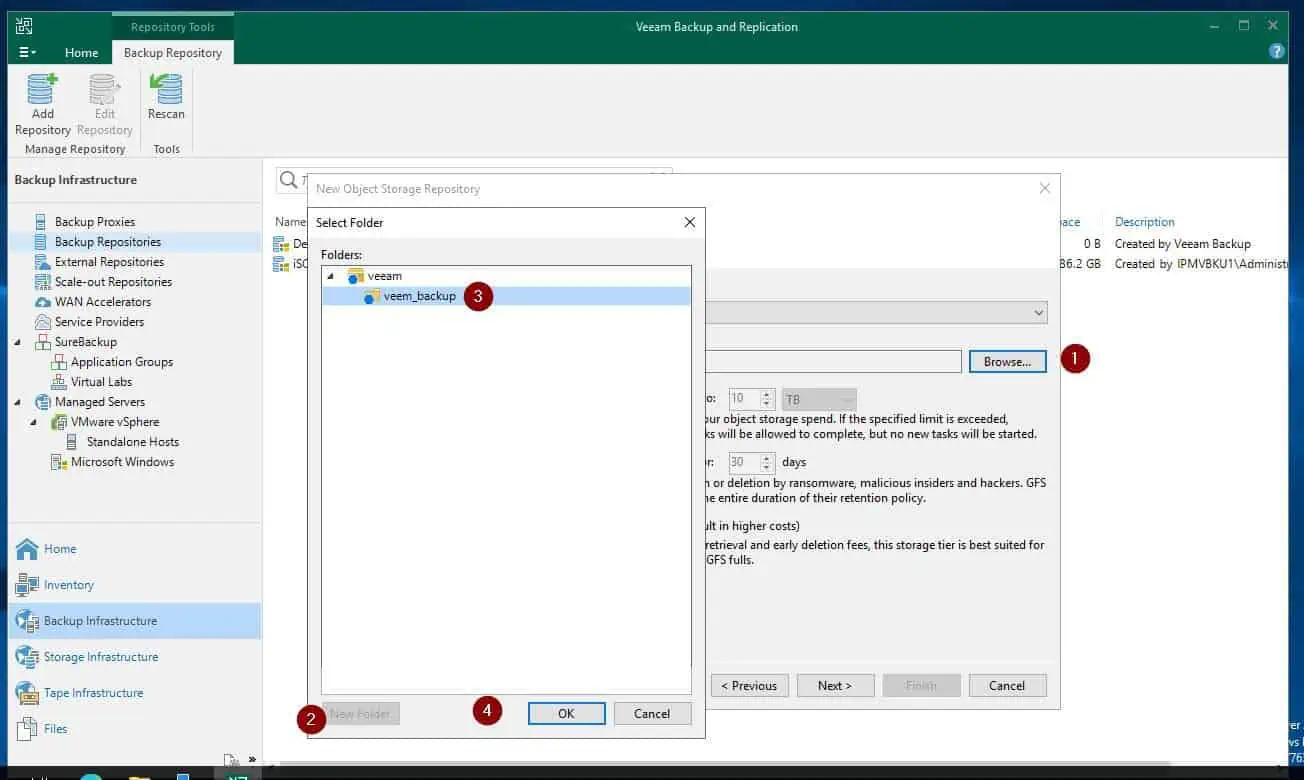
- On the Select folder pop-up, create a new folder (by clicking New folder), rename it, and click OK.
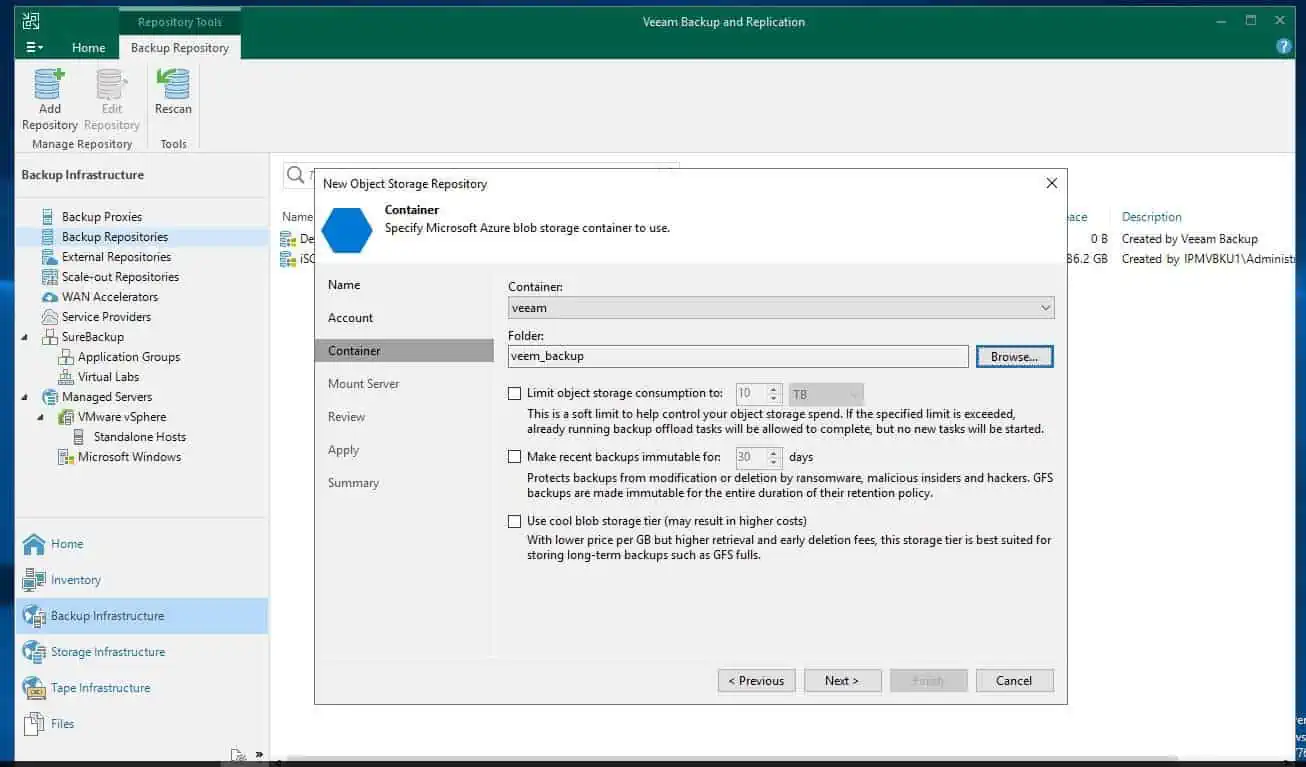
- When the wizard returns to the Container page, click Next.
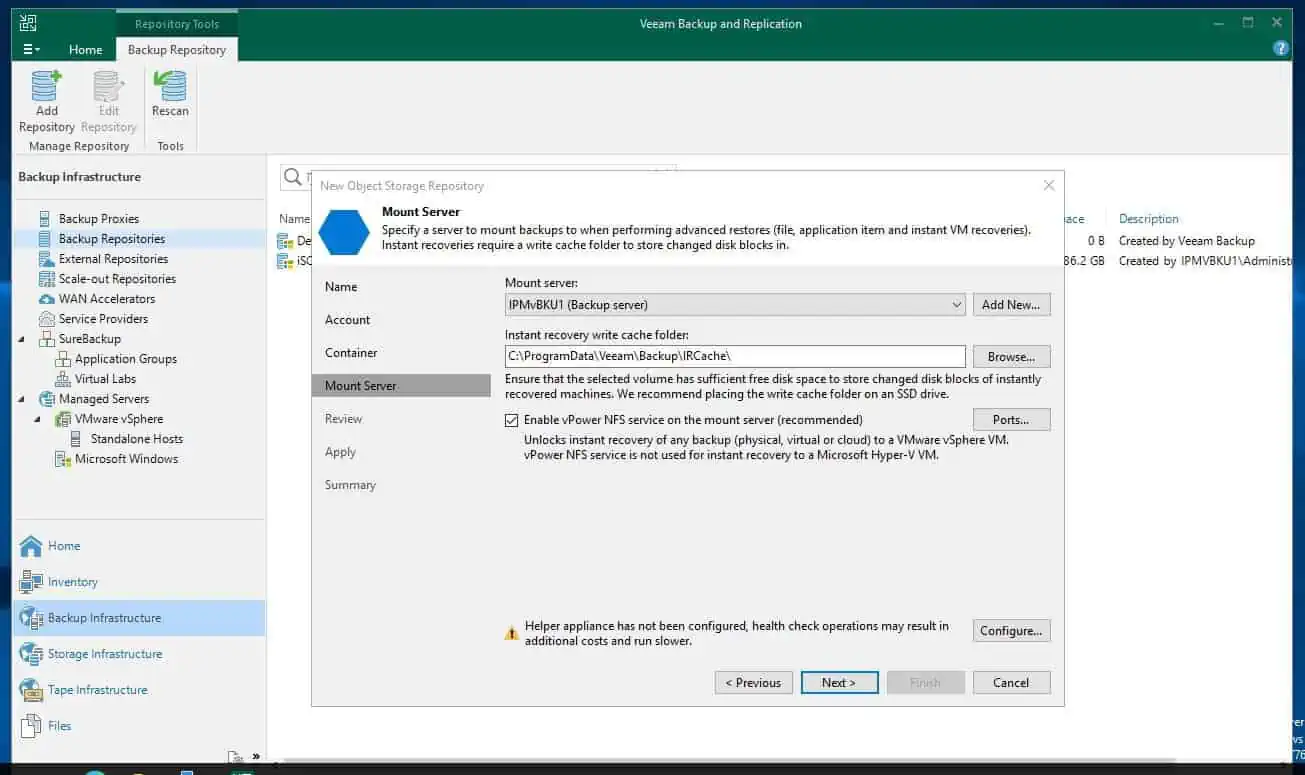
- At the Mount server page, select a Veeam backup server that will be used to mount the Azure blob storage.
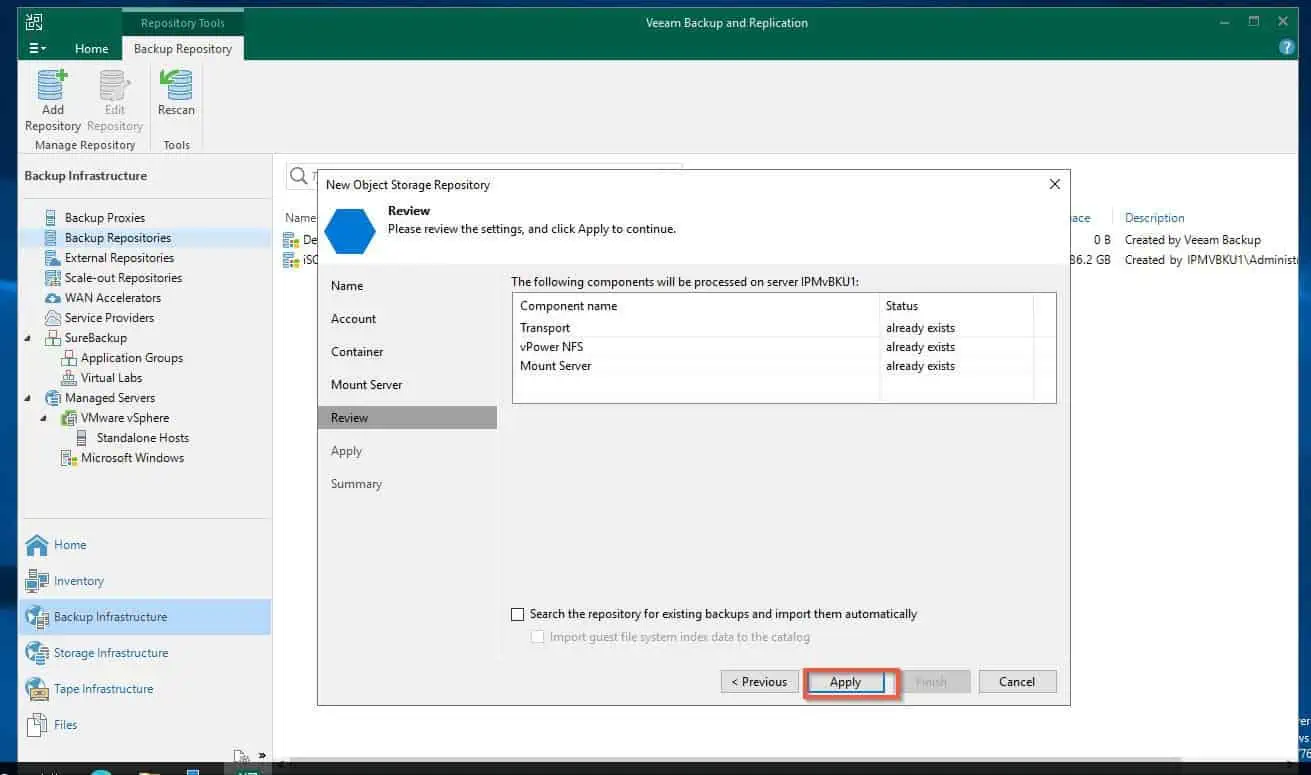
- Review your settings for adding Azure blob storage as a Veeam backup repository and click Apply.
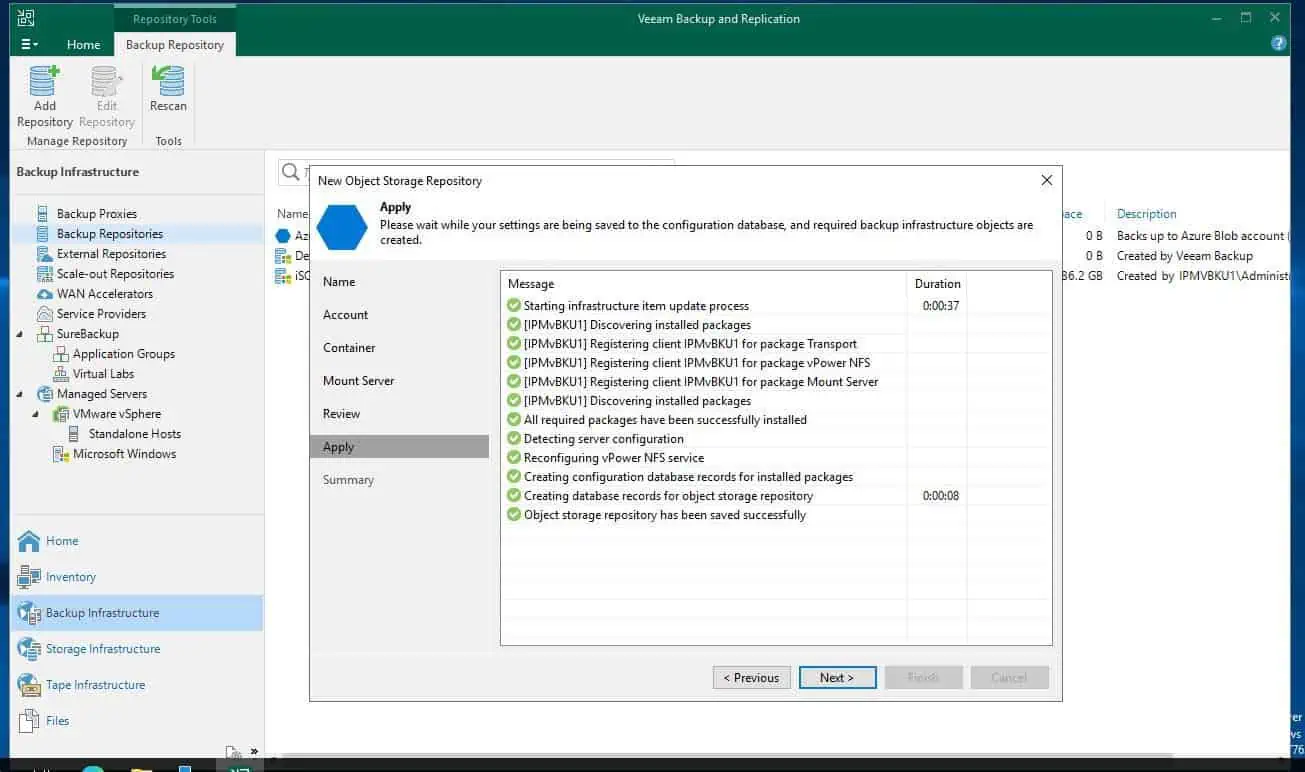
- Wait for Veeam to complete configuring the Backup repository, and click Next and Finish.
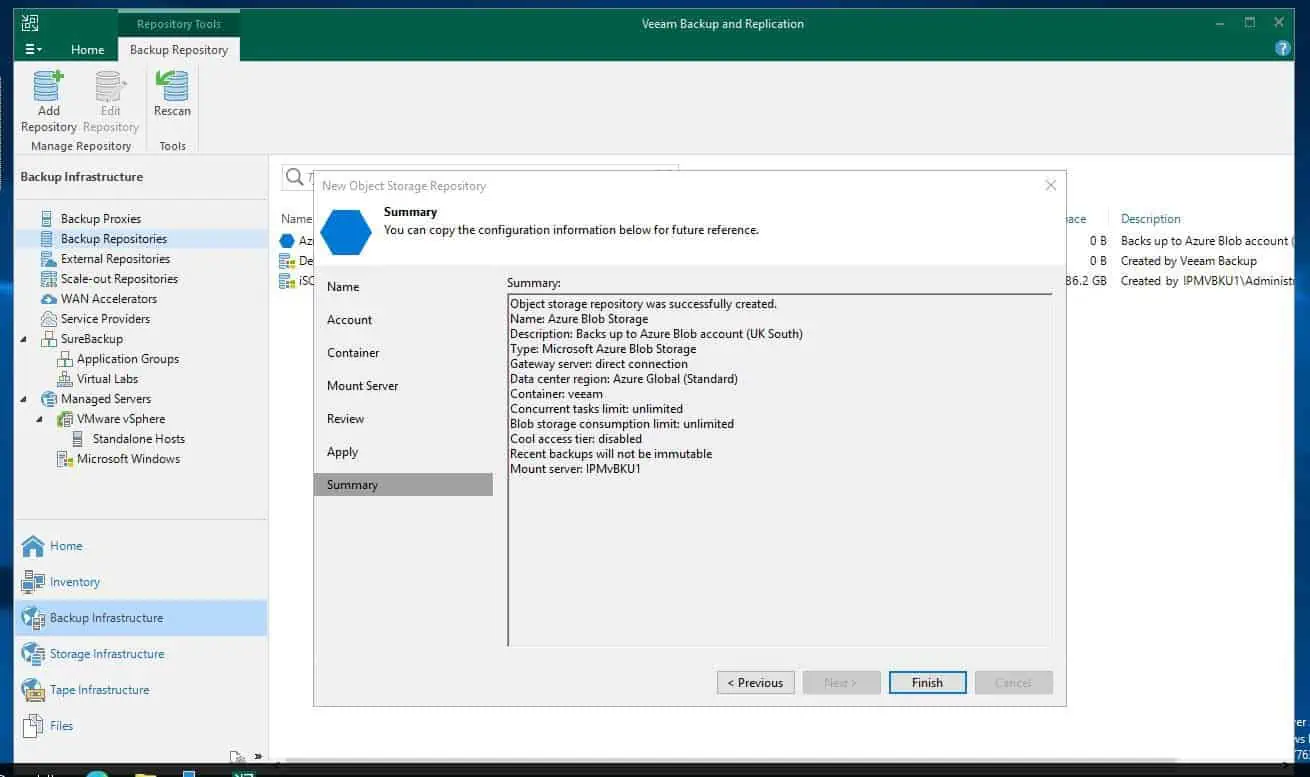
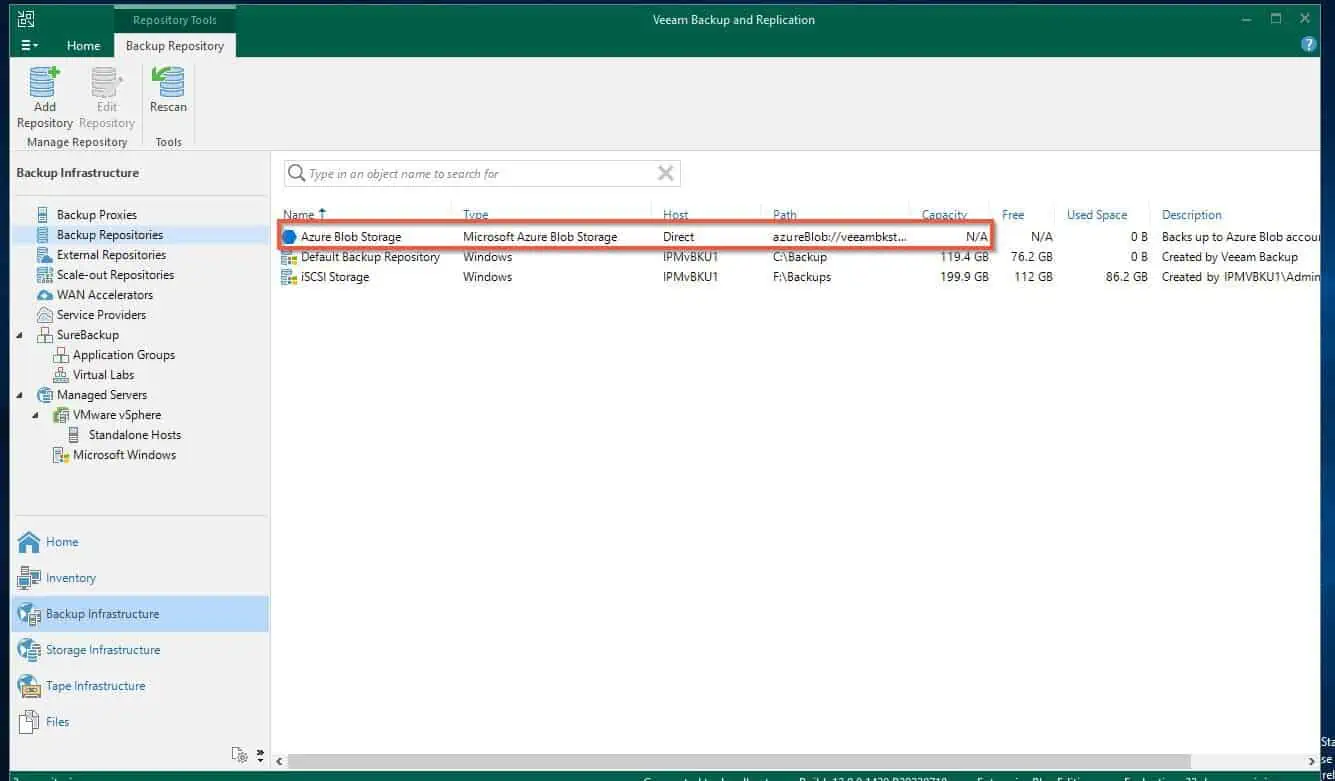
The Azure backup repository will be displayed in the list. You can use it for new or existing backup jobs.
Frequently Asked Questions
Backup Infrastructure -> Right-click Backup repository and select “add backup repository.”
a) Sign in to the Azure portal
b) Search for and open “storage account.”
c) On the Basic tab of the “Create a storage account” page, give it a name and select all the required options
d) Click the Advanced tab, scroll to the Blob storage section, and select the Cool access tier.
e) After that, click the Data protection tab and uncheck the following: Enable soft delete for blobs, Enable soft delete for containers, and Enable soft delete for file shares.
f) Click Review, then Create to complete the creation of the Azure blog storage.
Install Veeam Backup for Microsoft Azure BYOL Edition in Azure Marketplace.
Open the storage account, click “Object replication” under Data management, and create a replication rule.
Open Backup center in the Azure portal and click “+ Backup”. Then, on the Datasource type page, select Azure Blobs (Azure Storage).
Follow the wizard to complete the process.
Conclusion
Configuring Azure blob storage as a Veeam backup repository is a two-stage process. Firstly, you must create the Azure blob storage on the Azure portal.
After that, create a Veam backup repository using the Azure blob storage you created. In this article, we provided the steps to complete these tasks, and we hope you found it helpful.
If you did, kindly let us know by replying to this article’s topic at [discourse_topic_url]. Additionally, read similar articles by visiting our Storage & Disk Technology Explained page.
You’re welcome to leave your comments using the “Leave a Reply” form at the bottom of this page.
You could also use the “Was this page helpful?” buttons below to give us your feedback.