This guide offers a steps by steps for Google Voice setup in G Suite.
Google Voice is a telephone service for Google’s G Suite customers. It offers call forwarding, voicemail services and text messaging.
The service is available in the US and some international locations.
As at the time of writing this guide the service is available in the following countries: Denmark, France, Netherlands, Portugal, Spain, Sweden, Switzerland, UK and US.
Step 1: Add Google Voice to G Suite
The first task is to add Google Voice to G Suite. Here are the steps:
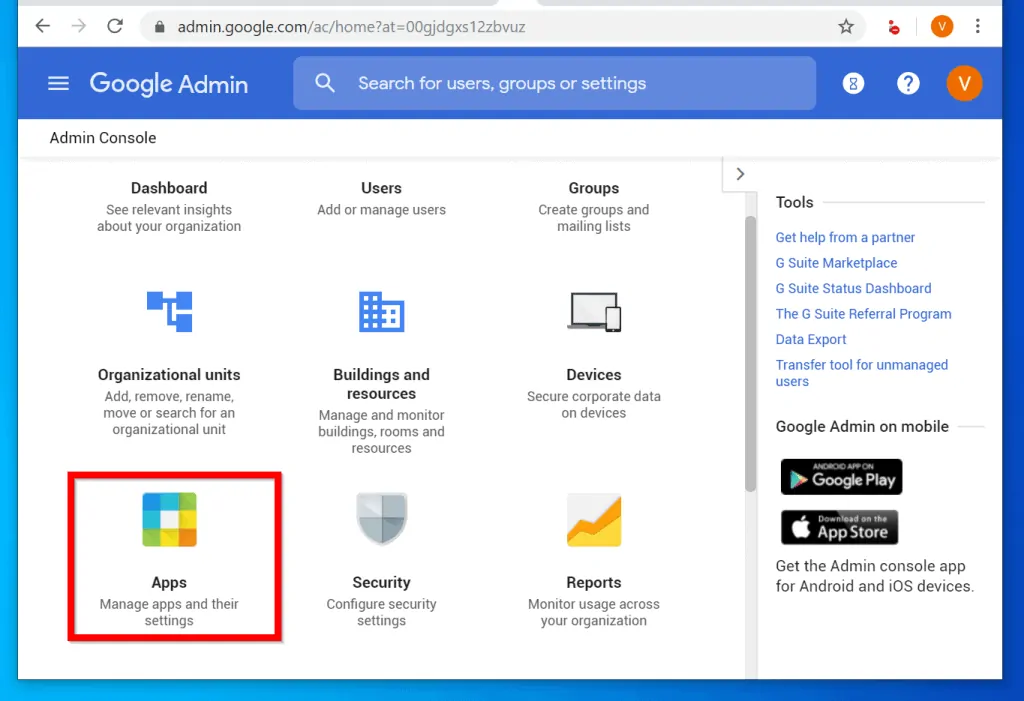
- Open G Suite page. If you are not signed in, you will be prompted to sign in.
- After signing in, at the Admin Console, scroll down and click Apps.
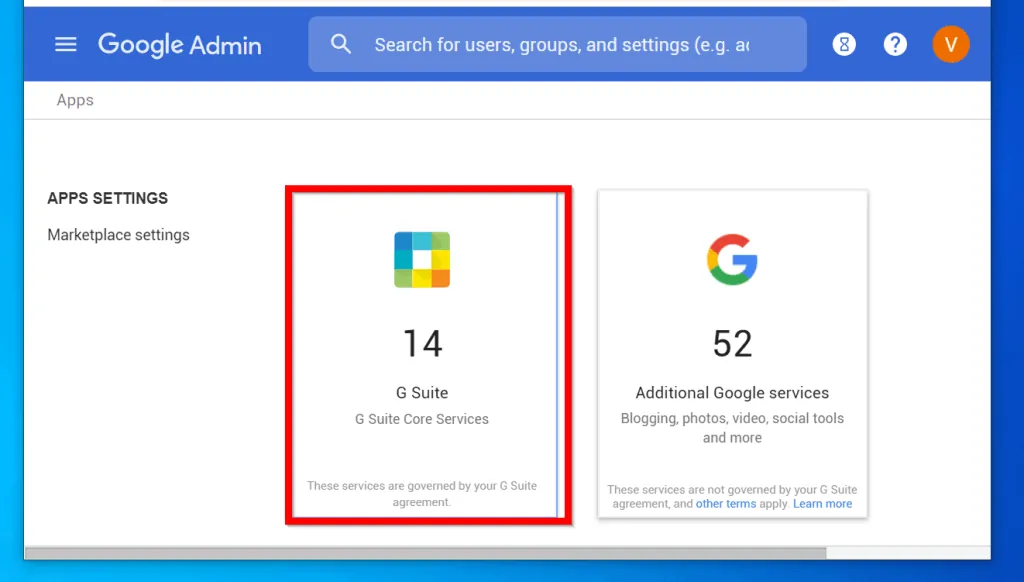
- Then at APP SETTINGS page, click G Suite.
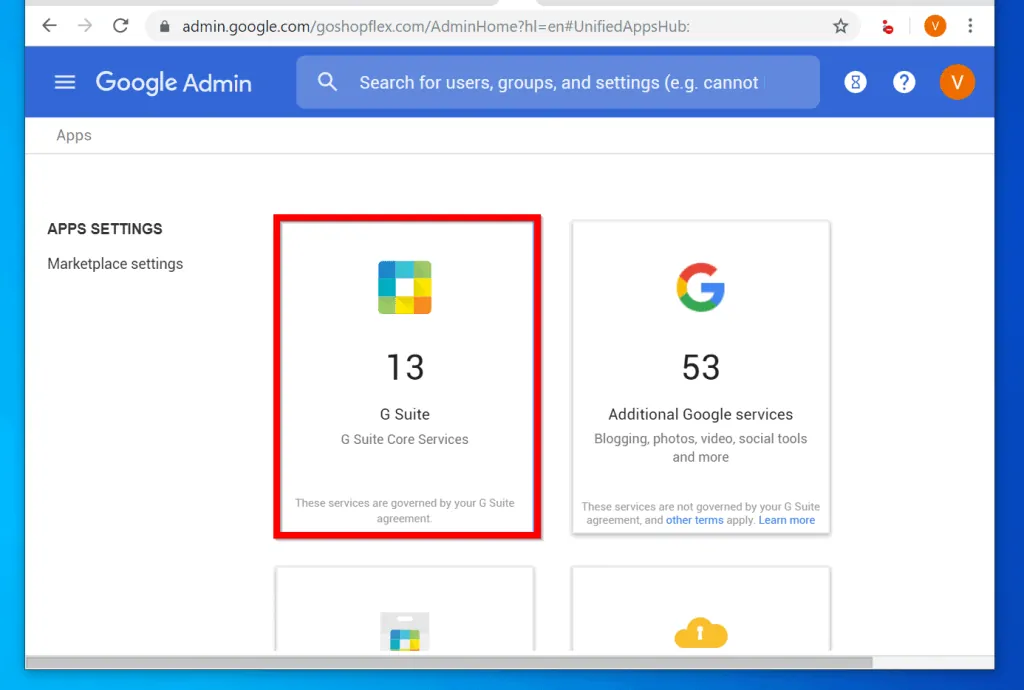
- Then click ADD SERVICES.
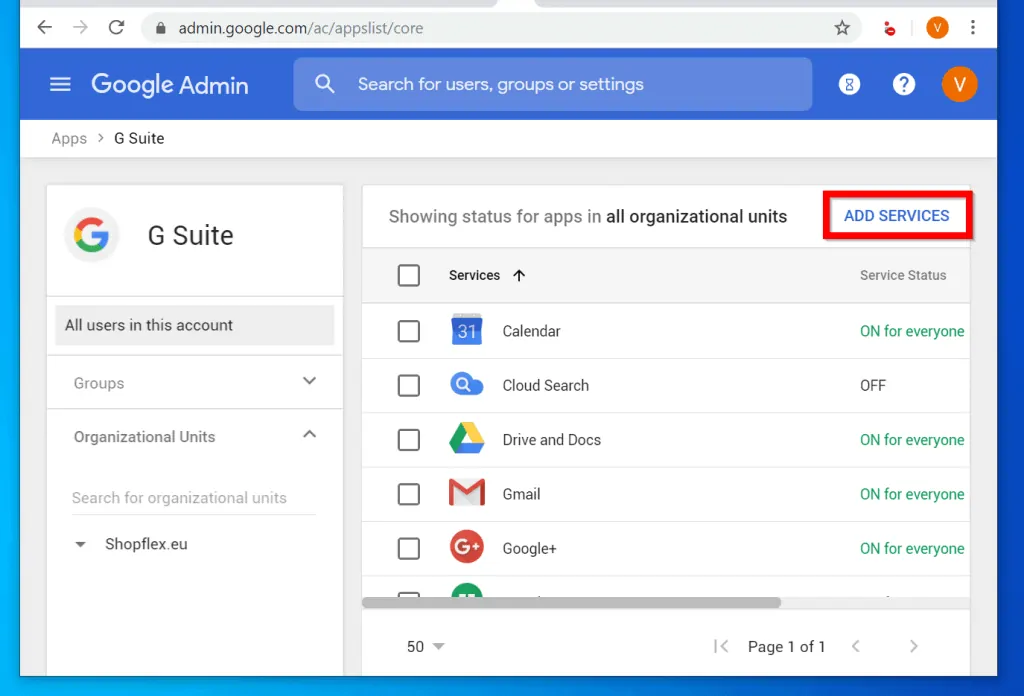
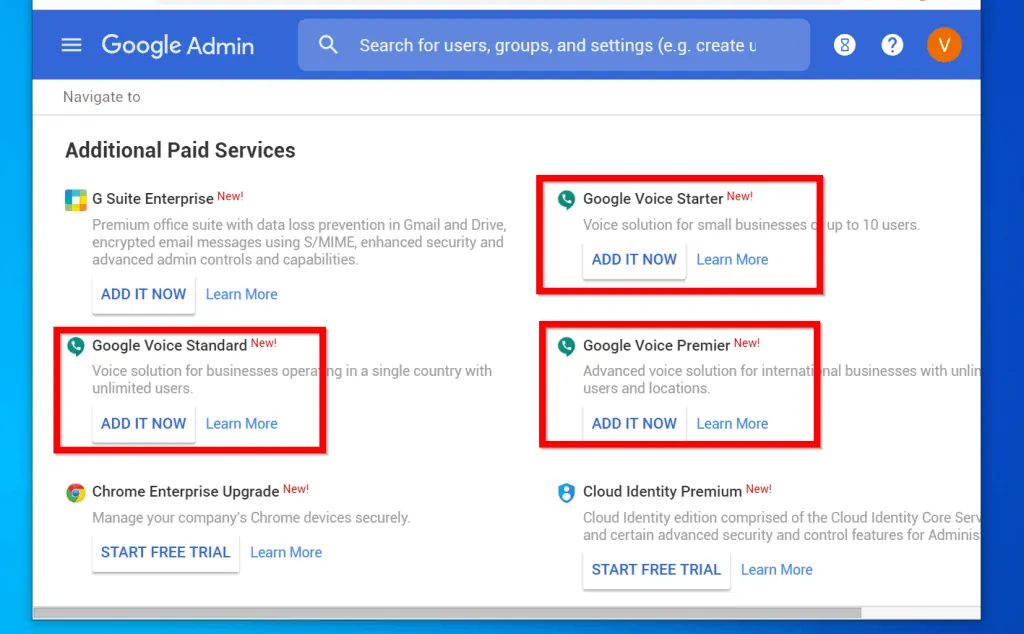
- Finally, on the Additional Paid Services page, beneath the Google Voice subscription you want to setup, click ADD IT NOW.
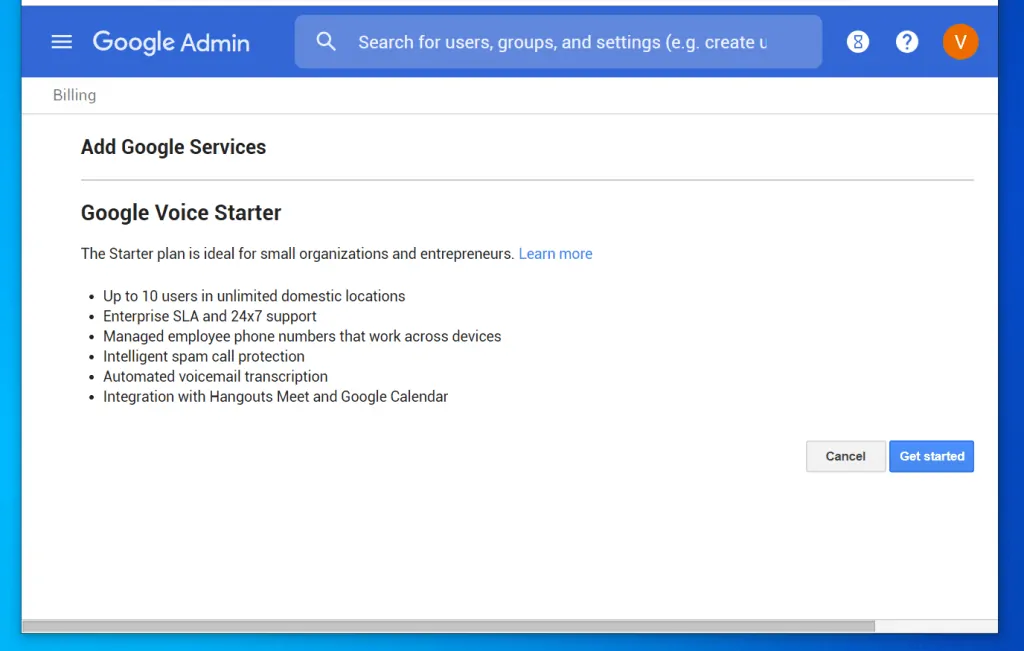
- Then, on the initial Google Voice setup page, click Get started.
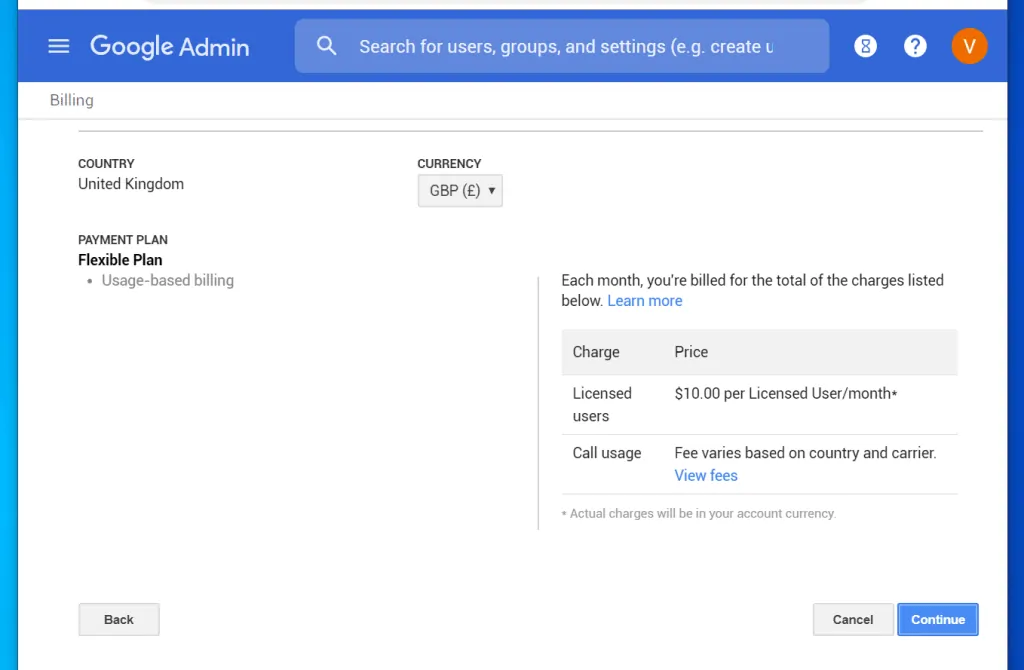
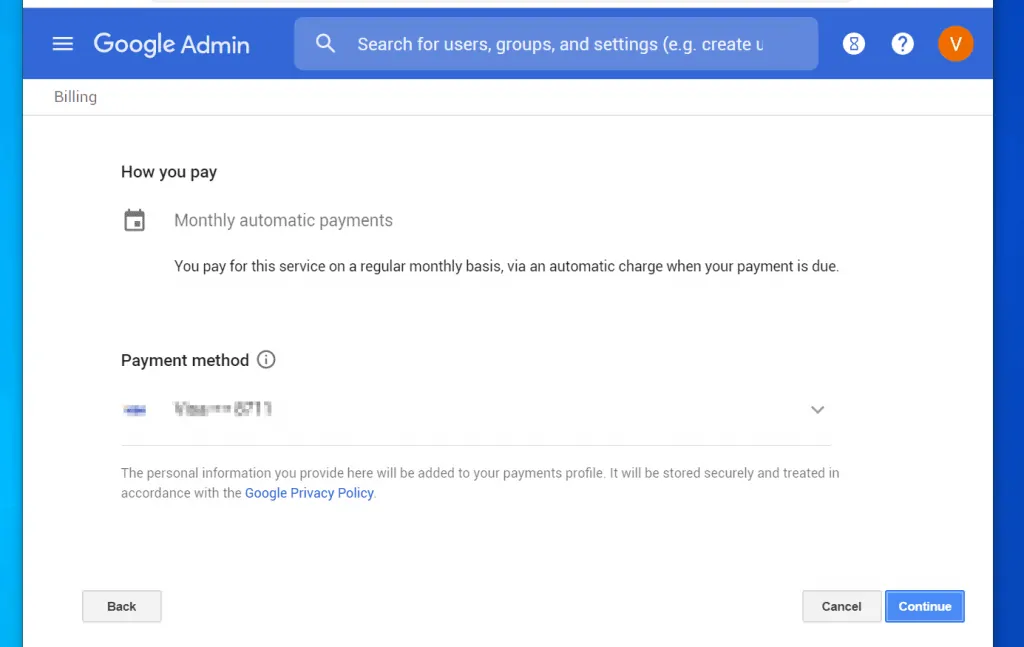
- On the Billing page, review the details. Then click Continue.
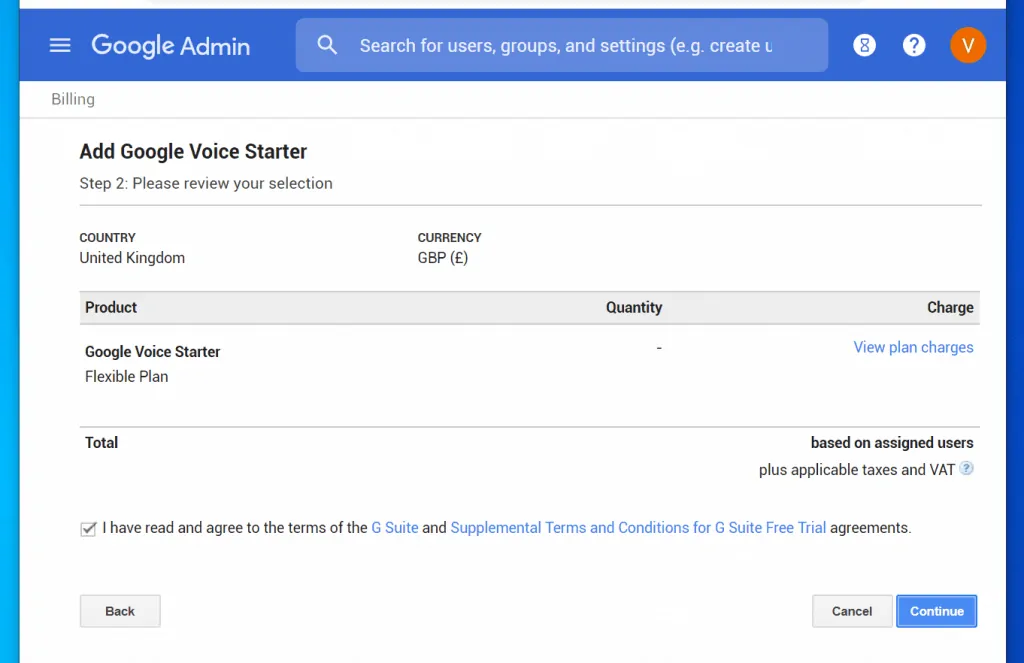
- Then on the next page, accept the terms and click Continue.
- Finally, enter your payment details and click Continue.
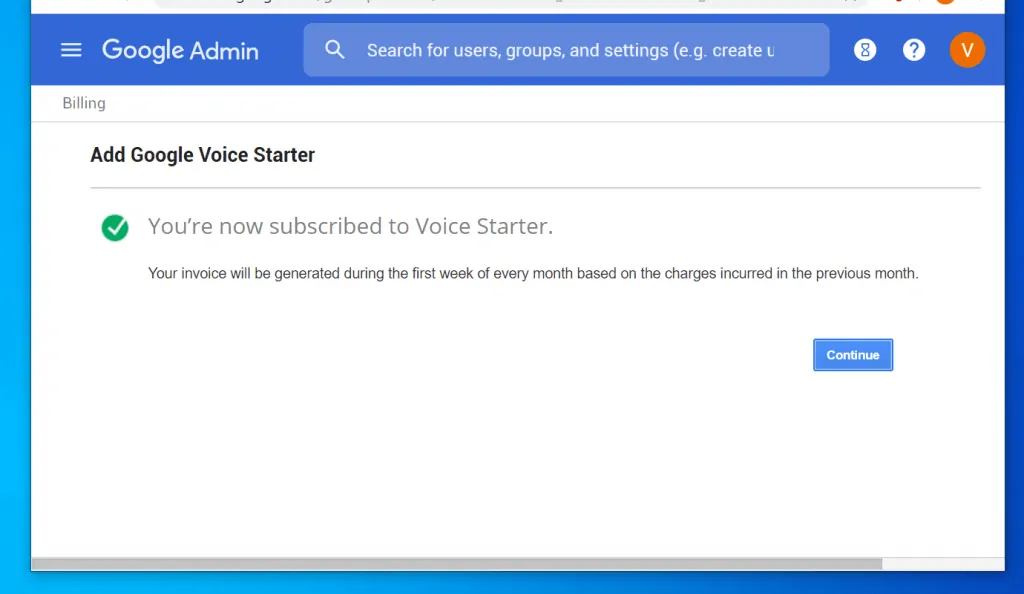
- Then, wait for your billing to be setup. Once set up, you will receive a confirmation page. Click Continue.
Step 2: Add Your Locations
After adding Google Voice to G Suite, the next step in Google Voice setup is to add your locations.
Here are the detailed steps:
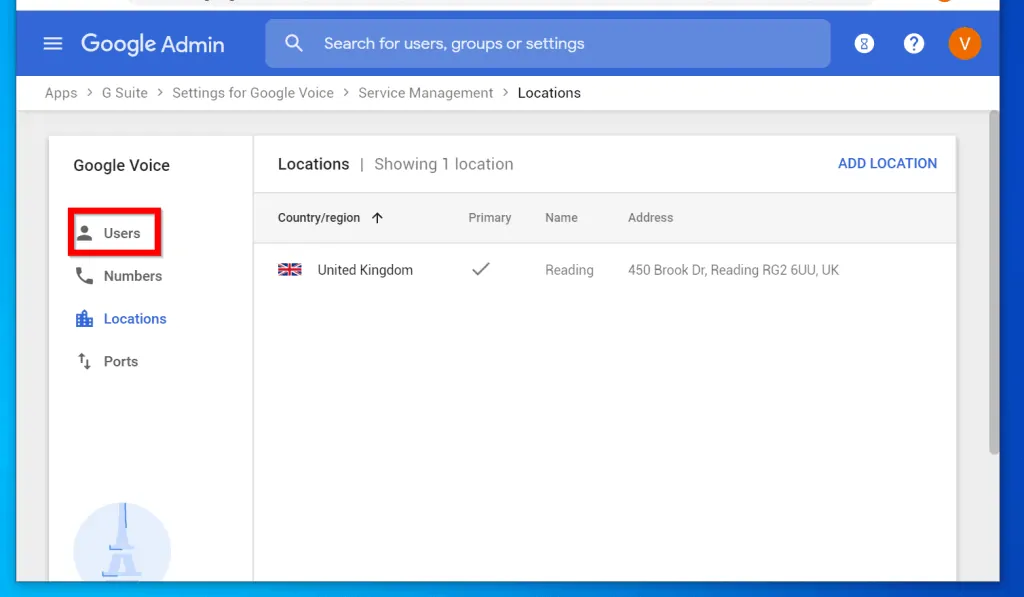
- Login to G Suite admin console. Then click Apps.
- On the APPS SETTINGS page, click G Suite.
- Then, on the G Suite Apps, locate and click Google Voice.
- On Google Voice console, click Service management.
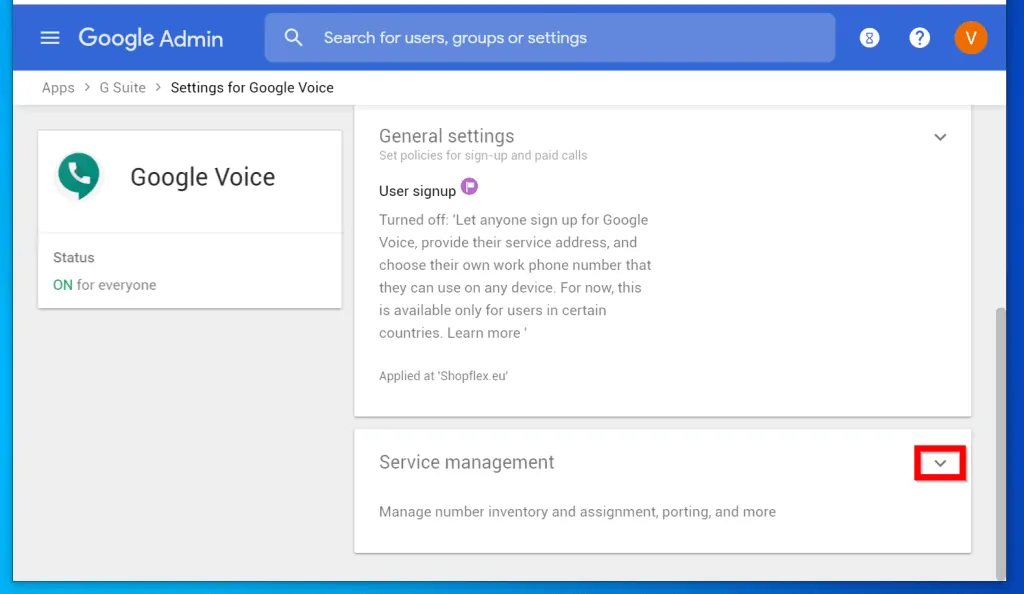
- Then click Locations.
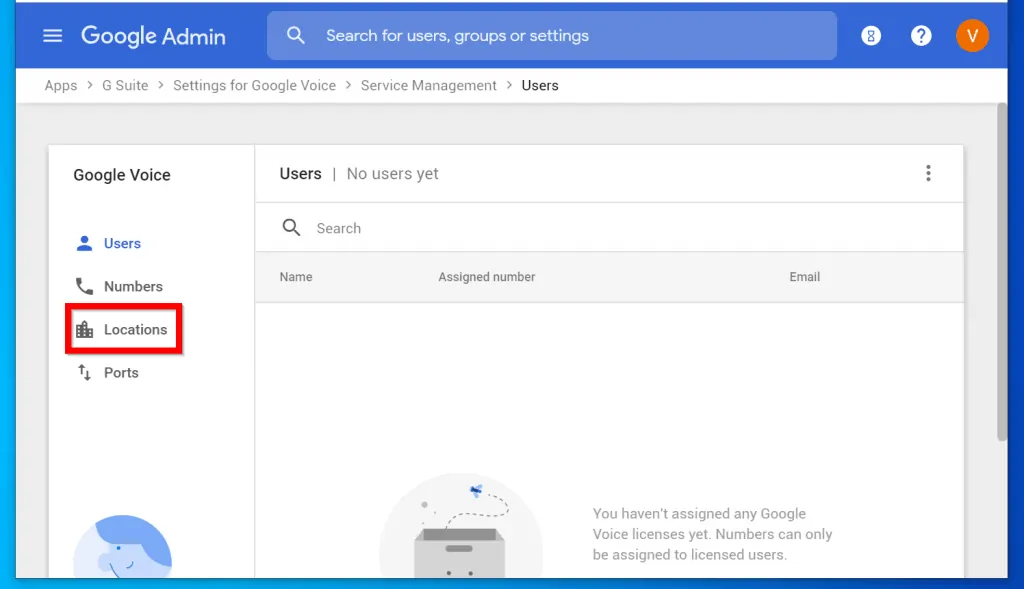
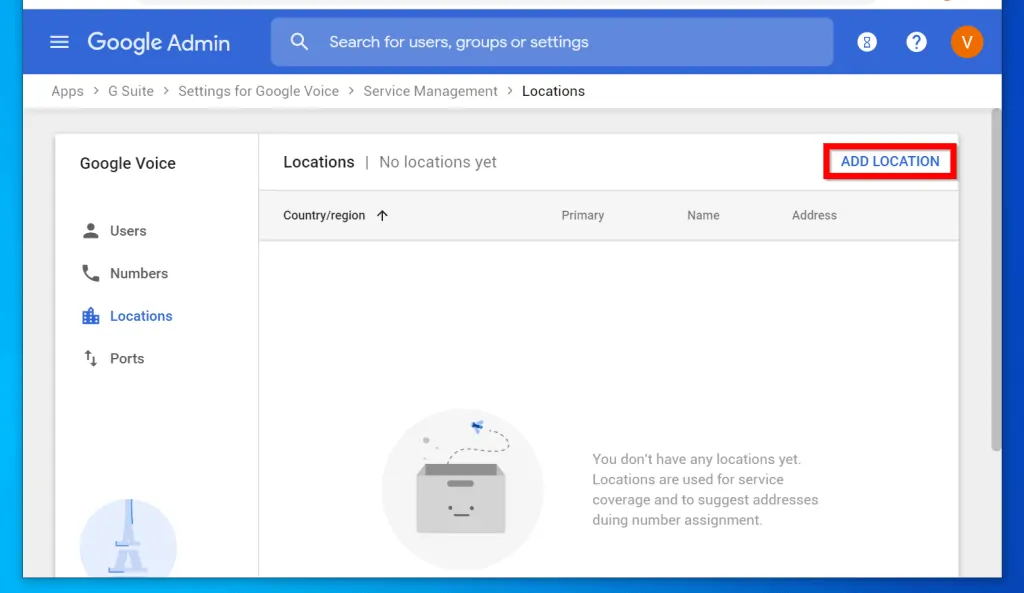
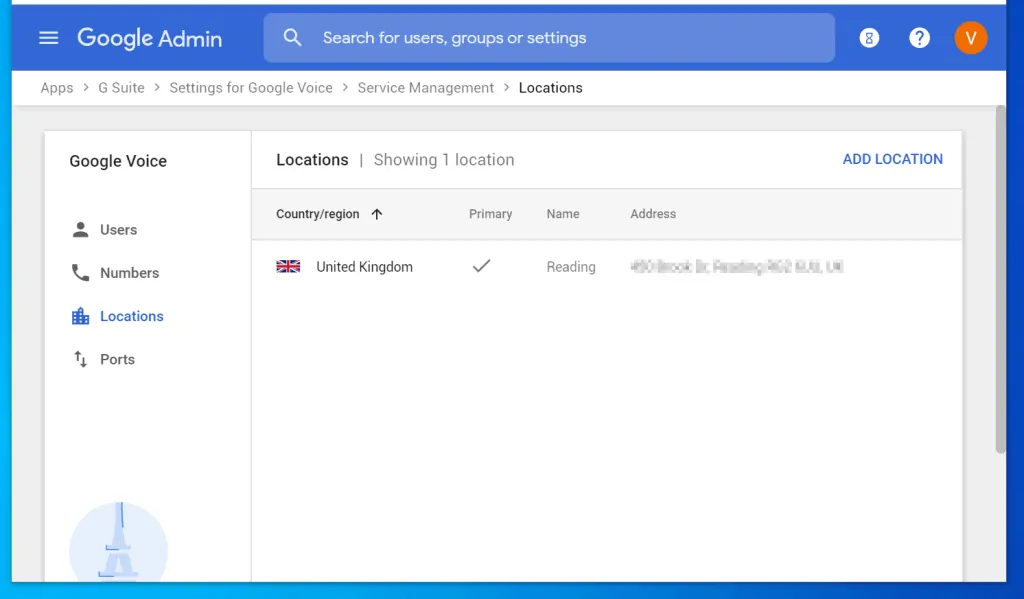
- On the Locations details page, click ADD LOCATION.
- When the Add a location window pops up, select your Country/region. Then enter a location name. Finally, enter your address details and click Save.
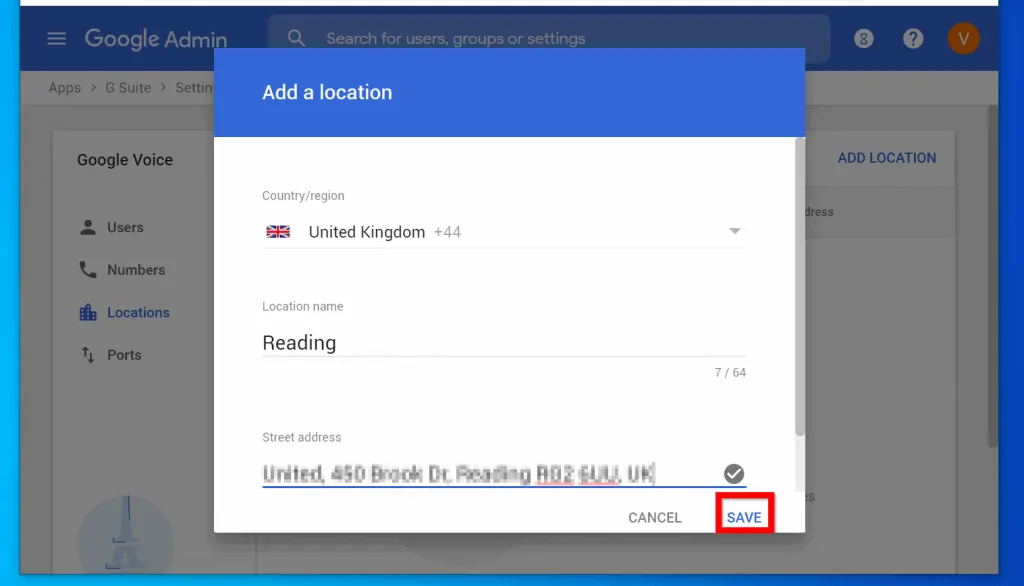
- The location you just added will now be displayed in your Locations list.
Step 3: Turn on Google Voice and Assign Voice License and Numbers
This section lists the steps you need to confirm that Google Voice is turned on and licenses are assigned.
The section also include steps to assign Google Voice numbers to G Suite users.
Here are the steps:
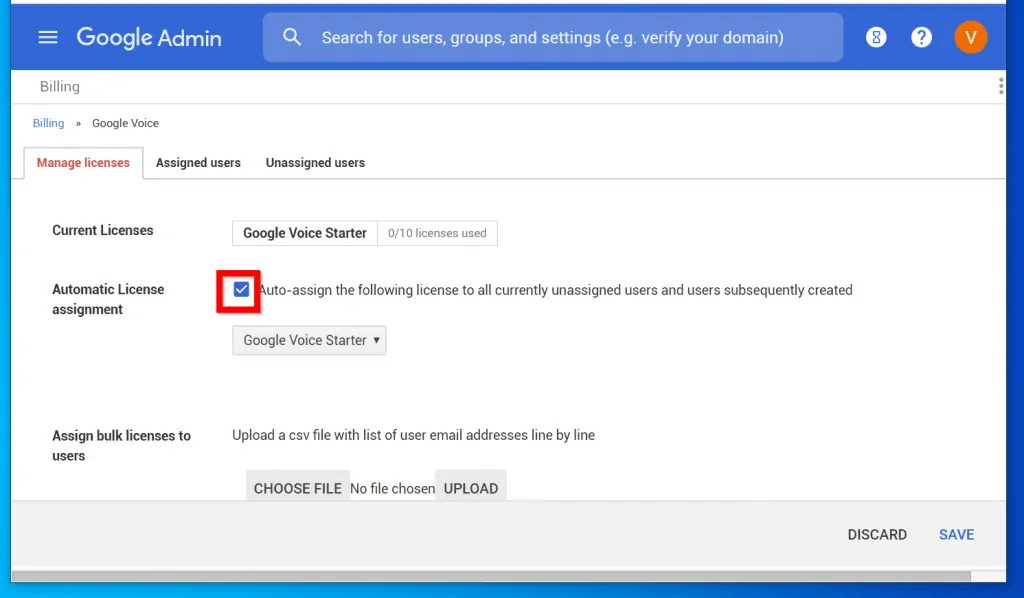
- Still logged on to G Suite Admin console, at Google Voice > Service Management click Users.
- Then scroll down and click ASSIGN LICENSES.

- Finally, check the box beside Automatic License assignment and click Save.
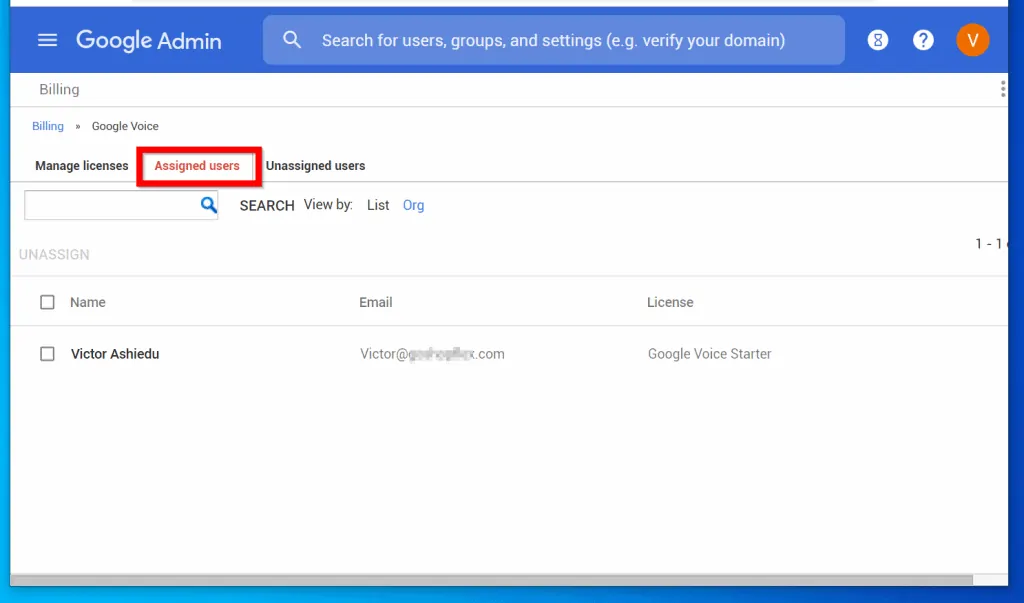
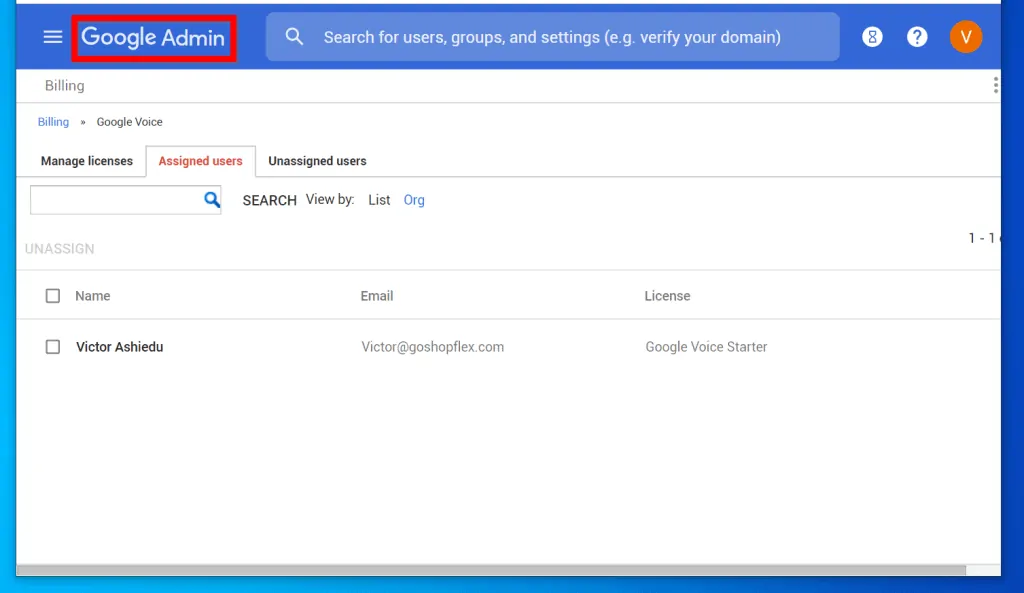
- To confirm that your users have been assigned licenses, click the Assigned users tab.
The last step in this section is to confirm that Google Voice is ON.
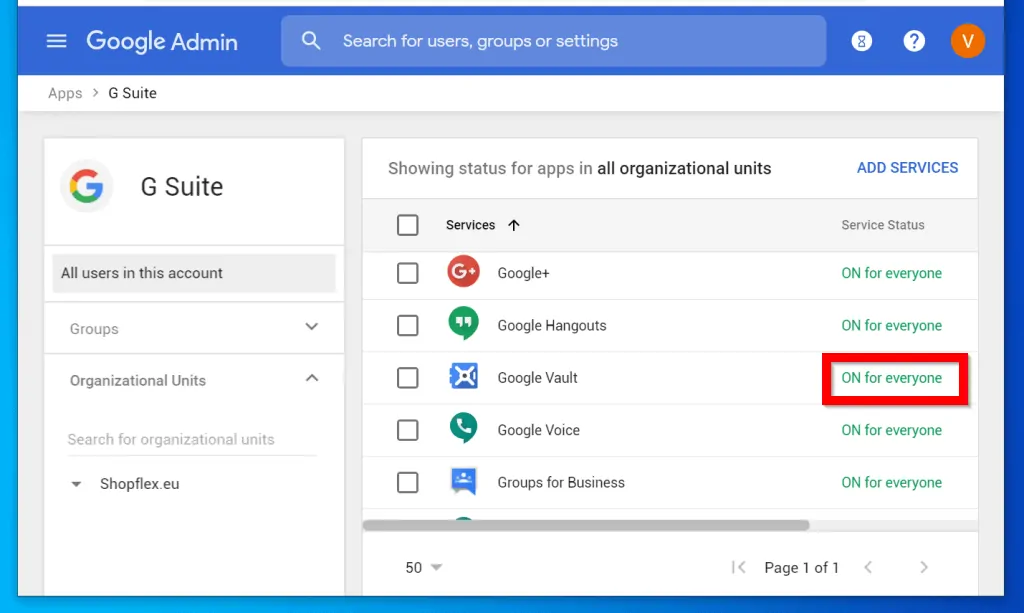
- To complete this task click Google Admin.
- Then click Apps.
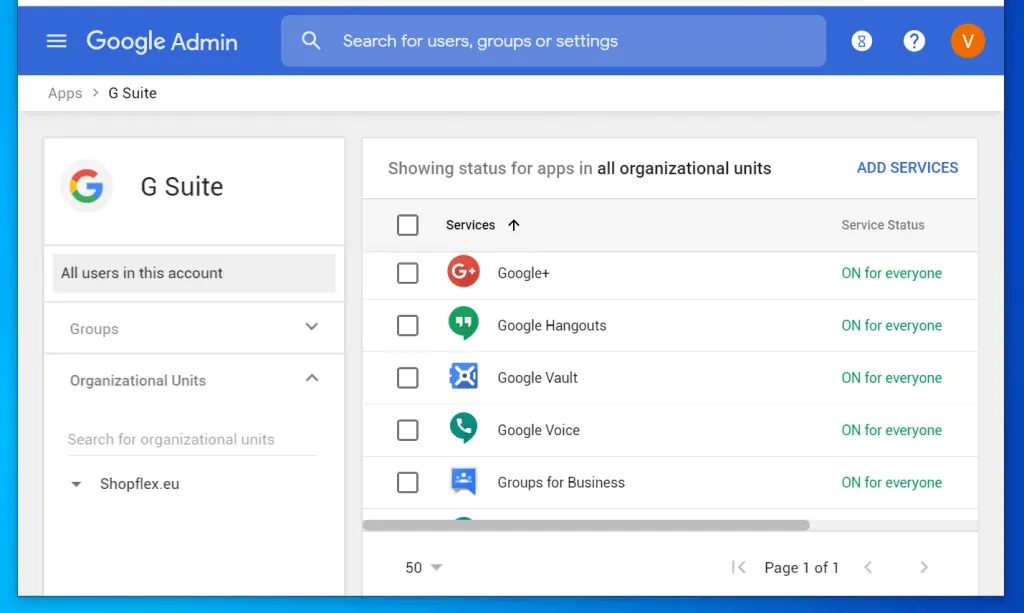
- On the APPS SETTINGS page, click G Suite.
- Finally, confirm that Google Voice is ON. By default it should be On for everyone.
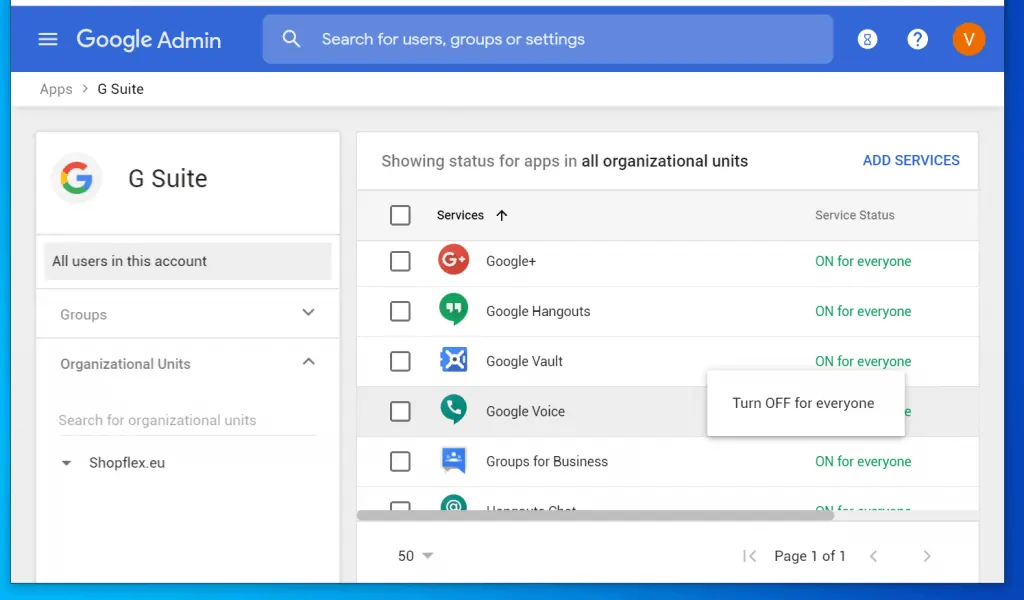
- If Google Voice is OFF for everyone, hover over it to display the 3 dots beside it.
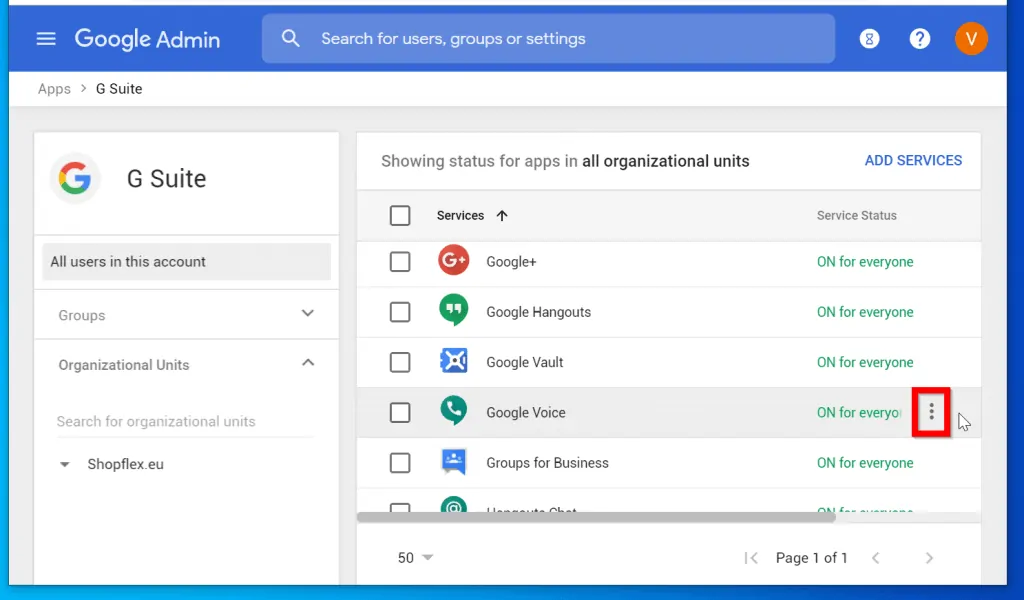
- Click on the 3 dots and select Turn ON for everyone.
- If you wish to assign Google Voice numbers to your users, click Google Voice. Then click Service management.
- The Users tab will be selected by default. Hover over the user you wish to assign a Google Voice number. Then click Edit (highlighted in the image below).
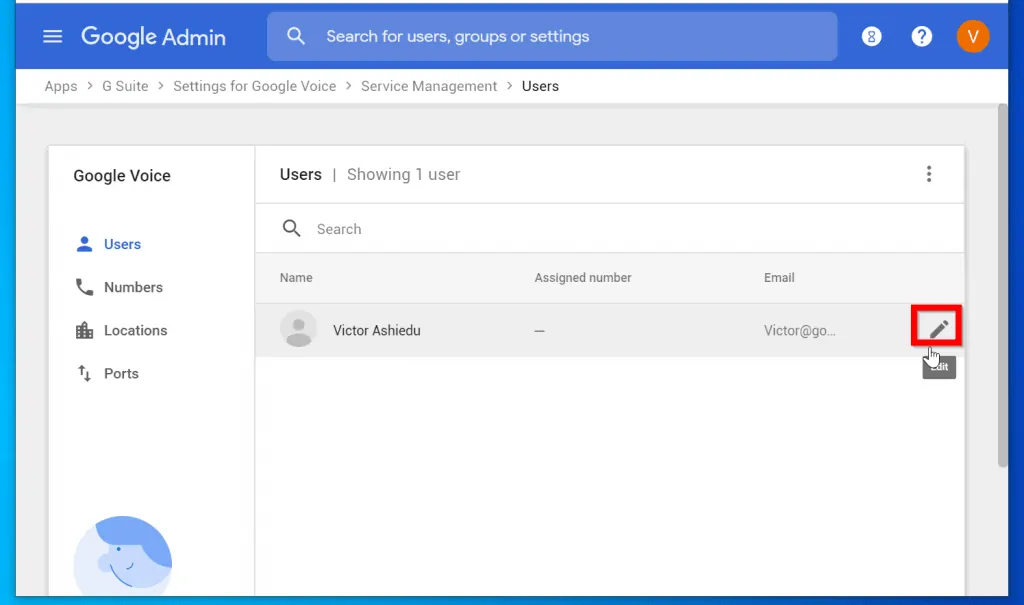
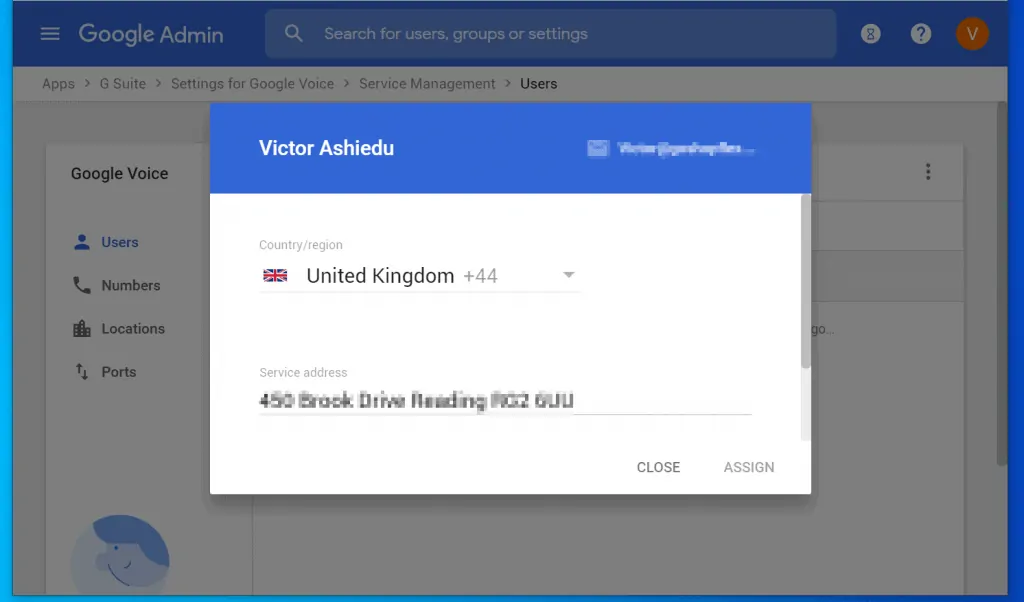
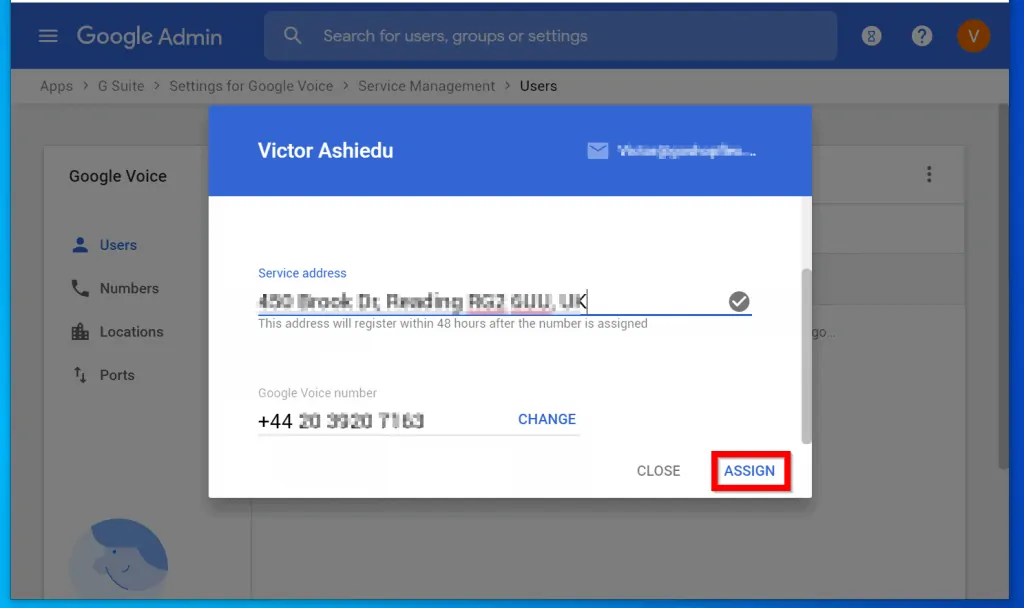
- Then from the Country/region drop-down select a country. Then type a Service address. Scroll down, confirm that a Voice number has been assigned. Finally, click ASSIGN.
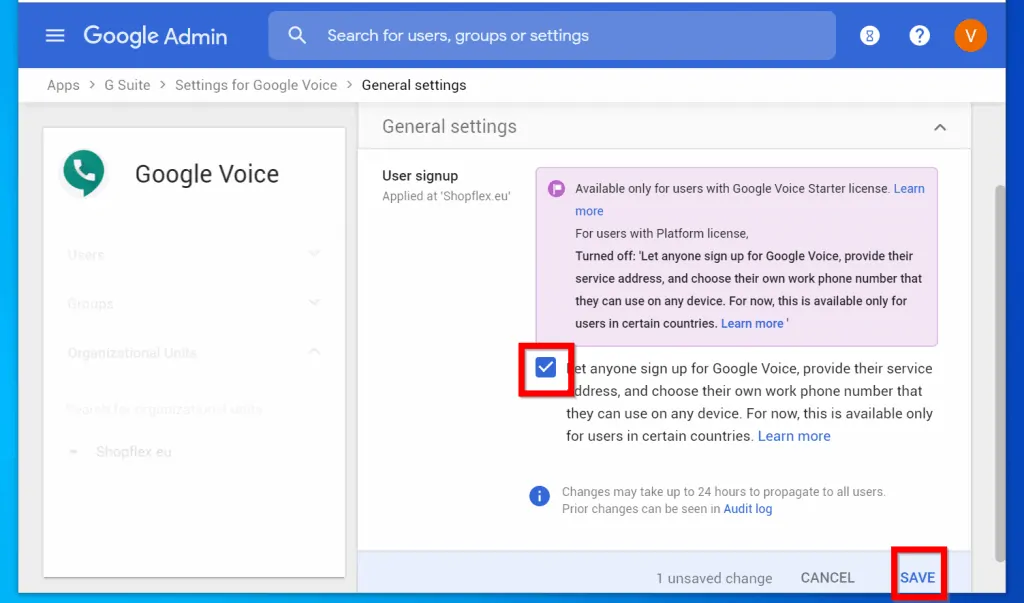
Step 4: Allow Users to Assign Numbers
If you want your users to assign Google Voice numbers to themselves use the steps below:
- Still logged in to G Suite admin console, click Apps > G Suite >Google Voice. Then scroll down and click General settings.
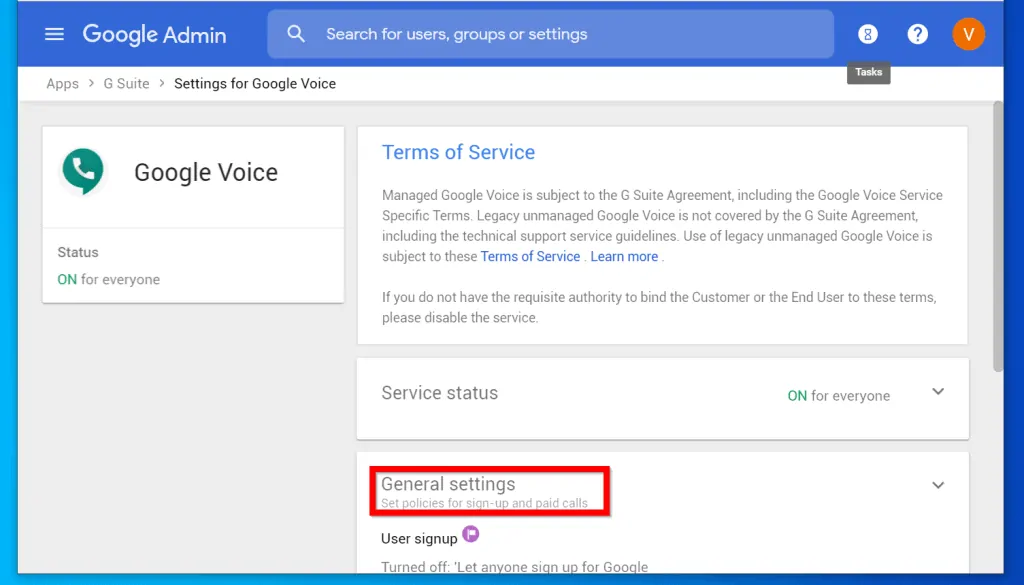
- Finally, check the box beside Let anyone sign up for Google Voice….and click Save.
Once you complete the setup as detailed in this guide users, in your G Suite account will be able to activate Voice services in their account.
I hope you found this Itechguide helpful. If it was helpful, click on “Yes” beside the “Was this page helpful” question below.
You may also express your thoughts and opinions by using the “Leave a Comment” form at the bottom of this page.
For more Google guides, visit our Google How To page.