Have you been looking for a way to enable Recycle Bin in Active Directory? This guide teaches you two methods to perform this task.
Overview
From time to time, Windows SysAdmins may mistakenly delete an AD object.
Before Windows Server 2008 R2, you could either restore the deleted object by restoring a Windows backup. Alternatively, you could perform a ntdsutil authoritative restore to restore deleted objects.
However, from Windows Server 2008 R2, Microsoft introduced AD Recycle Bin. When you enable Recycle Bin in Active Directory, you can restore deleted objects without having to perform an authoritative restore.
Active Directory is able to recover deleted objects using this method because after you enable AD Recycle Bin, AD preserves all link-valued and non-link-valued attributes of the deleted object.
It is important to mention that you cannot recover a deleted object with Recycle Bin after the tombstone lifetime set for the domain. By default, the tombstone lifetime of an AD forest is 180 days.
But, ad AD Admin can adjust this value. So, it is important to note the AD tombstone lifetime as you plan to start working with AD Recycle Bin.
Enable AD Recycle Bin with Active Directory Administrative Center
The fastest way to enable Recycle Bin in Active Directory is via the Active Directory Administrative Center.
Follow the steps below to enable AD Recycle Bin via AD DC.
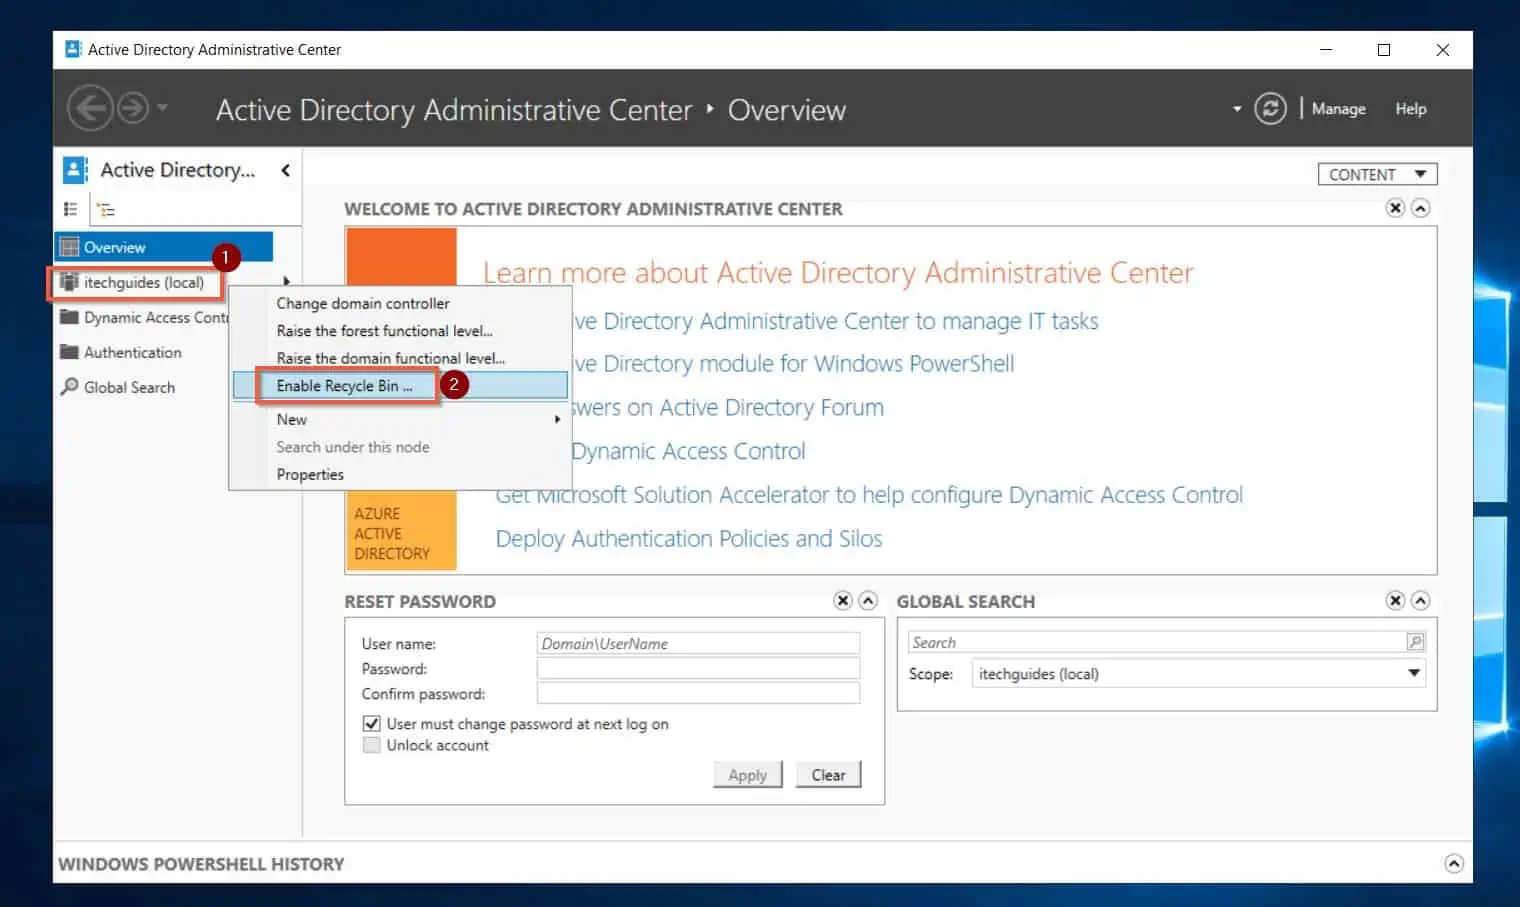
- Open Active Directory Administrative Center either from your Windows 10 or Windows 11 PC. Alternatively, you can open the Active Directory Administrative Center from a Domain Controller.
- Then, on the left pane of the Active Directory Administrative Center, right-click the name of your domain and select Enable Recycle Bin. AD DC will prompt you to confirm the action.
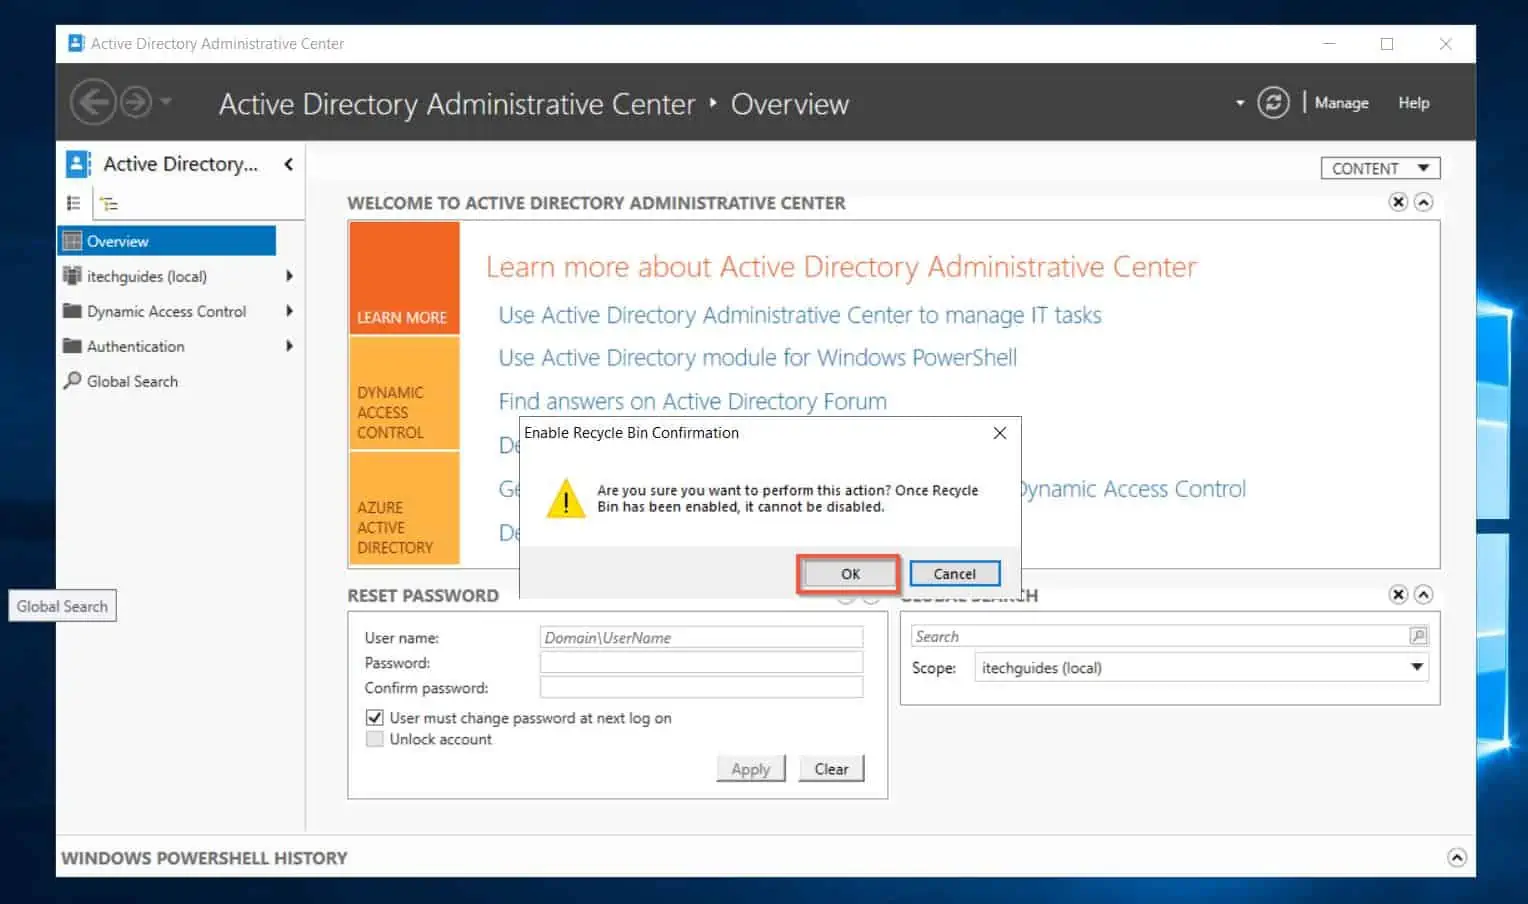
- On the confirmation pop-up, click OK.
Enable Recycle Bin with PowerShell
If you’re a PowerShell enthusiast, you’ll be excited to hear that you can also use PowerShell to enable AD Recycle Bin.
Follow the steps below to enable this important Active Directory feature with Windows PowerShell.
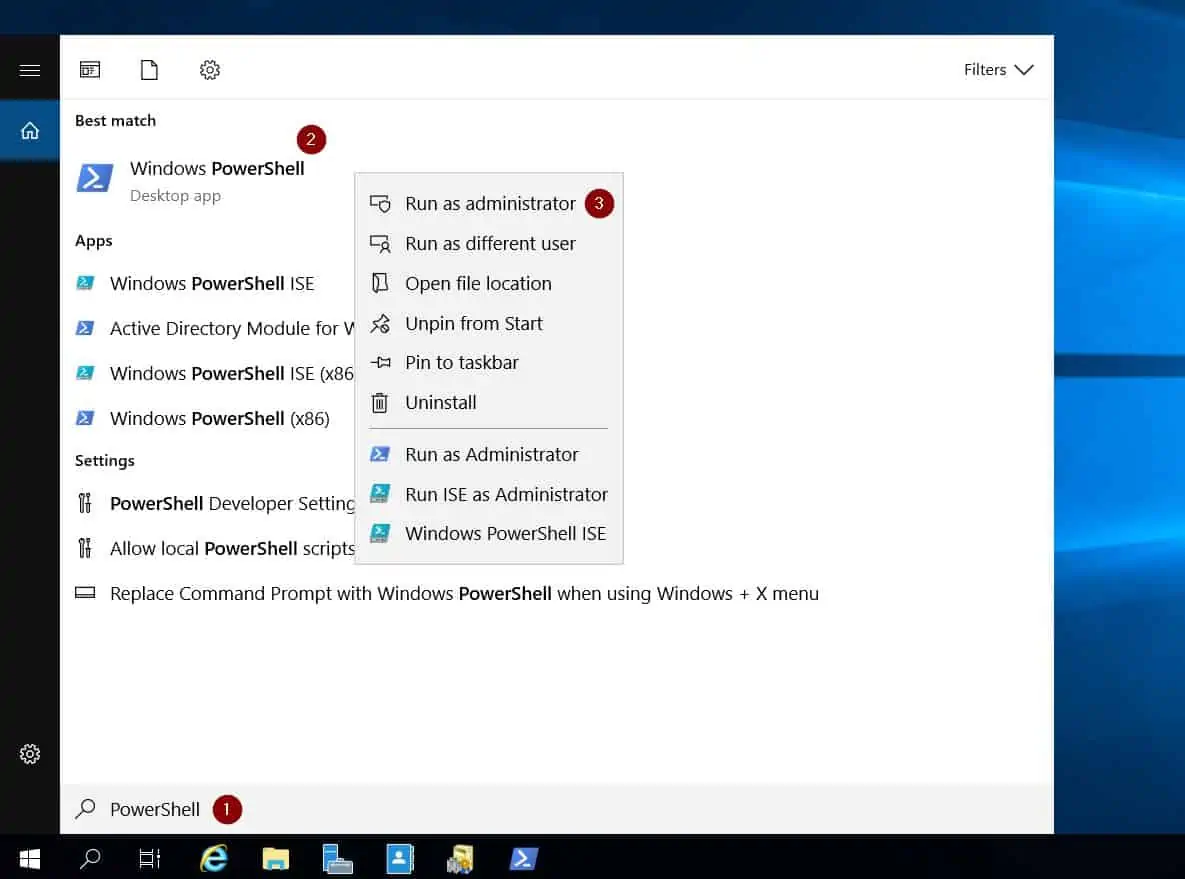
- Search PowerShell. Then, right-click Windows PowerShell from the search results and select Run as administrator.
- When Windows PowerShell opens, modify the command below – see my explanations beneath the command – then copy it to PowerShell and press the enter key on your PC’s keyboard.
Enable-ADOptionalFeature -Identity 'CN=Recycle Bin Feature,CN=Optional Features,CN=Directory Service,CN=Windows NT,CN=Services,CN=Configuration,DC=itechguides,DC=local' -Scope ForestOrConfigurationSet -Target 'itechguides.local'

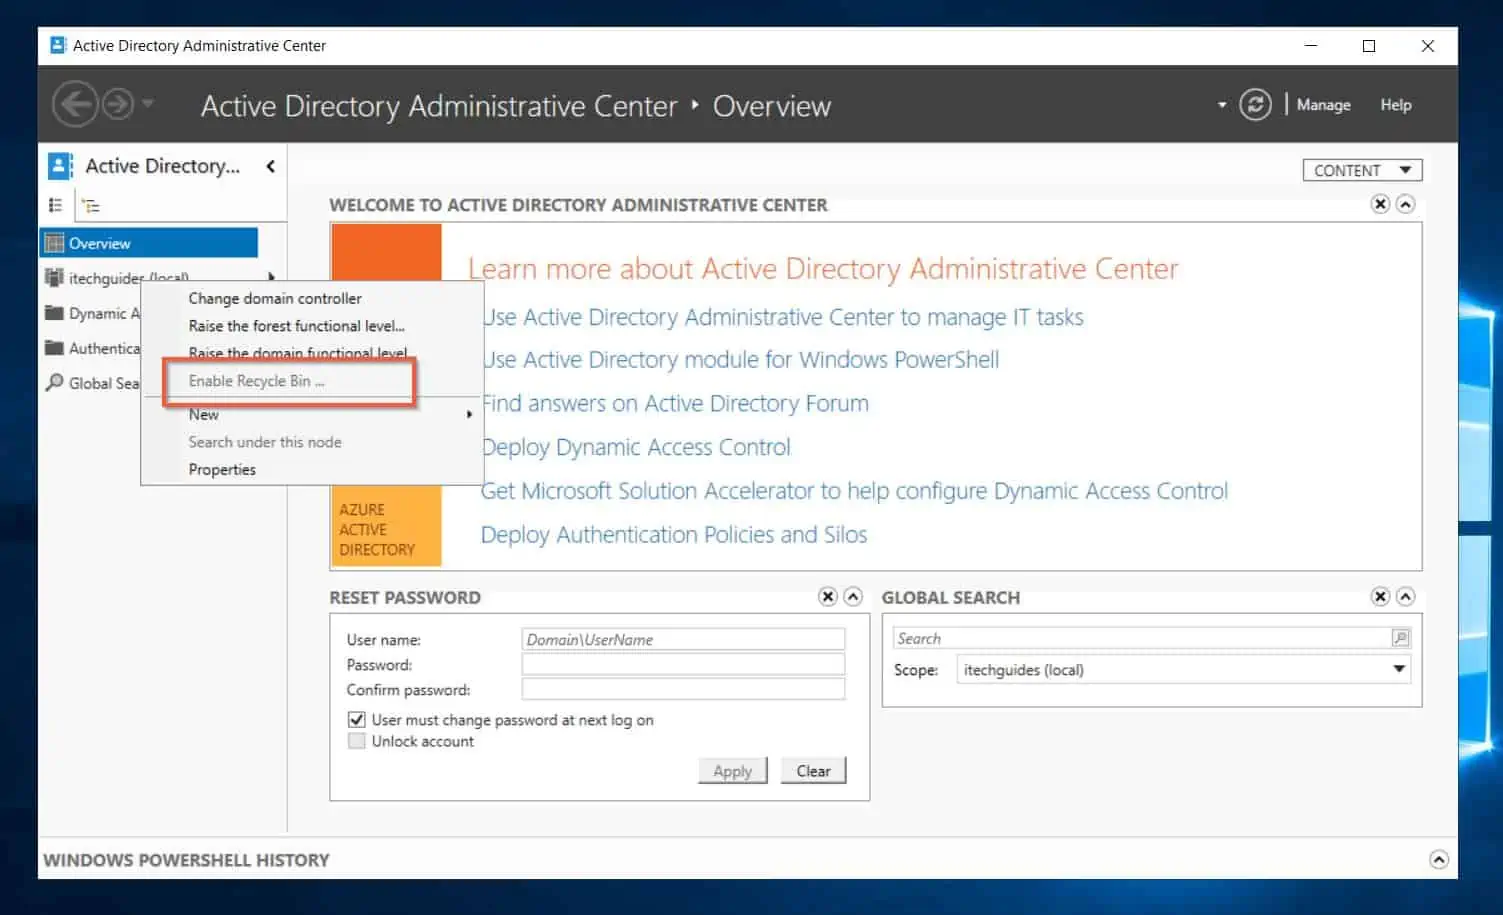
- Finally, to confirm that the last command enabled Recycle Bin in Active Directory, open Active Directory Administrative Center. Then, right-click your AD Domain name.
The Enable Recycle Bin option will be grayed out.
How to Restore a Deleted AD Object from Recycle Bin
Now that you have enabled Recycle Bin in AD, you can restore deleted objects with either Active Directory Administrative Center or Windows PowerShell.
Option 1: Restore a Deleted Active Directory Object with Active Directory Administrative Center
To show you how to restore a deleted AD object, I deleted an OU called New Writers.
- Open Active Directory Administrative Center.
- Then, left-click your domain name and double-click the Deleted Objects container.
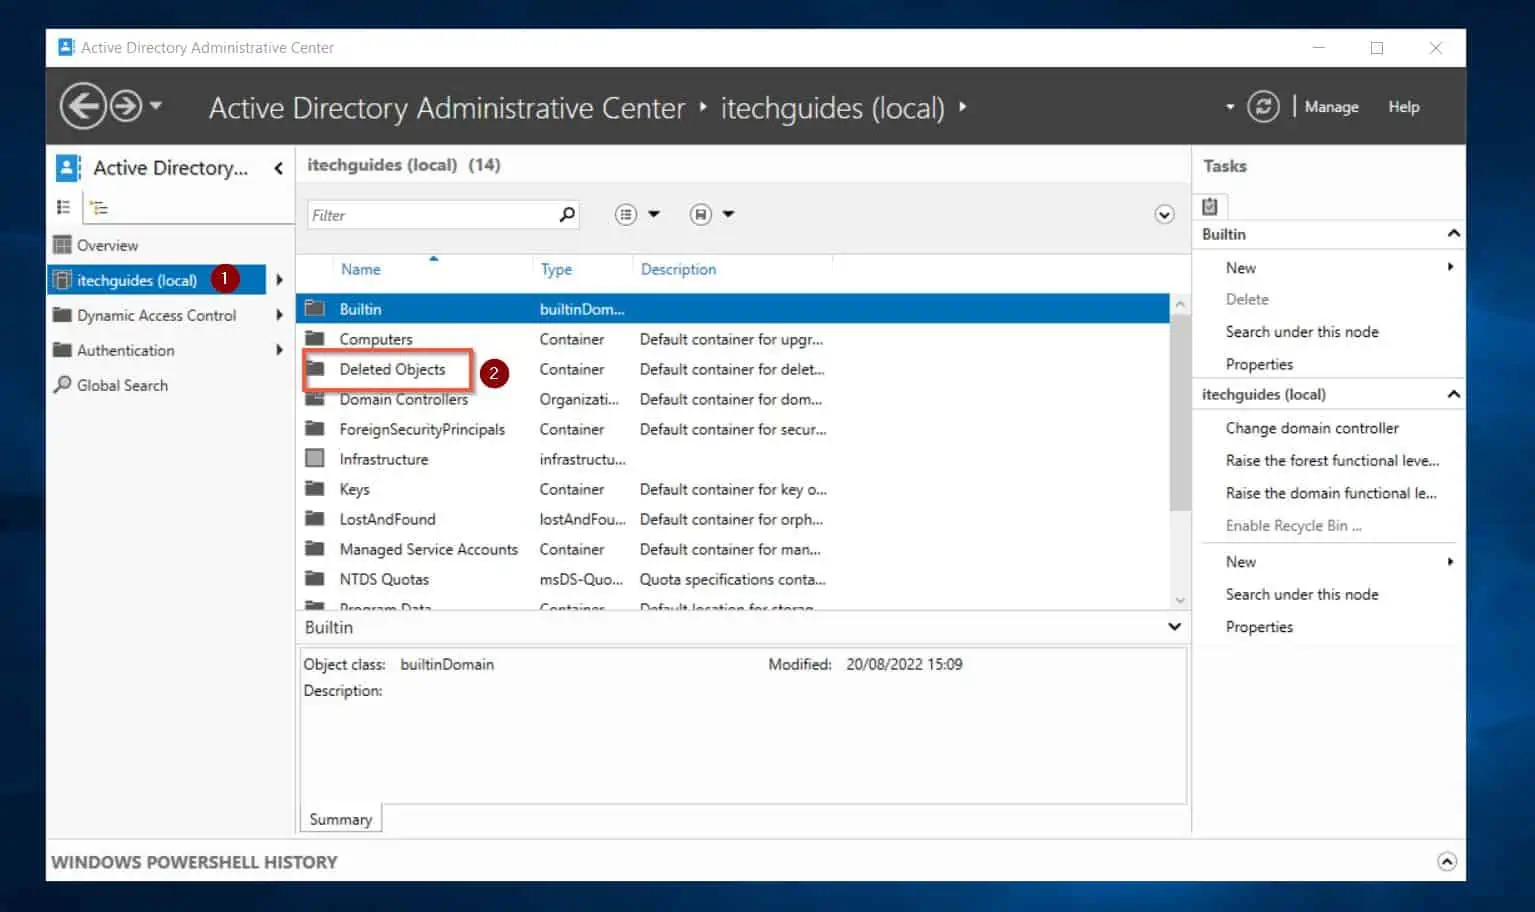
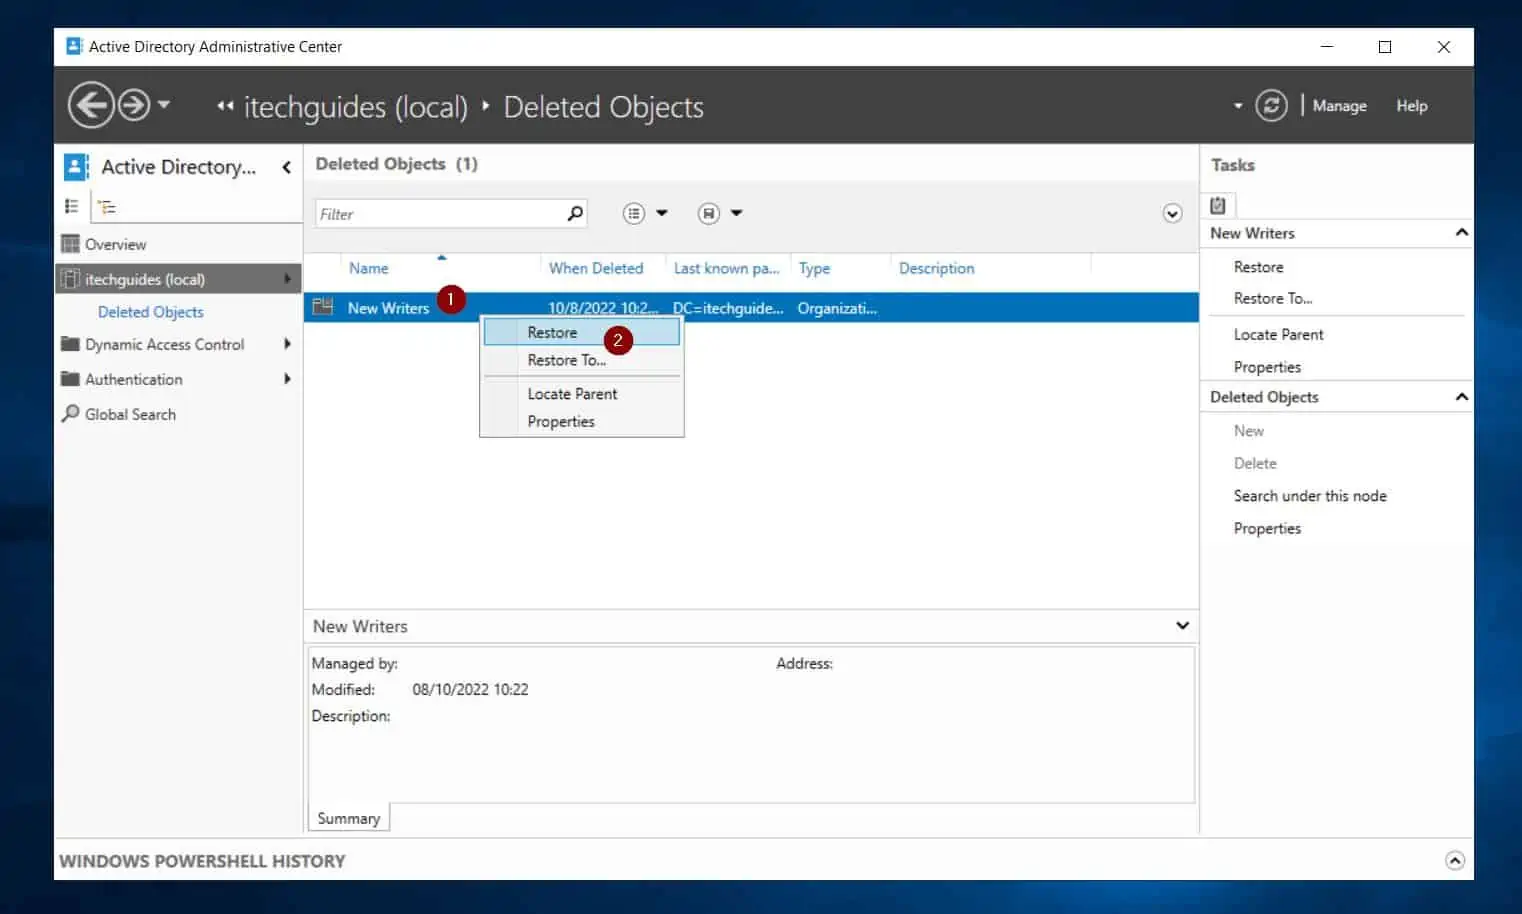
- Active Directory Administrative Center lists all deleted objects in the Deleted Objects container. Right-click the object you want to restore.
Then, select “Restore” or “Restore To…”
Option 2: Restore a Deleted Active Directory Object with PowerShell
- Search Windows PowerShell, then right-click Windows PowerShell and select run as administrator.
- When PowerShell opens, run a command like the one below.
Get-ADObject -Filter 'Name -Like "*new*"' -IncludeDeletedObjects | Restore-ADObject
Get-ADObject -Filter 'Name -Like "*new*"' -IncludeDeletedObjects | Restore-ADObject -TargetPath "OU=Writers,DC=itechguides,DC=local"
Frequently Asked Questions
Yes, from Windows Server 2008 R2, Microsoft introduced Recycle Bin in Active Directory.
To enable AD Recycle Bin, run the PowerShell Command below – change your domain name and its extension:
Enable-ADOptionalFeature -Identity ‘CN=Recycle Bin Feature,CN=Optional Features,CN=Directory Service,CN=Windows NT,CN=Services,CN=Configuration,DC=itechguides,DC=local‘ -Scope ForestOrConfigurationSet -Target ‘itechguides.local‘
The easiest way to check if AD Recycle Bin is enabled is to open Active Directory Administrative Center. Then, right-click your domain name.
The Enable Recycle Bin option will be grayed out.
Once you enable AD Recycle Bin, you cannot disable the feature. Enabling AD Recycle Bin is a one-way, irreversible action.
Deleted AD objects stay in the Recycle Bin for the length of the tombstone lifetime for the domain. By default, the tombstone lifetime of an AD Domain is 180 days.
So, a deleted AD object will stay in the Recycle Bin for 180 days, except if a SysAdmin has previously changed the tombstone lifetime of the AD Domain.
My Final Thoughts
Most Windows SysAdmins will argue that Active Directory Recycle Bin is one of the most important features of AD. I completely agree that AD Recycle Bin is an important feature.
The reason for this is obvious! Think about the last time you mistakenly deleted a user’s account, and you had to restore the previous day’s backup.
If you had enabled Enabling Recycle Bin in Active Directory, you wouldn’t have gone through all that trouble.
I hope you found this guide useful and that you have successfully enabled Recycle Bin in your AD Domain. If this guide saved your day, click on “Yes” beside the “Was this page helpful” question below.
You may also express your thoughts and opinions by using the “Leave a Comment” form at the bottom of this page.
Finally, to read more Active Directory articles, visit our Active Directory Guides page.