Do you need help installing and configuring the DHCP Relay Agent in Windows Server 2016? In this article, I share a practical step-by-step guide that will guide you from start to finish.
What is a DHCP Relay Agent?
A DHCP Relay Agent allows DHCP clients in a different network subnet to lease IP addresses from a DHCP server in a another network.
DHCP clients can only lease IP addresses from a DHCP server in its subnet. However, by installing a DHCP Relay agent, clients in other subnets can lease addresses.
The diagram below is the setup I used for this guide.
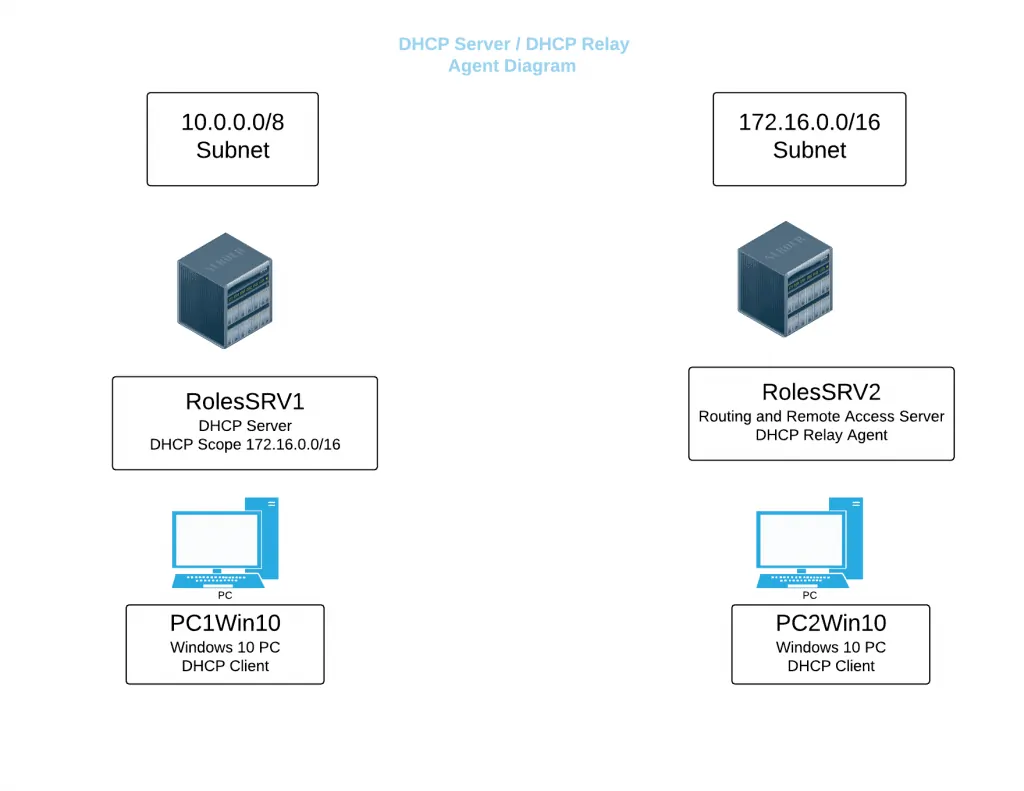
The DHCP server is on the same subnet with PC1Win10 (Windows 10 computer) so it can lease an IP address.
In comparison, PC2Win10 is in a different subnet so it cannot lease IP address from the DHCP Server. For PC2Win10 to lease an IP address, it requires a Relay Agent (RolesSRV2) to talk to the DHCP Server (RolesSRV2).
In Windows Server 2016, Remote Access role is required to configure DHCP Relay Agent.
A DHCP server with a working scope is required. This is NOT covered in this guide.
Step1: Install the Remote Access Role
To install Remote Access:
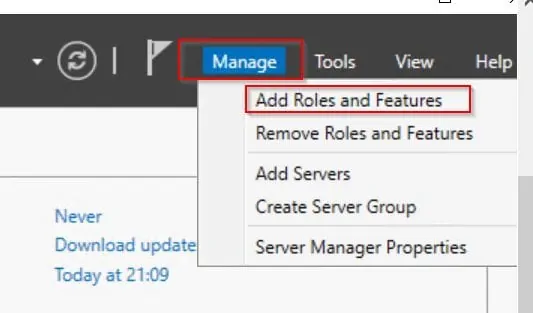
- Log on to the server and open Server Manager.
- Then click Manage and select Add Roles and Features.
- On the Before you begin screen, click Next.
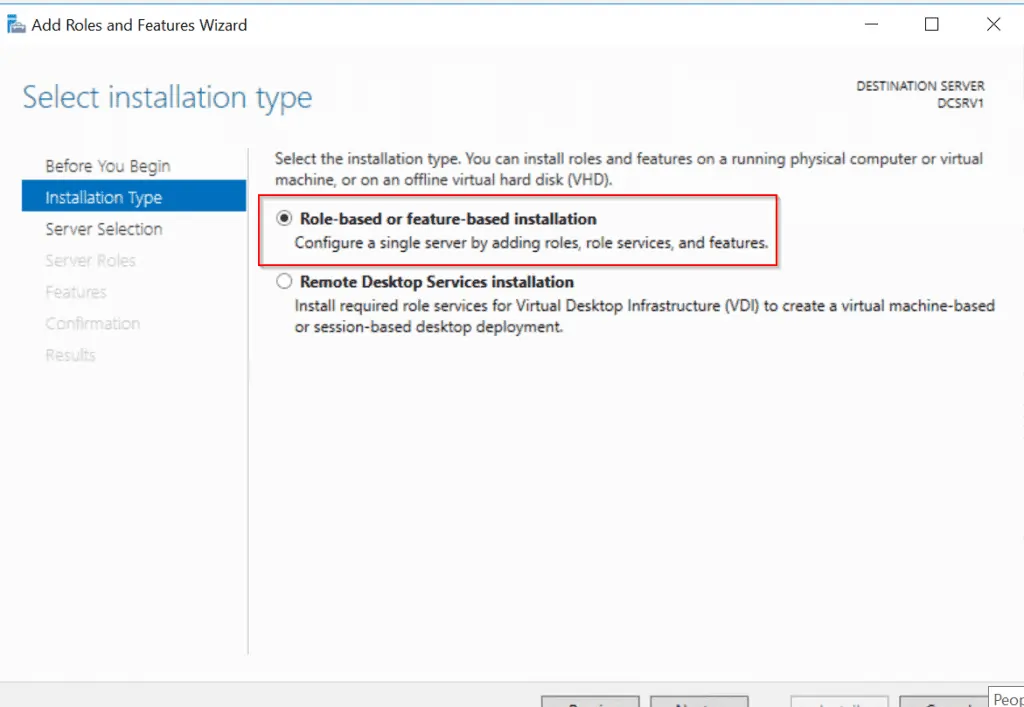
- Select Role-based or feature-based installation and click Next.
- Next, on the Select Destination server page, select the server you wish to install Windows Deployment Services Role.
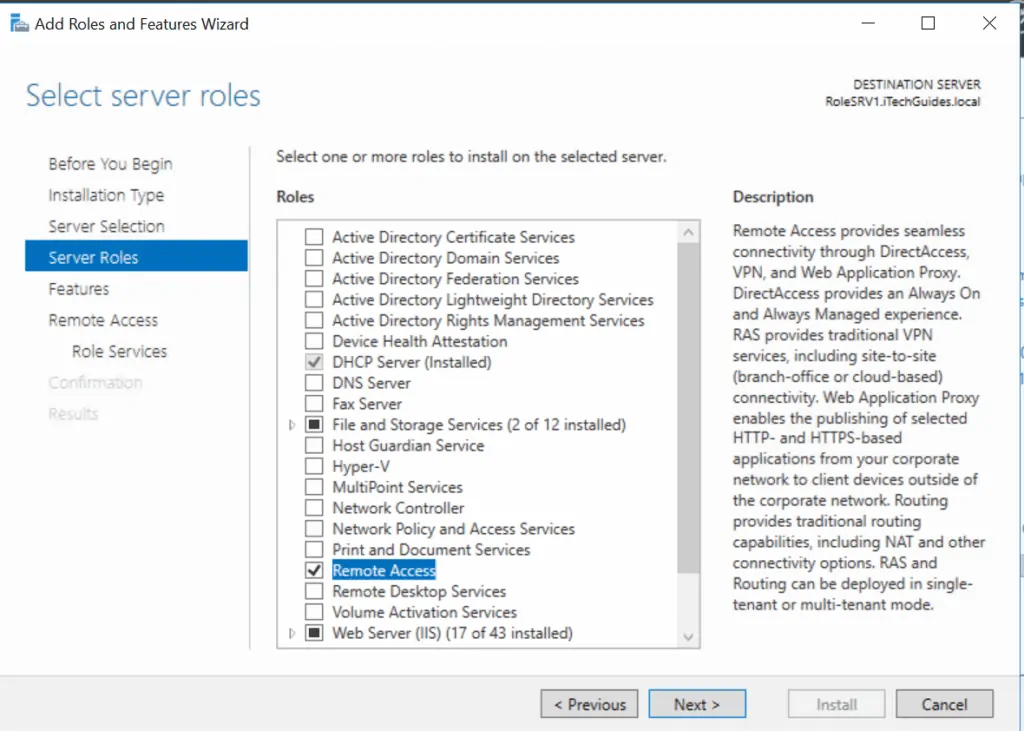
- On the Server Role page, check the box beside Remote Access then click Next.
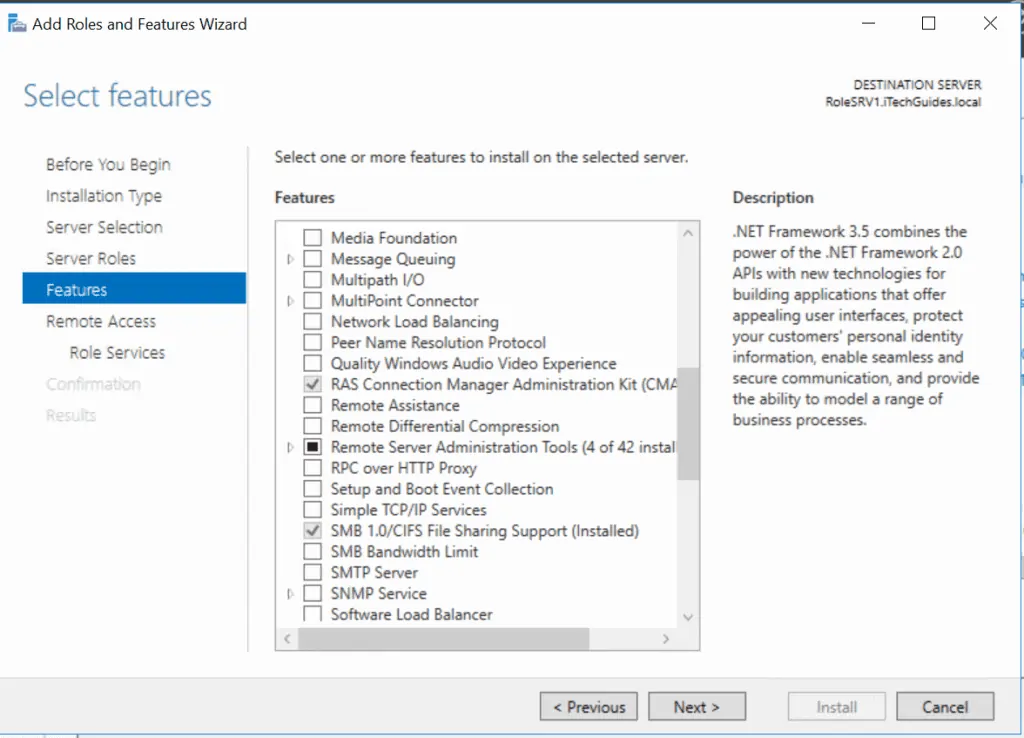
- On the Select Features page, click Next.
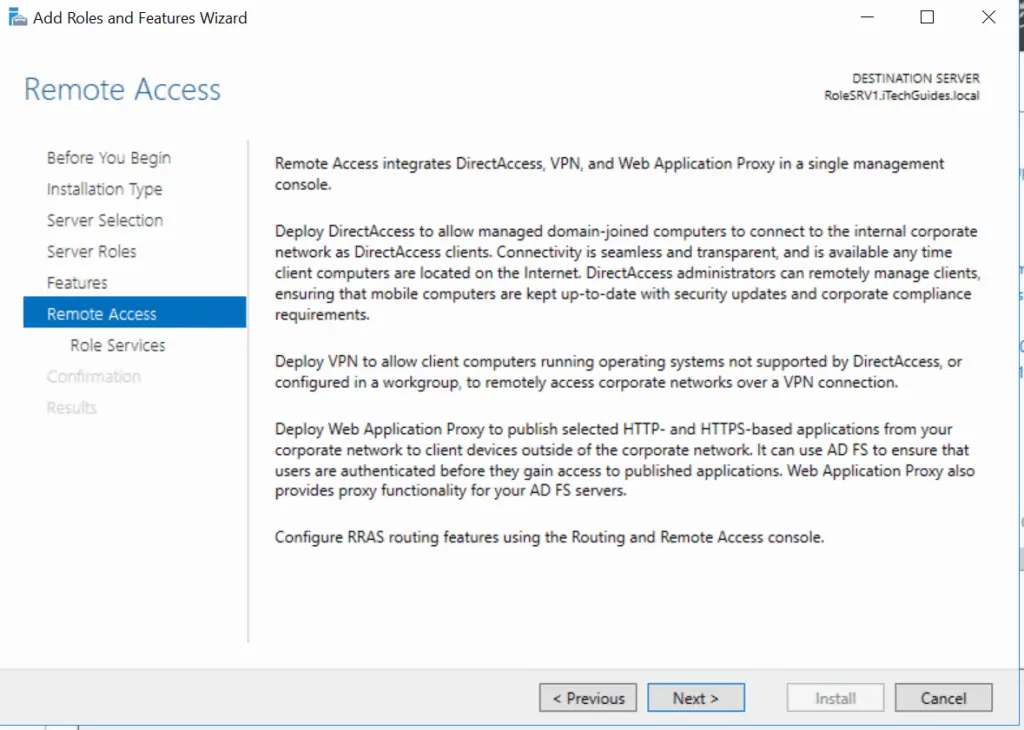
- Then on the Remote Access page, click Next.
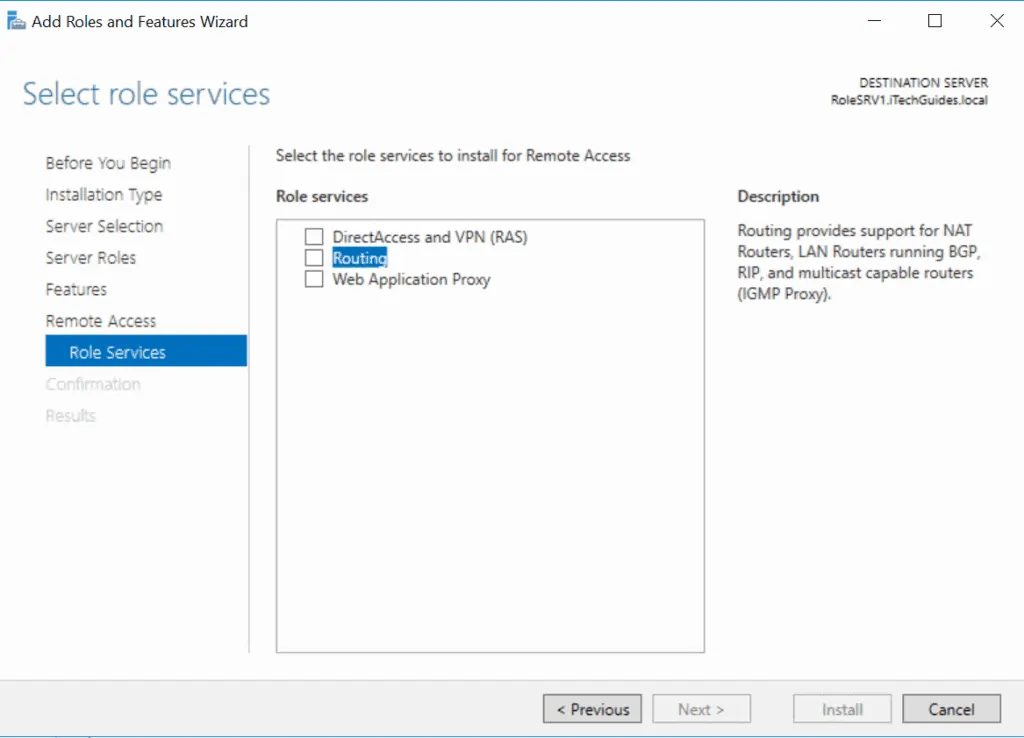
- On the Select Role service, check the box beside Routing. A window pops asking whether to add features required for routing? Click Add Features.

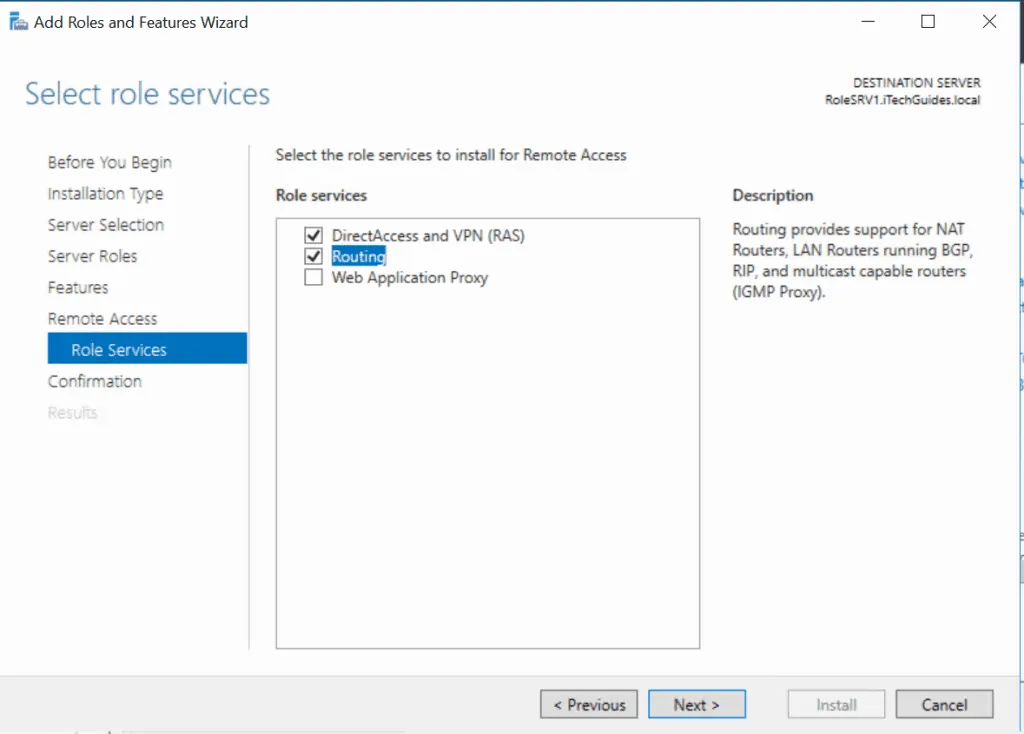
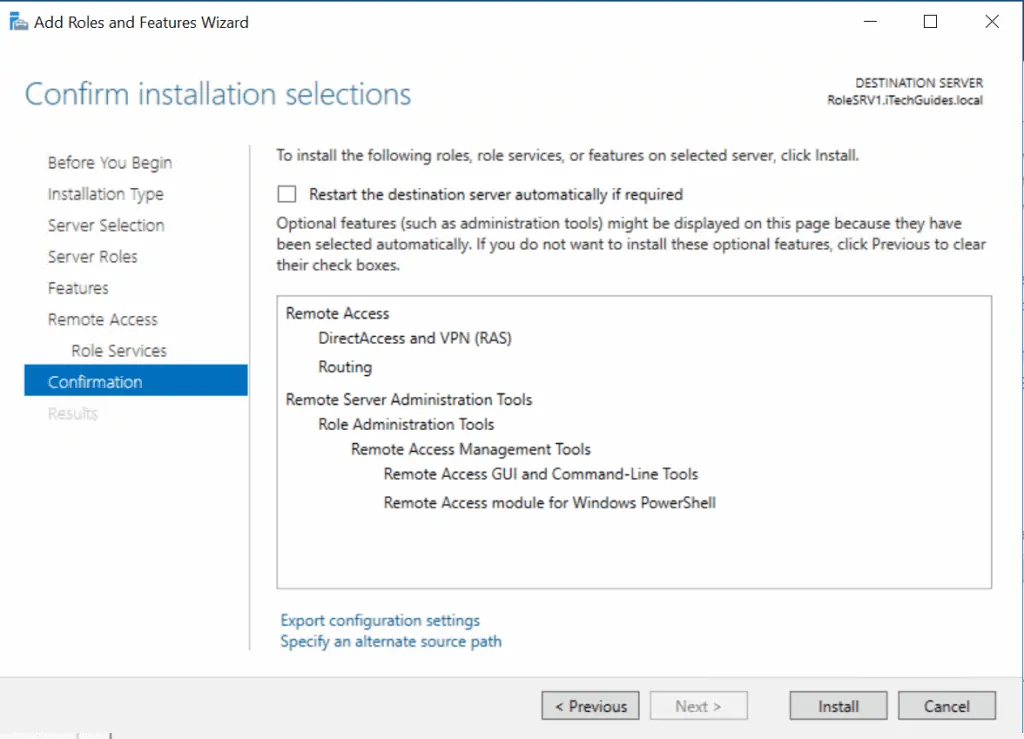
- You are returned to the Select role services page. Confirm that DirecttAccess (RAS) and Routing roles are selected. Then click Next.
- On the confirmation page, review the features you selected. Then click Install.
Step 2: Configure Routing and Remote Access
Before you configure DHCP Replay Agent, you have to configure Routing and Remote Access first.
Follow the steps below:
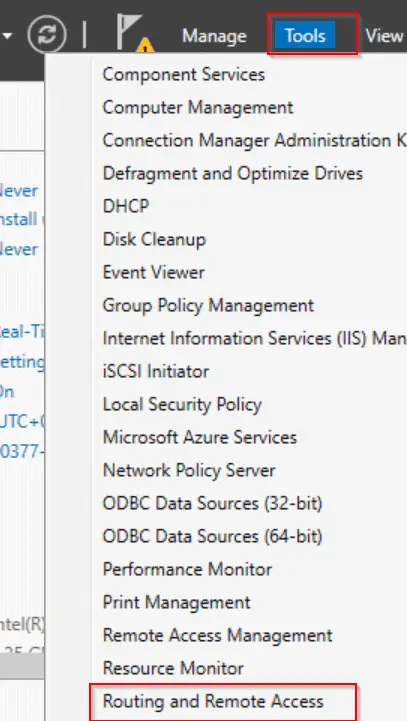
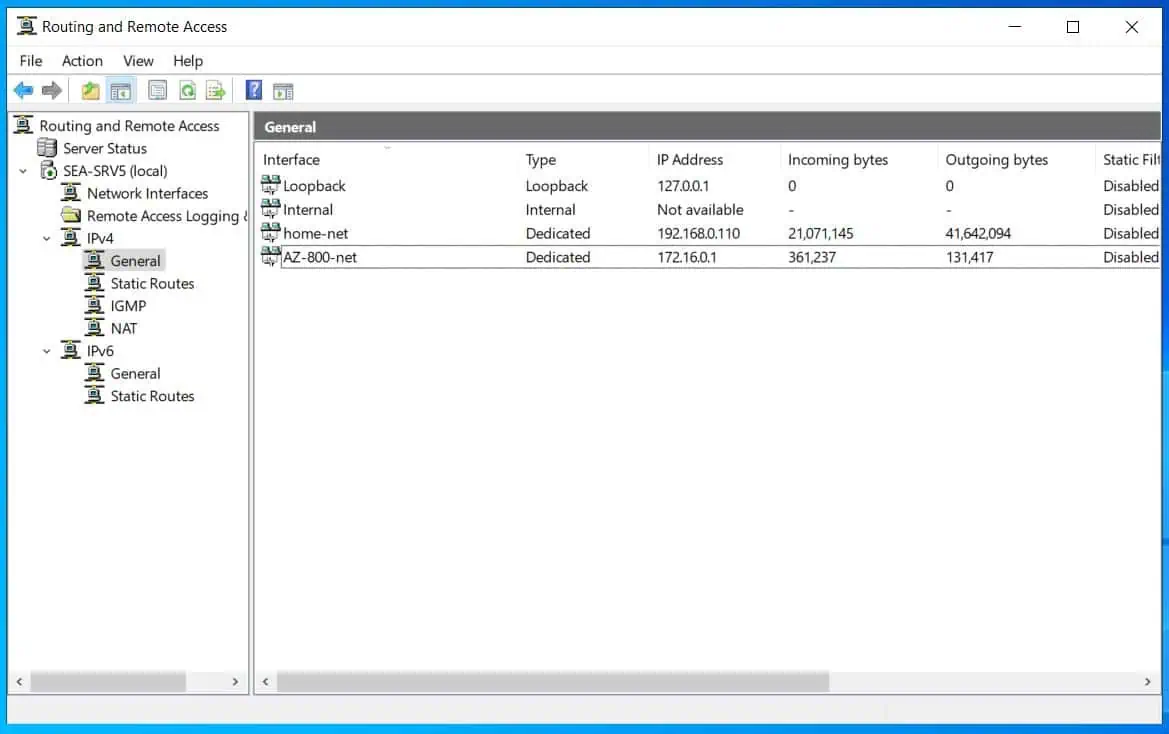
- From Server Manager, click Tools, then select Routing and Remote Access.
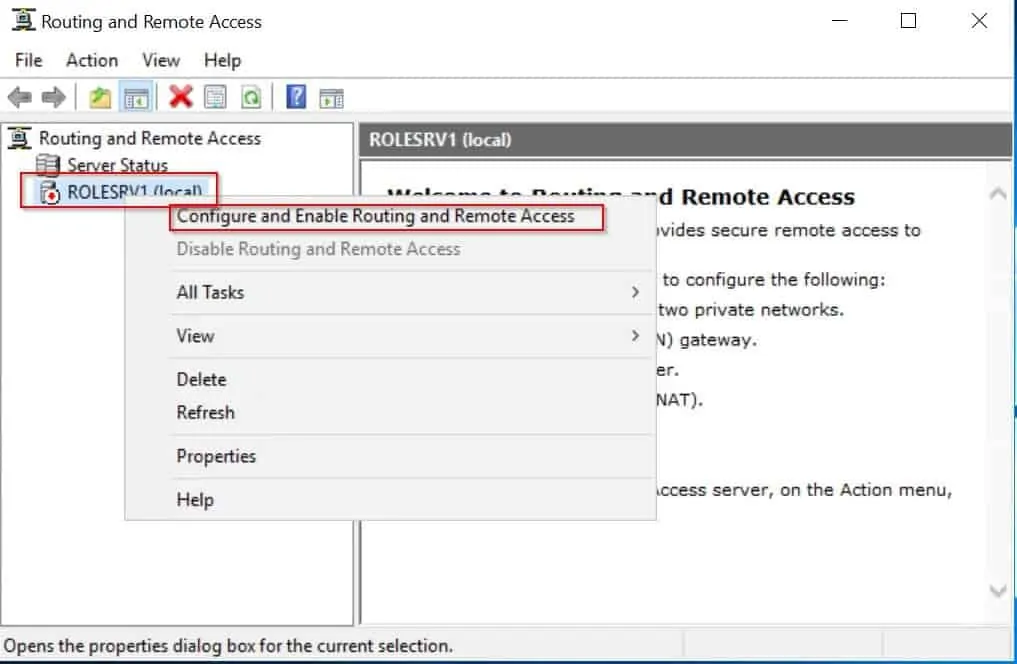
- On the Routing and Remote Access MMC, right-click your server then click Configure and Enable Routing and Remote Access.
- On the Welcome page, click Next.

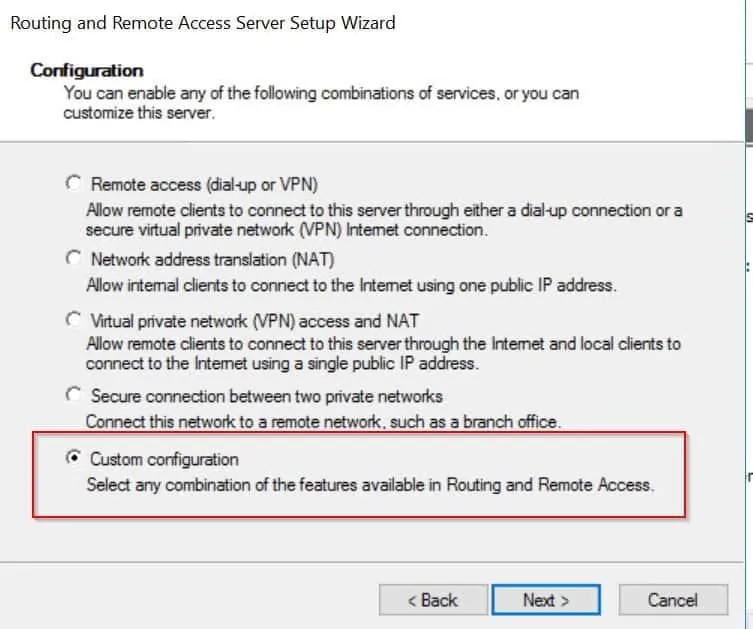
- The Configuration page opens. Select the last option, Custom Configuration. Then click Next.
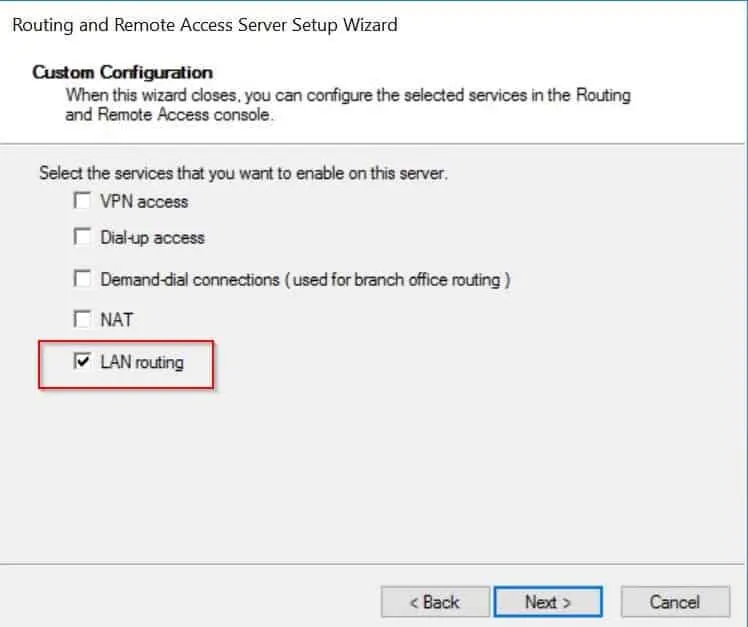
- On the Custom Configuration page, check the box beside LAN routing. Click Next. Then on the confirmation page, click Finish.
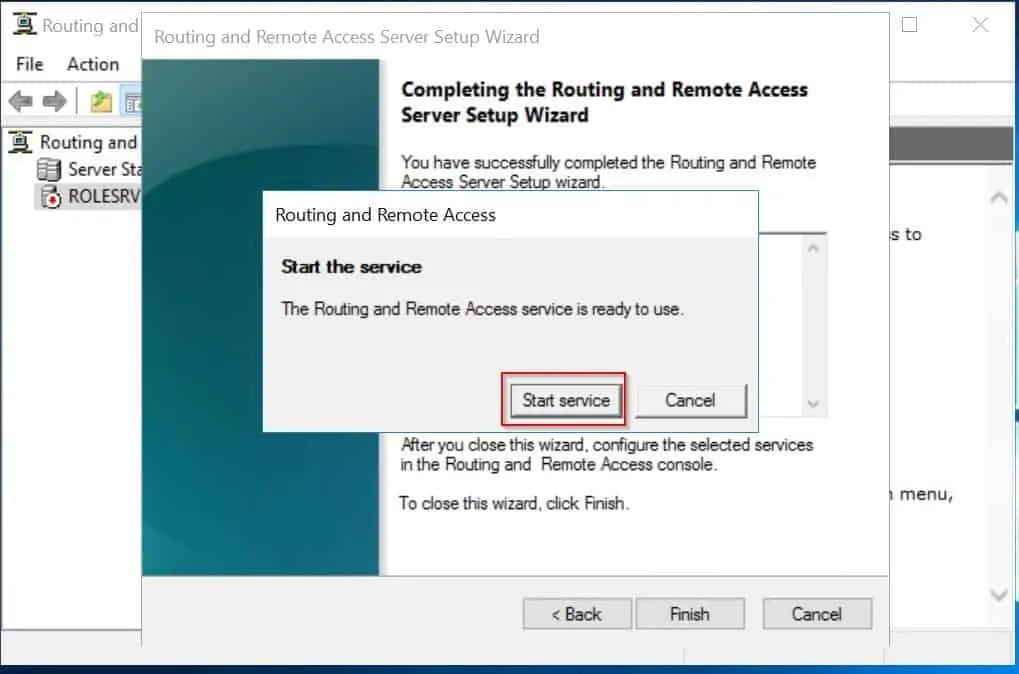
- A pop up appears prompting you to start Routing and remote access service. Click Start Service. Then wait for the service to start.
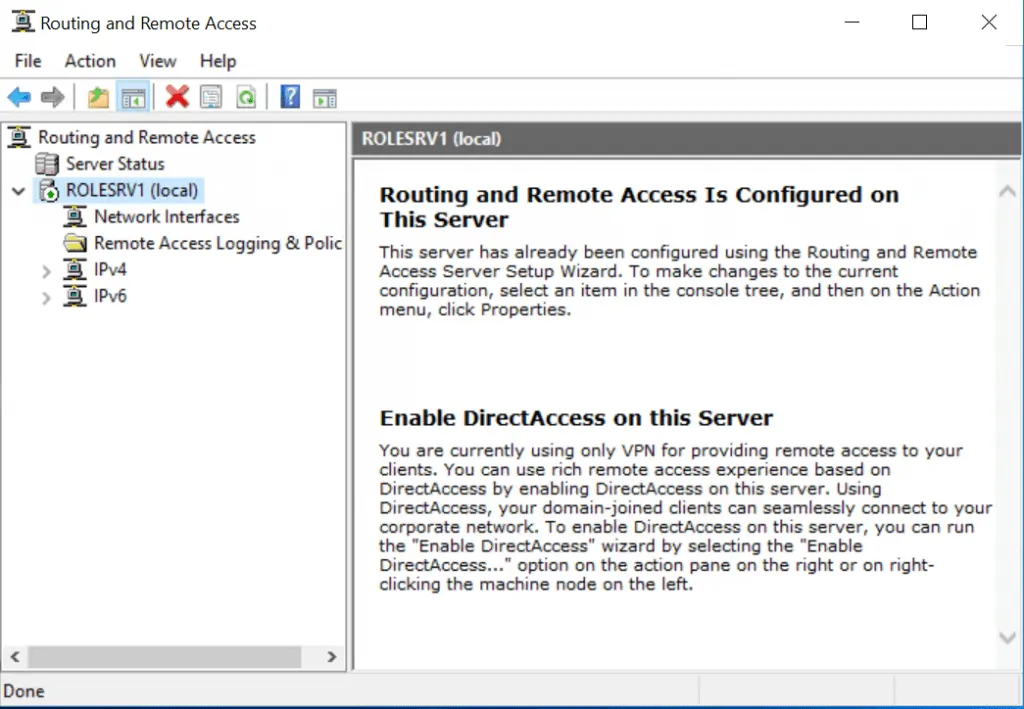
- Routing and Remote Access is now Configured. We are now ready to set up DHCP Relay Agent!
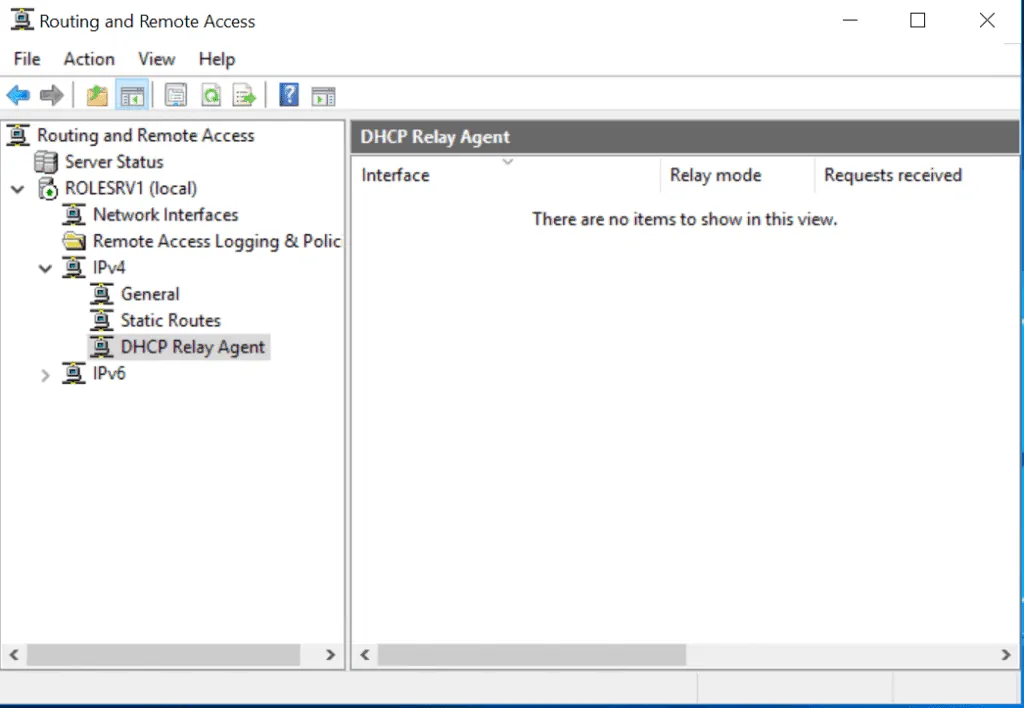
Step 2: Configure the DHCP Relay Agent
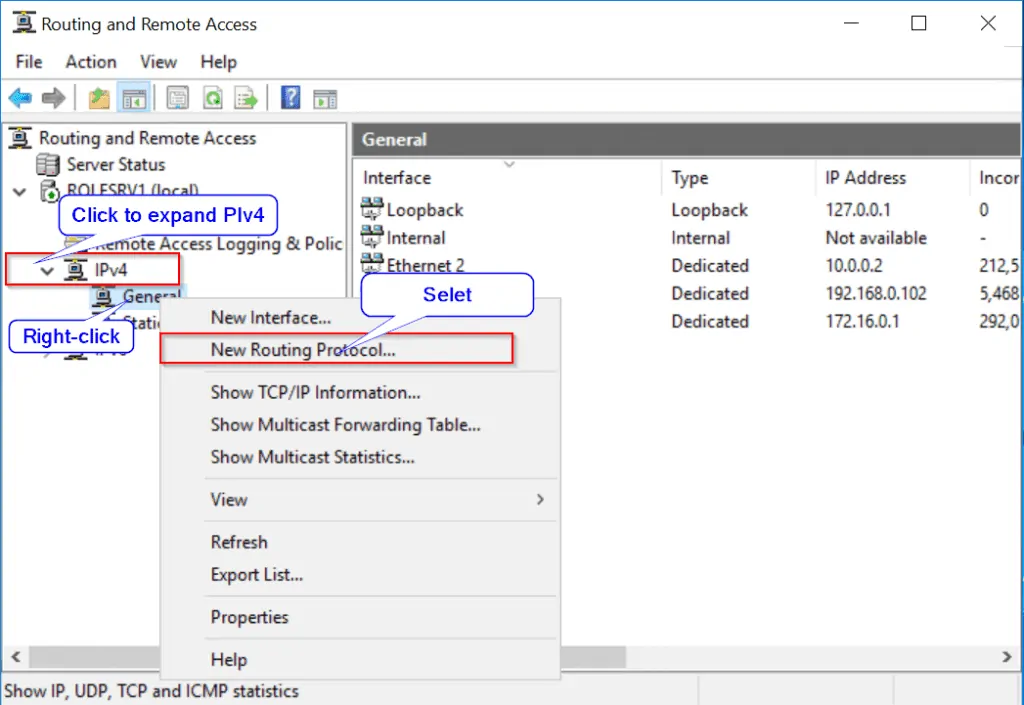
- Expand IPv4, then right-click General and select New Routing Protocol.
- On the New Routing Protocol window, select DHCP Relay Agent. Then click Ok.
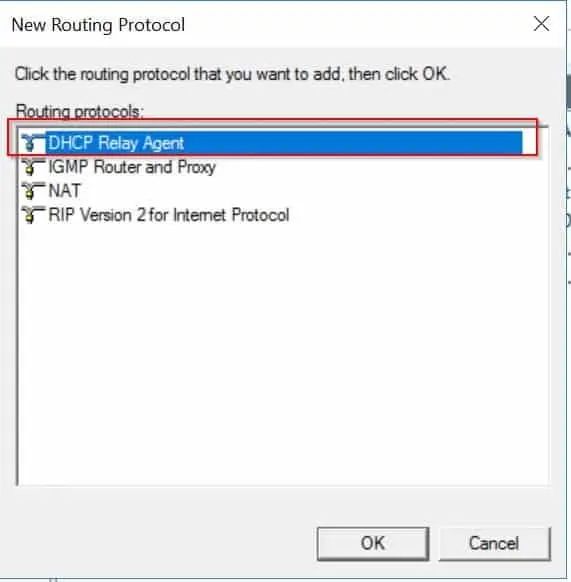
We are not done yet. Next step is to select the network interface.
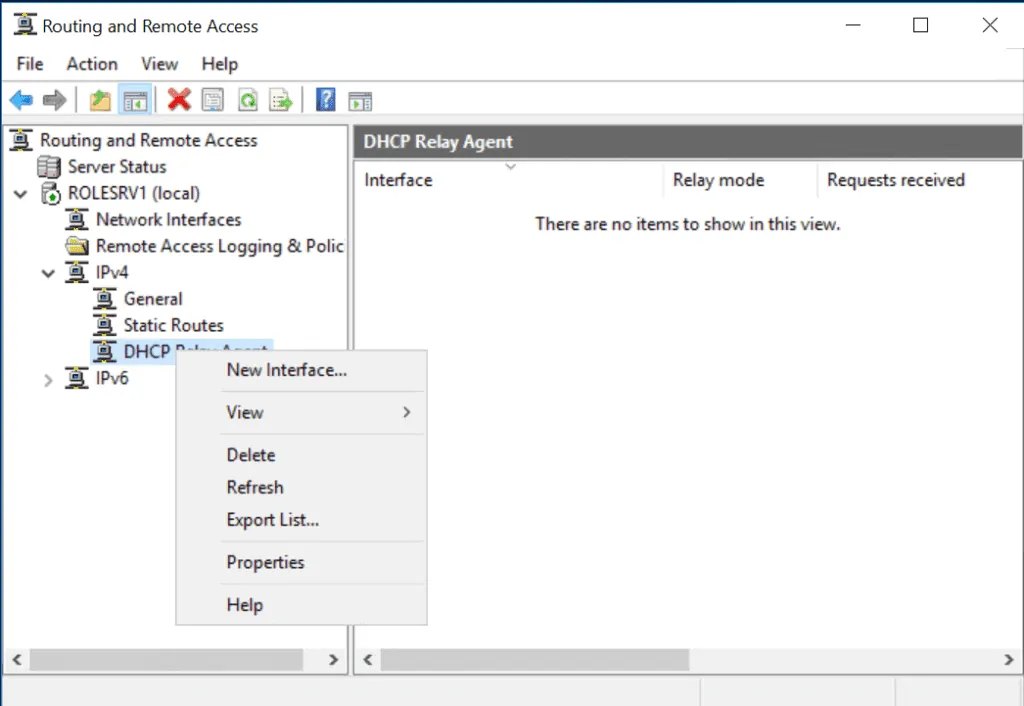
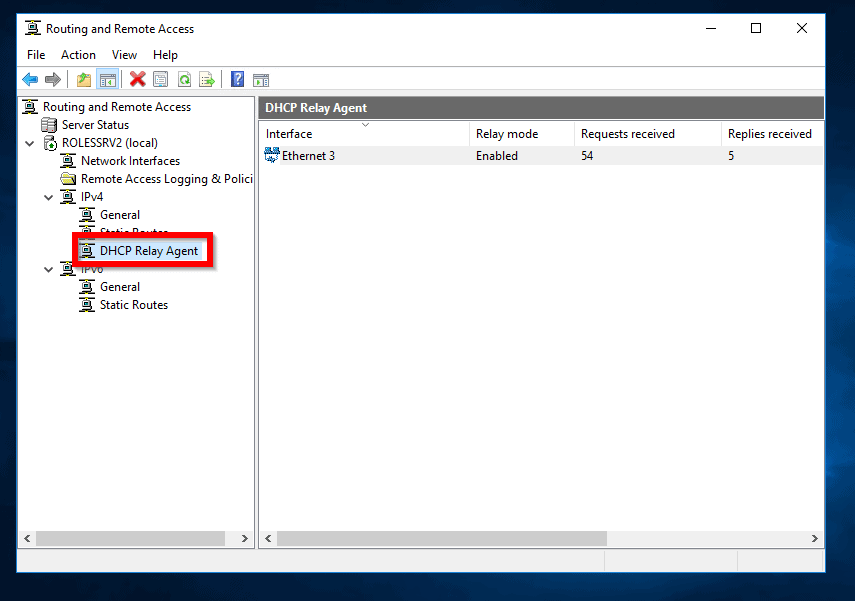
- Right-click DHCP Relay Agent and select New Interface.
- On the New Interface for DHCP Relay Agent, select the network interface. Then click Ok.
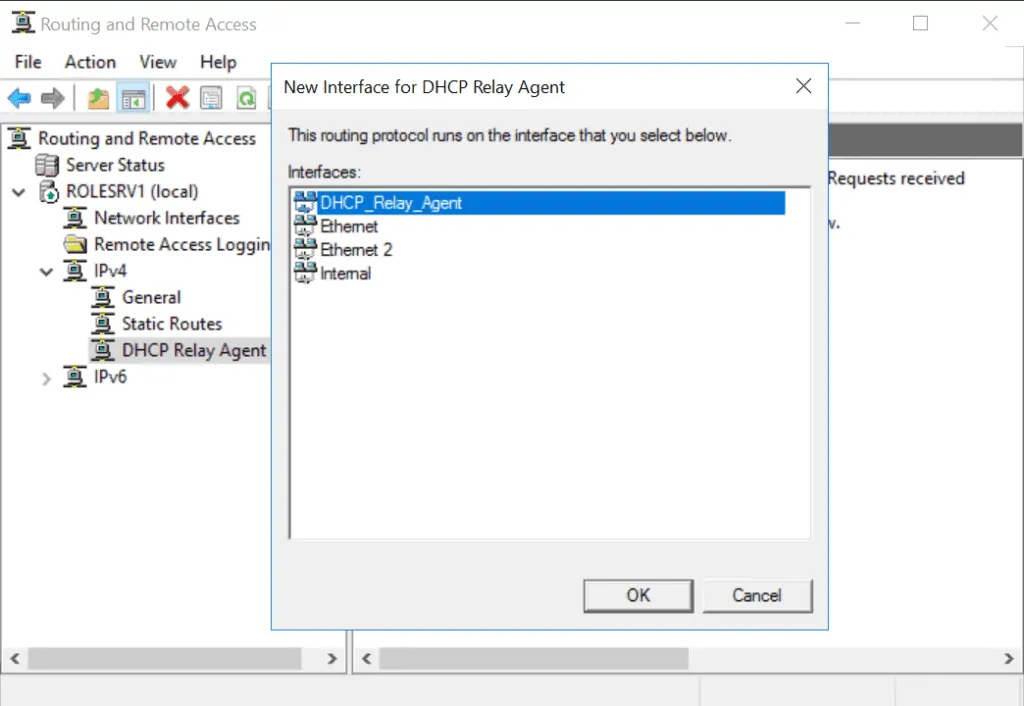
Your network interfaces may be different. It will depend on the names of the network cards you have on the server.
- When you click Ok in the last task, the properties of the network interface card opens for configuration. Accept the defaults then click Ok.
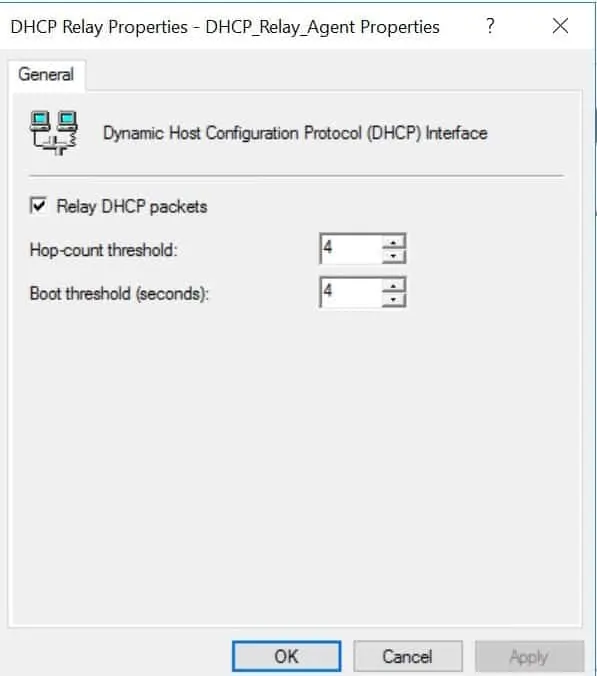
Hop-Count Threshold: The total number of devices that the packets should pass through as they travel from the source to the destination. In this instance the hop-count defines the number of DHCP Relay Agents the DHCP traffic is allowed to hop through.
Boot threshold (seconds): The number of seconds the relay agent ways before forwarding the message.
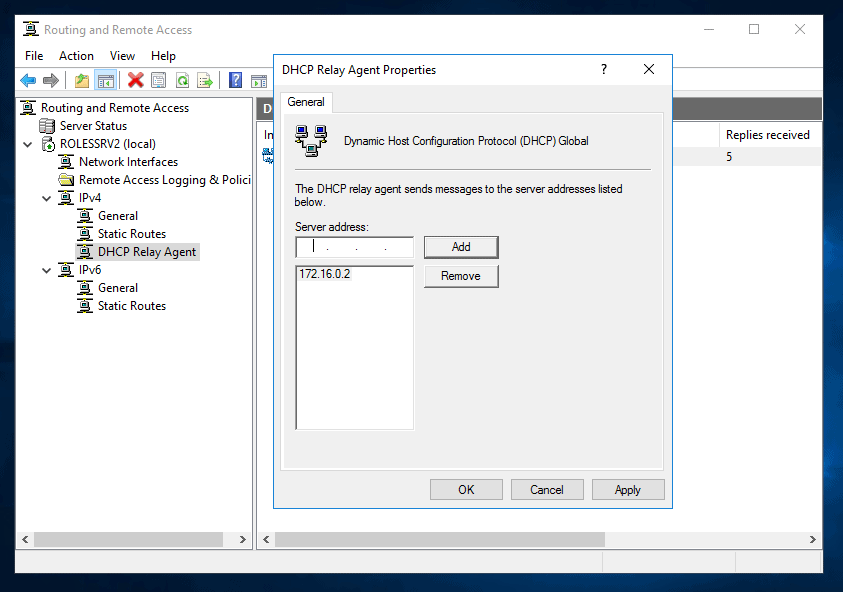
Your Relay Agent needs to know the DHCP server to contact when it receives a request. So the final step in this setup is to add the IP address of the Server to the Relay Agent procol.
To do this:
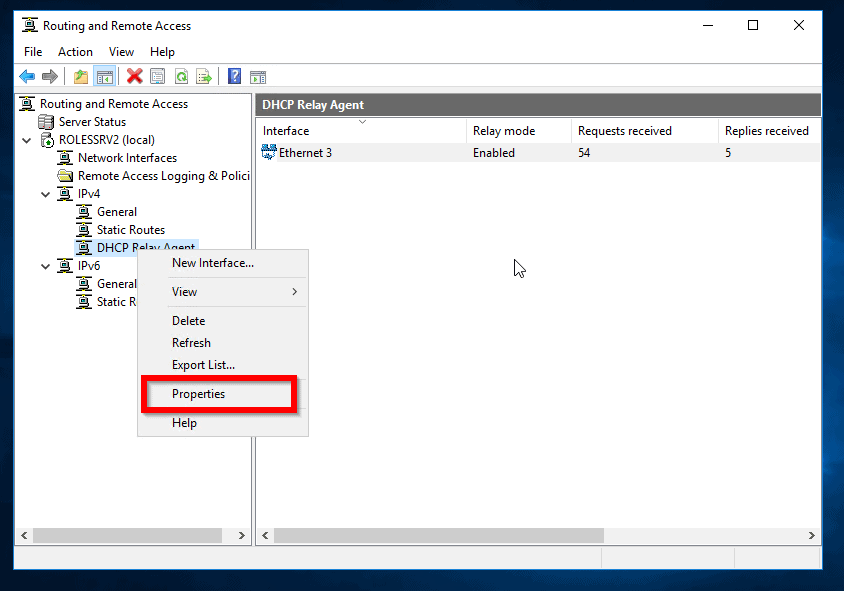
- Right-click DHCP Relay Agent protocol.
- Then select Properties
- Next, beneath Server address enter the IP address of DHCP server and click Add.
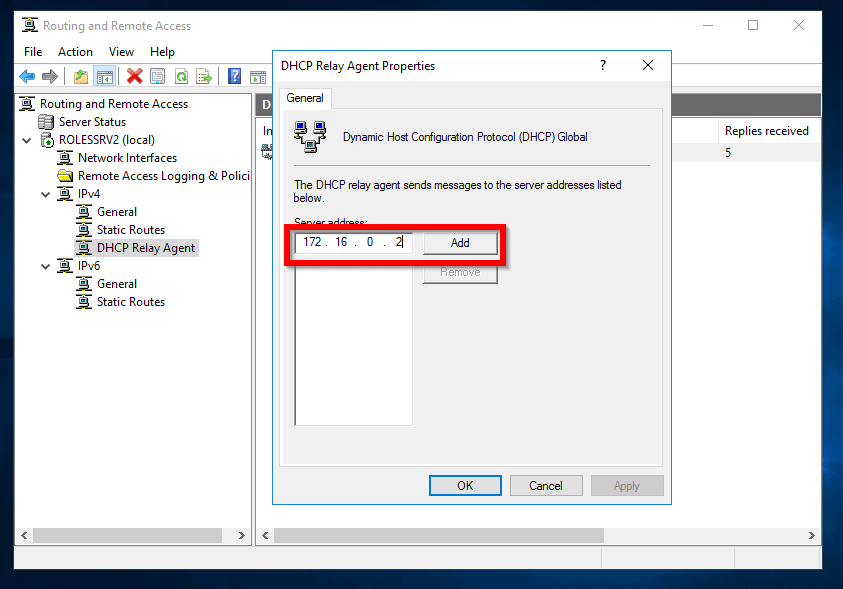
- To save your changes, click Ok.
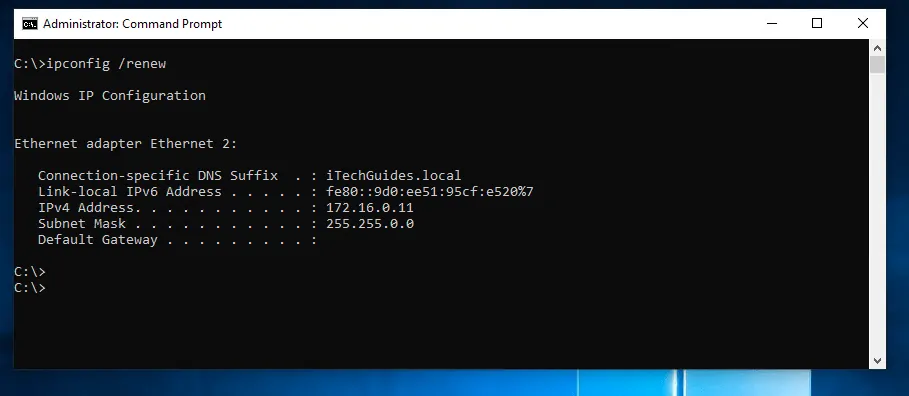
Now, when you run ipconfig /renew on a client in the subnet outside the DHCP server’s subnet, the client will lease an IP.
Frequently Asked Questions
You need to install the Remote Access service feature to use Windows Server 2016 as a DHCP relay agent.
Follow the steps below to configure the DHCP relay agent in Windows server 2016:
i) Install the Remote Access service feature
ii) Configure Routing and Remote Access
iii) Finally, configure DHCP Relay Agent
When a DHCP server sends a DHCP message to a ‘DHCP client, the server uses port 68. On the contrary, when a DHCP client sends a DHCP message to a DHCP server, the client uses port 67.
If a DHCP server is in a different network subnet, you need the DHCP Relay to allow DHCP clients in a different network to the DHCP Server to lease IP addresses from the DHCP server.
You can configure a DHCP relay agent on a Windows server or a switch.
Conclusion
There you have it. Clients can now lease IP addresses from DHCP servers outside their network.
I hope you found this itechguide helpful. If you did, kindly spare two minutes to share your experience with our community using the comments form at the bottom of this page.
Alternatively, you can respond to the “Was this page helpful?” question below.
By the way, if you are having trouble getting your configuration to work, read this guide – DHCP Relay Agent Windows Server 2016 Not Working [Fixed].
Nice article! Help me understand…
Wouldn’t the DHCP server be 10.X.X.X(RolesSRV1) yet handing out addresses through the relay on 172.16.X.X(RolesSRV2) to clients?
“In comparison, PC2Win10 is in a different subnet so it cannot lease IP address from the DHCP Server. For PC2Win10 to lease an IP address, it requires a Relay Agent (RolesSRV2) to talk to the DHCP Server (RolesSRV2)” –> Isn’t DHCP Server RolesSRV1.
So in the last steps, it appears you are configuring/pointing to a dhcp server 172.16.0.2 that lives on the 172.16 subnet, not the 10.x network.
Am I off here?