Need a step-by-step guide for installing Active Directory Domain Services? This article provides that and more.
Overview
Active Directory Domain Services (AD DS) is at the core of Microsoft’s Directory Services implementation – Active Directory.
So we can define AD DS as a Microsoft Directory service that manages objects and manages access to them. Examples of objects are users, computers, printers.
This step by step guide will discuss the requirements for installing AD DS in Windows Server 2016. It will then show you how to install Active Directory Domain Services. Finally, the guide will discuss some important AD DS configurations and administration.
Prerequisites for Installing AD DS
- The Server MUST be configured with a static IP address.
- Existence of a DNS Server that support the service (SRV) resource record type and dynamic update protocol.
How to Install Active Directory Domain Services
Before I show you how to install AD DS, first I will show you how to set static IP address on your server. Then I will show you how to install and configure DNS.
How to Configure Static IP Address in Windows Server 2016.
As I said earlier, one of the requirements of installing Active Directory Domain Services is that the server must be configured to use a static IP address. Below are the steps to complete this task:
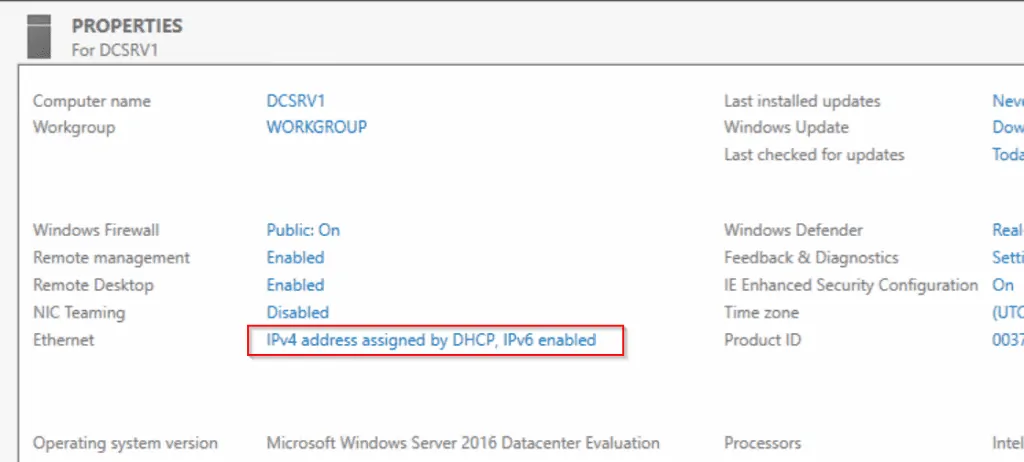
- Open Server Manager (the quickest way to open server manager is to click the search icon on the task bar then search server manager.
- Beside “Ethernet” click “IPv4 address assigned by DHCP, IPv6 enabled”. This will open available NICs.
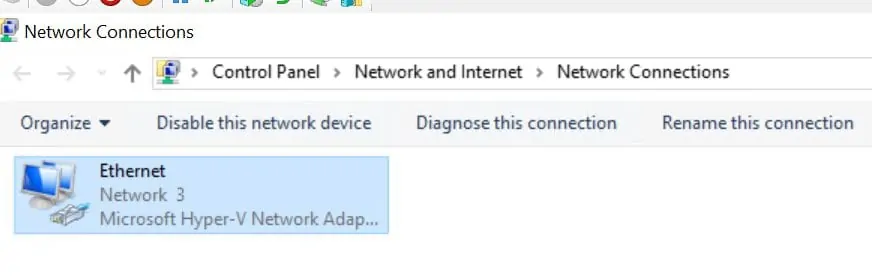
- Click the NIC you wish to set static IP address for. Mine is Ethernet Network 3….
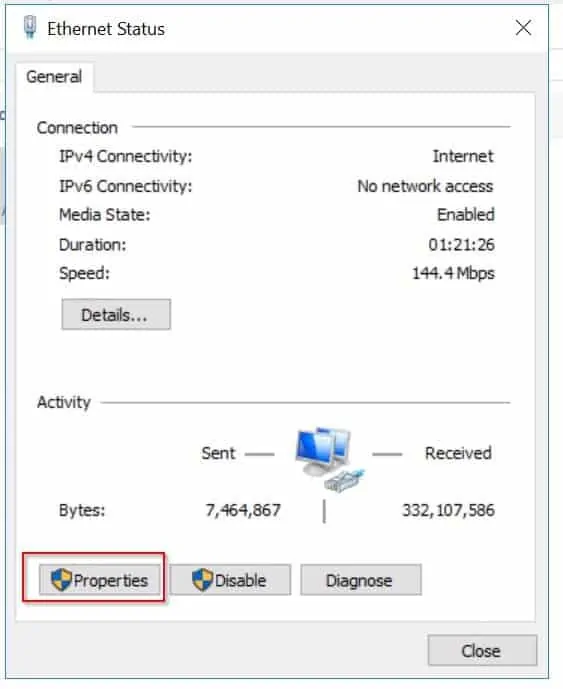
- The NIC status page will open (see image below). Click Properties (the highlighted portion of the image).
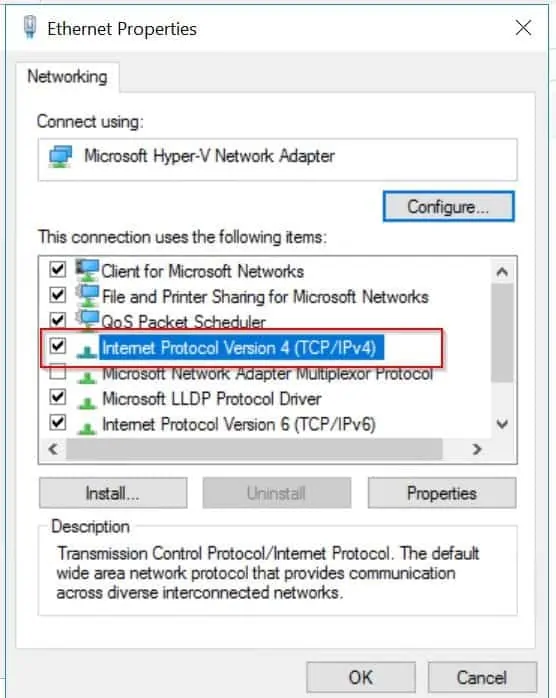
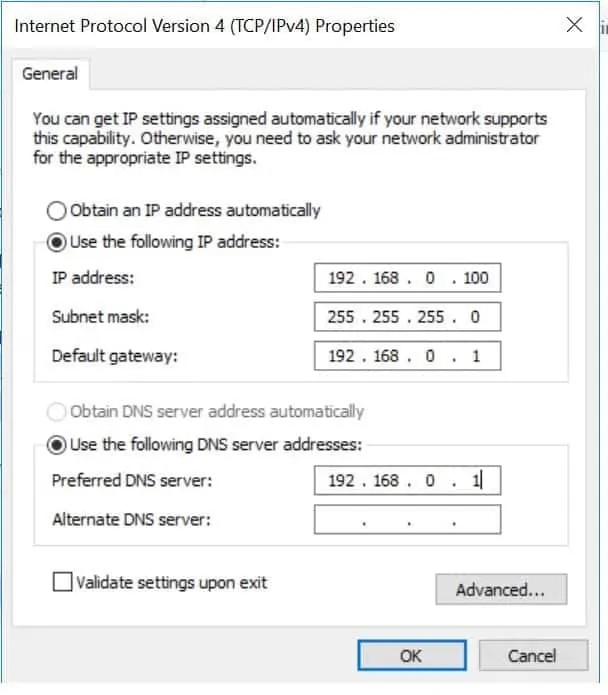
- The image below will open. Highlight “Internet Protocol Version 4 (TCP/IPv4)” then click Properties.
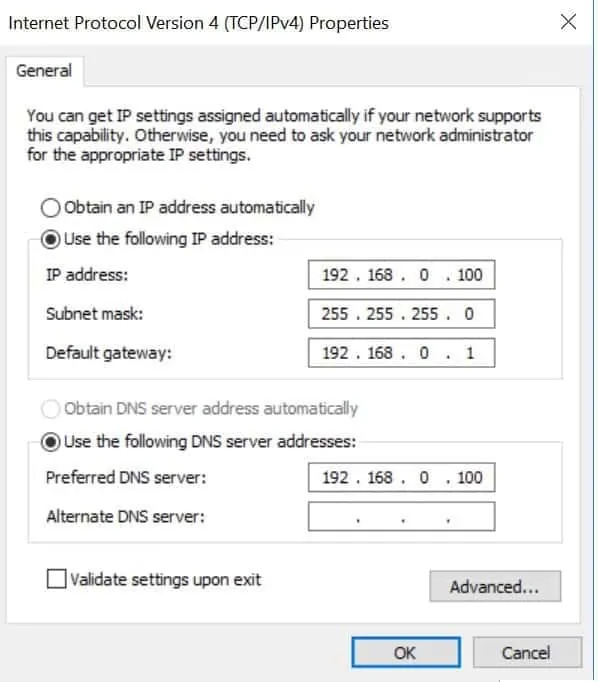
- The page to configure IP address appears (see sample image below). Select “Use the following IP address” then enter an IP address, a Subnet Mask and a Default Gateway. Also, select “Use the following DNS Servers”. When you finish, to save your changes click Ok.
- To close the opened dialogue boxes, click Close twice.
The first requirement for installing AD DS is now complete. Next, I will show you how to install and configure DNS for Active Directory Domain Services.
Install DNS and Active Directory Domain Services Roles
The next prerequisite for installing Active Directory Domain Services is DNS. To make it faster we will install DNS and AD DS roles at the same time. But we will configure DNS before promoting the server to a Domain Controller.
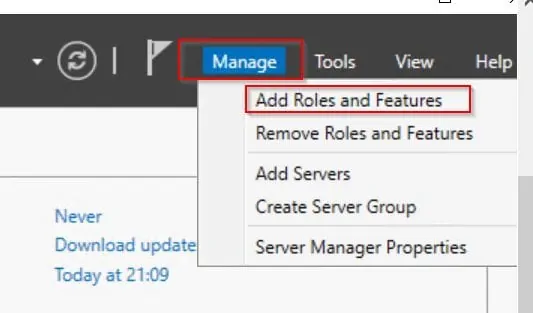
- From Server Manager, click Manage then select Add Roles and Features.
- On the “Before you begin” page, click Next.
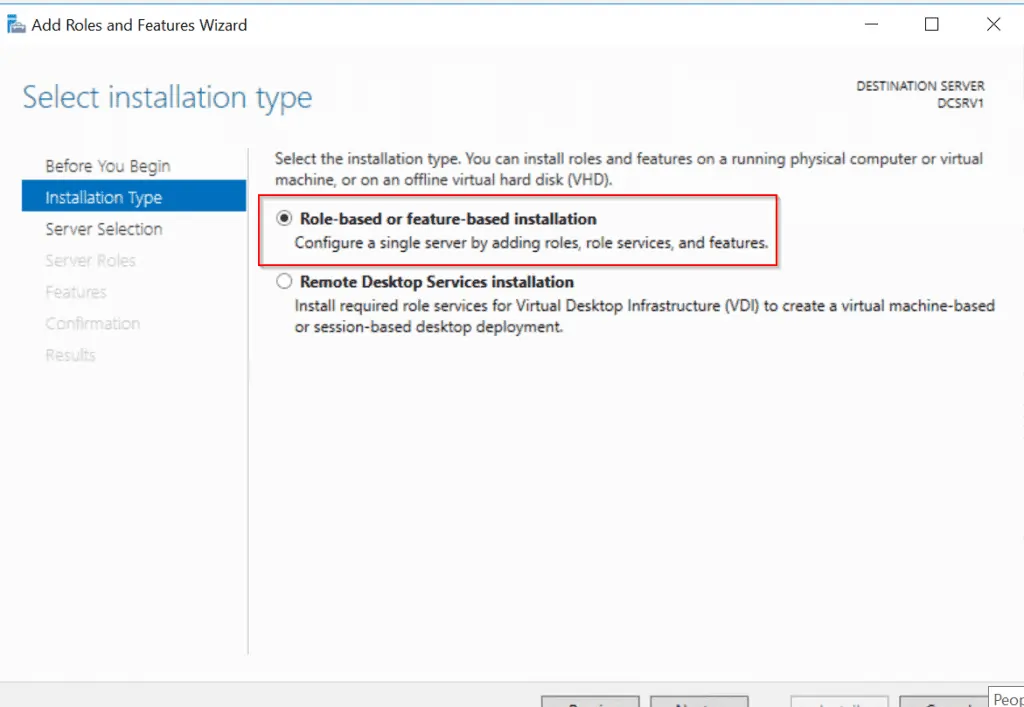
- On the “Select Installation type” select “Role-based or feature-based installation” and click Next.
- Next, on the “Select Destination server page”, select the server you wish to install DNS and AD DS and click Next.
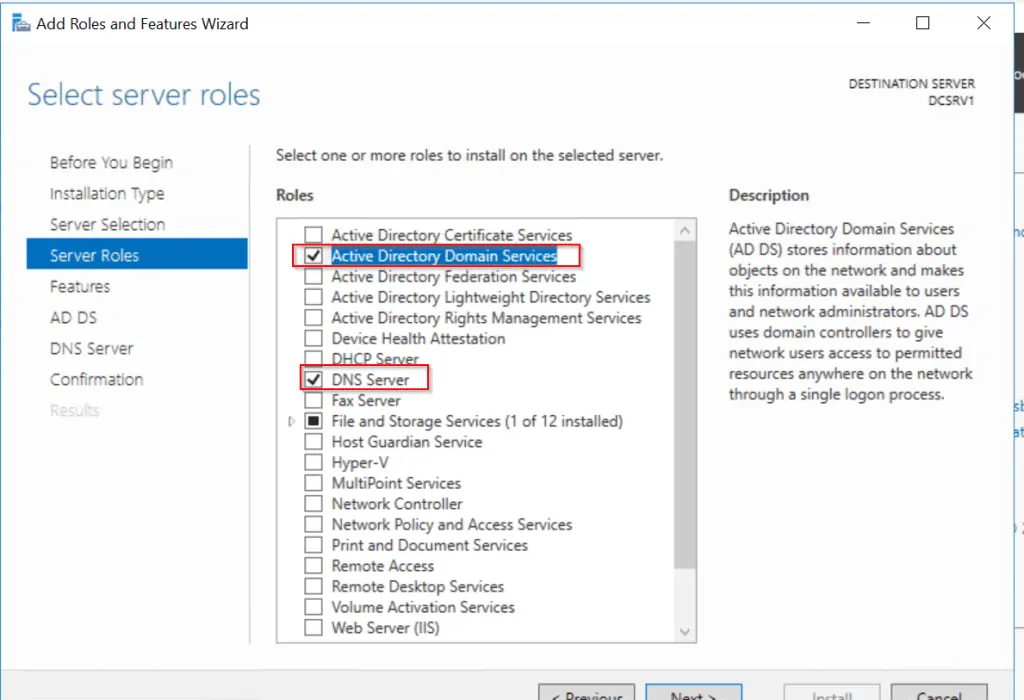
- Next page presents option to select the roles you wish to install. Check the boxes beside Active Directory Domain Services and DNS Server. Click Next.
- On the “Select features” page, click Next. Note the information provided in the “DNS Server” page then click Next.
- Also note the information provided in the AD DS page and click Next to continue.
- Finally, you are on the “Confirm your installation selection” page. Check the box “Restart the destination server automatically if required”, review your selected feature then click Install.
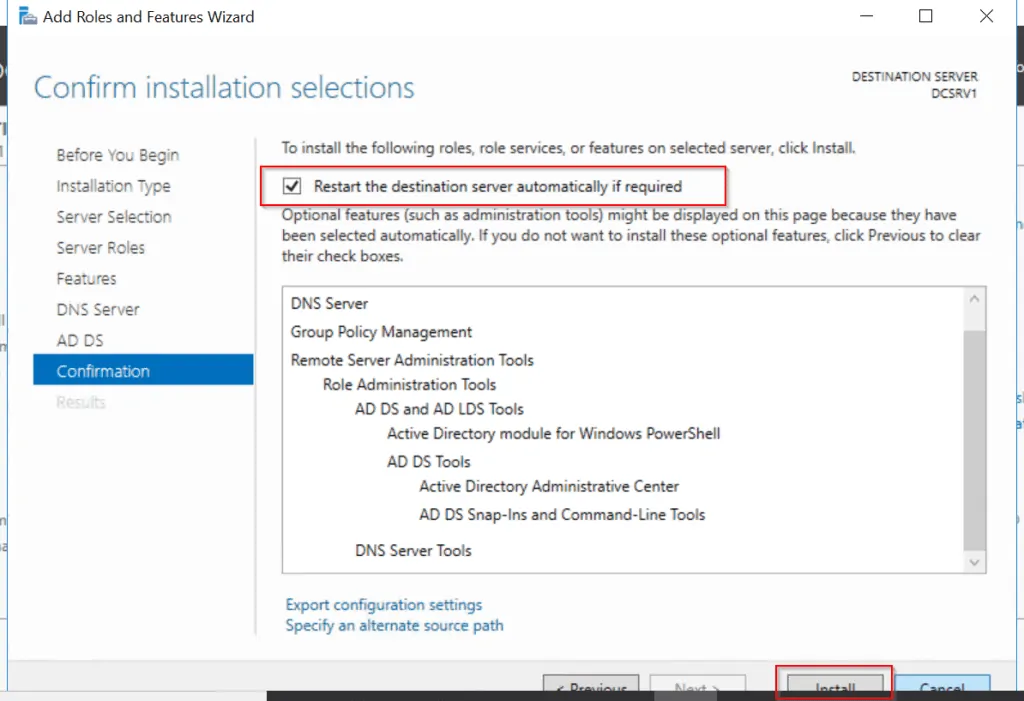
Wait for the roles to install. When the installation completes move to the next step.
Configure DNS For Active Directory Domain Services (Forward Look-up Zone)
The next step is to configure Forward Lookup DNS Zone. To complete this task, follow the steps below:
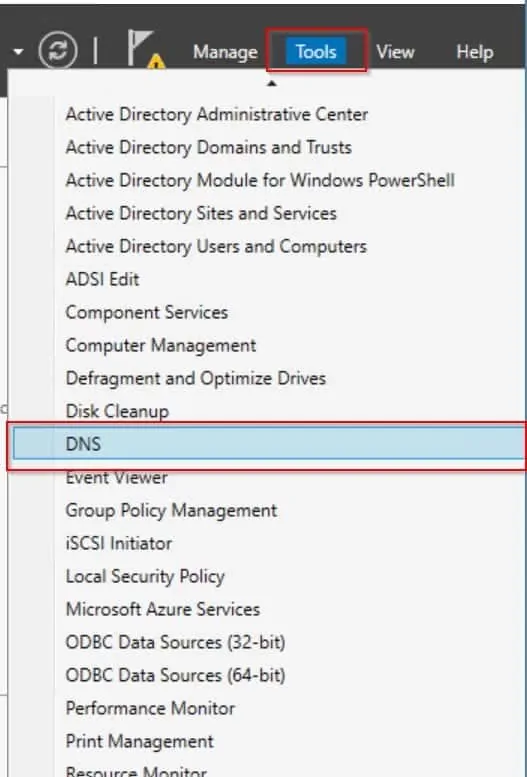
- From Server Manager, click Tools, then select DNS.
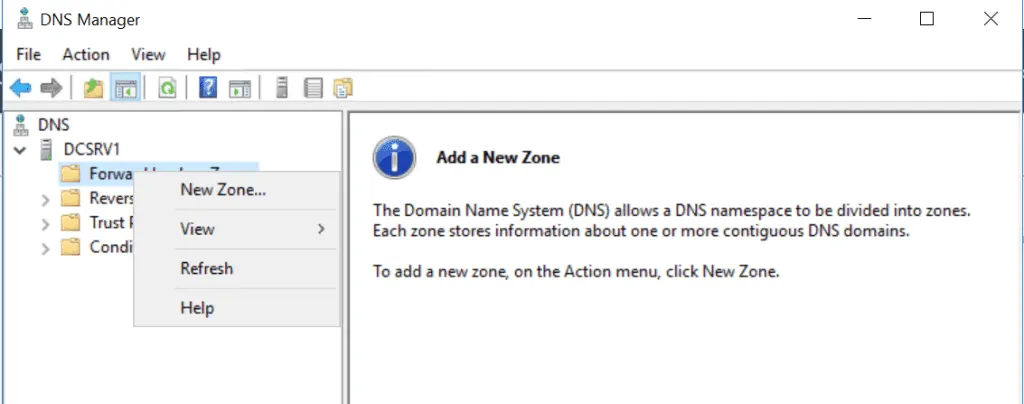
- Next, create a Forward Look up Zone. On the DNS Manager console, expand your server name (mine is DCSRV1).
- Right-click Forward Lookup Zones and click New Zone.
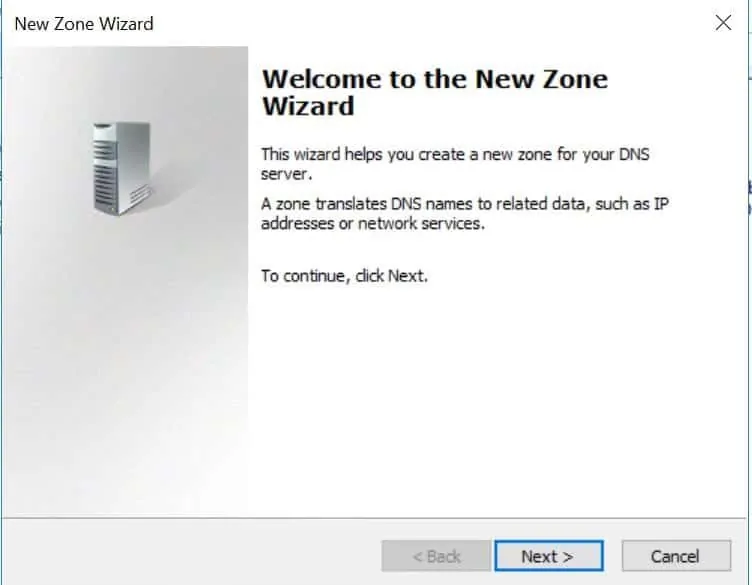
- The New Zone wizard will open. To proceed, click Next.
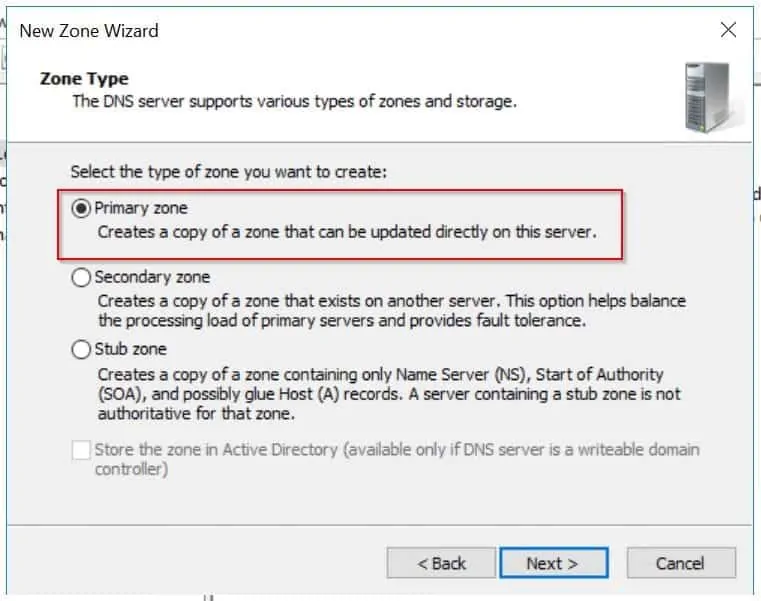
- On the Zone Type page, select Primary zone and click Next.
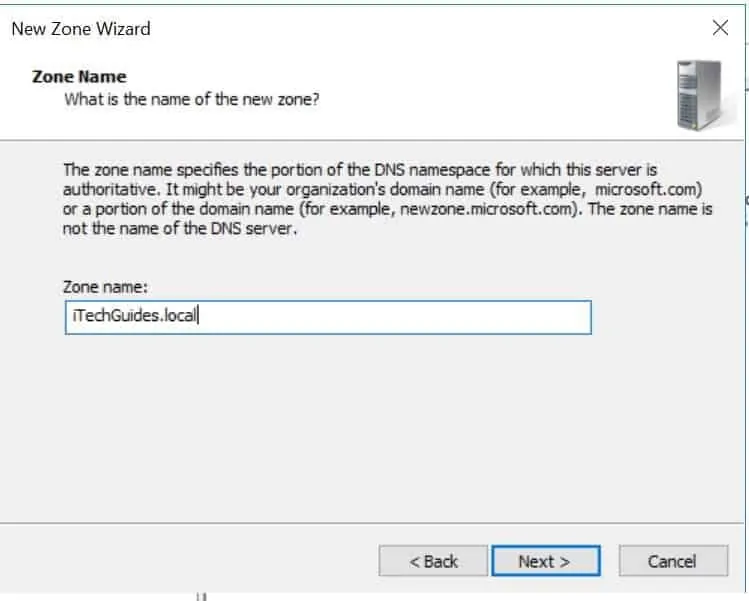
- Next, enter the DNS zone name in Fully Qualified Domain Name (FQDN) format. In my example, iTechGuides.local – it could also be .com. To proceed, click Next.
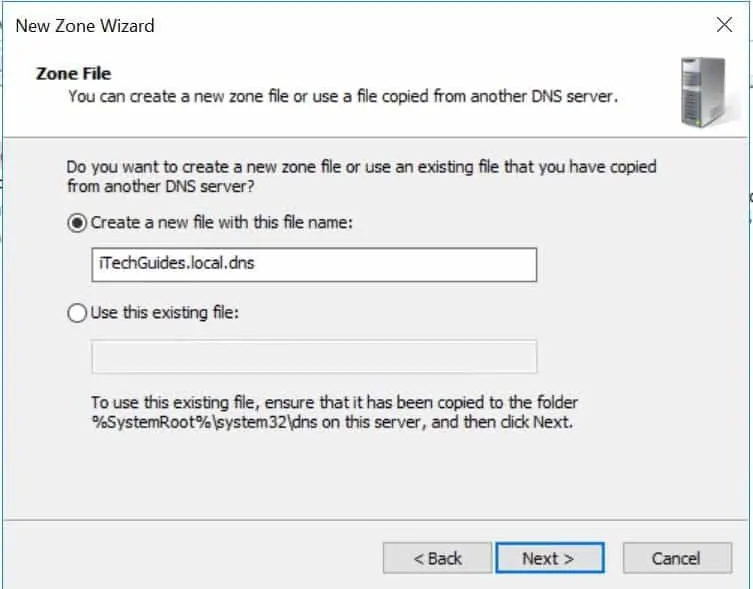
- Accept the suggested zone file name and click Next.
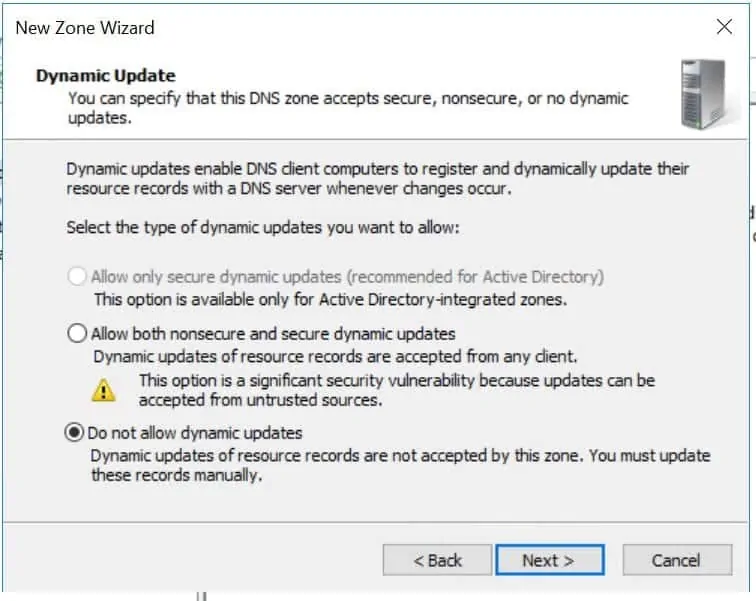
- On the Dynamic Updates page, accept the default, Do not allow dynamic updates. To proceed, click Next.
- To create your primary zone, click Finish.
Configure DNS For Active Directory Domain Services (Reverse Look-up Zone)
Next, you need to create a reverse look up zone. The steps below will guide you through this task.
- Still on the DNS Manager right-click Reverse Lookup Zones and click New Zone. On the welcome screen, click Next.
- On the Zone Type page, ensure that Primary Zone is selected then click Next.
- Select IPv4 reverse Lookup Zone then click Next.

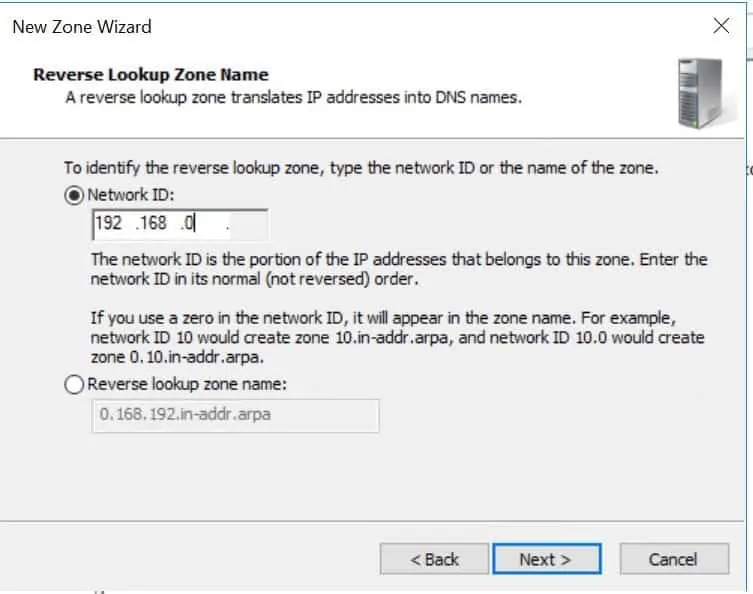
- Enter the Network ID portion of your IP address. The wizard will automatically create the reverse lookup zone name. To Proceed, click Next.
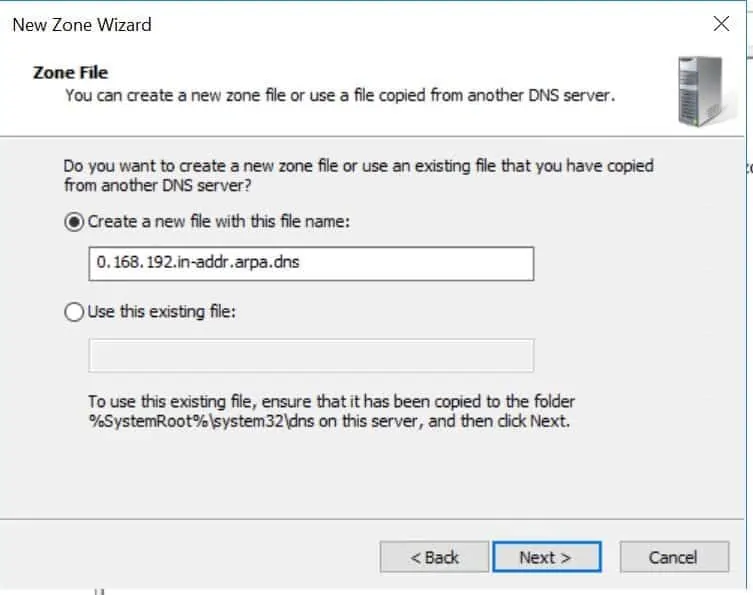
- Review the reverse lookup zone file name then click Next.
- On the Dynamic Updates page, accept the default, Do not allow dynamic updates. To proceed, click Next.
- To create your reverse lookup zone, click Finish.
Configure Additional Prerequisites
Before you promote your server you need to compete two more tasks. First, update the server to use its own DNS. To complete the task, open the NIC and change the DNS settings to the local server IP.
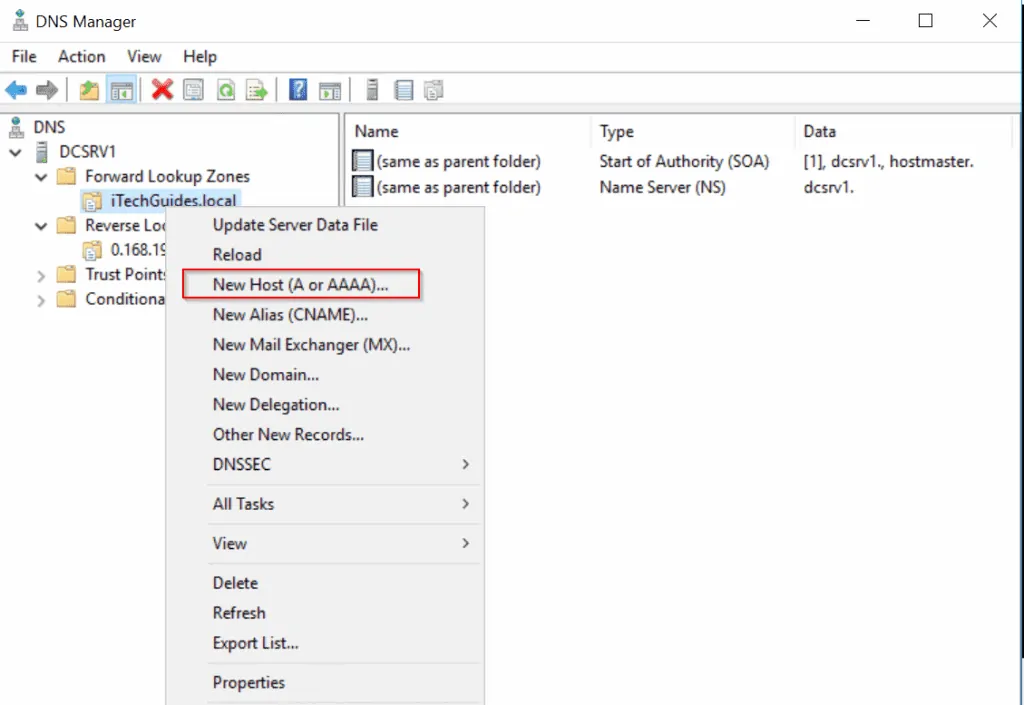
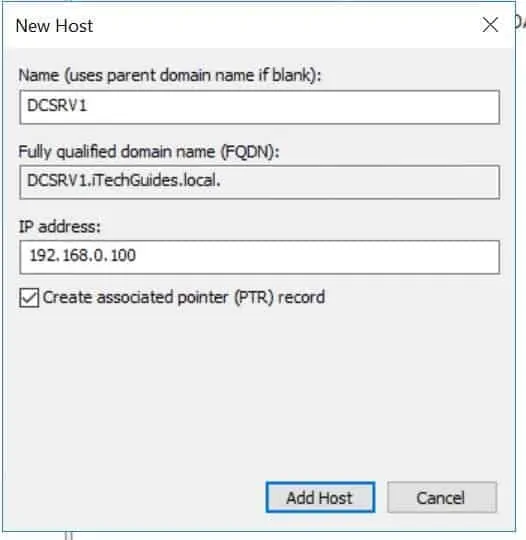
Next, create an A record for the server. Open DNS Manager, right-click iTechGuides.local zone and select New Host (A or AAAA…).
- The New Host dialogue box opens. Enter the name of the server then its IP addres. Finally, check the box Create associated pointer (PTR) record. To create the record, click Add Host.
Promote Your Server to a Domain Controller
Now that you have configured the prerequisites for AD DS, it is time to promote your server to a Domain Controller. The steps below will guide you through this task.
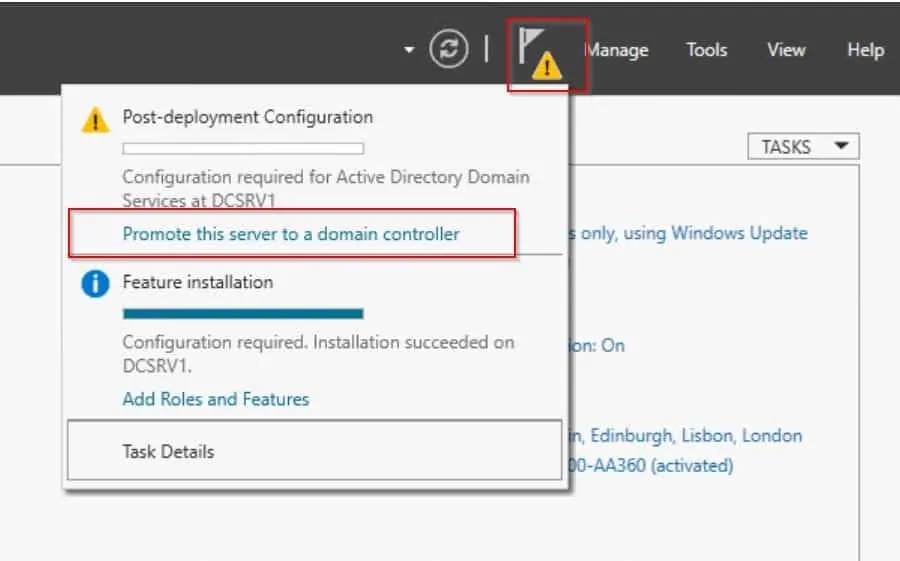
- Back to Server Manager, on the top right corner of the page, click the yellow amber notification. Then click Promote this server to a domain controller.
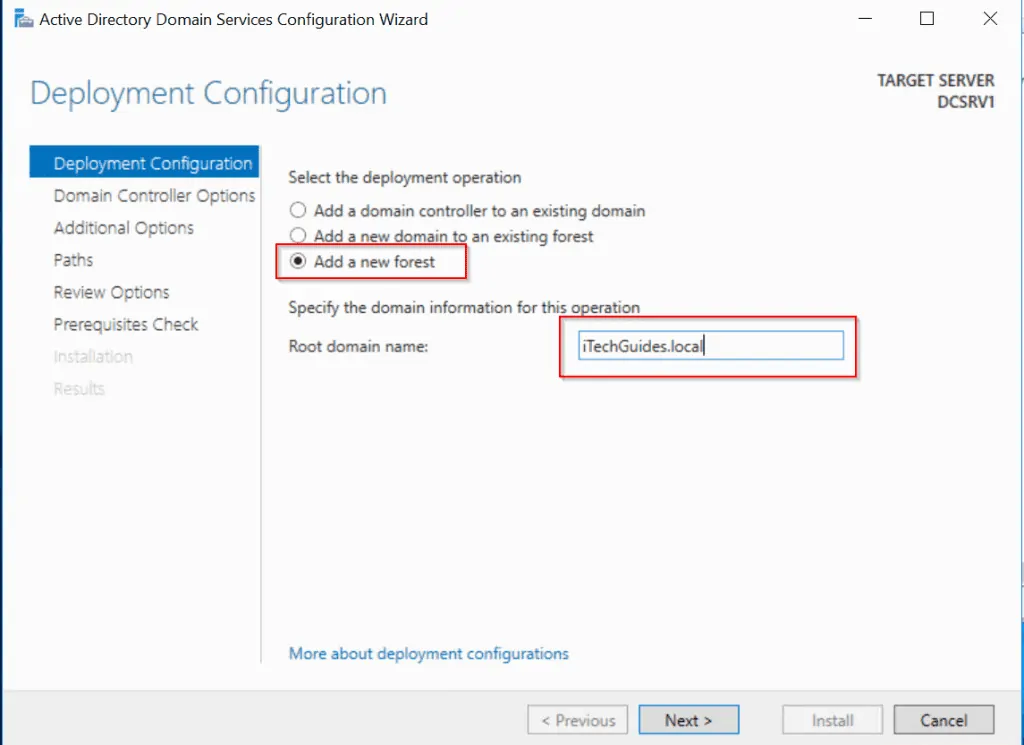
- On the Deployment Configuration page, select Add a new forest. Then on the Root domain name enter the exact name of the forward lookup zone you created earlier. To Proceed, click Next.
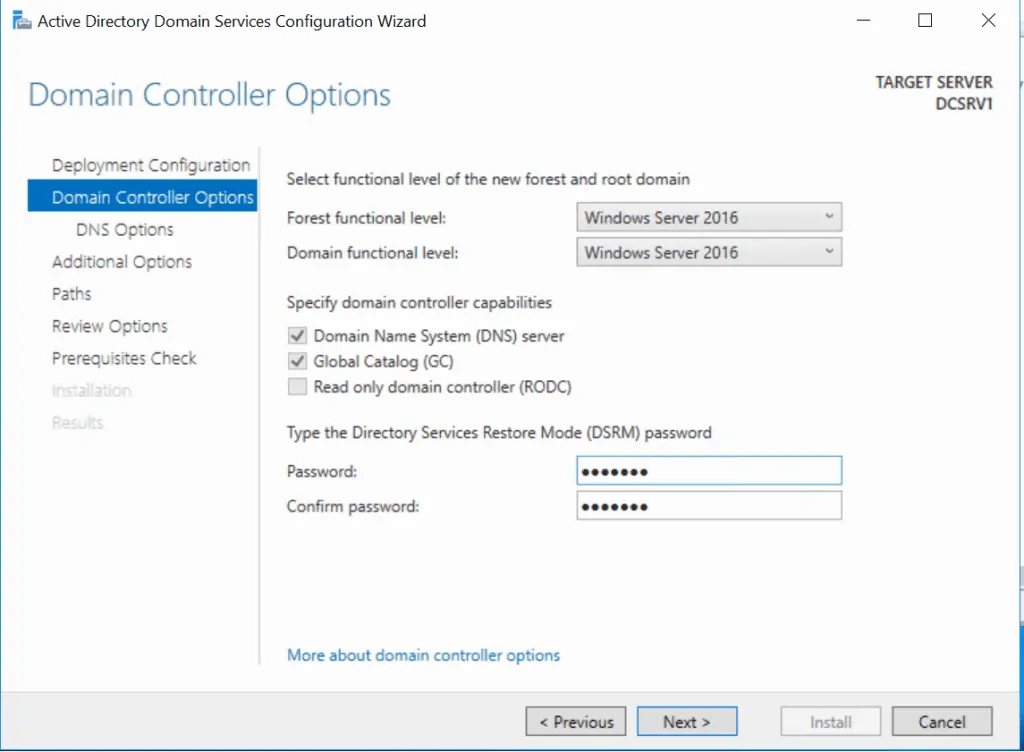
- The Domain Controller Options page loads. If you are adding a Windows Server 2016 DC to an existing domain, read about Forest and Domain Functional Levels.
However, I selected Windows Server 2016 for Forest and Domain Functional levels because I am in a test environment.
- Finally, for this page, enter the Directory Services Restore Mode (DSRM) password. Then click Next.
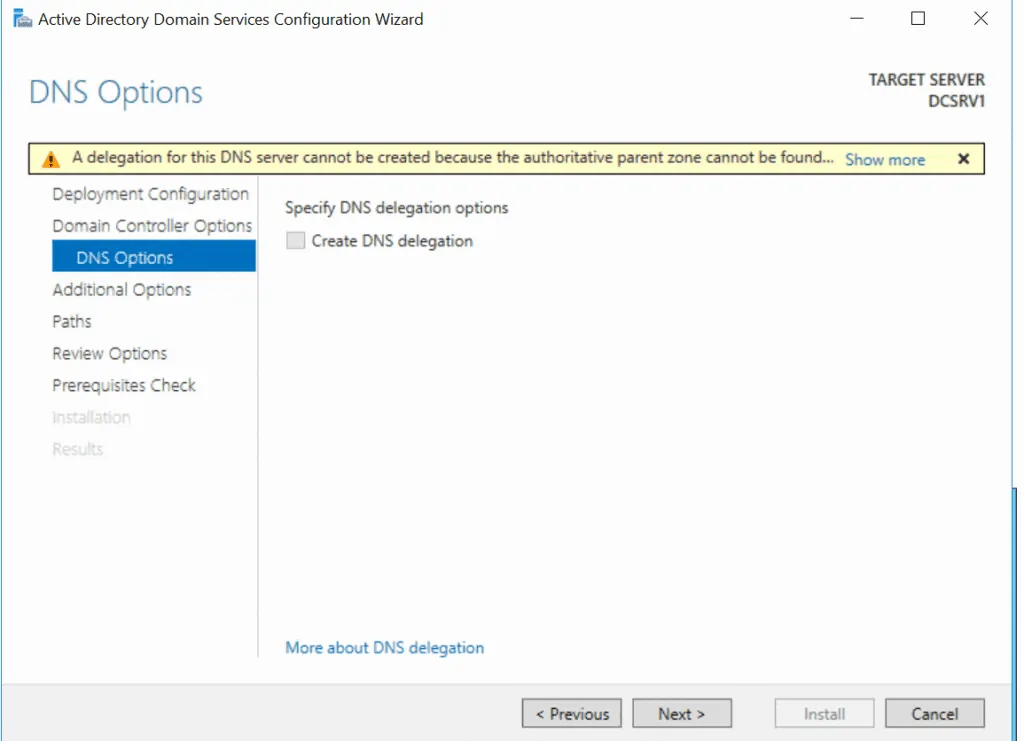
- Ignore the warning message on the DNS Options page. Click Next. However if you are adding a domain to an existing domain, read the warning message.
- On the Additional Options page, accepts the suggested NetBIOS domain name and click Next.
- Accept the suggested Paths and click Next. However, if you are in a production environment, you may want to move the paths to a drive other than drive C.

- Review your options then click Next. The wizard will run some prerequisite checks. Finally, review the results of the check then click Install.
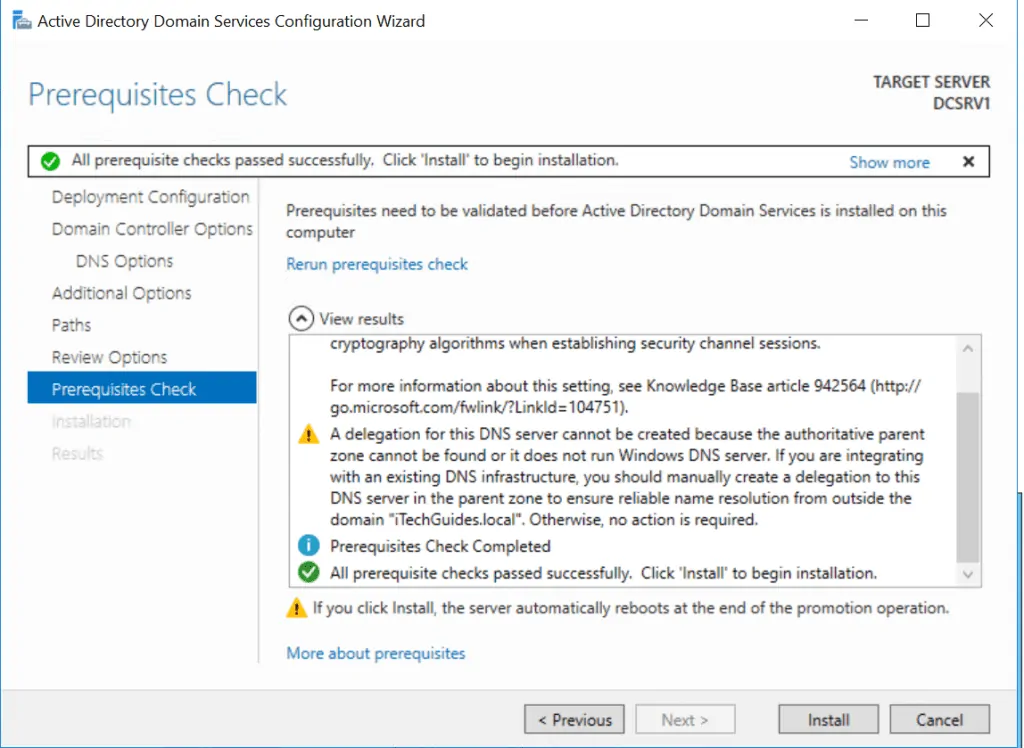
Once the server promotion is completed, the server will reboot.
Convert DNS Zones to Active Directory Integrated
Before we move on to AD DS configuration, let’s convert the DNS zones we created earlier to Active Directory integrated zones. The steps below will guide you through the task.
- From Server Manager, Open DNS. Expand the Server Name, then expand Forward Lookup Zones. Finally, right-click your forward lookup zone name and select Properties.
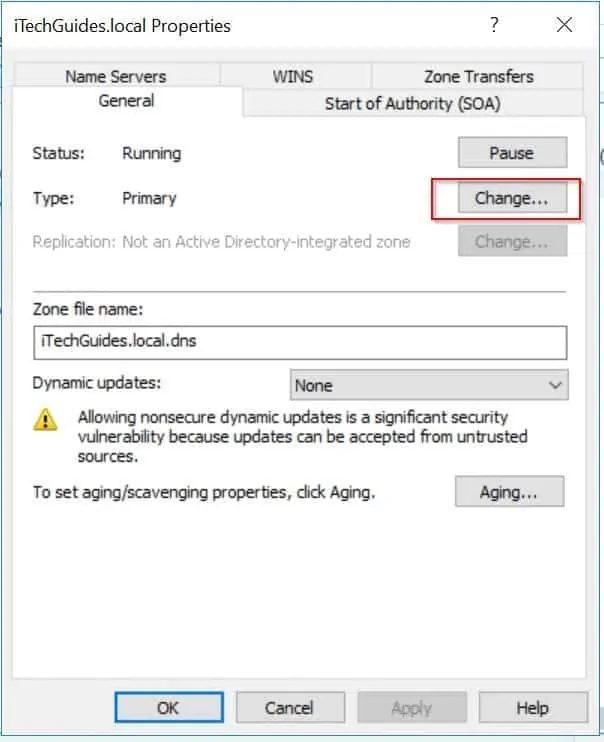
- Beside Primary, click Change. Check the box Store the zone in Active Directory...Then click Ok. Click Yes to confirm.

Repeat the task for the Reverse Lookup Zone.
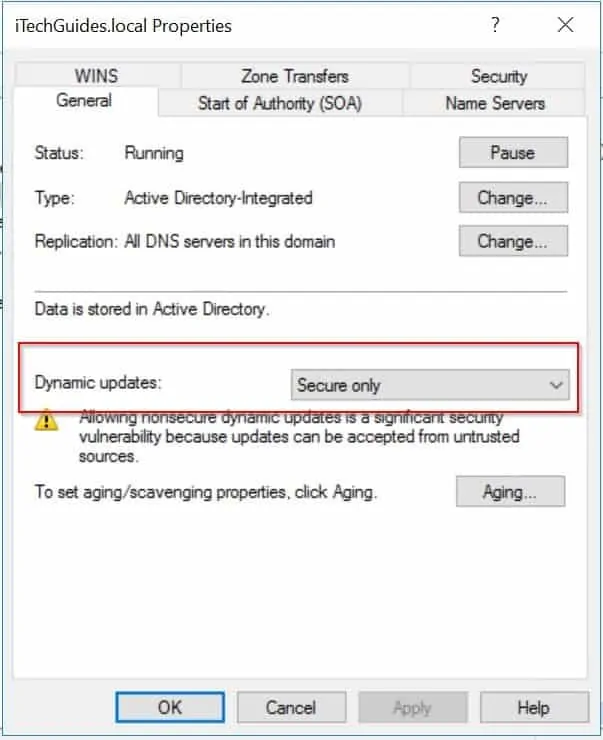
Next, configure Secure Dynamic updates. On the Properties of the zone, General tab, click the drop-down beside Dynamic updates. Select Secure Only. Finally, to save your changes click Ok.
Configure AD DS
Now that we have installed Active Directory Domain Services and promoted the server to a DC, next step is to perform some AD configurations.
Transferring RID, Infrastructure, PDC Operations Master Roles
If you want to learn about Operations Master Roles, read my articles on
What is Active Directory (Top 50 AD Questions Answered) and Active Directory: Concepts, Installation & Administration
To transfer RID, Infrastructure and PDC Emulator FSMO Roles open Active Directory Users and Computers. You can access AD Users and Computers via Server Manager, Tools. Then follow the steps below:
- First, connect to the Domain Controller you wish to transfer the roles to. Then right-click Active Directory Users and Computers and click Change Domain Controller.
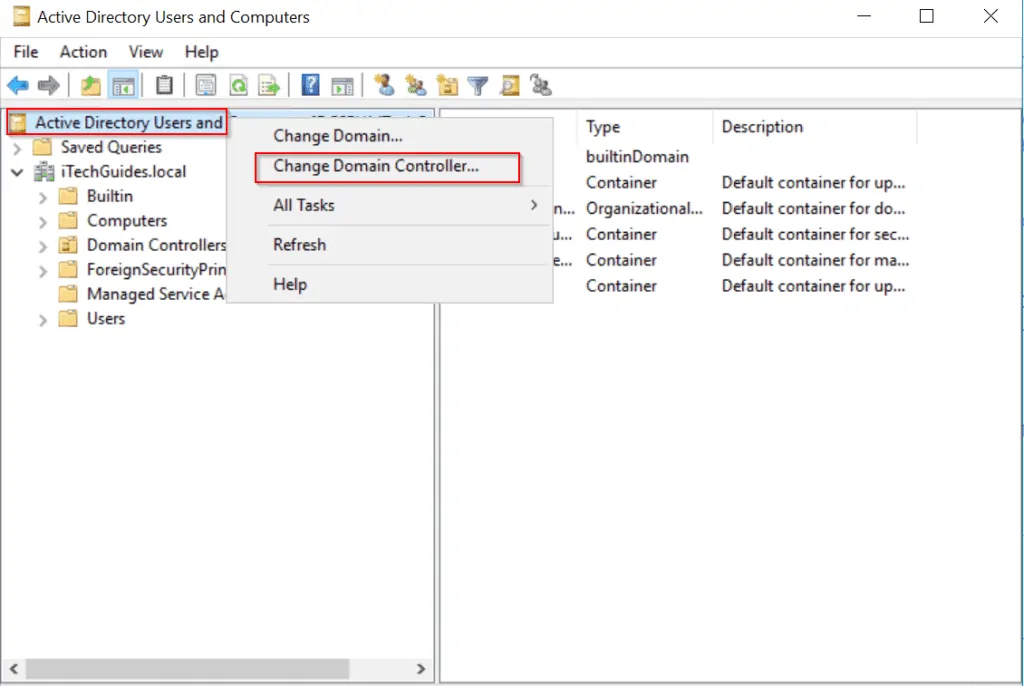
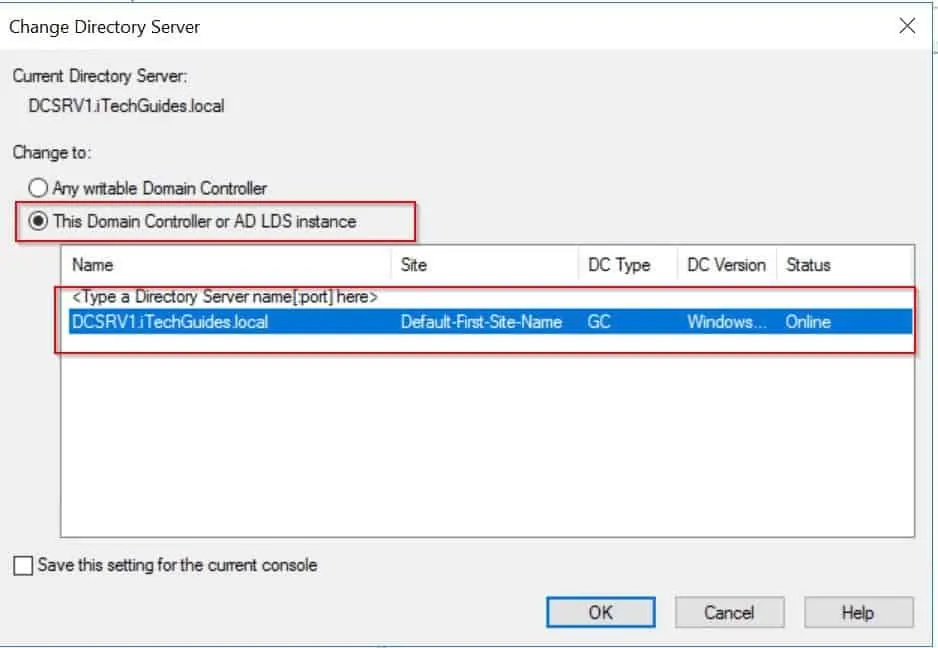
- Next, Select “This Domain Controller or AD LDS instance”. Then select the DC you wish to transfer the role to and click Ok.
- To change the Operations Master Roles, right-click the domain name then click Operations Masters.
- To transfer the RID, PDC or Infrastructure Master roles, click the RID, PDC or Infrastructure tabs. Next, click Change.

Transferring Domain Naming Master
To transfer the Domain Naming Master, open Active Directory Domains and Trusts.
Change to the DC you wish to transfer to before proceeding to the next task.
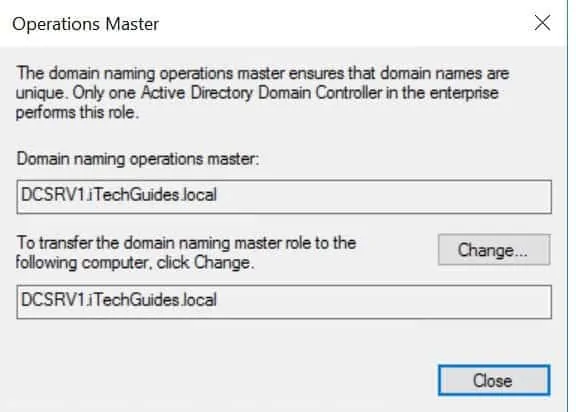
- Right-click Active Directory Domains and Trust, then select Operations Masters.
- Then to transfer the role, click Change.
Transferring the Schema Master Role
- Open command prompt as Admin and run the command below
regsvr32 schmmgmt.dll
See result below:
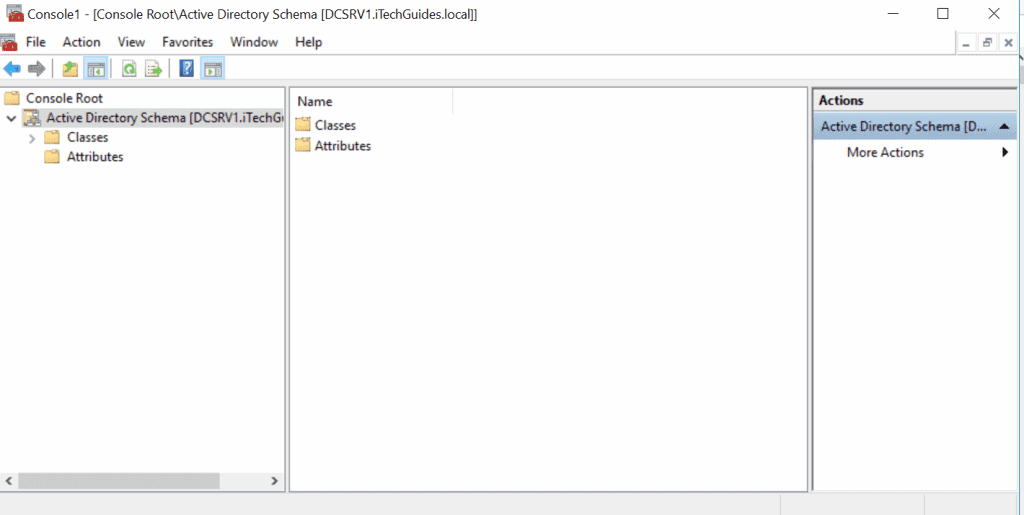
- Next step, open MMC. Then click File, Add or Remove Snap-in.
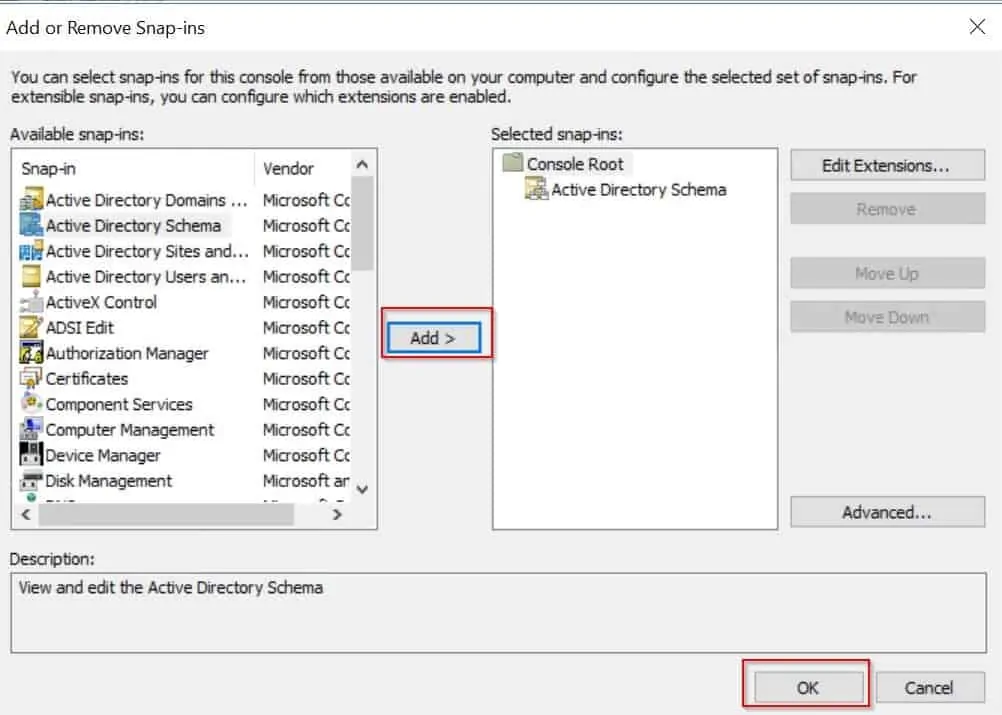
- The AD Schema MMC loads
Conclusion
There are so many more configurations you can perform in Active Directory and this article has covered most of them.
I hope you found this guide helpful. If it was helpful, please take two minutes to share your experience using the comment form at the bottom of this page.
Alternatively, you can respond to the “Was this page helpful?” question below.