If you want your PowerShell script to auto run at specific intervals you need to schedule the PowerShell script with Windows task scheduler.
There are other tools you can use to schedule a PowerShell script to run at specified times but this guide demonstrates how to do this with the Windows task scheduler
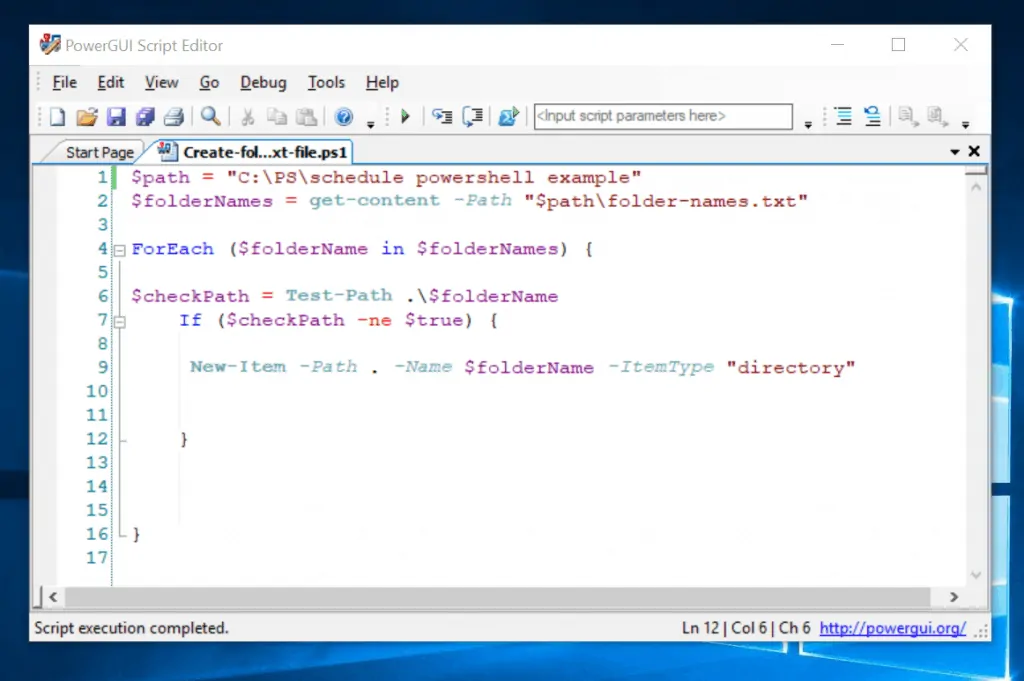
I will use the PowerShell script shown below for demo on this guide. The script creates folders if the folder does not exist in the directory.
To Schedule a PowerShell Script to auto on a Windows Server, follow the steps below:
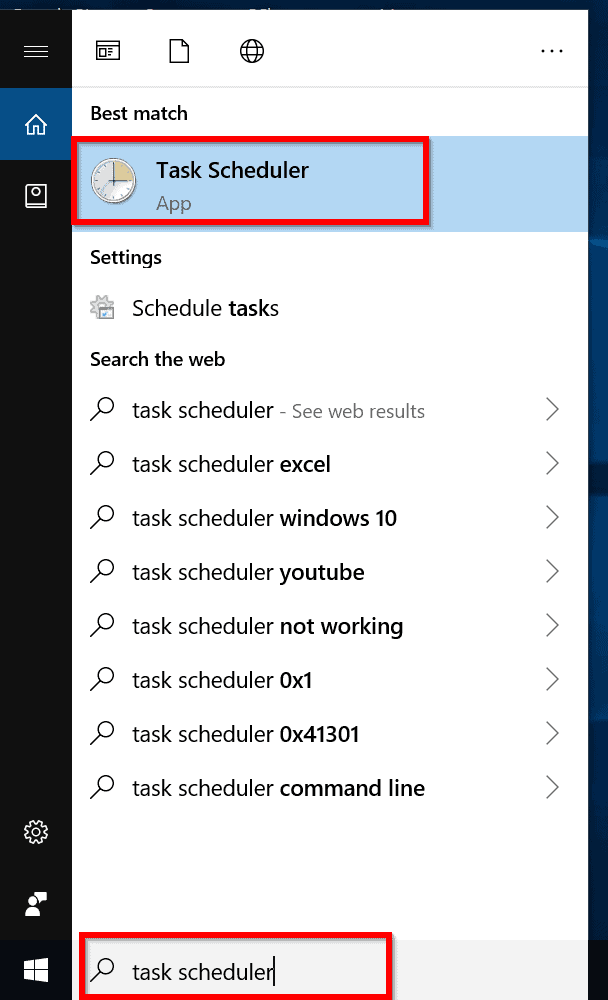
- Open Windows Task Scheduler – type task scheduler into the search box. Then click Task Scheduler.
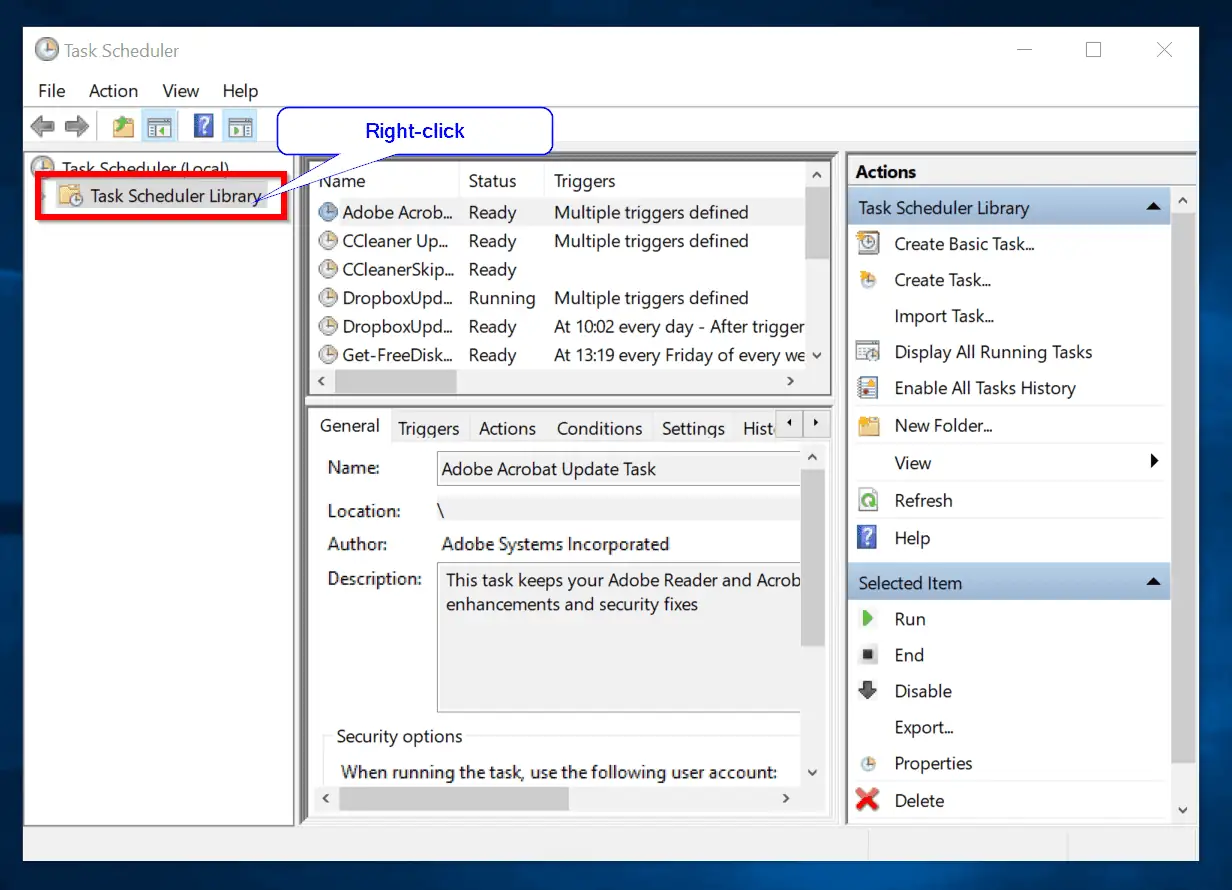
- Create a New Task – right-click Task Scheduler Library. Then select Create Task.
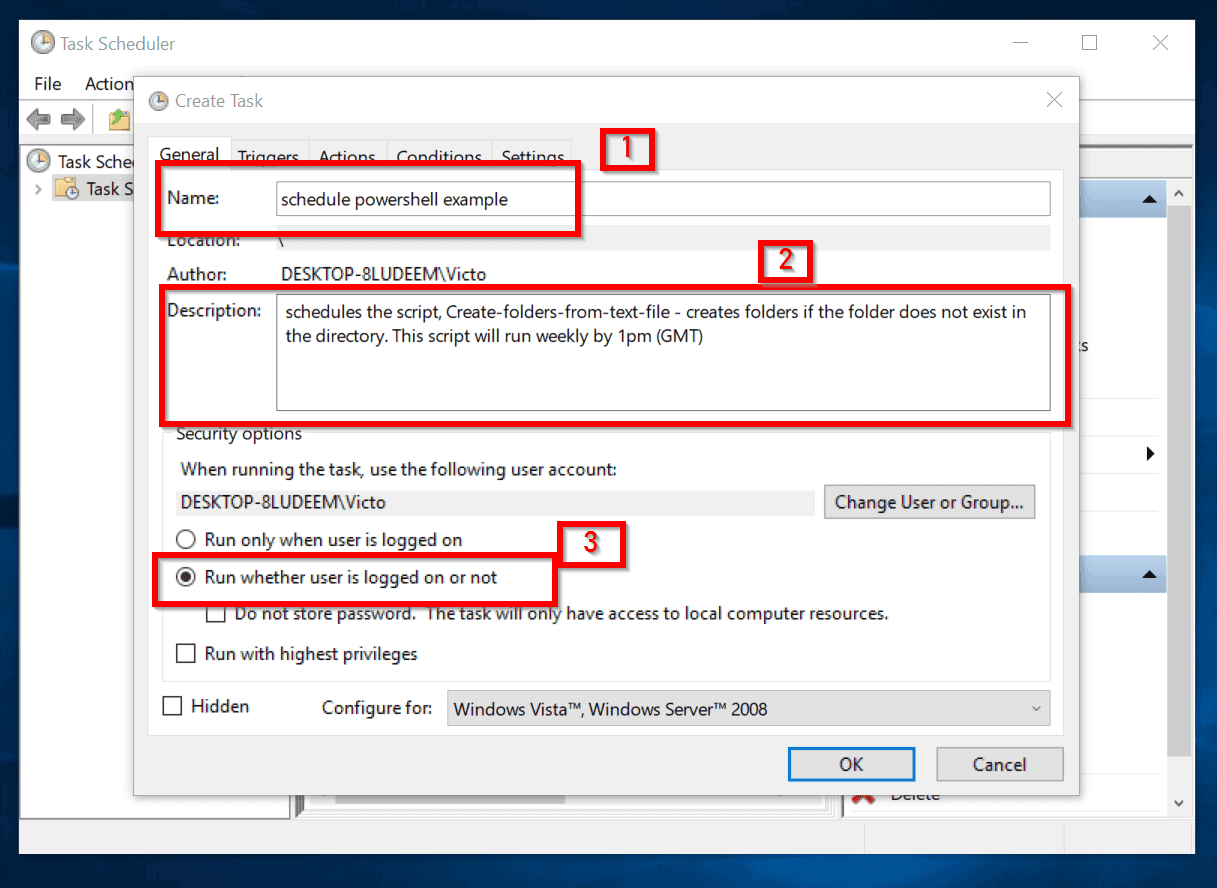
- Name the task and Enter an optional description – on the general tab of the new task give the task a name using the name field. You may also describe the task using the description box.
On the box labelled 3, be sure to select Run whether user is logged on or not. If you select the first option, the scheduled PowerShell script will not run unless the user is logged on.
- Create a Trigger to Auto run the Scheduled PowerShell Script
To do this, click the triggers tab. Then click New. The New Trigger window will open.
On the Begin the task drop-down, ensure that On a schedule is selected. Then select whether you want to Schedule the PowerShell Script to run Daily, Weekly or Monthly.
You may also wish to schedule the PowerShell script to repeat at specific interval. To do this, check the Repeat task every box. Then click the drop-down to select a period.
Another very important configuration is the Stop task if it runs longer than setting. Check this box to automatically stop the scheduled task. You may also set an expiry date for the task. The task will stop running after the set date.
When you finish configuring the trigger, click Ok.

- Schedule the PowerShell script using the Actions tab
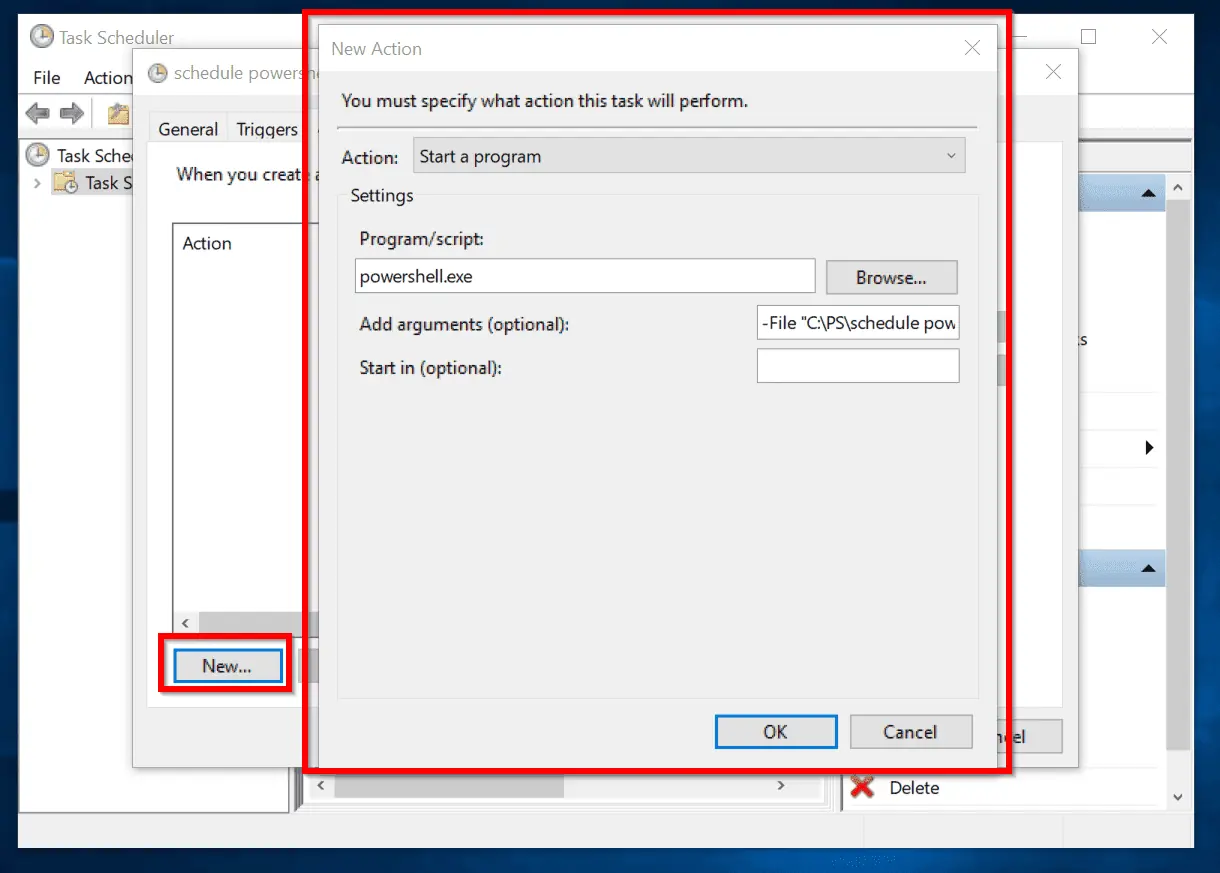
Click the Actions tab. Then click New. On the Action drop-down, ensure that Start a program is selected. Then type PowerShell.exe on the program/script field.
Next, enter the -File followed by the full path to the script on the Add arguments (optional) field. Here is the command I typed in the Add arguments (optional) field:
-File “C:\PS\schedule powershell example\Create-folders-from-text-file.ps1”
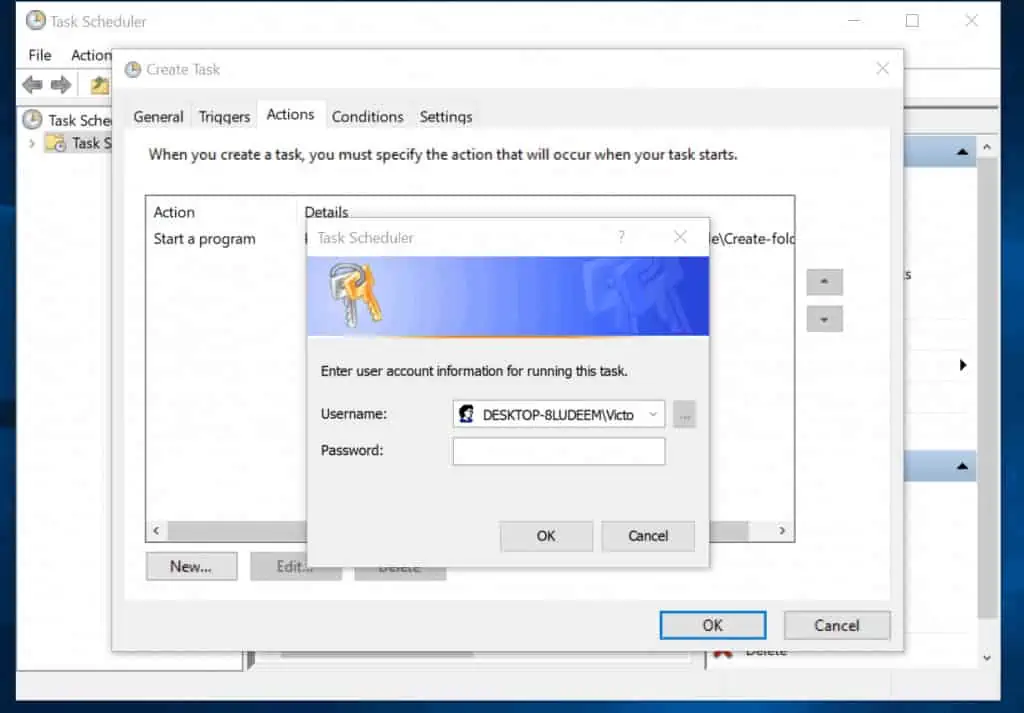
When you finish click Ok. Then click Ok again. When you click Ok, the second time, you will be required to confirm your password.
- On the Username field, use the format ComputerName\username or Domainname\Username.
- When you finish, here is what the Actions tab will look like. Effectively, you are asking task scheduler to run this command –
PowerShell.exe -File "C:\PS\schedule powershell example\Create-folders-from-text-file.ps1"
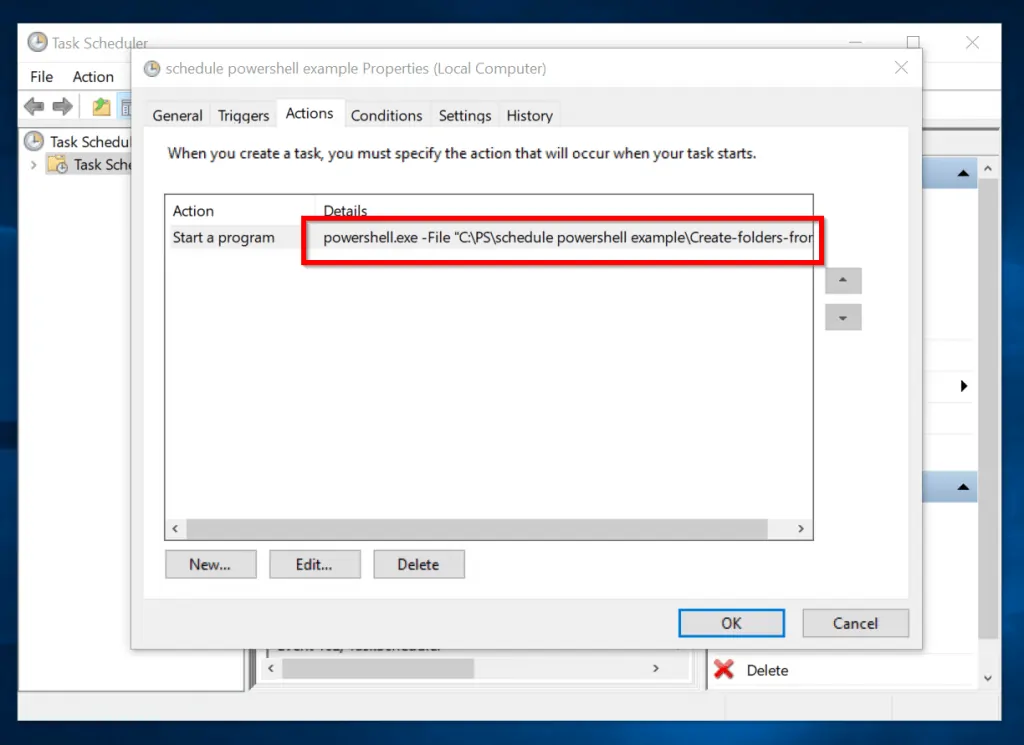
For your script to run you need to use the -File parameter of the PowerShell.exe command in the actions tab. This is the trick. Otherwise, your script may not run.
Hope you were able to schedule your PowerShell script with the steps I provided above. Let me know by responding to the “Was this page helpful?” question below.


Just wanted to say: “Thank you!”
Thank you for help
I am new to Powershell and your article contains part of what I was looking for. I need to write a script to search for a particular file. If the file is found, powershell does something otherwise, nothing.
I need this to run the way you have explained in your article. I am having problems finding the right way to write the script to find the file. I have looked all over the web and I am not coming up with any satisfactory suggestions. Could you possibly point me to somewhere that I can find some answers. I have also looked for Powershell Users forums without any success. Any help you can offer will be greatly appreciated.
Thank You,
Mariwana Hussaini-Ibrahim
You can use the script below:
Get-ChildItem -Path “file-folder-Path -Recurse -Include *filepatten* | Foreach-Object {
Use the $_ pipeline variable to perform the action on each result here
}