Are you unsure of how to underline text in WordPress? No problem, as this guide presents several methods to achieve this formatting effect.
Option 1: Style text With an Underline Using WordPress Block Editor
One way to style a text as underline on your WordPress website is by using the default WordPress block editor. The following procedures below demonstrate how to accomplish that.
- Go to the backend dashboard of your WordPress website using an administrator account. Then, among the menus on the dashboard’s left pane, click Pages or Posts, depending on where you want to underline text.

- After that, click the title of the page/post where you want to underline the text. For this illustration, I will select the “Hello world!” post on my WordPress site.

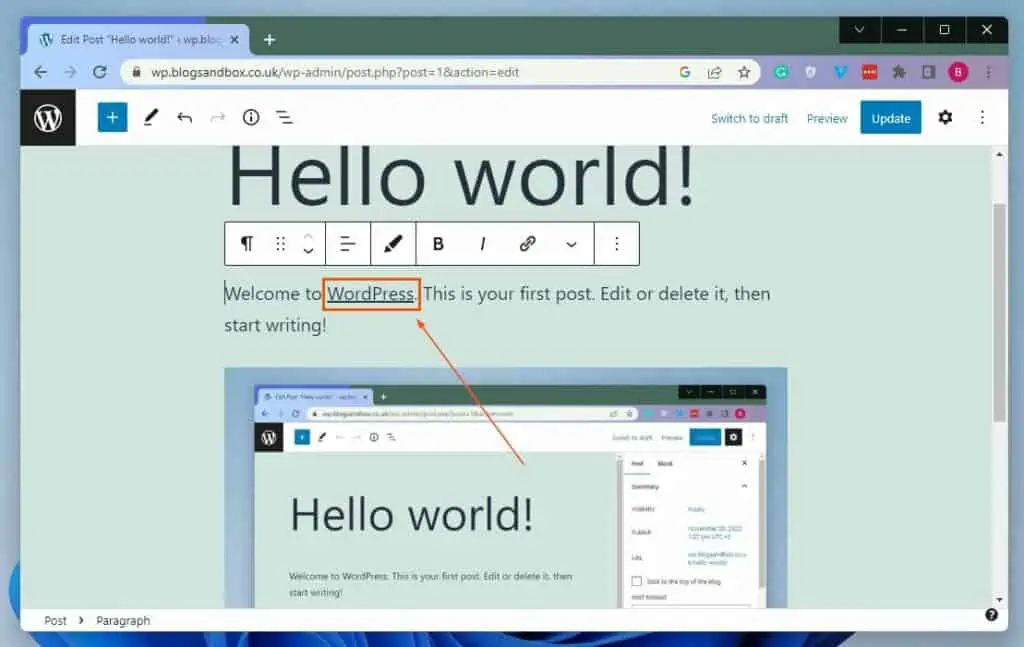
- When the post/page opens, select the text(s) you want to underline. For instance, I want to underline “WordPress.”
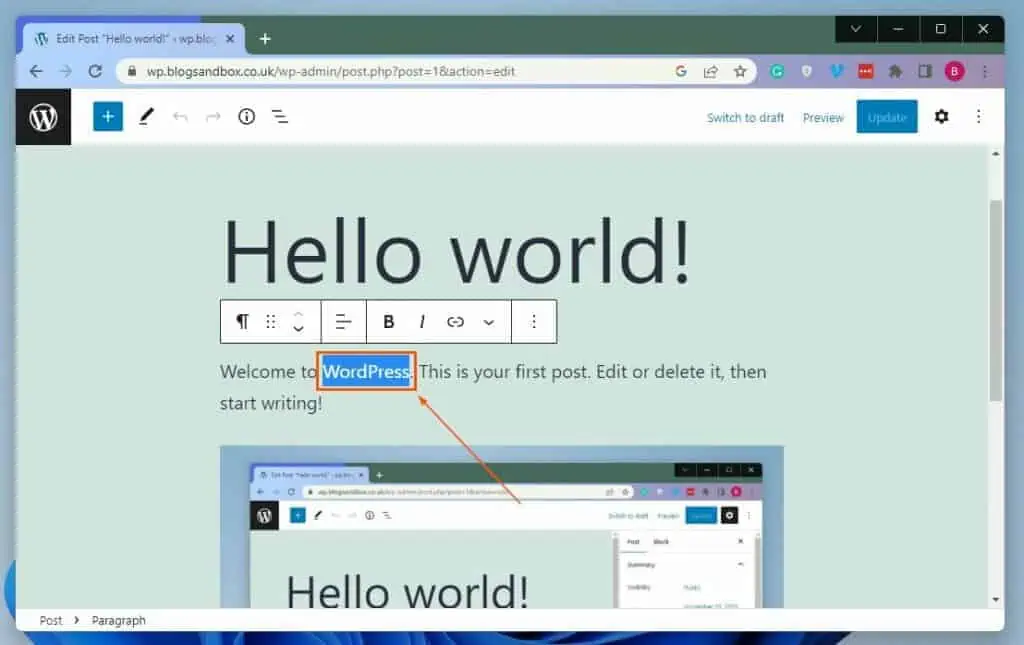
- Next, click the Settings icon at the top right corner of the page.
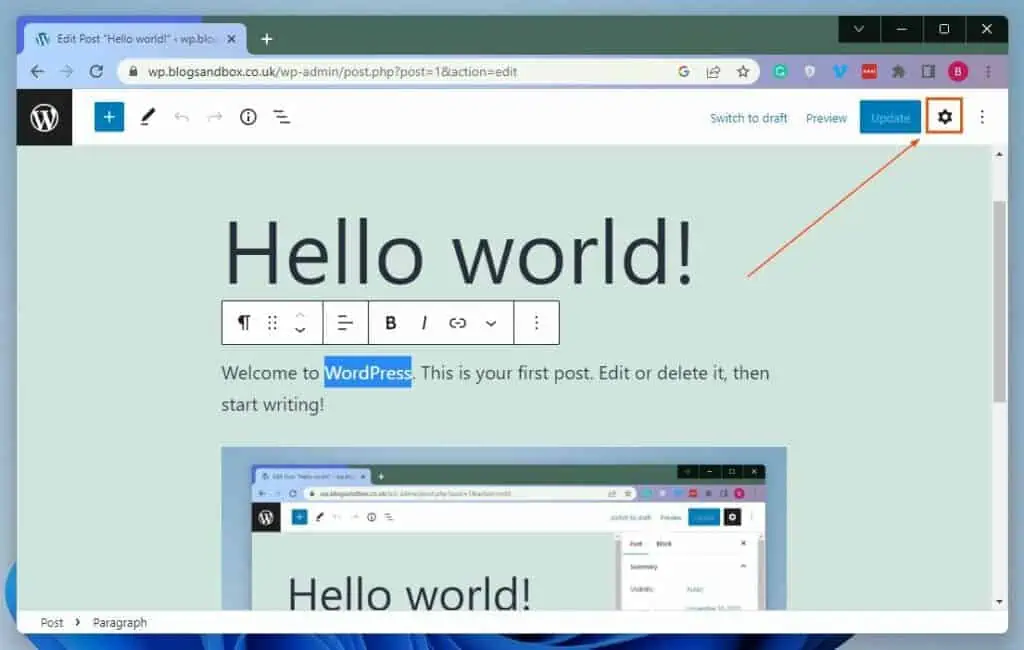
- Finally, under Formatting in the Block tab on the left pane of the page, click the Underline icon to underline the selected text.

Option 2: Styling Texts as Underline Using HTML
Another way to underline text in WordPress is by using an HTML element. To achieve that, carefully observe the following procedures below.
- Open the backend dashboard of your WordPress website with an administrator account. Then, among the options on the dashboard’s left pane, left-click Pages or Posts, depending on where you want to underline text.

- Subsequently, click the title of the page/post where you want to underline the text. For this demonstration, I will select the “Hello world!” post on my WordPress site.

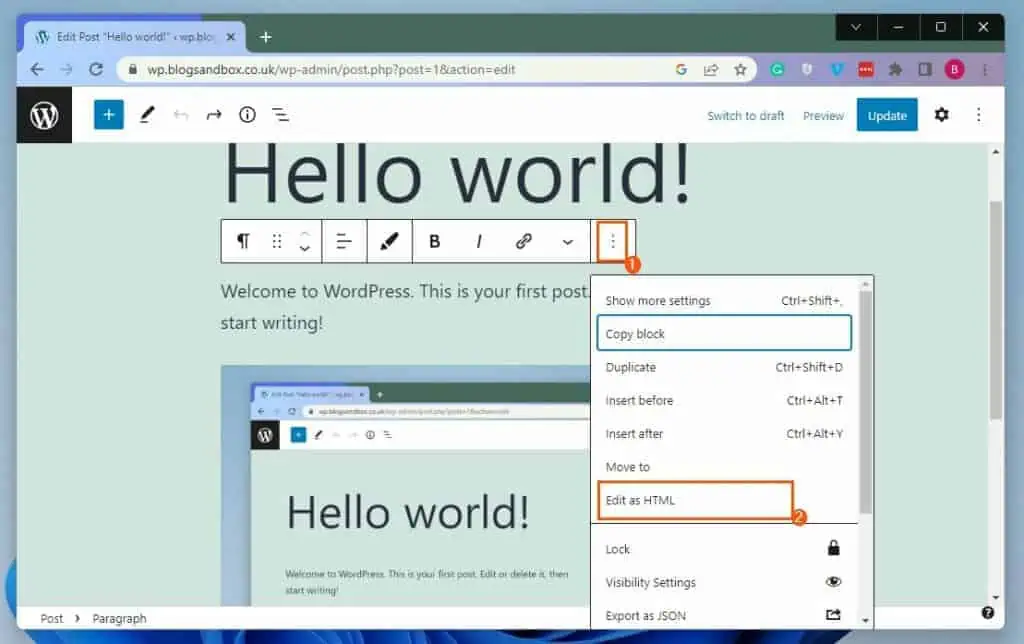
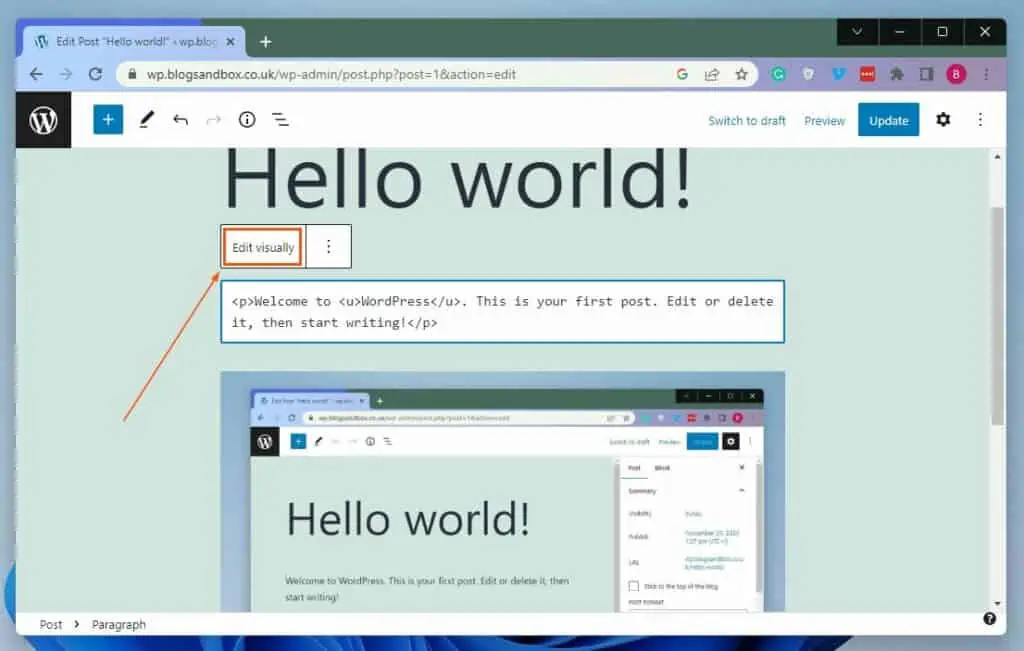
- When the post/page opens, select the text block that features the text(s) you want to underline. Next, click the Options icon in the toolbar at the top of the text block, then select Edit as HTML from the displayed options.
- Afterward, wrap the text(s) you want to underline between the <u> and </u> HTML tags. For instance, if I want to underline “WordPress,” below is what it will look like after wrapping it between the tags.
<u>WordPress</u>
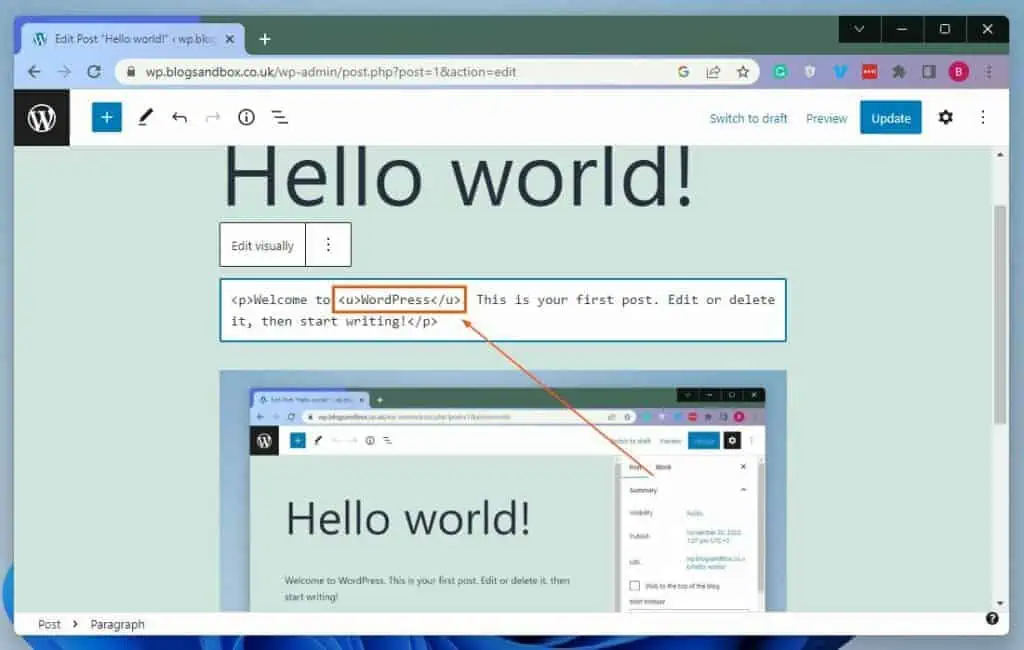
- Finally, click Edit visually. Hence, the text(s) should be underlined – see the second screenshot.
Option 3: Style a Text as an Underline Using A Plugin
Interestingly, you can underline text on your WordPress website with the help of a plugin known as Gutenberg Block Editor Toolkit – EditorsKit. This plugin adds more formatting options to the default WordPress block editor, including justify and underline.
So, in the following subsections, I will teach you how to install this plugin in WordPress. Then, you will learn how to use the plugin to underline text in WordPress.
Step 1: Install Gutenberg Block Editor Toolkit – EditorsKit Plugin
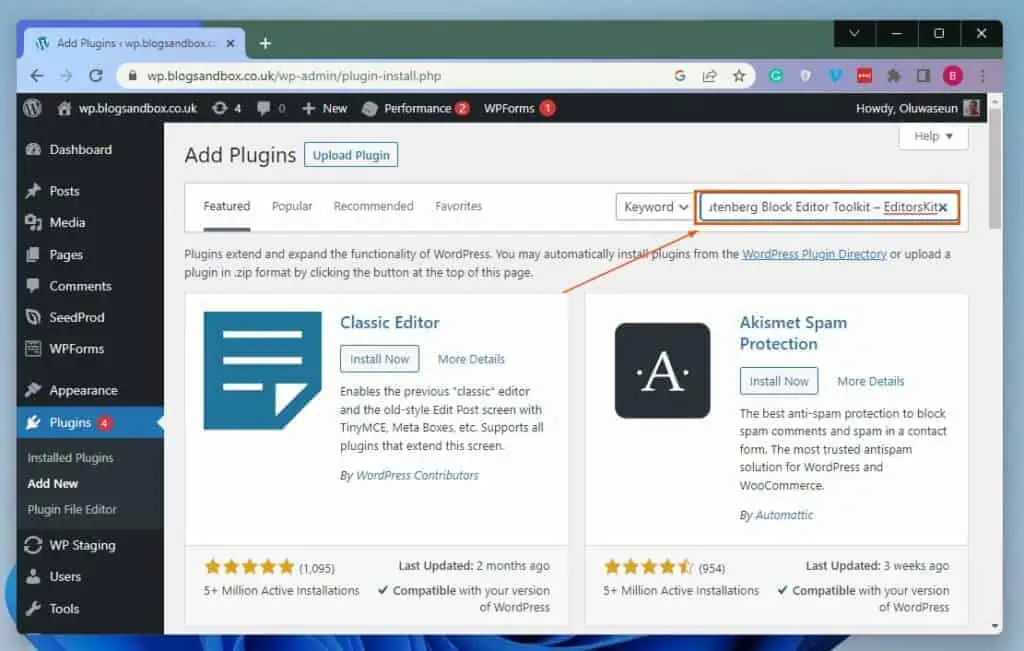
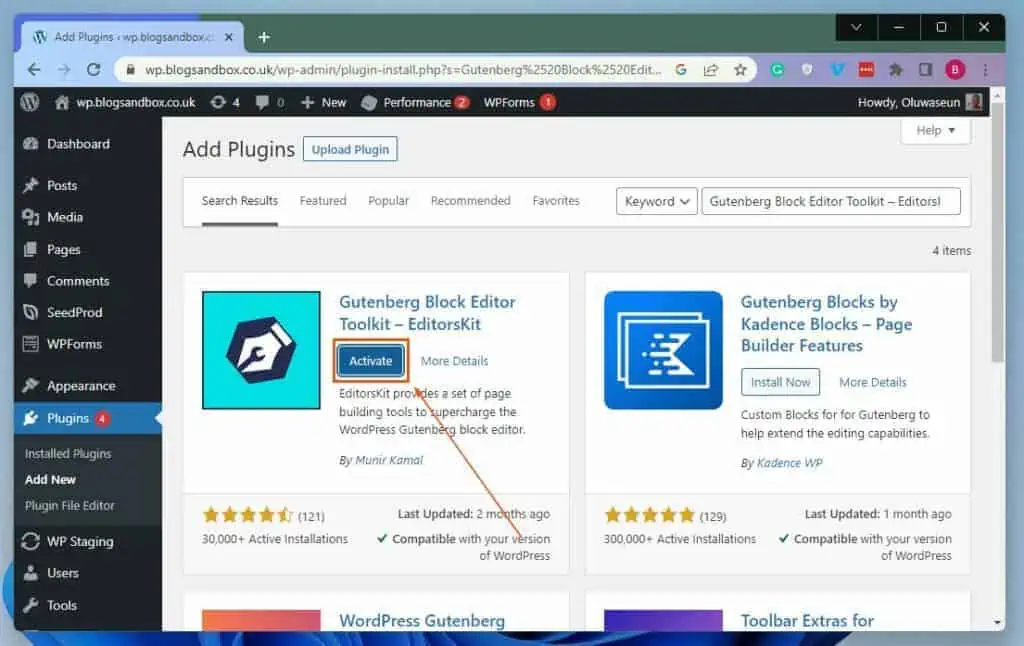
- Access the backend dashboard of your WordPress site with the aid of an admin account. Then, hover your mouse on Plugins among the menus on the left pane and select Add New.

- After that, input “Gutenberg Block Editor Toolkit – EditorsKit” in the search field on the Add Plugins page.
- Then, click the Install Now button on the Gutenberg Block Editor Toolkit – EditorsKit plugin from the search result.
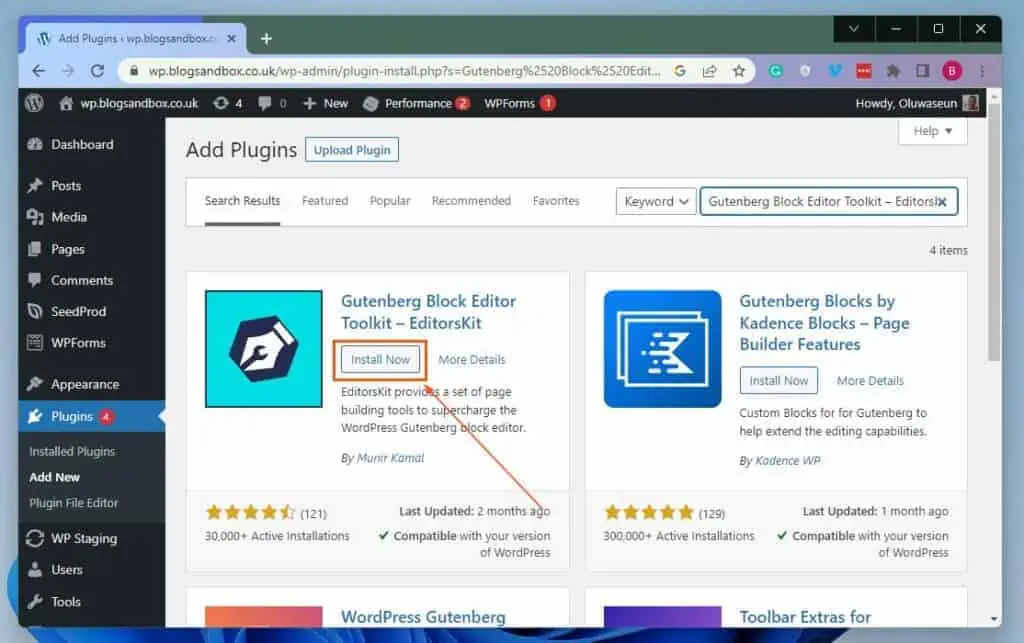
- After installing the plugin, click the Activate button to enable it.
Step 2: Use Gutenberg Block Editor Toolkit – EditorsKit Plugin to Underline Text
- Login to the backend dashboard of your WordPress site with an admin account. Next, depending on where you want to underline text, click Pages or Posts among the options on the dashboard’s left pane.
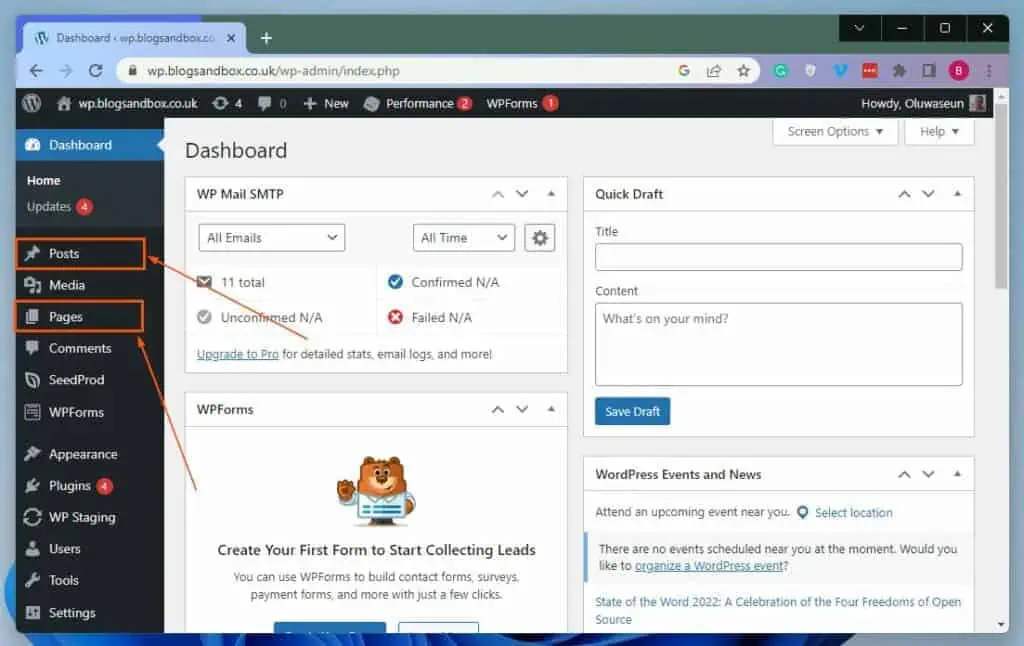
- After that, click the title of the post/page where you want to underline the text. Once again, I will select the “Hello world!” post on my WordPress site for this illustration.

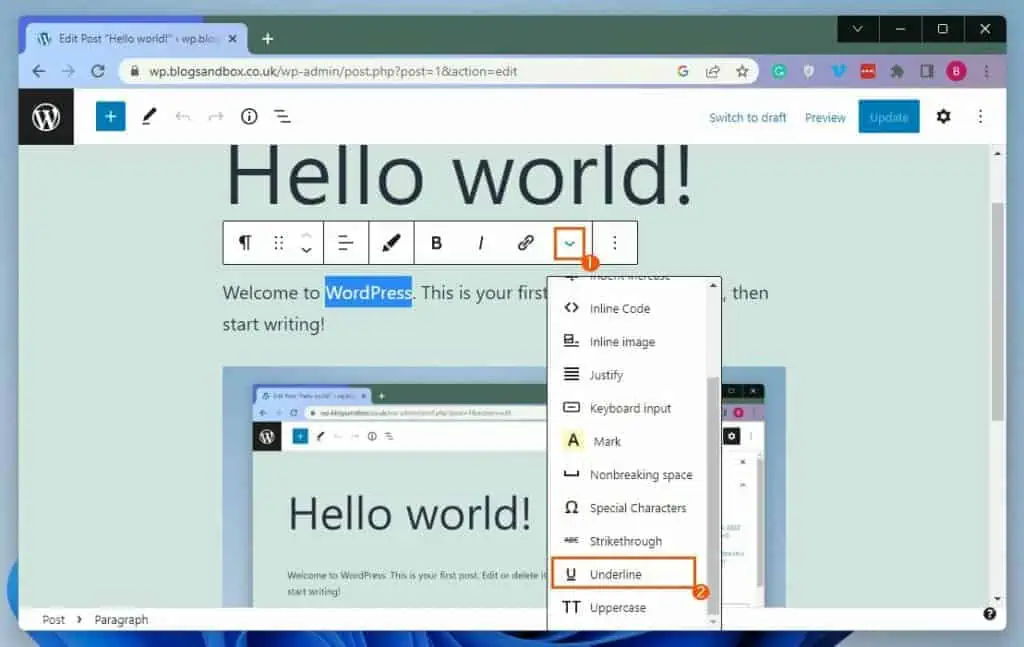
- Next, select the text you want to underline in the post/page. For example, I want to underline “WordPress.”

- Then, click the More icon (downward arrow) in the toolbar above the text block. Finally, select Underline from the options that appear.
Frequently Asked Questions
The keyboard shortcut to underline text in WordPress is Ctrl + U.
Yes, underline is a font style. Moreover, like italics and bold, underlining is used to emphasize one or more words in an article or blog post.
WordPress is a free and open-source content management system (CMS) for creating websites and blogs.
An underline is a horizontal line that is inserted immediately below a portion of text.
WordPress was released by American developer Matt Mullenweg and English developer Mike Little on May 27, 2003.
Conclusion
Underlining a text(s) on your WordPress site emphasizes the text(s) and can easily grab readers’ attention to the text(s). Fortunately, this guide demonstrated three distinct methods to underline text in WordPress.
To be more precise, I illustrated how to perform this task using the default WordPress block editor. Also, we discussed how to underline text in WordPress using HTML.
That’s not all; this guide also provided steps to carry out this task with the aid of a plugin called Gutenberg Block Editor Toolkit – EditorsKit.
I honestly hope you found this guide interesting and helpful. If you did, click on “Yes” beside the “Was this page helpful” question below.
You may also express your thoughts and opinions by using the “Leave a Comment” form at the bottom of this page.
Before leaving, you can visit our WordPress & Websites How-To page to find more WordPress guides like this.
![WordPress Lost Password Redirects to Page Not Found [Fixed]](https://www.itechguides.com/wp-content/uploads/2024/03/WordPress-Lost-Password-Redirects-to-Page-Not-Found-Fixed.webp)