This guide demos how to install and configure DNS on Windows Server 2016.
Step 1: Install the DNS Server Role
To install DNS role on Windows Server 2016:
- Logon to the server you want to install DNS role (preferably a domain controller). Then open Server Manager.
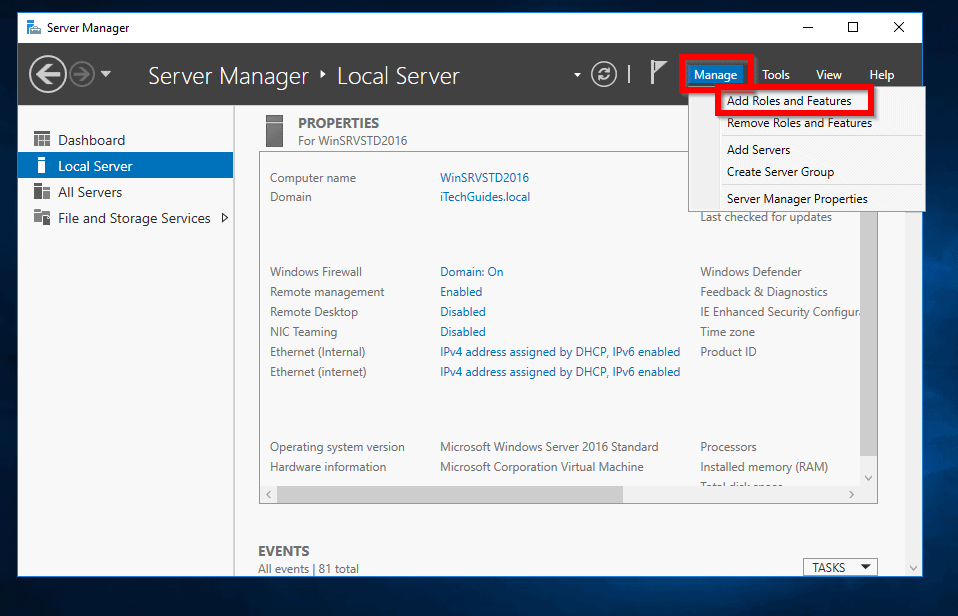
- At Server Manager, click Manage and select Add Roles or Features.
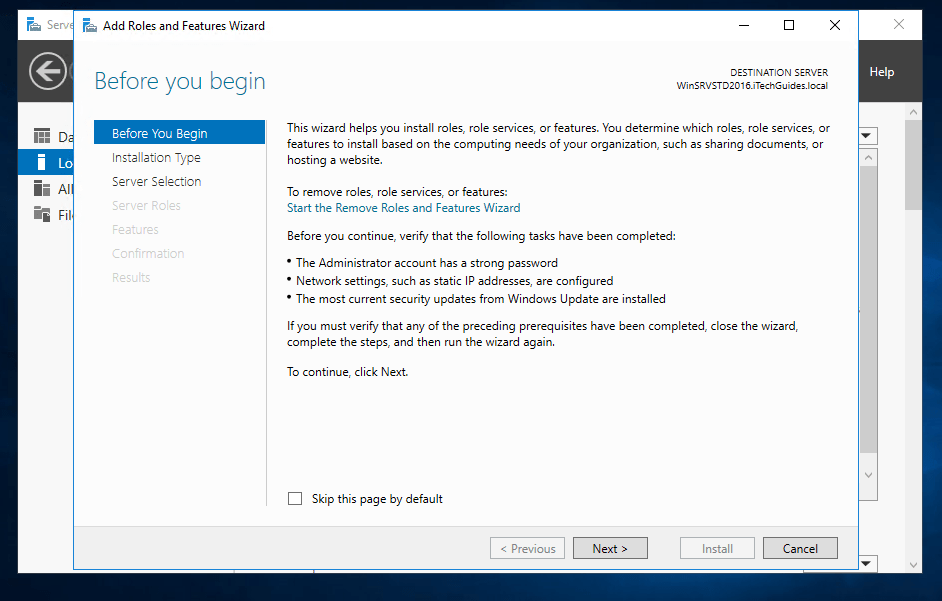
- When the Add Role and Features Wizard opens, click Next.
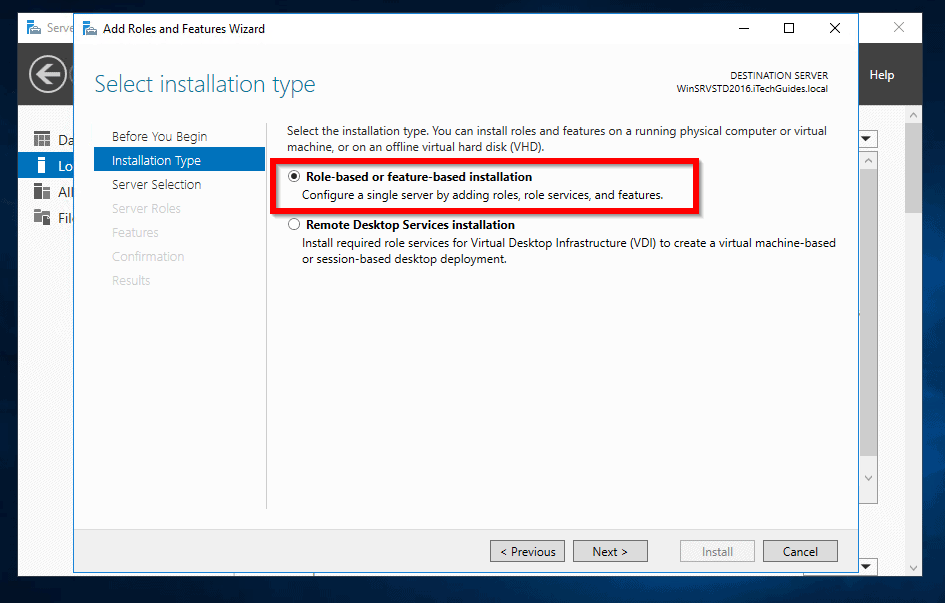
- At Select installation type screen, select Role-based or feature-based installation. Then click Next.
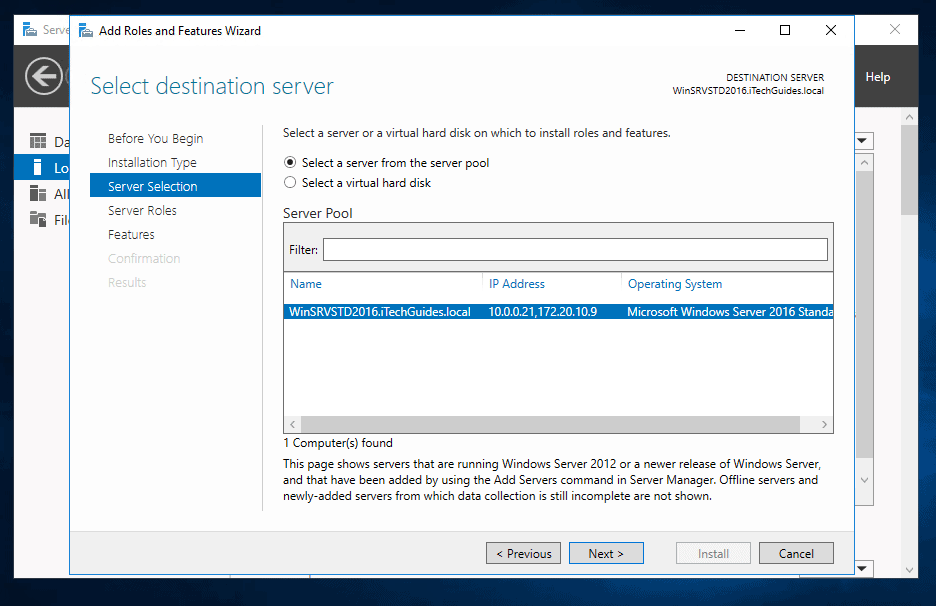
- When the screen to select a destination server opens, click Next.
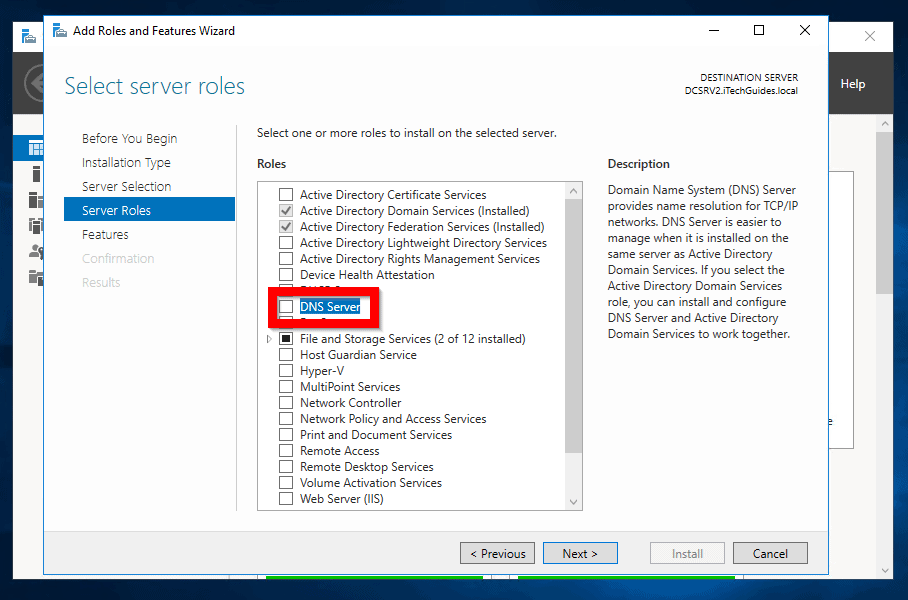
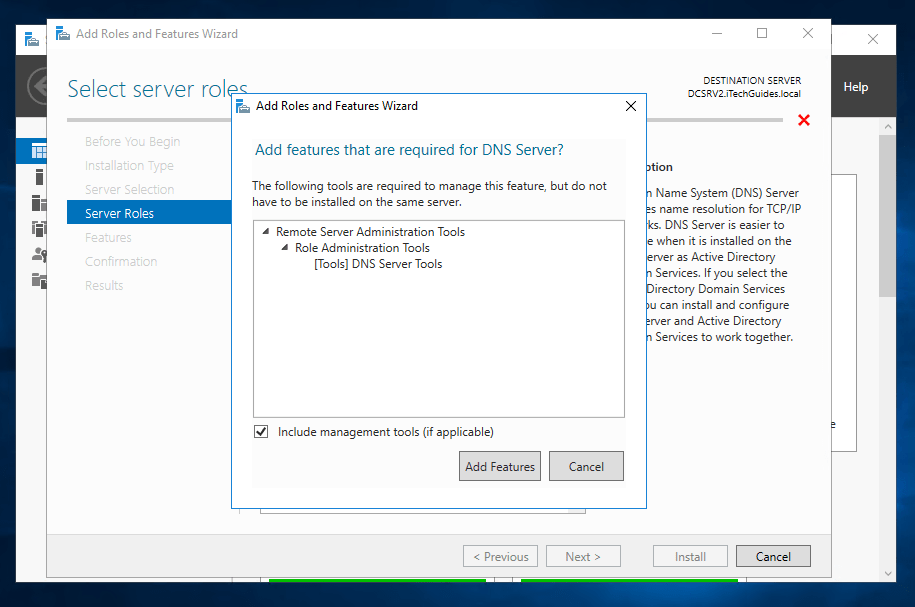
- On Select server roles screen, check the box beside DNS Server. When prompted to Add features that are required for DNS server, click Add Features.
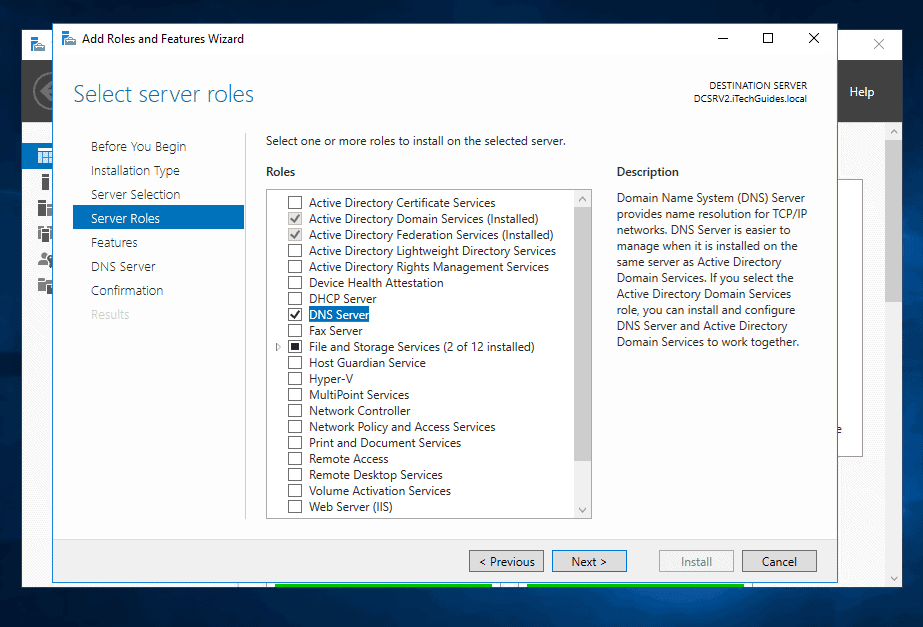
- When you return to Server roles selection screen, click Next.
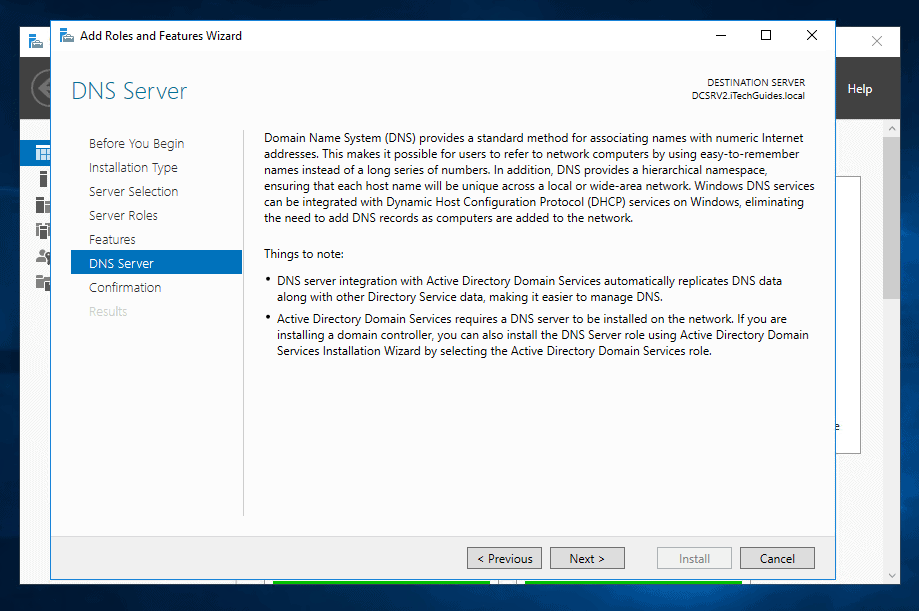
- Before you proceed to install DNS role on Windows Server 2016, read the info about DNS. Then click Next.
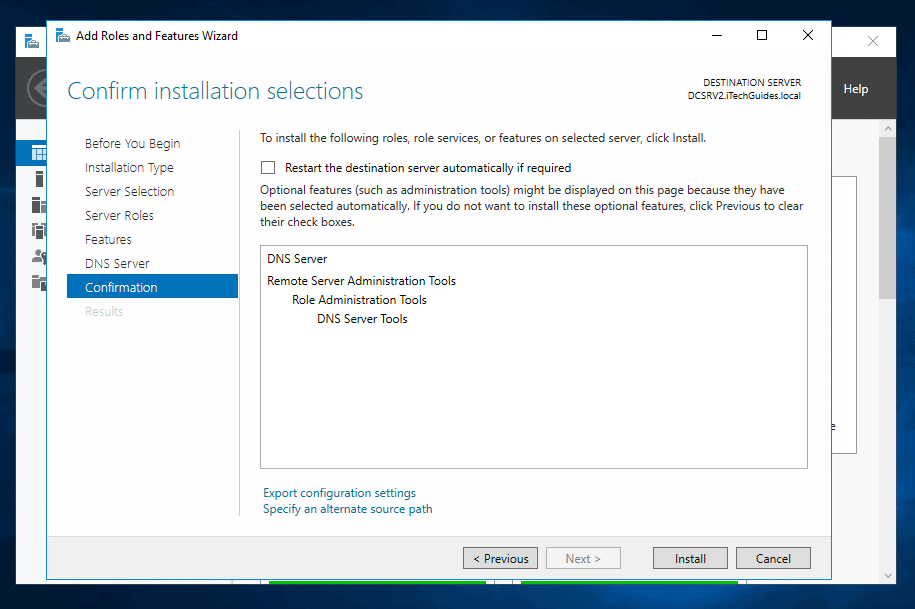
- Finally, to install DNS role on Windows Server 2016, click Install.
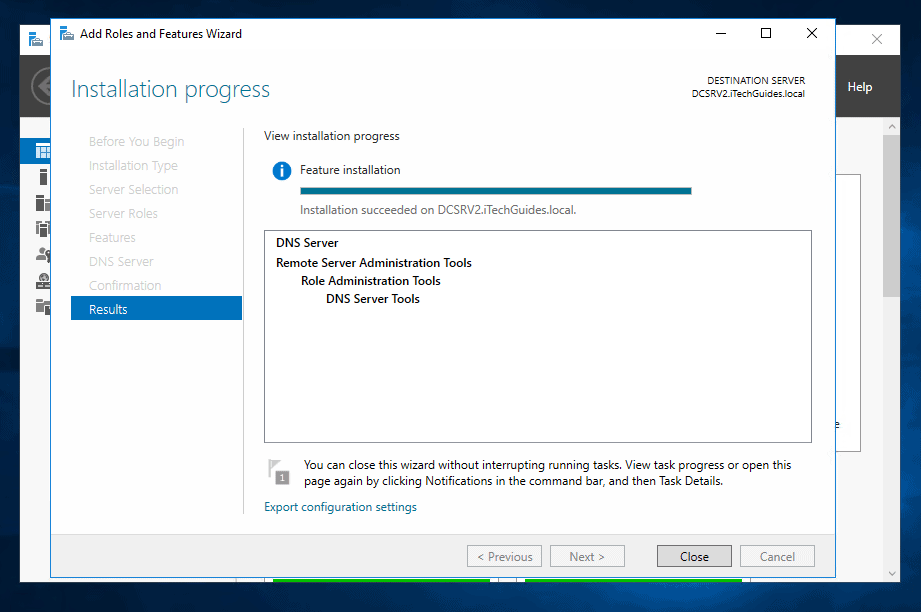
- When the installation is completed, click Close.
Step 2: Configure the DNS Server Role
The next step to install and configure DNS on Windows Server 2016 is to perform the configuration.
For a DNS Server to function, it requires a Forward Lookup zone and a Reverse lookup zone. The steps in this guide demos how to create a Forward and Reverse lookup zone in DNS Server 2016.
Create a Forward Lookup Zone in DNS Server 2016
Here are the steps:
- From Server Manager, click Tools. Then select DNS.

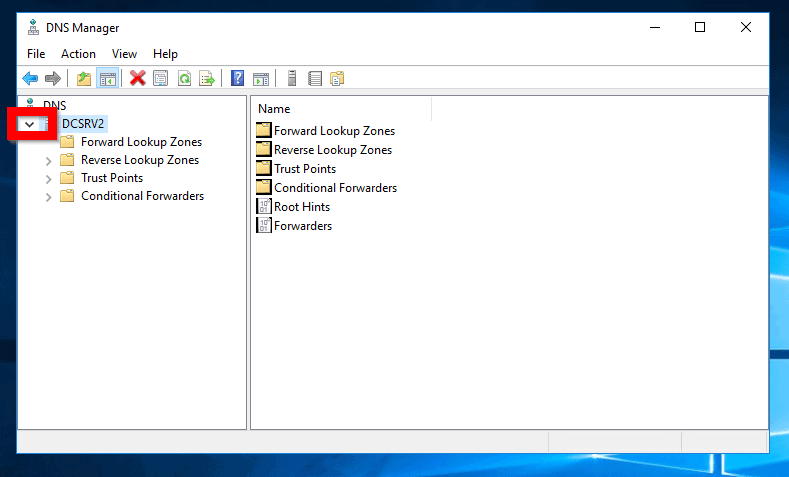
- When DNS Manager opens, expand the DNS server.
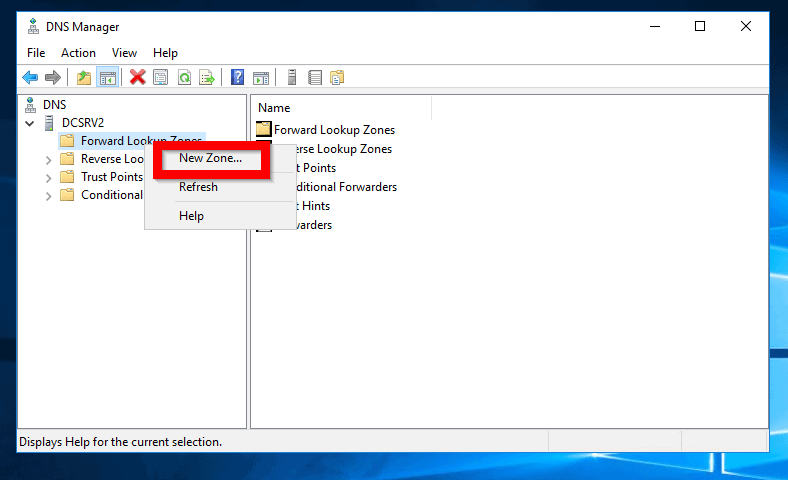
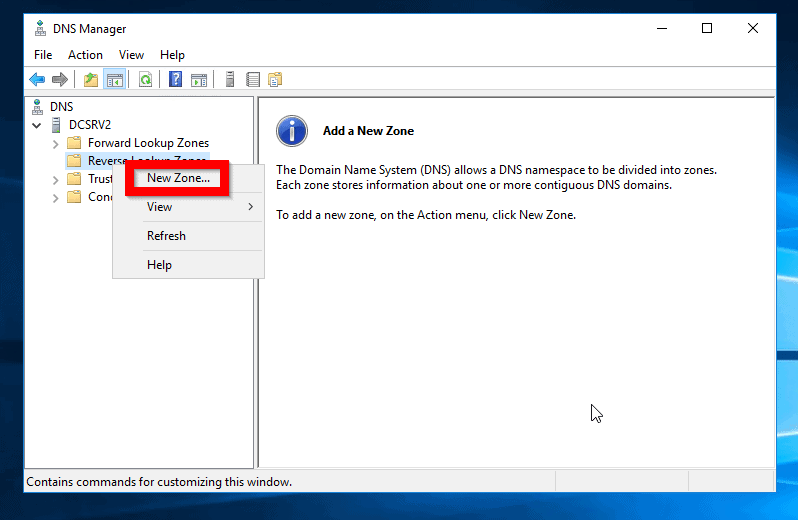
- Then Right-click Forward Lookup Zones and click New Zone…
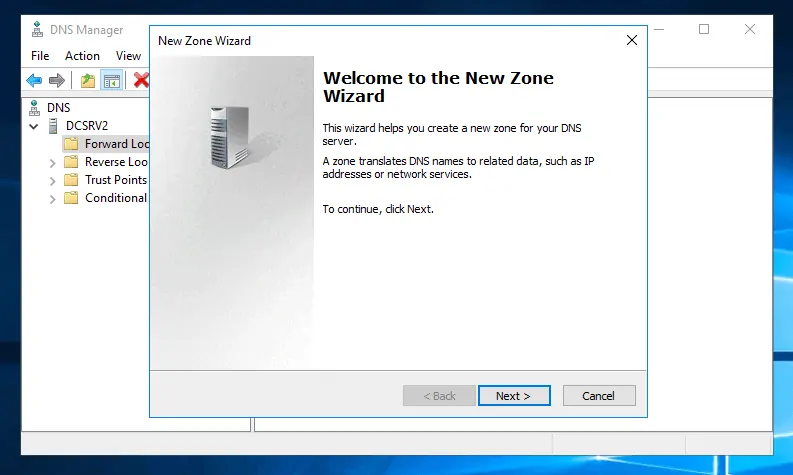
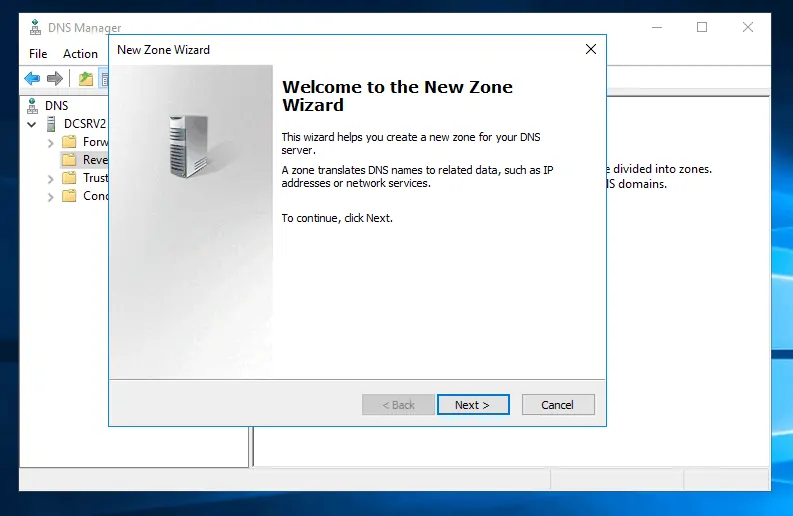
- On the Welcome to New Zone Wizard, click Next.
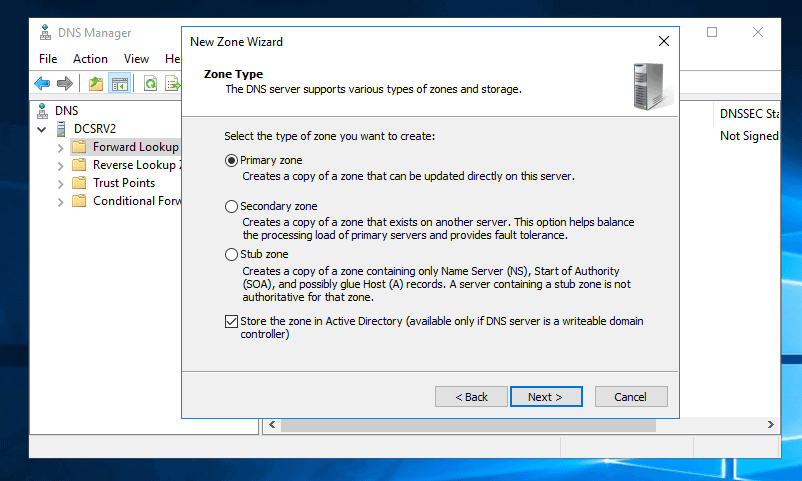
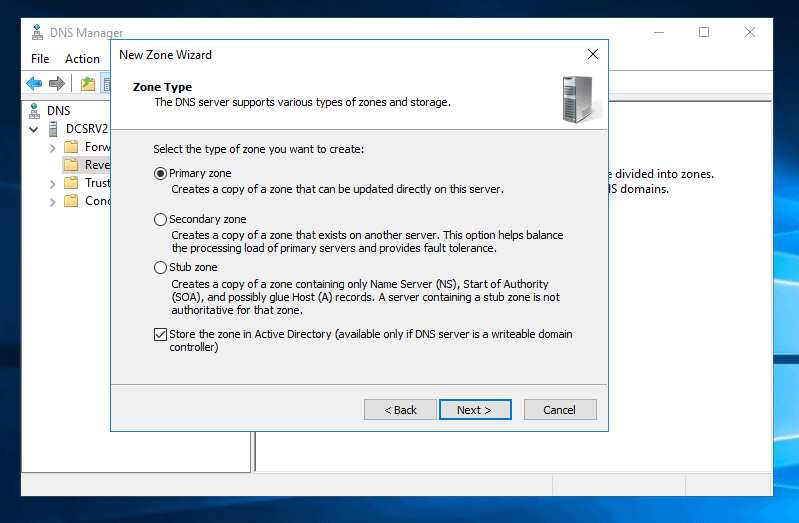
- Then on the Zone Type screen, select your zone type and click Next.
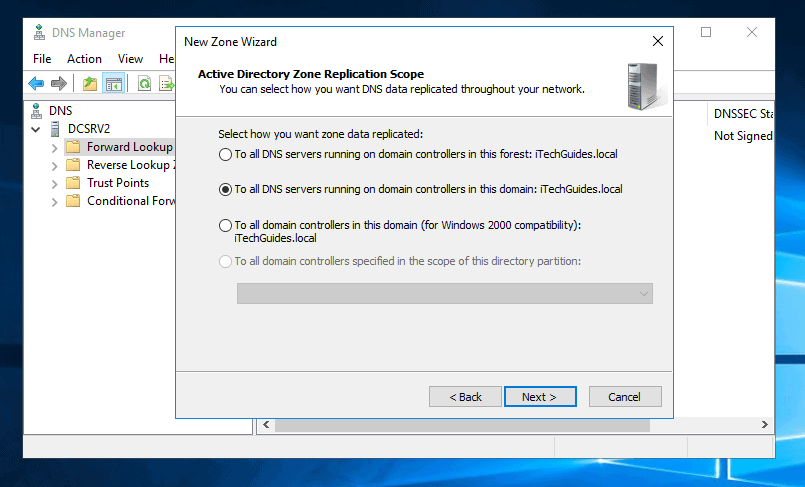
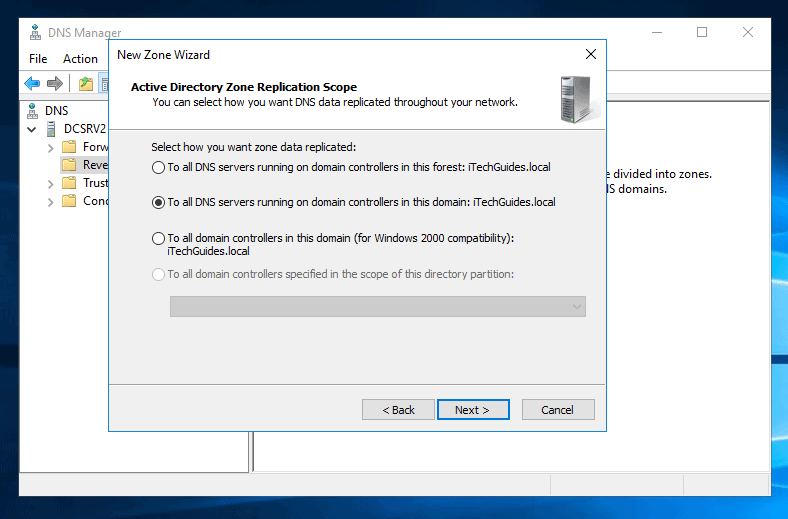
- On this screen, select the Active Directory Zone Replication Scope. If you are not sure, accept the default (shown). Then click Next.
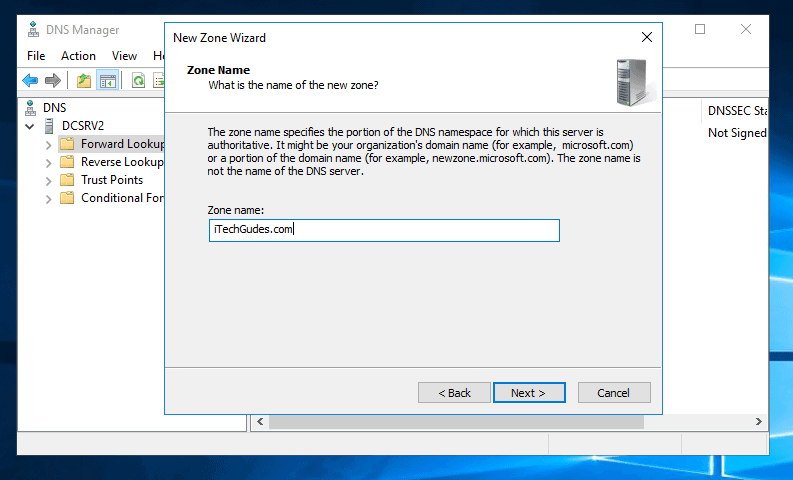
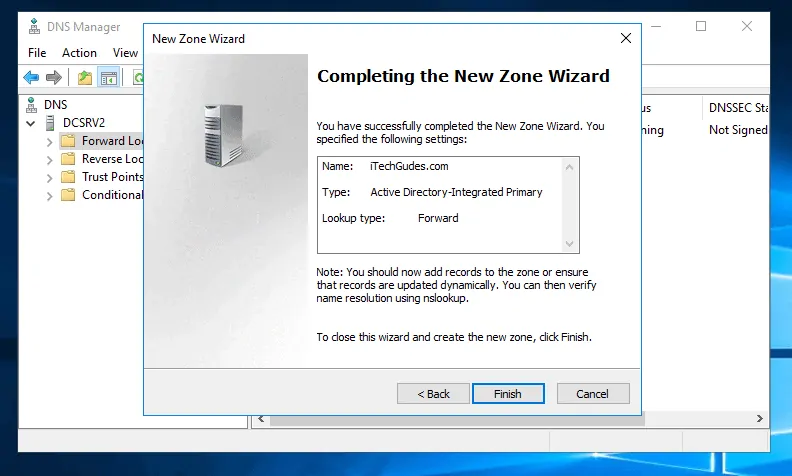
- Enter a zone name and click Next.
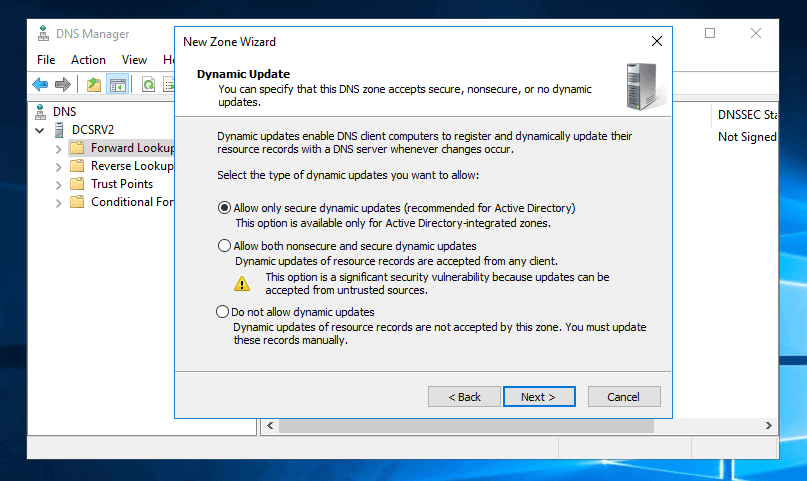
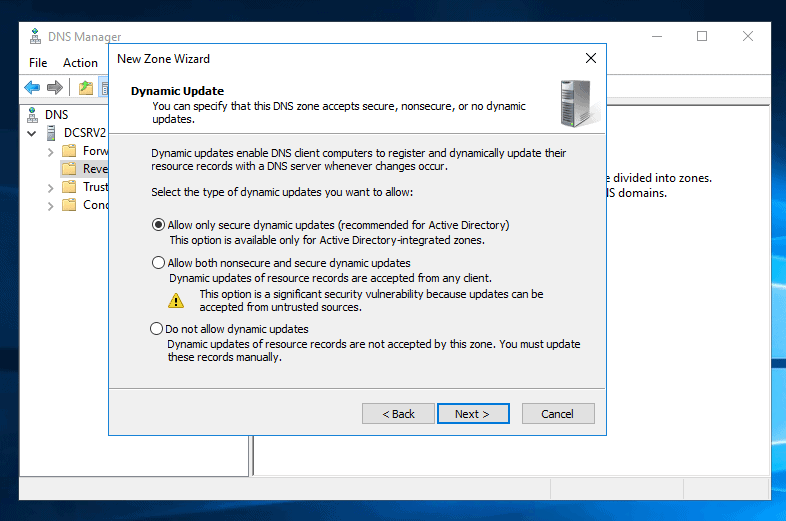
- On the Dynamic Update screen, select an option and click Next. If the zone is AD-integrated zone, the first option is recommended.
- Finally, to create a Forward Lookup Zone, click Finish.
Create a Reverse Lookup Zone in DNS Server 2016
The last step to install and configure DNS on Windows Server 2016 is to create a Reverse Lookup Zone.
Here are the steps:
- Right-click Reverse Lookup Zones. Then select New Zone…
- On the Welcome screen, click Next.
- Then select your Zone Type and click Next.
- If you checked to store zone in AD in the previous screen, select an AD replication scope. Then click Next.
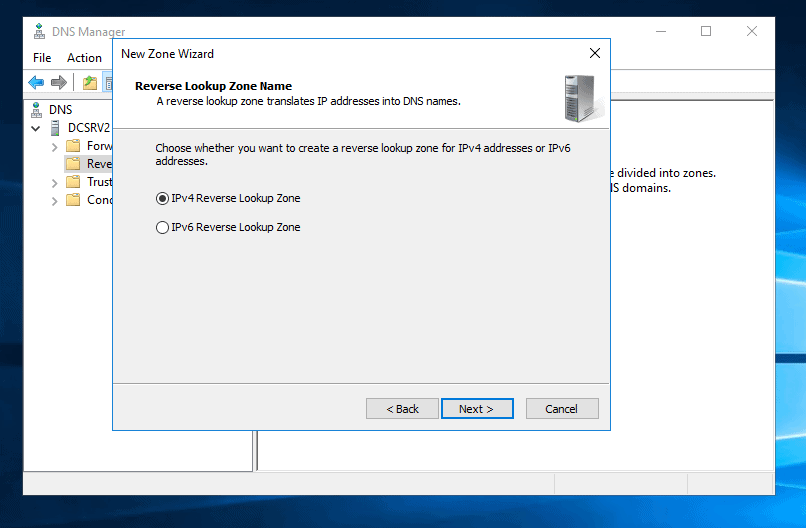
- Then select Reverse Lookup Zone Name (default is IPv4). Click Next.
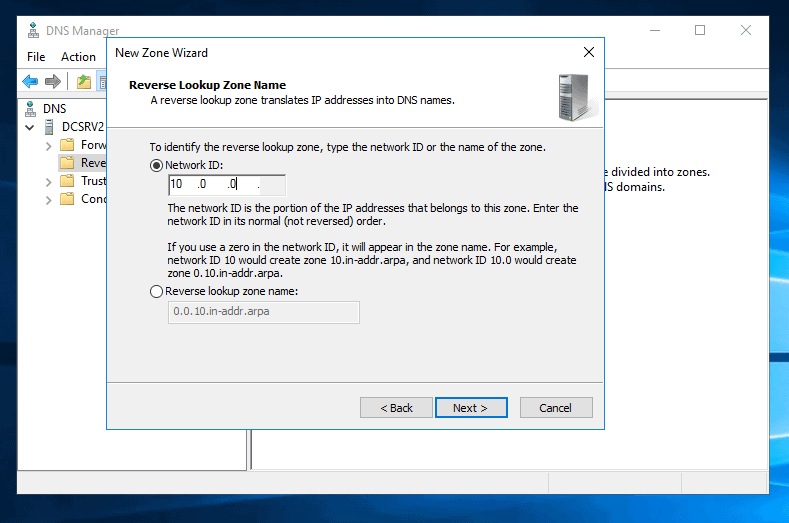
- Enter the Network ID (the the Reverse Lookup Zone Name is determined automatically). Click Next.
- Finally, select your zone Dynamic Update type and click Next.
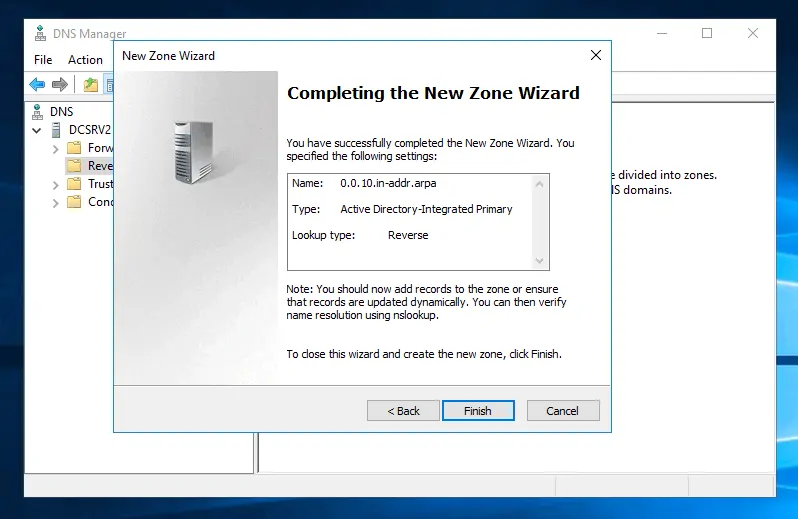
- Then click Finish.
Conclusion
To install and configure DNS on Windows Server 2016: Install the DNS role, then configure Forward and Reverse Lookup Zones.
With this basic configuration, your DNS server should be able to provide name resolutions.
I hope you found this Itechguide helpful. You can provide feedback by responding to the “Was this page helpful?” question below.
For more Windows Server guides visit our Windows Server How To page.