After creating a new Windows Active Directory domain, it is recommended to add more Domain Controllers. Read this guide to learn how to do that.
Step 1: Install AD DS and DNS Roles
To install the Active Directory Domain Service and DNS roles on the server, run this command.
Install-WindowsFeature -Name AD-Domain-Services, DNS -IncludeManagementTools -IncludeAllSubFeature
Step 2: Configure the Server’s DNS Address
Before promoting the server as an additional domain controller, you must change its DNS server to point to the IP of the existing DC. To do that:
- Click the Local Server node in Server Manager. Then, click the Server’s IP address to load the Network Connections settings.

- Then, double-click the net adapter, and use the numbering in my screenshot below to update the server’s TCP/IPv4 DNS address.

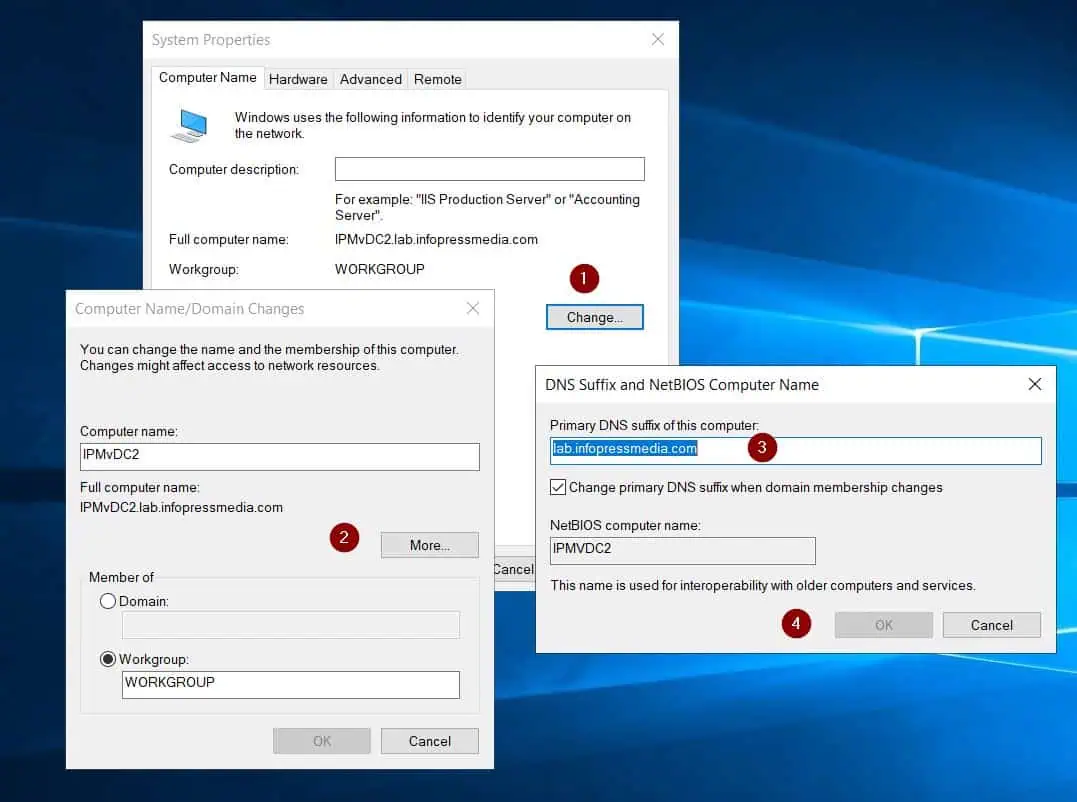
After changing the Server’s DNS address, join the server to the domain or modify its Primary DNS suffix.
Step 3: Promote the Server to a DC
- Open Server Manager, then, click the post-role installation task icon and select Promote this server to a domain controller.
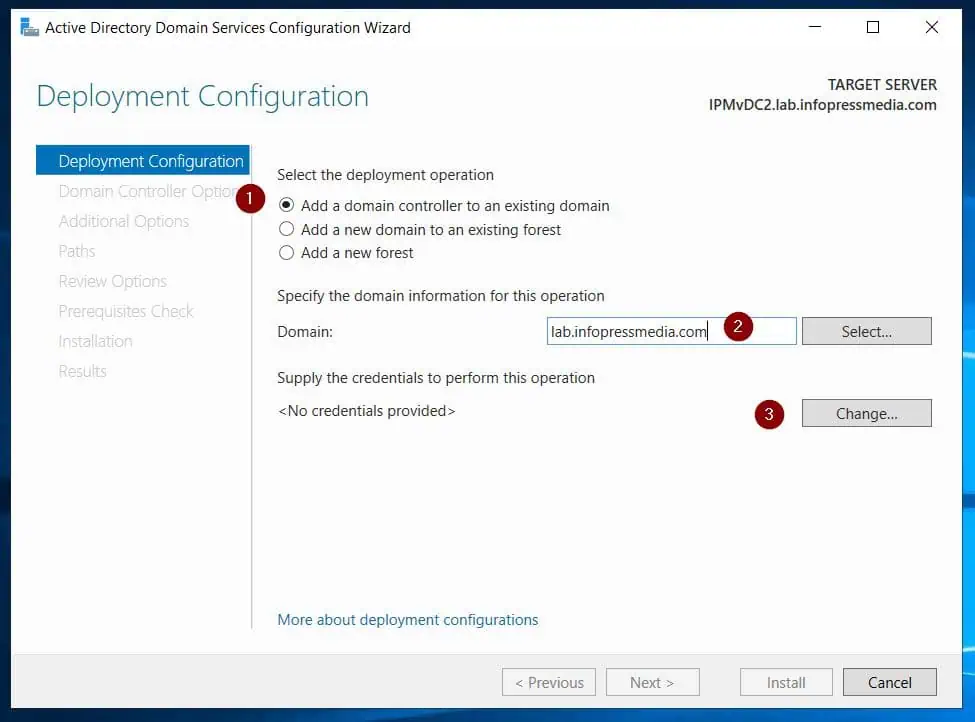
- On the first page of the wizard, select the “Add a Domain Controller to an existing domain” option, then, enter the FQDN of the domain.
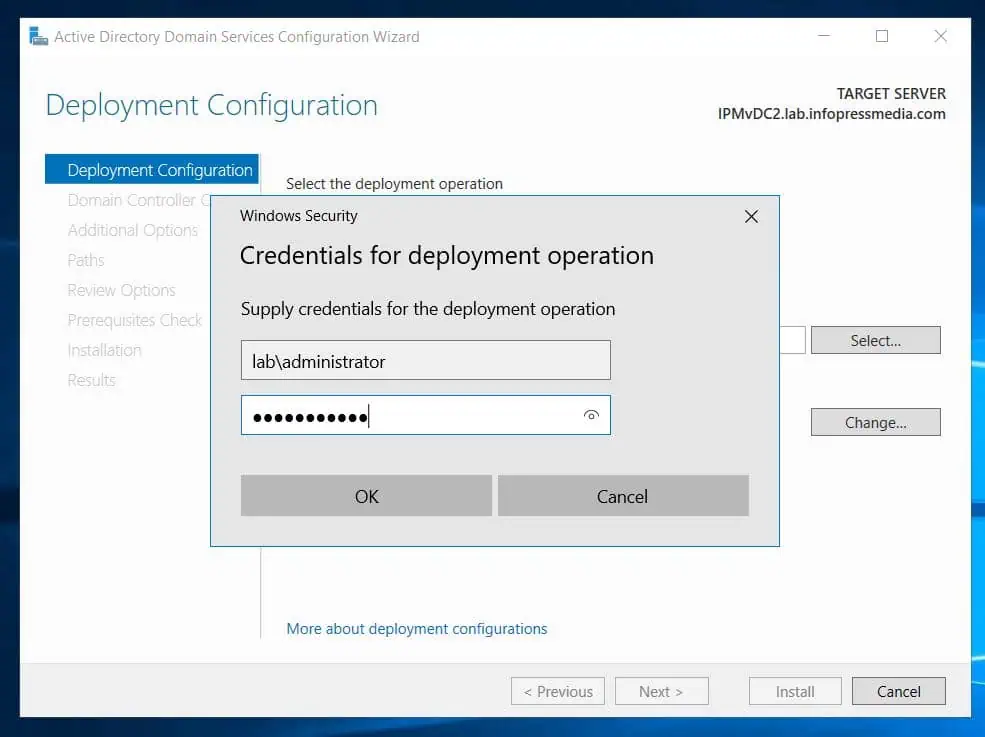
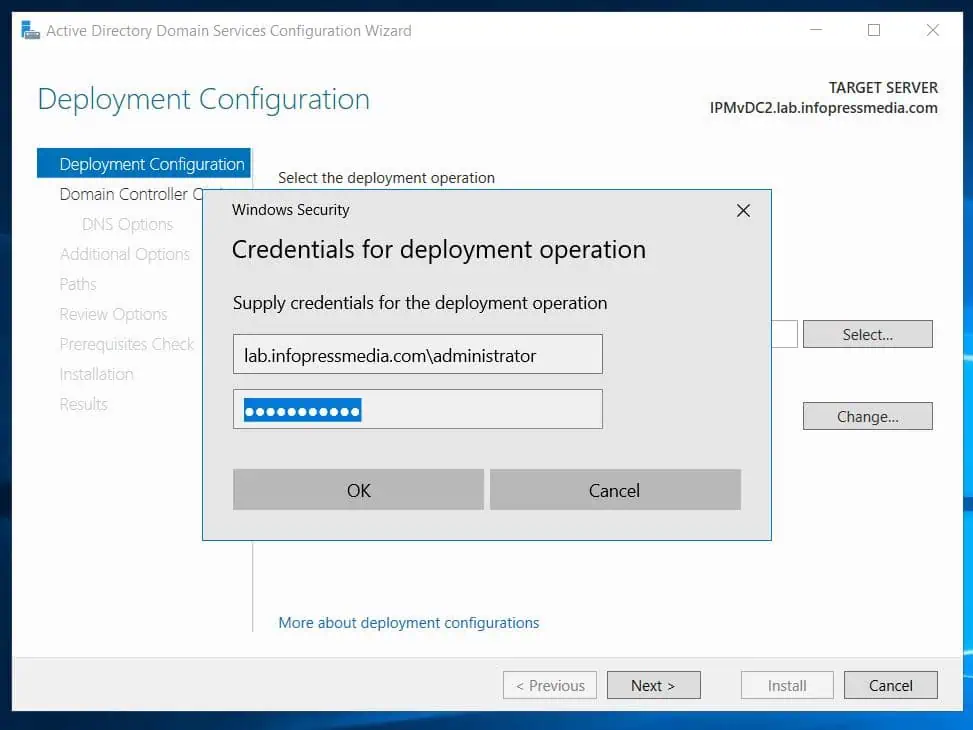
After that, click the Change button next to Supply the credentials to perform this operation. Then, provide the username and password for an account in the domain with permission to add a new DC.
- Back to the Deployment Configuration page, click Next.
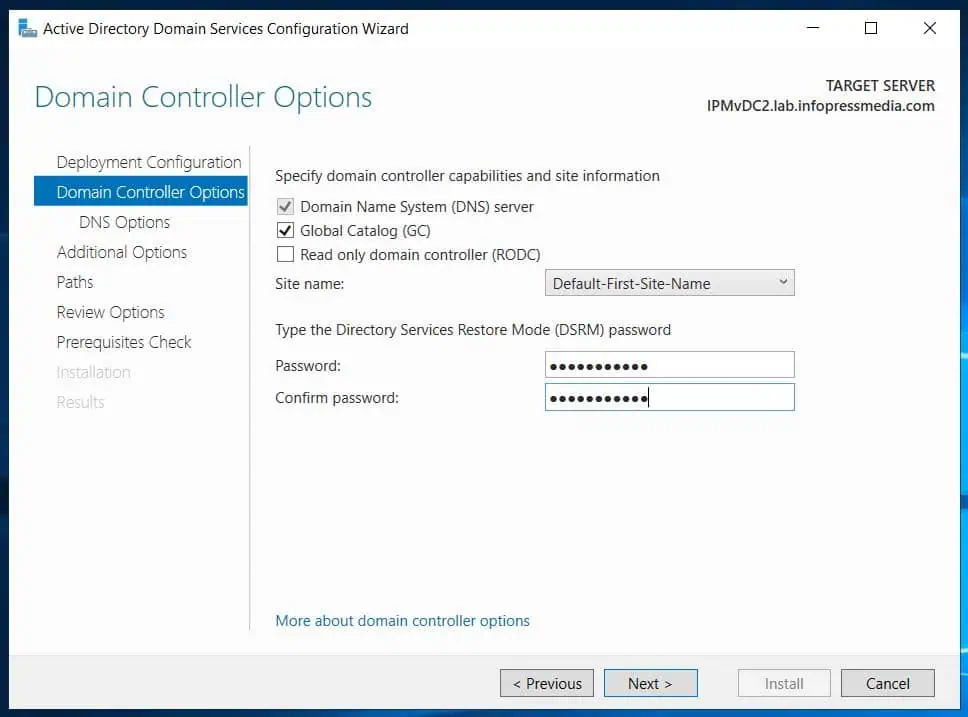
- On the next page, select the AD site to add the new DC, enter the Directory Services Restore Mode password for the DC, and click Next.
On the DNS Options page, ignore the warning and proceed.
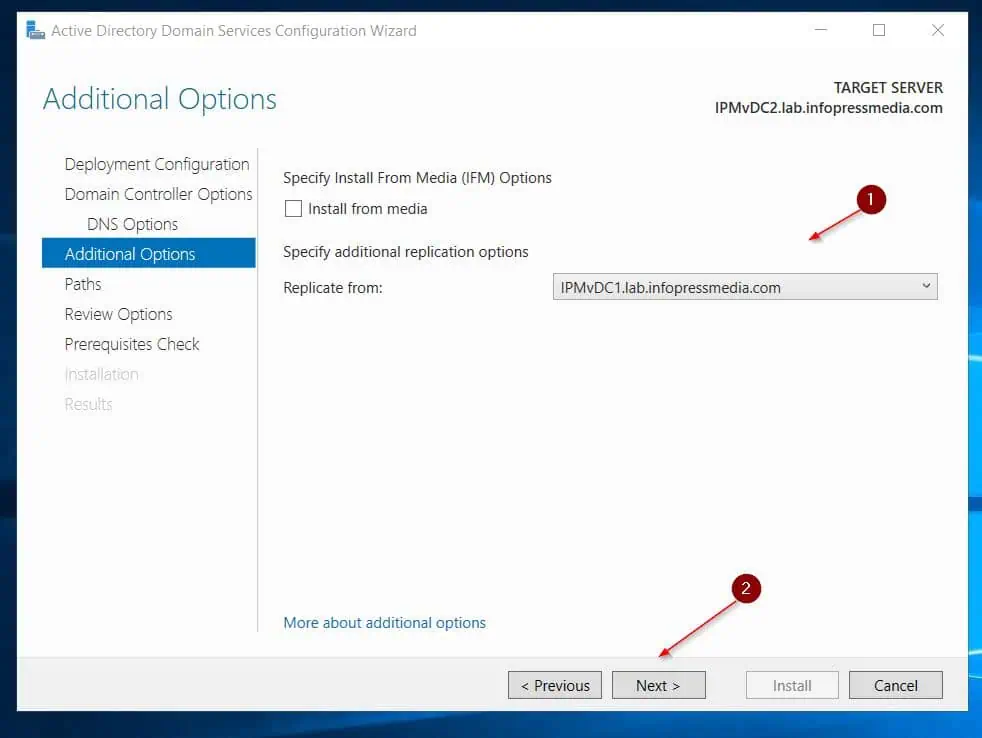
- Then, on the Replication page, select a DC from the drop-down and proceed to the next page.
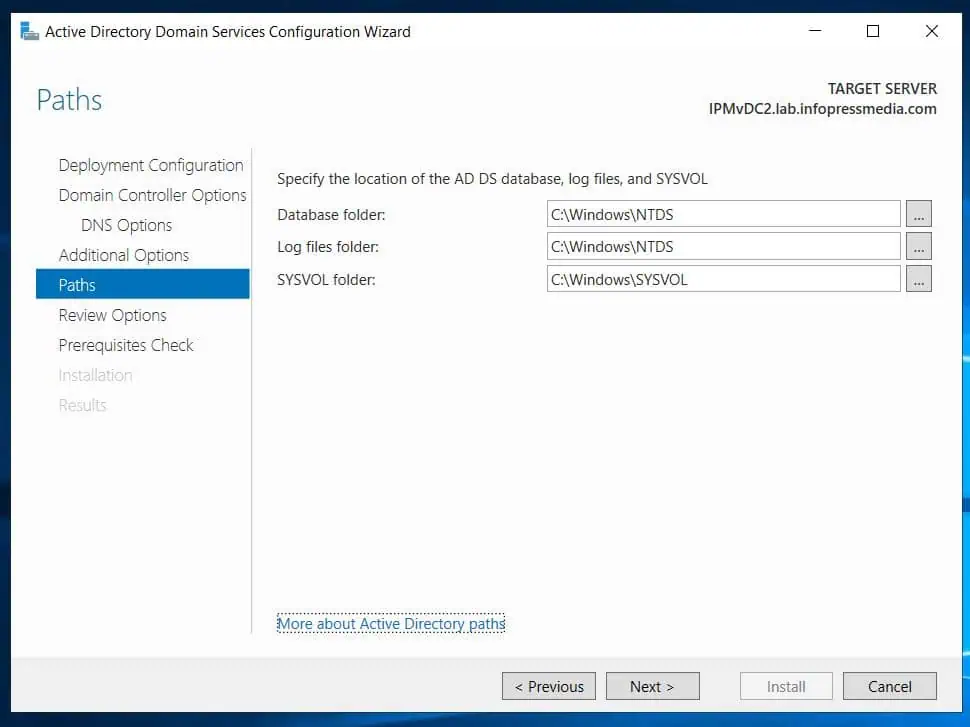
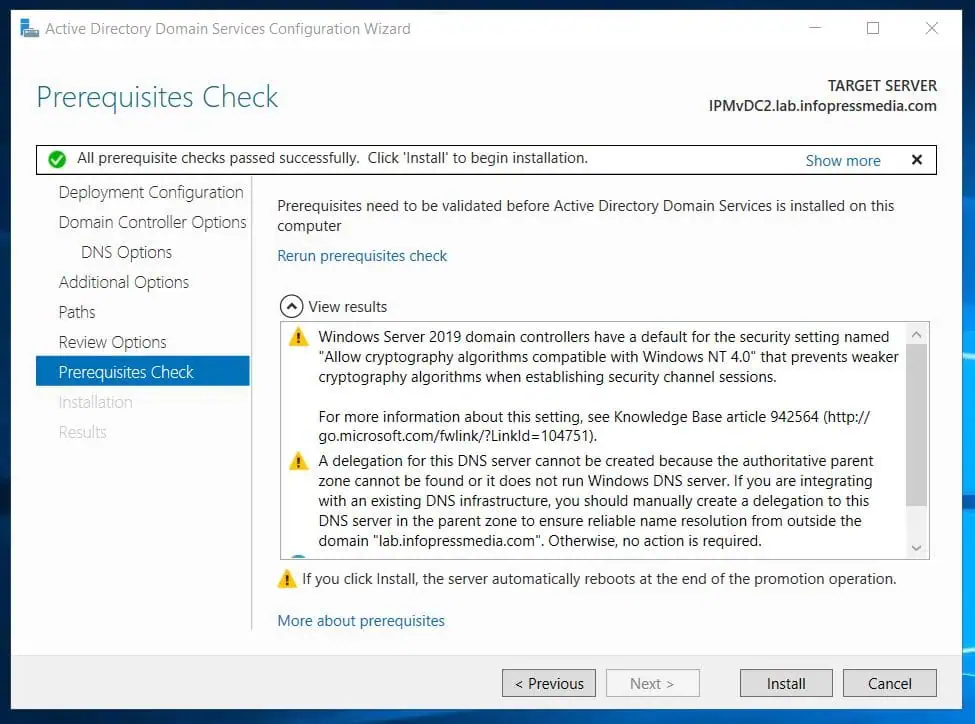
- Accept the default location for the Database, Log files, and SYSVOL folders. After that, review your settings, wait for the wizard to run prerequisite tests, then click Install to promote the server to a DC.
Conclusion
I have shown how to promote a Server as an Additional Domain Controller in a domain in this guide. I hope you found the guide easy to read and helpful.
Let me know your thoughts by responding to the “Was this page helpful?” feedback request below.