Have you ever wondered how to manage your Exchange Online environment more efficiently? PowerShell offers an efficient option, and this guide shows you how to connect to Exchange Online with PowerShell.
Step 1: Install the Exchange Online PowerShell Module
To install and download the Exchange Online PowerShell Module, follow the steps below:
- Click the search icon on your PC’s taskbar, then type powershell. Next, right-click “Windows PowerShell” from the search results and select Run as administrator.
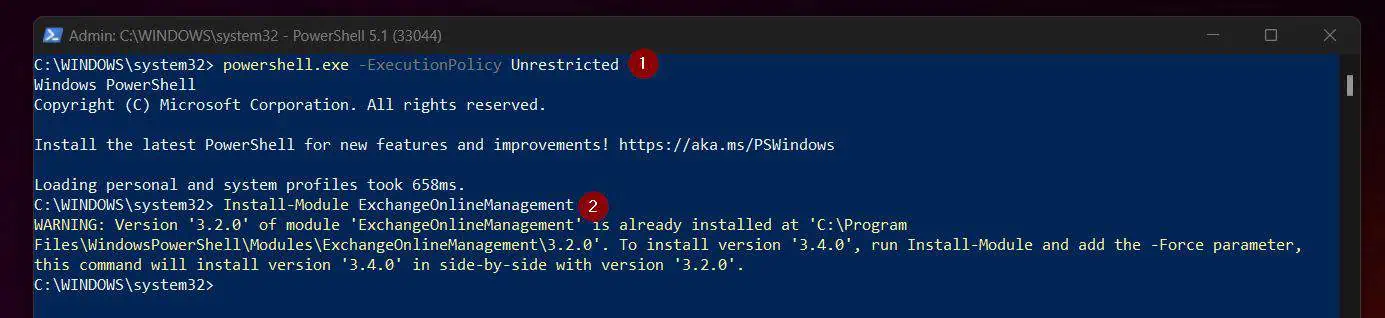
- When the PowerShell command console opens, enter the command below and press Enter.
powershell.exe -ExecutionPolicy Unrestricted
The above command will set the current PowerShell session to allow you to run commands you download from the internet. By default, and for security reasons, PowerShell blocks running commands you download from the internet.
- Then, to install the Exchange Online Module for PowerShell, run the command below.
Install-Module ExchangeOnlineManagement
The screenshot below shows the two commands I have run so far.
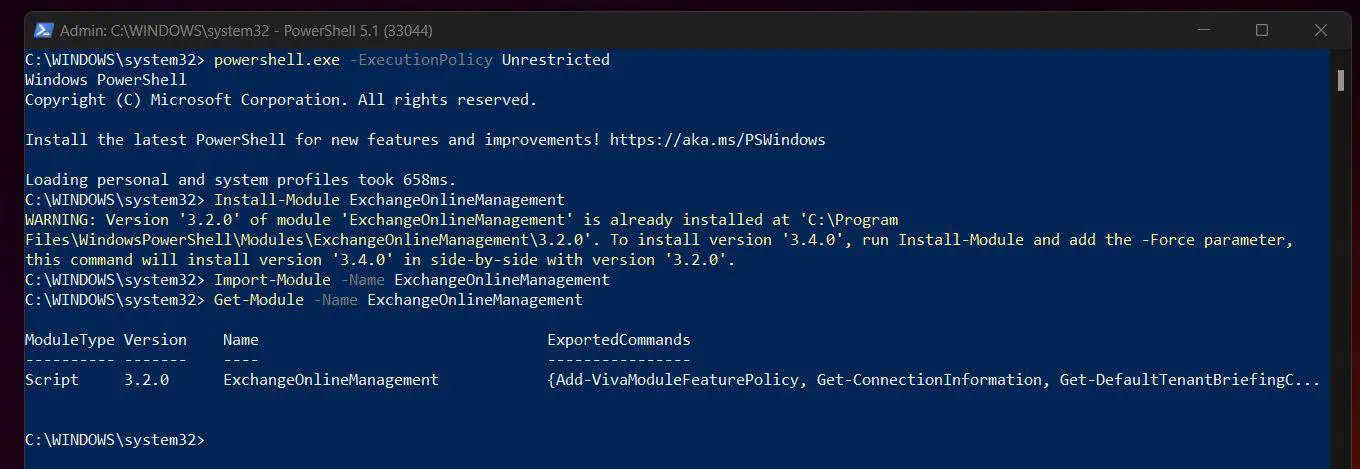
- Finally, to download the installed module to your PC, run the first command below. Then, run the second command to confirm that the module is available on your computer.
Import-Module -Name ExchangeOnlineManagement
Get-Module -Name ExchangeOnlineManagement
If you’ve successfully run all the commands in this article so far, the last command will display the module information. See my screenshot below.
Step 2: Connect PowerShell to Exchange Online
Now that you’ve installed and downloaded the module, it is time to make a connection to Exchange Online from PowerShell. Here’re the steps…
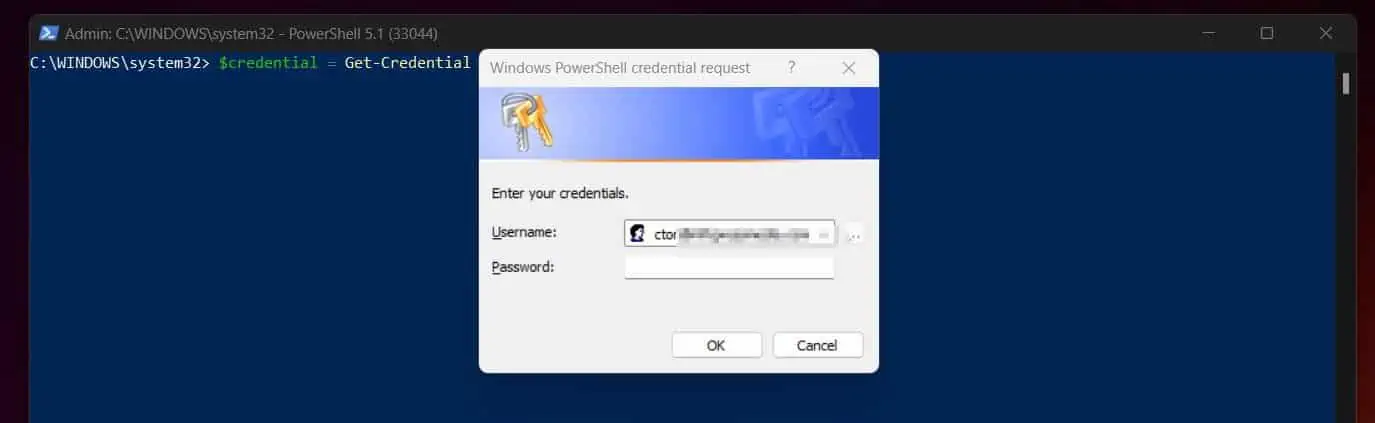
- Prepare the credentials you require: Save your Office 365 in a variable by running the command below:
$credential = Get-Credential [email protected]
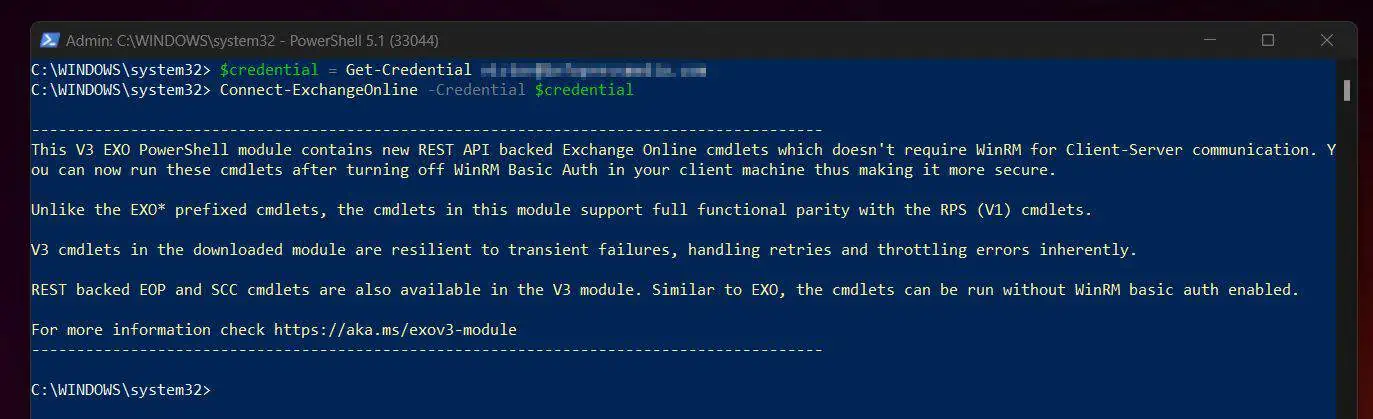
- Access Exchange Online via PowerShell: finally, to make a connection to your Exchange Online account, use the command below:
Connect-ExchangeOnline -Credential $credential
If the command executes successfully – and there is no reason why it should not – your PowerShell console should display some messages like the one shown in my screenshot below:
Step 3: Run PowerShell Commands in Exchange Online
After making a PowerShell connection to Exchange Online, you can run available commands to perform common tasks.
Here are some of the tasks you can perform:
- List available cmdlets in the ExchangeOnlineManagement module: the first obvious thing you want to do is to get all the commands you can run.
To do that, use the Get-Command command and specify the module parameter as shown below:
Get-Command -Module ExchangeOnlineManagement
The command lists all cmdlets available in the ExchangeOnlineManagement module.
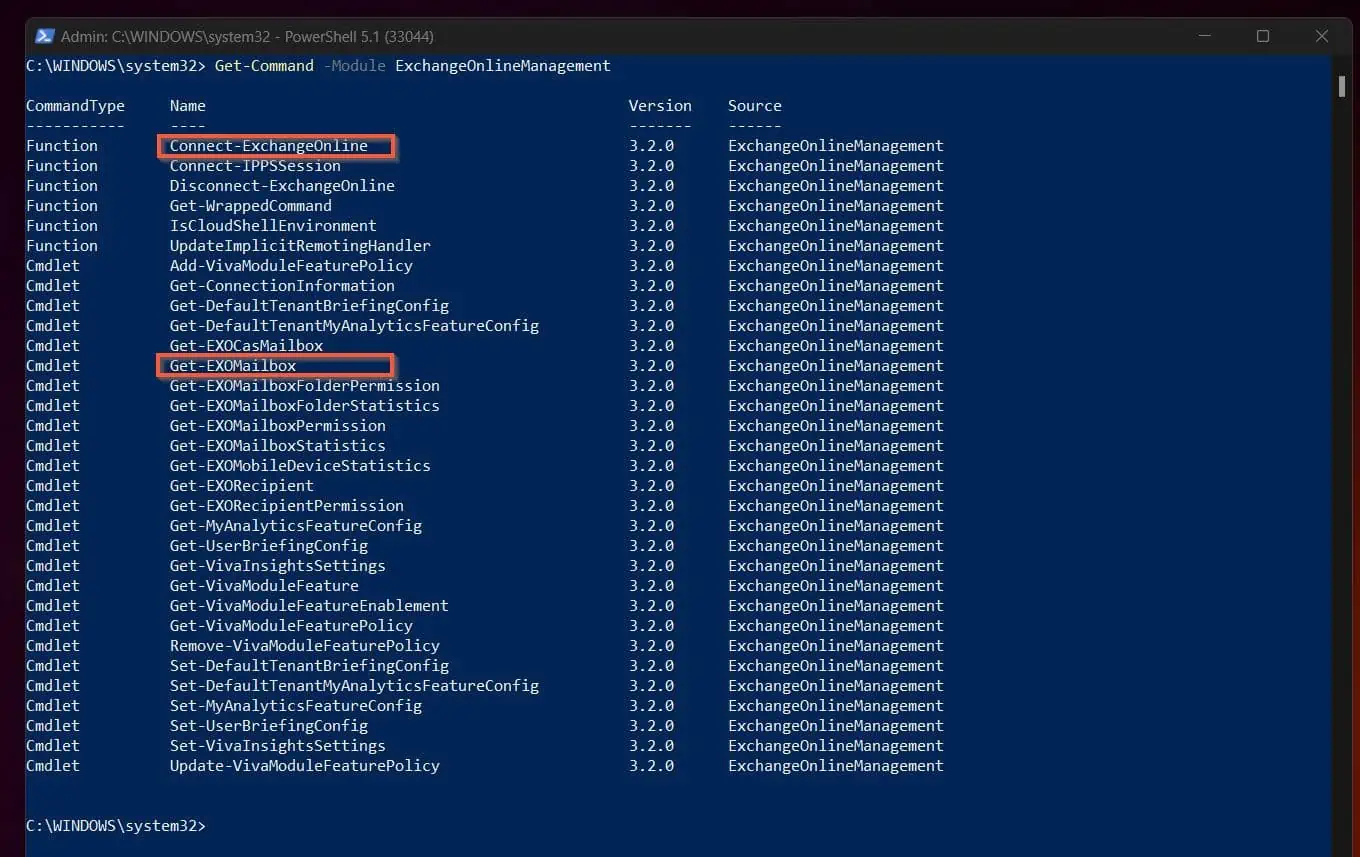
In the screenshot, I highlighted two cmdlets – Connect-ExchangeOnline and Get-EXOMailbox. We already used Connect-ExchangeOnline to make a connection to Exchange Online.
In the next example, I will show you how to use the Get-EXOMailbox command.
- Return all Exchange Online mailboxes with the Get-EXOMailbox command. the next common task you can perform after connecting to Exchange Online via PowerShell is to return all mailboxes.
If you want the cmdlet to return the full properties of all mailboxes in your organization, use the following command instead:
Get-EXOMailbox -ResultSize unlimited
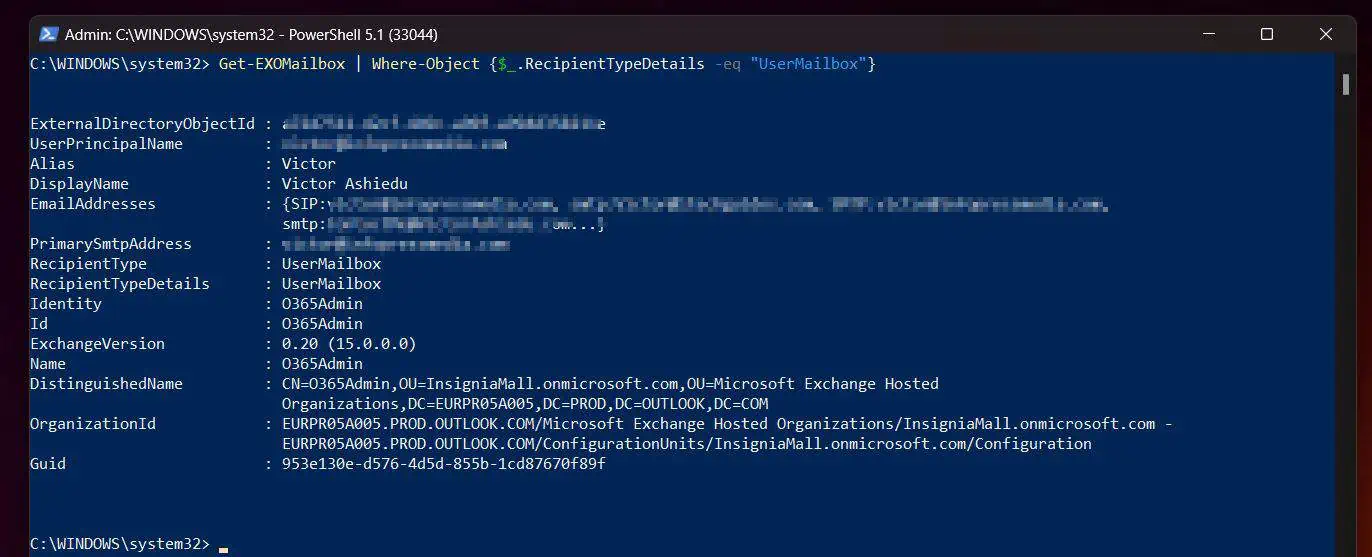
- Return User mailboxes, and exclude Shared mailboxes. You can filter the Get-EXOMailbox command to return the specific results you require.
For example, if you want to return User mailboxes, and exclude Shared mailboxes, use the command below.
Get-EXOMailbox | Where-Object {$_.RecipientTypeDetails -eq "UserMailbox"}
Frequently Asked Questions
The Exchange Online PowerShell module allows SysAdmins to connect to Microsoft 365 (previously Office 365) and manage Exchange Online from any computer with an internet connection.
When you connect to Microsoft 365 via PowerShell from your PC, you can create and manage mailboxes and configure mailbox permissions.
Additionally, you can manage email addresses and distribution groups, mobile device access, and perform numerous other tasks.
To connect to Office 365 Exchange, follow the steps below:
a) Export your Office 365 admin account to an XML file using the Get-Credential command.
b) Then, use the Import-Clixml command to import and decrypt the credential and save it in a variable.
c) Next, create a PS Session Option with the New-PSSessionOption command and save it in a variable.
d) Then, use the New-PSSession to connect to Exchange Online and save the session in a variable
e) Finally, use the Import-PSSession to import the Office 365 Exchange modules to your computer.
When you run the Import-PSSession, PowerShell downloads the modules from O365, then displays the module information. The information PowerShell displays contain the name of the module.
To display all the Cmdlets in the module, run the Get-Command command with the -Module parameter, then specify the module
From this point, you can run Office 365 PowerShell commands like Get-Mailbox.
To access Exchange Online from a browser, enter the URL https://admin.microsoft.com, then sign in with your Microsoft 365 admin credentials.
To access your Exchange email, visit Outlook.com, then sign in with your Office 365 username and password.
Exchange Online is part of the Office 365 subscription suite. Office 365 is a subscription-based service that includes Microsoft Word, Excel, PowerPoint, Outlook, and more.
On the other hand, Exchange Online is a distinct component of Office 365 (now known as Microsoft 365) that provides cloud-based email, calendar, and other cloud-based services.
Conclusion
I hope I taught you how to Connect to Exchange Online PowerShell successfully!
I also hope you found the Itechguide helpful. If you found it helpful, kindly click Yes to the “Was this page helpful?” question below.
However, on the rare event that you found it challenging to follow the steps in the guide or you followed the steps but didn’t get the desired result, click No, then, provide us as many details as possible.
Finally, for more PowerShell tech Itechguides, visit our Windows PowerShell how-to page. You may also find our Work from Home page very helpful.