Do you want to return information from a website in PowerShell but are not sure how to do that? You need the PowerShell cURL (Invoke-WebRequest) command and this guide teaches you all you need to know about this command.
Overview
The Invoke-WebRequest cmdlet, introduced in PowerShell 3.0 sends HTTP and HTTPS requests to a web page or web service.
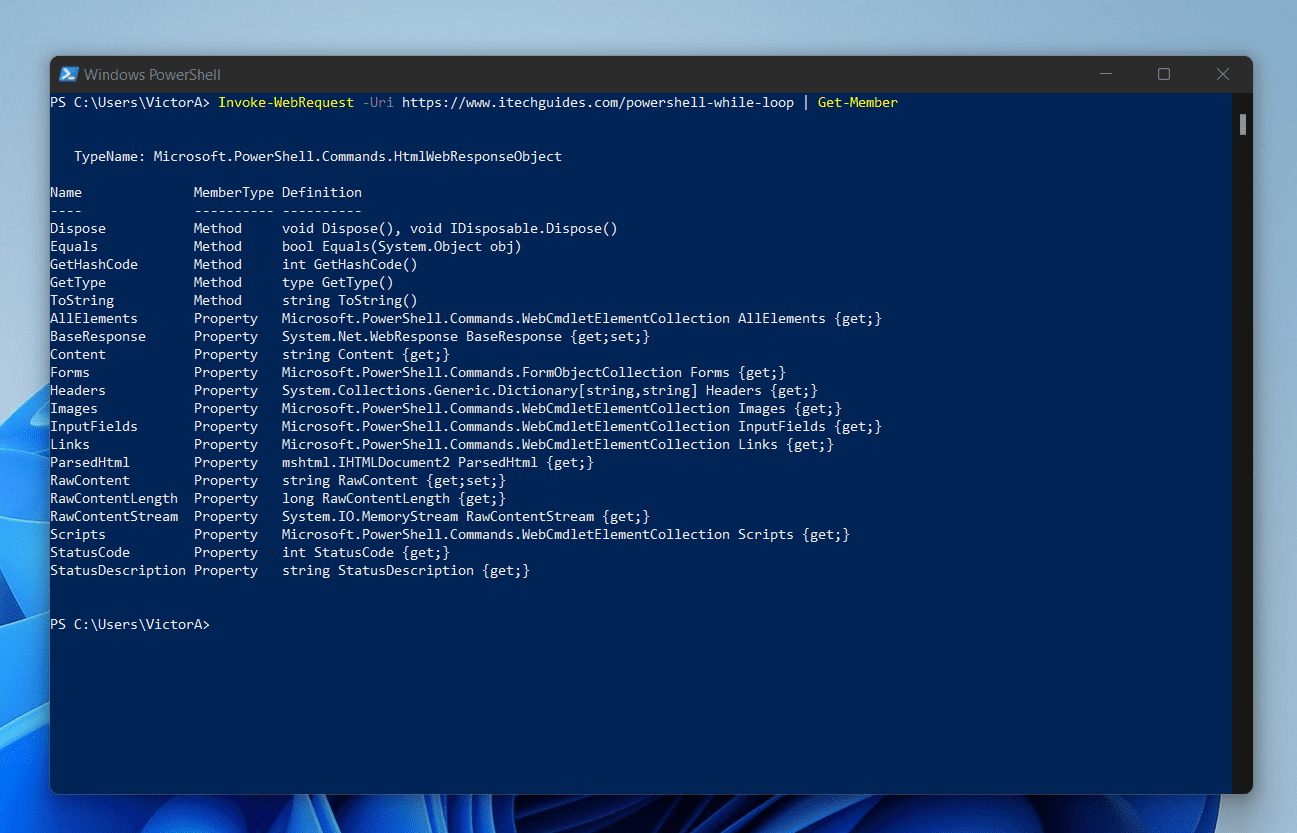
When you run the PowerShell cURL (Invoke-WebRequest) command, PowerShell returns much useful information. Some of the returned information is Properties, while others are Methods you can use to manipulate the objects received.
Some common properties returned by this command are Content, Forms, and Images. In addition to those, you also get more properties like Links and StatusCode.
As I mentioned earlier, Invoke-WebRequest has some useful Methods like GetHashCode, GetType, and ToString.
The screenshot at the beginning of this section shows the output of the Invoke-WebRequest when I piped it to the Get-Member cmdlet.
Syntaxes
The Invoke-WebRequest cmdlet has four syntaxes. Here they are…
Invoke-WebRequest
      [-UseBasicParsing]
      [-Uri] <Uri>
      [-WebSession <WebRequestSession>]
      [-SessionVariable <String>]
      [-AllowUnencryptedAuthentication]
      [-Authentication <WebAuthenticationType>]
      [-Credential <PSCredential>]
      [-UseDefaultCredentials]
      [-CertificateThumbprint <String>]
      [-Certificate <X509Certificate>]
      [-SkipCertificateCheck]
      [-SslProtocol <WebSslProtocol>]
      [-Token <SecureString>]
      [-UserAgent <String>]
      [-DisableKeepAlive]
      [-TimeoutSec <Int32>]
      [-Headers <IDictionary>]
      [-MaximumRedirection <Int32>]
      [-MaximumRetryCount <Int32>]
      [-RetryIntervalSec <Int32>]
      [-Method <WebRequestMethod>]
      [-Proxy <Uri>]
      [-ProxyCredential <PSCredential>]
      [-ProxyUseDefaultCredentials]
      [-Body <Object>]
      [-Form <IDictionary>]
      [-ContentType <String>]
      [-TransferEncoding <String>]
      [-InFile <String>]
      [-OutFile <String>]
      [-PassThru]
      [-Resume]
      [-SkipHttpErrorCheck]
      [-PreserveAuthorizationOnRedirect]
      [-SkipHeaderValidation]
      [<CommonParameters>]
Invoke-WebRequest
      [-UseBasicParsing]
      [-Uri] <Uri>
      [-WebSession <WebRequestSession>]
      [-SessionVariable <String>]
      [-AllowUnencryptedAuthentication]
      [-Authentication <WebAuthenticationType>]
      [-Credential <PSCredential>]
      [-UseDefaultCredentials]
      [-CertificateThumbprint <String>]
      [-Certificate <X509Certificate>]
      [-SkipCertificateCheck]
      [-SslProtocol <WebSslProtocol>]
      [-Token <SecureString>]
      [-UserAgent <String>]
      [-DisableKeepAlive]
      [-TimeoutSec <Int32>]
      [-Headers <IDictionary>]
      [-MaximumRedirection <Int32>]
      [-MaximumRetryCount <Int32>]
      [-RetryIntervalSec <Int32>]
      [-Method <WebRequestMethod>]
      -NoProxy
      [-Body <Object>]
      [-Form <IDictionary>]
      [-ContentType <String>]
      [-TransferEncoding <String>]
      [-InFile <String>]
      [-OutFile <String>]
      [-PassThru]
      [-Resume]
      [-SkipHttpErrorCheck]
      [-PreserveAuthorizationOnRedirect]
      [-SkipHeaderValidation]
      [<CommonParameters>]
Invoke-WebRequest
      [-UseBasicParsing]
      [-Uri] <Uri>
      [-WebSession <WebRequestSession>]
      [-SessionVariable <String>]
      [-AllowUnencryptedAuthentication]
      [-Authentication <WebAuthenticationType>]
      [-Credential <PSCredential>]
      [-UseDefaultCredentials]
      [-CertificateThumbprint <String>]
      [-Certificate <X509Certificate>]
      [-SkipCertificateCheck]
      [-SslProtocol <WebSslProtocol>]
      [-Token <SecureString>]
      [-UserAgent <String>]
      [-DisableKeepAlive]
      [-TimeoutSec <Int32>]
      [-Headers <IDictionary>]
      [-MaximumRedirection <Int32>]
      [-MaximumRetryCount <Int32>]
      [-RetryIntervalSec <Int32>]
      -CustomMethod <String>
      [-Proxy <Uri>]
      [-ProxyCredential <PSCredential>]
      [-ProxyUseDefaultCredentials]
      [-Body <Object>]
      [-Form <IDictionary>]
      [-ContentType <String>]
      [-TransferEncoding <String>]
      [-InFile <String>]
      [-OutFile <String>]
      [-PassThru]
      [-Resume]
      [-SkipHttpErrorCheck]
      [-PreserveAuthorizationOnRedirect]
      [-SkipHeaderValidation]
      [<CommonParameters>]
Invoke-WebRequest
      [-UseBasicParsing]
      [-Uri] <Uri>
      [-WebSession <WebRequestSession>]
      [-SessionVariable <String>]
      [-AllowUnencryptedAuthentication]
      [-Authentication <WebAuthenticationType>]
      [-Credential <PSCredential>]
      [-UseDefaultCredentials]
      [-CertificateThumbprint <String>]
      [-Certificate <X509Certificate>]
      [-SkipCertificateCheck]
      [-SslProtocol <WebSslProtocol>]
      [-Token <SecureString>]
      [-UserAgent <String>]
      [-DisableKeepAlive]
      [-TimeoutSec <Int32>]
      [-Headers <IDictionary>]
      [-MaximumRedirection <Int32>]
      [-MaximumRetryCount <Int32>]
      [-RetryIntervalSec <Int32>]
      -CustomMethod <String>
      -NoProxy
      [-Body <Object>]
      [-Form <IDictionary>]
      [-ContentType <String>]
      [-TransferEncoding <String>]
      [-InFile <String>]
      [-OutFile <String>]
      [-PassThru]
      [-Resume]
      [-SkipHttpErrorCheck]
      [-PreserveAuthorizationOnRedirect]
      [-SkipHeaderValidation]
      [<CommonParameters>]
If you’re wondering about the difference between the four syntaxes, it is primarily the presence of the Proxy parameter in the first syntax but NoProxy in the second.
So, since the second syntax has the NoProxy parameter, it also means that the syntax does not include the ProxyCredential and ProxyUseDefaultCredentials parameters.
The reason for the absence of these two parameters in the second syntax is that they are related to the Proxy parameter.
Moving on to the third syntaxes, it still has the Proxy, ProxyCredential, and ProxyUseDefaultCredentials parameters. However, in addition to those, it includes another parameter – CustomMethod.
So, the difference between the first and the third syntaxes is the CustomMethod parameter.
Now, enter the fourth syntax. It also has the CustomMethod parameter but instead of having the Proxy parameter, it has the NoProxy parameter.
I admit that the information I have detailed so far is slightly difficult to comprehend. So, I created a summary table below:
| Syntaxes | Parameters | Comments/Notes |
|---|---|---|
| 1st Syntax | Proxy, ProxyCredential, ProxyUseDefaultCredentials, and Method | You cannot specify the ProxyUseDefaultCredentials parameter and the ProxyCredential parameter in the same command. You can only use one. |
| 2nd Syntax | NoProxy and Method | |
| 3rd Syntax | Proxy, ProxyCredential, ProxyUseDefaultCredentials, and CustomMethod | You cannot specify the ProxyUseDefaultCredentials parameter and the ProxyCredential parameter in the same command. You can only use one. |
| 4th Syntax | NoProxy and CustomMethod |
Any syntax that has the CustomMethod parameter does not include the Method parameter and vice versa. So, you cannot use the Method and the CustomMethod parameters in the same command.
If you try to mix and match parameters from two syntaxes, you may receive errors.
To represent my last statement visually, here are the only parameters that can work together (plus any other parameter not shown in the simplified syntaxes below).
Invoke-WebRequest
   [-Method <WebRequestMethod>]
   [-Proxy <Uri>]
   [-ProxyCredential <PSCredential>]
   [-ProxyUseDefaultCredentials]

#you cannot specify the ProxyUseDefaultCredentials parameter and the ProxyCredential parameter in the same command. You can only use one.
Invoke-WebRequest
  [-Method <WebRequestMethod>]
  -NoProxy
Invoke-WebRequest
 -CustomMethod <String>
 [-Proxy <Uri>]
 [-ProxyCredential <PSCredential>]
 [-ProxyUseDefaultCredentials]

#you cannot specify the ProxyUseDefaultCredentials parameter and the ProxyCredential parameter in the same command. You can only use one.
Invoke-WebRequest
   -CustomMethod <String>
   -NoProxy
Parameters
In the table below, I listed all the parameters of the Invoke-WebRequest cmdlet. I also explained what each parameter does and provided notes on how to use them.
| S/N | Parameter Name | PowerShell cURL Parameter Meaning/Notes |
|---|---|---|
| 1 | Uri | Use the Uri parameter to the Uniform Resource Identifier (URI) of the internet resource you’re sending the web request. In simple terms, use the Uri parameter to specify the website you want to query. The parameter supports HTTP, HTTPS, FTP, and FILE values. |
| 2 | UseBasicParsing | You only need to specify this parameter when Internet Explorer is not installed on the computers. For example, if you run this command on a Server Core installation of a Windows Server operating system, you need to specify the UseBasicParsing. In terms of what the UseBasicParsing does, it indicates that the Invoke-WebRequest command uses the response object for HTML content without parsing Document Object Model (DOM). |
| 3 | WebSession | If you specify information about the website you wish to query in a variable say $WebSession, you can use the WebSession parameter of the PowerShell cURL command to specify the variable. To create a web request session, enter a variable name (without a dollar sign) in the value of the SessionVariable parameter of an Invoke-WebRequest command. When you do this, the Invoke-WebRequest command creates the session and saves it in the variable. Then, in subsequent commands, use the variable as the value of the WebSession parameter. |
| 4 | SessionVariable | The SessionVariable parameter specifies a variable for which the Invoke-WebRequest cmdlet creates a web request session and saves it in the value. To use this variable, enter a variable name without the dollar sign ($) symbol. |
| 5 | Authentication | The default authentication used by the Invoke-WebRequest cmdlet is None. However, if you wish to explicitly specify an authentication type to use for the web request, use the Authentication parameter. |
| 6 | AllowUnencryptedAuthentication | By default, when you supply Credential or an Authentication option with a Uri that does not begin with https:// will result in an error. Then, the request is aborted. However, you can use the AllowUnencryptedAuthentication parameter to bypass the default behavior. |
| 7 | Credential | By default when you run the PowerShell cURL (Invoke-WebRequest) command, the cmdlet authenticates with the current user. But, if you wish to specify a user account that has permission to send the web request, use the Credential parameter. |
| 8 | UseDefaultCredentials | When you specify this parameter, you indicate that you want the cmdlet to use the credentials of the currently logged-in user to send the web request. |
| 9 | Certificate | The Certificate parameter specifies the client certificate that is used by PowerShell cURL (Invoke-WebRequest) for a secure web request. You can enter a variable that contains a certificate Alternatively, you can enter a command or expression that gets the certificate. |
| 10 | CertificateThumbprint | Use this parameter to specify the digital public key certificate (X509) of a user account that has permission to send the web request. |
| 11 | SkipCertificateCheck | When you specify the SkipCertificateCheck parameter, the Invoke-WebRequest command skips the certificate validation check. |
| 12 | SslProtocol | By default all, the PowerShell cURL (Invoke-WebRequest) command allows all SSL/TLS protocols supported by the system. However, if you wish to set the SSL/TLS protocols that are permissible for the web request, use the SslProtocol parameter. |
| 13 | Token | The Token parameter was introduced in PowerShell 6.0. Use this parameter to specify the OAuth or Bearer token to include in the request. Token is required by certain Authentication options. The Token parameter cannot be used independently. |
| 14 | UserAgent | Use this parameter to specify a user agent string for the web request. |
| 15 | DisableKeepAlive | As the name implies, KeepAlive establishes a persistent connection to the server receiving the web request to facilitate subsequent requests. By default, KeepAlive is True. However, if you wish to disable this and set KeepAlive to False, specify the DisableKeepAlive parameter. |
| 16 | TimeoutSec | When you run the PowerShell cURL (Invoke-WebRequest) command, the default time-out value is 0 – which specifies an indefinite time-out. But, if you wish to specify a timeout in seconds, use the TimeoutSec parameter. |
| 17 | Headers | Use the Headers parameter to specify the headers of the web request. you can enter a hash table or dictionary. |
| 18 | MaximumRedirection | When you run the PowerShell cURL command, PowerShell may redirect to an alternate URI (website, FTP site, etc) – the default number of allowed redirects is 5. If you want to disable all redirects specify 0 (zero) with the MaximumRedirection parameter. |
| 19 | MaximumRetryCount | When you run the Invoke-WebRequest command, PowerShell may fail to get a response from the website. You can use the MaximumRetryCount parameter to specify how many retries are allowed. |
| 20 | RetryIntervalSec | When the PowerShell cURL (Invoke-WebRequest) command receives a failure code between 400 and 599, inclusive or 304, it performs a retry. Use the RetryIntervalSec parameter to specify the interval between retries. |
| 21 | Method | Use this parameter to specify the method used for the web request. The acceptable methods are Default, Delete, Get, Head, Merge, Options, Patch, Post, Put or Trace. |
| 22 | Proxy | If you connect to the internet via a proxy server, use the Proxy parameter to specify a proxy server for the request. |
| 23 | ProxyCredential | When you specify a proxy with the Proxy parameter and wish to specify a user account with the permission to use the proxy server, use the ProxyCredential parameter to specify the user login credentials. By default is the Invoke-WebRequest command uses the current user to authenticate to the proxy server. |
| 24 | ProxyUseDefaultCredentials | This is a Switch parameter – meaning that it does not require any input. When you specify this parameter, the PowerShell cURL (Invoke-WebRequest) cmdlet uses the credentials of the current user to authenticate to the proxy server that you specified by the Proxy parameter. |
| 25 | Body | The body of a web resource is the content of the request that follows the header. Use the Body parameter to specify the body of the request. You can use the Body parameter to specify a list of query parameters or specify the content of the response. |
| 26 | Form | Use the Form parameter to specify the information you want the PowerShell cURL command to submit. You can create a hashtable, save it in a variable and call the variable when you specify the Form parameter. |
| 27 | ContentType | Use the ContentType parameter to specify the content type of the web request. |
| 28 | TransferEncoding | Used to specify a value for the transfer-encoding HTTP response header. You can specify any of the following acceptable values for this parameter – Chunked, Compress, Deflate, or GZip. |
| 29 | InFile | Gets the content of the web request from a file you specify. The default for this parameter is the current location. |
| 30 | OutFile | Specifies the output file for which the PowerShell cURL (Invoke-WebRequest) cmdlet saves the response body. To specify a path for this parameter, enter a path and file name. The default is the current location. |
| 31 | PassThru | In PowerShell, the PassThru parameter is usually used to indicate that a cmdlet performs two actions – usually, to display results on the console as well as save them to a file. If you specify the PassThru parameter, you MUST also specify the OutFile parameter – so, you can specify the output file path. |
| 32 | Resume | To specify the Resume parameter, you must also specify the OutFile parameter. When you specify the Resume parameter the Invoke-WebRequest cmdlet performs a best-effort attempt to resume downloading a partial file. |
| 33 | SkipHttpErrorCheck | This parameter causes the PowerShell cURL (Invoke-WebRequest) to ignore HTTP error statuses and continue to process responses. The cmdlet still writes the error responses to the pipeline just as if they were successful. |
| 34 | PreserveAuthorizationOnRedirect | This parameter indicates the Invoke-WebRequest cmdlet should preserve the Authorization header, when present, across redirections. By default, PowerShell cURL strips the Authorization header before redirecting. When you want to change this default behavior specify this parameter to disable this logic for cases where the header needs to be sent to the redirection location. |
| 35 | SkipHeaderValidation | This parameter indicates that the Invoke-WebRequest cmdlet should add headers to the request without validating the headers. This switch parameter should be used for sites that require header values that do not conform to standards. Specifying this parameter disables validation to allow the value to be passed without being checked. |
| 36 | NoProxy | Specifying this parameter forces the PowerShell cURL (Invoke-WebRequest) to not use a proxy to reach the destination. This parameter was introduced in PowerShell 6.0.0 |
| 37 | CustomMethod | This parameter is meant to be used in place of the Method parameter. As I mentioned in the Method parameter, it supports the following – Default, Delete, Get, Head, Merge, Options, Patch, Post, Put or Trace. However, if you need to specify a Request Method not listed above, use the CustomMethod parameter to specify the Method. |
Examples
So far I have given you an overview of the Invoke-WebRequest (cURL) cmdlet. In addition to that, I have discussed the syntax and parameters of this cmdlet.
All the information so far is meant to prepare you for this section. In this section, I’ll use examples to show you different ways you can use PowerShell cURL (Invoke-WebRequest) to solve problems.
1. Get Help About PowerShell cURL (Invoke-WebRequest)
Although I have discussed the syntax and parameters of the cURL command, it is useful to know how to find help for this cmdlet.
Like all PowerShell cmdlets, you can use the Get-Help cmdlet to find information about how to use Invoke-WebRequest. Specifically, you can get information about its syntax and parameters.
Not only that but you can also use the Get-Help cmdlet to find examples of the cURL command.
At the most basic level, to use the Get-Help cmdlet to find information about the Invoke-WebRequest, run the command below:
Get-Help Invoke-WebRequest
Alternatively, you can use the alias of the Invoke-WebRequest cmdlet…
Get-Help cURL
Both commands will display the basic help information about PowerShell cURL (Invoke-WebRequest).

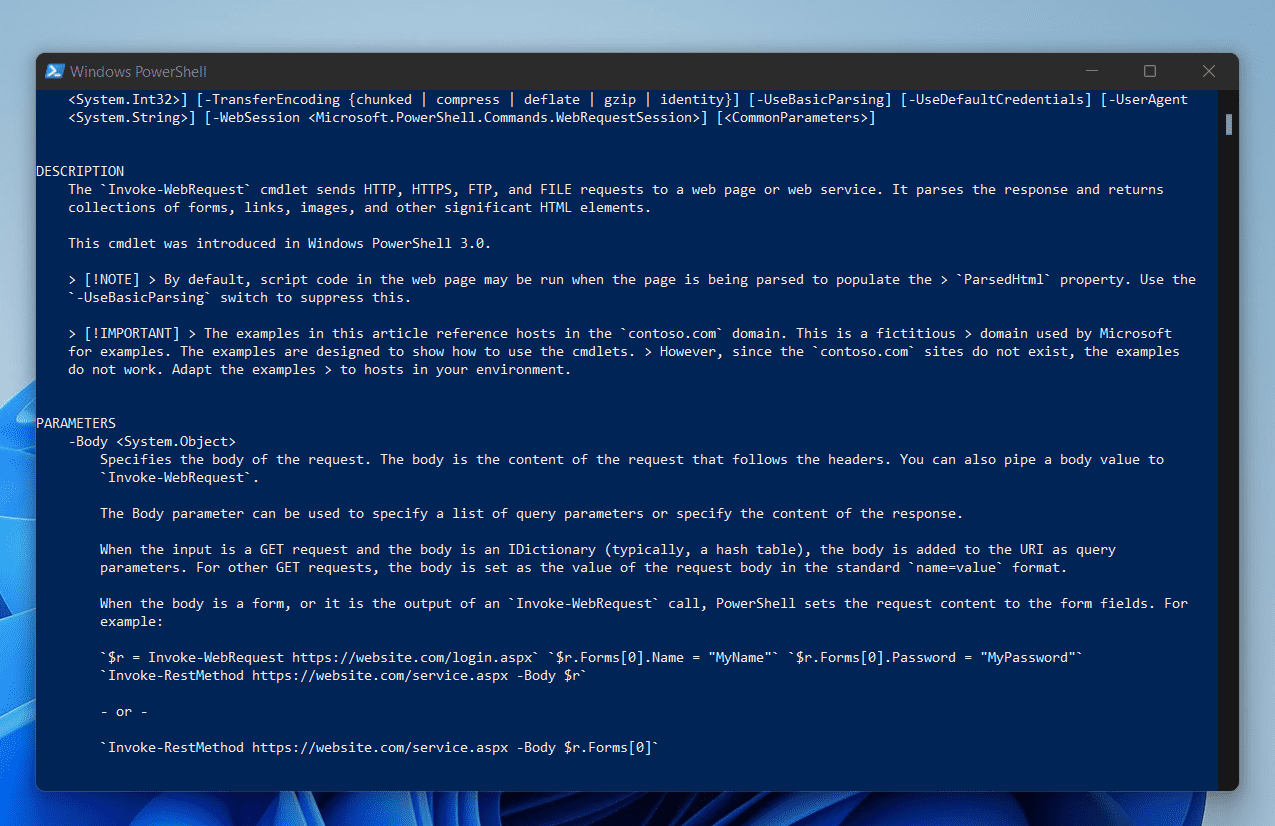
However, if you want detailed help information, you can use some parameters of the Get-Help cmdlet. For instance, if you want to display detailed help information about this cmdlet, use the Detailed parameter of Get-Help.
Here is the command…
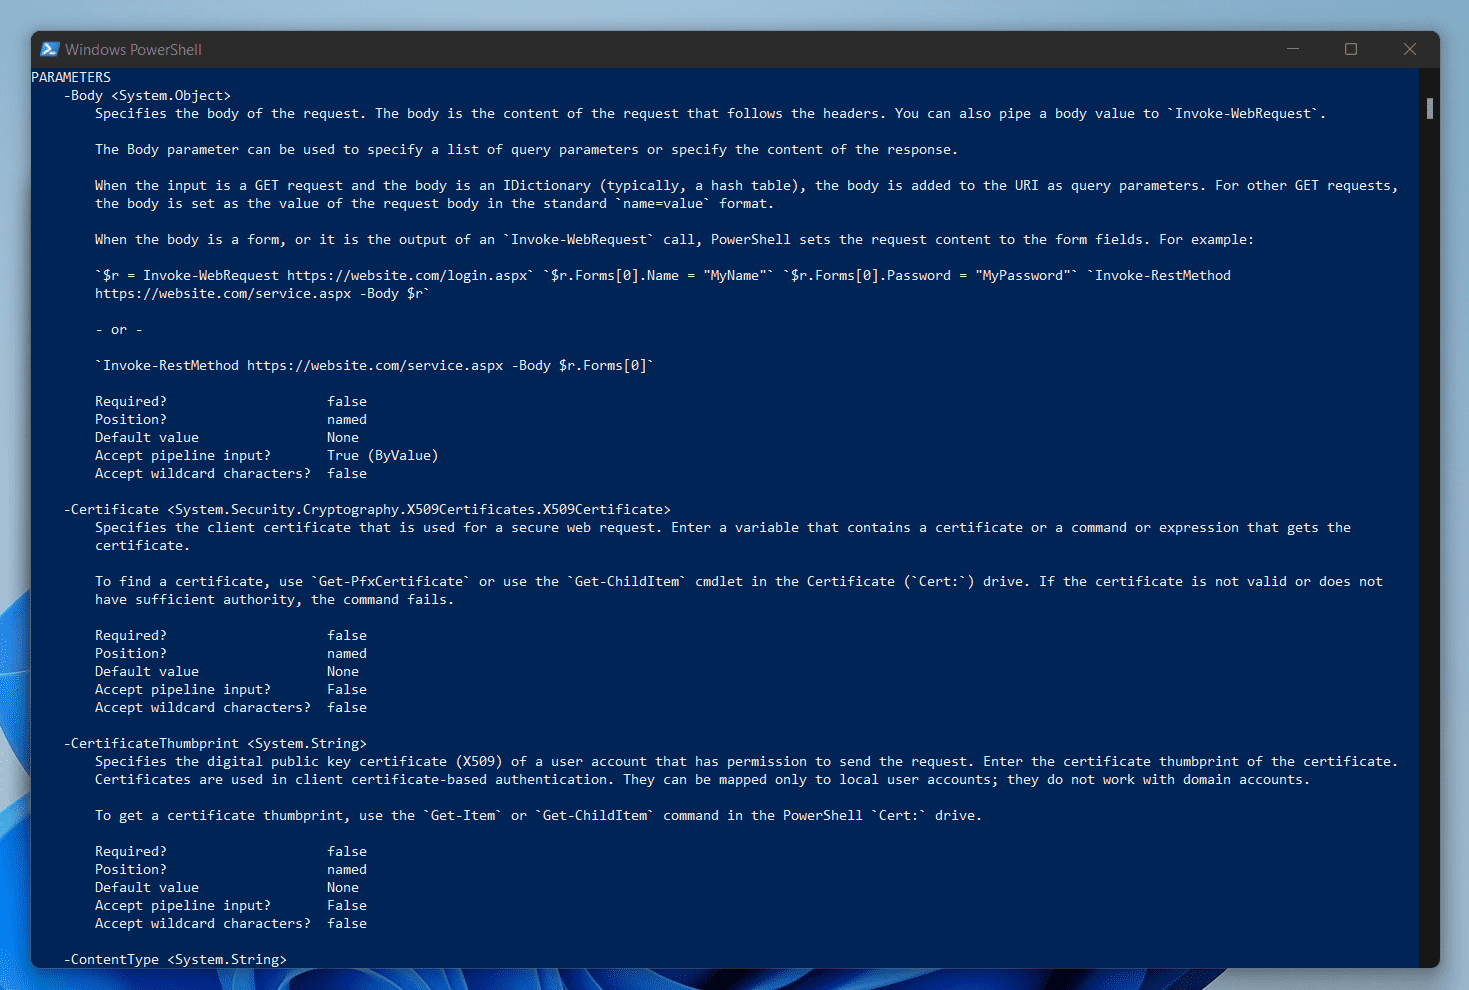
Get-Help Invoke-WebRequest -Detailed
As you can see from the screenshot below, the command displays more information. For example, you get more information about the parameters of the cURL command.
In addition to that, you also get some examples. However, if you want to display examples alone, you can use the Examples parameter of Get-Help.
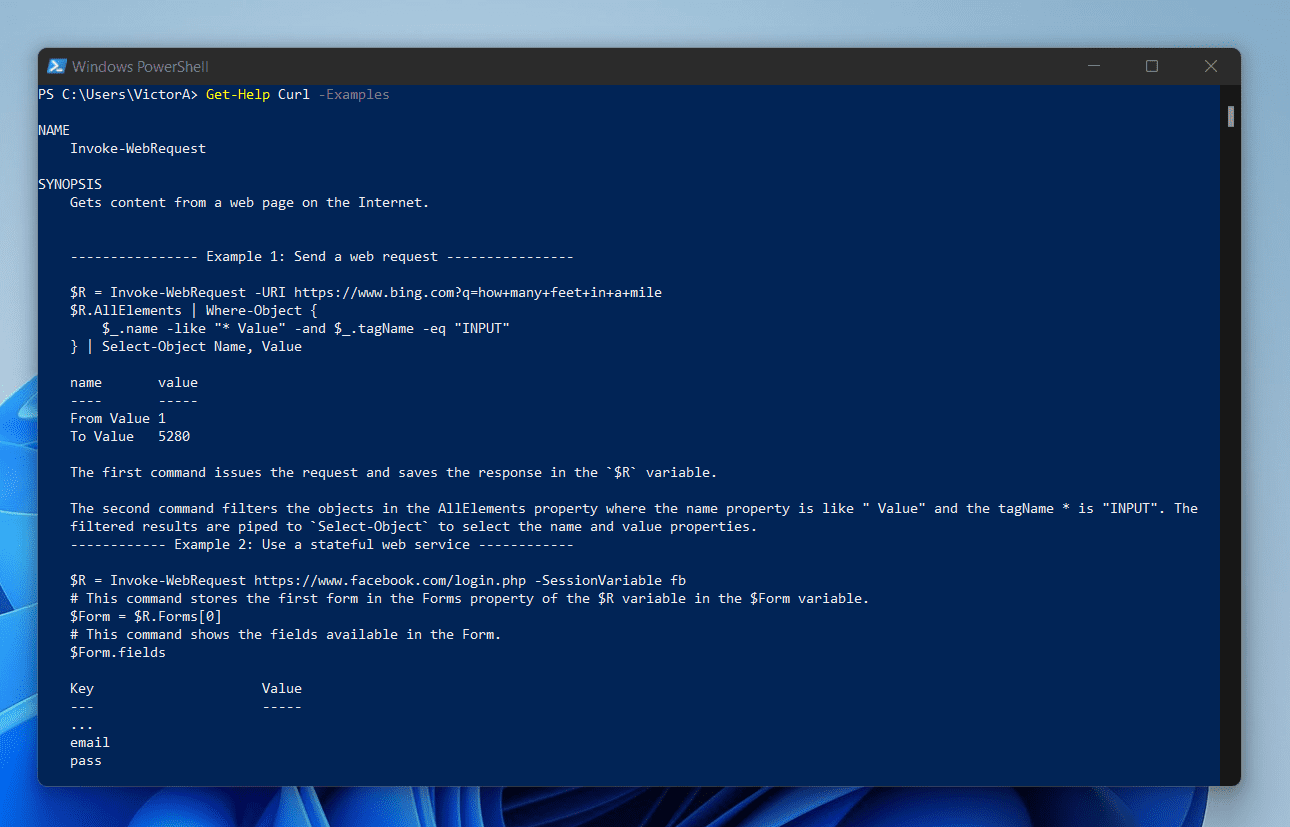
Get-Help cURL -Examples
The last command displays multiple examples of how to use the PowerShell cURL command.
2. Use the Post Method Command to Return a Website’s HTTP Headers
In this example, I will show you how to use the Post Method Of PowerShell cURL (Invoke-WebRequest) to return the Header information of a website.
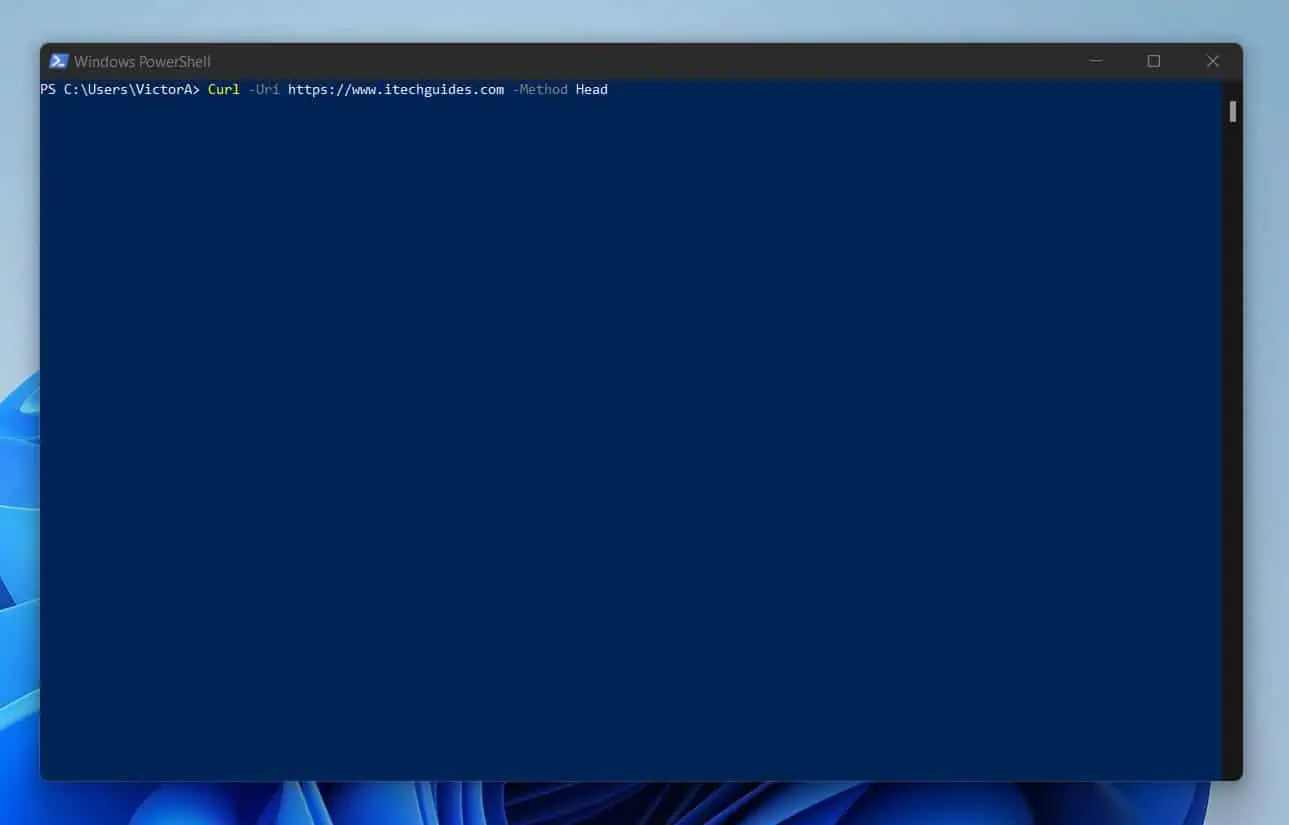
cURL -Uri https://www.itechguides.com -Method Head
When you run the command, it takes a while to return results. The reason for this is that PowerShell is communicating with a website over the internet.
Eventually, it will return the following information.
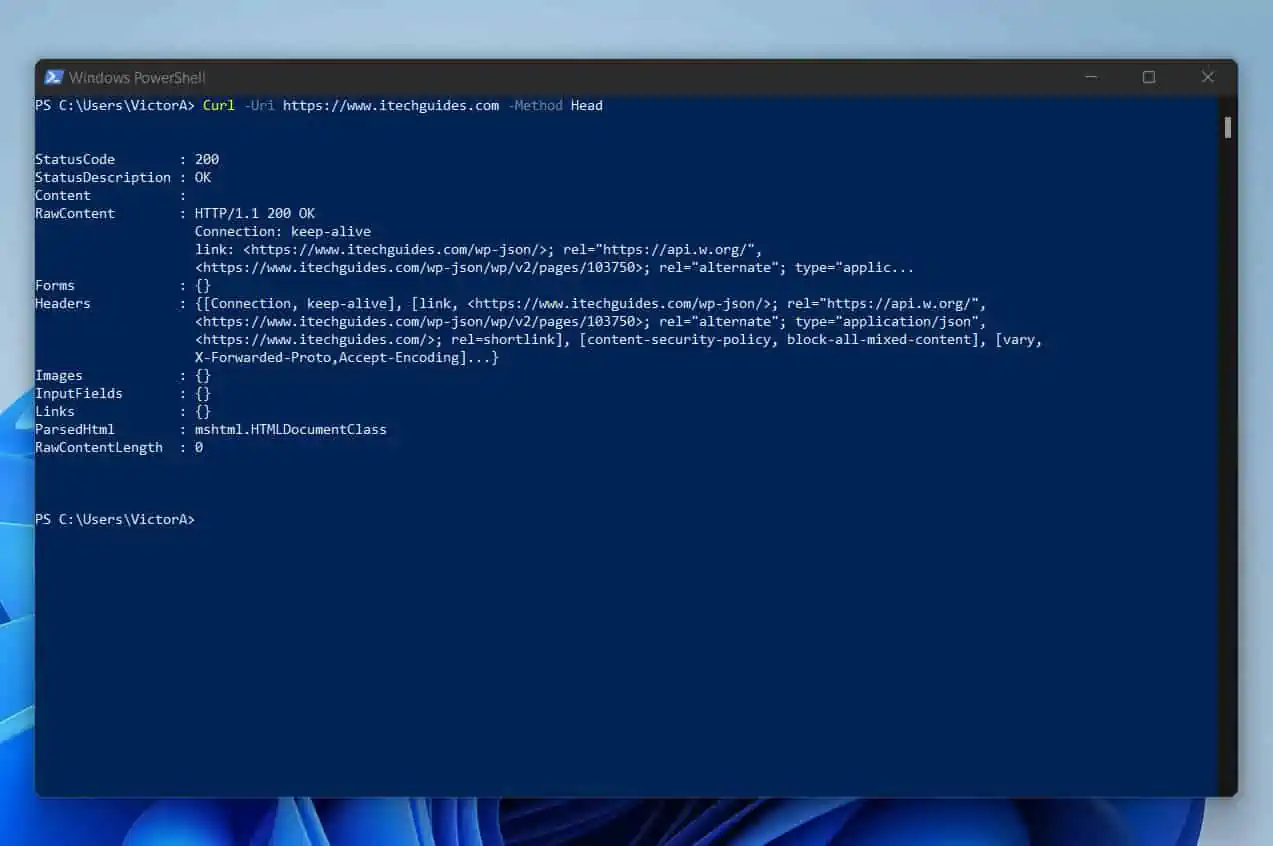
By specifying the Head Method, I used the Invoke-WebRequest (cURL) command to return only the HTTP headers of the website.
As seen in the screenshot above, the command returned information like the site’s StatusCode, StatusDescription, RawContent, and more.
To make it easy to manipulate the information returned, it is better to save the result in a variable. Here is the modified command…
$webrequest = cURL -Uri https://www.itechguides.com -Method Head
Once the command is completed, I can use the variable to return the specific information I require from the site’s HTTP headers. For example, to return the RawContent property, I’ll use the command below.
$webrequest.RawContent
This command returns some very interesting information about the website.
3. Use Command to Download File from a Website
In this example, I will demonstrate how to download a file from a website with PowerShell cURL. This URL on Itechguides.com has a zip file.
https://www.itechguides.com/windows-11-compatibility-checker/
The fastest way to do this is to get the link to the file you want to download. In this example, here is the link to the file on the page…
https://www.itechguides.com/wp-content/uploads/2021/09/Get-Windows11Compatibility.zip
Then, run the cURL or Invoke-WebRequest command as shown below:
cURL -Uri https://www.itechguides.com/wp-content/uploads/2021/09/Get-Windows11Compatibility.zip -OutFile D:\report\Get-Windows11Compatibility.zip
Here is the screenshot of the command and the file I downloaded.
4. Use Username and Password to Access a Secure Site
In this example, you’ll learn how to use the Credential parameter of PowerShell cURL (Invoke-WebRequest) cmdlet to specify username and password
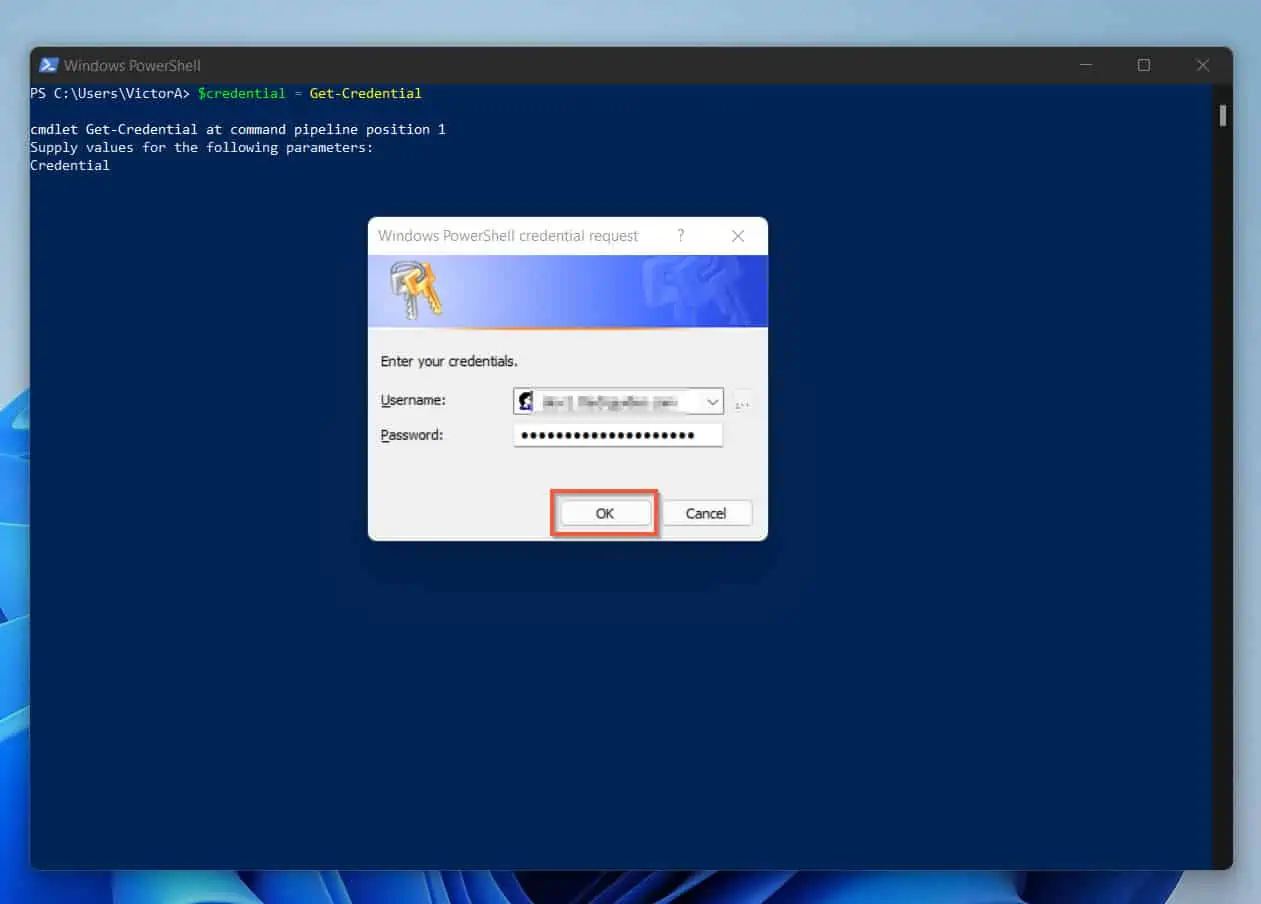
The first step is to save the username and password I need in a variable I call $credential. Here is the command that does the job…
$credential = Get-Credential
When you run the command in PowerShell, you’ll be prompted for the username and password. Enter the username and the password of the account with permission to access the site.
Then, run the Invoke-WebRequest command and use the Credential parameter to specify the username and password you saved in the $credential variable.
Invoke-WebRequest -Uri https://<server ip address or URL> -Credential $credential
5. Return the Content of a Website
When you run the cURL command in PowerShell, one of the properties returned is the Content of the website. Here is a sample command to return the Content of the www.itechguides.com homepage…
(cURL -Uri https://www.itechguides.com -UseBasicParsing).Content
The command will take a while to complete. When the command completes, it returns a long list of information.
6. Bypass Proxy in a Command
From PowerShell 6.0.0 Microsoft included the NoProxy parameter to the Invoke-WebRequest cmdlet. To run bypass proxy when you run the Invoke-WebRequest, specify the NoProxy parameter.
To download and install the latest version, visit Installing PowerShell on Windows. Then, scroll down to the “Installing the MSI package” section, download the MSI file and install it.
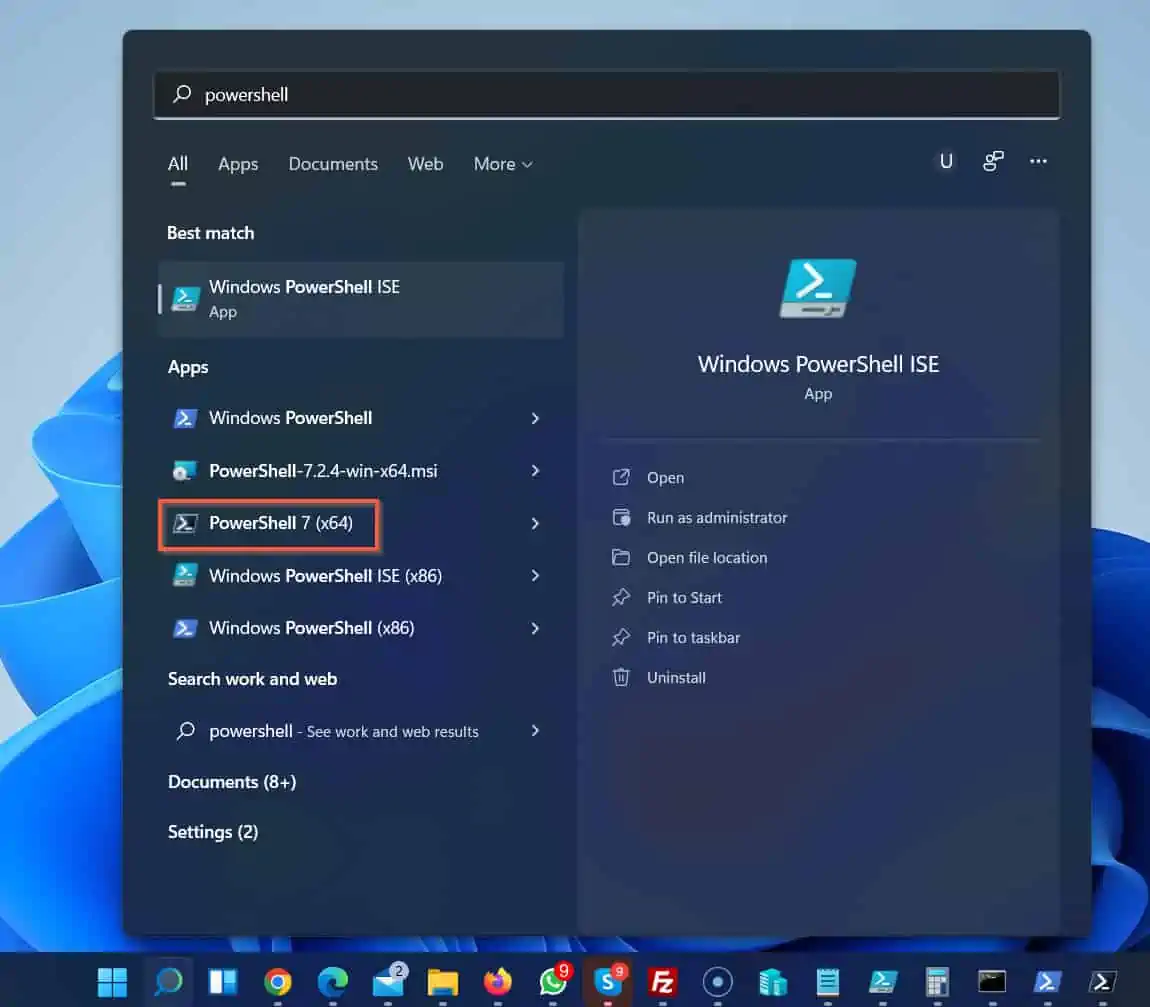
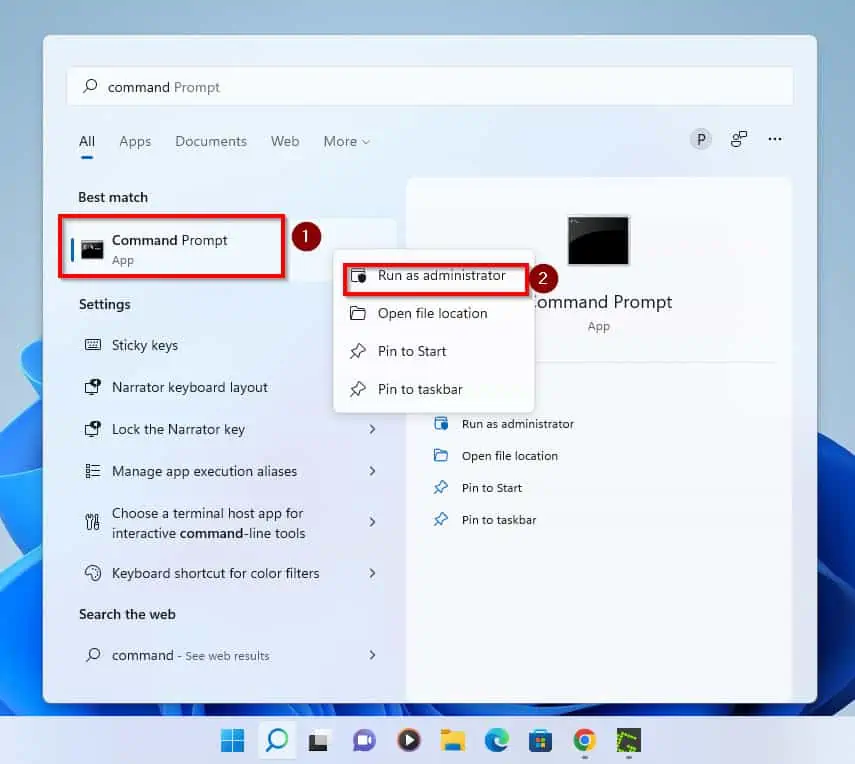
To run the command below, search powershell. Then, open the latest version of PowerShell you just installed.
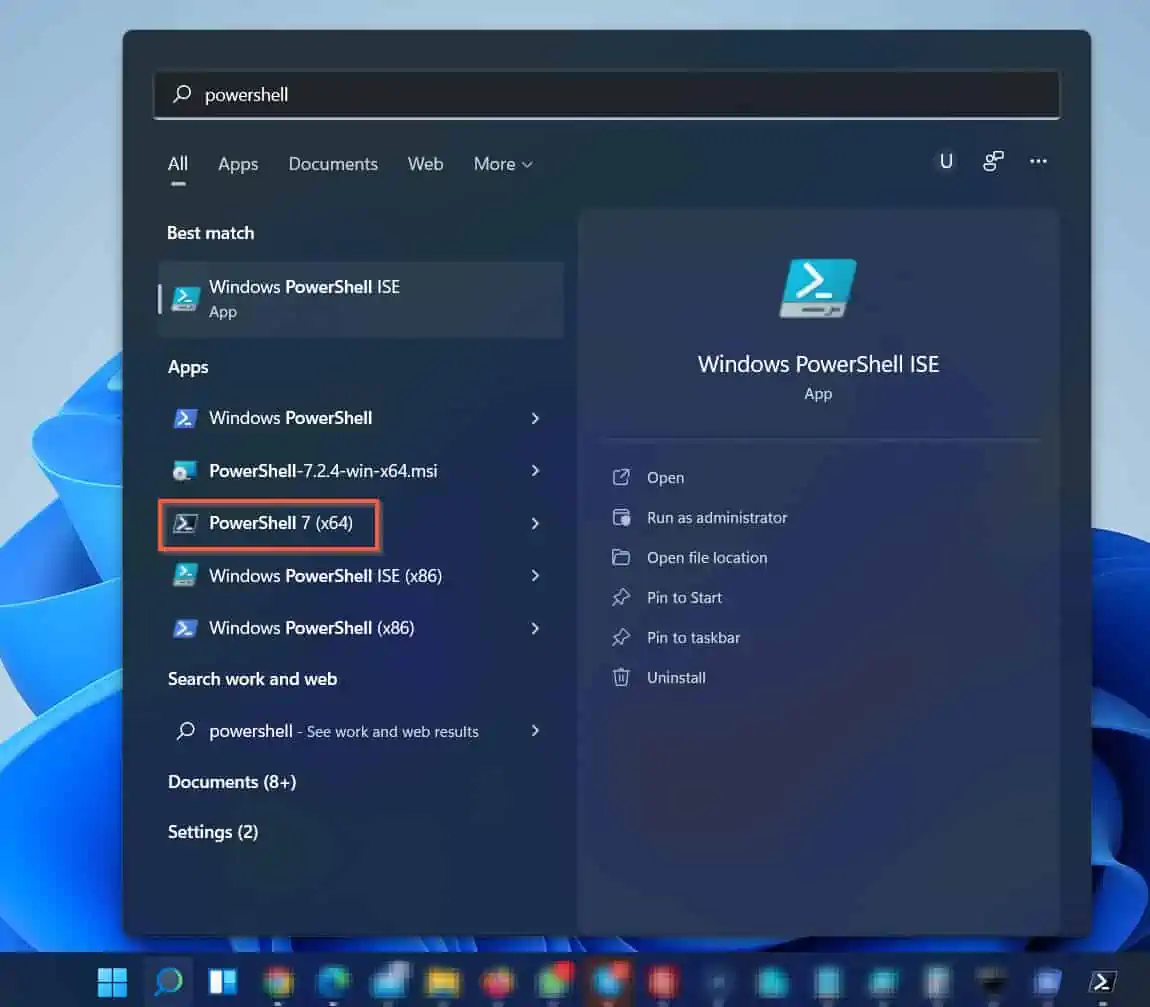
When you open the latest PowerShell version (at least 6.0.0), run the command below…
Invoke-WebRequest -Uri https://www.itechguides.com -UseBasicParsing -NoProxy
The com and will run, bypassing any proxy…
Frequently Asked Questions
In PowerShell, the symbol {} is called curly brackets. The curly brackets have many uses in PowerShell.
One example that stands out is it is used in creating hashtables. For example, to create a hashtable, enclose the hashtable’s key/value attributes in curly brackets.
@{
Name = “Document”
PSProvider = “FileSystem”
Root = “C:\Users\victo\Documents” }
In PowerShell, @() is used to create an array. The command below creates an array with three objects.
@(“Document”, “FileSystem”, “C:\Users\victo\Documents”)
In PowerShell, the cURL command is an alias of the Invoke-WebRequest cmdlet. The Invoke-WebRequest cmdlet is used to send requests to a website.
A simple Invoke-WebRequest or cURL command must include the URI (the full URL of the website you wish to send a request to). Here is a sample command that uses PowerShell cURL to query Itechguides.com.
cURL https://www.itechguides.com
The simple answer is Yes. It is relatively easy to learn PowerShell. You can start by reading my PowerShell Tutorial series.
However, if you feel you need more help, I offer a mentorship program. To find out more, email [email protected].
There are three types of brackets:
() – Parenthesis brackets
{} – Braces or curly brackets
[] – Square brackets
Conclusion
The Invoke-WebRequest (PowerShell cURL) cmdlet is one of those cmdlets that you may not need often. However, when you need it, it is one of those cmdlets that is fairly complicated to learn.
In the first instance, it is the first cmdlet that I have seen with more than thirty parameters! Not only that, there are four different syntaxes of the Invoke-WebRequest cmdlet.
No matter how complex the PowerShell cURL command may be, I hope I was able to make it easier for you to understand! If It did, click on “Yes” beside the “Was this page helpful” question below.
You may also express your thoughts and opinions by using the “Leave a Comment” form at the bottom of this page.
Finally, if you want to gain more PowerShell skills, you will benefit from our other articles on our Windows PowerShell Explained page. Alternatively, you can take a look at our Windows PowerShell How-To Guides.
To learn more, email [email protected].