This Itechguide teaches you how to remove a device from Google account. The guide covers steps to remove a device from Google account from a PC, iPhone or Android.
Option 1: Remove a Device via a PC
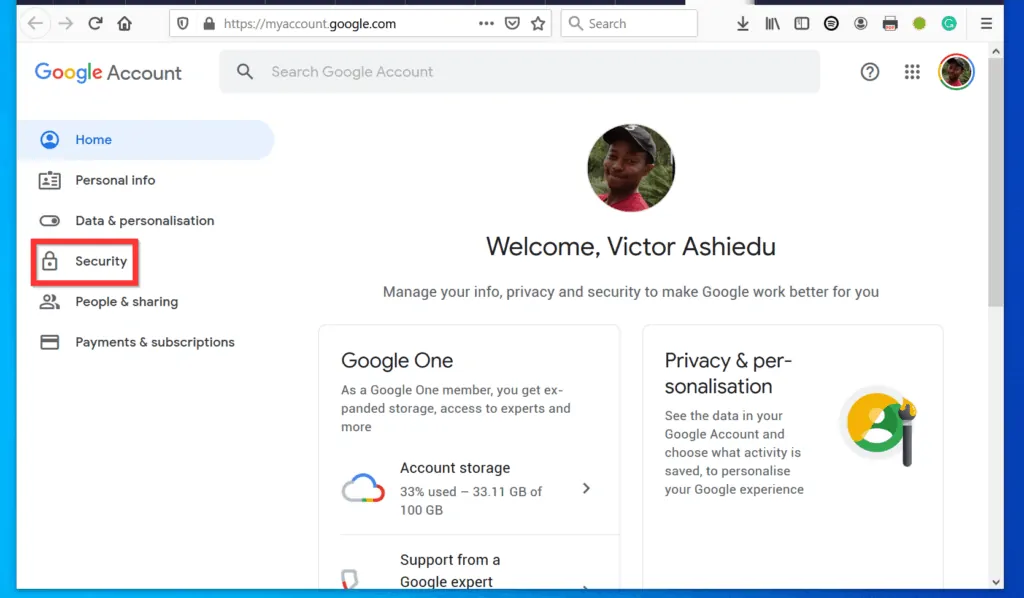
- Open myaccount.google.com from a browser on your PC – you may be required to sign in.
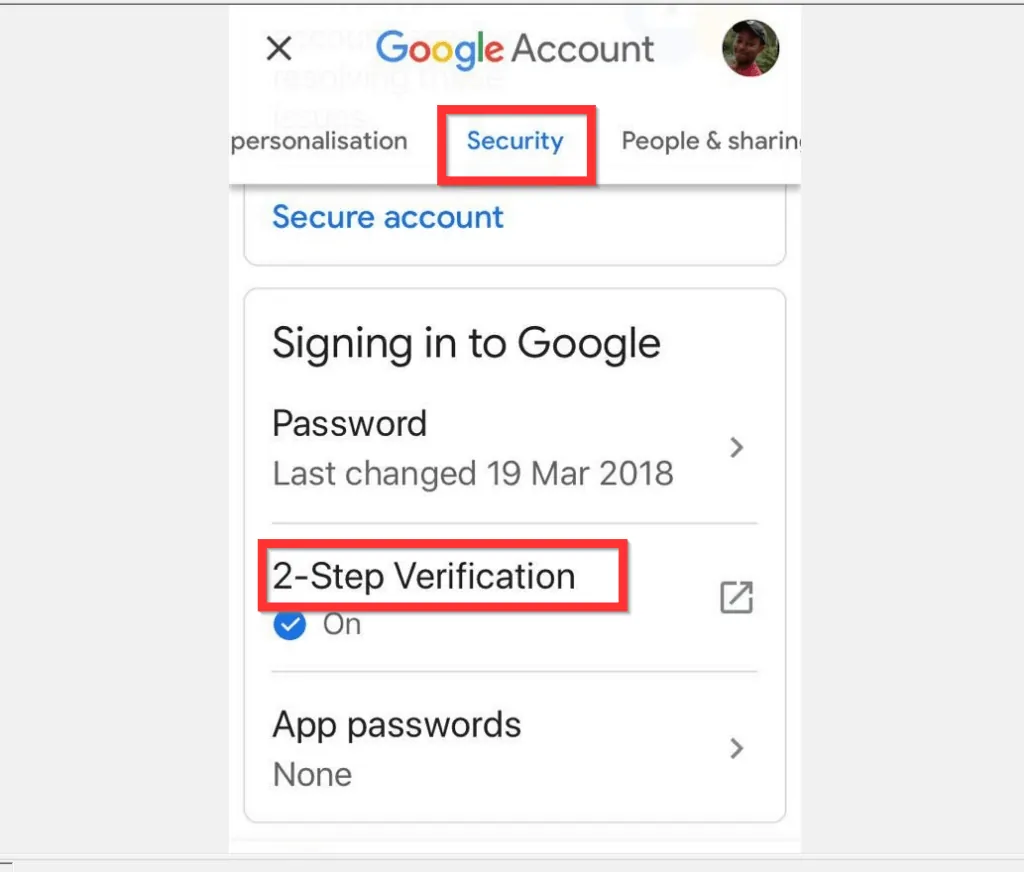
- Then, at the left pane of the page, click the Security tab.
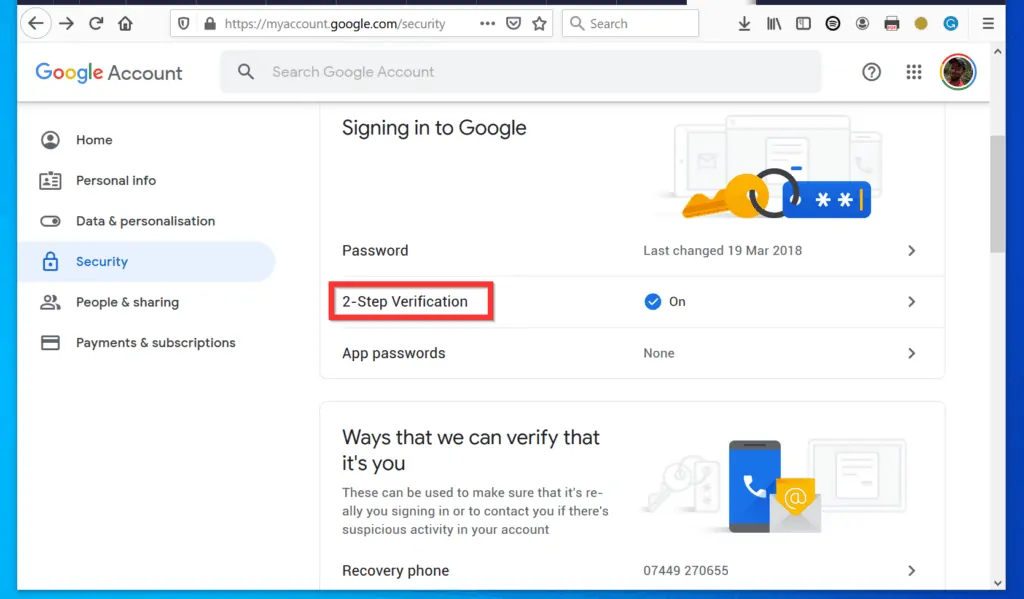
- When the Security tab opens, scroll down to Signing in to Google section and click 2-step Verification.
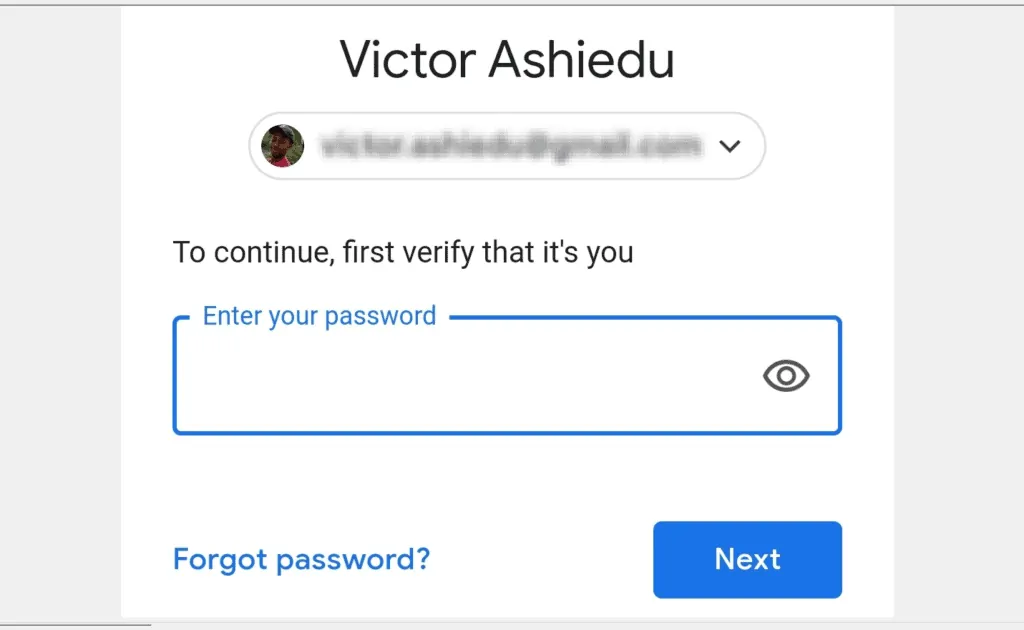
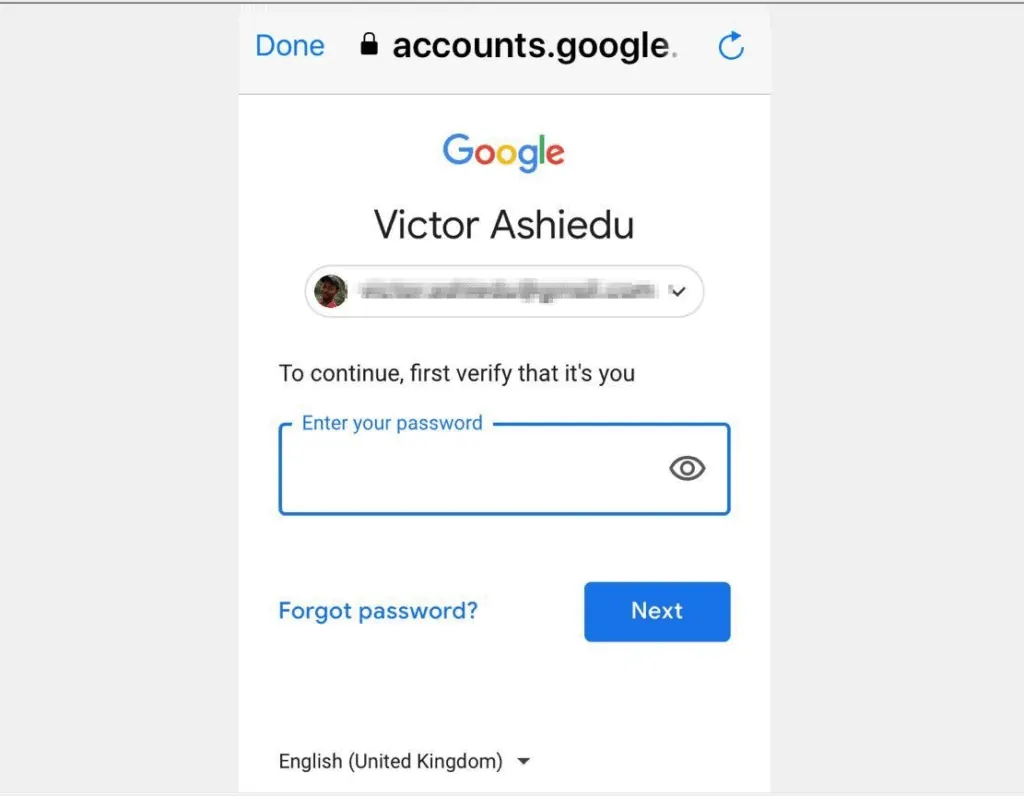
- You may be required to verify your account by re-entering password.

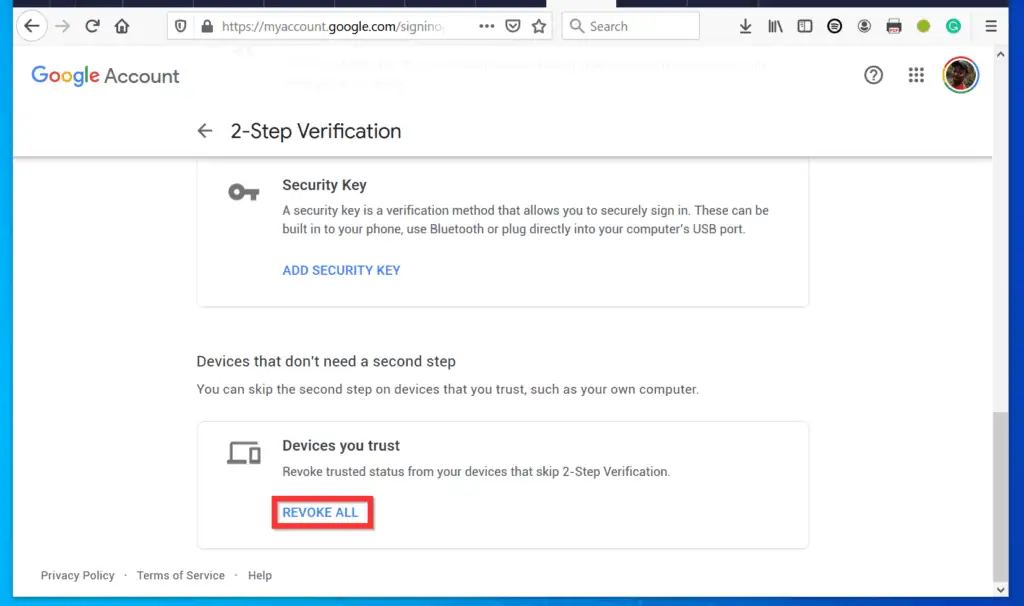
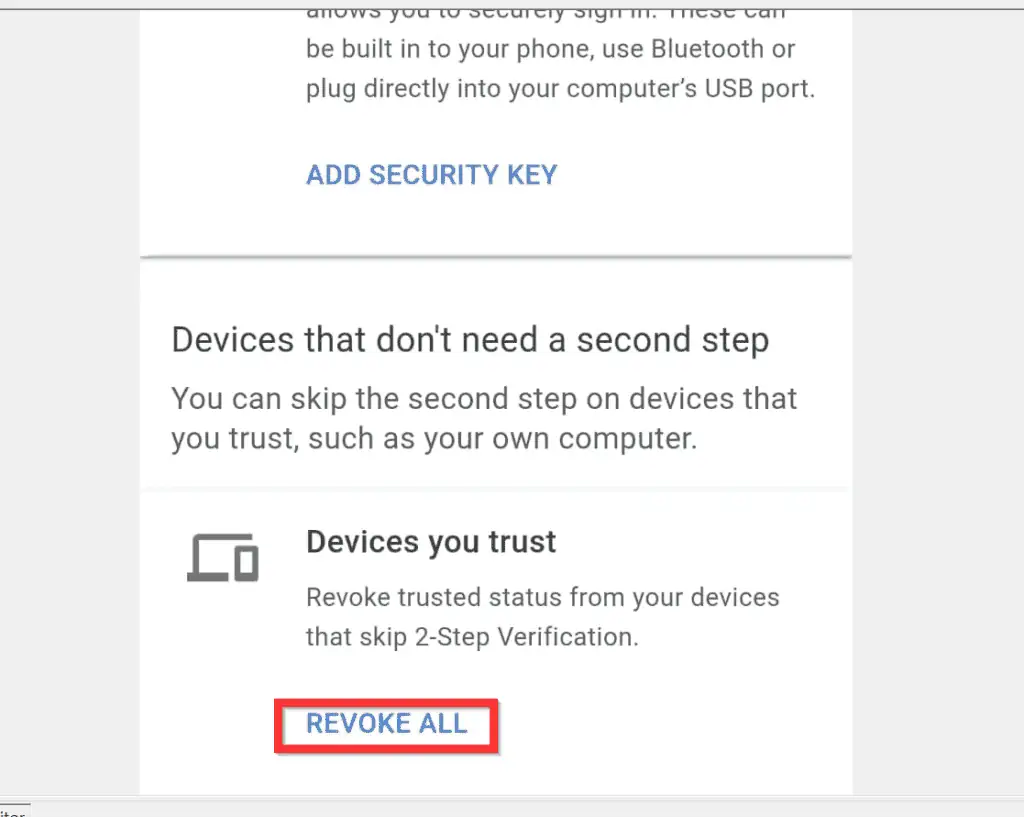
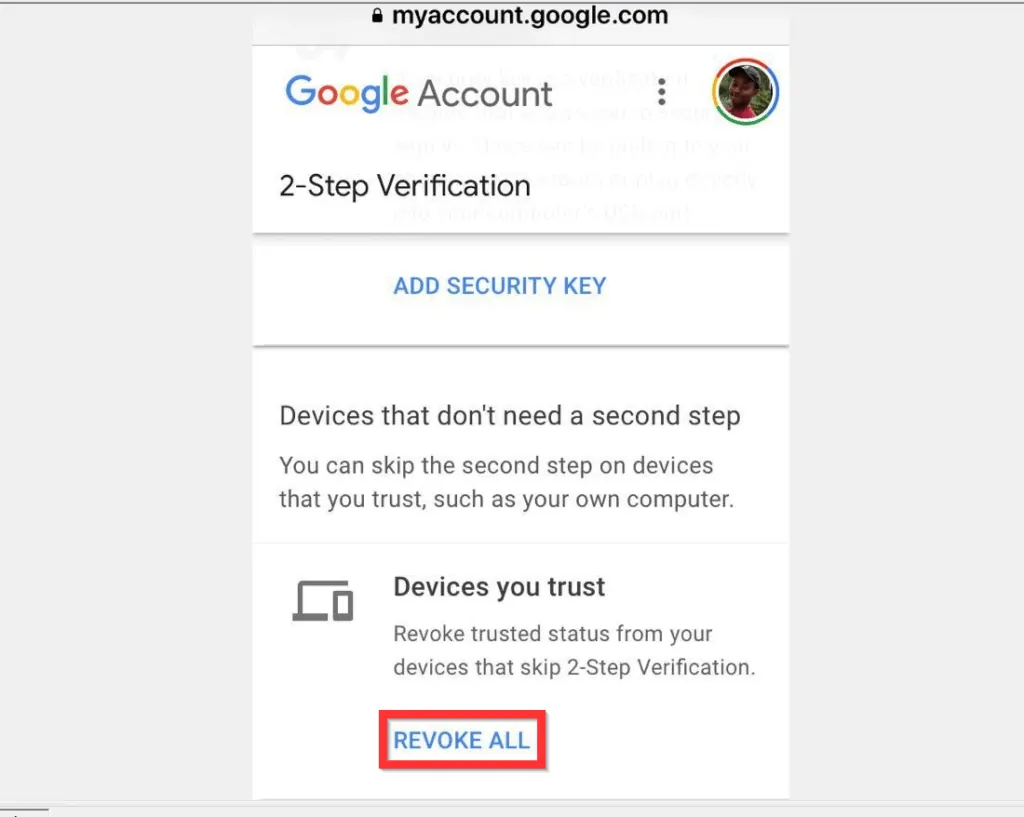
- Finally, on the 2-Step Verification page, scroll down to the bottom of the page. Beneath Devices you trust, click REVOKE ALL.
Option 2: Remove a Device Using an Android Device
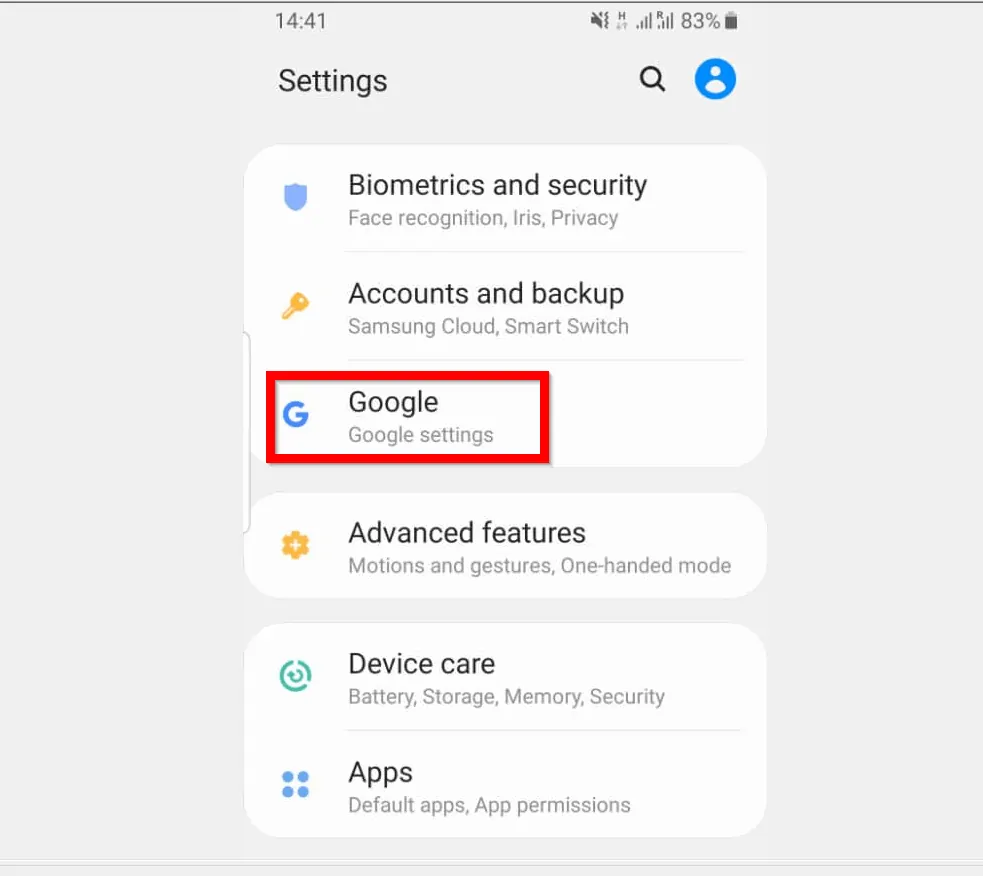
- Open the Settings app on your Android phone.

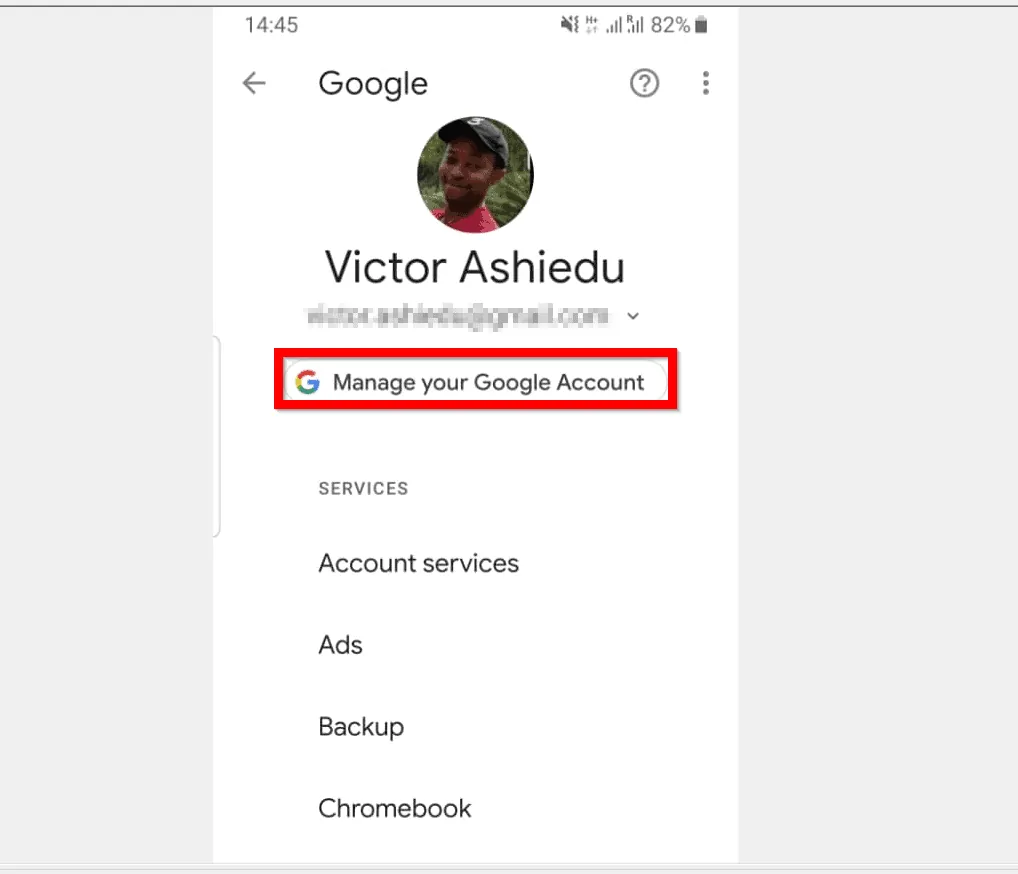
- Then, scroll down the list of Settings Apps and tap Google.
- When your Google Settings page opens, tap Manage your Google Account.
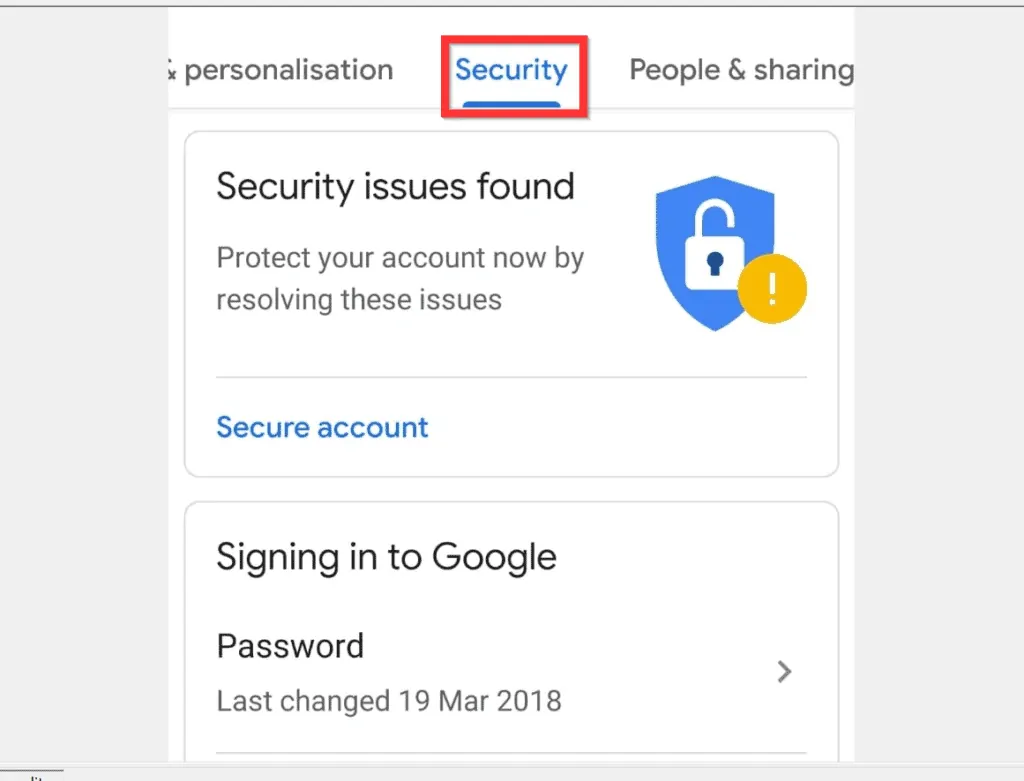
- On your Google Account page, swipe right until you get to the Security tab.

- Tap the Security tab. Then, on the Signing in to Google section of the Security tab, tap 2-Step Verification. You will be required to re-enter your Google account’s password.

- On the account verification page, enter the password for your Google account and tap Next.
- Finally, scroll down to the bottom of the 2-Step Verification page. On the Devices you trust section, tap REVOKE ALL.
Option 3: Remove a Device Using an iPhone/iPad
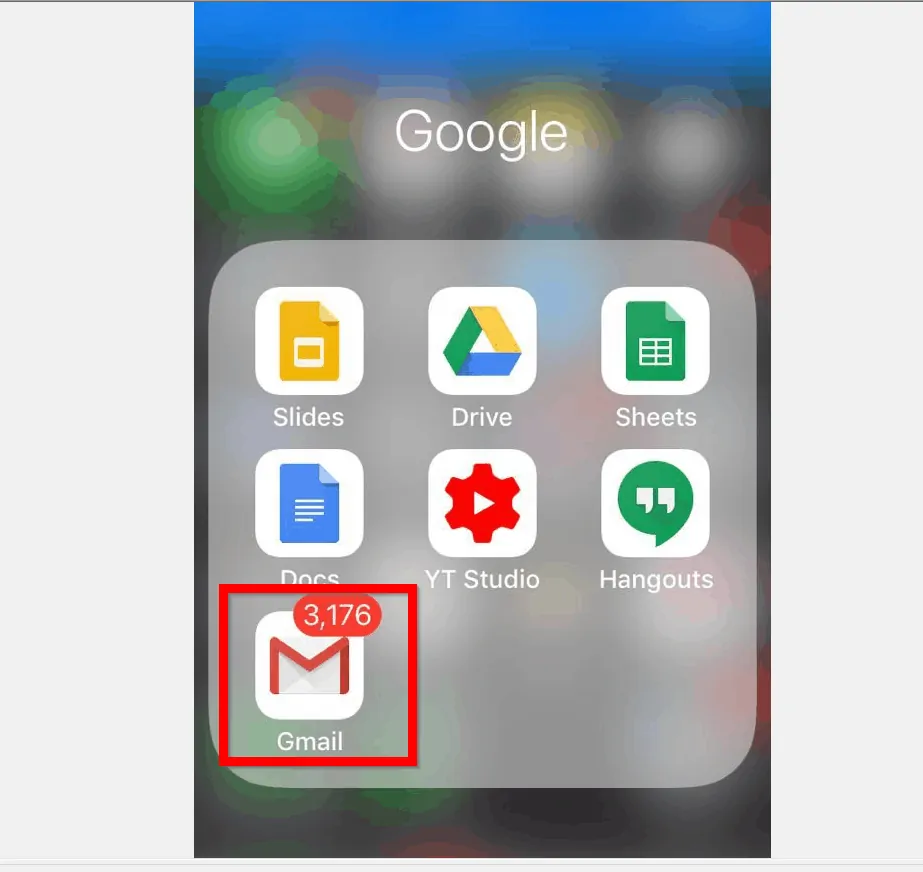
- Open the Gmail App on your iPhone or iPad. Then, sign in to the App with Google account you want to remove devices from.
- On the top left of the Gmail App, tap the menu icon (3 lines).
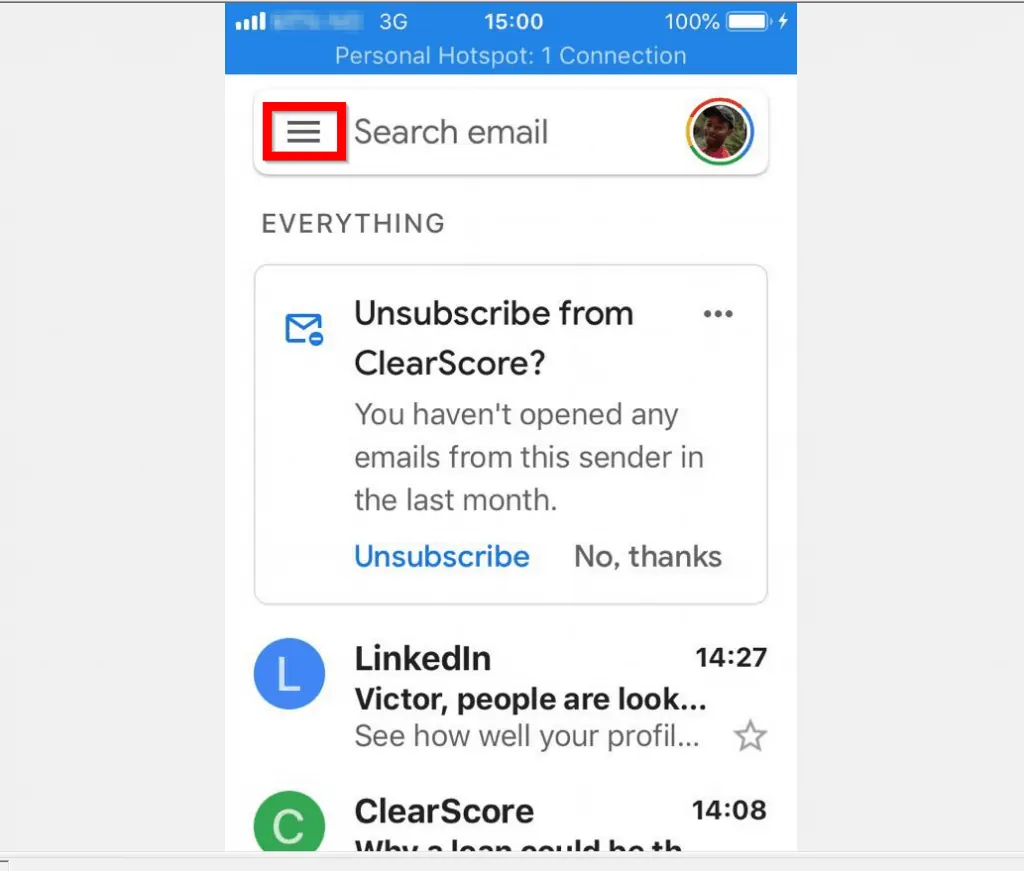
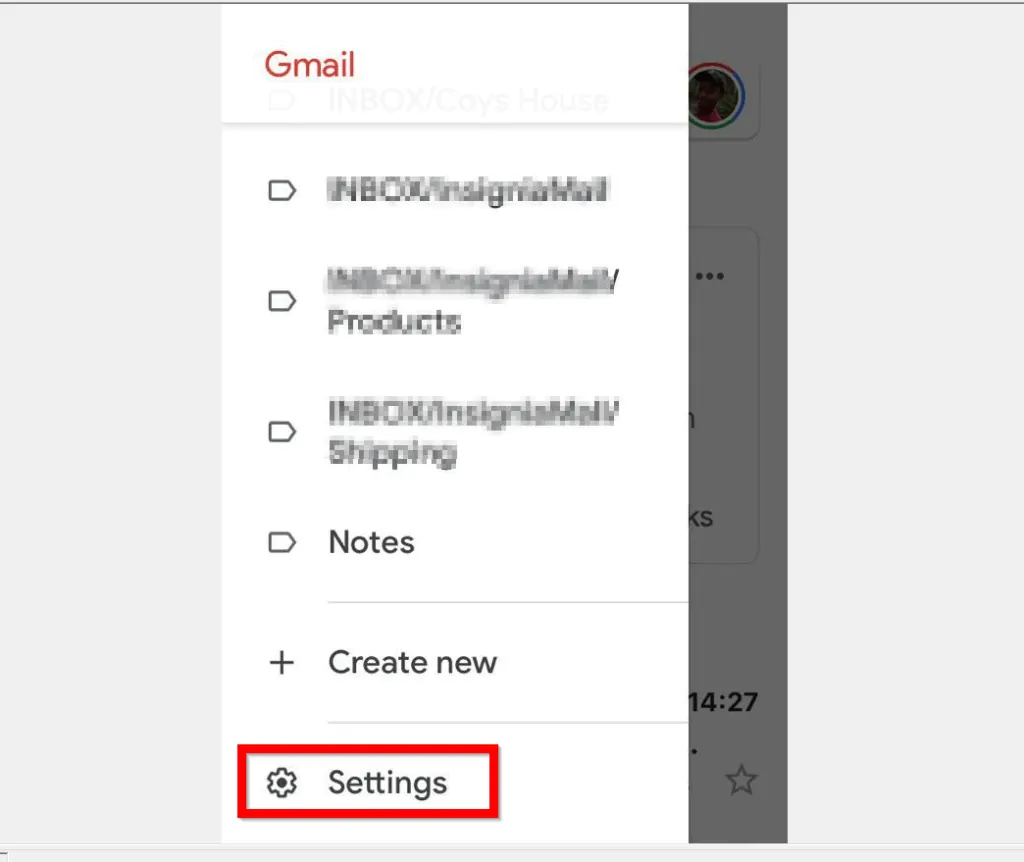
- Then, scroll down to the bottom of the displayed screen and tap Settings.
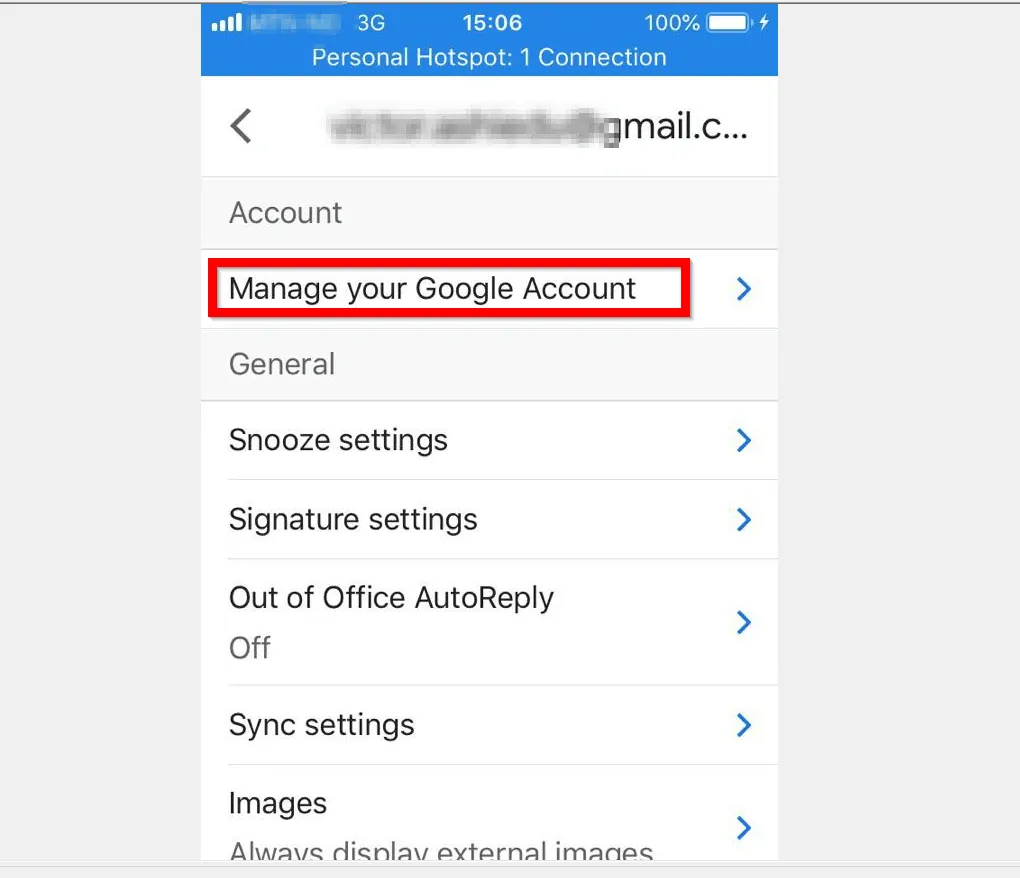
- On the Settings screen, tap on the email address for the Account you want to remove a device from.

- Then, on the Account screen, tap Manage your Google Account.
- When your Google Account page opens, swipe right until you get to the Security tab.

- Tap the Security tab. Then, on the Security tab, tap 2-Step Verification (on the Signing in to Google section).
- You will be required to re-enter the password for your Google account.
- On the account verification screen, type the password for your Google Account and tap Next.
- Finally, scroll down to the bottom of the page. Beneath Devices you trust section, tap REVOKE ALL.
It is this easy to remove a device from a Google account! I hope you found this Itechguide helpful. If you were able to remove a device from Google with the steps in this guide, click on “Yes” beside the “Was this page helpful” question below.
You may also express your thoughts and opinions by using the “Leave a Comment” form at the bottom of this page.
Finally, for more Google Itechguides, visit our Google How-To page.