Have you run into a roadblock when you tried to install the Community Edition (CE) of Docker on a Windows Server VM? This quick step-by-step guide resolved that problem for you!
Deploy Docker Community Edition on a Windows Server Virtual Machine
- Create a folder called “Docker” on drive C:\ (or any other drive on the server).
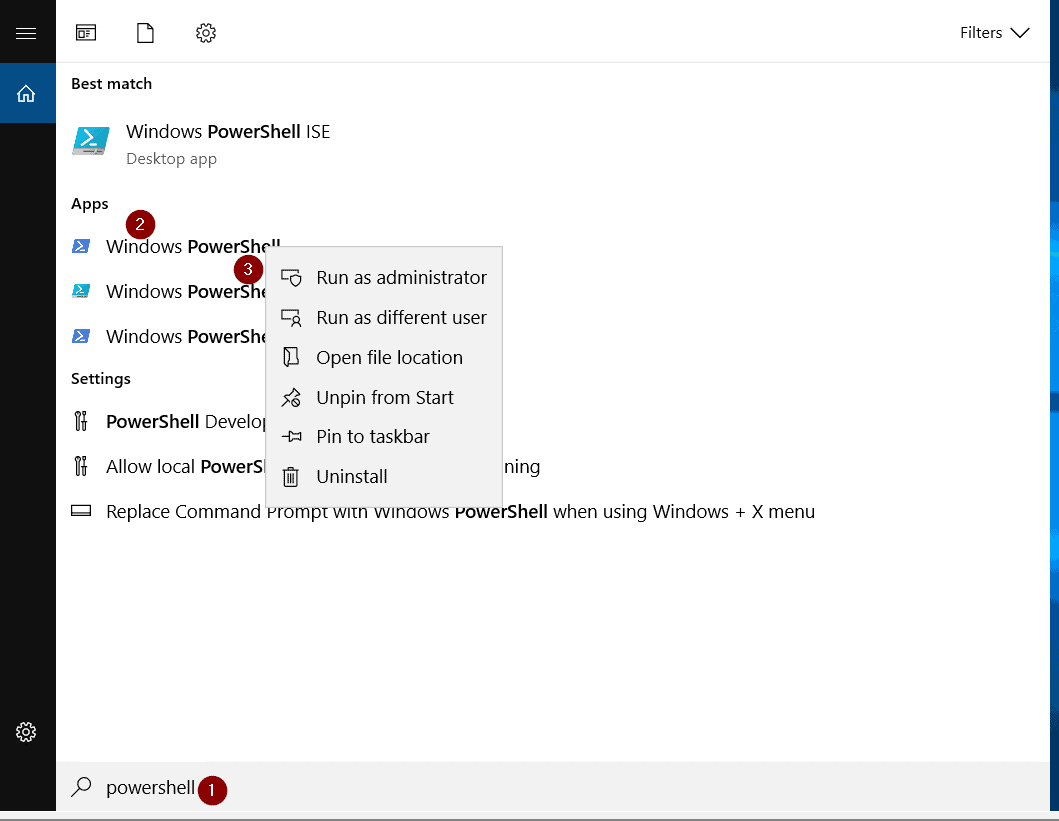
- Then, search “powershell”, right-click “Windows PowerShell” and select “Run as Administrator.
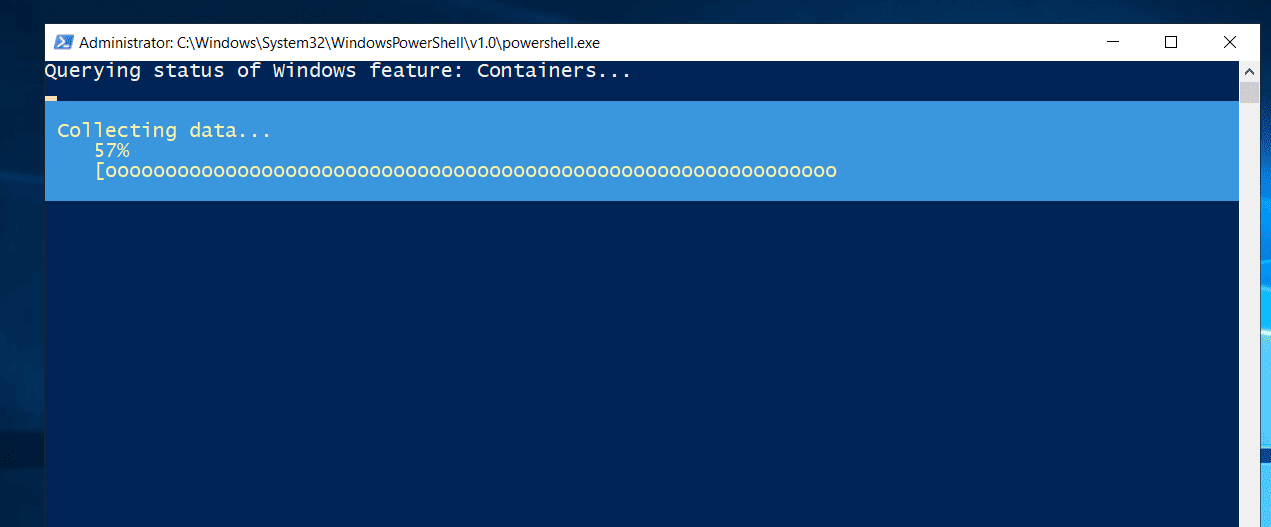
- When the PowerShell console opens, run these three commands.
cd C:\Docker

Invoke-WebRequest -UseBasicParsing "https://raw.githubusercontent.com/microsoft/Windows-Containers/Main/helpful_tools/Install-DockerCE/install-docker-ce.ps1" -o install-docker-ce.ps1

.\install-docker-ce.ps1
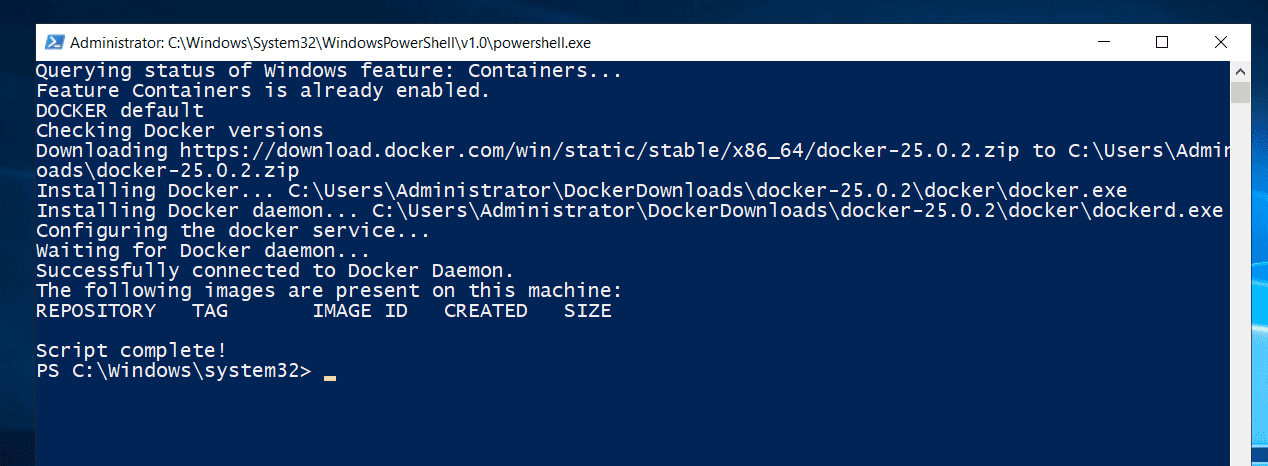
- When the VM restarts, the Docker installation will continue. After installation, it displays the information shown in the second screenshot below.
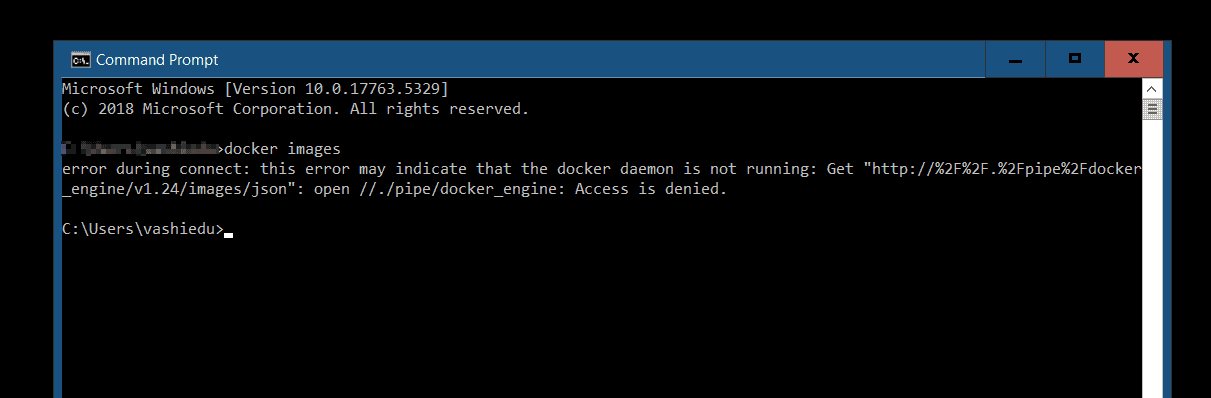
- You can run docker commands on the same PowerShell console, like “docker images.” However, in some instances, if non-administrators run docker commands, they may receive the “Open \.\pipe\docker_engine: Access Denied” error.
In the next section, I will discuss the steps that fix this error.
How to Fix the “Open \.\pipe\docker_engine: Access Denied” Docker Error
As explained in this article – Using the #Docker Named Pipe as a Non-Admin for #WindowsContainers – Docker on Windows requires running CMD or PowerShell as administrator to run Docker commands.
Apparently, this is a known issue and it has to do with how Docker for Windows configures permission in the named pipe, “\.\pipe\docker_engine.”
Follow the steps below to fix the “Open .\pipe\docker_engine: Access Denied” Docker error on Windows.
- Open the daemon.json file located in the path, C:\ProgramData\docker\config.
- Replace the content of daemon.json with the following code and save the file:
{
    "hosts": [
        "tcp://127.0.0.1:2376",
        "npipe://"
    ]
}
- Once you’ve updated the daemon.json file, restart the “Docker Engine” service by running the command.
Get-Service "Docker Engine" | Restart-Service
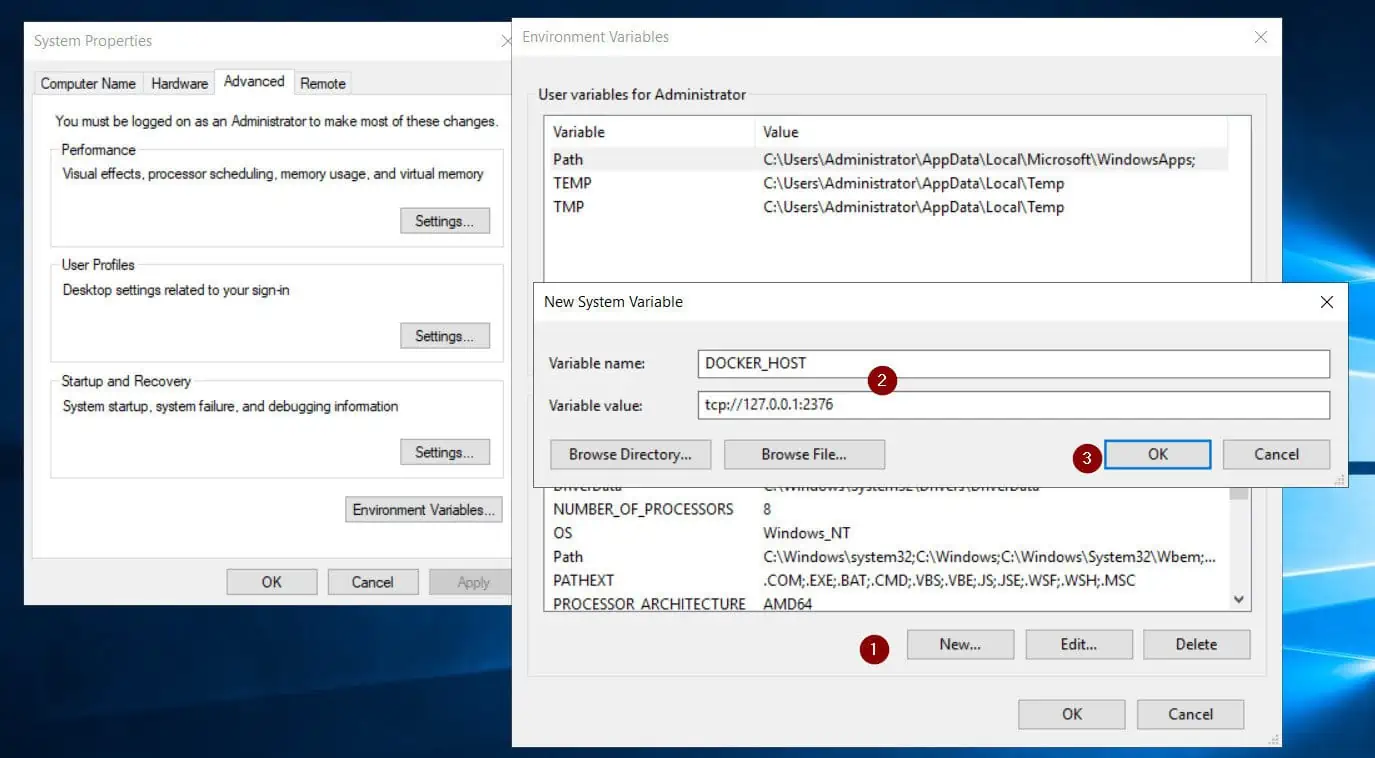
- The final step is to create an environment variable called DOCKER_HOST. This variable defines the location of the docker engine as configured in the daemon.json file.
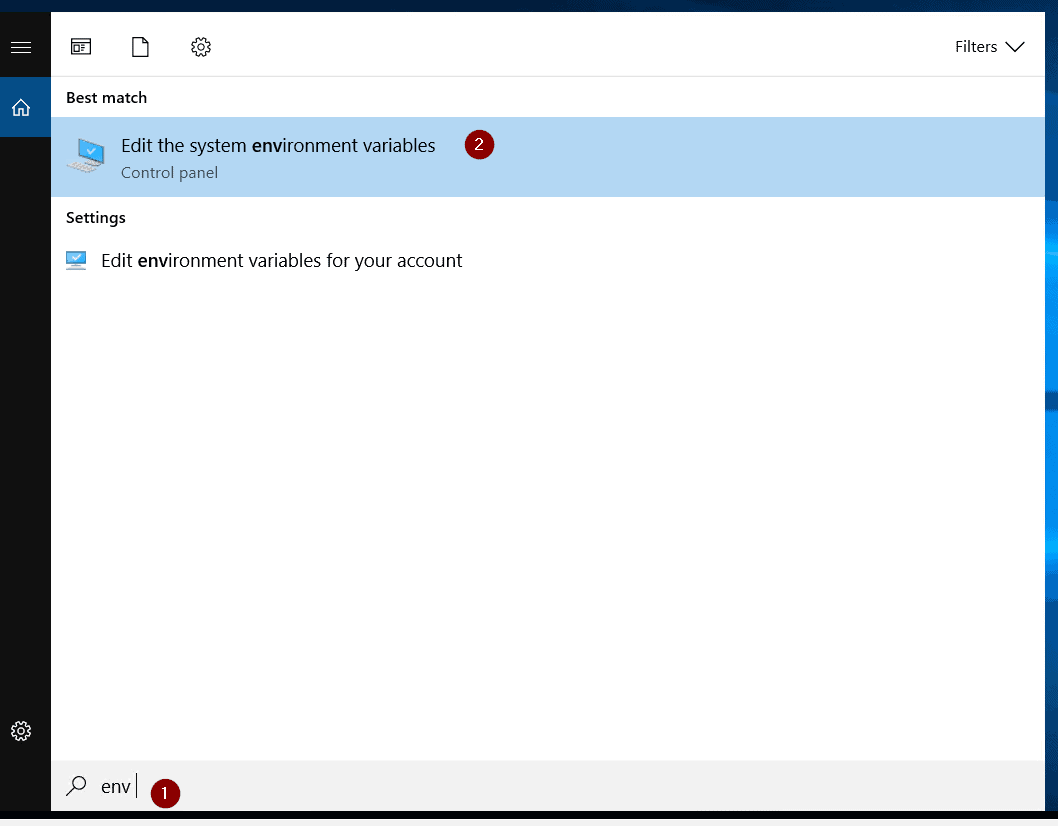
To create a DOCKER_HOST environment variable:
a) Search env and select “Edit the system environment variables.”
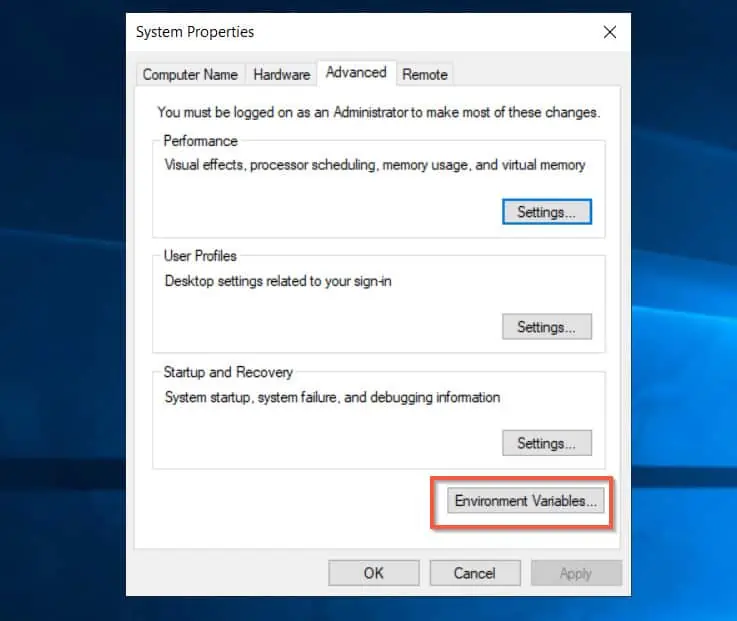
b) Then, on the “Advanced” tab of System Properties, click “Environment Variables”
c) Finally, follow the numbering in the screenshots below to create the
c) Finally, follow the numbering in the screenshots below to create the DOCKER_HOST environment variable.
Install Docker Compose Standalone on a Windows Server VM
Earlier, I hinted that installing the Docker CE on a Windows Server VM does not include some Docker components like “docker-compose.”
We’ll fix that problem by installing Docker Compose Standalone with the steps below:
- Open PowerShell as administrator by searching “powershell” right-clicking “Windows PowerShell” and selecting “Run as administrator.”
- Once PowerShell opens, enable TLS1.2 – a GitHub requirement.
[Net.ServicePointManager]::SecurityProtocol = [Net.SecurityProtocolType]::Tls12
- After that, create the Docker folder in Program Files with this PowerShell command:
New-Item -Name Docker -Path $Env:ProgramFiles -ItemType Directory
- Then, run this command to download the latest version of Docker Compose.
Start-BitsTransfer -Source "https://github.com/docker/compose/releases/download/v2.24.5/docker-compose-windows-x86_64.exe" -Destination $Env:ProgramFiles\Docker\docker-compose.exe
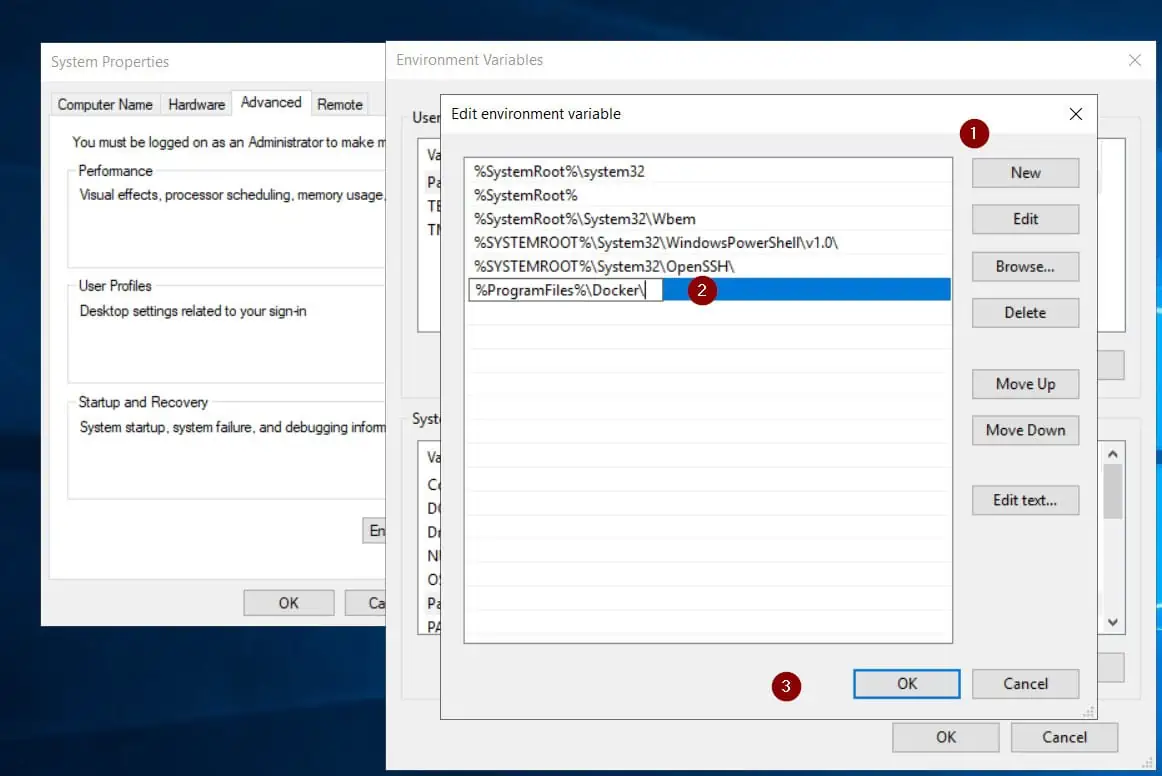
- Finally, to make the docker-compose.exe command available, add it to the PATH environment variable. Use steps 4 a) and b) in the previous section to open Environment Variables.
Then, on the “Systems variable” section, highlight the “Path” environment variables and click Edit.
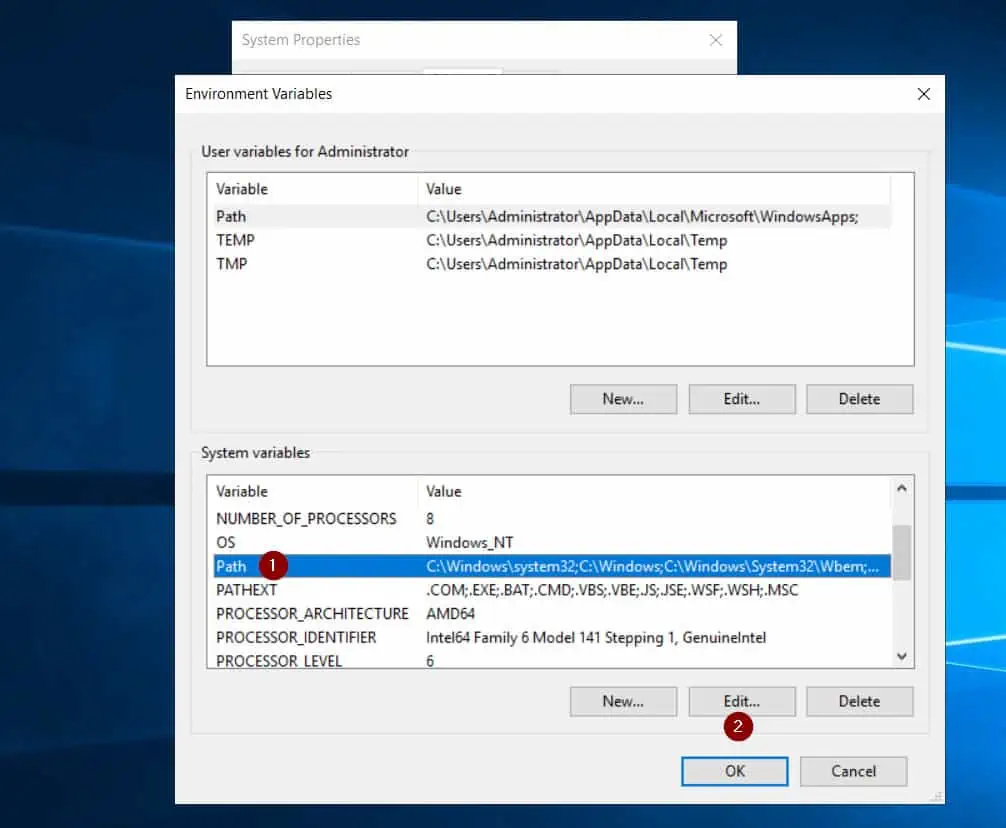
Finally, follow the numbering in the screenshot below to add “%ProgramFiles%\Docker\” to the PATH environment variable.
Now you can run the docker-compose.exe command!
Frequently Asked Questions
Yes, you can install Docker on a Windows Server by downloading and running the Microsoft PowerShell script built for this purpose, install-docker-ce.ps1.
To install Docker-Compose on a Windows Server, follow the steps in this Official Document, Install Compose standalone.
Docker CE stands for Docker Community Edition. It is the free Docker version – maintained by the Docker community – that you can deploy to Windows Server.
To check if the Docker Community Edition is available on a Windows server, open a CMD or PowerShell and run “docker –version”. If Docker is available on the server, the command should display the Docker version.
No, there is a difference between Docker CE (Community Edition) and Docker Desktop. Firstly, Docker Desktop can only be installed on Windows 10 or Windows 11 while Docker CE runs on Windows Server.
Also, Docker CE does not install some Docker components like Docker Compose while the Desktop Edition does.
Conclusion
Trying to navigate the world of Docker on Windows can be challenging. With this article, we hope we’ve reduced that problem by one!
If we did and you like to share your thoughts or even ask additional questions, use the Comment form towards the end of this page.
Alternatively, you can respond to the “Was this page helpful?” question below.
Thank you for reading!


I like this guide, have used it several times and forwarded links to colleagues.
However, there’s one point I don’t like: In your example, you setup the Docker daemon to listen on TCP port 2376. Whilst this works, it’s violating normal port usage. For the Docker daemon, port 2375 is used for unencrypted TCP connections, port 2376 for TLS encrypted connections.
Using port 2376 for unencrypted connections will surely confuse me.