Have you been looking for a comprehensive guide that explains the “docker exec -it” command? You’ve come to the right place as this guide covers all you need to know about this Docker command.
Overview and Command Syntax
As a DevOps Engineer, you need to manage Docker containers. However, to be able to manage a container, you must sign in to the container.
But how do you do that?
This is the problem that the “Docker Exec” command solves. The command allows you to interact with a running container.
By “interact” I mean, log in to the container like you would log in to a normal Linux box.
Wait a minute, what about the “-it” part of the command?
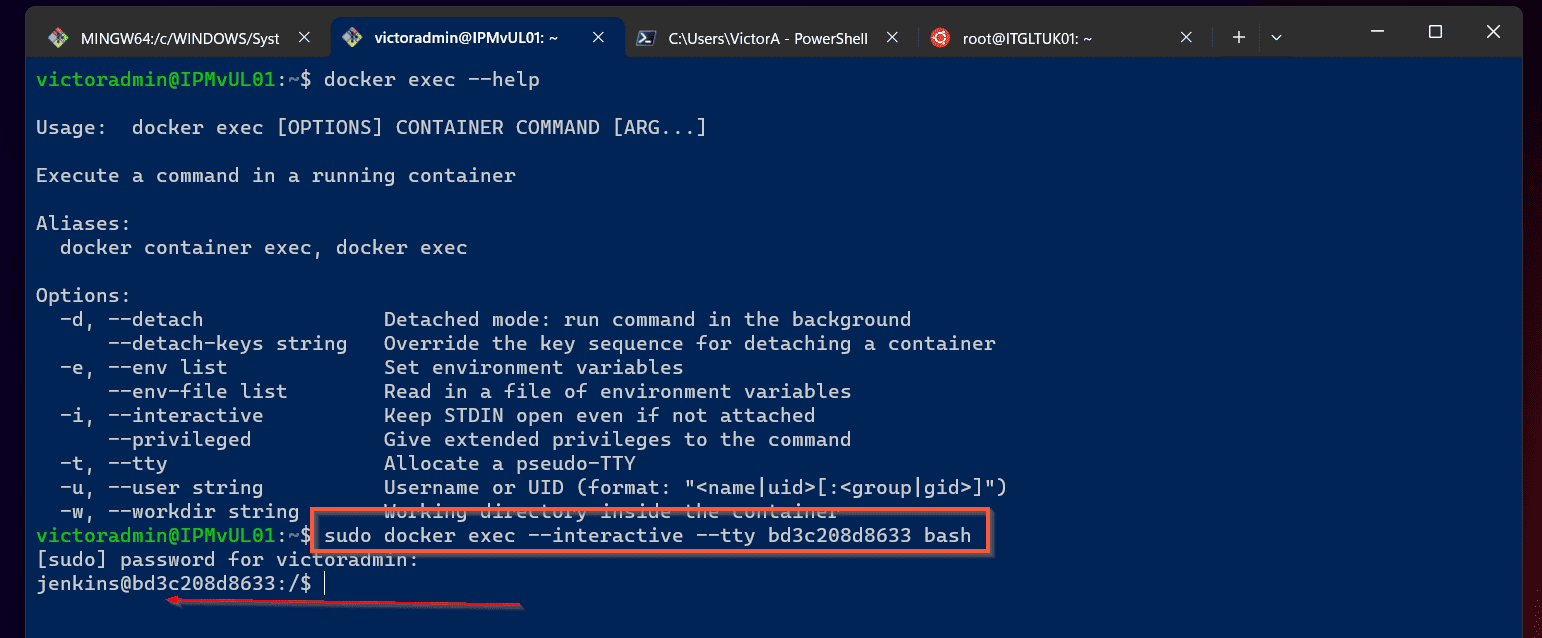
To answer that question, let’s look at the syntax of the “Docker Exec” command. And there is no better way to do this than to look at the command’s help file.
To see the syntax of the Docker Exec and all its arguments, run this command.
docker exec --help
The command returns some useful information about the “docker exec” command, including its options.
I have labeled the different parts of the help file in the screenshot below. To see my explanation, proceed beneath the screenshot.
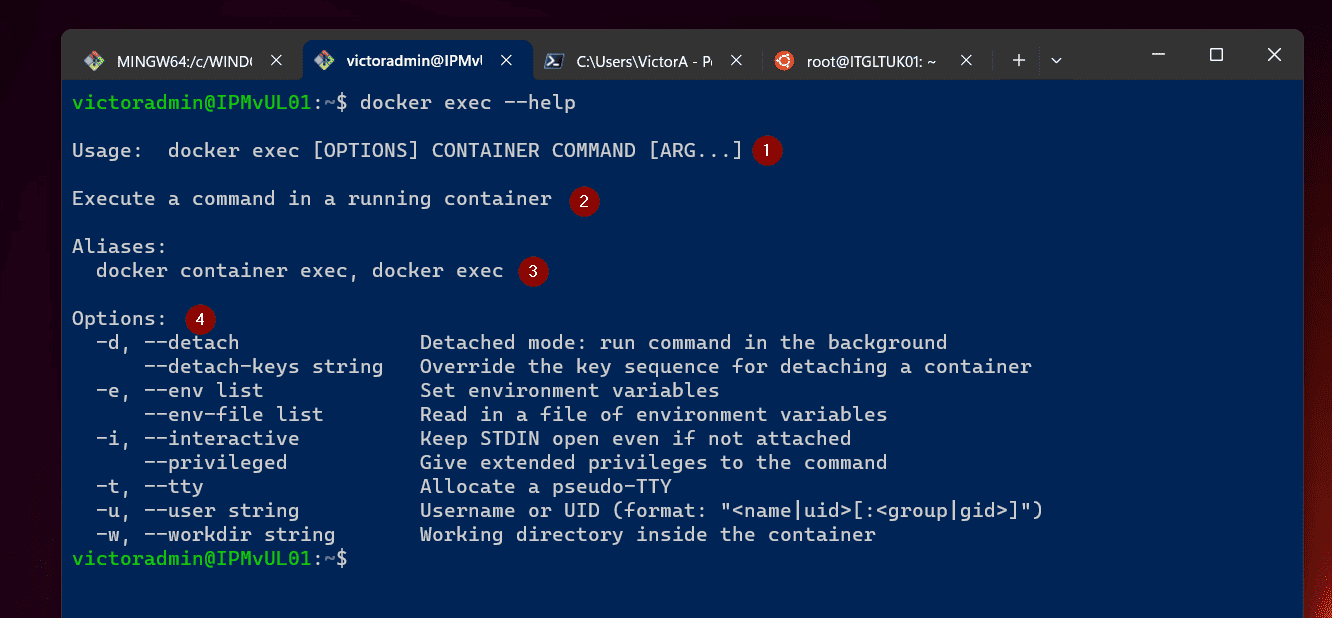
- Displays how to use the command. So, to run this Docker command, start by entering the actual command – docker exe.
Next, enter the OPTIONS or arguments – more on this shortly. After entering the option, the final part is to include the command you want to execute on the container.
- Explains what the “docker exec” command does. Specifically, the help file explains that the command “Executes a command in a running container.”
This is pretty straightforward. In essence, when you want to run (execute, thus the “exe”) command on a running Docker container, you use the “docker exec” command.
- Provides the aliases of the command.
- Explains the options you can provide when you run the command. For this article, our focus is two of the options – “-i” and “-t.”
Please read about the other options.
Back to our focus options, starting with “-i”, when you specify the “-i” option, you want to “interactively” connect to the container.
This means that you want to “log in” to the container. Or in the exact words of the help file, “Keep STDIN open even if not attached.”
Before I explain the “-i” option, I wanted to point out that you can also use the “–interactive” instead of “-i” – I will provide more details about this in the next section.
Meanwhile, according to the help file, specifying the “-t” or “–tty” option means to “Allocate a pseudo-TTY.”
But what does this mean?
It simply means to provide terminal access to the container.
So, essentially, using the “-i” option of the “docker exec” means that you want to interact (run commands) on the container.
On the other hand, the “-t” option provides terminal access (a standard Linux/Unix login interface).
To conclude this section when you run the “docker exec -it” command, Docker opens a terminal access to the container so you can run commands.
The last part of the command syntax is the command you want to run. Most times, users normally specify “bash” or “sh” – to open a Bash or sh shell on the container’s terminal
How to Use the “Docker Exec -it” Command
Now that we have explained this command and the two options, let’s see how to use it in the real world.
Step 1: Get the Container Name or ID
Let’s start by re-examining the syntax of the “docker exec” command.
docker exec [OPTIONS] CONTAINER COMMAND [ARG...]
The “CONTAINER” part means the container name or ID. So, before you can interactively manage a running Docker container, you need to get its ID or name.
This is done by running the “docker ps” command. I have a Docker container on my test Ubuntu box.
To find the container ID, I’ll run the “docker ps” command. Since this command requires root access, I will run it with “sudo.”
sudo docker ps
The command did not display any container information! But, I have at least one container on this server.
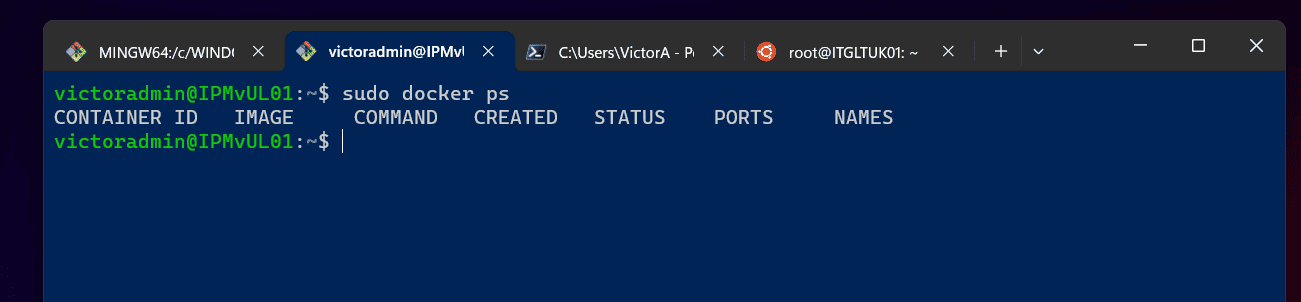
The reason for this is that I do not have any running containers. Running “docker ps” without any option only displays running containers.
So, if I want to display non-running containers, I must include the “-a” option. Let’s try that…
That’s better, now I have two containers.
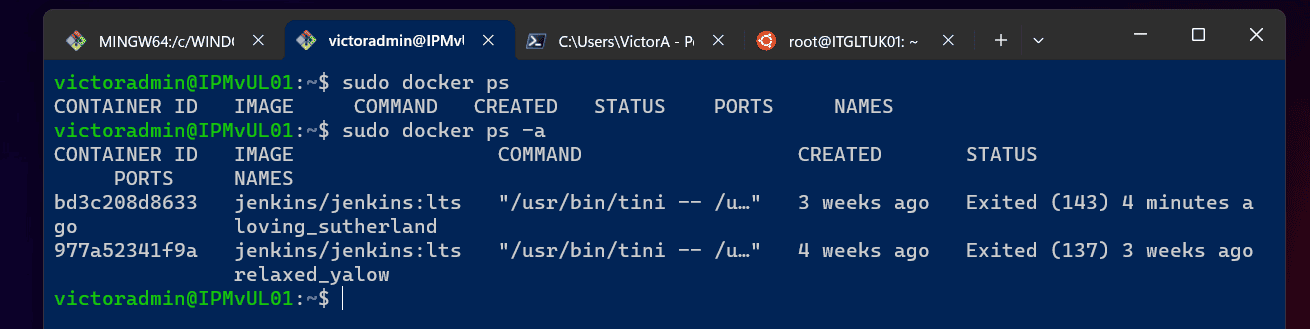
But, there is one more problem, none of them is running and to run the “docker exec -it” command, the container must be running.
To start an existing container that is currently not running, we use the “docker start” command, specifying the container’s ID next to the command.
Here is the command I’ll use to start the first container on the list returned by the previous command…
sudo docker start bd3c208d8633
This starts the container with ID, bd3c208d8633. Now, if I run “docker ps”, it returns this running container.
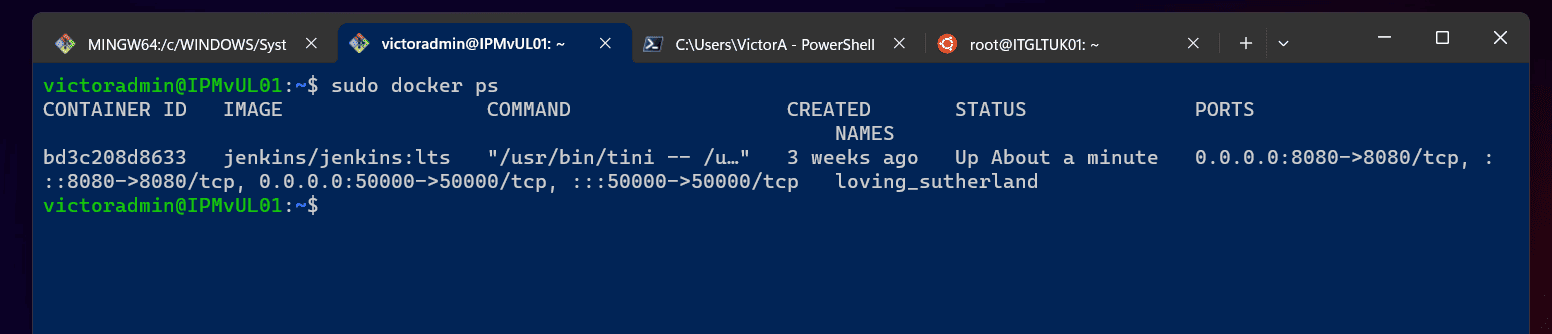
Now, that the container is running, let’s note the ID or name (the last item on the list). In the next subsection, we will use the “docker exec -it” command to log in to the container and interact with it.
Step 2: Log in to the Docker Container with Docker Exec
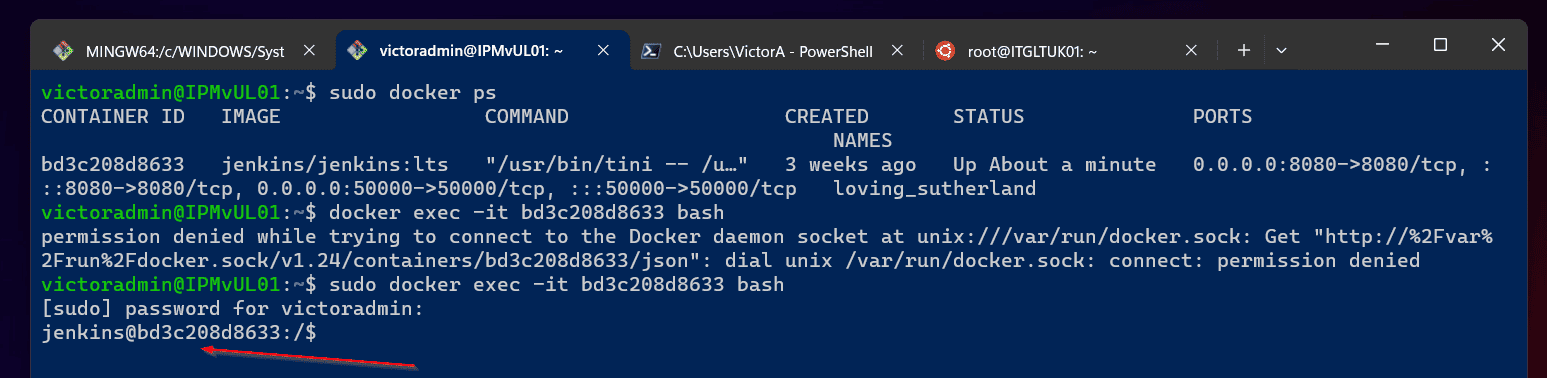
To log in to the container, execute the “docker exec” with the “-it” option as shown below:
sudo docker exec -it bd3c208d8633 bash
To confirm that you’re now on the container’s terminal, it will display the name of the user you’re signed in as. In my example, I’m signed in as “jenkins” as this is a Jenkins container.
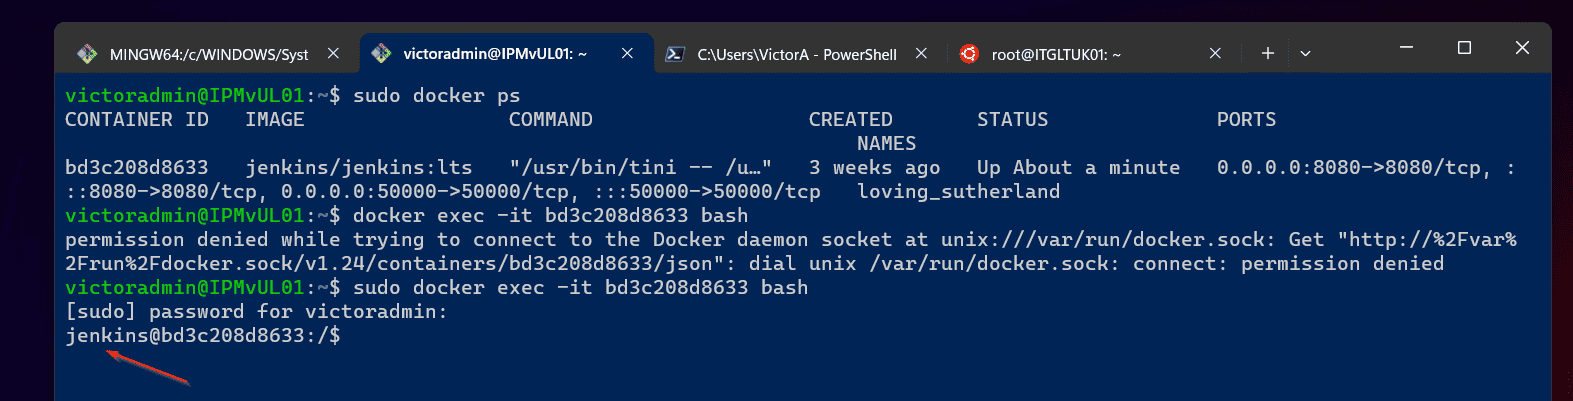
Secondly, the terminal will display the container’s ID.
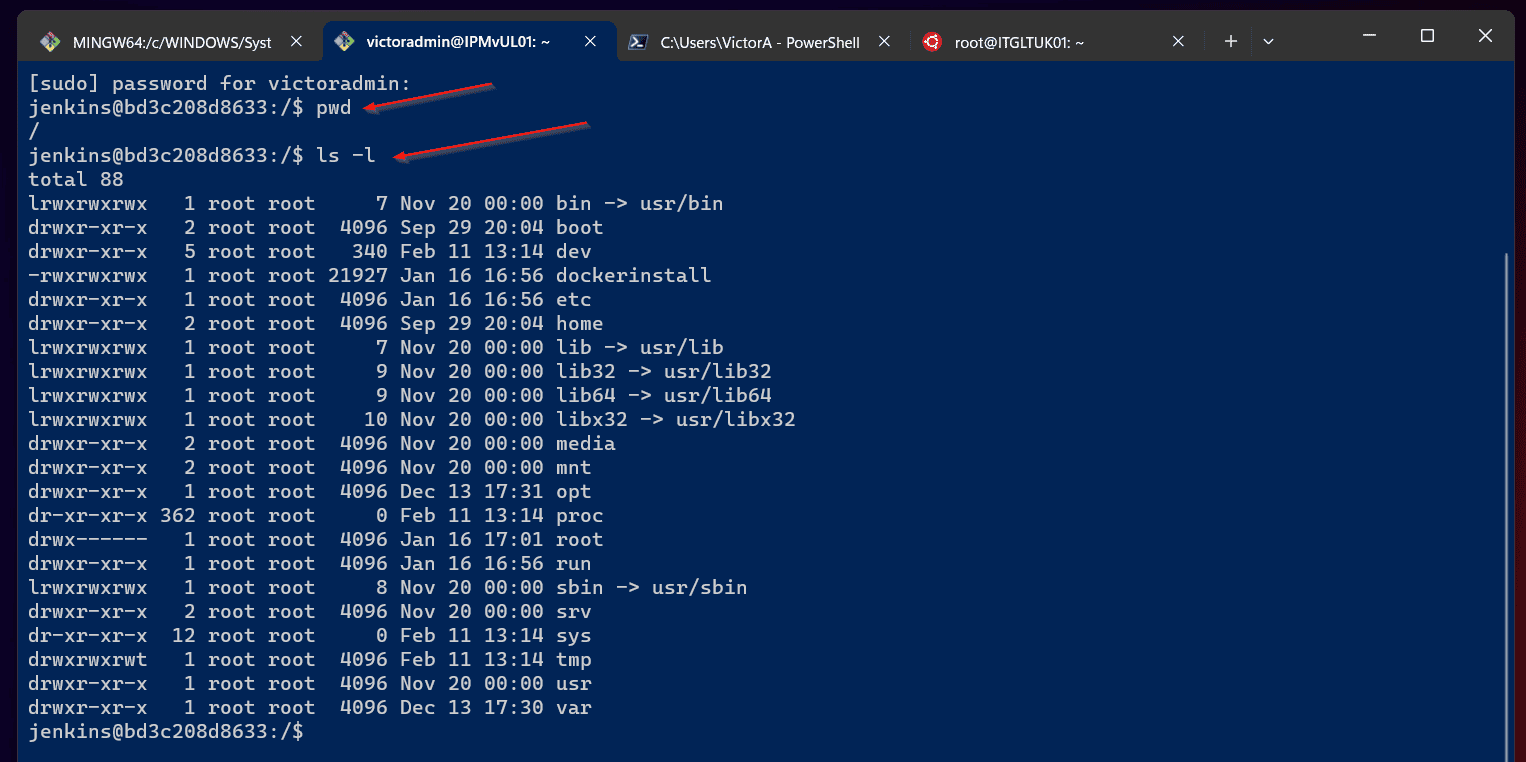
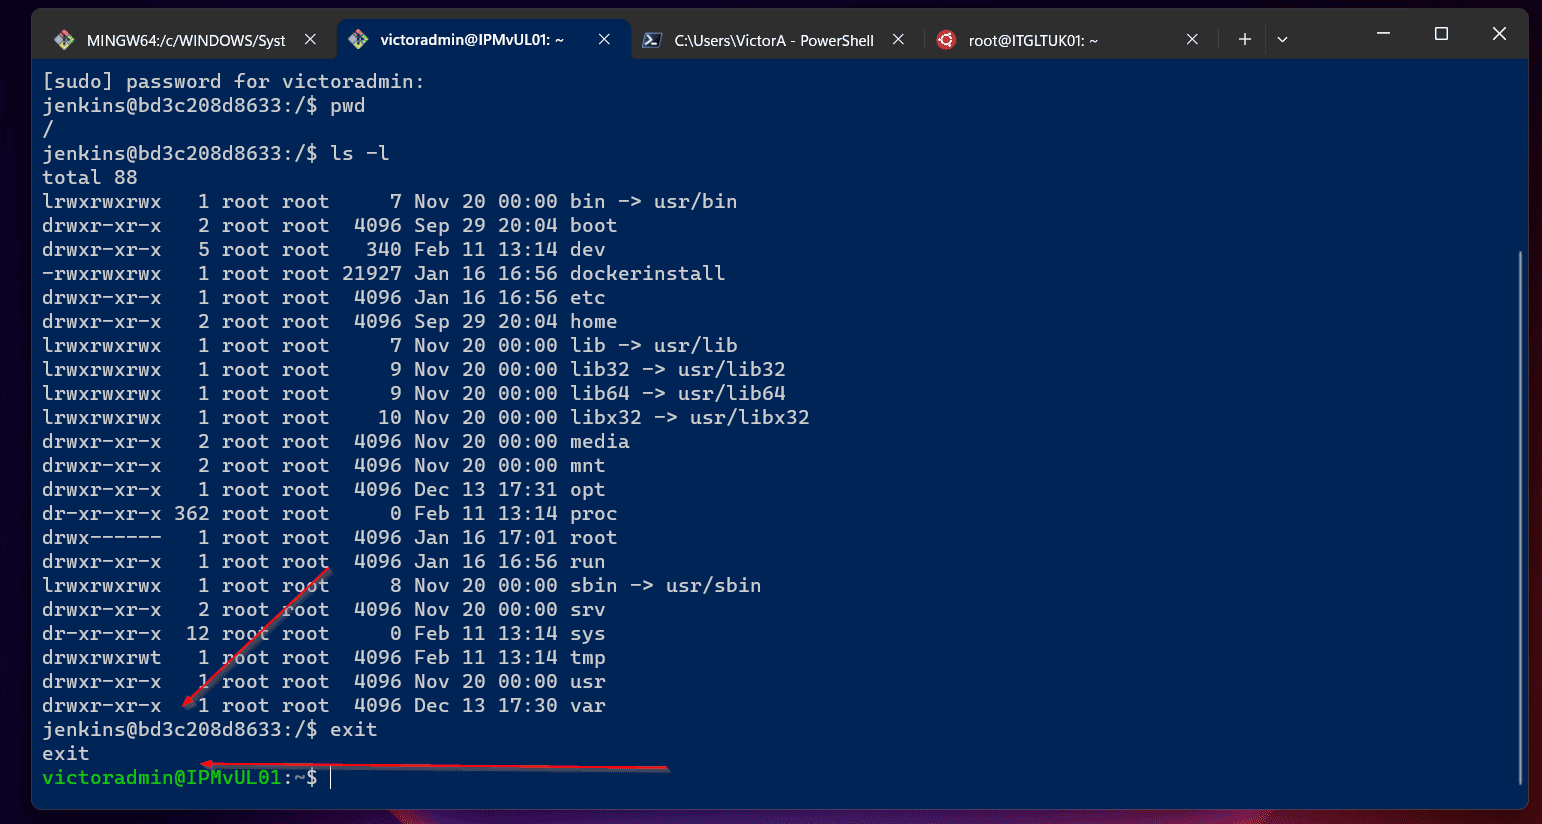
Now that we’re on the container’s terminal, we can run available Bash commands. To demonstrate this, I have executed “pwd” and “ls -l” in my Jenkins container.
Finally, when you finish “interacting” with the container, log off with the “exit” command. When you exit the container, your console returns to the host server’s terminal.
Earlier, I mentioned that you could use the “–interactive” option in place of “-i”. Similarly, you could use the “–tty” option instead of “-t.”
So, our previous command – sudo docker exec -it bd3c208d8633 bash – is the sam as the command below.
sudo docker exec --interactive --tty bd3c208d8633 bash
Not surprisingly, the command opens the container’s terminal for interaction as well!
How to Login to a Docker Container as Root
When I executed the “docker exec -it” command in the last section, I signed in to the container as a non-root user. This is standard security best practice as containers should not run on root by default.
However, there may be occasions when you need to log in to the container as root. Fortunately, the “docker exec” command provides the “-u” option which allows us to specify a user.
So, with the “-u” option, you can specify the root user as “root” or “0” (zero). Let’s see how this works in practice.
To log in to my container with ID, bd3c208d8633 as root and open Bash on the terminal, I’ll run either of these commands.
 sudo docker exec -it -u 0 bd3c208d8633 bash
 sudo docker exec -it -u root bd3c208d8633 bash
As indicated, the logged-in user is now “root.” This is also confirmed by the “#” at the terminal instead of the “$” for non-root users.

How to Set a Working Directory in a Docker Container
The last thing I want to show you about the “docker exec” is how to set the working directory inside the container as you log in.
By default, the working directory displayed when you log in to a container is defined when the container was built with Dockerfile.
To see the working directory, run the “pwd” command. The result of the command shows that the default working directory on my Jenkins container is “/.”
But, I can change it when I log in to the container using the “-w” or “–workdir” option. To set the working directory for my Jenkins container to “/home,” I’ll run the command below:
sudo docker exec -it -w /home bd3c208d8633 bash
Now, my working directory is “/home” instead of the default, which was “/”

Conclusion
I hope I have been able to show you how easy it is to interact with running Docker containers with the “docker exec -it” command!
We appreciate feedback from our readers, so kindly share your thoughts – or ask a question about this topic – with the comments form found at the end of this page.
Alternatively, you can respond to the “Was this page helpful?” question below.