As you progress in your PowerShell scripting skills, you soon realize that you need to use Powershell.exe Command. In this Itechguide, you will learn how to use the PowerShell.exe command and its arguments.
The Location Of PowerShell.exe Executable in Windows 10
Before we get to the part where you learn about PowerShell.exe commands, I believe it is essential that you know the location of the executable. In the next section, you will see the first benefit of this knowledge.
In Windows 10 PowerShell.exe is located in two folders. You can find it here – %SystemRoot%\SysWOW64\WindowsPowerShell\v1.0\
Additionally, you can also find PowerShell.exe in %SystemRoot%\system32\WindowsPowerShell\v1.0\.
If you run the 32-bit version of Windows 10, your Windows 10 will only have %SystemRoot%\system32\WindowsPowerShell\v1.0. However, if you run the 64-bits you will have both paths.
You may not find this information useful now. However, as you script, you may find it handy in the future.
How to Fix PowerShell.exe “Command Not Found” Error
Before I poceed to discuss the PowerShell.exe command further, let me deal with an error that some people may receive when they run PowerShell.exe – Command Not Found.
This error message may also present in some other ways. For example, you may receive an error message “Powershell’ is not recognized as an internal or external command, operable program or batch file“.
If you receive one of these error messages, the possible culprit is path environment variable. The solution is to add the path, %SYSTEMROOT%\System32\WindowsPowerShell\v1.0\ to your path environment variable.
If you are having this problem, follow the steps below to fix it…
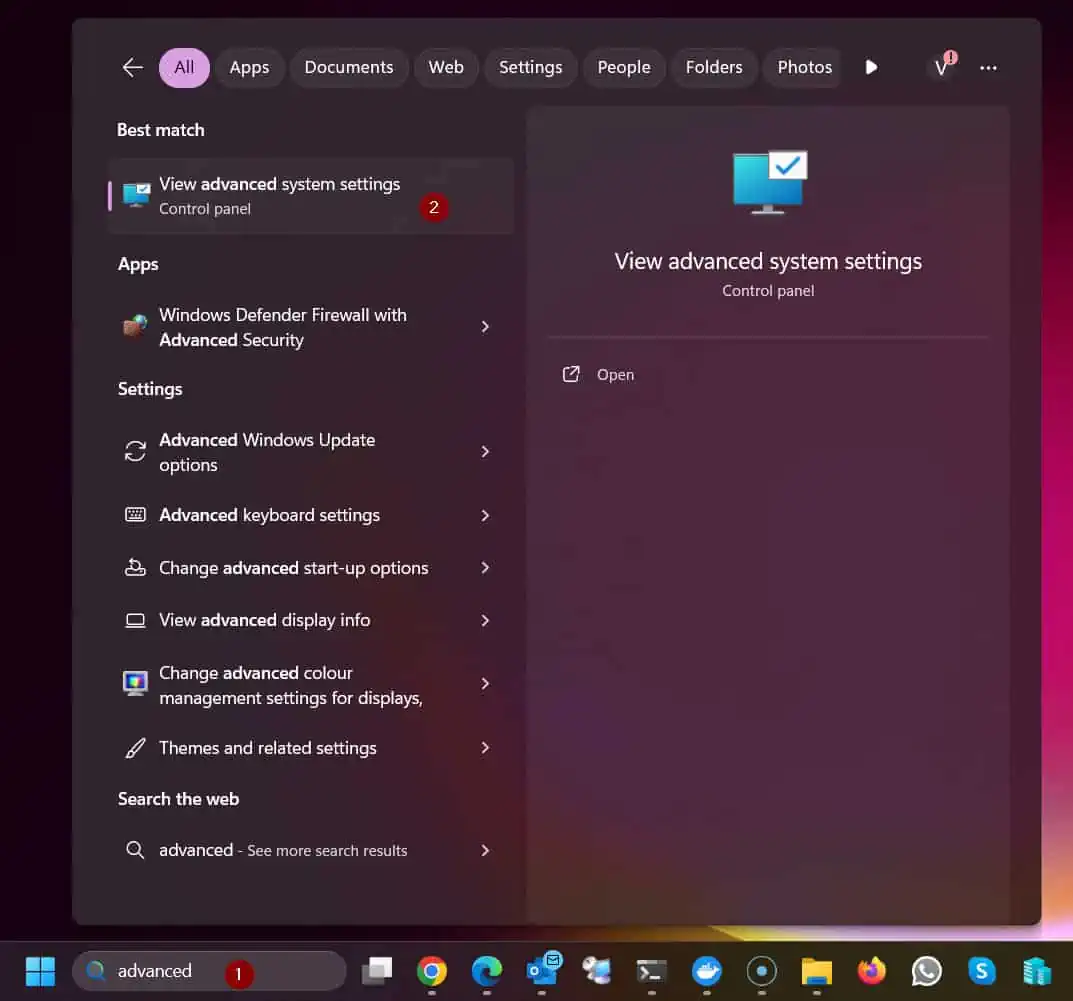
- Enter advanced in the Windows search box. Then click View Advanced System Settings from the search results.
- Beneath Start-up and Recovery section, click Environment Variables.

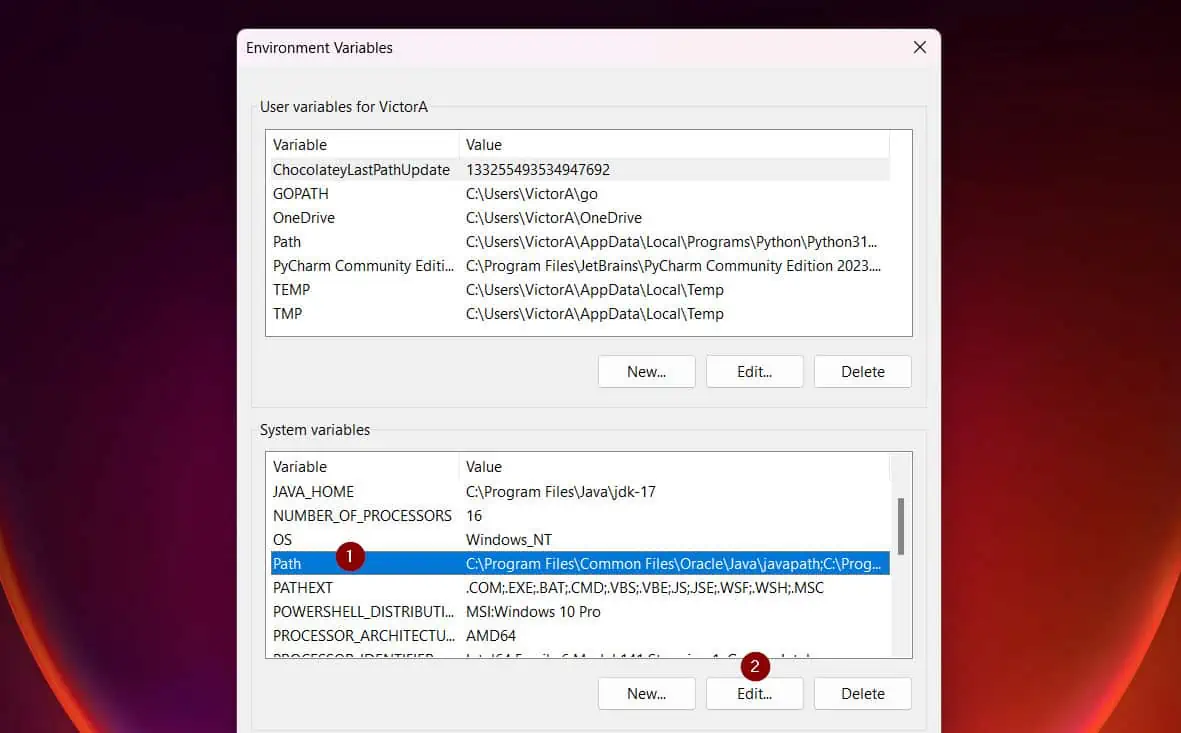
- Then, on the Systems Variables section, double-click the Path variable. You could also select the Path variable and click Edit.
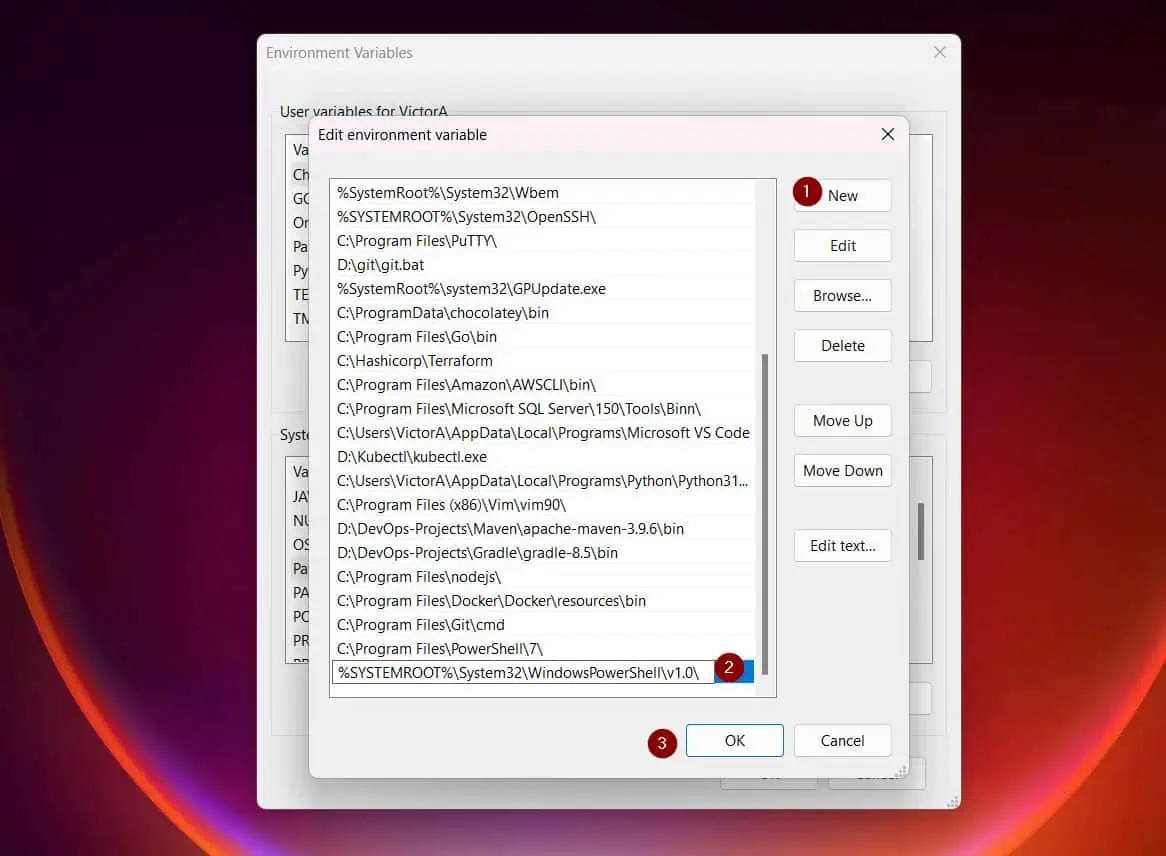
- When the Path variable list opens, click New.
- Then, enter %SYSTEMROOT%\System32\WindowsPowerShell\v1.0\ and press the enter key on your keyboard. Once you confirm that the path has been entered successfully, click OK 3 times.
- Finally, close and re-open Powershell. Then, run Powershell.exe command again. This time, it should work.
PowerShell.exe Command-line Help
Like most, if not all Windows commands, PowerShell.exe has some help information. To access the help information of PowerShell.exe command, run one of the commands below:
PowerShell.exe -Help
 PowerShell.exe -?
 PowerShell.exe /?
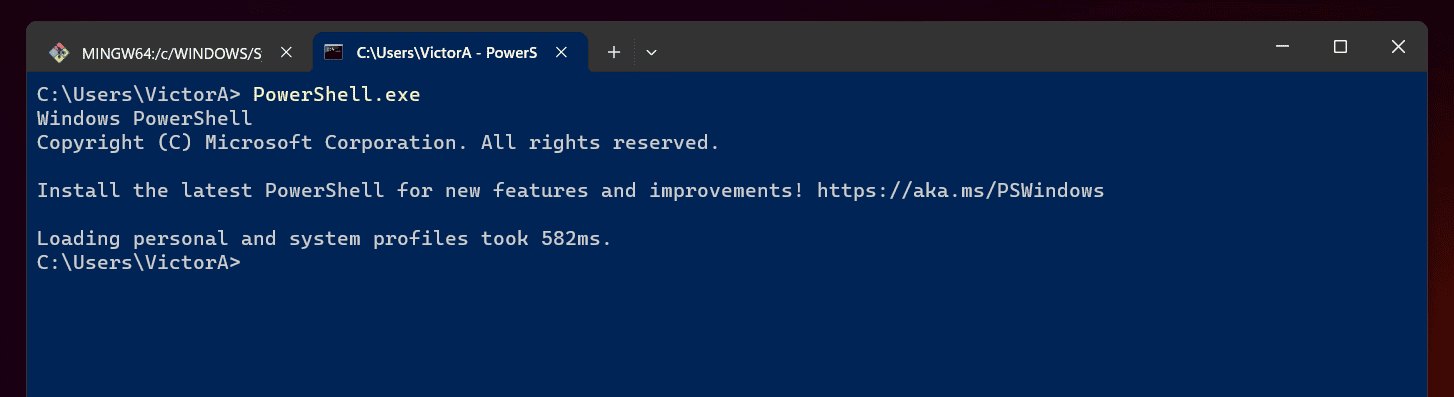
Here is what the PowerShell.exe help information looks….
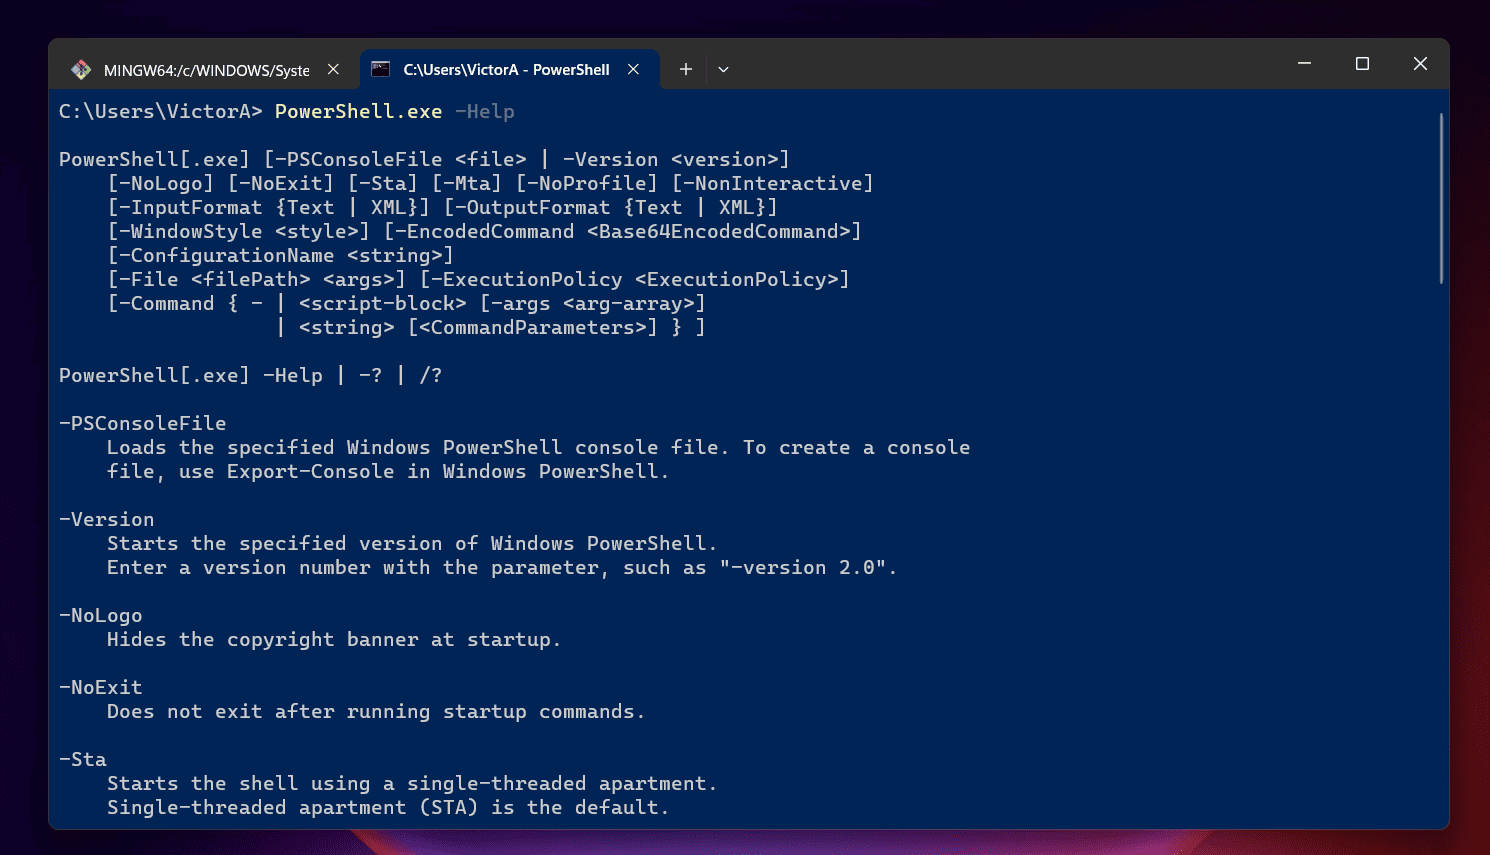
The help information lists the Syntax of the command, its arguments/parameters, and some examples. We will be covering all these in the subsequent sections of this guide.
Syntax of PowerShell.exe Command
The syntax of PowerShell.exe Command is…
PowerShell.exe -<command line arguments>
The full command line arguments will be discussed in the next section.
PowerShell.exe Command Line Arguments/Parameters
You’ve already seen how to list help information for PowerShell.exe. When you list PowerShell help information, it includes its command-line arguments and parameters.
I have listed all the PowerShell.exe Command Line Arguments in the table below:
| S/N | PowerShell.exe Command Line Argument | Purpose Of The Comand-Line Argument |
|---|---|---|
| 1 | ExecutionPolicy | Use this parameter to set the default execution policy for the current PowerShell session. |
| 2 | NoExit | If you use the NoExit parameter, PowerShell will not exit after running startup commands |
| 3 | NoProfile | Use this argument if you do not want to load the Windows PowerShell profile |
| 4 | NonInteractive | If you use the NonInteractive parameter, PowerShell will not present an interactive prompt to the user |
| 5 | File | This parameter is used to run a specified script in the local scope – the functions and variables created by the script are available in the current session |
| 6 | NoLogo | Hides the Microsoft information displayed when PowerShell.exe starts up. It also hides all other start-up information. |
| 7 | Version | The Version parameter is used to start PowerShell in a specified version. |
| 8 | WindowStyle | Determines PowerShell Windows Style. Valid values are Normal, Minimized, Maximized, or Hidden |
| 9 | Command | Use the Command parameter to specify a command you want PowerShell.exe to execute. |
| 10 | PSConsoleFile | Used to specify a Windows PowerShell console file. You can create a console file with the Export-Console command |
| 11 | Sta | Starts PowerShell shell using single-threaded apartment. This is the default. |
| 12 | Mta | Start the PowerShell shell using a multithreaded apartment. Default is sta |
| 13 | InputFormat | Use this parameter to describe the type of data sent to PowerShell. Valid values are “XML” or “Text”. |
| 14 | OutputFormat | This parameter is used to specify how PowerShell should format its output values. Valid values are “XML” or “Text” |
| 15 | EncodedCommand | Used to submit complex commands to PowerShell. The EncodedCommand parameter accepts a base-64-encoded string version of a command |
| 16 | ConfigurationName | Use the ConfigurationName argument to specify a configuration endpoint to PowerShell |
| 17 | Help | Displays the full help information, including the arguments of the PowerShell.exe command |
Common PowerShell.exe Command Parameter Examples
In the last section, I listed all the command line arguments of the PowerShell.exe Command. In this section, I will dive deeper into some of the common parameters and how to use them.
PowerShell.exe Command ExecutionPolicy Parameter
As explained in the last section, the ExecutionPolicy parameter is used to set the default execution policy for the current PowerShell session. The default execution policy set by the ExecutionPolicy parameter is saved in the $env:PSExecutionPolicyPreference environment variable.
Note that the execution policy set by this parameter is only valid for the current PowerShell session. Furthermore, it does not modify the PowerShell execution policy set in the Windows registry.
Moving on to examples, you may need to set a different execution policy if the current execution policy is too restrictive. For example, if you want to call a downloaded, unsigned PowerShell script, you may use the ExecutionPolicy parameter to specify a less restrictive execution policy.
Valid values for the ExecutionPolicy argument are Restricted, or AllSigned. Additionally, you can set RemoteSigned, Unrestricted, Bypass, or Undefined.
To learn more about these execution policies and how they work, read our PowerShell ExecutionPolicy Explained guide.
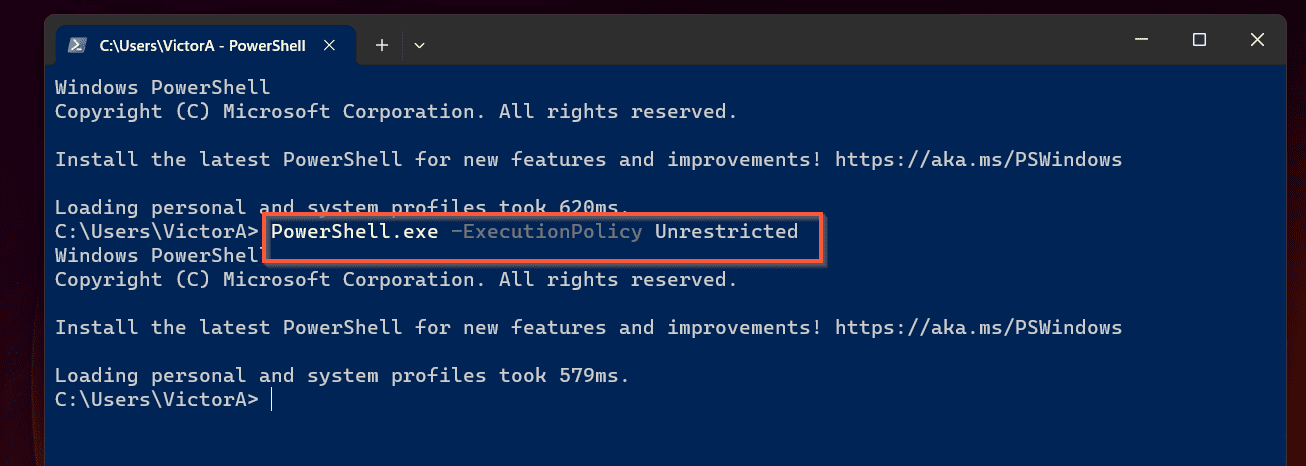
Finally, to end this section with an example, to set the execution policy for the current session to Unrestricted, run the command below…
PowerShell.exe -ExecutionPolicy Unrestricted
Here is the command in PowerShell…
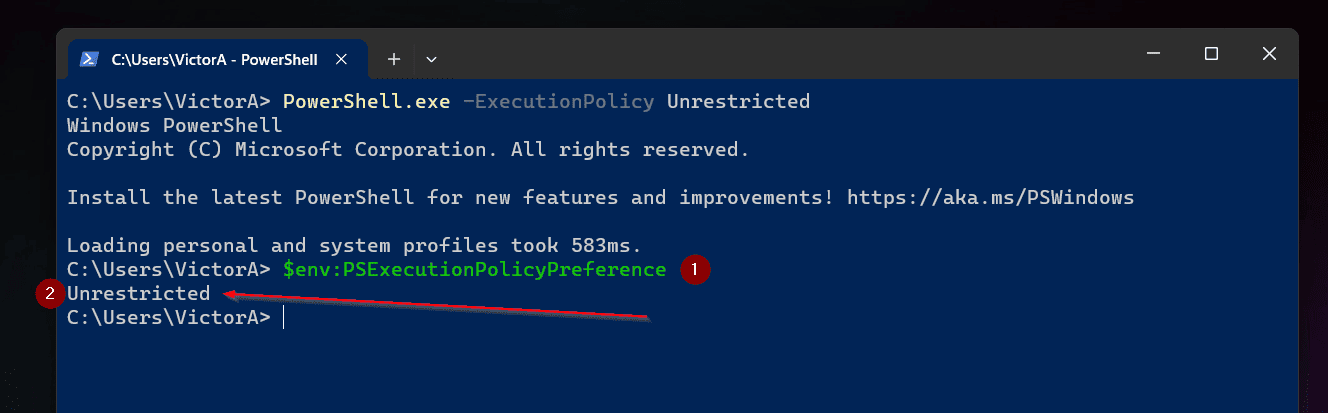
I mentioned earlier in this sub-section that the execution policy set by this parameter is saved in the $env:PSExecutionPolicyPreference environment variable.
To confirm this, run the command below in the same PowerShell session you ran the last command…
$env:PSExecutionPolicyPreference
Here you go…the command shows that the execution policy is Unrestricted!
Once you set this policy, you can run unsigned PowerShell scripts within the current session.
PowerShell.exe Command NoExit Parameter
By default, when you run PowerShell.exe command, after running start up commands, the shell will exit. If you do not want the shell to exit, specify the NoExit parameter.
This is a switch parameter – meaning that it does not require any additional inputs.
The best way to show how this works is to use cmd. First, open Windows command prompt.
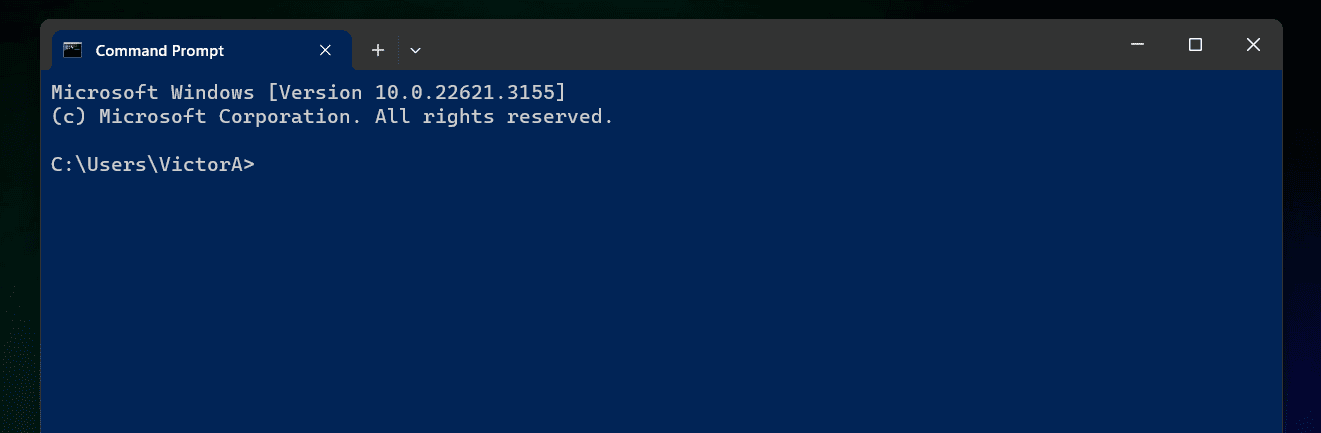
Then, open Task Manager, it will not have any PowerShell instances. It shows just the instance of the CMD.
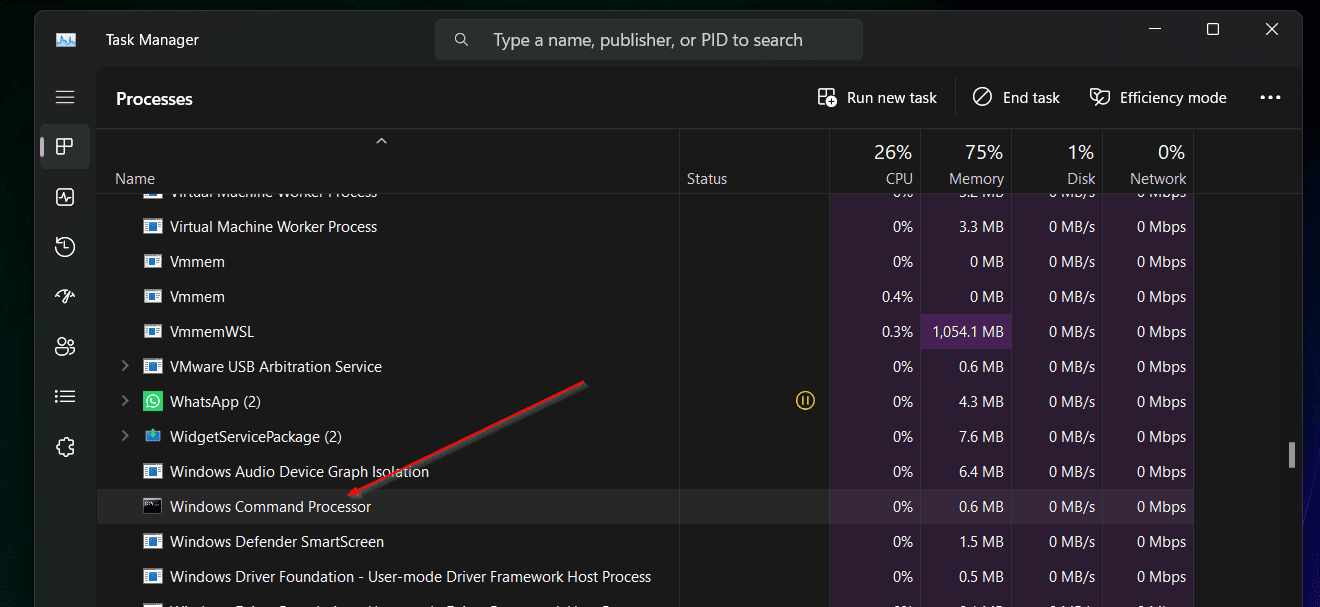
Go back to the Windows command prompt and run powershell.exe.
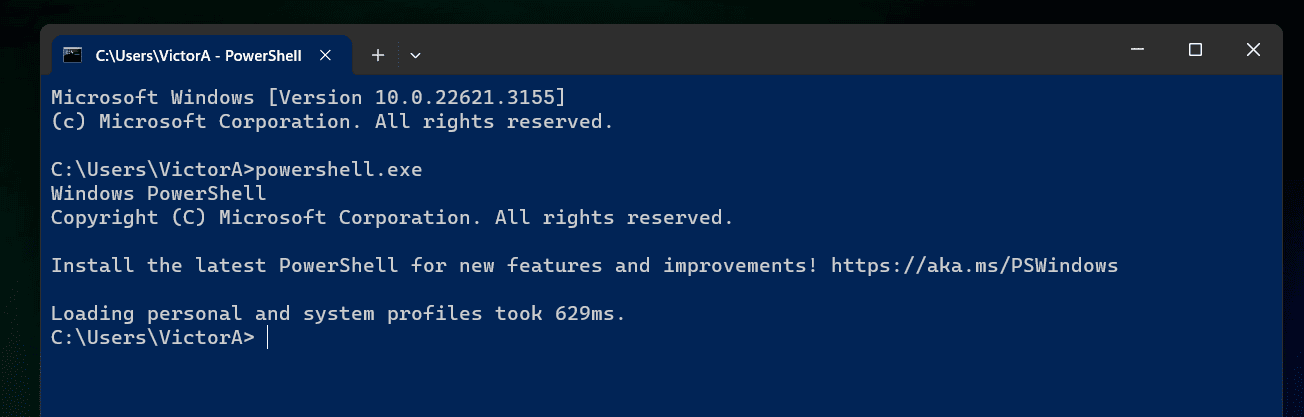
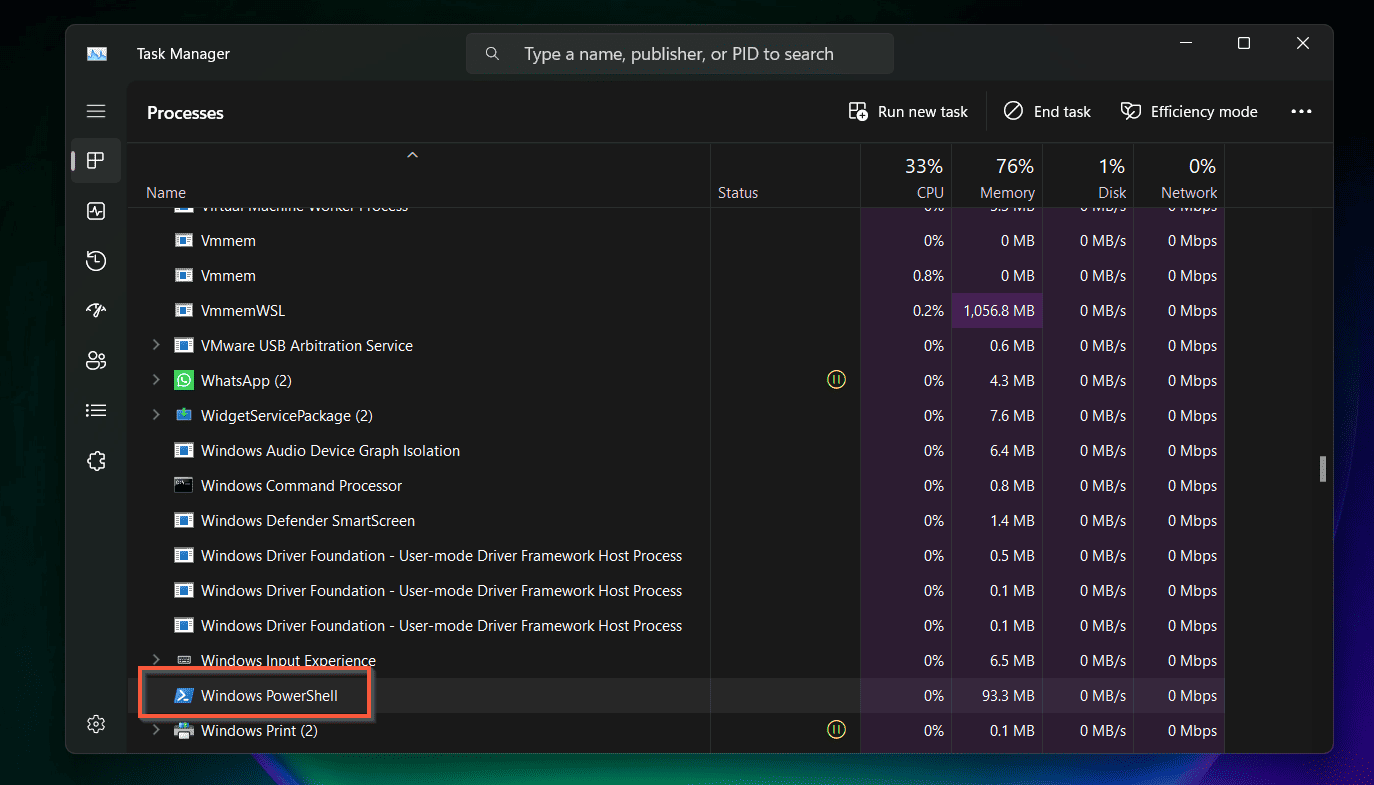
When you check Task Manager, it will now have an instance of PowerShell.
When I executed powershell in CMD without the NoExit parameter, CMD runs PowerShell but exits the PowerShell console immediately. This is the default behavior.
To see this in action, run the command below in CMD.
powershell.exe -Command {Write-Host "This will exits"}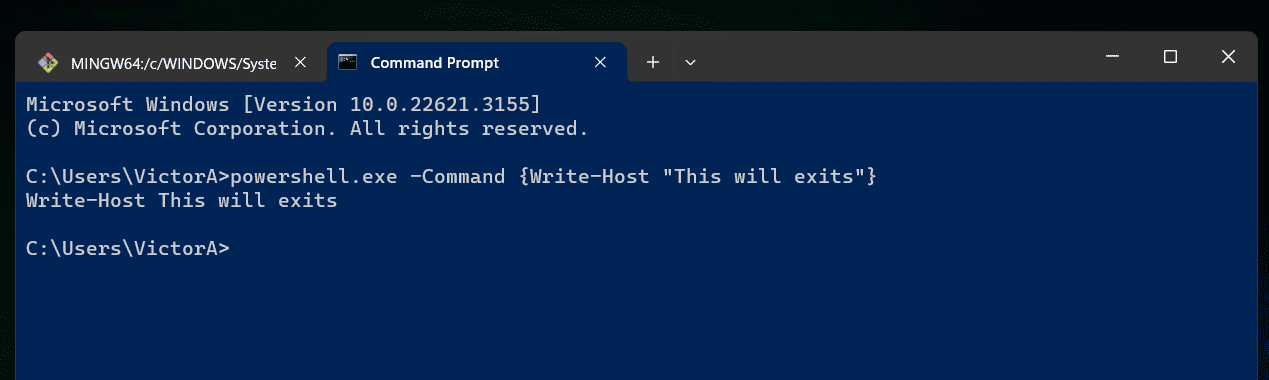
Once again, return to Windows Task Manager. It should still have one instance of PowerShell even though you just ran a PowerShell.exe command.
This is because by default when you run a PowerShell.exe command when the command completes, it exits the shell.
Finally, now run this PowerShell.exe command with the NoExit parameter…
powershell.exe -NoExit -Command {Write-Host "This will NOT exit"}
If you look at Windows Task Manager, the Windows Command Processor will have one additional instance of PowerShell.
To make this even more obvious, return to the Windows Command prompt and run the exit command. Task Manager will now show just one instance of PowerShell!
PowerShell.exe Command NoProfile Parameter
By default when you run PowerShell.exe, it loads the PowerShell profile. However, if you want to change this default behavior, use the NoExit parameter.
Like NoExit, NoProfile is a switch parameter – it does not require any inputs.
A PowerShell profile is a script that runs automatically every time PowerShell starts. This script is not created by default.
However, if you need to customize your PowerShell environment with some commands, aliases, or functions, you can create a profile script. Then, save the script as Microsoft.PowerShell_profile.ps1 in the location below:
$Home\Documents\PowerShell\
I went into some details about PowerShell profiles so you will understand why you may not want to load any existing PowerShell profiles. To read more about PowerShell profiles, visit about_Profiles.
Finally, to run PowerShell.exe command without loading any profiles, use the NoProfile parameter. Here is a sample command…
PowerShell.exe -NoProfile -Command {Get-Eventlog -LogName System}PowerShell.exe Command NonInteractive Parameter
Some PowerShell commands have some required parameters. For example, if you run Get-Credential without providing credentials, PowerShell will prompt you to provide the credentials.
This PowerShell behavior is referred to as an interactive behavior. This means that PowerShell interacts by prompting for inputs.
This is all well and good. However, in an automated scripting scenarios, you may want to stop PowerShell prompting for inputs.
This is where the NonInteractive parameter comes in.
Going back to my Get-Credential command example, if I run the command below, I will be prompted to provide the required Credential parameter.
Get-Credential
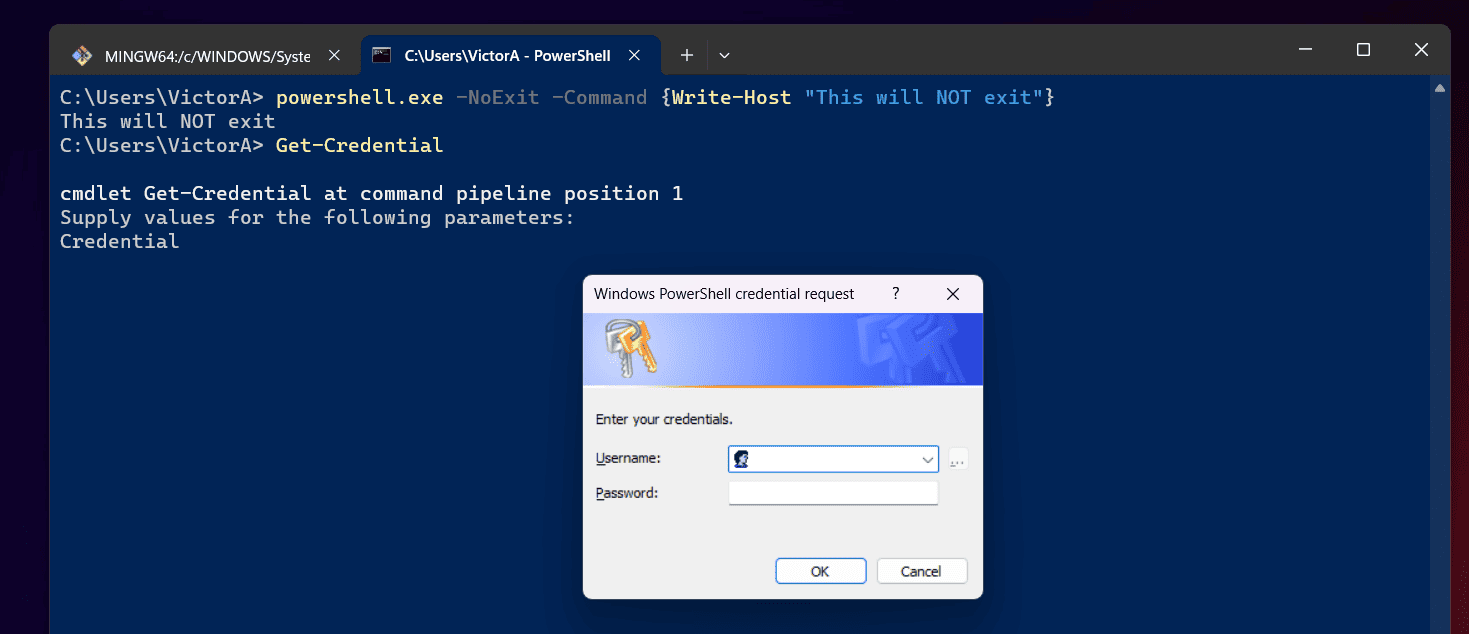
However, if I do not want PowerShell to prompt me for credentials, I will modify the command as shown below…
PowerShell.exe -NonInteractive -Command {Get-Credential}
When I run this command, it will simply fail, instead of promoting for an input.
To appreciate the importance of the NonInteractive parameter, think of a script executing automatically. If you do not use this parameter, the script will stop executing while it waits for an input.
PowerShell.exe Command NoLogo Parameter
If you run PowerShell.exe command, it displays some copyright information. See the highlighted portion of the screenshot below.
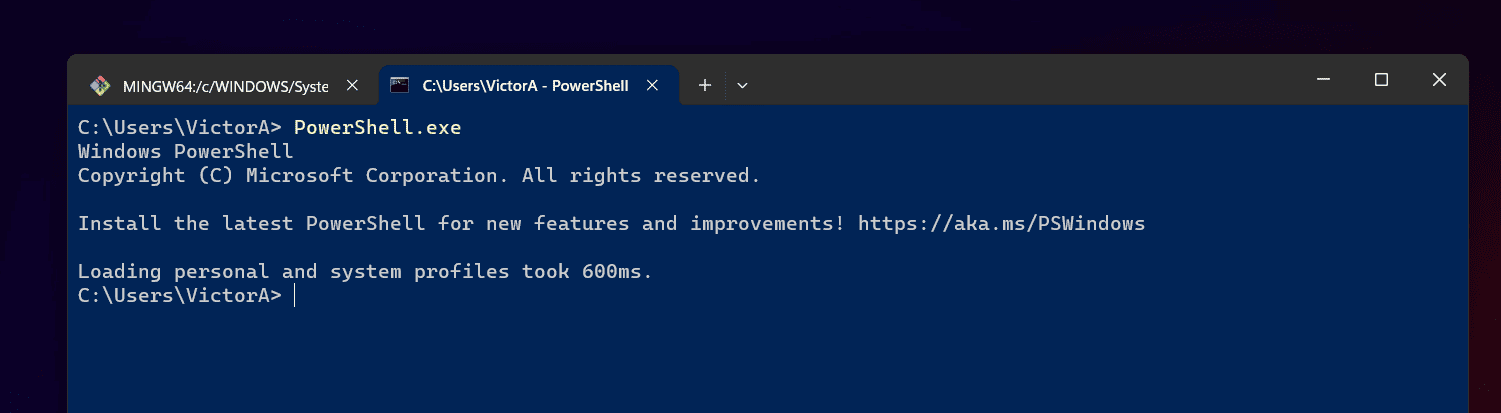
However, if you do not want PowerShell to display this copyright information when it starts, include the NoLogo parameter. Here is an example…
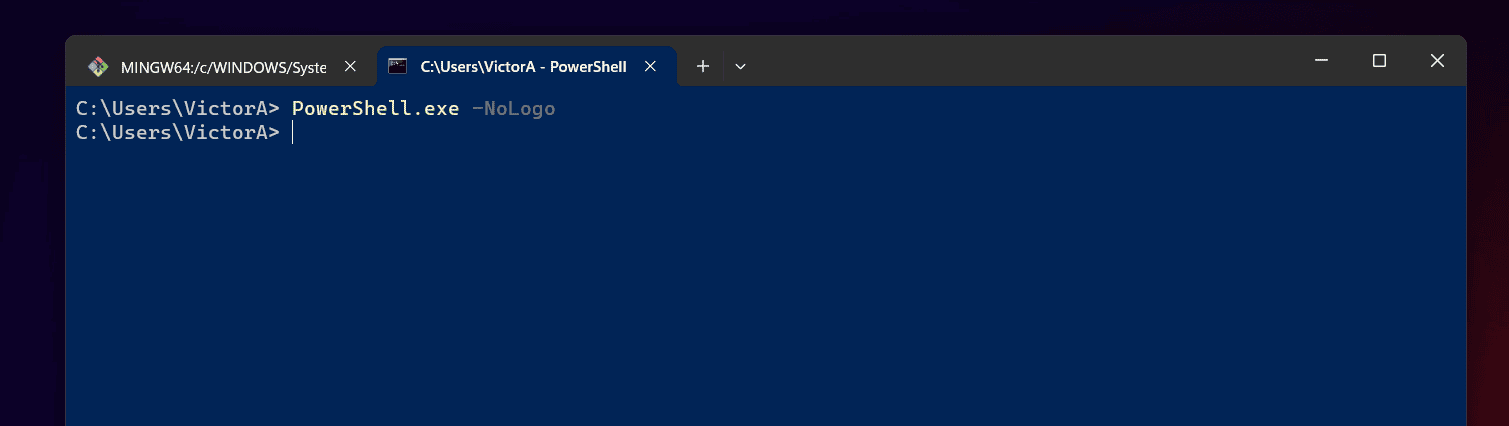
PowerShell.exe -NoLogo
Now, with the NoLogo parameter, PowerShell opens without displaying those information.
PowerShell.exe Command Version Parameter
If you build a PowerShell script with Cmdlets compatible up to a PowerShell version, you can use the Version parameter to force PowerShell to start in a specified version.
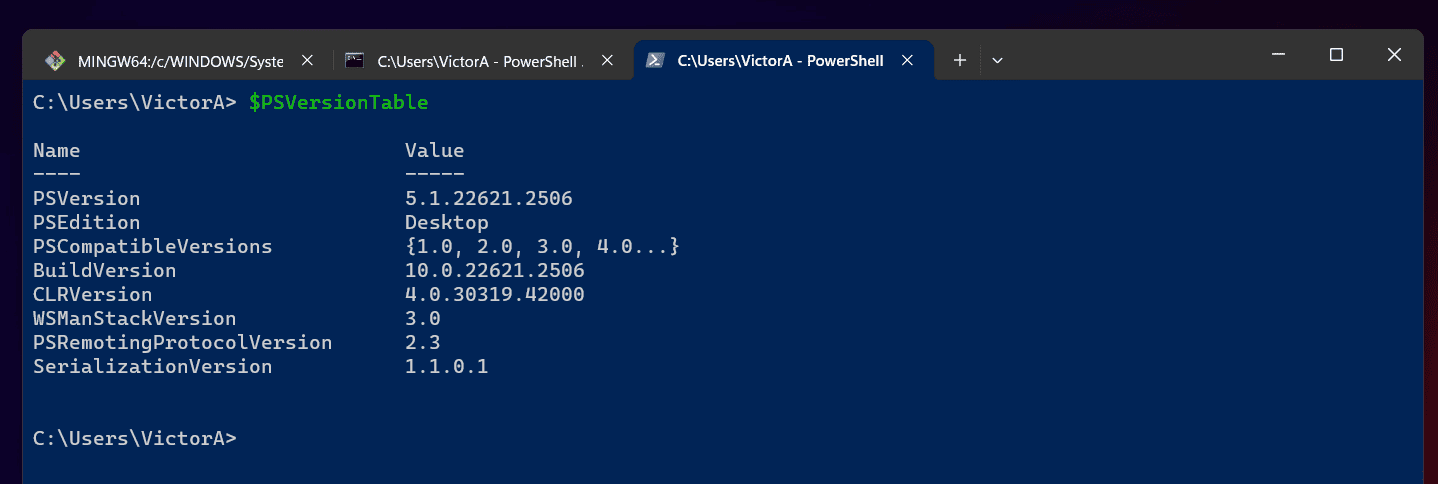
Before I give an example, let me check the current version of PowerShell on my computer. To do this, I will run the command below…
$PSVersionTable
The commands show that my current PowerShell version is 5.1…
Even though the current version of PowerShell on my PC is 5.1, I can force PowerShell to run version 2. To do this, I will run the command below…
PowerShell.exe -Version 2.0
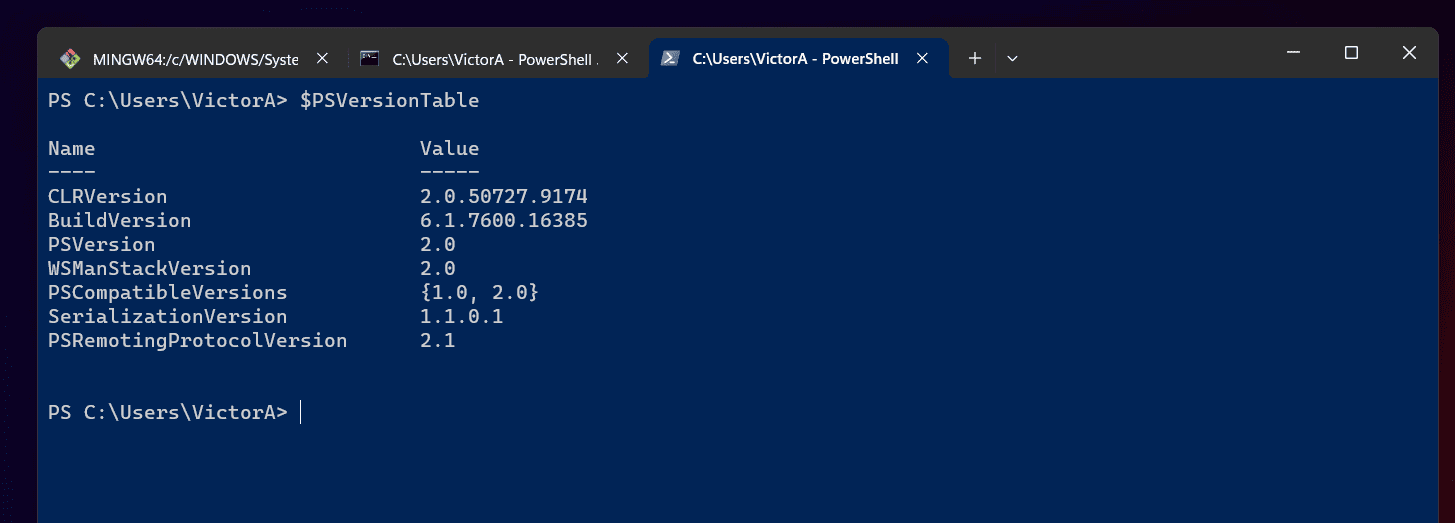
Now, if I run, $PSVersionTable, it shows that my PowerShell session is now open in version 2.0!
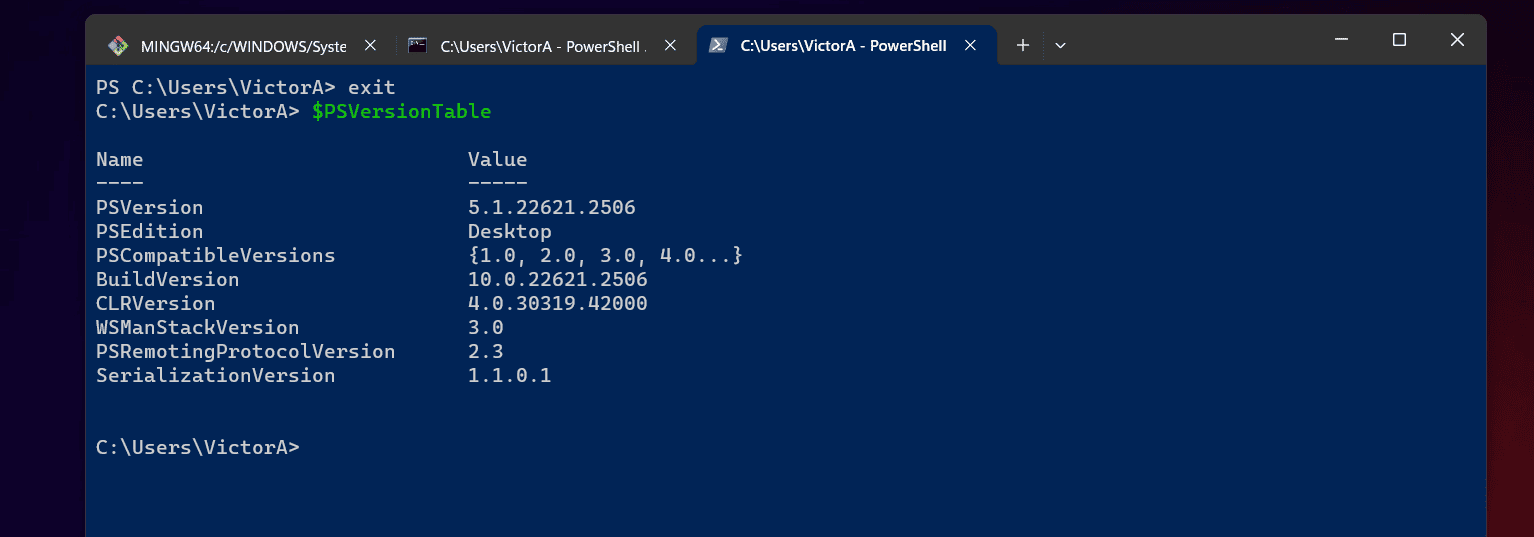
Finally, for this sub-section, to exit the PowerShell version and load your default, run exit. Now, I am back to version 5.1!
PowerShell.exe Command WindowStyle Parameter
Once again, in a scripting scenario, if you may not want to display the PowerShell window. You can use the WindowStyle parameter to hide the PowerShell window.
Additionally, you ca also use the parameter to display the PowerShell Window Minimized, or Maximized.
Let’s see how PowerShell.exe command behaves if we specify hidden as the WindowStyle…
PowerShell.exe -WindowStyle Hidden
When you run this command, as expected, the PowerShell window is closed from view.
Similarly, if you use the Minimized WindowStyle, the PowerShell window will close from view. However, unlike what happens with the Hidden style, this time, it stays in the taskbar.
PowerShell.exe -WindowStyle Minimized
I believe by now, you get the gist. You can use the WindowStyle parameter to control the behavior of the PowerShell window.
PowerShell.exe Command “Command” Parameter
I have already used the “Command” parameter in multiple examples in this guide. This parameter is used to specify a PowerShell command you want to run.
The command is usually enclosed in a {} bracket. Additionally, if you want to run multiple or complex commands, add the ampersand before the {} bracket and enclose everything in double quotes.
Here is how to use ampersand with the “Command” parameter…
PowerShell.exe -Command "& {Get-EventLog -LogName system}"Moving on, the command can be a normal PowerShell Cmdlet, a script block, or even a string. For example, I can get PowerShell to display the text “this is a string” with the command below…
PowerShell -Command {"this is a string"}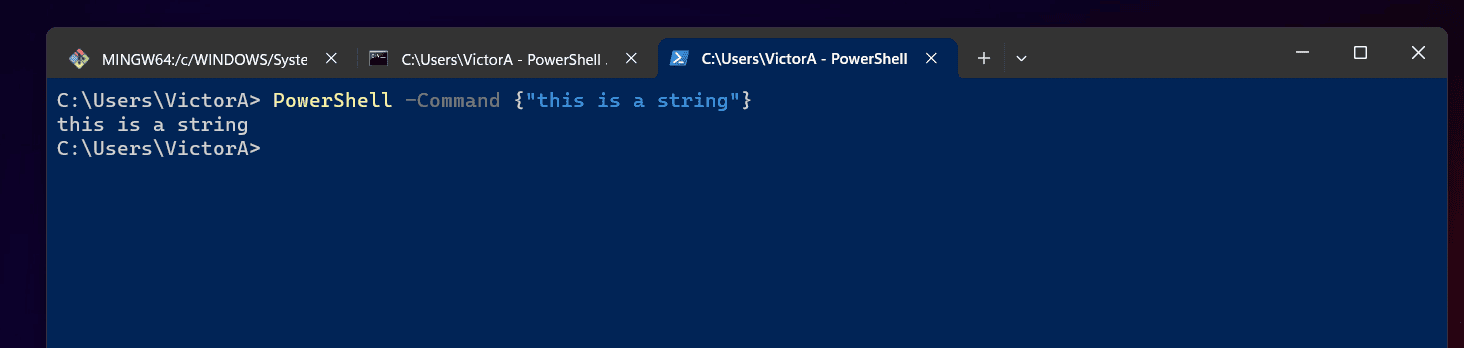
PowerShell.exe Command File Parameter
The File parameter is another important PowerShell.exe parameter. You can use this parameter to call a PowerShell script.
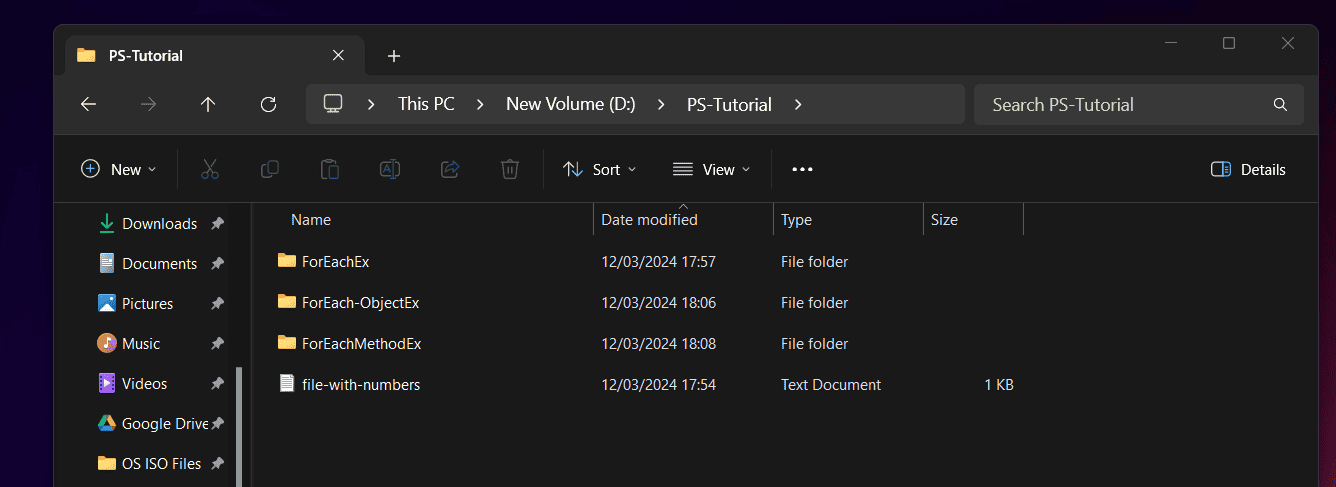
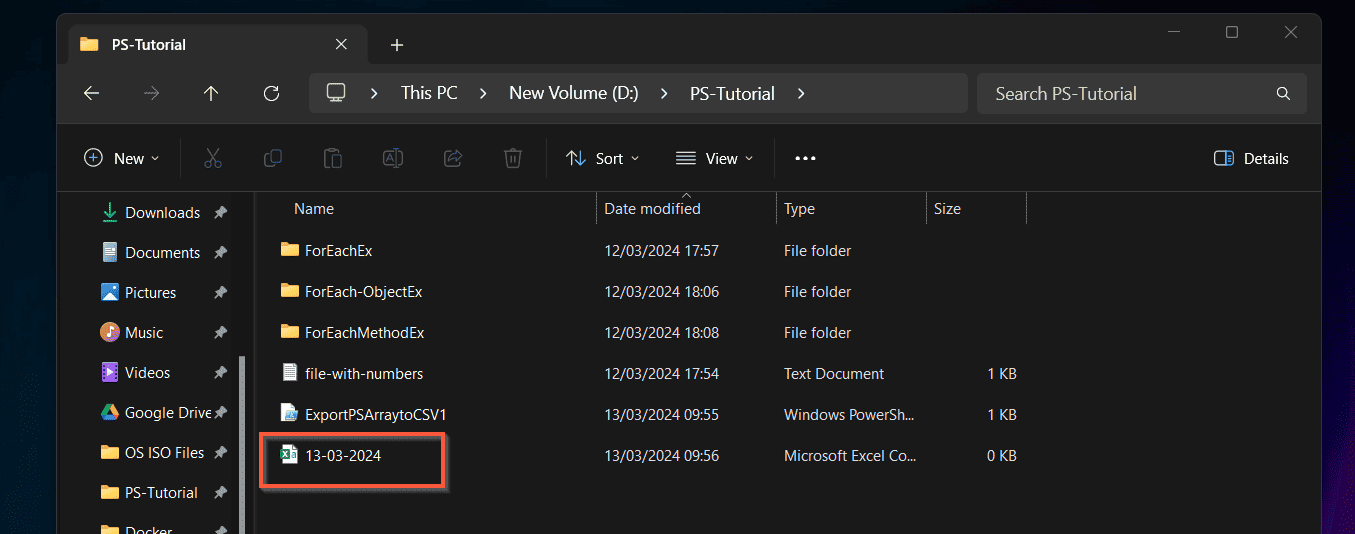
I will give an example with one of my PowerShell scripts that creates a CSV file in the path, D:\PS-Tutorial. The script creates a filename for the CSV file with the current date and time.
Here is a screenshot of the folder – it has just no CSV file with the current date…
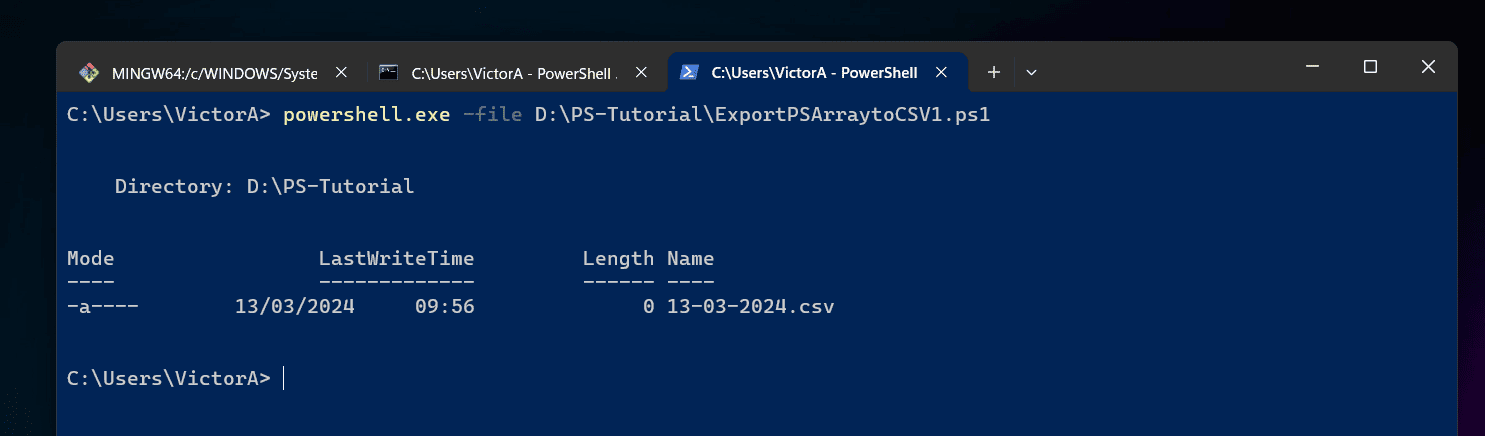
Now, I will run the script using PowerShell.exe and the File parameter…
powershell.exe -file D:\PS-Tutorial\ExportPSArraytoCSV1.ps1
When I run the command, a new CSV file is created.
PowerShell.exe Command Line Examples
In this second and last section of the guide, I give multiple examples of different ways to use PowerShell.exe Command.
Example 1: Open PowerShell.exe Command as a Different User
In this section, I show you how to open PowerShell as a different user.
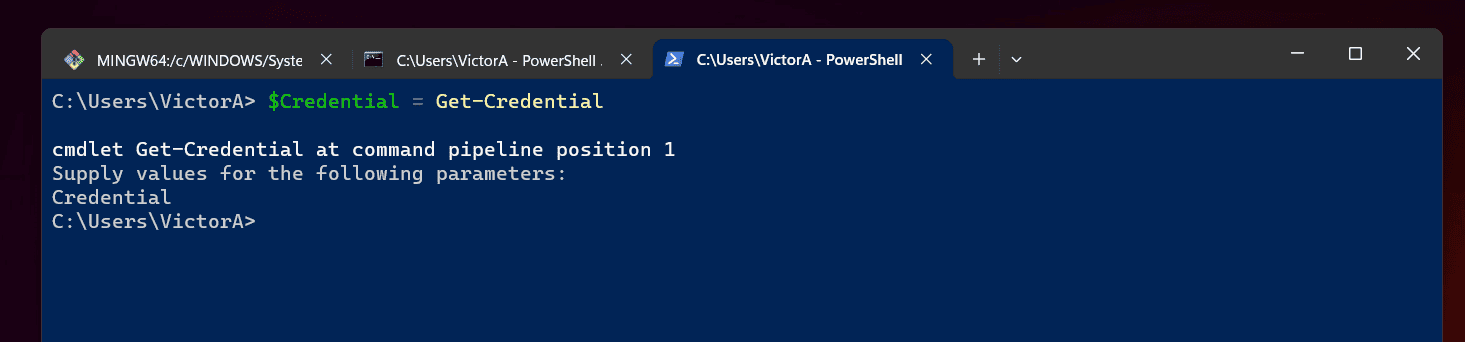
The first step is to save the username and password in a variable called, $Credential.
$Credential = Get-Credential
When you run the command, PowerShell will prompt you to enter a username and password. Enter the username and password of the account you want to open PowerShell as.
Finally, click OK.
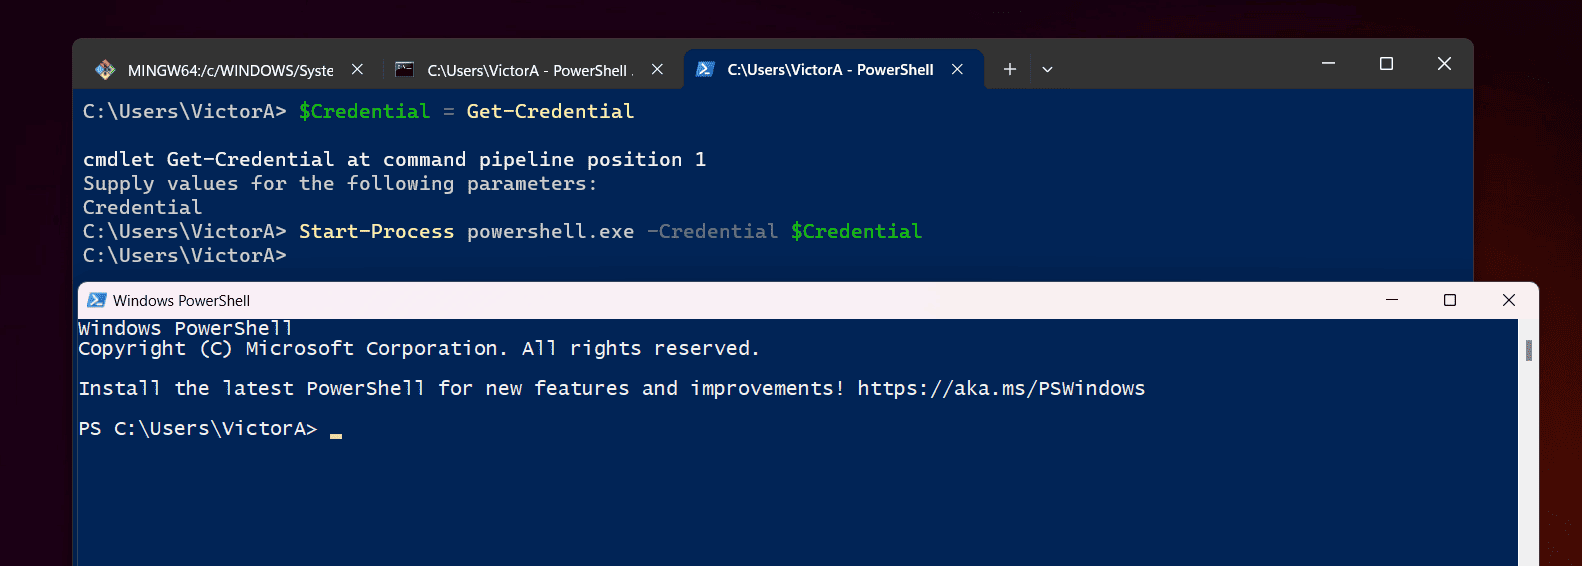
Once you have saved the login details, run this second command…
Start-Process powershell.exe -Credential $Credential
When you run the last command, it opens a new PowerShell session. This new PowerShell session is opened as the user specified in the $Credential variable.
Now, let me walk you through the command..
Start-Process powershell.exe -Credential $Credential
In the command, I used Start-Process to start powershell.exe. I had to do this because powershell.exe does not have the Credential parameter.
However, Start-Process has the the Credential parameter. I used this to specify the login details of the person I wish to run PowerShell as.
Example 2: Open PowerShell.exe Command from CMD
To open the PowerShell.exe command from CMD, enter PowerShell.exe in CMD and press the enter key.
PowerShell.exe
Once you run the command, a PowerShell session opens within the Windows command prompt.
Once it opens, you can run normal PowerShell commands. Additionally, the commands will autocomplete.
For example, I can now run…
Get-ChildItem
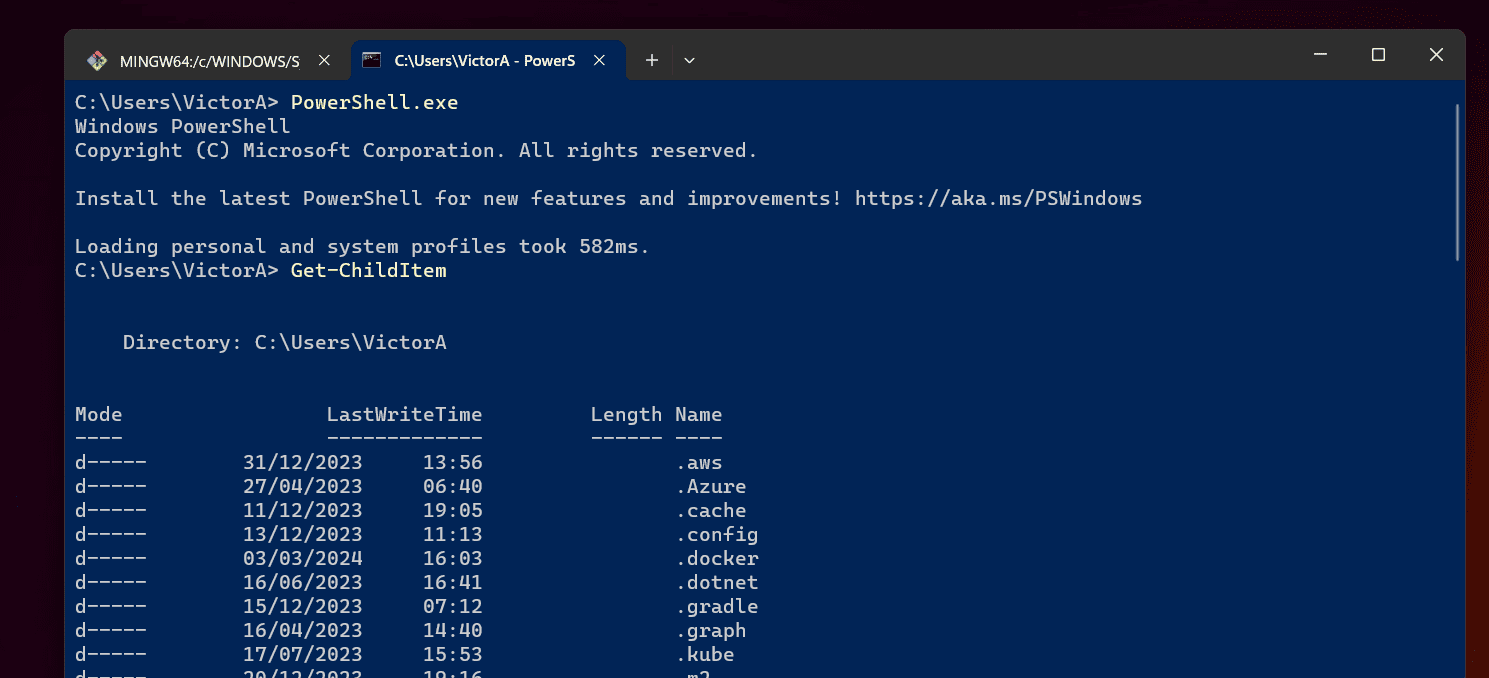
Before I move on from this sub-section, I like to mention that when you open the PowerShell.exe command from CMD, you can use any of the parameters.
For example, if I don’t want to display the copyright information, I will include the NoLogo parameter.
PowerShell.exe -NoLogo
This time, CMD opens a PS session without displaying the usual copyright info…
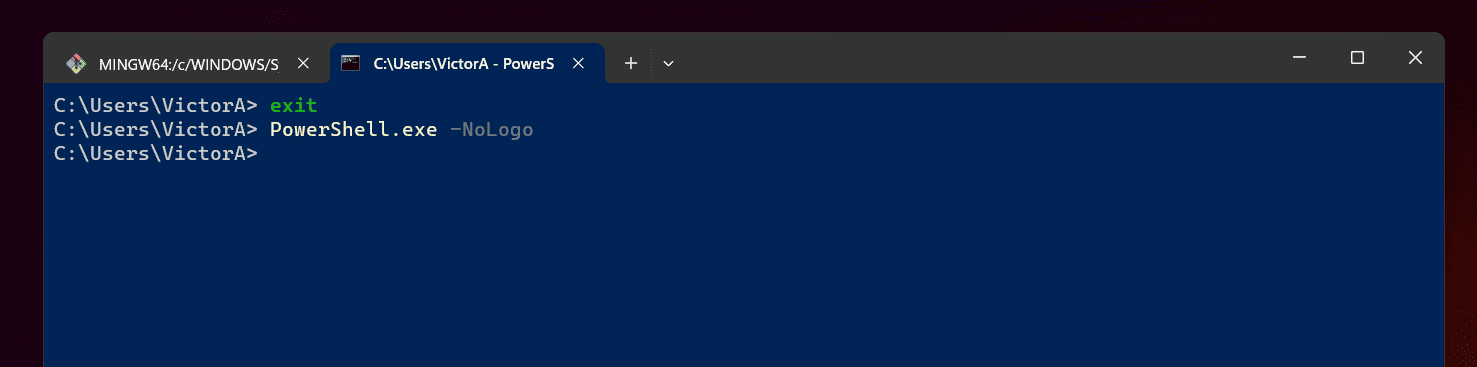
Finally, to close PowerShell session opened in CMD, run the exit command….
exit
I had to run the exit command several times because I had opened multiple PS sessions.
Example 3: Run PowerShell.exe Command Inline
Running a PowerShell command with multiple parameters can pose some challenges.
When I was researching this topic, I came across this Stackoverflow.com question. The person wants to run the Send-MailMessage PowerShell command with multiple parameters.
Here is the command the person is trying to run…
PowerShell.exe -Command "{Send-MailMessage -From "Name [email protected]" -To "[email protected]" -Subject "Test Subject" -Body "Test body at $(Get-Date -Format "dd/MM/yyyy")." -SmtpServer "smtp.domain.com" -UseSSL}"Unfortunately, according to the user, the command fails. The solution is to add an ampersand before the opening bracket, {.
Here is the modified command offered by Buxmaniak…
PowerShell -Command "& {Send-MailMessage -From 'Name ' -To '[email protected]' -Subject 'Test Subject' -Body ('Test body at {0}.' -f (Get-Date -Format 'dd/MM/yyyy')) -SmtpServer 'smtp.domain.com' -UseSSL}"If you notice, instead of the double quotes used to wrap the parameter values in the original command, the new command uses single quotes.
Finally, for this sub-section, the trick to running PowerShell.exe Command “inline” is to use the Command parameter. Then, enclose the command in {} brackets – finally, include an ampersand and enclose everything in double-quotes.
Here is a simplified example…
PowerShell.exe -Command "& {Get-EventLog -LogName system}"Example 4: Run Multiple Commands in a PowerShell.exe Scriptblock
To run multiple commands in a PowerShell.exe scriptblock, you need to use the Command parameter. Then, open the command block with an opening double quote, followed by an ampersand…
powershell.exe -Command "&
Next, including an opening bracket, { followed by the first command…
powershell.exe -Command "&{Get-Command Out-fileOnce you enter the first command, enter a semi-colon next to the first command.
powershell.exe -Command "&{Get-Command Out-file;Then, enter the second command…
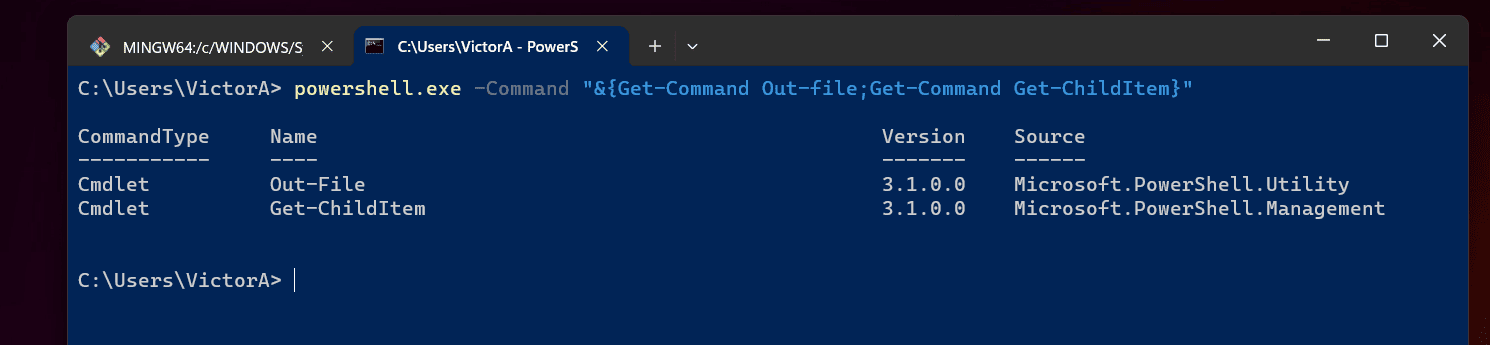
powershell.exe -Command "&{Get-Command Out-file;Get-Command Get-ChildItemFinally, enter the closing bracket, } – and then, the closing double-quote.
powershell.exe -Command "&{Get-Command Out-file;Get-Command Get-ChildItem}"Here is the result of the command…
Example 5: Redirect the Output of a PowerShell.exe Command
The easiest way to redirect output in a PowerShell.exe command is to use Out-File.
When you run the powershell.exe command, within the Command parameter, you can pipe the output of the command to Out-File. Here is an example.
powershell.exe -command {Get-Process | Out-File D:\PS-Tutorial\PSGetProcess.txt}You can also use any of the other PowerShell file manipulation commands like Add-Content and Set-Content.
Example 6: Schedule a Powershell Script to Run in Task Scheduler
In the last part of this guide I will demonstrate how to schedule a PowerShell script with task scheduler.
In this example, I will schedule Get-FreeDiskSpace script. This script will run weekly and send a report of free disk spaces on all servers.
Follow the steps below to schedule Get-FreeDiskSpace PowerShell script:
- Open PowerShell or command prompt. Then type this command and press Enter.
taskschd.msc
This will open Task Scheduler.
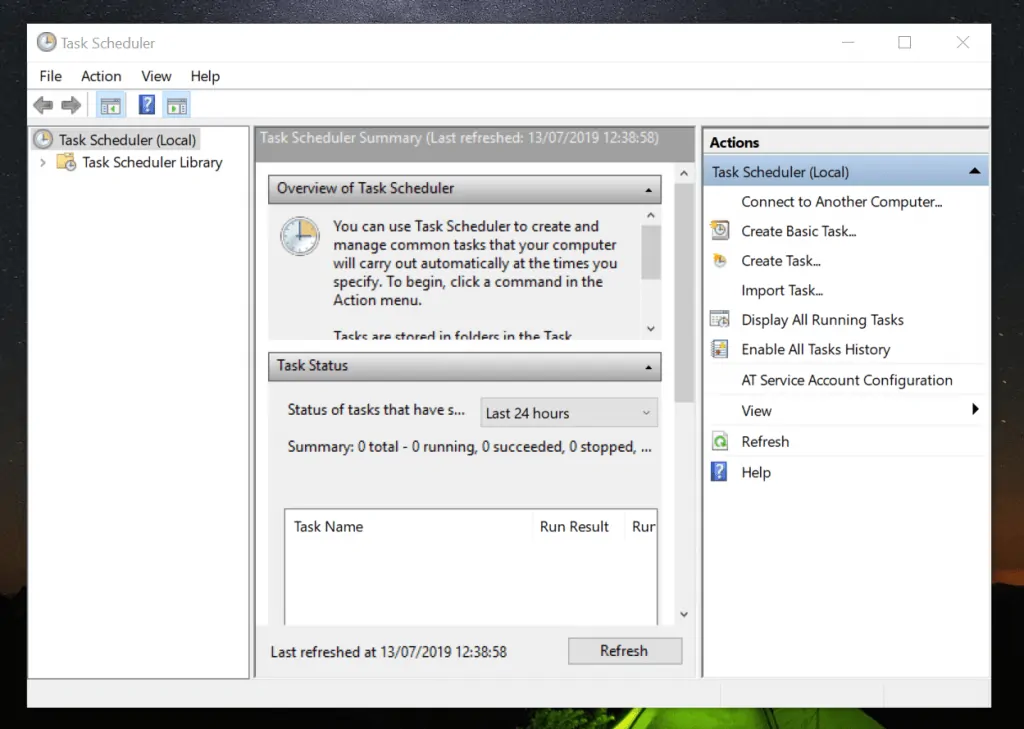
- Right-click Task Scheduler and select Create Task.
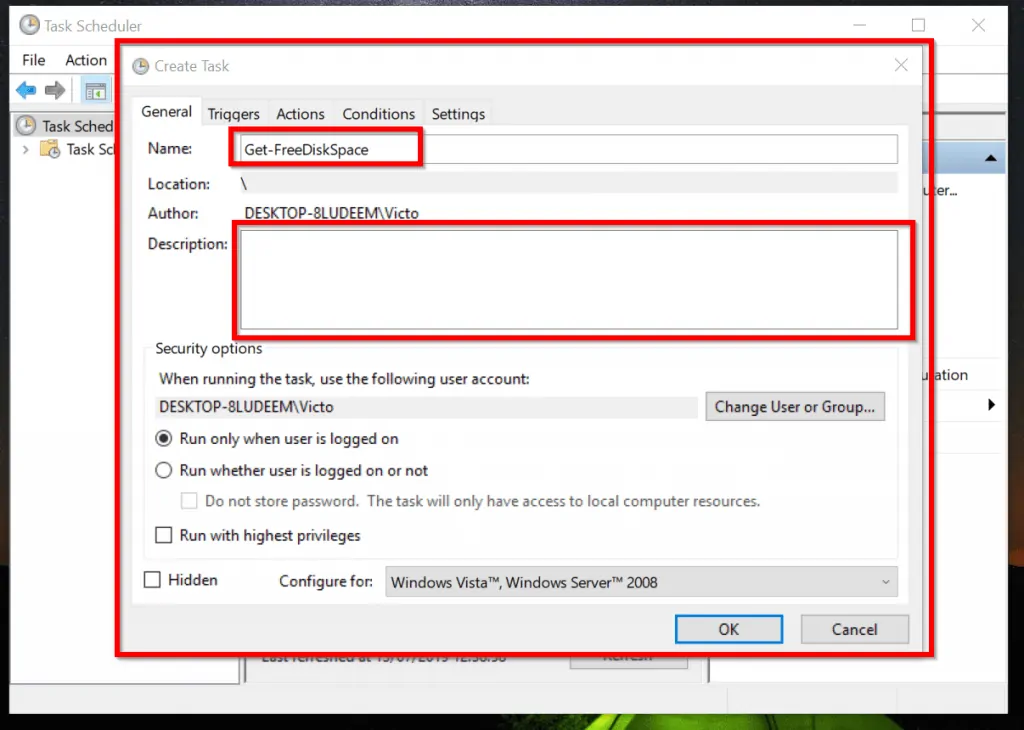
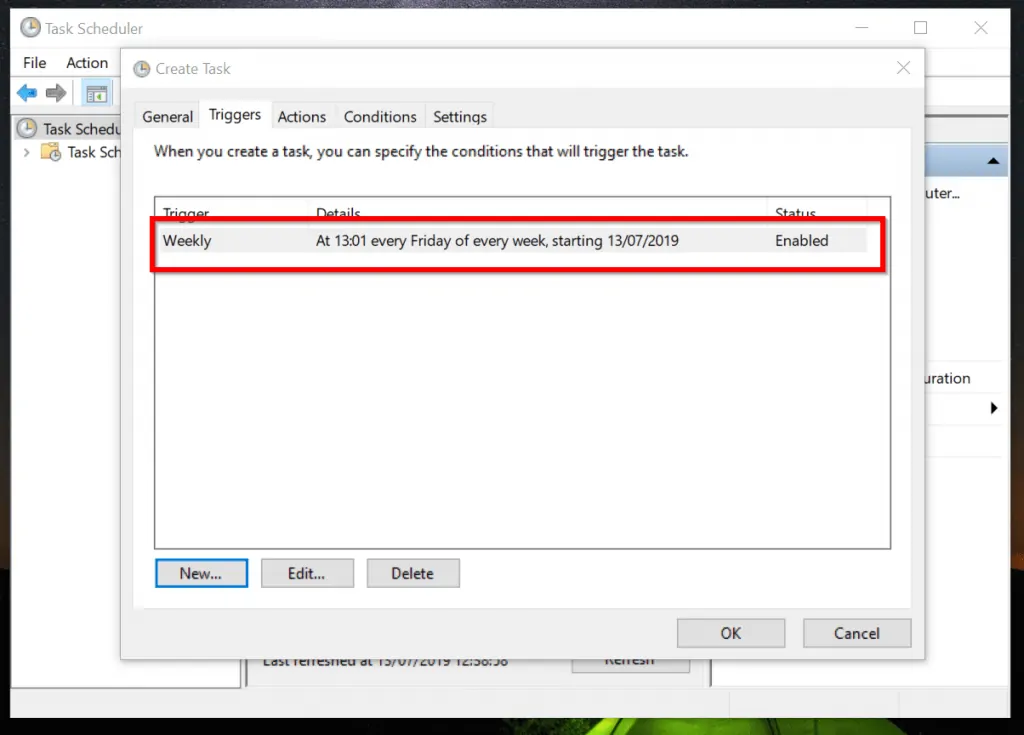
- Give the task a name. You could also enter a description. Then click Triggers tab.
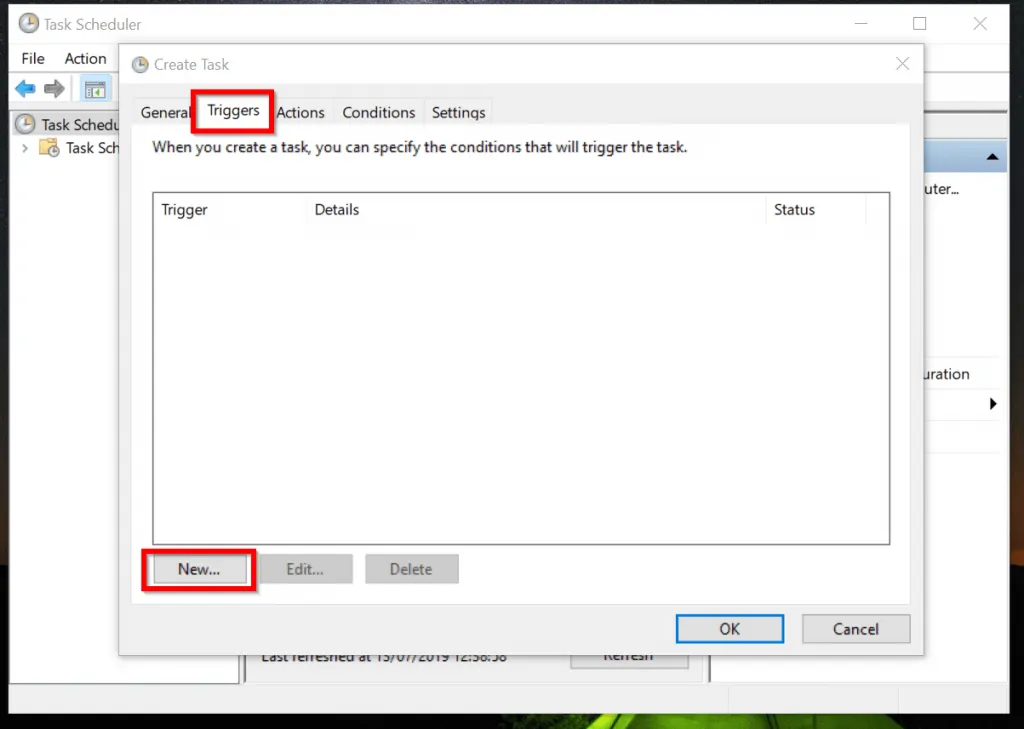
- To create a new trigger click New.
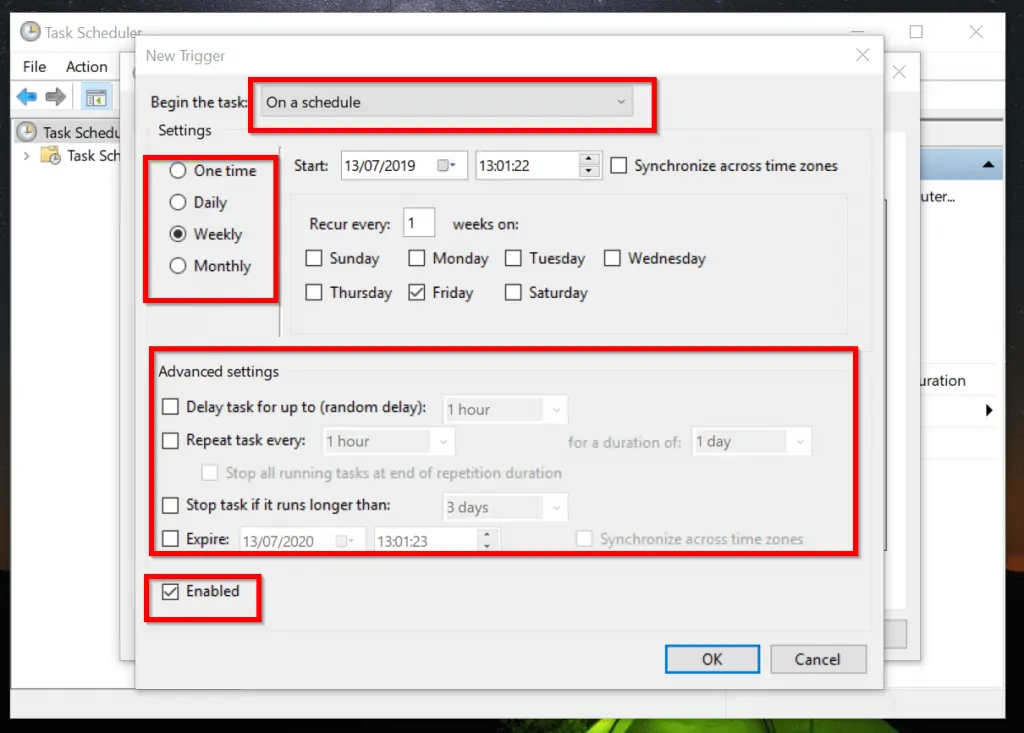
- On the New Trigger page, on the Begin the task drop-down, ensure that On a schedule is selected.
Then select the frequency. If you select Weekly, then check the box beside the day of the week you want your task to run.
Finally, configure Advanced settings. Click Ok. Then, on the Create Task page, click Ok again (Second image below).
- Next, click the Actions tab.
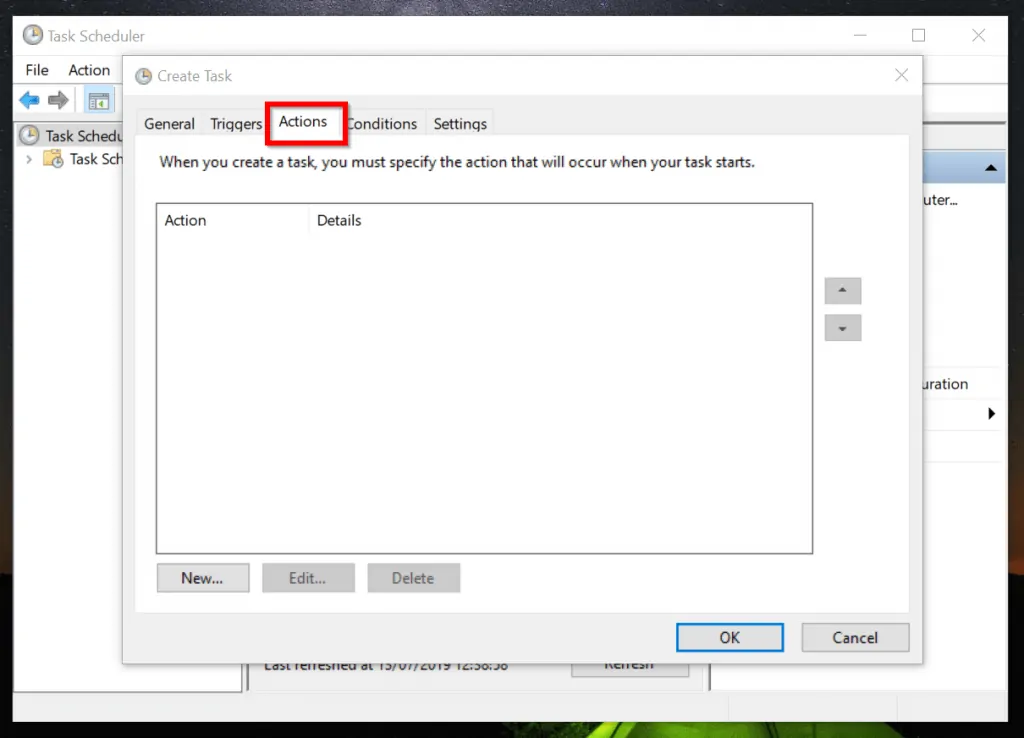
- On the Actions tab, click New. On the New Action page, beneath program/script, enter the command below:
PowerShell
- Then beside Add arguments (optional), enter the following
-File C:\PS\Get-FreeDiskSpace.ps1
- When you finish, click Ok.

Conclusion
When you start with running basic PowerShell commands, you may not need to know about the powershell.exe command. However, as you progress to complex tasks, you may need to control the behavior of the PowerShell command.
This guide explains different ways to make PowerShell behave to suit your requirements.
We like to hear your thoughts about this article.
The quickest way to provide feedback is by responding to the “Was this page helpful?” question below. You could also post a comment or ask a question using the “Leave a Reply” form found at the bottom of this page.
Finally, for more PowerShell tech guides, visit our Windows PowerShell How-To guide page.